
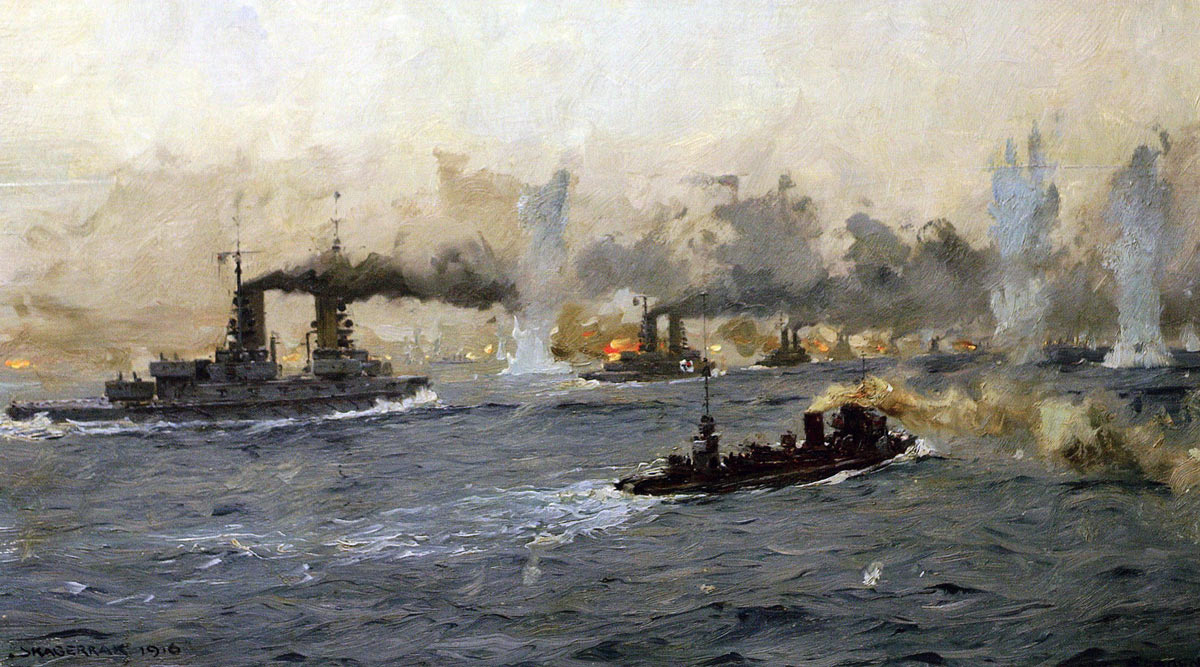
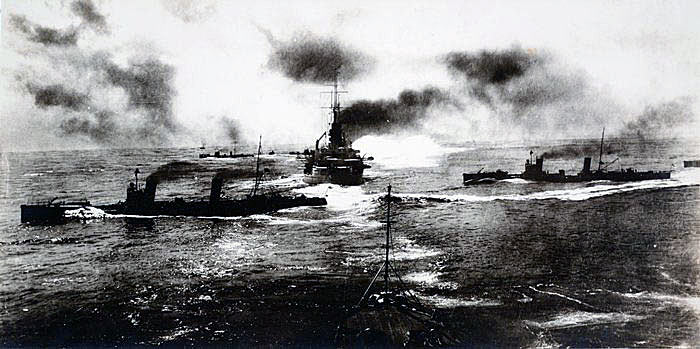
The Titanic struggle between the British Grand Fleet and the German High Seas Fleet on 31st May 1916

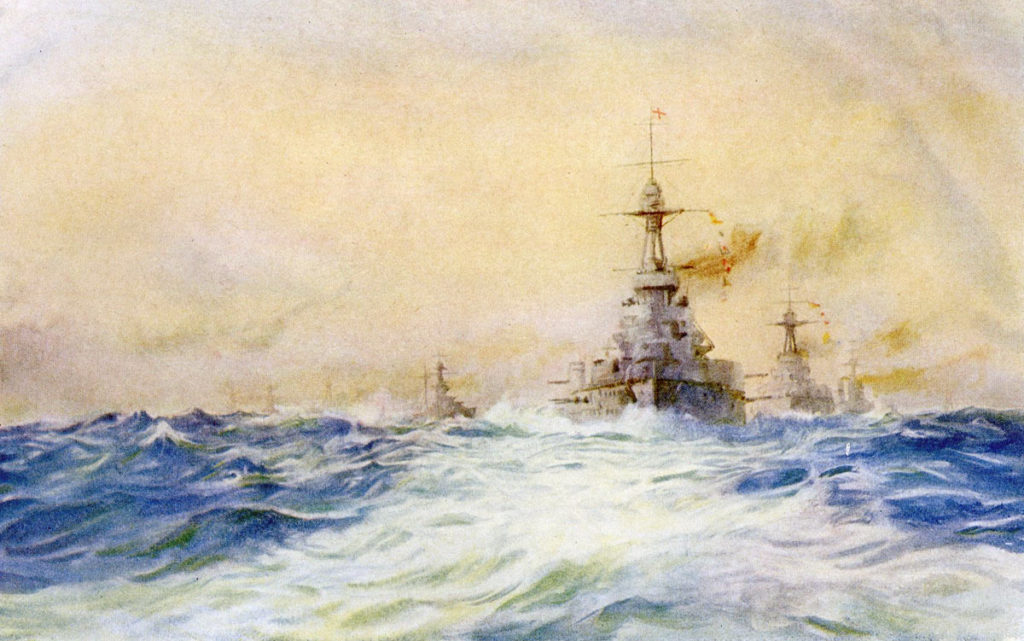
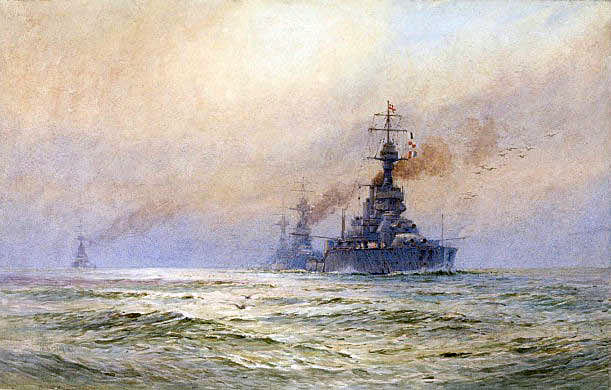
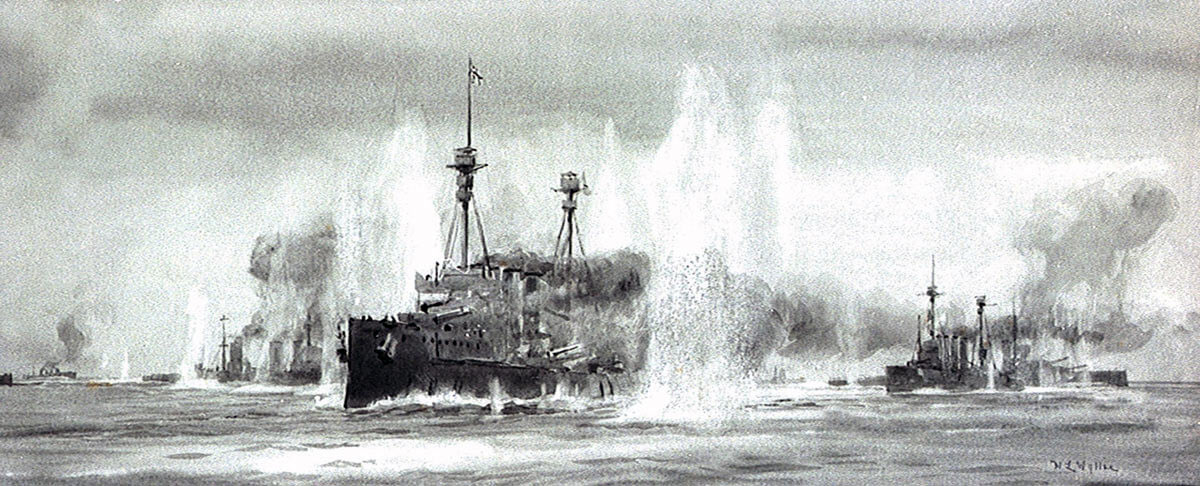
British Battleships led by HMS Iron Duke Flagship of the Grand Fleet at Battle of Jutland 31st May 1916: picture by Lionel Wyllie
The previous battle of the First World War is the Battle of Jutland Part II
The next battle of the First World War is the Battle of Jutland Part IV
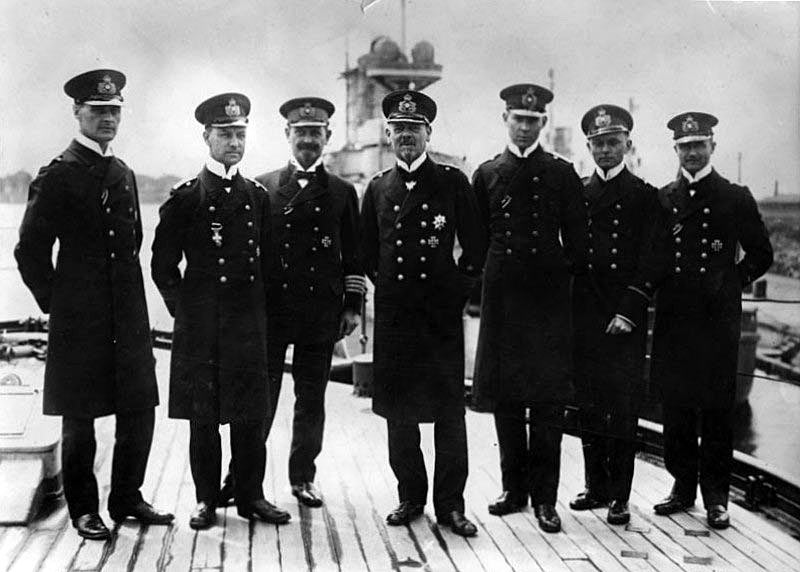
Vice-Admiral Franz Hipper (in the centre), commander of the German 1st Scouting Group (battle cruisers) at the Battle of Jutland on 31st May 1916 and his staff
Date: 31st May 1916
Place: In the North Sea off the coast of Denmark
War: The First World War
Contestants: The British Royal Navy against the Imperial German Navy
Admirals: Admiral Sir John Jellicoe commanded the Royal Navy’s Grand Fleet. Vice Admiral Sir David Beatty commanded the British Battle Cruiser Fleet. Admiral Reinhard Scheer commanded the German High Seas Fleet. Vice Admiral Franz Hipper commanded the German Battle Cruiser Squadron.
The opposing fleets: See The Battle of Jutland Part II
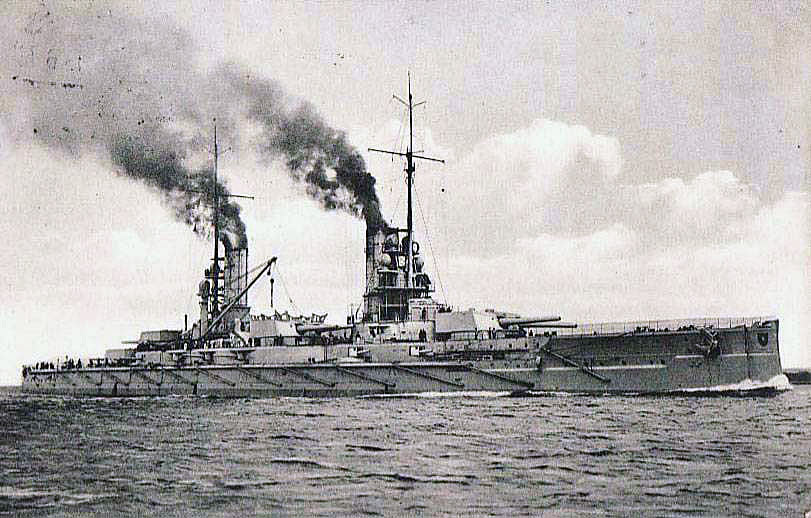
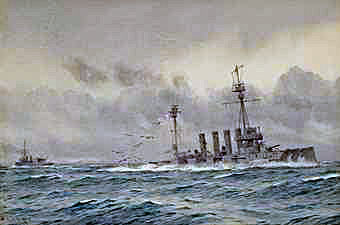
German Battleship SMS Kaiser. Kaiser fought in the 3rd Battle Squadron at the Battle of Jutland 31st May 1916
Winner:
The German navy considered it won the Battle of Skagerrak, the German name for Jutland, having sunk more Royal Navy ships and inflicted more casualties. The Royal Navy considered that it had repelled the incursion by the High Seas Fleet into the North Sea. The German fleet made only one further incursion during the War.
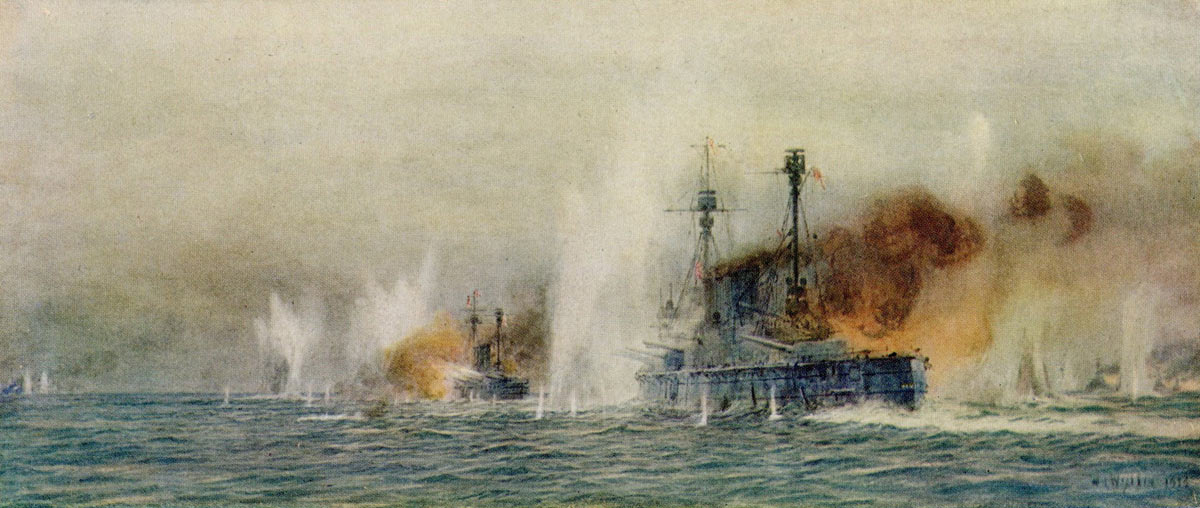
The Battle of Jutland Part III: Clash between the British and German Battle Fleets during the evening 31st May 1916
The disposition of the Grand Fleet:
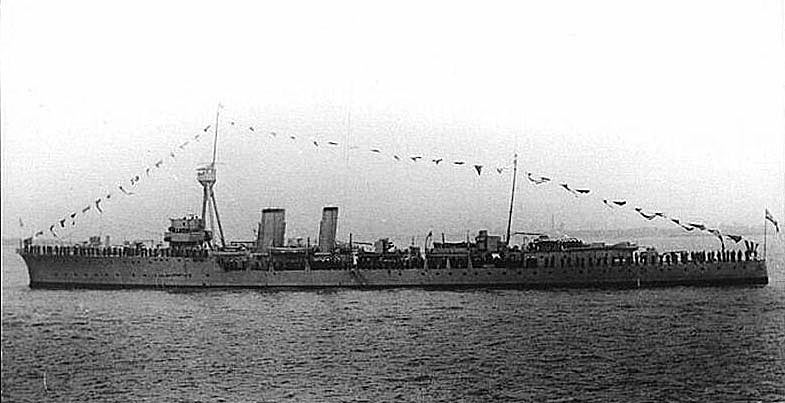
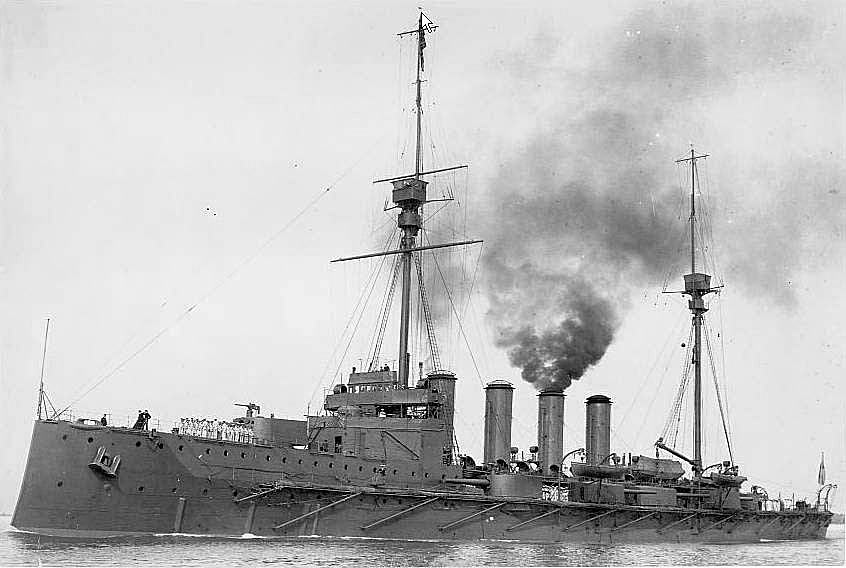
British Cruiser HMS Calliope. Calliope fought at the Battle of Jutland on 31st May 1916 as flag ship in 4th Light Cruiser Squadron
At 5.30pm Jellicoe was twenty-three miles north of Beatty.
Jellicoe’s battleships were in a row of three squadrons with the ships in line ahead within their squadrons.
Rear-Admiral Hood with the 3rd Battle Cruiser Squadron (HMS Invincible, Inflexible and Indomitable), the light cruisers Chester and Canterbury and four destroyers was to the east and twenty-one miles in advance, out of sight of Beatty’s force.
British Cruiser HMS Warrior. Warrior fought at the Battle of Jutland on 31st May 1916 in Admiral Arbuthnot’s 1st Cruiser Squadron. Warrior sank during 1st June 1916 due to damage she had suffered during the battle
Two heavy cruiser squadrons led the battle fleet, Rear-Admiral Arbuthnot’s 1st Cruiser Squadron (HMS Defence, Warrior, Duke of Edinburgh and Black Prince) and Rear-Admiral Heath’s 2nd Cruiser Squadron (HMS Minotaur, Cochrane, Shannon and Hampshire). Leading these squadrons was Commodore Le Mesurier’s 4th Light Cruiser Squadron (HMS Calliope, Constance, Comus, Royalist and Caroline).

British Battleship HMS Bellerophon in action at the Battle of Jutland on 31st May 1916
Due to the adverse visibility the squadrons during the voyage south moved closer to each other so that the force covered a front of twenty-five miles rather than the planned forty miles.
The starboard wing comprised the 1st Battle Squadron 6th Division (Vice-Admiral Burney: HMS Marlborough, Revenge, Hercules and Agincourt), then 5th Division (Rear-Admiral Gaunt: HMS Colossus, Collingwood, Neptune and St Vincent).
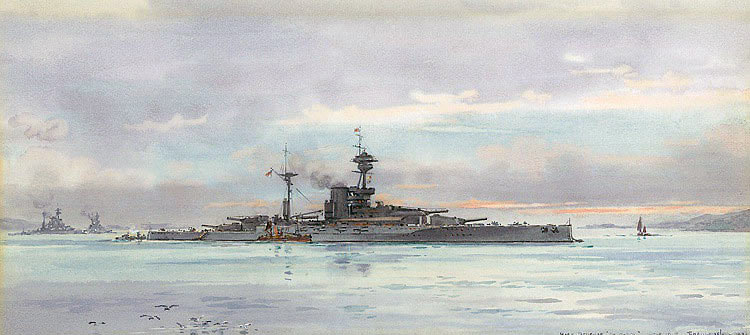
British Battleship HMS King George V with other battleships. King George V fought in Admiral Jerram’s 2nd Battle Squadron at the Battle of Jutland on 31st May 1916
On the port wing was the 2nd Battle Squadron (Vice-Admiral Jerram with 1st Division: HMS King George V, Ajax, Centurion and Erin), then 2nd Division (Rear-Admiral Leveson: Orion, Monarch, Conqueror and Thunderer).
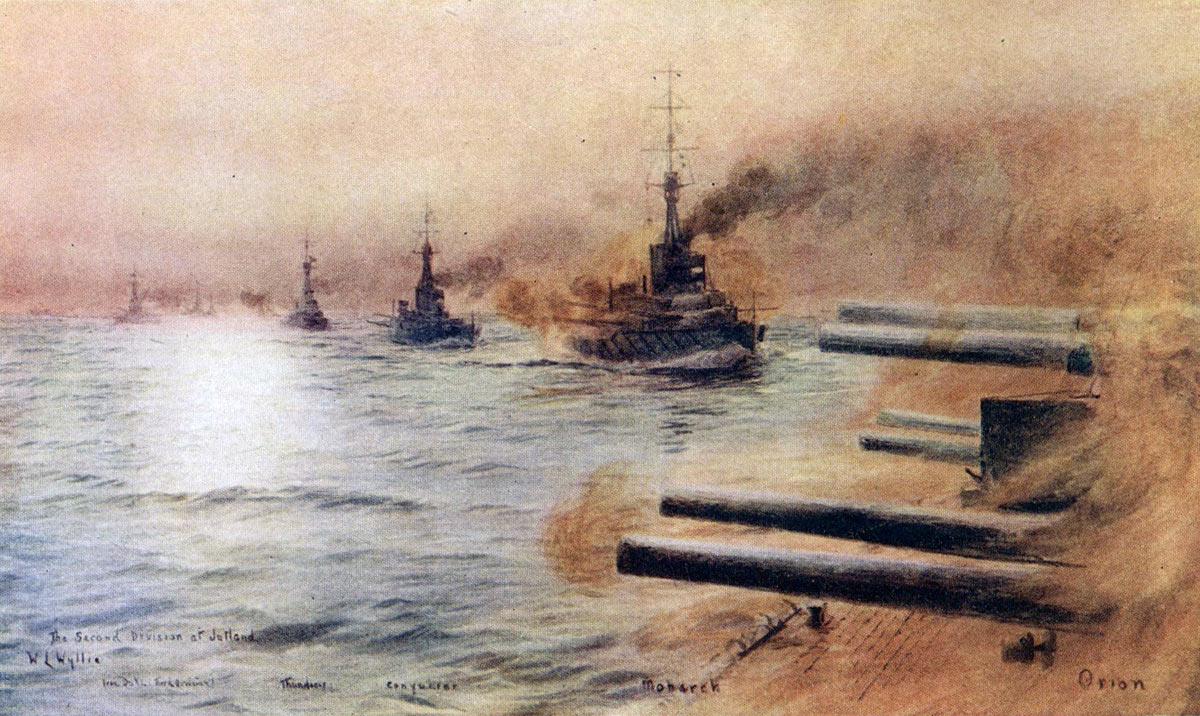
British 2nd Division of Battleships at the Battle of Jutland 31st May 1916: from the right HMS Orion Monarch Conqueror and Thunderer: picture by Lionel Wyllie
The 4th Squadron took the centre (Vice-Admiral Sturdee) with 4th Division (HMS Benbow, Bellerophon, Temeraire and Vanguard) and 3rd Division headed by HMS Iron Duke, Fleet Flagship of Admiral Jellicoe (Rear-Admiral Duff: HMS Superb, Royal Oak and Canada).

British Battleships at the Battle of Jutland 31st May 1916: HMS Royal Oak, Benbow, Superb and Canada: picture by Lionel Wyllie
Jellicoe’s immediate force comprised twenty-four Dreadnoughts with guns from 12 inch to 15 inch while Scheer’s force comprised 16 Dreadnoughts and 6 pre-Dreadnoughts with guns no larger than 12 inch. The German ships were more heavily armoured and more heavily crewed.
Beatty’s force comprised the four Queen Elizabeth battleships of Admiral Owen-Thomas’s 5th Battle Squadron with 15 inch guns and four battle cruisers, having lost two in the battle.
Jellicoe also deployed the three battle cruisers of Admiral Hood’s 3rd Battle Cruiser Squadron.
Hipper commanded five battle cruisers.
As the main battle began the British Grand Fleet deployed thirty-five capital ships against the German High Seas Fleet’s twenty-one capital ships.
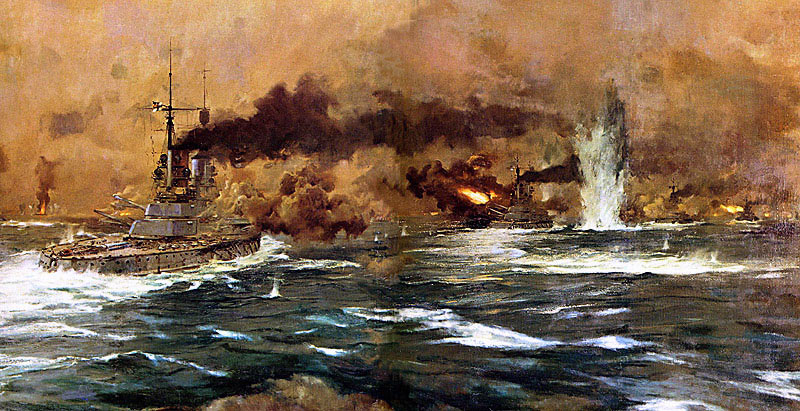
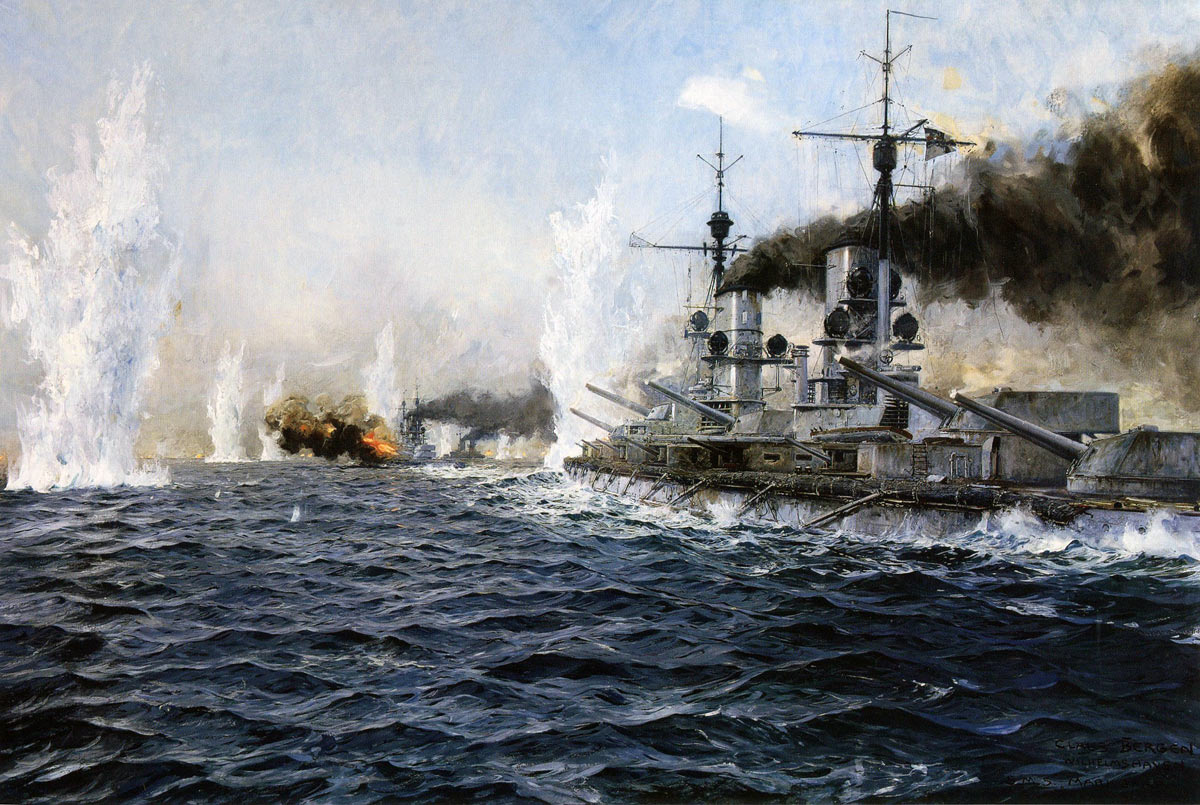
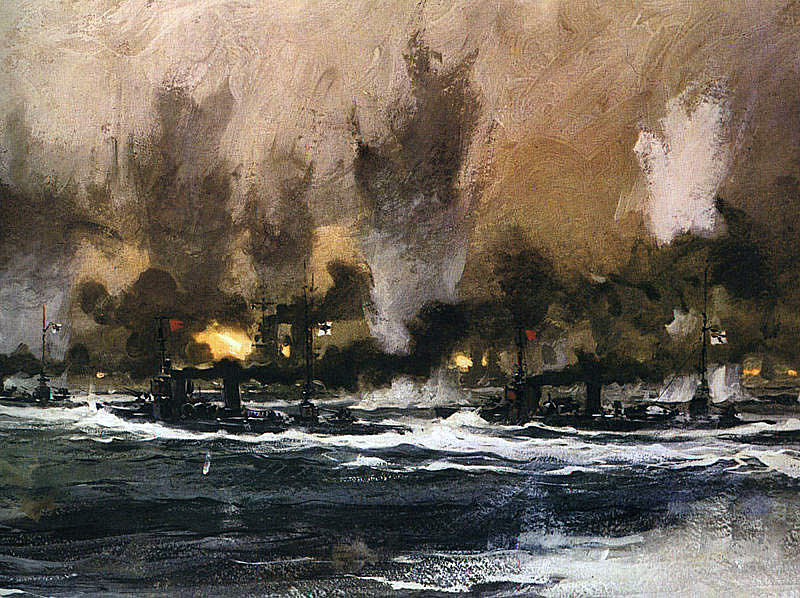
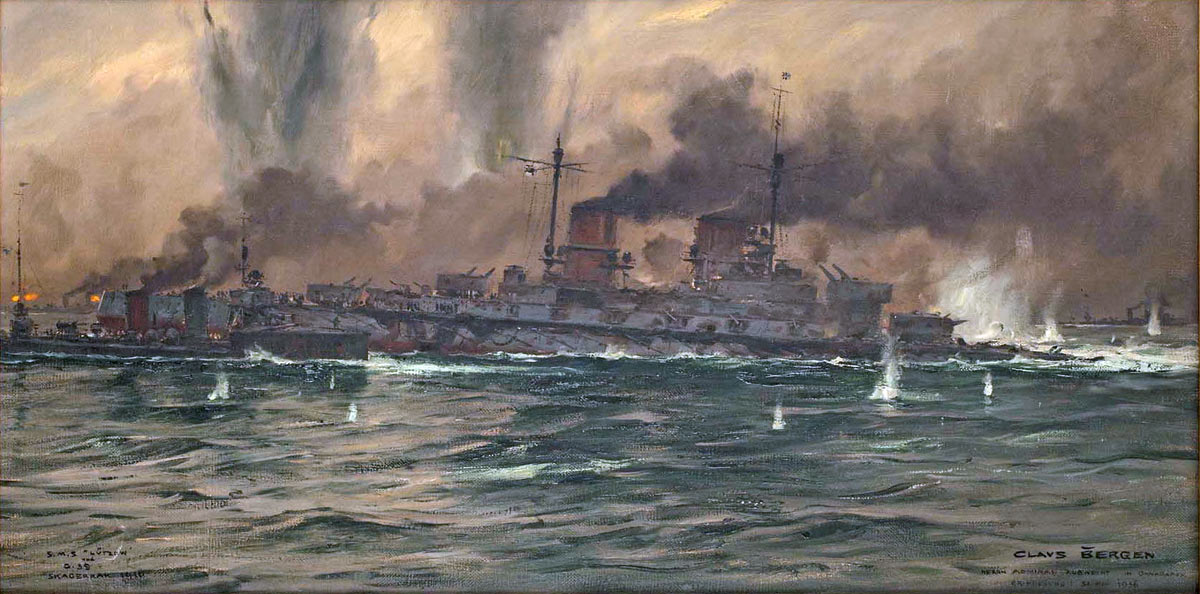
German Battleships steaming into action at the Battle of Jutland 31st May 1916: picture by Claus Bergen
Jellicoe’s concern was to utilise his advantage in numbers of heavy guns and their greater range while keeping his ships out of effective torpedo range of the large number of German torpedo boats. The optimum range to achieve these two aims was considered to be 15,000 yards (8½ miles).
Jellicoe was twelve miles short of the 2pm rendezvous when he began to receive the signals from HMS Galatea reporting the first contact with German ships.
At 2.43pm it became clear that Galatea was reporting the presence of a significant German force. Jellicoe ceased zig-zagging and increased speed to seventeen knots.
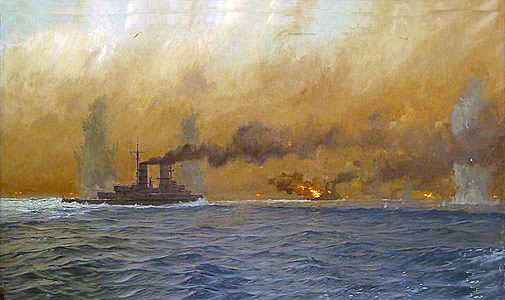
German Battleship SMS Markgraf firing on the British Fleet at the Battle of Jutland 31st May 1916: picture by Claus Bergen
At 3.15pm Jellicoe was sailing at nineteen knots and warning his squadrons to prepare for contact with German ships.
Between then and 3.55pm a series of signals arrived from Beatty announcing the sighting of the German battle cruiser fleet and that he was engaging them.
At 4.40pm Jellicoe’s wireless room on HMS Iron Duke took in the message from HMS Southampton that she had sighted the German Battle Fleet bearing south-east course north. This information was confirmed by a message from Beatty that had to be sent via Princess Royal as Lion’s wireless had been destroyed by shell fire.
At 4.47pm Jellicoe’s fleet was warned ‘Enemy battle fleet coming north’ and at 4.50pm Jellicoe wirelessed the Admiralty in London ‘Fleet Action is imminent.’
At 5.05pm Jellicoe issued the general order ‘Prepare for action in every respect’.
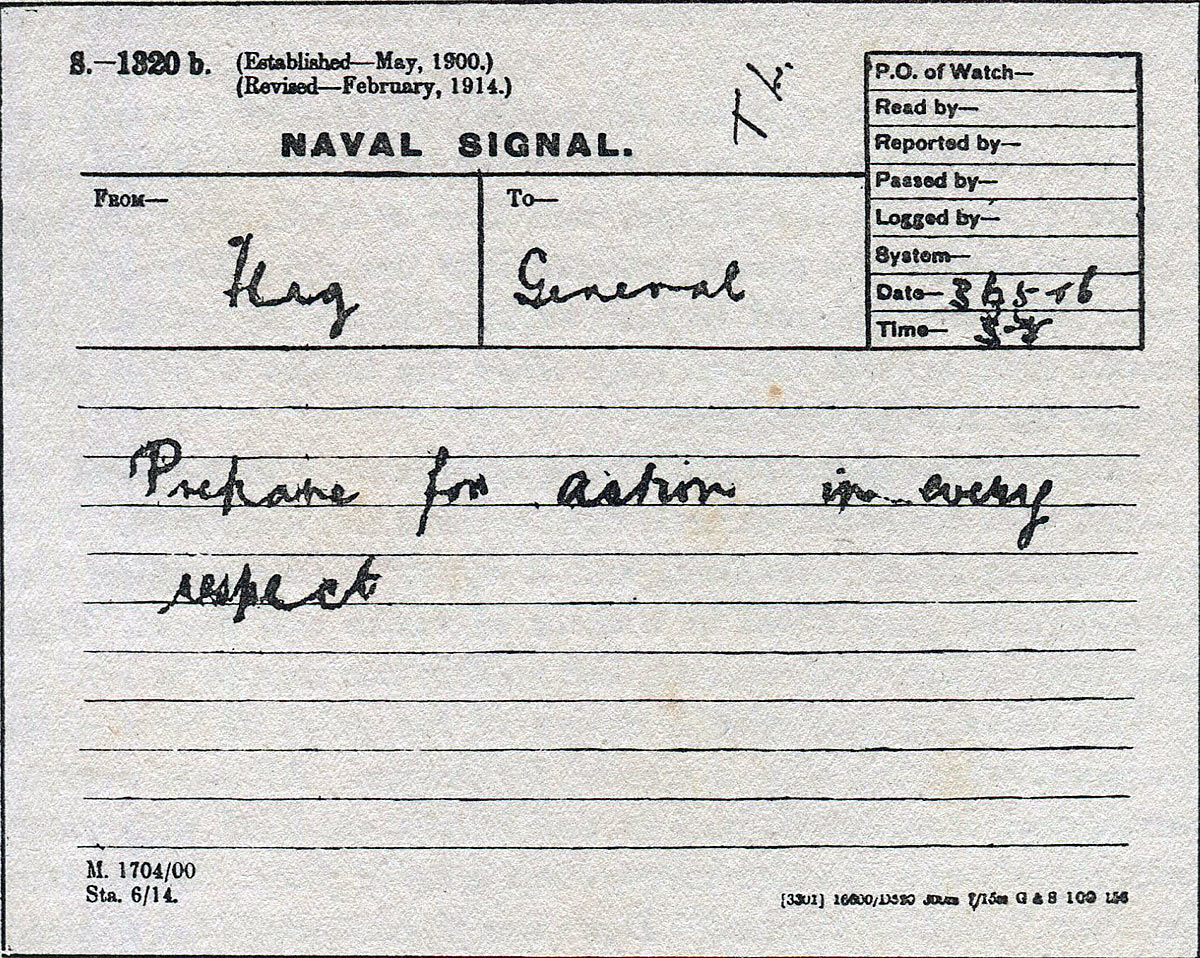
Admiral Jellicoe’s order to the Grand Fleet to ‘prepare for action’ timed 5.5 on 31st May 1916
At 5.30pm Beatty’s battle cruisers were on a course north north-west closing with Jellicoe’s battle fleet. Evan-Thomas was four miles behind heading north and still in action, Barham and Valiant exchanging fire with Hipper’s battle cruisers and Warspite and Malaya with Scheer’s leading battleships, all at extreme ranges of around 19,000 yards (11 miles).
As Scheer’s course was oblique to Evan-Thomas’s the range remained constant in spite of the superior speed of the ‘Queen Elizabeth’ battleships of 5th Battle Squadron and Warspite and Malaya suffered consequentially.
In compliance with Scheer’s ‘General Chase’ order Hipper adopted a course converging with Beatty and around 5.40pm the opposing battle cruisers came in sight of each other at around 14,000 yards (8 miles) and resumed fire.
German Battleships and Destroyers in action Battle of Jutland 31st May 1916: picture by Claus Bergen
Hipper’s five battle cruisers were now under fire from Beatty’s four surviving battle cruisers and the two leading battleships of 5th Battle Squadron and began to suffer heavily, causing Hipper to veer to starboard and increase the range.
At 5.33pm HMS Falmouth leading the light cruisers ahead of HMS Lion and HMS Black Prince the most westerly of the cruisers leading Jellicoe’s battle fleet spotted each other, the first contact between the two British forces.
Black Prince reported ‘Battle Cruisers five miles to the south’. While the nationality was unclear Jellicoe correctly took them to be Beatty’s.
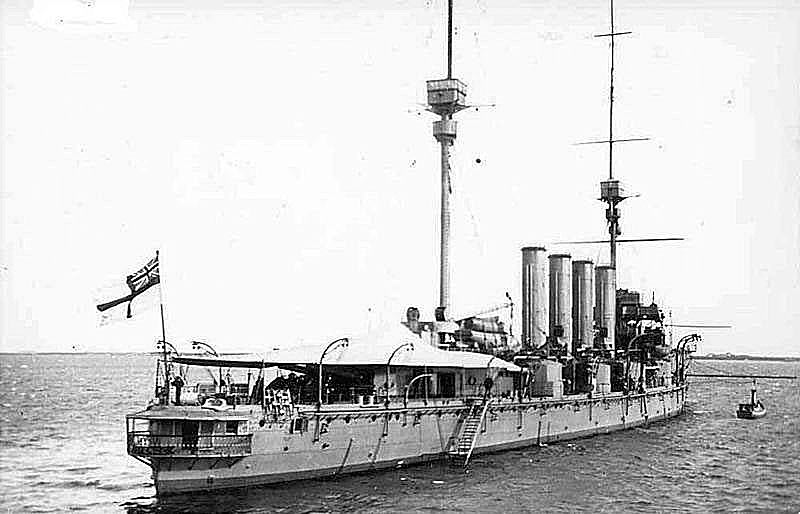
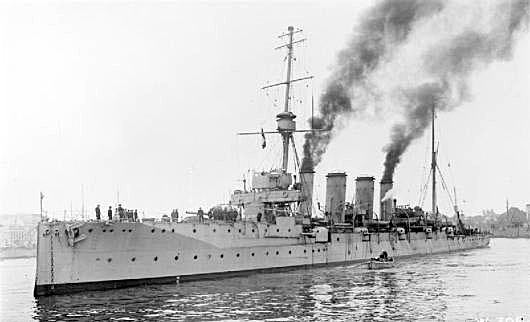
British light cruiser HMS Chester in action at the Battle of Jutland on 31st May 1916
On Jellicoe’s other wing Admiral Hood’s 3rd Battle Cruiser Squadron, ordered forward to support Beatty, and was twenty-five miles ahead of the battle fleet with its accompanying light cruisers HMS Canterbury and Chester and destroyers Shark, Acasta, Ophelia and Christopher. Canterbury was five miles in advance to the east and Chester a similar distance to the west, the destroyers providing an anti-submarine screen between the two.
HMS Chester:
At 5.27pm Chester heard firing to her south-west and turned to investigate. In the distance could be seen the gun flashes of 5th Battle Squadron.
Suddenly a four funnelled ship accompanied by destroyers crossed in front of Chester, clearly a German light cruiser.
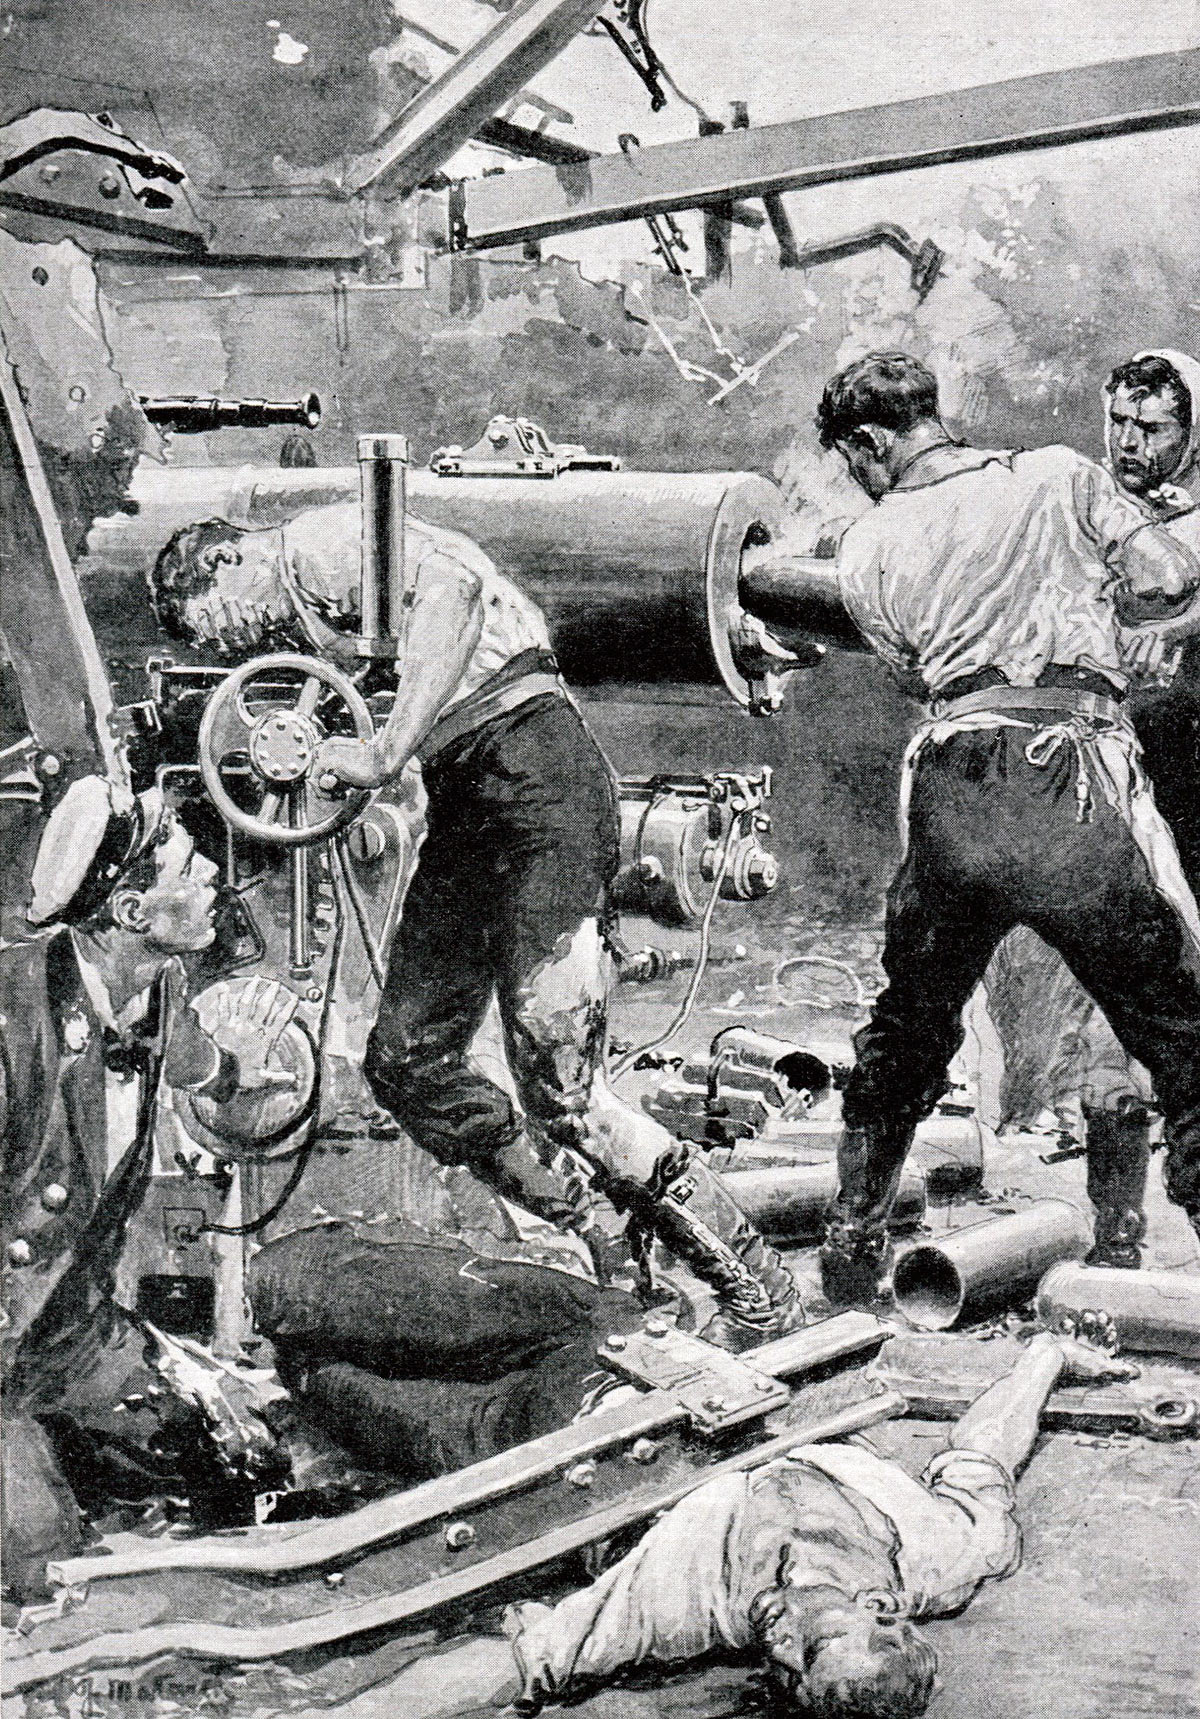
British Light Cruiser HMS Chester engages the German Light Cruisers at the Battle of Jutland 31st May 1916: First Class Boy Jack Cornwell was awarded a posthumous Victoria Cross for his conduct: picture by Lionel Wyllie
Chester opened fire turning north to avoid a torpedo attack. Two more German light cruisers appeared and opened fire on Chester.
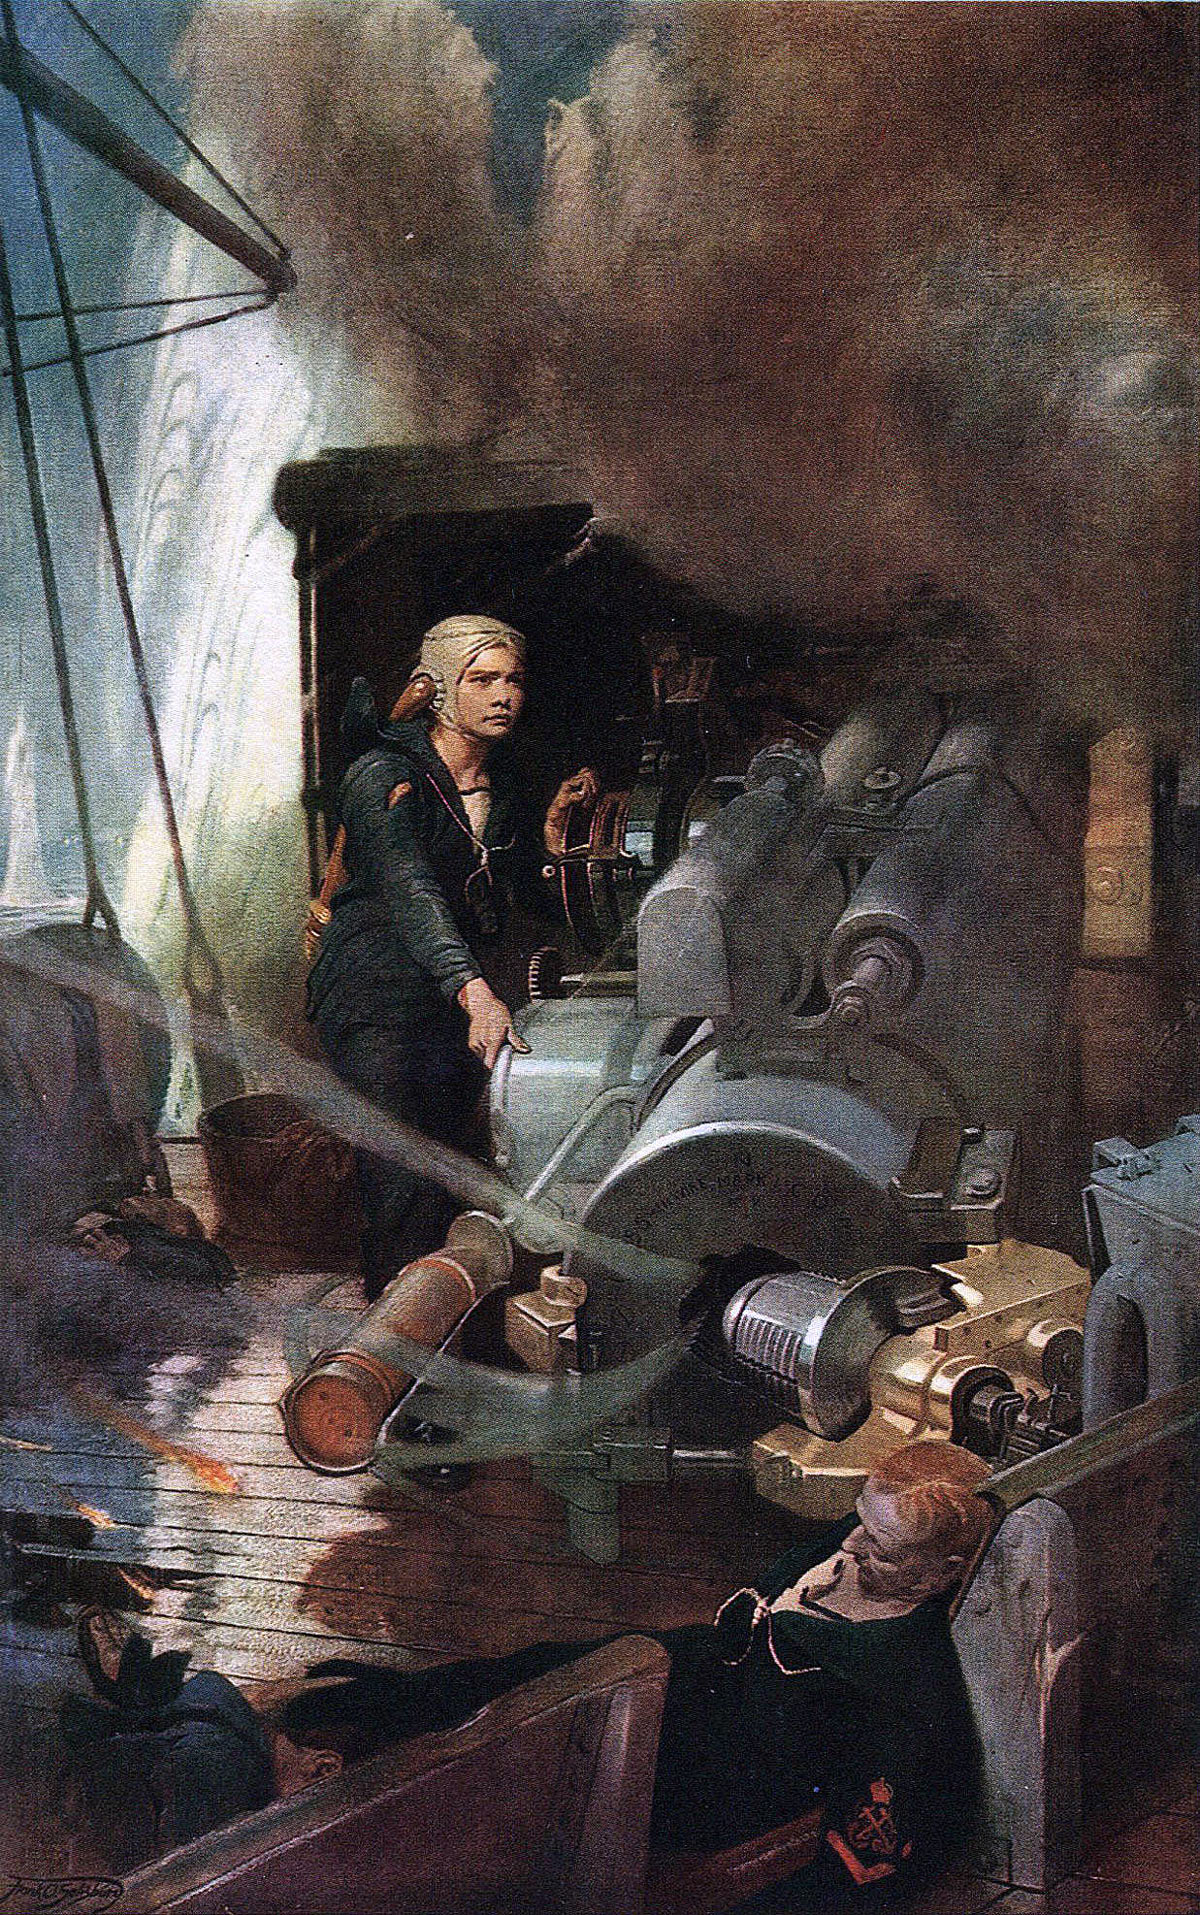
Jack Cornwell continuing to operate his gun on HMS Chester at the Battle of Jutland on 31st May 1916 after the death or disabling of the other gun crew winning a posthumous Victoria Cross
Chester had run into the light cruisers Frankfurt, Pillau, Elbing and Wiesbaden of Admiral Boedicker’s Second Scouting Group positioned on the disengaged starboard side of Hipper’s battle cruisers.
Within five minutes three of Chester’s four guns were disabled with the crews dead or wounded. The fourth gun continued firing as Chester made off to the north-east.
Hearing the firing at 5.37pm Admiral Hood swung his three battle cruisers to the north-west on a course converging with Chester and the German light cruisers.
Seeing the British battle cruisers Boedicker changed course to starboard on the opposing course to Hood and discharged torpedoes causing Hood to veer away. Boedicker thereby managed to escape into the gloom, but not before the battle cruisers’ 12 inch guns had severely damaged Wiesbaden and hit Pillau and Frankfurt.
Chester hurried away to the north.
It was during this action that the 16 year old ‘First Class Boy’ Jack Cornwell won his posthumous Victoria Cross by sticking to his gun on HMS Chester and continuing to fire even when mortally wounded, the rest of the gun crew being dead.
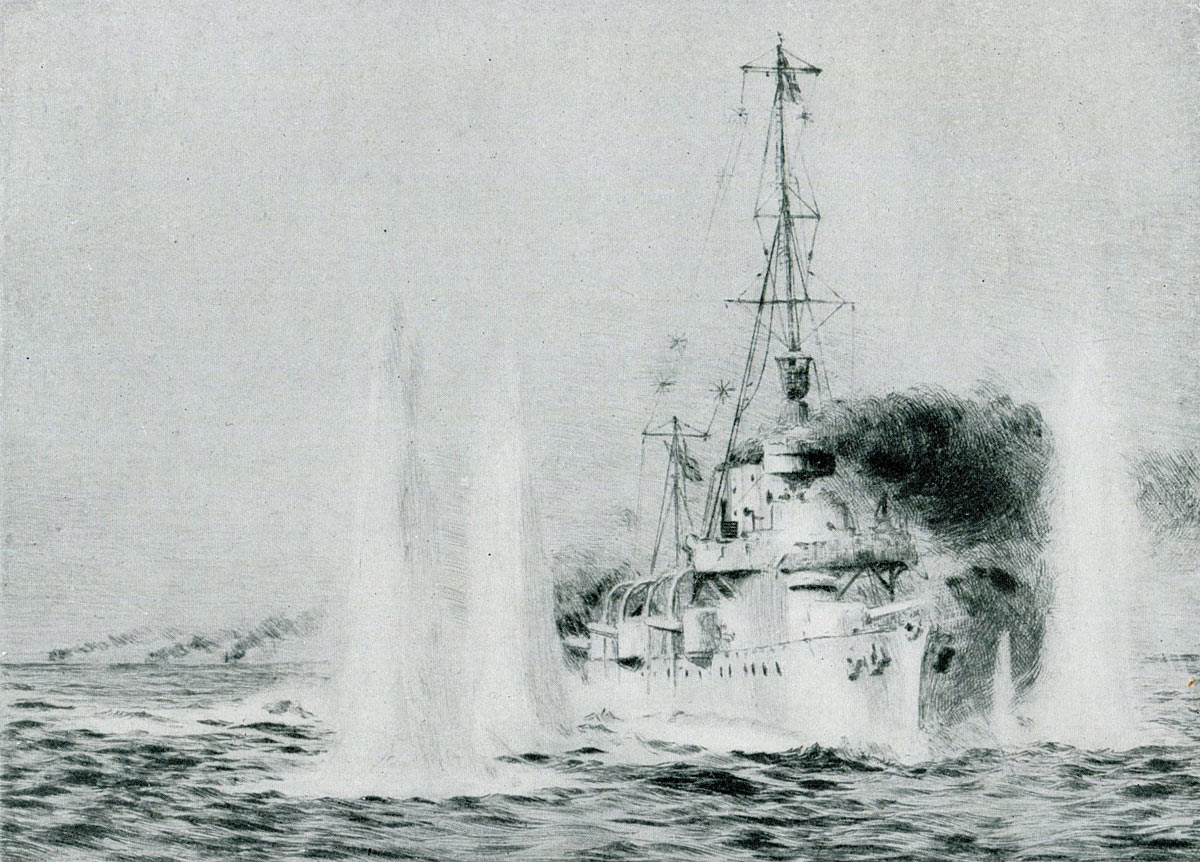
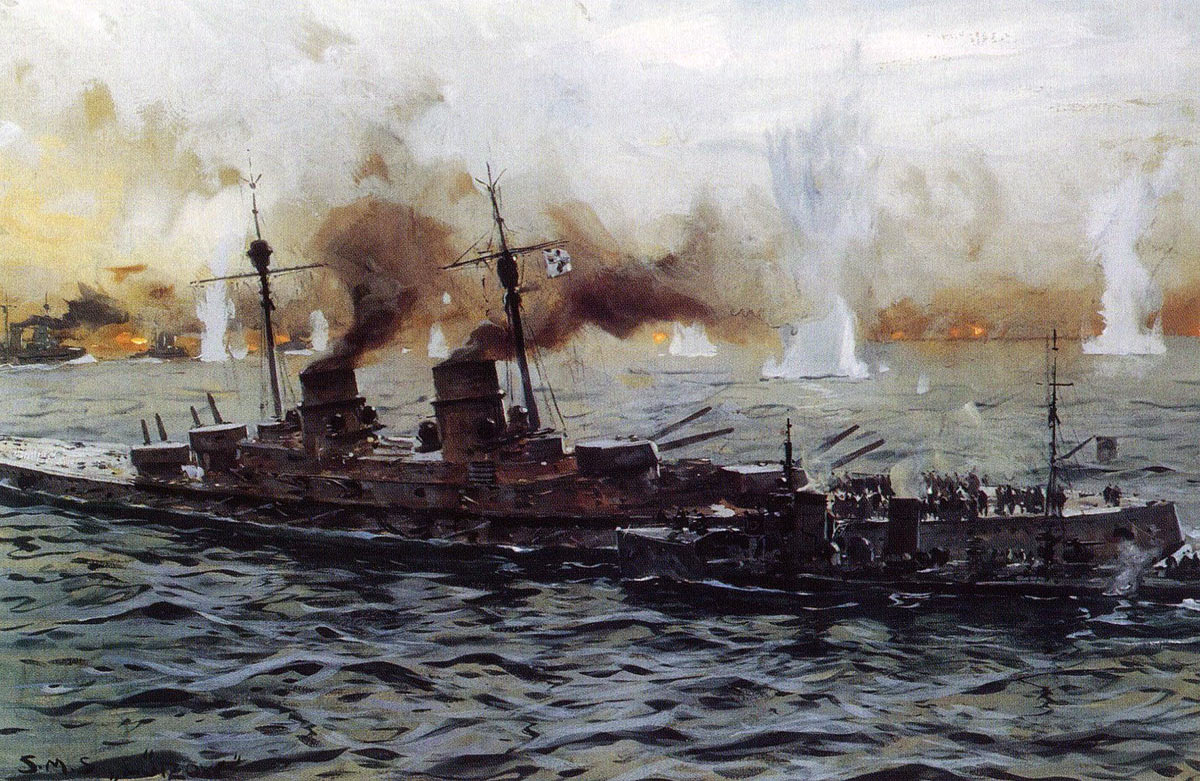
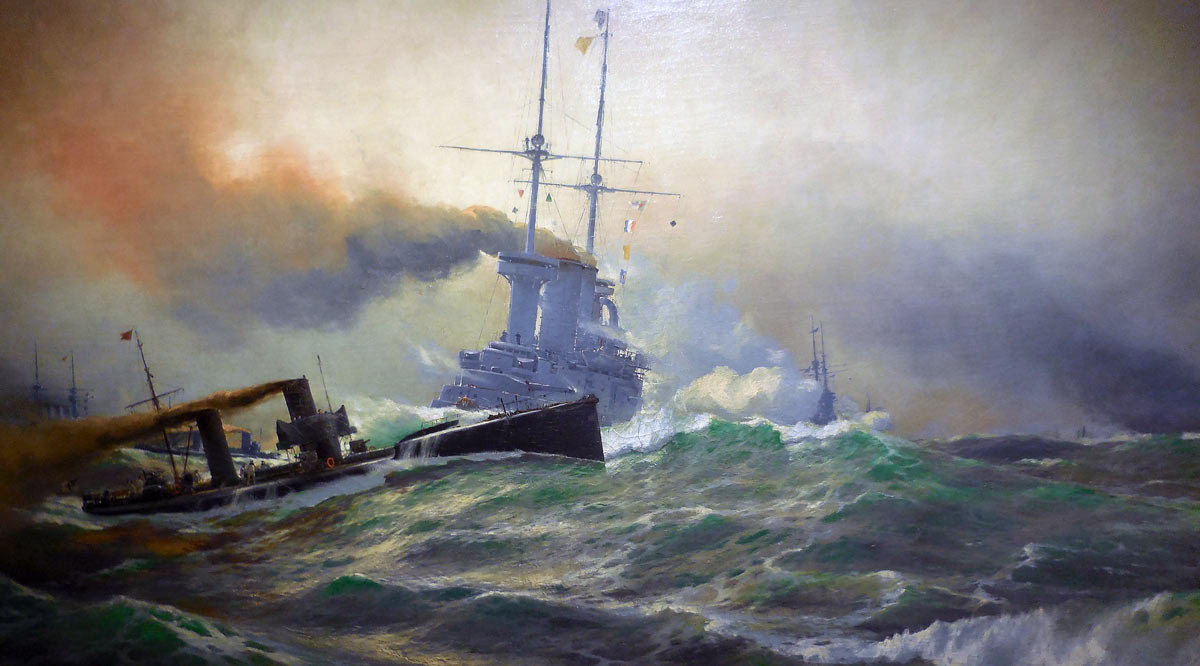
British Destroyer HMS Shark. Shark was sunk at the Battle of Jutland on 31st May 1916 her captain Commander Loftus Jones being awarded a posthumous Victoria Cross
HMS Shark:
With the turn of Hood’s battle cruisers to rescue HMS Chester the destroyer screen led by Commander Loftus Jones in HMS Shark was left on the port beam facing Boedicker’s escaping German light cruisers and the accompanying force of torpedo boats.
The German torpedo boats were in the process of attacking the British battle cruisers when Shark, Acasta, Ophelia and Christopher intervened.

Commander Loftus Jones Royal Navy awarded a posthumous Victoria Cross for his conduct as captain of the destroyer HMS Shark in the Battle of Jutland on 31st May 1916
Shark fired a torpedo at the German light cruisers but was quickly reduced to a ruin by German gun fire. Acasta was also badly damaged.
The light cruiser HMS Canterbury intervened and drew off the German light cruisers.
Shark was soon under attack again by a further force of German torpedo boats sent by Hipper to attack Hood’s battle cruisers and prevent them from interfering in his withdrawal. These torpedo boats fired on the immobile Shark which continued to fight until her last gun was hit. Commander Jones controlling the gun lost a leg.
British Destroyer HMS Shark fighting to the last before sinking in the Battle of Jutland on 31st May 1916. Shark’s captain Commander Loftus Jones was awarded a posthumous Victoria Cross
The crew abandoned ship as the Shark sank. Jones died in the boat and the surviving six crew were later rescued by a Danish steamer. Commander Loftus Jones was awarded a posthumous Victoria Cross.
Shark sank in the middle of the developing battlefield. Jellicoe’s battleships were fourteen miles to the north-west; Beatty was six miles to the south-west engaged with Hipper’s battle cruisers and the leading battleships of the German High Seas Fleet supported by the 5th Battle Squadron.
Hipper had been forced to turn east and Beatty was pursuing him, having at 5.56pm seen the leading battleships of the Grand Fleet. As Beatty crossed in front of Jellicoe sailing west to east he lost sight of Hipper’s ships.
Jellicoe urgently needed to know where the German ships were so that he could begin the deployment of his battleships from squadron columns into a single line heading across the German front, the manoeuvre of ‘Crossing the T’, which would unleash the broadside fire of his battleship force on the leading German ships.
Hipper finding the fire from Beatty’s battlecruisers and Evan-Thomas’s battleships too hot to endure had turned away to the east and then back towards the advancing German battleships.
At this point the destroyer Ophelia launched a torpedo attack on Hipper’s ships. The torpedo missed.

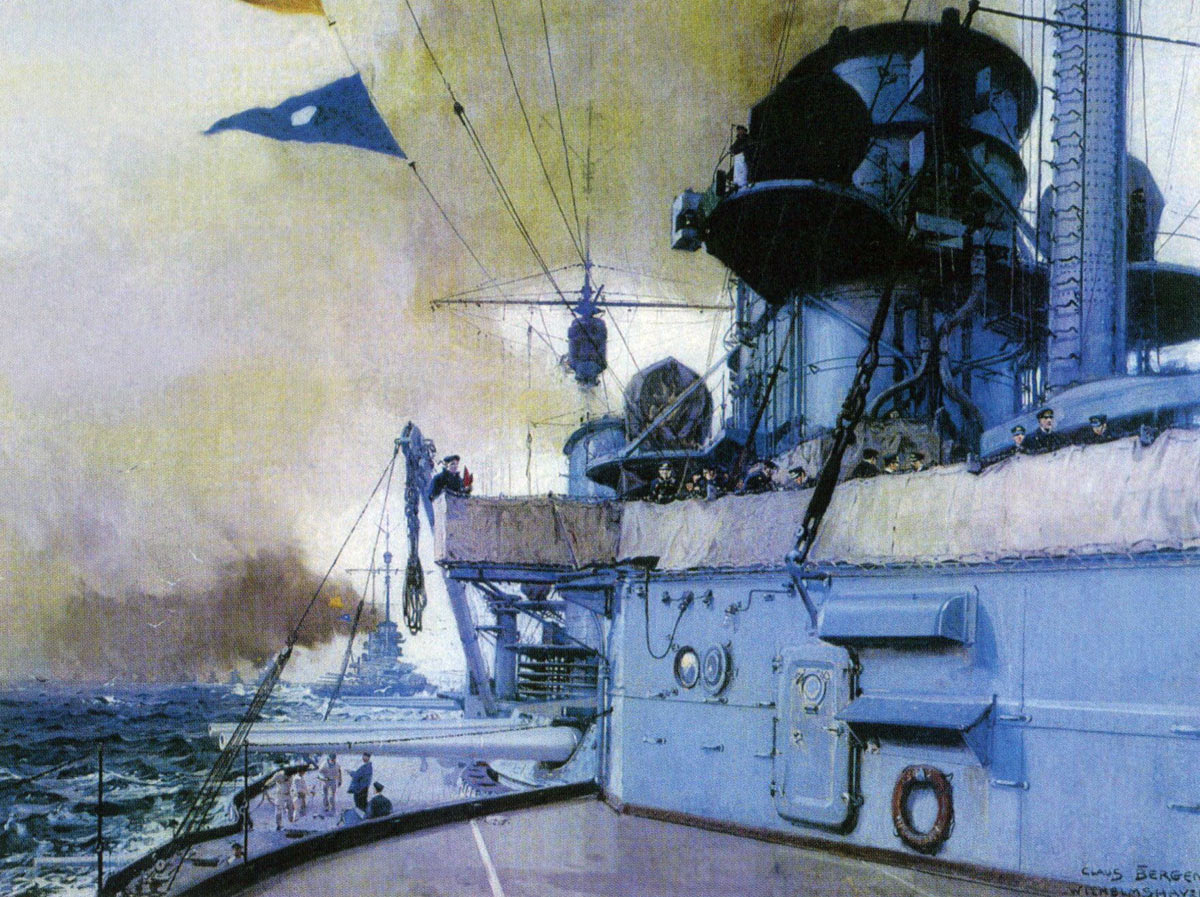
HMS Tiger and other British Battle Cruisers at ‘Windy Corner’ in the Battle of Jutland 31st May 1916
At 6.14pm Hipper turned back again to the north-east on the same course as the following German battle fleet. He was soon subject to attack, by the destroyers Onslow on his port bow and Acasta on his starboard.
Onslow had been in the course of an attack on the crippled German light cruiser Wiesbaden when the captain saw the advancing German battle cruisers and ordered a salvo of four torpedoes at Hipper’s ships. At the same moment the Onslow was struck by a heavy shell and was enveloped in a steam cloud, firing only one torpedo.
13.5 inch guns of the British Battleship HMS Ajax: Ajax fought at the Battle of Jutland on 31st May 1916 in the 2nd Battle Squadron commanded by Vice Admiral Sir Thomas Jerram
On the other bow Acasta was approaching after offering Shark assistance and being rebuffed. Undeterred by a storm of gunfire Acasta fired a torpedo at Lützow, Hipper’s flagship, and saw it strike home with an explosion.
Limping away Onslow passed the disabled Wiesbaden and fired one of her remaining torpedoes into the German light cruiser further crippling her.
At this point Lieutenant-Commander Tovey the captain of Onslow saw looming out of the mist some five miles away the leading German battleships. Onslow made towards the German line at its much reduced speed of 10 knots and fired her remaining two torpedoes at the German battleships at a range of 8,000 yards (4 ½ miles). Neither torpedo achieved a hit. Onslow withdrew from the battle, reaching port two days later towed by the destroyer HMS Defender.
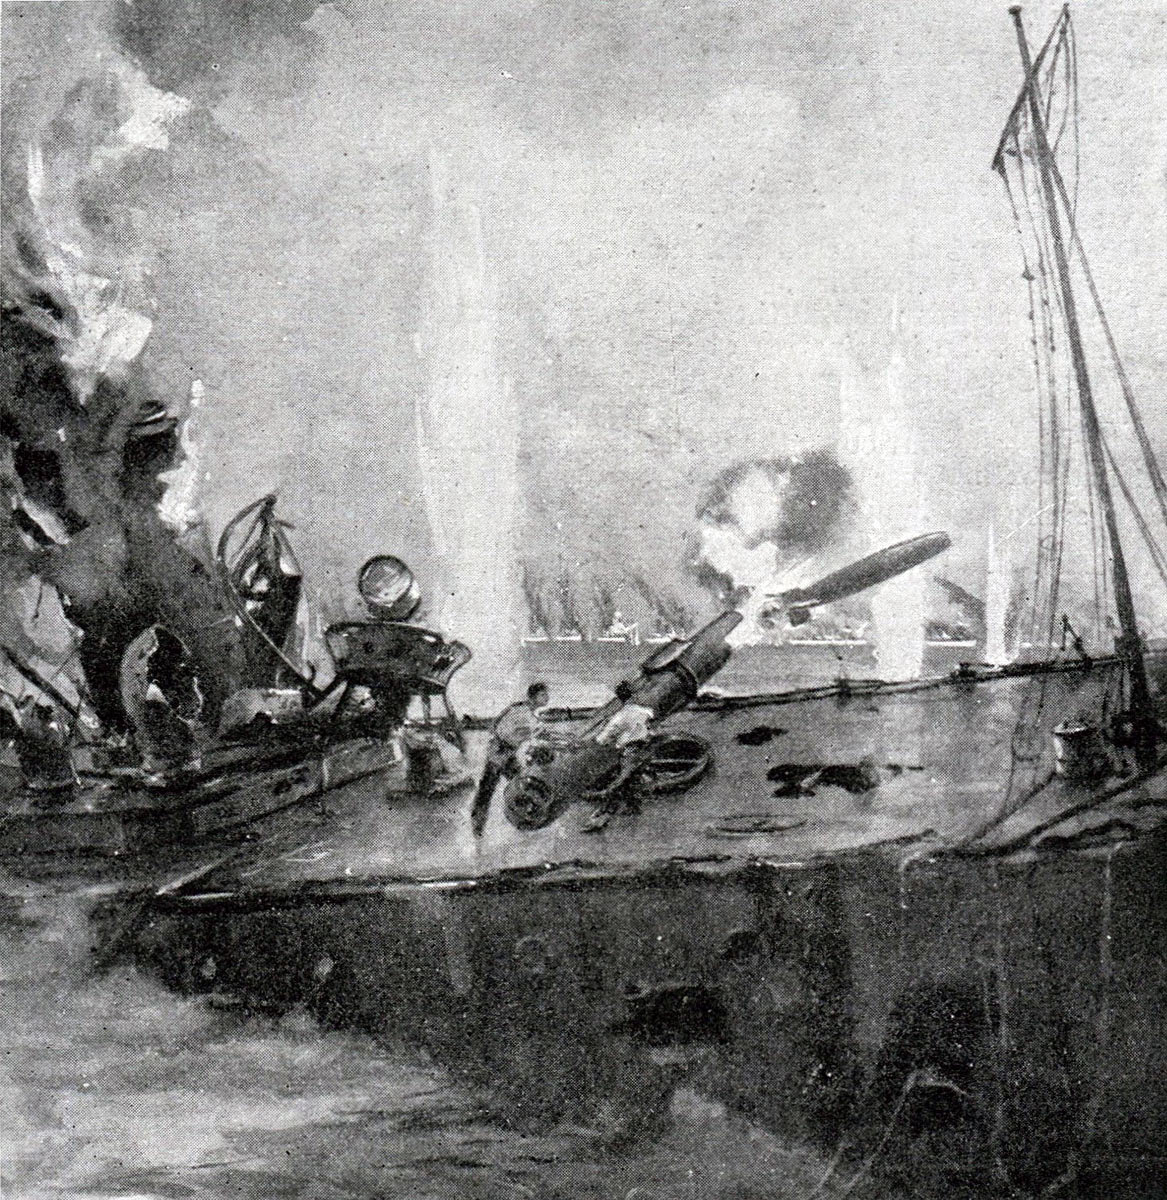
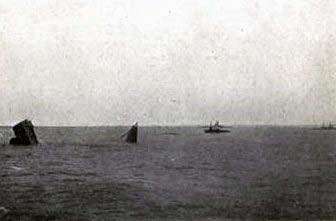
British Cruiser HMS Defence. Defence exploded at the Battle of Jutland 31st May 1916 after being hit by German fire
Admiral Arbuthnot’s 1st Cruiser Squadron (HMS Defence, Warrior, Duke of Edinburgh and Black Prince):
Hipper continued turning away from Beatty’s fire onto a north-east course in advance of Scheer’s battleship line until he came up with the severely damaged light cruiser Wiesbaden, now under heavy fire from Admiral Arbuthnot’s 1st Cruiser Squadron (HMS Defence, Warrior, Duke of Edinburgh and Black Prince) which was in advance of Jellicoe’s battleship squadrons.
British Cruisers HMS Warrior and Defence of Admiral Arbuthnot’s 1st Cruiser Squadron in action against Hipper’s Battle Cruisers at the Battle of Jutland 31st May 1916: picture by Lionel Wyllie
Beatty’s battle cruisers after turning east to pursue Hipper’s ships were coming across Arbuthnot’s course. Arbuthnot continued on with Defence leading his squadron and Warrior immediately behind, forcing Lion to turn away.
British warships HMS Tiger, Princess Royal, Lion, Warrior and Defence in action at the Battle of Jutland 31st May 1916 shortly before Defence was sunk: picture by Lionel Wyllie
Battle Orders laid down that the duty of cruisers was to engage enemy cruisers. However Arbuthnot was about to engage battle cruisers with his cruisers (9.2 inch guns against 12 inch guns), clearly not envisaged by the Battle Orders.
Defence and Warrior passing the Battle Cruiser Squadron at the Battle of Jutland: picture by Lionel Wyllie
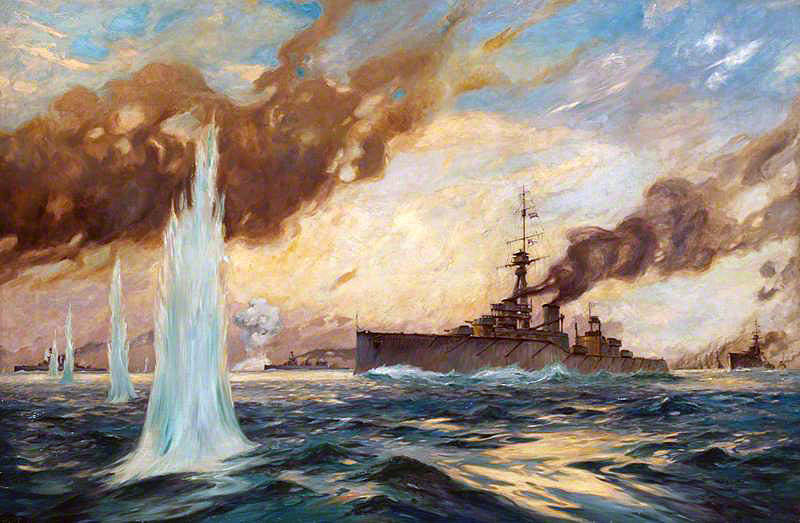
British Cruiser HMS Defence sinks at the Battle of Jutland 31st May 1916: picture by Alma Burlton
Defence and Warrior hit Wiesbaden and then carried on to within 5,500 yards of the German ship.
At 6.20pm after passing Lion Defence was struck by two succeeding salvos from the German battle cruisers and blew up.
Warrior severely damaged escaped a similar fate because at this point the battleship HMS Warspite, suffering heavy fire at the rear of Evan-Thomas’s 5th Battle Squadron, fell out of the line and steamed in a circle around Warrior flying the signal ‘Not under control’. Much of the fire that would have been aimed at Warrior for this brief period was diverted to Warspite.

British warships HMS Warspite and Warrior in action at the Battle of Jutland 31st May 1916 after the sinking of HMS Defence: picture by Lionel Wyllie
It was at this time that Scheer’s advancing ships saw Jellicoe’s Grand Fleet battleships emerging from the poor visibility.
Jellicoe had experienced considerable difficulty in finding the German fleet. His light cruiser screen was intended to give him adequate warning of the German position, but the speed of the Grand Fleet’s advance had prevented the light cruisers from steaming sufficiently far in advance to carry out this role.
British Cruiser HMS Defence explodes after being struck by several salvos from German Battleships at the Battle of Jutland 31st May 1916: picture by Claus Bergen
Scheer had been forced to reduce speed to enable his slower battleships to catch up and had then turned towards the disabled Wiesbaden causing the opposing fleets to converge.
The sight of the British Grand Fleet came as a shock to the German admiral who thought he was only dealing with Beatty’s force of battle cruisers, the four battleships of the 5th Battle Squadron and their accompanying light cruisers and destroyers.
Jellicoe now had to deploy his four squadrons of battleships into line to bring maximum fire on the German fleet.
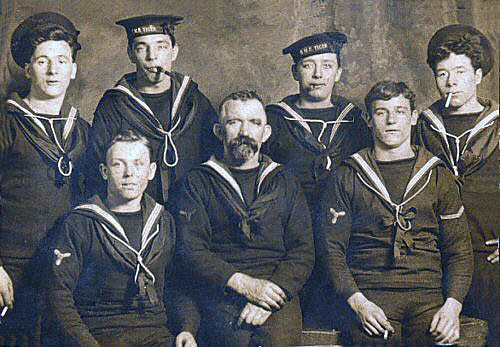
Crew members of British Battle Cruiser HMS Tiger. Tiger fought at the Battle of Jutland 31st May 1916 as part of Admiral Beatty’s Battle Cruiser Fleet
In view of the German course the ideal turn would be to starboard but this would put his least powerful and oldest ships at the front of the deploying line (Admiral Burney in Marlborough and his 1st Battle Squadron) and put his ships where the German battleships could launch torpedoes at them, Scheer’s ideal attack. Jellicoe therefore chose to deploy his line to port with the King George V class ships at the front.
Beatty’s battle cruisers were passing across the front of Jellicoe’s turning squadrons in order to adopt the position in the line allocated to the battle cruisers of being in the van.
Evan-Thomas in order not to mask the fire of Jellicoe’s battleships by following Beatty fell into the rear of the line behind Burney, less Warspite which was now circling Warrior apparently out of control.
The danger Jellicoe had anticipated of Burney’s ships being most exposed was realised by the time it took for the squadrons to turn and deploy to port, but the presence of Evan-Thomas’s ‘Queen Elizabeths’ delivering a heavy and highly accurate fire on the German ships prevented Burney suffering unduly.
Rear-Admiral Hood commanding 3rd Battle Cruister Squadron at the Battle of Jutland on 31st May 1916. Admiral Hood was lost when his flagship HMS Invincible blew up
As Beatty’s four remaining battle cruisers steamed across the front of the Grand Fleet to take the lead they came under torpedo attack from Hipper’s ships, prior to his turn away to escape from the British battle line.
Admiral Hood with his three battle cruisers of the 3rd Battle Cruiser Squadron was hurrying up to assist Beatty from his position at the eastern end of the deployment.
Beatty’s ships swerved to avoid the torpedoes and Hood’s squadron turned about to take the lead of the battle cruiser line. The number of ships travelling at high speed on conflicting courses made a collision almost inevitable but within minutes the battle cruisers emerged heading in line ahead on a south easterly course leading Jellicoe’s battleships. It was a masterly piece of seamanship.
The movement of Beatty’s battle cruisers across the front of the deploying battleships delayed the moment when Jellicoe could open fire. His ships had been forced to reduce speed to enable the battle cruisers to clear their front.
During this delay Hipper’s battle cruisers turned to the south to escape, the Lützow badly damaged and almost disabled.
In order to bring his ships on a parallel course with Jellicoe, the only way to avoid the ‘Crossed T’ ordeal, Scheer wheeled his leading ships to starboard.
Crew of the British Destroyer HMS Acasta damaged and unable to move cheer the Commander-in-Chief Admiral Jellicoe as he passes in HMS Iron Duke at the Battle of Jutland 31st May 1916: picture by Lionel Wyllie
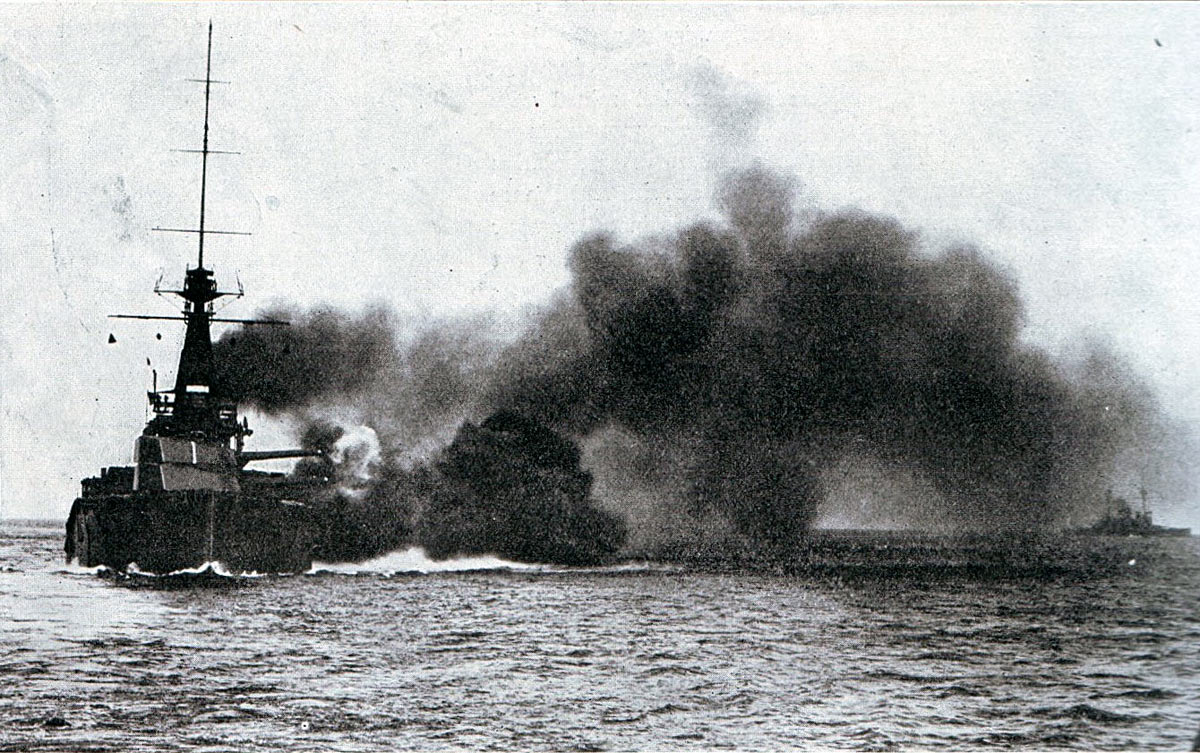
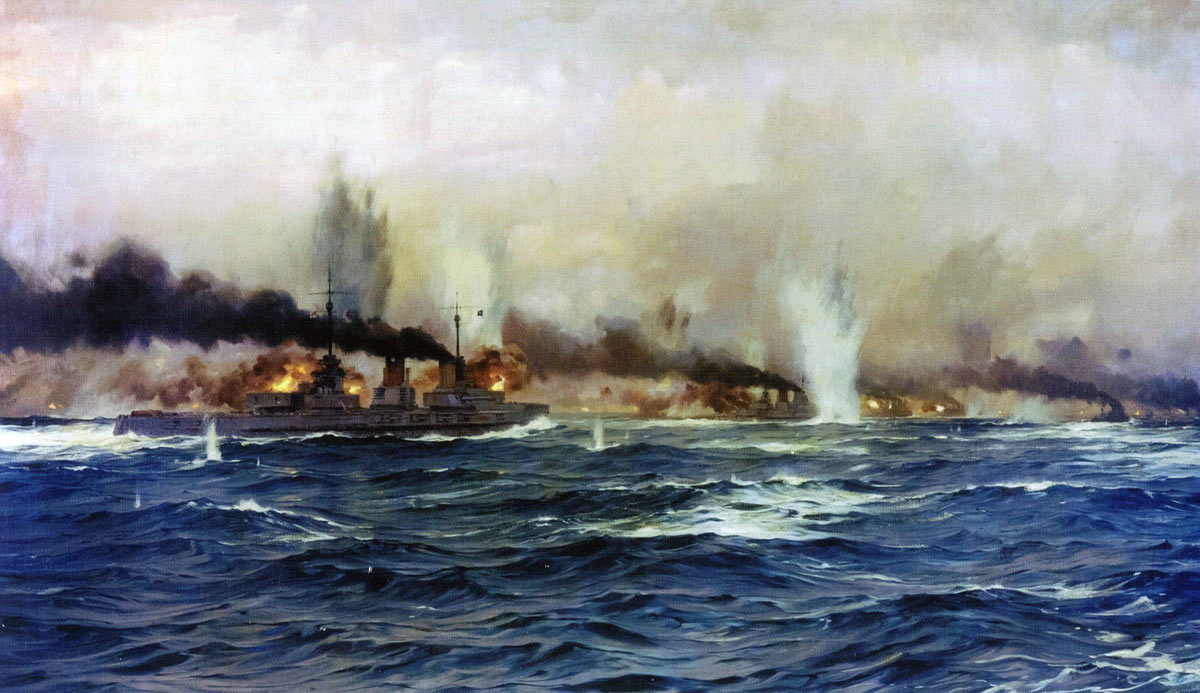
The Grand Fleet opens fire:
At about 6.30pm HMS Iron Duke in the centre of the line opened fire on SMS Koenig as she led the German battleships to the eastward.
British Battle Cruiser HMS Invincible going into action at the Battle of Jutland 31st May 1916: photograph taken from HMS Indomitable
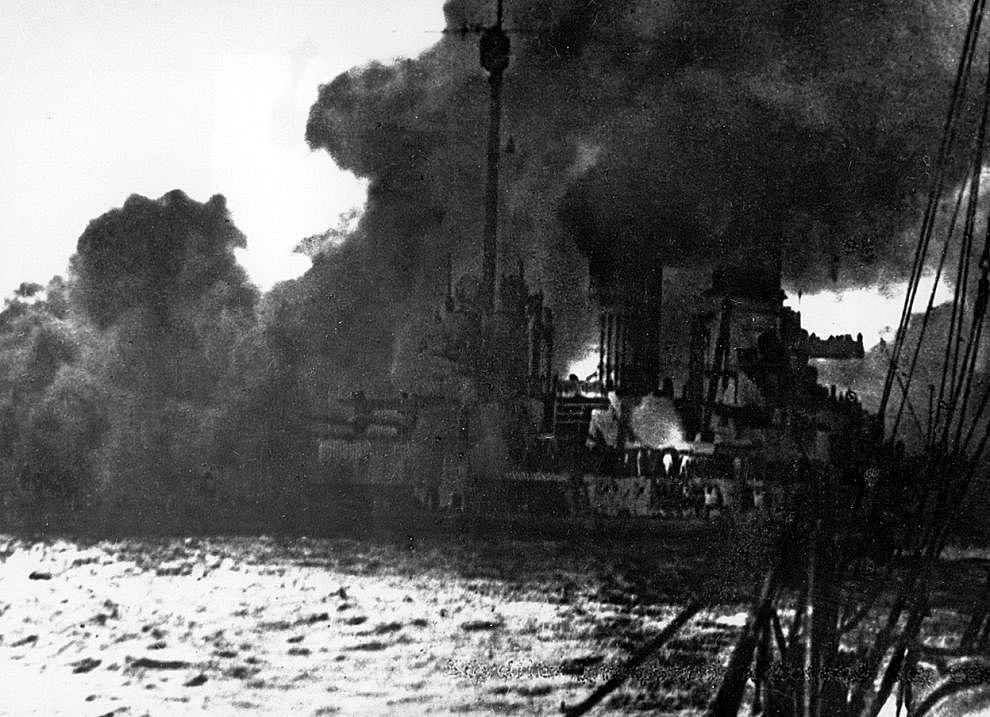
Loss of HMS Invincible:
At the front of the British line HMS Invincible exchanged a hot fire with Hipper’s ships (Lützow had now fallen out of the line).
Invincible was inflicting considerable punishment on Derfflinger at a range of less than 9,000 yards (5 miles).
British Battle Cruiser HMS Invincible explodes at the Battle of Jutland 31st May 1916: photograph taken from HMS Indomitable
Invincible then entered an area clear of mist and could be easily seen from the German line. Several salvos from Derfflinger and the following Koenig struck Invincible penetrating to her magazines and Invincible blew up.
There were six survivors. Admiral Hood and his staff all perished on the ship.
Bow and Stern of British Battle Cruiser HMS Invincible after she had exploded at the Battle of Jutland 31st May 1916: photograph taken from HMS Indomitable
The sea was shallow at this point and as the other British ships raced past the bows and stern of Invincible stuck out of the water each part resting on the sea bottom.
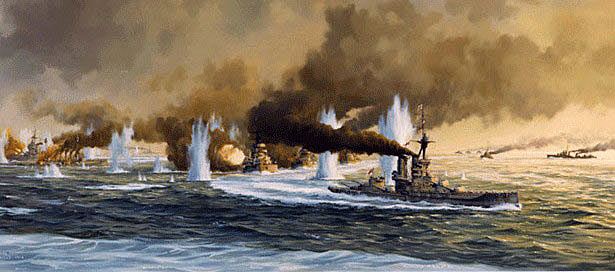
Jutland- the Third Phase:
Jellicoe’s battle line was finally in a position to fire on the German fleet. However the atmosphere was misty and the presence of so many coal burning ships moving at high speed filled the air with clouds of black smoke so that the German ships could be seen only intermittently and in the distance. Nevertheless the massed fire power of Jellicoe’s battleships and battle cruisers quickly inflicted significant damage on Scheer’s leading ships. Of his battle cruisers Lützow was now a sinking wreck and Seydlitz and Derfflinger were suffering badly. Hipper was arranging to shift his flag by destroyer from Lützow to Moltke.
British Battleship HMS Monarch in action at the Battle of Jutland on 31st May 1916
Scheer needed to extract his fleet from Jellicoe’s ambush. The problem was how to do this with his ships in line ahead and already executing two turns, to the east and to the south.
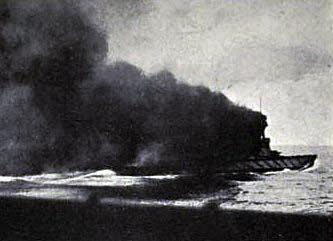
German Battle Cruiser SMS Seydlitz burning during the Battle of Jutland 31st May 1916
A turn in succession would mean the destruction of the ships at the rear of his line as they came up to the British battle line and were subjected to the massed fire of Jellicoe’s twenty-three battleships (Warspite had withdrawn due to the damage she had suffered) and six battle cruisers and torpedo attacks from his light cruisers and destroyers.
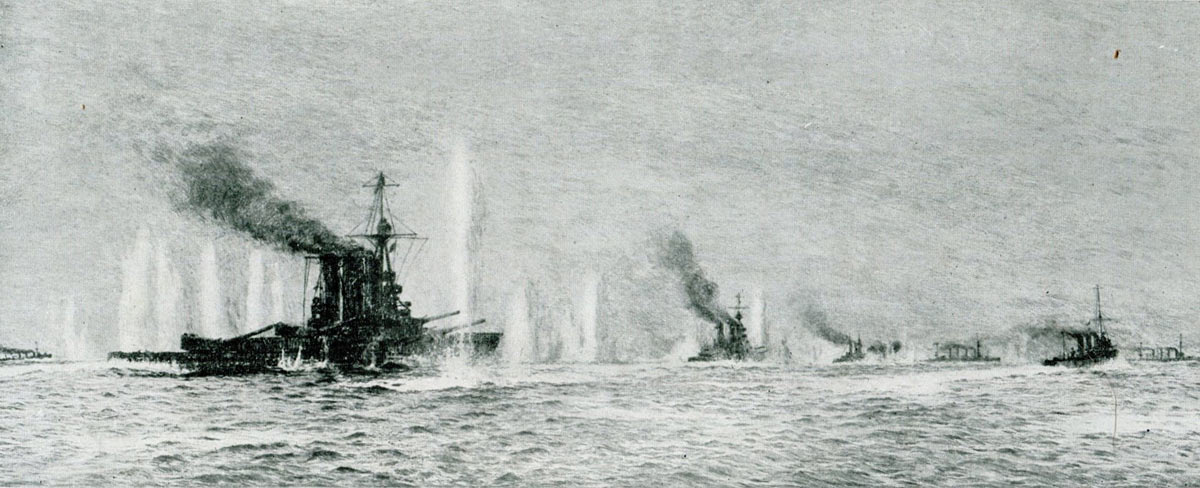
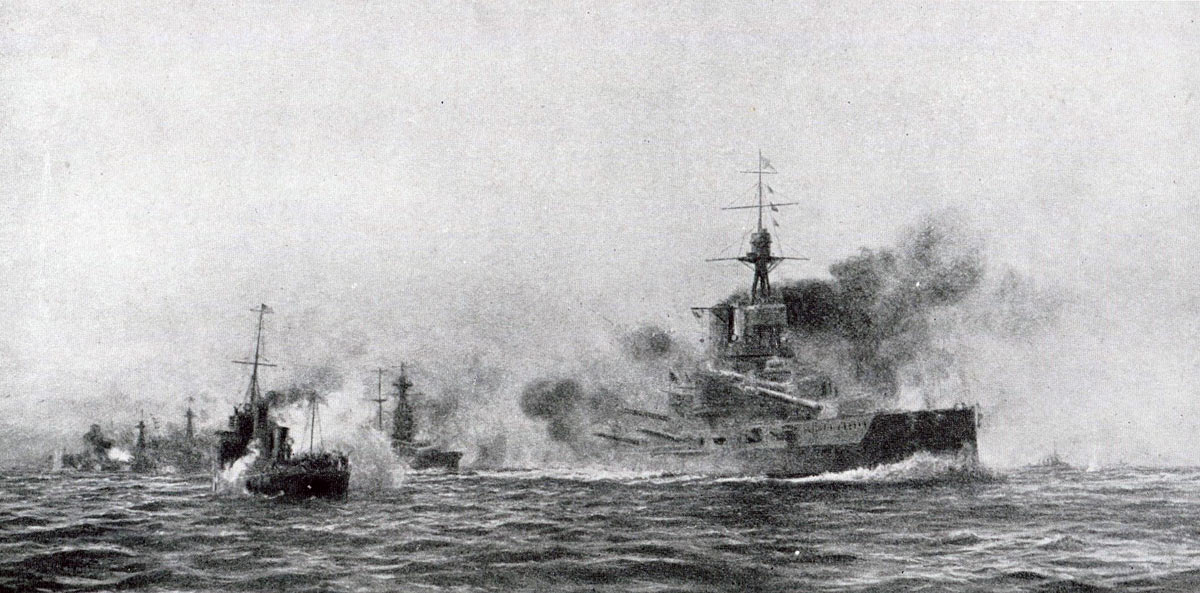
German Battle Fleet carries out the ‘Battle Turn Away’ to escape from the British Grand Fleet at the Battle of Jutland 31st May 1916
The German fleet had practised a manoeuvre for just such a predicament: the ‘Battle Turn Away’ (Gefechtskehrtwendung). This manoeuvre required each ship to turn away simultaneously, covered by a smoke screen generated by the destroyers and light cruisers. In the confusion of battle a high degree of seamanship was required of the battleship’s captains.
This is what Scheer’s fleet now did. Scheer made the signal at 6.35pm, sending his destroyers to make a torpedo attack on the British battle line and to generate the smoke screen.
German Destroyers crossing through the line of German Battleships to deliver their torpedo attack on the British Battle Line and create the smoke screen at the Battle of Jutland 31st May 1916
The smoke screen was highly effective. Added to the gathering darkness and misty conditions it delayed the British ships seeing that Scheer’s battleships were turning away and prevented them from identifying the German course away from the battle.
In the period before Jutland Jellicoe had planned to deal with the eventualities of a general engagement. Direct pursuit of a retreating German fleet was ruled out by the dangers of floating mines released from the German ships and by the possibilities of a submarine ambush.
At 6.44pm Jellicoe, not knowing in which direction Scheer was heading, turned his battleships from line into their original divisions heading south-east, his aim being to put the Grand Fleet between the High Seas Fleet and its bases.
As there was no report of German ships from either wing of the British Fleet and it was clear that Scheer was not heading in an easterly direction, at 6.54pm Jellicoe ordered his divisions to turn directly south putting the divisions in an oblique order with the battle cruisers leading on the advanced port wing.

Map of the Battle of Jutland at 6.30pm on 31st May 1916: Admiral Jellicoe’s line of British Battleships is steaming to the south-east and about to open fire on the German High Seas Fleet: map by John Fawkes
Beatty after steaming in a circle to resume his formation was now heading south-west.
The German destroyers’ torpedo attack was half-hearted and unsuccessful. However during Jellicoe’s changes of course HMS Marlborough, Admiral Burney’s flagship, was struck by a torpedo thought to have been fired by the stricken German light cruiser Wiesbaden. Although damage was caused and Marlborough had trouble reaching port after the battle she continued in action.
The Wiesbaden was now the only German ship in sight and received considerable fire until she sank at around 7.15pm.
Scheer’s High Seas Fleet was now heading westwards with his four Dreadnought divisions in echelon, his battle cruisers on the port beam and the two Pre-Dreadnought divisions in the lead to the south.
German Destroyers going in to make a torpedo attack on the British Battleship line at the Battle of Jutland 31st May 1916
The German turn to the East:
With still one hour remaining to sunset Scheer decided that it was too hazardous for the German fleet simply to retreat. Several of the German ships had lost speed due to shell damage and might well be overtaken. Scheer seems to have formed the view that some form of resumption of the attack was necessary.
Observations suggested, wrongly as it turned out, that Jellicoe had broken up his fleet in order to pursue the Germans. Scheer could see a ‘Queen Elizabeth’ and other ships (probably the damaged Warspite and Goodenough’s light cruisers) heading east and formed the intention of bringing his battle fleet against these ships and cutting them off from the main British fleet.
This course would also enable him to rescue the crew of the disabled light cruiser Wiesbaden.
British Battleship HMS Revenge. Revenge fought at the Battle of Jutland 31st May 1916
At 7pm Scheer signalled to his fleet to turn together back to the east, the 5th Division of ‘Königs’ leading.
At 6.55pm Jellicoe had turned south from his easterly course and at around 7pm, soon after Scheer’s about turn, Jellicoe received the information from Beatty that the German fleet was to the west, this information coming from Goodenough’s 2nd Light Cruiser Squadron, which had come under fire almost as soon as the German fleet turned.
At 7.5pm Jellicoe turned three points to starboard towards the approaching German fleet. A submarine scare then caused Jellicoe to turn to the south again which brought his ships into ‘line ahead’. He could again ‘cross the T’ and fire full broadsides at the advancing Germans who could only fire their forward facing guns and then when not impeded by a preceding ship.
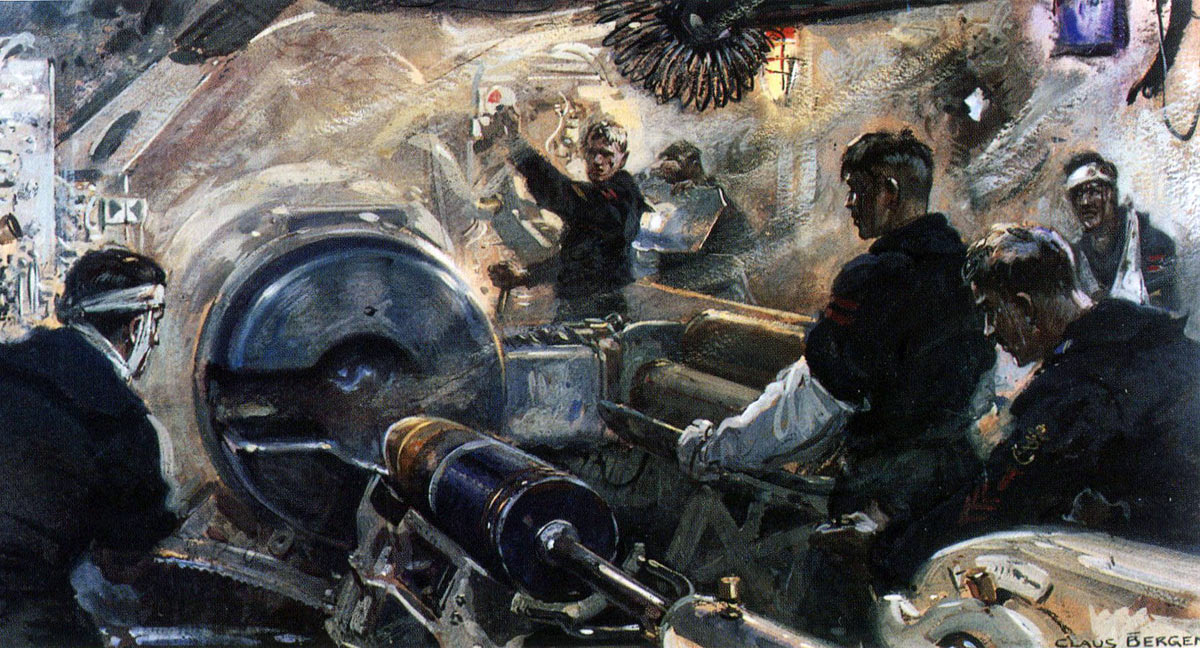
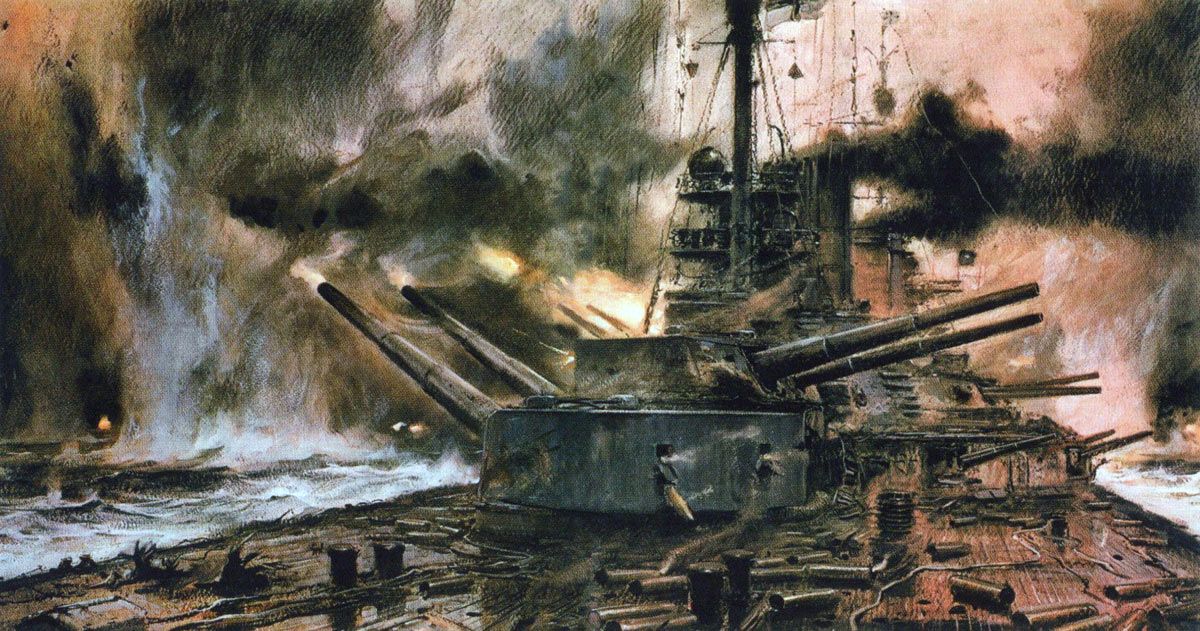
Inside a Main Gun Turret of a German Battle Cruiser at the Battle of Jutland 31st May 1916: picture by Claus Bergen
Admiral Burney at the rear of Jellicoe’s line with the 6th Division opened fire on the German battleships as they came into sight, headed by light cruisers and destroyers.

Stokers on a British battle ship 1916
Burney’s flagship Marlborough fired fourteen salvos in six minutes scoring four or more hits on the leading German battleship, probably König. Revenge fired into König before shifting her fire to the fourth ship, Markgraf or Kronprinz, scoring several hits. The next two ships of the British squadron, Hercules and Revenge, fired on the German battle cruisers to the left of the battleship line, Revenge putting a torpedo into Von Der Tann. The final ship Agincourt fired on the battleships scoring a number of hits.
On Burney’s port bow Admiral Gaunt’s 5th Division came into action against the first ships they saw, the German battle cruisers steaming to starboard of the leading German battleships,. The range was short at between 8,000 and 9,000 yards (4 ½ and 5 miles) enabling the division to pour an overwhelming fire on Hipper’s ships without them being able to give an effective reply.
From his position in the middle of the fleet Jellicoe ordered Burney to form line astern of him with his squadron while Jerram took station ahead with 1st and 2nd Divisions of his 2nd Battle Squadron and Sturdee with the 4th Battle Squadron formed immediately behind Jellicoe.
German Battleship SMS Friedrich der Grosse firing a salvo during the Battle of Jutland 31st May 1916
Jellicoe now had his line forming the cross for the T with the German ships advancing towards him.
At 7.13pm Iron Duke followed by the rest of the British battleship line opened fire on the Königs leading Scheer’s column and Hipper’s battle cruisers at ranges between 9,000 and 12,000 yards (5 and 7 miles).
The German van turned to starboard to bring their broadsides to bear on the British leaving Scheer with a bent line.
Again taken by surprise by the British Grand Fleet Scheer could only see a line of dark shadows and orange flashes as the British guns fired, while his ships were silhouetted against the setting sun, clear targets for the Royal Navy gunners. Instead of finding his way around the rear of the British Fleet Scheer was rushing headlong into its extended line, marked by a long line of gun fire.
At 7.12pm Scheer signalled another Kehrtwendung (‘Battle Turn Away’) and ordered a second destroyer attack, a combination of smoke screen and torpedo shots.
German Battle Cruiser SMS Seydlitz in action at the Battle of Jutland on 31st May 1916: picture by Claus Bergen
The German Battle Cruiser attack:
Even as Scheer gave the order for the ‘Battle Turn Away’ the German battle cruisers and leading battleships were already turning to starboard to bring their broadsides to bear on the British ships. It was now clear that Scheer’s van was too close to the British line for the destroyers to provide adequate cover as his battleships manoeuvred to turn away.
Scheer ordered Hipper’s battle cruisers to launch a suicidal attack on the head of the British line to enable the German battleships to get away.
German Battle Cruiser’s ‘Ran an den feind’ or Suicide Attack
Scheer flew the flag giving the battle cruisers the signal labelled ‘Ran an den feind’ or ‘Charge the Enemy’. The implication was that the battle cruisers must launch themselves at the British line even resorting to ramming British ships.
One German battle cruiser recorded the order she received as ‘Charge the enemy. Ram. Ships denoted are to attack without regard to consequences’.
The German 1st Scouting Group was temporarily under the command of Captain Hartog of SMS Derfflinger as Admiral Hipper was still on the disabled Lützow from which he was arranging a transfer by destroyer to Moltke.
Hartog immediately began what was described as a ‘Death Ride’ for the German battle cruisers towards the British line.
German Battle Cruiser SMS Lützow Hipper’s Flagship badly damaged by British shell fire at the Battle of Jutland 31st May 1916: picture by Claus Bergen
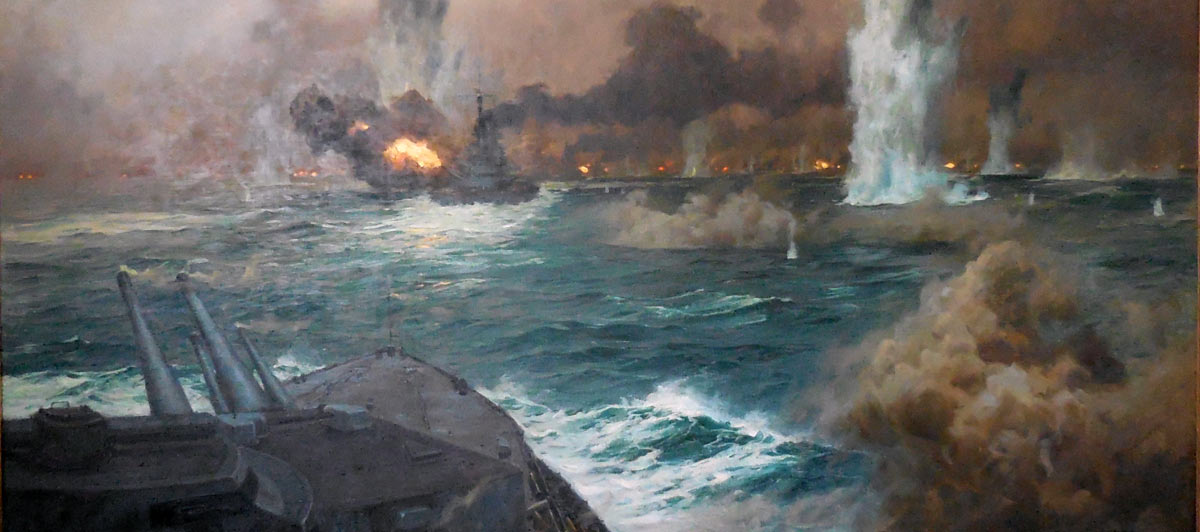
The German battle cruisers turned east and raced towards the British line. The British battleships turned their fire on the German battle cruisers with their main armament while their secondary armament engaged the attacking German destroyers: some three hundred main armament guns of calibre from 12 to 15 inch and probably double that number of smaller guns firing from the British battle line.
Beatty’s British battle cruisers were at 7.10pm to the south-east of the head of the battleship line. Beatty came up on the port wing of the battleships and seeing the German ships advancing to the attack assumed this was the whole of Scheer’s Battle Fleet rather than just the German battle cruisers.
Admiral Hipper leaves his stricken flagship SMS Lützow by destroyer for SMS Moltke. Lützow later sank. Battle of Jutland 31st May 1916: picture by Claus Bergen
Beatty’s ships opened fire at a range of 18,000 yards (10 miles). With the sun setting behind the German ships they were easily made out.
The British gunfire quickly told on the German battle cruisers. Derfflinger lost two turrets and was extensively on fire.
It is a tribute to German warship design and building that none of the German battle cruisers was sunk by the torrent of fire. A major factor was the inferior quality of ammunition produced by British armaments factories up to 1916.
During this phase of the battle Admiral Hipper boarded a destroyer from his disabled flagship Lützow and tried to find a new flagship from his squadron. He found the Seydlitz to be heavily damaged and down by the bow. Derfflinger was little better. Initially Moltke was under such heavy fire as to be unable to stop for sufficient time for Hipper to board her. Eventually the admiral boarded Moltke and hoisted his flag in his new flagship. Lützow managed to struggle back into the battle cruiser line.
Admiral Hipper’s replacement Flagship at the Battle of Jutland 31st May 1916, SMS Moltke: picture by Claus Bergen
The German Destroyer Attack:
Behind the battle cruisers the German battleships were turning away, some to port and some to starboard, an indicator of the haste of the manoeuvre in which normally all ships turned the same way after waiting for the next ship behind to begin the turn.
Again it was a tribute to German seamanship that there were no collisions and to the thoroughness of the High Seas Fleet’s training over the preceding years.
All the German battleships were round by 7.20pm and making away from the British line. This enabled Scheer to call of the battle cruisers’ ‘Death Ride’ ordering them simply to ’manoeuvre off the enemy’s van’.
The smoke screen generated by the German destroyers prevented Jellicoe from realising what the German fleet had done and reacting. In any case the British battle line now had to deal with the German destroyers’ torpedo attack.
‘Stander Z’ the signal to the German destroyer flotillas to attack at the Battle of Jutland on 31st May 1916: picture by Willy Stoewer
Delivered at extreme range and without great commitment the torpedoes did not pose a particular threat but there were plenty of them and the British battleships had to execute the much practised turn away to reduce the exposure of each ship.
At the same time the battleships engaged the destroyers with their primary and secondary armament. So heavy was the British fire that the German destroyers discharged their torpedoes at extreme range rather than close under the bombardment.
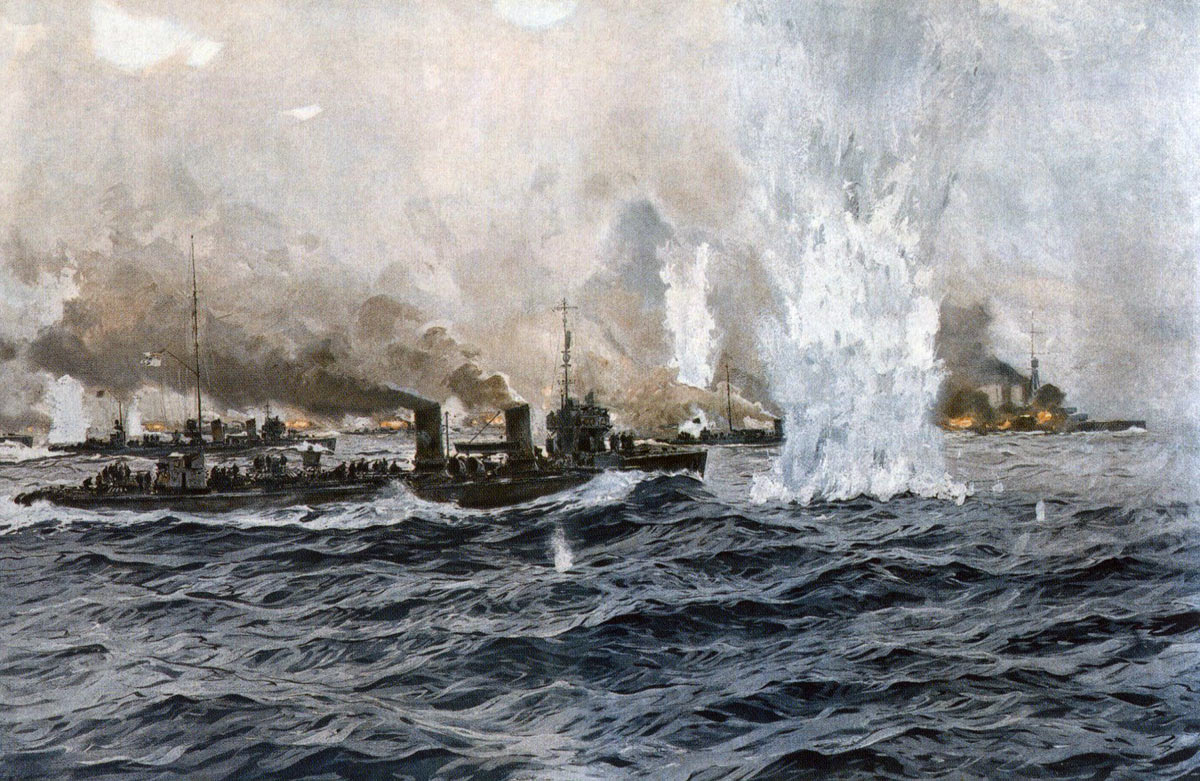
As the last German flotillas, the 3rd and 5th, came in to attack they were counter-attacked with great vigour by Commodore Le Mesurier and his 4th Light Cruiser Squadron (HMS Calliope, Constance, Comus, Royalist and Caroline).
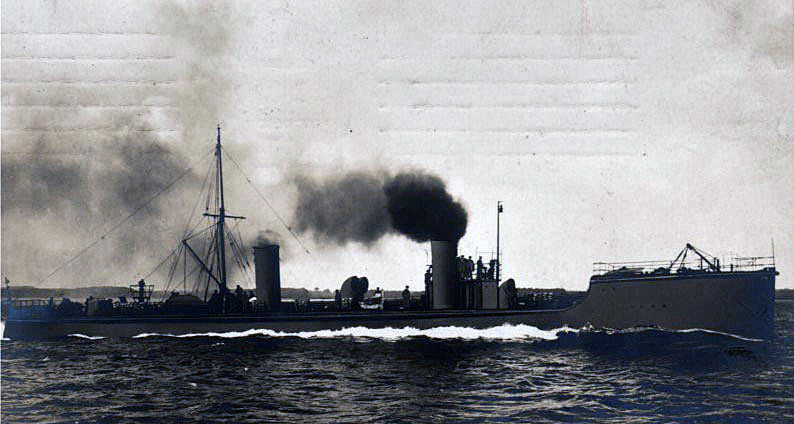
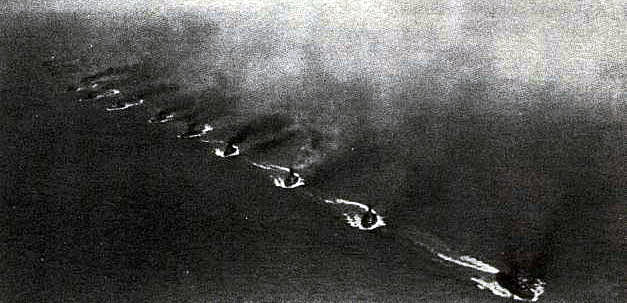
German torpedo boat beached in Portsmouth Harbour after the War: picture by Lionel Wyllie
During the German destroyers’ attack no British ship was hit by a torpedo. One German destroyer S35 was sunk and several more damaged. The small fast moving destroyers were not an easy target.
With his view of the German fleet concealed by the heavy smoke screen and still hearing firing, which was in fact British ships firing at the destroyers, Jellicoe presumed that once the smoke cleared the German battleships would come into sight again.
At 7.35pm Jellicoe ordered the British line to turn five points to south by west, a course designed to keep the British fleet between Scheer and his home ports.
At 7.40pm Beatty signalled that the German ships were north-west by west of him and ten miles away. Jellicoe knew his battle cruisers were some six miles ahead of the van of the British battleships. He immediately ordered line ahead and a course of south-west.
Further messages from Commodore Goodenough and Beatty caused Jellicoe to order a further turn by divisions to the west and then at around 8pm Jellicoe ordered Admiral Jerram to turn and follow Beatty’s battlecruisers.
The last chance to engage the German battle line before dark was at hand.
The problem was that Beatty was reporting to his commander-in-chief when he could no longer see the German fleet and did not know where they were.
Gun Crew in action on a British Light Cruiser at the Battle of Jutland 31st May 1916: picture by Fred Matania
Beatty despatched his 1st and 3rd Light Cruiser Squadrons to the west to search for the German battleships.
In fact on disengaging and escaping out of sight of the British ships Scheer had turned from west to south in the hope that the British Fleet would continue to the west and the German Fleet could evade it and escape to the Horn Reefs route back to his bases.
Scheer resolved to make for the Horn Reefs by the most direct route with his battleships in close order, leaving his destroyer flotillas to spend the night attacking the British Fleet as a diversion, even though this might leave his battleships without destroyer cover in the morning.
At 7.53pm Scheer made the turn to the south. This was as near to the route to the Horn Reefs as he dared go.
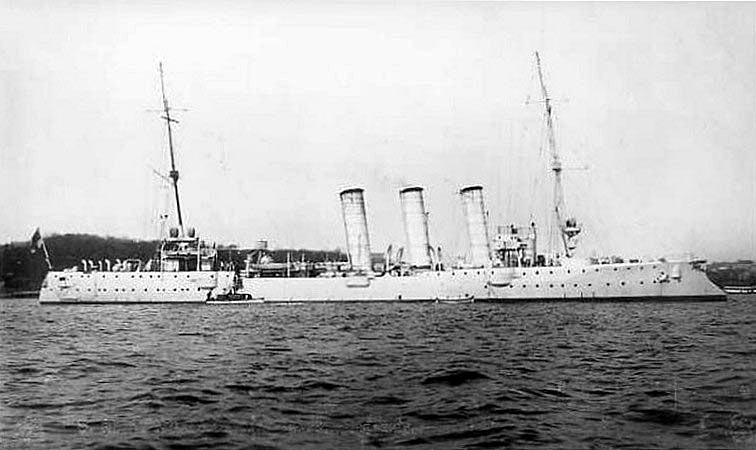
British Light Cruiser HMS Gloucester. Gloucester fought at the Battle of Jutland 31st May 1916 in Admiral Napier’s 3rd Light Cruiser Squadron
The British squadrons continued to search for the elusive German fleet.
Jellicoe in ordering Jerram at the van of his battleships to follow the battle cruisers assumed that Jerram was in sight of Beatty. This was not the case. Jerram signalled Beatty asking for his position but received no reply. Hearing gunfire to his west south-west Jerram headed in that direction.
The gunfire arose from a clash between Admiral Napier’s 3rd Light Cruiser Squadron (HMS Falmouth, Yarmouth, Birkenhead, Gloucester and Chester) and the German 4th Scouting Group (light cruisers SMS Stettin, Munchen, Frauenlob, Stuttgart and Hamburg).
German Light Cruiser SMS München. München fought at the Battle of Jutland 31st May 1916 in the 4th Scouting Group
Sent westwards by Beatty Napier at 8.10pm reported German ships in sight north by north-west. The 4th Scouting Group was sailing across Napier’s bow. Napier turned his ships on a parallel course and opened fire, the firing heard by Admiral Jerram.
At 8.19pm Beatty coming up behind Napier caught sight of the German pre-Dreadnoughts and battle cruisers in the van of Scheer’s fleet. Beatty turned one point to port and opened fire.
Further north Le Mesurier and Goodenough heading west to tackle a force of German destroyers saw the German battle fleet heading south. They reported their sightings and Jellicoe now knew where the German fleet was and what course it was on.
German Fleet practising the ‘Turn Away’ on manoeuvres
At 8.28pm Jellicoe turned his battleships to the south west by divisions which brought them into line on a course converging with Scheer’s fleet.
Ahead of Jellicoe Beatty’s battle cruisers were inflicting heavy damage on their German counterparts which were unable to make out the British ships in the gloom of the eastern sky, seeing only their gun flashes.
Hipper was supported by Admiral Mauve’s pre-Dreadnought battleships which provided a fire line against Beatty’s ships while the German battle cruisers and the light cruisers and destroyers passed to the west of this line.

Shell cases on the deck of a German Battleship during the Battle of Jutland 31st May 1916: picture by Claus Bergen
Scheer was again thwarted in his attempt to make it to the eastern route for his home bases, was forced for the third time to make a turn away and by 8.35pm his fleet was hidden by the night and the mist.
Jellicoe heard the firing ahead of his line dying away. The light cruiser HMS Comus was still firing and reported that its target was the ‘Enemy’s battle fleet west’.
A signal originating from Beatty informed Jellicoe that the German battle cruisers and pre-Dreadnoughts were north north-west of him ten miles away heading south-west.
Caroline and Royalist of the Fourth Light Cruiser Squadron made a torpedo attack on Mauve’s pre-Dreadnoughts and to Jellicoe’s rear Goodenough’s light cruisers engaged German destroyers attempting to make a torpedo attack on the 5th Battle Squadron at the end of his line.
German Destroyers going in to the attack at the Battle of Jutland 31st May 1916: picture by Claus Bergen
Admiral Jerram at the head of the line signalled that he had seen Beatty’s ships but in fact he had seen Hipper’s battle cruisers.
While Jellicoe was no longer able to deploy his battleships against Scheer’s ships he now knew that he was between the German fleet and it home bases.
Bridge of the German Battleship SMS Markgraf. Markgraf fought at the Battle of Jutland 31st May 1916: picture by Claus Bergen
At 9.17pm Jellicoe ordered his fleet to assume night cruising order in close formation to ensure that the ships kept together thereby avoiding the danger of misidentifying each other as German ships on a southerly course. The squadrons formed three columns with the 5th Battle Squadron on the port flank. Beatty’s battle cruisers took station ahead of the Battle Fleet.
Scheer now had three routes to safety: one by the Horn Reefs and the Amrum Bank to the east, the second by passing west of Heligoland and the third to reach the Friesian Coast and take the swept channels along the coast east to the Jade Estuary.
Preparing to cover the most likely of Scheer’s options Jellicoe sent the minelayer HMS Abdiel to extend the eastern minefield and ordered his destroyer flotillas to mass five miles astern of the main fleet as it steamed to the south during the night to prevent the German fleet from escaping east behind his battle line.
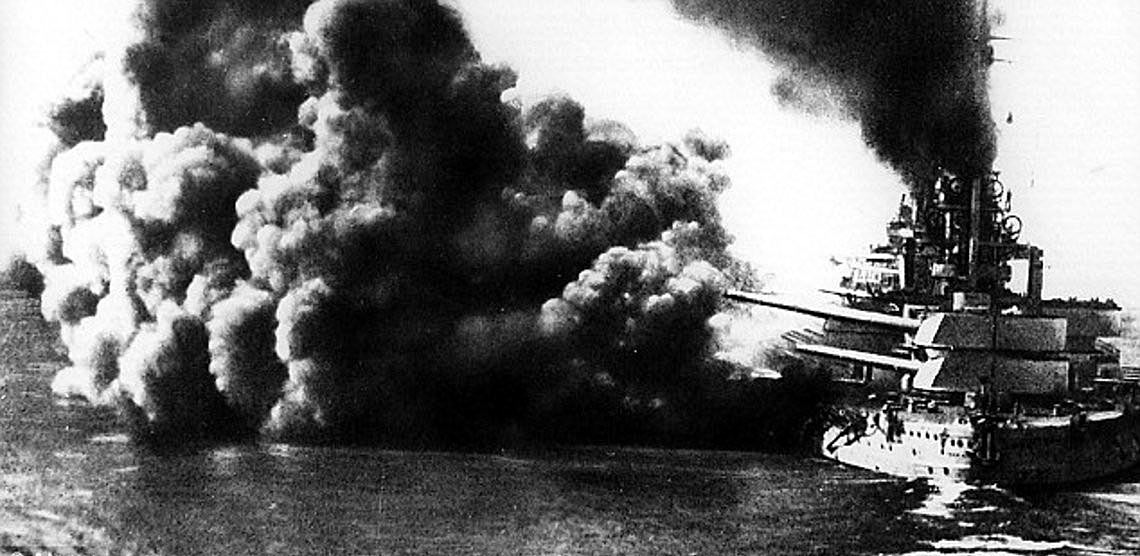
German High Seas Fleet in action at the Battle of Jutland on 31st May 1916: picture by Claus Bergen
The previous battle of the First World War is the Battle of Jutland Part II
The next battle of the First World War is the Battle of Jutland Part IV