The initial naval campaign of the Allies gamble to knock Turkey out of the First World War and penetrate through to the Black Sea and Russia
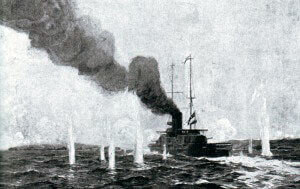
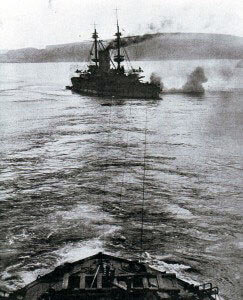
British battleship HMS Agamemnon bombarding the Dardanelles Straits: Gallipoli campaign Part I: the Naval Bombardment, February 1915 in the First World War
The previous battle of the First World War is the Battle of the Dogger Bank
The next battle of the First World War is Gallipoli Part II: Genesis of the land attack on the Gallipoli Peninsula
The Dardanelles and Gallipoli: The campaign during 1915 conducted by the British and the French, using British, French and Australian warships and British, French, Australian, New Zealand and Indian troops, to take the Gallipoli Peninsular, penetrate the Dardanelles waterway and capture Constantinople, thereby knocking the Ottoman Turkish Empire out of the First World War.
Date: 19th February 1915 to January 1916
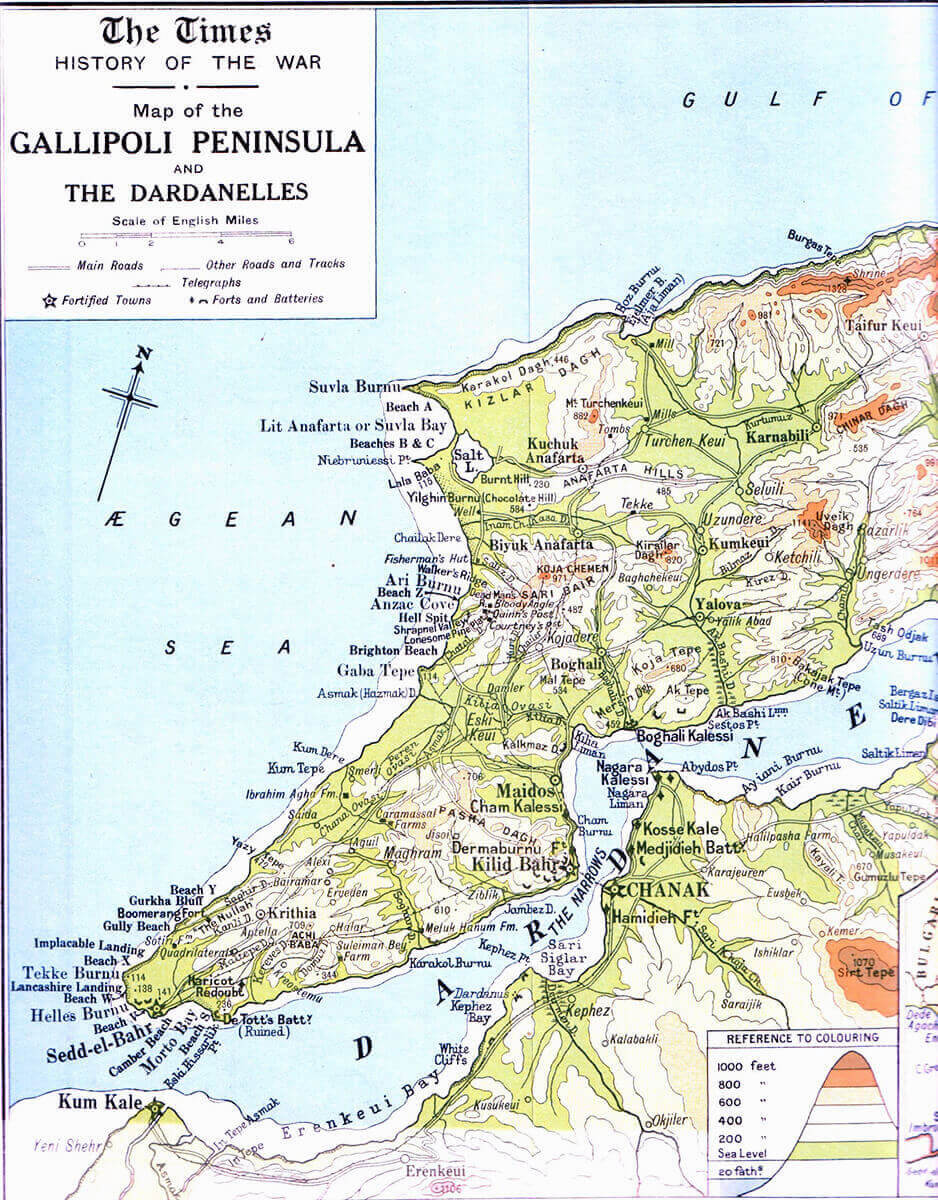
Place: The Gallipoli Peninsular forms the northern shore of the Dardanelles, the narrow waterway leading from the north east corner of the Aegean Sea to the Sea of Marmora, the city of Constantinople (in 1915 the capital of the Ottoman Turkish Empire) and then to the Black Sea.
The British and French Fleets attacking the Turkish fortifications in the Dardanelles waterway: Gallipoli campaign Part I: the Naval Bombardment, March 1915 in the First World War
War: The First World War also known as ‘The Great War’.
Contestants: British, Australian and New Zealand troops with French troops supported by British and French naval ships against Turkish troops and ships led by German senior officers.
Map of the western end of the Dardanelles waterway showing the entrance, with Cape Helles on the Gallipoli Peninsular, Kum Kale on the Asiatic shore and the Narrows at Chanak: Gallipoli campaign Part I: the Naval Bombardment, March 1915 in the First World War
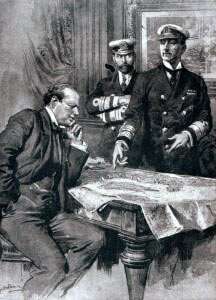
Generals: General Sir Ian Hamilton led the Entente (British, French, Australian, New Zealand and Indian) troops until he was replaced by General Sir Charles Munro in December 1915. General Eric Liman von Sanders, a German officer, commanded the Turkish troops. Vice-Admiral Carden commanded the British and French fleets until mid-April 1915, when he was replaced by his deputy commander Vice-Admiral de Robeck. Admiral Guépratte commanded the French warships.
Winner: The final outcome was that the Entente Allies, Britain and France, withdrew from the Gallipoli Peninsular in December 1915 and January 1916 leaving the Turks victorious.
Part I: The Naval Attack on the Dardanelles
Background:
The Gallipoli campaign (also known as the Dardanelles) lasted from 19th February 1915 until the Entente powers final withdrew on 8th January 1916.
The Dardanelles is the fifty mile long waterway from the Aegean Sea to the Sea of Marmora. At the north-eastern end of the Sea of Marmora lies Constantinople, now Istanbul, on the narrow channel, the Bosporus, leading to the Black Sea. Gallipoli is the hilly peninsular of land along the north coast of the Dardanelles.
British battleships and battlecruisers bombarding the Dardanelles Narrows: Gallipoli campaign Part I: the Naval Bombardment, March 1915 in the First World War: picture by Lionel Wyllie
The Gallipoli campaign gave rise to controversy from its inception. The campaign is of great importance in Australia and New Zealand due to the prominent involvement of troops from those countries and their heavy losses. Gallipoli is described as the event that caused these two dominions to ‘come of age’.
The aim of the Gallipoli campaign was to enable the Entente fleets to capture Constantinople and knock Turkey out of the Great War.
British and French cruisers in the Eastern Mediterranean at the beginning of the First World War: Gallipoli campaign Part I: the Naval Bombardment, March 1915 in the First World War
As Winston Churchill has described in his writings on the Great War each step taken by the British and French authorities during 1915 to strengthen the operations against the Turks in the Dardanelles came approximately one month too late and if taken at the earlier time could well have been decisive.
The background to the Dardanelles campaign, both the sea and the land operations, was the position adopted by the Ottoman Turkish Empire on the outbreak of the First World War. Throughout the 19th Century Great Britain was the main foreign influence over the Ottoman Court. By 1914 that influence was such that the Turkish Navy was commanded by a British admiral. From the turn of the century as it seemed likely that the impending war would be between Germany, Austria and Italy on one side and France, Russia and Britain on the other the German government put considerable effort and resources into courting the Ottomans with the aim of causing the Turks to fight the Great War on the side of the Central Powers (Germany and Austria).
Sultan Osman I: One of two battleships under construction in British shipyards in 1914 sold to the Turkish navy, one of these ships financed by Turkish public subscription. The battleship was commandeered by the British Government and joined the Royal Navy’s Grand Fleet as HMS Agincourt
In 1914 two modern battleships were under construction in British shipyards for the Turkish navy, one of these ships financed by Turkish public subscription.
Reşadiye: One of two battleships under construction in British shipyards in 1914 sold to the Turkish navy, one of these ships financed by Turkish public subscription. The battleship was commandeered by the British Government and joined the Royal Navy’s Grand Fleet as HMS Erin: Gallipoli campaign Part I: the Naval Bombardment, March 1915 in the First World War
With the British declaration of war on Germany, following the German invasion of Belgium, the British Government commandeered the two Turkish ships for the Royal Navy, leading to an upsurge of anti-British sentiment in Turkey. Two German cruisers, SMS Goeben and Breslau, escaped through the Mediterranean to Constantinople where the Germans donated the cruisers to Turkey.
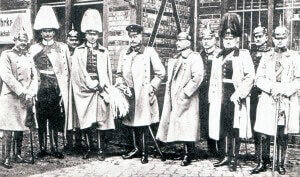
General Eric Liman von Sanders and his staff. Liman von Sanders was appointed commander-in-chief of the Turkish Army in 1915 and conducted the defence of Gallipoli
From the end of the Balkan Wars in 1912 the Turkish Army was subjected to a program of modernisation by a team of German officers led by General Liman von Sanders.
In the months leading to the Great War a change in the Turkish government enabled Enver Pasha, a pro-German general, to dominate Turkish policy.
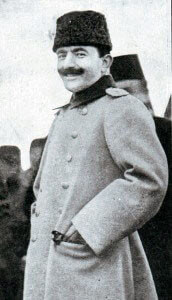
Enver Pasha: Ottoman Minister of War during the First World War and actively pro-German. Enver Pasha engineered Turkey’s entry into the War on the side of the Central Powers, Germany and Austria
On 28th October 1914 the Ottoman Empire declared war on Britain and France. An Anglo-French naval squadron immediately established a blockade at the Aegean end of the Dardanelles.
A number of factors made it highly desirable for Britain and France to penetrate the Dardanelles. Broadly these factors were: 1) To establish a maritime route to Russia. At the end of 1914 Russia needed 1 ½ million rifles to re-equip its army after her defeat by the Germans at Tannenberg and other battles. Russia was expending 35,000 artillery rounds a week against its industrial capacity to produce only 25,000 rounds a month.
With the closure of the Baltic by the German Fleet Russia was unable to import the arms it needed or to export grain to generate foreign credits for Russia and provide food for Britain and France. 2) Russia needed pressure to be brought against the Turks to assist its army in the Caucasus. 3) A defeat of Turkey would go far to bring Greece, Bulgaria and Rumania into the war on the side of Britain and France. This in turn would reduce the pressure on Serbia, under attack by the Austrians.
By the beginning of 1915 the Western Front was established in the phase of ‘Trench Warfare’ with each side’s flanks fixed on the sea at one end and the Swiss border at the other. It seemed unlikely that a decision could be achieved by either side in France. This was confirmed for Britain by the Battles of Loos and Neuve Chapelle in early 1915, the British loosing substantial casualties for little gain.
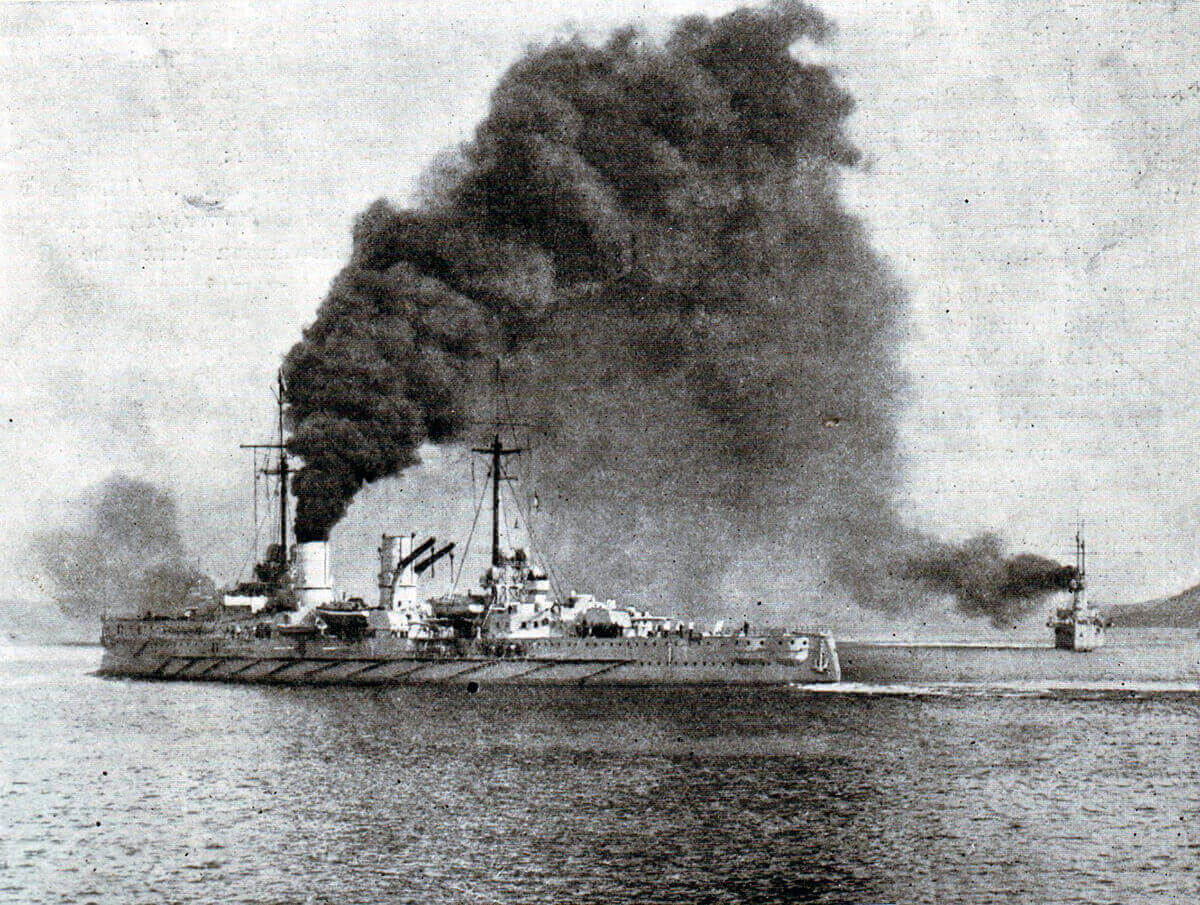
SMS Goeben: German heavy cruiser whose escape with SMS Breslau to Constantinople in 1914 and incorporation into the Turkish navy helped push the Ottoman Empire into the camp of the Central Powers, Germany and Austria: Gallipoli campaign Part I: the Naval Bombardment, March 1915 in the First World War
A significant school of thought in the British Government considered that more could be achieved by an attack on the Ottoman Empire in the Dardanelles, a view reinforced by British concerns over the safety of Egypt and the Suez Canal, the most direct route from Britain to India, Australia and New Zealand, which the Ottoman Empire threatened.

SMS Breslau: German light cruiser whose escape with SMS Goeben to Constantinople in 1914 and incorporation into the Turkish navy helped push the Ottoman Empire into the camp of the Central Powers, Germany and Austria. Breslau flies the Turkish flag: Gallipoli campaign Part I: the Naval Bombardment, March 1915 in the First World War
The support for taking action in the Dardanelles fluctuated throughout 1915, the counterbalancing arguments coming from the substantial and often overpowering Western Front lobby.
The French Commander-in-Chief, General Joffre, remained emphatically against any dilution of French and British effort against the Germans in France. Field Marshal Sir John French, the British Commander-in-Chief in France, was of the same view that the decisive point was France. Many of the most senior British army officers were serving in France and agreed with their commander.
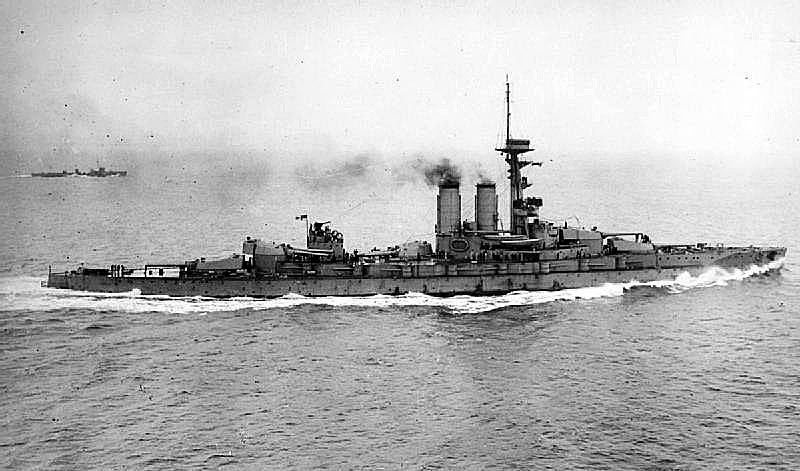
HMS Majestic: British pre-Dreadnought battleship that took part in the attack on the Dardanelles: Gallipoli campaign Part I: the Naval Bombardment, March 1915 in the First World War
The most influential British soldier was Lord Kitchener, the Secretary of State for War. Kitchener had served for much of his early military career in the Eastern Mediterranean and was knowledgeable about the Ottoman Empire, even speaking some Turkish. Kitchener blew hot and cold on the Gallipoli enterprise.
Winston Churchill as First Lord of the Admiralty in 1914, with Admirals Madden & Jellicoe. Churchill was a prime architect of the Dardanelles naval campaign
The main support for action in the Dardanelles came from the British Admiralty under the First Lord, Winston Churchill, and varying elements of the British and French governments with Kitchener’s vacillating support.
Once the principal of such an attack had been adopted the decision became whether this should be a purely naval attack or a combined operation with land forces on the Gallipoli peninsular.
This raised the next problem which was to plague the whole Gallipoli operation: the shortage of military forces and equipment.
The British Expeditionary Force went to France in August 1914 with four infantry divisions and one cavalry division formed of regular troops and reservists. The extensive system of Territorial Infantry and Yeomanry Cavalry formations was used for lines of communication and home defence.
Lord Kitchener, one of the few officials with a firm belief that the war would be of considerable duration, immediately began the raising of new army units.
A further two regular infantry divisions were sent to France and subsequently two further divisions, the 28th and 29th, were formed from regular infantry battalions returning from the colonies.
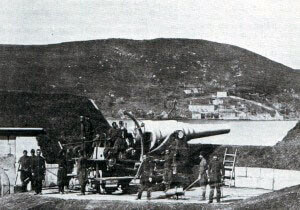
Turkish heavy gun at the Dardanelles Straits before the bombardment by the British and French fleets: Gallipoli campaign Part I: the Naval Bombardment, March 1915 in the First World War
During 1915 reinforcements were made available for the Gallipoli operation at various points but never in sufficient time for them to be decisive.
The substantial expansion of the British Army threw up immense problems of supply. By the end of 1914 Britain had large numbers of soldiers in training, needing uniforms and weapons.
In addition the troops already in action needed significantly greater quantities of equipment and ammunition than had been envisaged in pre-war planning. In one month of the Loos battle the British artillery fired more shells than had been fired in the whole of the three year South African War.
Trench warfare required specialist weapons not envisaged before the war: in particular trench mortars and grenades (called during the war ‘bombs’).

HMS Triumph: British pre-Dreadnought battleship in the attack on the Dardanelles. Triumph was mobilised in Hong Kong on the outbreak of war and partly crewed by 100 soldiers until the naval crew could be completed: Gallipoli campaign Part I: the Naval Bombardment, March 1915 in the First World War
Many more machine guns and field guns were required, as were heavier guns. These demands created a significant crisis for the government, only overcome by mobilising most of Britain’s pre-war industrial capacity for the manufacture of munitions, a process that was not completed until the middle of 1916.
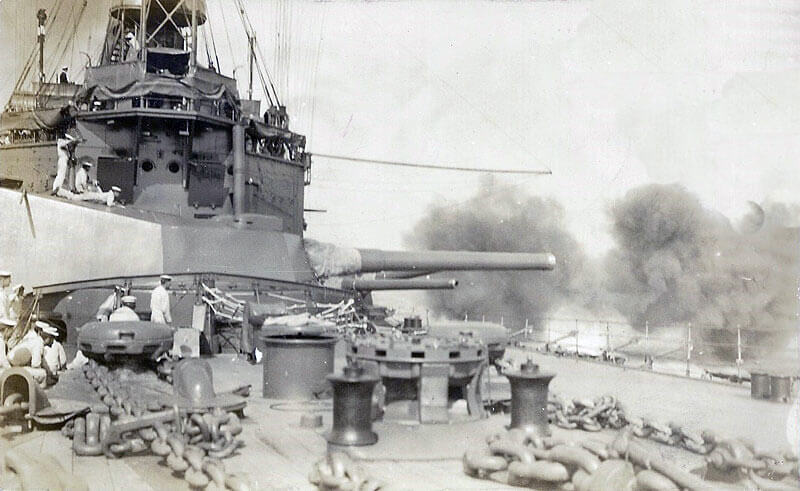
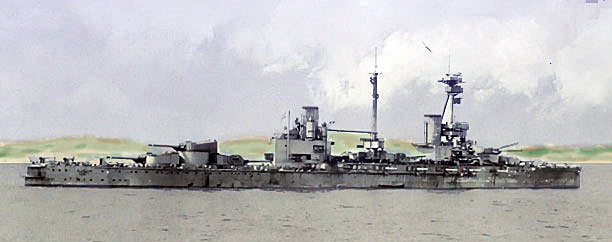
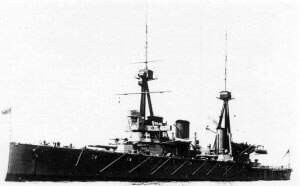
The 15 inch guns of HMS Queen Elizabeth with the coast of the Dardanelles in the distance: Gallipoli campaign Part I: the Naval Bombardment, March 1915 in the First World War
Throughout 1915 the British troops in France had first call on supplies of kit and ammunition, leaving wholly inadequate quantities for the troops in other theatres. No bombs were at any time supplied to the Gallipoli troops, in spite of the clear need for bombs in close trench fighting.
Ammunition supplies were always inadequate in the Gallipoli operation, particularly artillery ammunition. For action against trench systems the most effective gun ammunition was high explosive. Most of the ammunition supplied to the troops in Gallipoli was shrapnel and in insufficient quantities.
The number of field and heavy guns provided to the British and ANZAC formations was wholly inadequate for offensive operations against entrenched opposition.
The Royal Navy had its own pre-occupation, to ensure that there were enough ships in the Grand Fleet, the main British naval force in the North Sea, to defeat the German High Seas Fleet if it was to venture into the North Sea from its network of bases on the German coast.
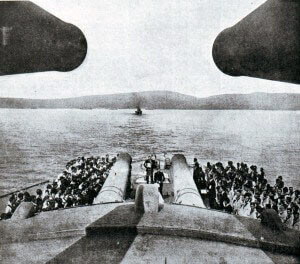
British Destroyer in the Eastern Mediterranean. A substantial flotilla of destroyers supported the attack on the Dardanelles: Gallipoli campaign Part I: the Naval Bombardment, March 1915 in the First World War
The formula for the Royal Navy was simple; there had to be a sufficient number of battleships and battle cruisers with the requisite speed, width of armour and size of gun to combat the German capital ships (broadly Dreadnoughts and post-Dreadnoughts). That left a significant number of older ships of inadequate speed, armour and armament to qualify for the Grand Fleet, but more than sufficient for use in the Mediterranean and an attack on the Ottoman capital, Constantinople. These were the ships in the main that were assembled off the Dardanelles under Admirals Carden, de Robeck and Wemyss.
In January 1915 in the absence of troops to mount a landing on the Gallipoli Peninsular the British War Cabinet resolved to launch a naval attack up the Dardanelles with the aim of taking Constantinople. In a telegram sent on 5th January 1915 Admiral Carden, the naval commander-in-chief, informed the British War Cabinet that a naval assault on the Dardanelles might succeed with a large number of ships. It was decided to take this step and the forces were built up in the Eastern Mediterranean to mount the attack.
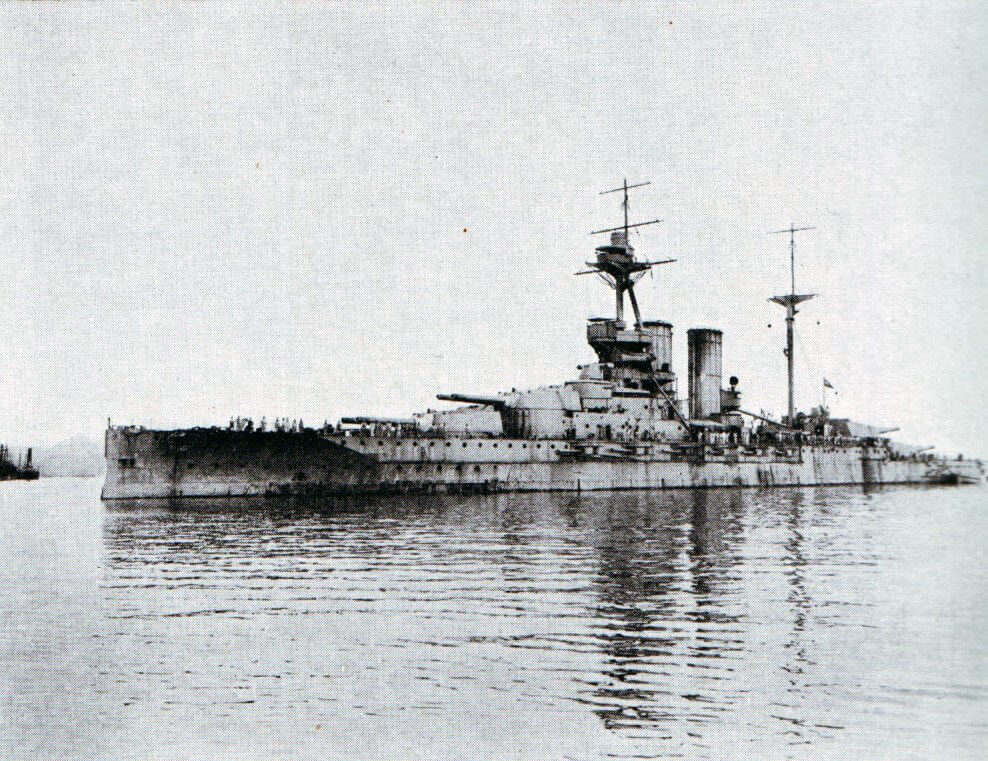
HMS Queen Elizabeth: new British battleship armed with 15 inch guns. Queen Elizabeth was the most powerful battleship in the British Fleet bombarding the Gallipoli Peninsula: Gallipoli campaign Part I: the Naval Bombardment, March 1915 in the First World War
The British and French navies took over the harbour of Mudros on the Greek Island of Lemnos to use as a base and the joint fleet assembled there for the attack on the Dardanelles.
The Dardanelles is some 47 miles in length. At the Aegean end its width varies between 4 and 6 miles, closing at the Narrows, half way along, to a mile, before widening as it approaches the Sea of Marmora. It is a deep channel with a strong current running from east to west against any ships entering from the Mediterranean. Turkish forts with guns and several gun batteries were positioned along each shore.
The attacking operation would involve a bombardment of the Turkish shore positions followed by an incursion up the Dardanelles in which the minesweepers would find and remove the Turkish mines while the big ships protected the minesweepers from shore bombardment from the fixed positions on the coast and mobile gun batteries moving around the hinterland.
The north eastern corner of the Aegean is subject to storms and adverse weather that interfered with naval and air activity throughout 1915.

French battleships in Mudros Harbour, Lemnos in 1915: St Louis, Charlemagne and Suffren. These ships took part in the bombardment of the Turkish defences in the Dardanelles. Suffren suffered significant damage from Turkish gunfire on 18th March 1915: Gallipoli campaign Part I: the Naval Bombardment, March 1915 in the First World War
The British and French Ships deployed to the Eastern Mediterranean:
HMS Queen Elizabeth: Britain’s most modern battleship with six 15 inch guns, was made available because she was required to carry out gunnery trials before joining the Grand Fleet in the North Sea. Queen Elizabeth was sent to the Mediterranean to carry out her gunnery trials on the Turks during the forcing of the Dardanelles.
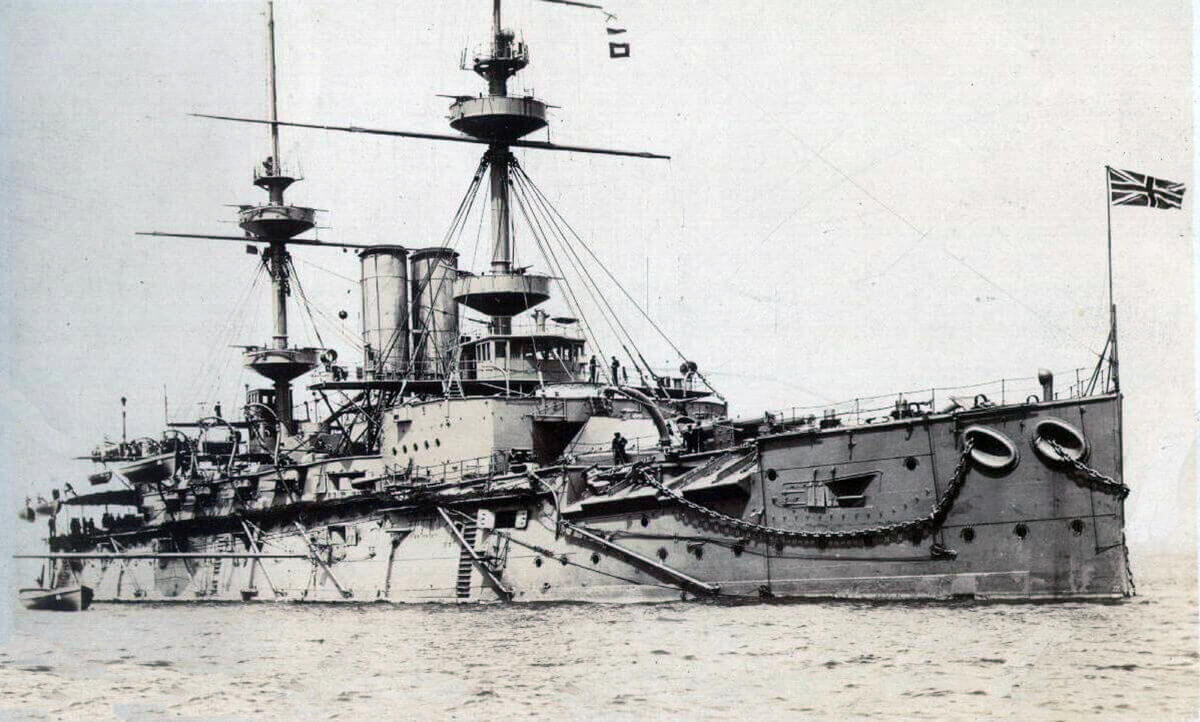
HMS Prince George, Irresistible, Cornwallis, Ocean, Lord Nelson, Swiftsure and Triumph: all pre-Dreadnought battleships too old to serve in the Grand Fleet.

HMS Cornwallis: pre-Dreadnought battleship that bombarded the Turkish defences in the Dardanelles and supported the land forces on the Gallipoli Peninsular: Gallipoli campaign Part I: the Naval Bombardment, March 1915 in the First World War
HMS Vengeance: British pre-Dreadnought battleship in action in the Dardanelles in March 1915
HMS Vengeance and Canopus: both pre-Dreadnought battleships too old to serve in the Grand Fleet. Canopus was part of Admiral Craddock’s squadron off Chile in Autumn 1914 at the Battle of Coronel and took part in the Battle of the Falkland Islands on 8th December 1914.
HMS Albion: a pre-Dreadnought battleship posted from the Cape of Good Hope.
HMS Victorious, Mars, Magnificent and Hannibal: all pre-Dreadnought battleships ear-marked for scrapping and reprieved to serve in the Dardanelles operation.
HMS Indefatigable and Inflexible: both battle cruisers attached to the Dardanelles Fleet. Indefatigable was stationed in the Mediterranean and was due to be relieved by Inflexible from the North Sea. Both remained for the Dardanelles operation. Inflexible was one of Admiral Sturdee’s two battle cruisers in the Battle of the Falkland Islands on 8th December 1914.
Bouvet, Charlemagne, Gaulois and Suffren: all French pre-Dreadnought battleships commanded by Rear Admiral Guépratte.
HMS Inflexible: see text.
Most of these capital ships, other than Queen Elizabeth, mounted a main armament of 12 inch guns.
The fleet in the Eastern Mediterranean also comprise light cruisers, destroyers, submarines and several squadrons of mine sweepers.
Later in the campaign the naval fleet was re-enforced with the newly built Monitors (shallow draught ships mounted with guns between 6 inch and 12 inch specifically designed for shore bombardment).
The Naval Attack:
As the army refused to make troops available for an operation in the Dardanelles the naval authorities reconciled themselves to attacking with ships alone. A detailed plan was drawn up by Admiral Carden’s staff the aim of which was to crush the Turkish coastal defences, force a passage through the Dardanelles, enter the Sea of Marmora and capture the Ottoman capital of Constantinople, thereby compelling Turkey to make peace.
The Dardanelles were reconnoitred by British and French submarines, of which the first was B11, commanded by Commander Holbrook, beginning her patrol on 13th December 1914. In the course of this voyage B11 sank the aged Turkish Battleship Messudiyeh, for which Holbrook received the Victoria Cross.
These reconnaissances and other observations revealed that the Turks, under German supervision, had laid a number of lines of mines across the Dardanelles. Under the British plan of attack these would be swept by the assaulting British and French ships.

French Battleship Suffren: Suffren formed part of the first line in the attack on the Dardanelles Narrows on 18th March 1915 and was badly damaged by Turkish gunfire: Gallipoli campaign Part I: the Naval Bombardment, March 1915 in the First World War
19th February 1915:
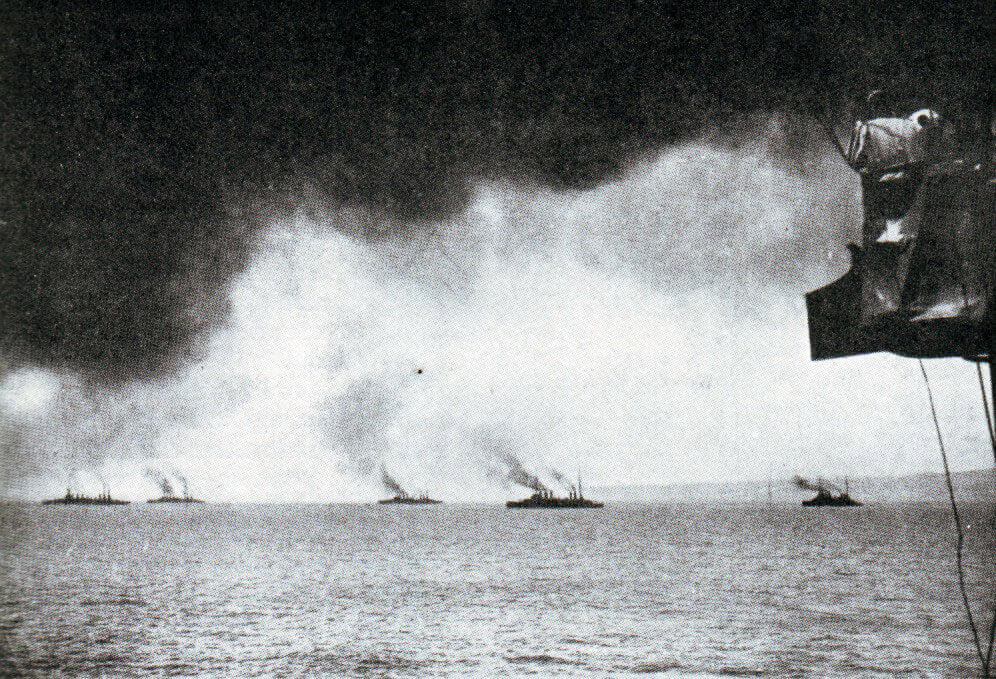
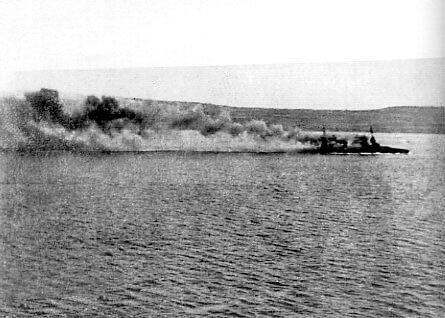
The attack by the British and French ships began on 19th February 1915. The first Turkish forts to be bombarded were those at the entrance to the Dardanelles, Sed el Bahr on Cape Helles and Kum Kale on the Asiatic south shore, with their associated batteries. In the morning the bombardment was conducted at long range by Agamemnon, Cornwallis, Vengeance, Triumph, Inflexible, Bouvet, Suffren and Gaulois. Destroyers provided escorts while other ships reported the fall of shot.
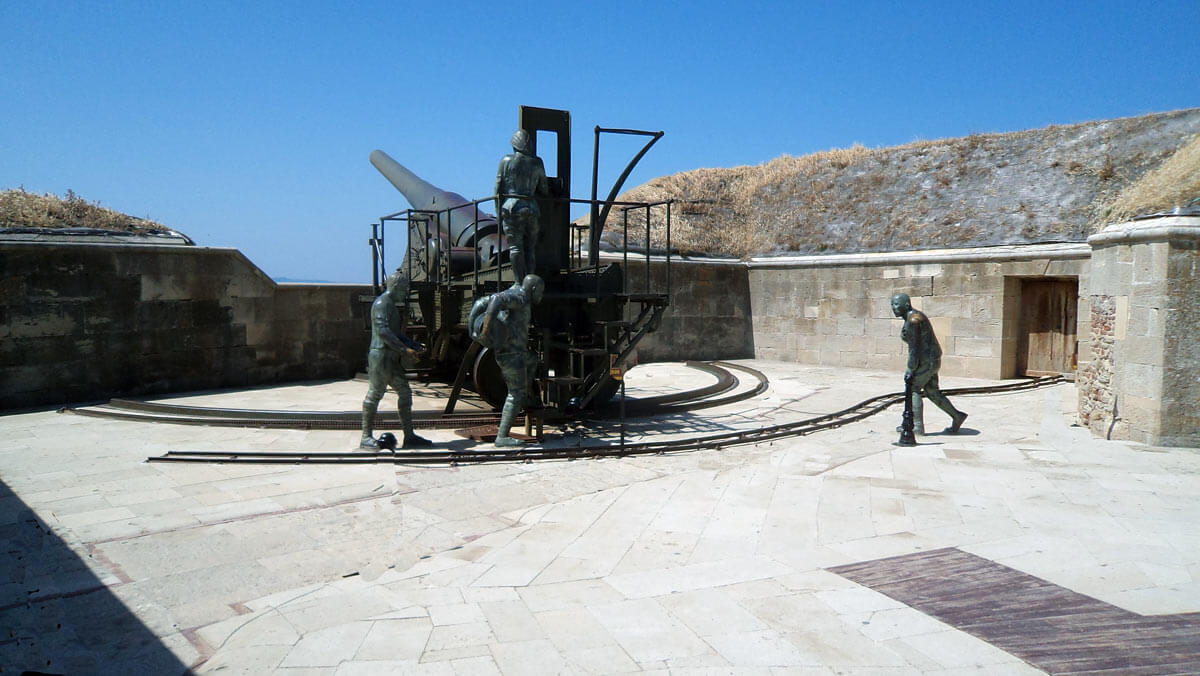
Reconstructed Turkish heavy gun site at the Dardanelles Straits before the bombardment by the British and French fleets: Gallipoli campaign Part I: the Naval Bombardment, March 1915 in the First World War
In the afternoon of 19th February a number of the ships closed the range and continued firing on the forts under their own observation.
The ships withdrew at nightfall. The Turkish forts, while suffering damage, were not put out of action and many of their guns remained serviceable. A difficulty for the British ships was that they were equipped with amour piercing shells rather than the high explosive shells required for land bombardment, so that only material directly struck by a shell suffered damage.
Bad weather then intervened so that the attack was held up for several days.

HMS Bulldog: British destroyer, part of the flotilla of destroyers that provided escorts for the capital ships in the Dardanelles and played a major role in landing the troops on the Gallipoli Peninsular and providing them with support
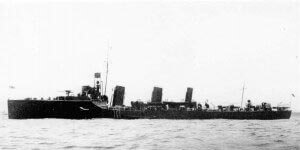
HMS Bulldog: British destroyer, part of the flotilla of destroyers that provided escorts for the capital ships in the Dardanelles and played a major role in landing the troops on the Gallipoli Peninsular and providing them with support
25th February 1915:
The bombardment was resumed in the morning of 25th February 1915 at long range by HMS Queen Elizabeth, Agamemnon, Irresistible and Gaulois, joined in mid-morning by Vengeance, Cornwallis, Suffren and Charlemagne. Considerable further damaged was inflicted on the Turkish forts.
In the afternoon several of the ships engaged the forts at close range putting them out of action, although only temporarily.
British minesweepers were enabled to begin their work and cleared much of the channel of mines by the morning of 26th February, enabling Albion, Vengeance and Majestic to engage Fort Dardanus, positioned on the Asiatic shore at the beginning of the Narrows (the inner section of the Dardanelles).
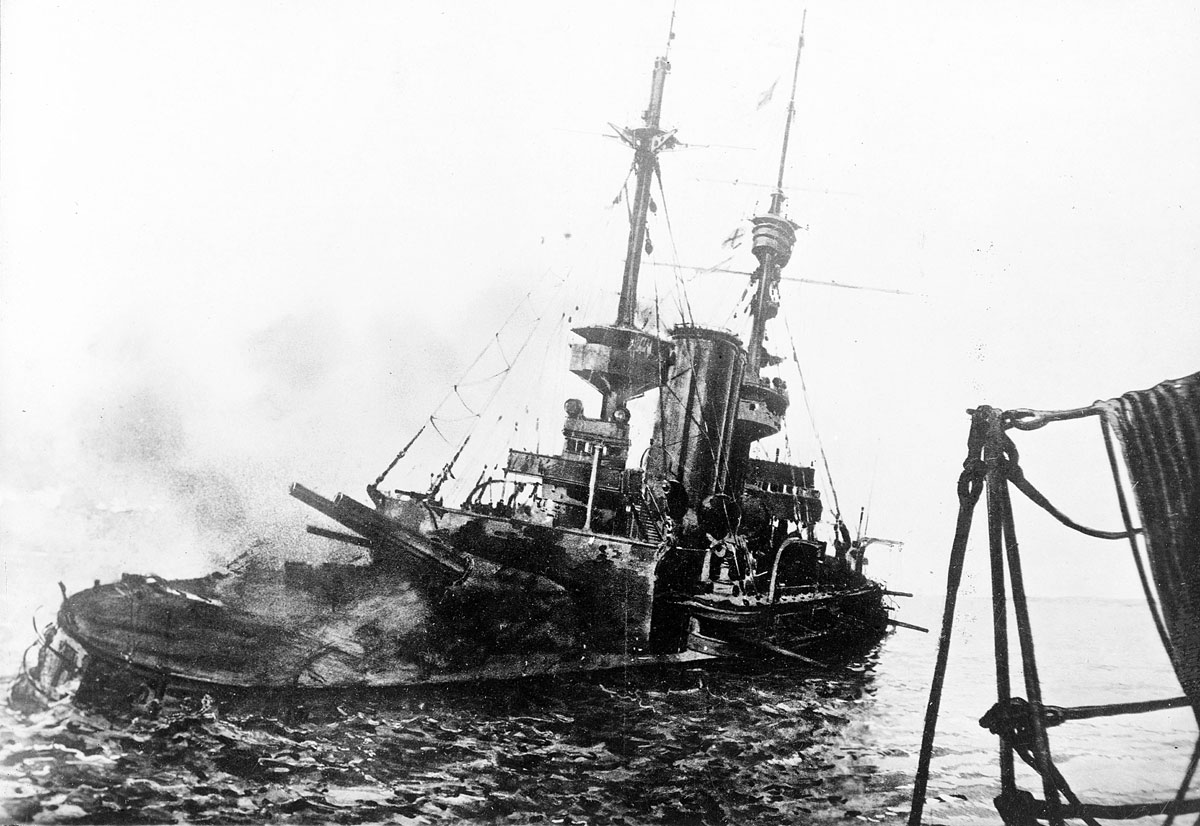
HMS Albion, pre-Dreadnought British battleship, aground in the Dardanelles during the bombardment of the Turkish land defences and being towed off by HMS Canopus
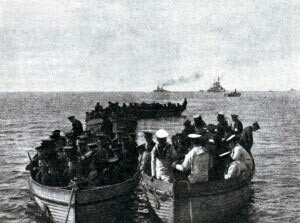
Royal Marine detachment landing at Kum Kale on 4th March 1915
At Cape Helles Royal Marine landing parties were put ashore to complete the demolition of the forts. The landing party at Kum Kale on the Asiatic shore was driven back by Turkish troops.
The ease with which the marines landed on Gallipoli indicates the lack of Turkish defences on the peninsular and contrasts with the fierce fighting required in late April 1915 when the landings finally took place in strength.
2nd, 3rd and 4th March 1915:
On 2nd March the ships bombarded the Turkish positions in the Narrows.
At the same time French ships moved up the Gulf of Saros on the northern coast of Gallipoli and bombarded the area of Bulair, where the Turkish Army held a defensive line across the neck of the peninsular.
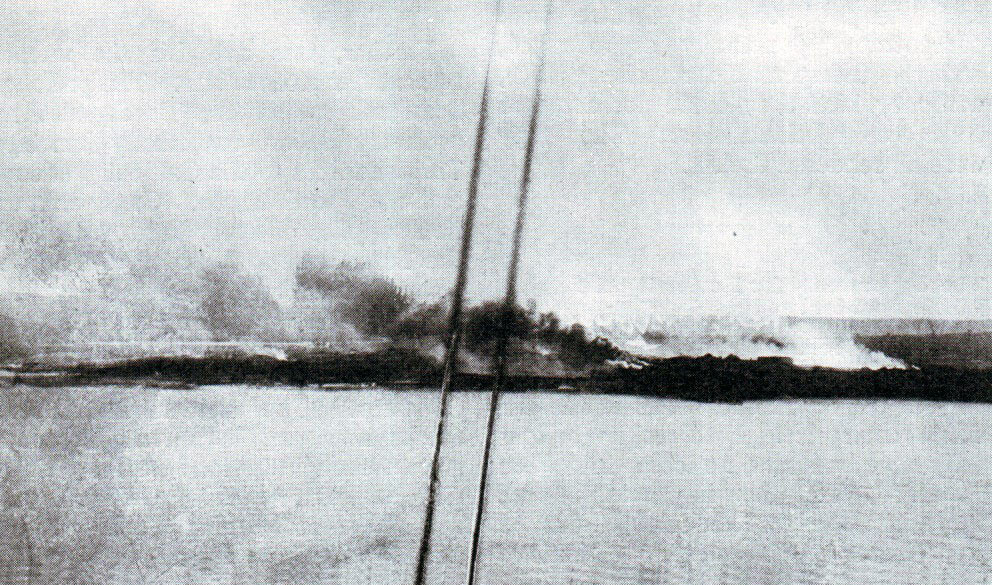
Kum Kale 4th March 1915 burning after the bombardment by British and French ships: Gallipoli campaign Part I: the Naval Bombardment, March 1915 in the First World War
On 4th March a Royal Marine detachment from HMS Irresistible landed at Kum Kale to complete the destruction of the defensive works, but was driven back to its boats by Turkish troops, in spite of fire support from the light cruiser HMS Amethyst and a force of destroyers.

British minesweepers in action: Gallipoli campaign Part I: the Naval Bombardment, March 1915 in the First World War
5th to 18th March 1915:
The attack on the Narrows began on 5th March 1915. The Turkish forts were more heavily defended than those at the mouth of the Dardanelles and mounted guns of between 9 inch and 14 inch in calibre. It is claimed that the Turks deployed floating mines carried down the channel by the current, in addition to fixed mine fields, creating a substantial additional hazard for the attacking British and French ships.
(It is very possible that the ‘floating mines’ were moored mines that the British and French ships failed to identify. Floating mines were relatively easy to spot and destroy and would have been a waste of a valuable resource.)
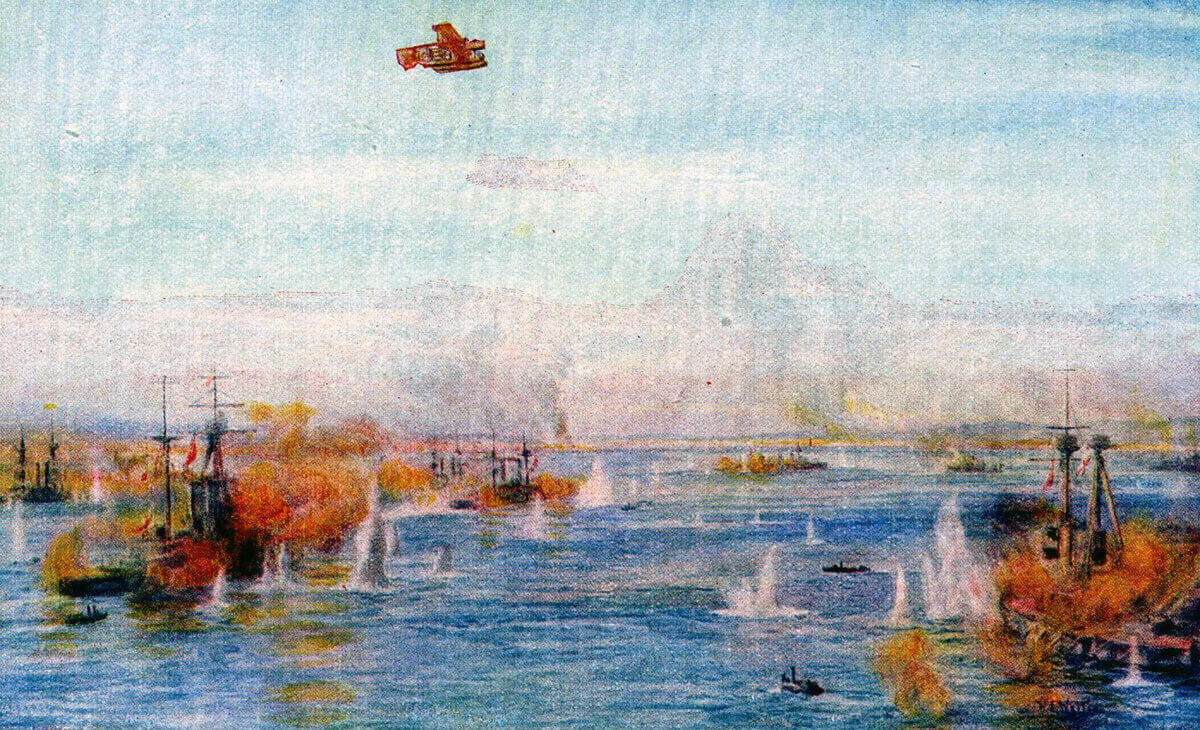
HMS Queen Elizabeth provided indirect fire from the Gulf of Saros to the north of the Gallipoli Peninsular, twelve miles away, the fall of shot on the Turkish forts in the Narrows being reported by Royal Navy seaplanes.
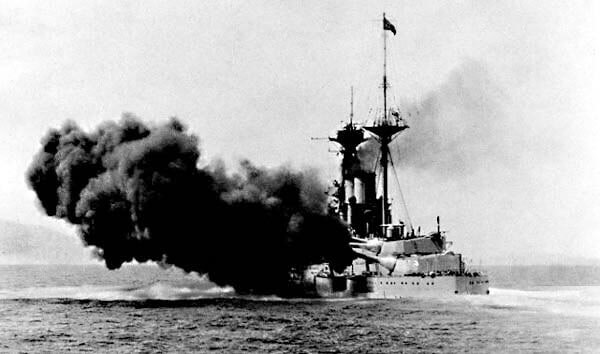
British battleship HMS Queen Elizabeth firing a 15 inch broadside. Admiral de Robeck’s flagship, Queen Elizabeth, played a primary role in the bombardment of the Turkish defences in the Dardanelles: Gallipoli campaign Part I: the Naval Bombardment, March 1915 in the First World War
The pattern of attack continued for two weeks with Queen Elizabeth, accompanied by Inflexible and Prince George, firing from the Gulf of Saros while other capital ships engaged the Turkish forts from inside the Dardanelles. The damage to the Turkish shore installations was substantial.
Meanwhile the mine sweepers cleared the approaches to the Narrows covered by fire from British light cruisers and destroyers, which engaged the mobile Turkish batteries on the shore. The mine sweepers were considerably hampered by the strong adverse current flowing down the waterway.
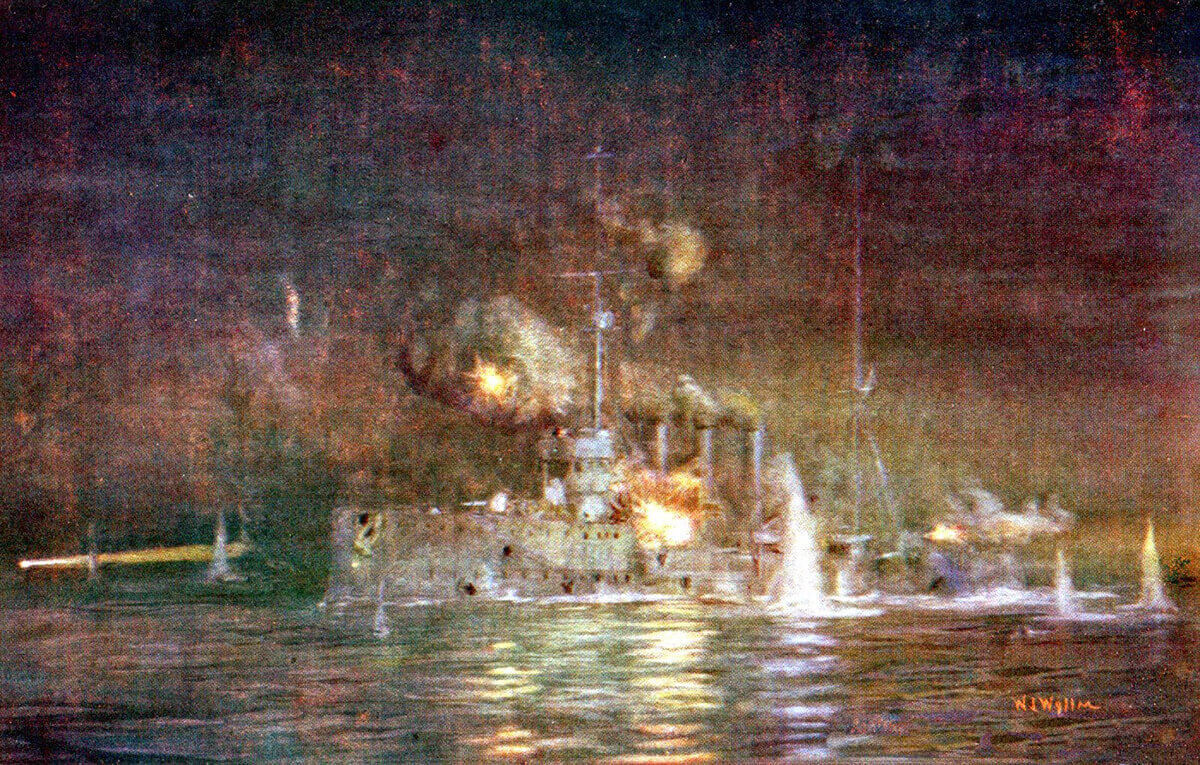
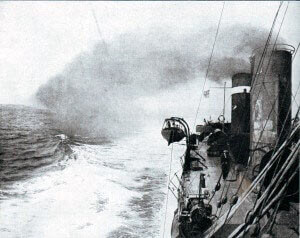
British light cruiser HMS Amethyst engaging Turkish batteries at Kephez Point on the night of 14th March 1915, in support of the mine sweeping operation: Gallipoli campaign Part I: the Naval Bombardment, March 1915 in the First World War: picture by Lionel Wyllie

Plan of the attack by the British and French capital ships on the Dardanelles Narrows on 18th March 1915, leading to the loss of three ships and the damaging of two more: Gallipoli campaign Part I: the Naval Bombardment, March 1915 in the First World War
On the night of 14th March 1915 HMS Amethyst engaged the Turkish batteries at Kephez Point while covering the mine sweeping operations and suffered severe damage and loss of life.
18th March 1915 was the last day of the attempt to force the Dardanelles with ships.
The mine sweeping operation was thought to have been successful with all the lines of moored mines removed.
The British and French capital ships steamed towards Chanak, following a zig zag course so that fire could be brought in turn on each coast, with the intention of sailing through the Narrows and out into the Sea of Marmora.
The first line comprised the French battleships Suffren, Bouvet, Charlemagne and Gaulois. The second line comprised the British battleships Triumph, Albion, Irresistible and Ocean. The third line comprised Queen Elizabeth, Agamemnon, Lord Nelson and the battlecruiser Inflexible.
The Turks bombarded the advancing ships from the forts and mobile land batteries.
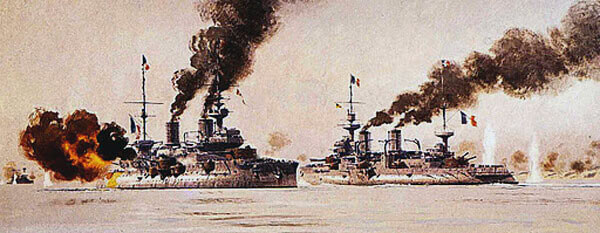
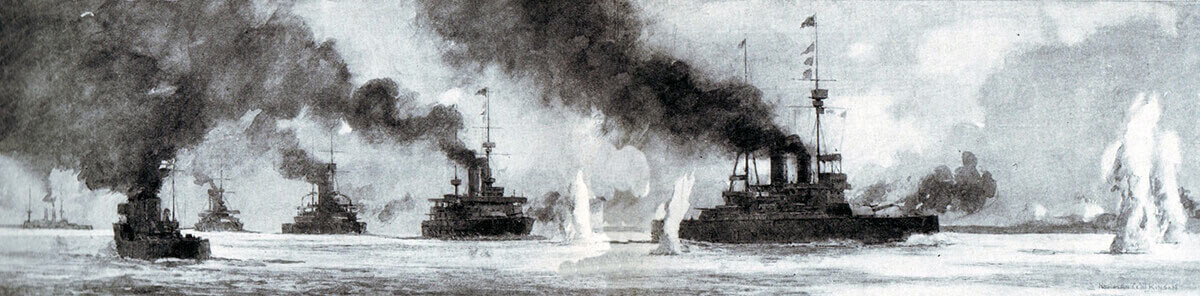
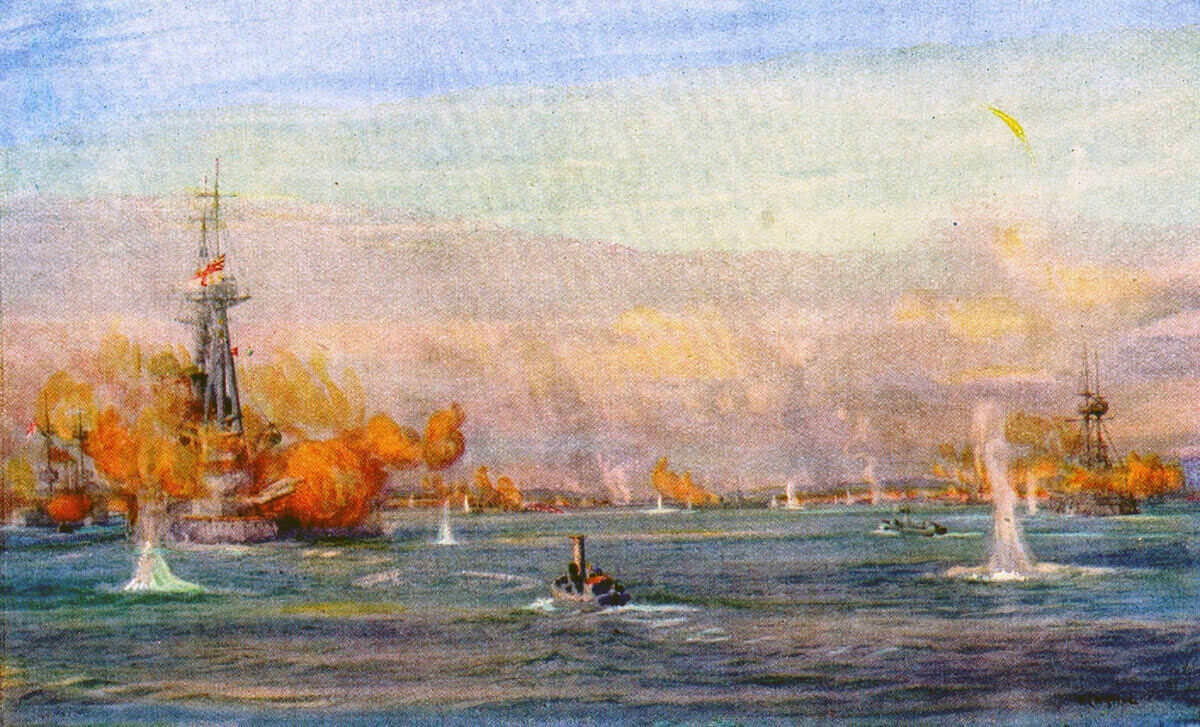
French battleships in the Dardanelles Narrows on 18th March 1915; Bouvet, sinking after striking a mine, and Suffren, under heavy Turkish shell fire: Gallipoli campaign Part I: the Naval Bombardment, March 1915 in the First World War
The French battleships, running low on ammunition, turned to starboard to permit the second line to take over the van. As they turned Bouvet struck a mine, capsized and sank with heavy loss of life.
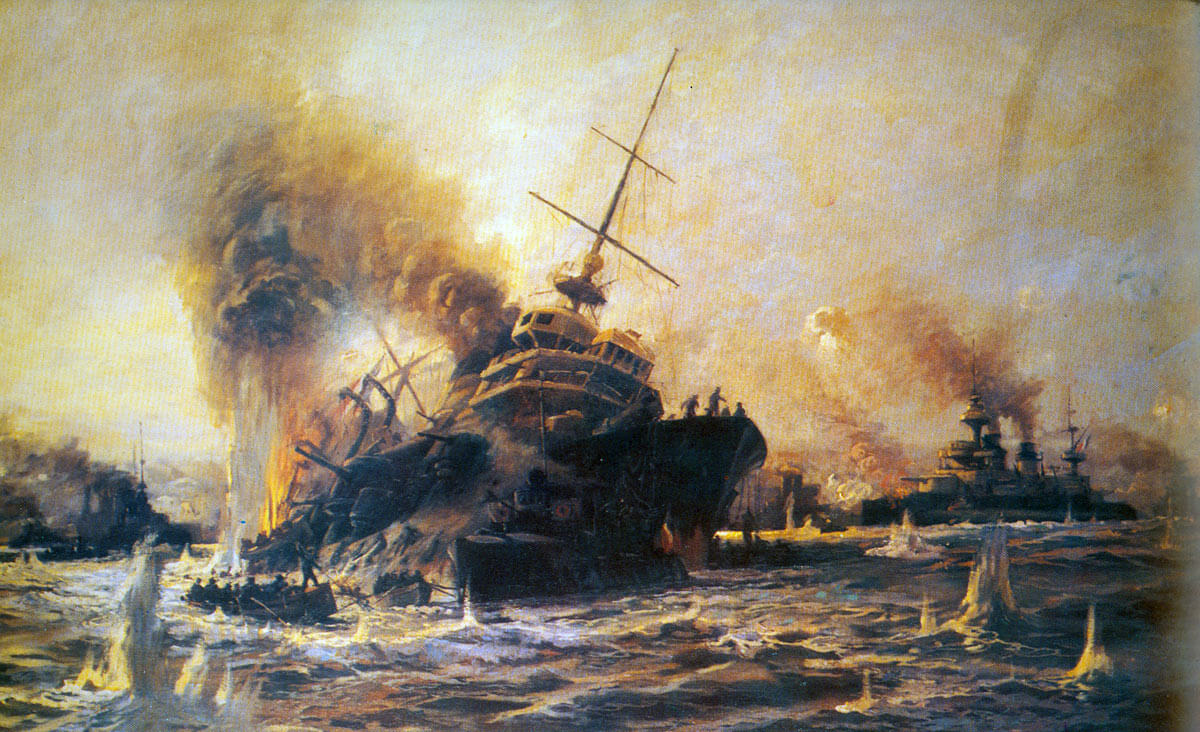
French battleship Bouvet, sinking after hitting a mine: Gallipoli campaign Part I: the Naval Bombardment, March 1915 in the First World War
Soon afterwards Irresistible struck a mine and slowly sank, most of her crew being rescued. Ocean then struck a mine and was lost, again with little loss of life. The final major ship to hit a mine was Inflexible but she managed to reach Lemnos, although badly damaged.
HMS Irresistible sinking after striking a Turkish mine on 18th March 1915: Gallipoli campaign Part I: the Naval Bombardment, March 1915 in the First World War: photograph taken from HMS Nelson
At the time it was believed that these heavy losses were caused by floating mines or shore-based torpedo tubes. In fact the losses were caused by a further undiscovered row of fixed mines. Noticing that each line of British and French battleships turned to starboard and filed back along the southern coastline, past the following lines of ships, overnight the Turks laid mines along that coastline. It was on these mines that the French and British ships foundered.
British battleships bombarding Turkish batteries at Chanak in the Dardanelles Narrows on 18th March 1915: Gallipoli campaign Part I: the Naval Bombardment, March 1915 in the First World War: picture by Lionel Wyllie
In addition the French battleships Gaulois and Suffren were so badly damaged by Turkish gunfire as to require dockyard repair.

Guns of HMS Lord Nelson: Lord Nelson, a British pre-Dreadnought battleship, took part in the attacks on the Dardanelles: Gallipoli campaign Part I: the Naval Bombardment, March 1915 in the First World War
The final day of the British and French naval attack on 18th March 1915 stretched the Turkish defences almost to breaking point. More than half the artillery ammunition had been fired and could not be replaced. The mine fields were almost entirely gone, other than the surprise row that sank the British and French battleships. To the relief of the Turks and their German commanders the attack was not resumed.
Survivors from HMS Ocean sunk by a Turkish mine in the Dardanelles Narrows on 18th March 1915: Gallipoli campaign Part I: the Naval Bombardment, March 1915 in the First World War
At dusk the British and French ships withdrew. Admiral de Robeck was now in command in place of Admiral Carden. De Robeck’s view was that the operation to clear the Turkish mine fields could not ensure a safe passage for the battleships and that naval guns with the form of ammunition available to the fleet were unable to ensure the destruction of the Turkish fortifications and deal with the numbers of mobile land based guns.
The attempt to force the Dardanelles by the Fleet alone was abandoned.
By this time troops were gathering in the Eastern Mediterranean. It would be left to them to attempt to take the Gallipoli Peninsular and thereby enable the fleet to pass the Dardanelles.
French battleship Bouvet sinking with considerable loss of life after striking a Turkish mine in the Dardanelles Narrows on 18th March 1915: Gallipoli campaign Part I: the Naval Bombardment
The previous battle of the First World War is the Battle of the Dogger Bank
The next battle of the First World War is Gallipoli Part II: Genesis of the land attack on the Gallipoli Peninsula