The ANZAC (Australian and New Zealand Army Corps) landing on Gallipoli on 25th April 1915 in the First World War, an iconic event for both those nations
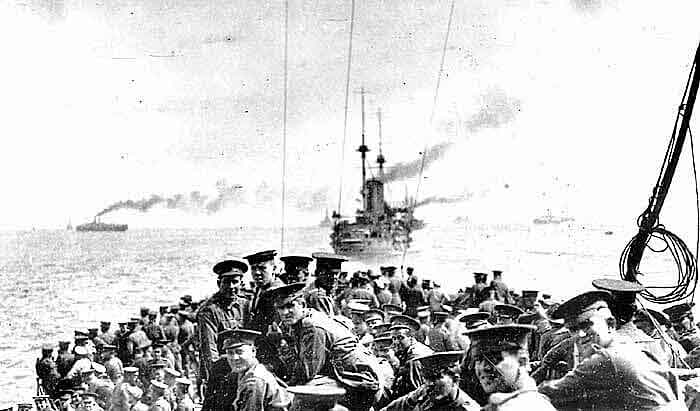
11th Battalion Australian Imperial Force and 1st Field Company Australian Engineers on HMS London sailing 24th April 1915 from the Greek Island of Lemnos for the landing on Gallipoli: Gallipoli Part III, ANZAC landing on 25th April 1915 in the First World War
The previous battle of the First World War is Gallipoli Part II: Genesis of the land attack on the Gallipoli Peninsula
The next battle of the First World War is Gallipoli Part IV: First landings at Cape Helles and Y Beach on 25th April 1915
The Dardanelles and Gallipoli: The campaign during 1915 conducted by the British and the French, using British, French and Australian warships and British, French, Australian, New Zealand and Indian troops, to take the Gallipoli Peninsular, penetrate the Dardanelles waterway and capture Constantinople, thereby knocking the Ottoman Turkish Empire out of the First World War.
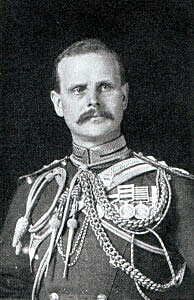
Lieutenant General William Birdwood commander of the ANZAC Corps on Gallipoli
Date: March 1915 to January 1916
Place: The Gallipoli Peninsular forms the northern shore of the Dardanelles, the narrow waterway leading from the north east corner of the Aegean Sea to the Sea of Marmora, the city of Constantinople (in 1915 the capital of the Ottoman Turkish Empire) and then to the Black Sea.
War: The First World War also known as ‘The Great War’.
Contestants: British, Australian and New Zealand troops with French troops supported by British and French naval ships against Turkish troops and ships led by German senior officers.
Generals: General Sir Ian Hamilton led the Entente (British, French, Australian, New Zealand and Indian) troops until he was replaced by General Sir Charles Munro in October 1915. General Eric Liman von Sanders, a German officer, commanded the Turkish troops. Vice-Admiral Carden commanded the British and French fleets until mid-April 1915, when he was replaced by his deputy commander Vice-Admiral de Robeck. Admiral Guépratte commanded the French warships.
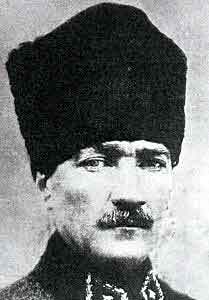
Mustafa Kemal Bey commander of the Turkish 19th Division at Anzac on Gallipoli and after the Great War Turkey’s ruler
Major General William Birdwood commanded the ANZAC Corps. Major General Bridges commanded the 1st Australian Division and Major General Godley commanded the Australian and New Zealand Division. Rear Admiral Thursby commanded the Royal Navy ships at Anzac.
Mustafa Kemal Bey commanded the Turkish 19th Division. Sami Bey commanded the Turkish 27th Regiment.
Winner: The final outcome was that the Entente Allies, Britain and France, withdrew from the Gallipoli Peninsular in December 1915 and January 1916 leaving the Turks victorious.
The Australian and New Zealand Army Corps (ANZAC)
On the outbreak of the Great War the Australian and New Zealand governments faced the same problem with their pre-war armies that Britain faced with its Territorial Force and Yeomanry regiments. The part-time units that made up these forces could not be compelled to serve abroad.
To fulfil its commitment to fight alongside Britain the Australian Government formed the Australian Imperial Force and recruited the units for this force from scratch. The New Zealand Government made similar arrangements.
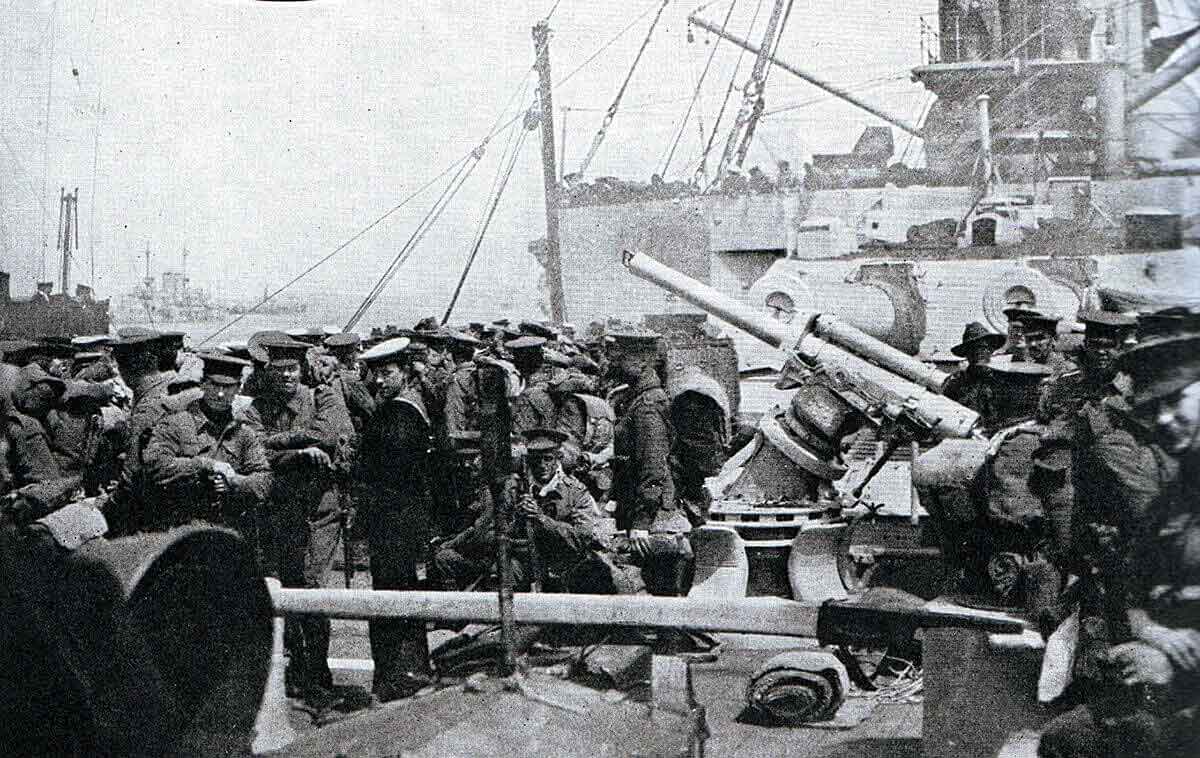
Australian troops on board a Royal Navy warship waiting to land at Anzac Cove on the Gallipoli Peninsular: Gallipoli Part III, ANZAC landing on 25th April 1915 in the First World War
The first newly raised regiments from each country, forming the First Australian Division and the combined Australian and New Zealand Division, travelled in a convoy to Egypt where they encamped under the Pyramids and trained for action, forming the Australian and New Zealand Army Corps (ANZAC).
Major General Birdwood, an Indian Army cavalry officer, was appointed to command the ANZAC Corps.
Birdwood, later known as the ‘Soul of ANZAC’, continued to command Australian and New Zealand troops in a succession of promotions throughout the Great War. ‘Birdie’ built up a rapport with his soldiers that was considered to be too familiar by many senior British officers.
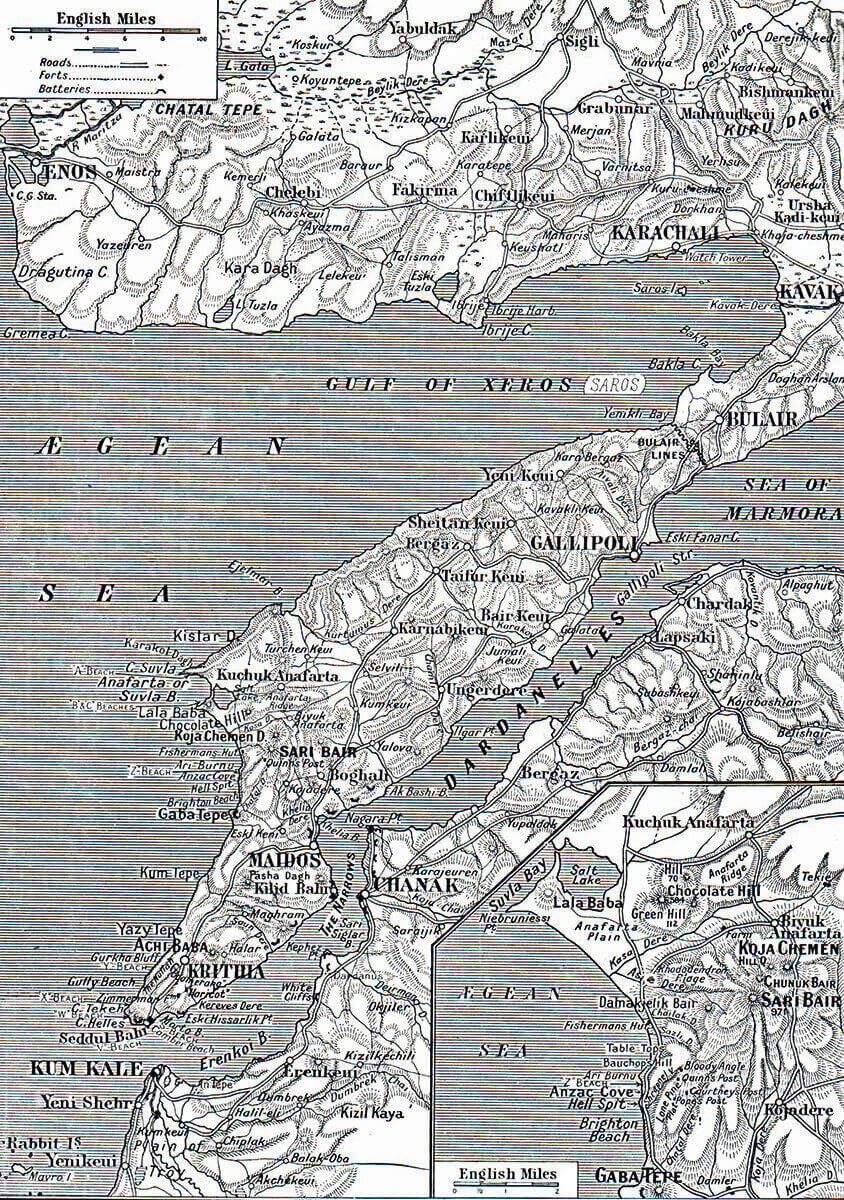
Map of the Gallipoli Peninsular. The inset shows the area of Anzac Cove and Suvla Bay: Gallipoli Part III, ANZAC landing on 25th April 1915 in the First World War
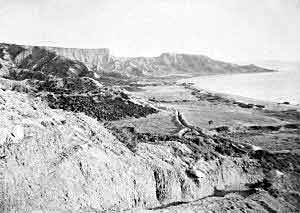
Anzac Cove in April 1915
The Area for the ANZAC landing:
The area selected for the ANZAC landing was a sandy beach just to the north of the Gaba Tepe promontory. Gaba Tepe continued to be held by the Turks throughout the Gallipoli campaign and was a constant source of harassing fire against the ANZAC bridgehead.
Inland from ANZAC Cove three ridges ran diagonally away from the coast in a north easterly direction. The first ridge was the shortest and overlooked the Ari Burnu promontory. The second ridge began above the proposed landing beach. The third ridge was the largest and lay behind the second. The area of high ground, Sari Bar, contained a number of features that would be given idiosyncratic names by the attacking troops. The ground comprised steep gullies in random formations covered by thick thorn scrub, difficult to penetrate and confusing to navigate, a perfect hunting ground for the adept Turkish snipers, whose victims included many senior officers.
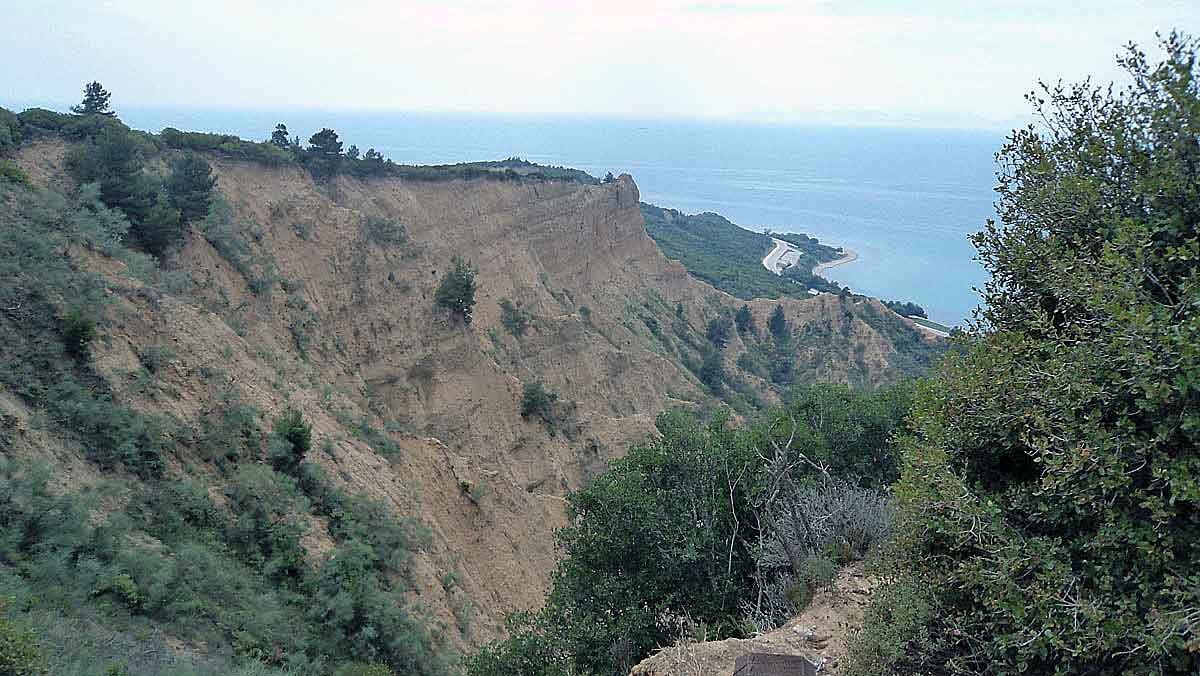
View down Monash and Shrapnell Gullies to ANZAC Cove in 2017: Gallipoli Part III, ANZAC landing on 25th April 1915 in the First World War
The landing was to be made initially by a covering party with orders to advance as quickly as possible up to the high ground and dig in. The rest of the ANZAC corps would follow the covering party over the following days.
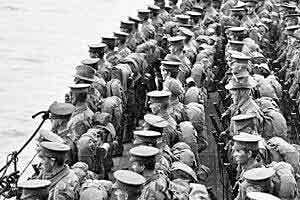
Australian troops on the decks of HMS Prince of Wales before the landing on Gallipoli 25th April 1915
The orders to the ANZAC covering force required them to land one mile north of Gaba Tepe and push up the second ridge onto Gun Ridge (the third ridge). The left of the covering party was to secure Chunuk Bair, a peak at the north end of the third ridge, and the right to clear Gaba Tepe. As with the first day’s targets at Cape Helles these positions were not reached at any time during the Gallipoli campaign.
The ANZAC covering party was provided by 3rd Brigade of the 1st Australian Division with 7th Indian Mountain Artillery Brigade, commanded by Colonel Sinclair-MacLagan. He directed his brigade to land with the 9th Australian Battalion on the right, the 10th in the centre and the 11th on the left. The 12th Battalion provided the reserve.
The 2nd Brigade of 1st Division formed a second wave and was to extend to the north holding a line from Hill 971 (north of Chunuk Bair) to Fisherman’s Hut on the coast. The mountain guns were to advance to 400 Plateau on the second ridge. The 1st Brigade would provide a reserve.
The rest of the ANZAC corps were to go ashore as quickly as arrangements could be made to transport them after the covering party and the rest of 1st Australian Division landed.
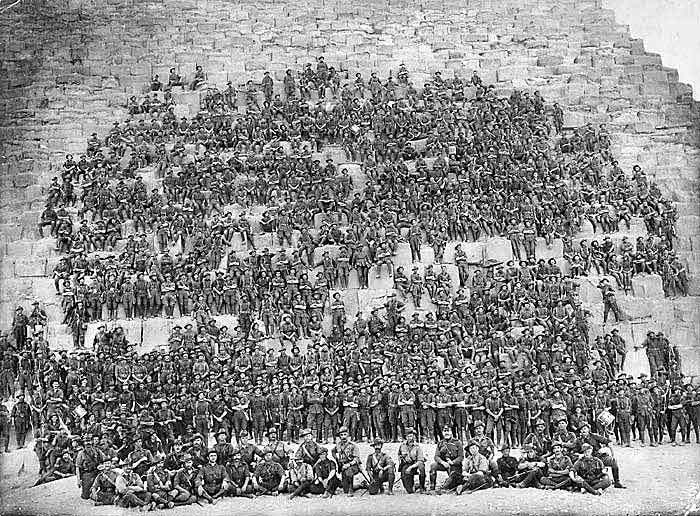
Australian 11th Battalion 3rd Brigade on Cheops Pyramid in Egypt in early 1915: Gallipoli Part III, ANZAC landing on 25th April 1915 in the First World War
General Birdwood, the ANZAC corps commander, was keen that the intitial landings take place in darkness. This could have been achieved on 23rd April but on 25th April the moon did not go down until 2.57am and if any ship were to approach the shore in moonlight surprise would be lost. This meant that the covering force could not reach the beach until around 4.30am while dawn was at 4am.
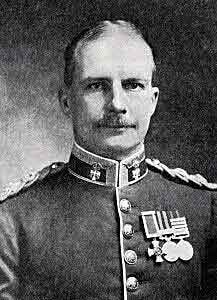
Lieutenant Colonel Sinclair-McLagan commanding 3rd Australian Brigade in the Anzac landings on 25th April 1915
The landing arrangements were that the first wave of 1,500 men would be taken in three battleships to within 2 miles of the shore and then landed in 12 tows, each tow comprising a stream launch towing four open rowing boats packed with troops. The following wave of 1,500 men was to be brought near the shore in destroyers and landed in ship’s lifeboats.
The rest of the ANZAC corps would follow in transports and be landed as arrangements could be made.
Birdwood’s headquarters travelled in the flagship with Admiral Thursby the naval commander.
Landing at Anzac on 25th April 1915:
When the moon went down at 2.35am on 25th April 1915 the flotilla sailed towards the Gallipoli Peninsular. The 12 tows carrying the first three battalions of Sinclair-MacLagan’s 3rd Brigade were released from the battleships and began the final two mile approach to the shore each towed by a steam launch.
The 12 towing launches were in line abreast with the navigating officer in the right hand launch. Each of the remaining launches was directed to keep150 yards from the launch on its right.
All the Gallipoli amphibious operations were dogged by the British lack of experience in making landings on a hostile shore. General Birdwood and his staff considered that the threat of Turkish fire could be neutralised by an approach in darkness. The navy urged that the landings should be made in daylight due to the difficulties of navigating onto a strange shore at night.
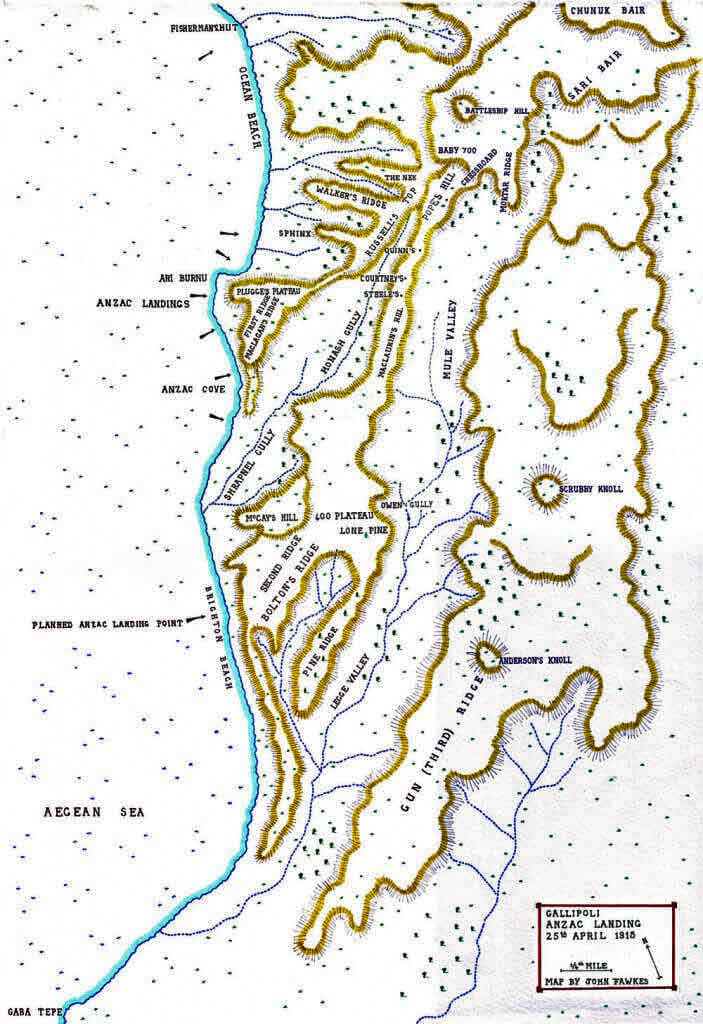
Map of the Anzac landing on Gallipoli 25th April 1915: Gallipoli Part III, ANZAC landing on 25th April 1915 in the First World War: map by John Fawkes
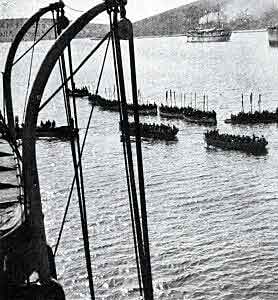
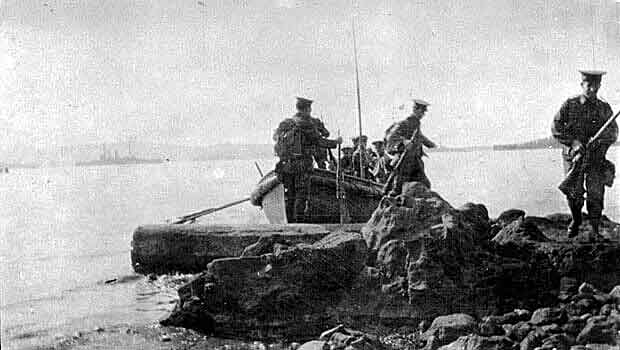
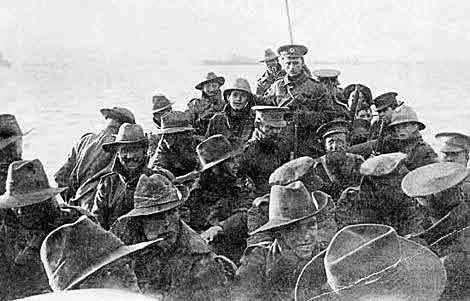
Troops in tows preparing to land on the Gallipoli Peninsula in April 1915
The navy’s fears were fully justified. The northerly current that flowed along the Gallipoli coast was much stronger than the sailors realised and the line of tows was imperceptibly swept to the north as they approached the shore. In the darkness the Royal Navy navigating officer misidentified Ari Burnu as Gaba Tepe and tried to move even further north before a correction was implemented by another officer. The result was that the covering force for the ANZAC corps landed around the Ari Burnu promontory, a mile north of the point intended for the landing.
As a result of this error Sinclair-MacLagan’s 3rd Brigade had to extemporise a new course of action. Gaba Tepe was now beyond the brigade’s reach and could not be taken. Instead of having only the second and third ridges to scale the brigade now had the first ridge as well and was on a section of shore hemmed in by cliffs instead of being open beach.
In attempts to remedy the navigating error the tows had changed order as they approached the shore. The battalions landed out of sequence and were disordered as well as being in the wrong place. Some time was spent trying to sort the men out. Some soldiers went off on their own without knowing where they were or what they were meant to be doing. Some headed off down the beach towards Anzac cove. The most northern troops were pinned down by machine gun fire from the Turkish position at Fisherman’s Hut.
In spite of these difficulties the covering force landed with few casualties and the Turks were completely surprised.

Australian roll-call Anzac Cove 25th April 1915: Gallipoli Part III, ANZAC landing on 25th April 1915 in the First World War
The order that had been emphasised was to press on inland. Parties formed and scaled the cliffs up to what was later called Plugge’s Plateau. From there it became clear that the force was in the wrong place. 400 Plateau the objective of the centre and left of the brigade was a thousand yards to the right.
The 12th Battalion, the 3rd Brigade reserve, landed from the destroyers at around 4.40am and followed the other battalions inland.
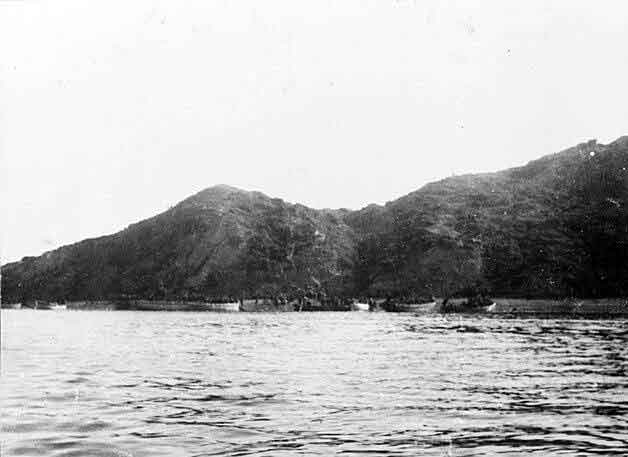
Anzacs landing on Gallipoli 25th April 1915: Gallipoli Part III, ANZAC landing on 25th April 1915 in the First World War
Colonel Sinclair-McLagan’s brigade was in an awkward position. His advanced troops were too far to the left. A significant number of his men were pinned on the beach around Ari Burnu by the cliffs and heavy fire from Turkish machine guns at Fisherman’s Hut further along the beach to the north. When the main body landed at Anzac Cove they would be open to an attack from the Turkish troops positioned at Gaba Tepe to the south which the 3rd Brigade was now powerless to intercept.
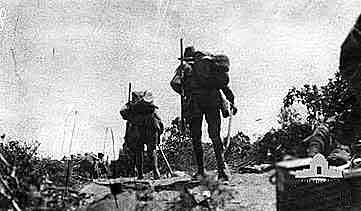
Anzacs moving inland from the landing on 25th April 1915
At 6am the main body began to land at Anzac Cove. Sinclair-McLagan met the brigade commander of 2nd Brigade, Colonel M’Cay, and got him to agree to occupy 400 Plateau on the right flank instead of his planned role on the left flank. M’Cay established his headquarters on M’Cay’s Hill and directed his troops to reinforce the few Australians holding Bolton’s Ridge at the southern end of 400 Plateau.
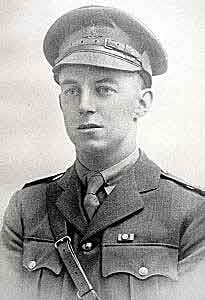
Lieutenant Noel Loutit of 10th Battalion Australian Imperial Force later in the Great War as a lieutenant Colonel with the DSO & Bar
By 7am the 2nd Brigade was in possession of the second ridge including much of 400 Plateau and Pine Ridge. Some small parties reached further onto the western slopes of Gun Ridge. Lieutenant Loutit with a party from 10th Battalion reached Scrubby Knoll and could see the Dardanelles on the far side of the Peninsular. It was only needed to reinforce him in strength and the division’s objective would have been achieved.
However the errors in the original landing had thrown the whole operation into confusion and it was taking time to organise the new scheme for assaulting the Third or Gun Ridge. Had the senior officers known it Loutit’s men and other parties of Australian troops were already on Gun Ridge and had found it largely undefended. The Australians could have advanced without the necessity for an organised assault.
Sinclair-MacLagen after reaching the northern end of 400 Plateau ordered his brigade to dig in along the western rim. He felt unable to continue with the advance onto Gun Ridge until his battalions were re-organised.
On the ANZAC left the battalions were also in confusion with many of the officers casualties. The Turkish resistance comprised a small number of well-concealed riflemen who made it their concern to pick off any Australian who appeared to be in authority. The attrition of senior ranks by Turkish snipers proved to be a continuing feature in the Gallipoli campaign. The advance halted on Russell’s Top and the Nek although one party pressed on to the slopes of Baby 700.
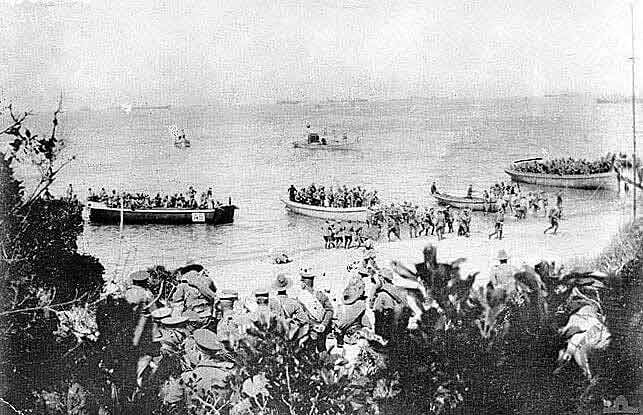
ANZACs landing at Anzac Cove on Gallipoli 25th April 1915: Gallipoli Part III, ANZAC landing on 25th April 1915 in the First World War
The landing of the main ANZAC body began in accordance with the plan, the ships arriving off the coast. They soon attracted heavy Turkish shell fire from the area of Gaba Tepe one and a half miles down the coast.
The transport Galeka had orders to land the 6th and 7th Battalions on the left of the covering party, which had landed a mile too far north.
No tows appearing the Galeka began to land a company of the 7th Battalion in its own boats. These boats headed straight for the Turkish position at Fisherman’s Hut. The Turks waited until the boats were two hundred yards off-shore before opening fire, hitting one hundred of the 140 men in the company. After capturing the Turkish post the 18 survivors from the company moved south along the beach to join the extreme left of the ANZAC position at Ari Burnu.
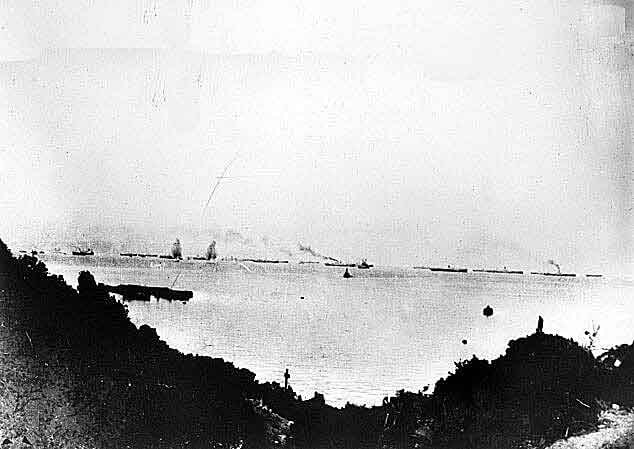
Transports off Anzac Gallipoli under bombardment from Turkish guns on Ari Burnu on 25th April 1915: Gallipoli Part III, ANZAC landing on 25th April 1915 in the First World War
The rest of the troops from the 1st and 2nd Brigades were landed at Anzac Cove as planned. A considerable delay in getting the troops ashore was caused by the shelling from Gaba Tepe which kept the transports further out to sea than intended. Due to the distance the divisional infantry was not fully ashore until 1pm when the last men of the 1st Brigade landed.
An additional cause of delay was the failure of the naval beach personnel to comply with a direction that wounded were only to be evacuated in specified medical craft leaving the tows free to collect and land new parties of troops. Numbers of soldiers were shot and wounded during the journey ashore and left in the boats, but in addition the beach parties embarked wounded on boats as they reached the shore. This delayed the departure of the boats and the wounded had to be removed at the transports before more troops could embark. In some cases naval boat crews joined the advance inland in their excitement and had to be rounded up and sent back.
1st Australian Division Signal Company about to land at Anzac Cove on 25th April 1915: Gallipoli Part III, ANZAC landing on 25th April 1915 in the First World War
The need for tight control and organisation of the landing area was one of the grim lessons of amphibious landings in the Gallipoli campaign.
Confusion soon engulfed the main body of the 2nd and 1st Australian Brigades. The change of plan to route the 2nd Brigade to the right instead of to the left did not reach some units and those it did reach had difficulty issuing replacement orders that reflected the change.
As 2nd Brigade companies landed they were directed to a rendezvous at the southern end of Shrapnel Gully. Many companies then pressed on into the hinterland without knowing where they were meant to go and became lost. Some companies were called to fill gaps in other parts of the line diverting them from their intended role. As the 1st Brigade landed its companies were sucked into the rush forward breaking up the battalions and causing the brigade to disintegrate, leaving no divisional reserve.
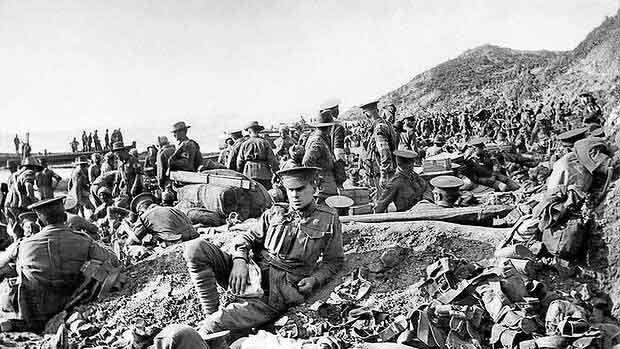
ANZAC troops on the beach at Anzac Cove on 25th April 1915: Gallipoli Part III, ANZAC landing on 25th April 1915 in the First World War
On the Turkish side the first reports of the landings at Ari Burnu came into the area headquarters at Maidos around 5.30am. Soon after 8am a further message reported that Australian troops in battalion strength were attacking up the main ridge towards Chunuk Bair. The area commander, Colonel Sami Bey, asked that the Turkish 19th Division, which was in reserve, send a battalion to Chunuk Bair to guard his right flank. This was in fact the right flank of the whole Turkish position in the south of the Gallipoli Peninsular, which stretched with some gaps from Cape Helles northwards.
It was still the belief of General Liman von Sanders that the main attack was to be made on the Bulair Isthmus at the northern end of the Gallipoli Peninsular.
Australian 1st Division landing at Anzac Cove on 25th April 1915: Gallipoli Part III, ANZAC landing on 25th April 1915 in the First World War
The commander of the Turkish 19th Division was Mustafa Kemal Bey, later the first president of the post-war Turkish state. Mustafa Kemal realised that the advance on Chunuk Bair could not be a diversion but was part of the main British-French attack. Kemal set off to investigate leaving orders for the three battalions of the 57th Regiment with a mountain battery to follow with all speed.
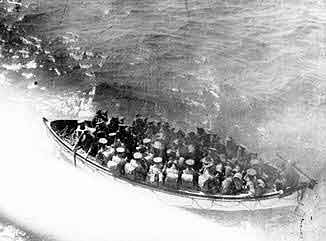
Australian Troops in a tow: Gallipoli Part III, ANZAC landing on 25th April 1915 in the First World War
The troops of the Turkish 57th Regiment began to come into action along the high ground in front of the Australians from around 9.30am. The mountain battery got into position and opened fire at around 1pm (the artillery of both sides suffered great difficulty in identifying suitable battery sites among the steep broken hills).
Before the arrival of the Turkish 19th Division units the forces facing the 1st Australian Division comprised only a few scattered companies that put up little defence, other than the actions of highly effective individual Turkish snipers. It was the confusion of the landing and the difficult country that caused the opportunity to take the high ground of Gun Ridge and Chunuk Bair to slip away.
From 9.30am the rifle fire of the advancing Turkish 57th Regiment forced the Australians to pull back from the western side of Gun Ridge.
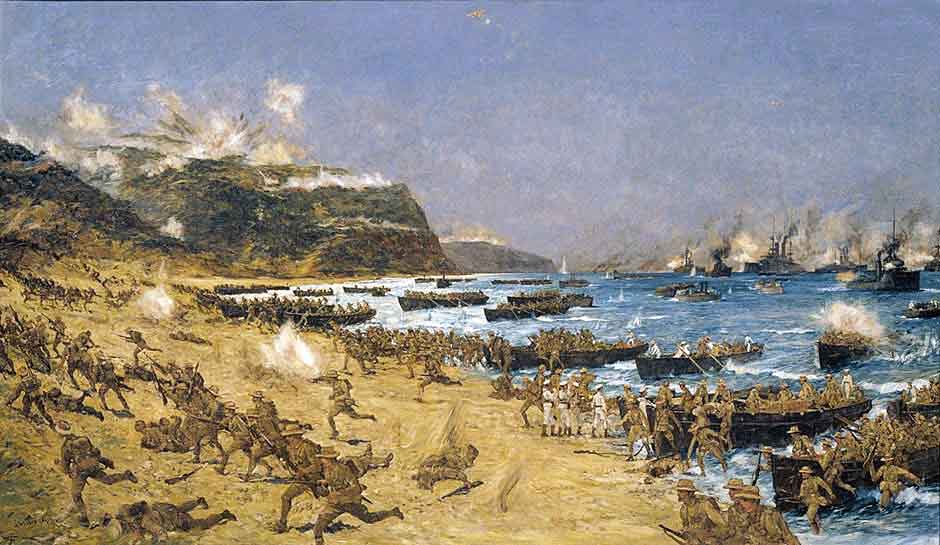
Australian and New Zealand troops landing at Anzac Cove, Gallipoli, on 25th April 1915: picture by Charles Edward Dixon: Gallipoli Part III, ANZAC landing on 25th April 1915 in the First World War
The Turkish fire also inflicted substantial casualties on the Australian 9th Battalion as it attempted to move forward to meet the Turkish advance.
On the Australian left a small party of troops was holding Battleship Hill. The Turkish 57th Regiment also attacked in this area and the Australians on Battleship Hill and Baby 700 were driven back.
A company from the Australian 1st Battalion advanced over the Nek and retook Baby 700.
In the centre another Australian company was forced to withdraw from the southern end of Baby 700 after being outflanked by the Turks. Sinclair-McLagan reported to his divisional commander that unless the position on the Australian left was reinforced he did not expect to be able to hold the Second Ridge.
Anzacs landing at Anzac Cove on Gallipoli 25th April 1915: Gallipoli Part III, ANZAC landing on 25th April 1915 in the First World War
The ANZAC plan for the landing envisaged that the covering party of the 3rd Brigade would secure an advanced position on the Third or Gun Ridge early in the operation. Instead the whole of the Australian 1st Division was bogged down in difficult country well short of that target with many of its battalions, including the intended reserve of the 1st Brigade, broken up and committed piecemeal. The opportunity to make significant advances before the Turks could commit their troops in strength was lost.
In view of Sinclair-McLagan’s message Major-General Bridges, the 1st Division commander, at 10.35am committed his remaining two companies to reinforce the troops holding the Nek. The division’s reserves were now fully committed other than the 4th Battalion and two companies of the 2nd which had not yet disembarked.
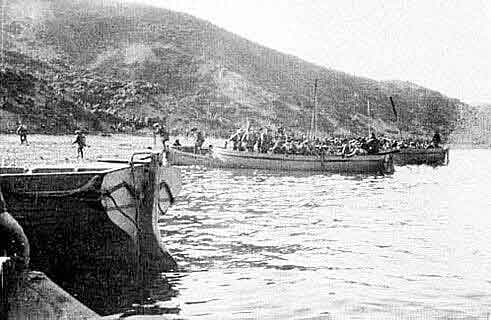
Anzacs landing at Anzac Cove 25th April 1915: Gallipoli Part III, ANZAC landing on 25th April 1915 in the First World War
At about 10.45am General Birdwood signalled to General Bridges from his shipboard headquarters that he was sending ashore one and a half battalions of New Zealand infantry that had arrived on their transport. As these troops landed General Bridges directed the Auckland Battalion to reinforce the positions on the Nek.
The Auckland Battalion had considerable difficulty attempting to climb the steep scrub covered slopes under Turkish fire and were diverted to a route via Russell’s Top and Plugge’s Plateau (named after the commanding officer of the Auckland Battalion Lieutenant-Colonel A. Plugge). As they did so the various sub-units became lost so that only one Auckland Battalion company under the commanding officer reached the Nek before 1.30pm, the rest ending up in various other positions.
During the afternoon the Canterbury half battalion found its way to the Nek where its commanding officer was killed and Colonel Plugge wounded.
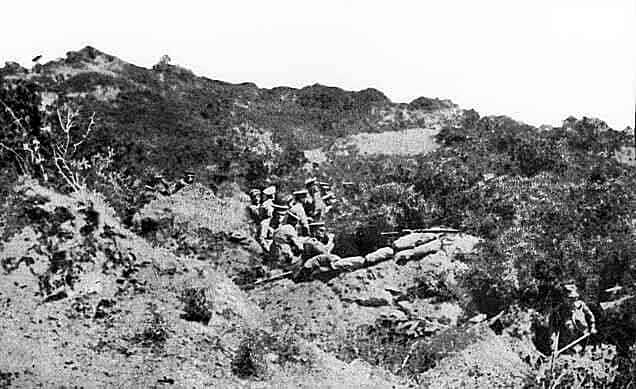
Australian or New Zealand trenches above Anzac Cove on Gallipoli 25th April 1915: Gallipoli , ANZAC landing on 25th April 1915 in the First World War
During the rest of the afternoon the Australian and New Zealand troops held the summit of Baby 700 and the flank position at the Nek under increasing rifle fire from the Turkish troops gathering at the top of the high ground. Turkish guns searched the summit of the hills with shrapnel. ANZAC officer casualties mounted as the company and battalion officers attempted to maintain control of the line and to encourage their soldiers.
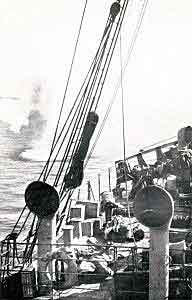
SS Clacton, Anzac landing ship, under shrapnel fire just after three Australians were killed
At about 4pm the Turkish 57th Regiment launched its expected counter-attack on both sides of Baby 700 pushing back the ANZAC line and capturing the hill. Some of the retreating soldiers made their way back to the shore while others ended up on Pope’s Hill and McLaurin’s Hill. One group dug the position that became known as Quinn’s Post.
Two companies of the 2nd Battalion commanded by Lieutenant-Colonel Braund held a position at the head of Walker’s Ridge. They were one of the few groups keeping the Turks back from penetrating into the heart of the ANZAC position.
By the end of the afternoon of 25th April 1915 the effects of fighting over this difficult country were bearing on the Turkish troops as much as they were on the ANZACs and Turkish units and sub-units were becoming scattered, uncoordinated, exhausted and confused.
Colonel Braund, commanding the 2nd Battalion at the head of Walker’s Ridge, at 5pm sent a message to his brigade commander that if reinforced he could restore the position with an advance. But there were for the time being no ANZAC reinforcements until the rest of the New Zealand Brigade and the 4th Australian Brigade were landed.
While the main Turkish attack went in on Baby 700 a subsidiary attack was made on the coastal end of Walker’s Ridge. Here a group of 33 men from five different Australian battalions held a defensive post. These men resisted the Turkish attack until reinforced.
The first of the reinforcements comprised two companies of the 16th Battalion with another from the15th and a New Zealand platoon, all from the 4th Australian Brigade and led by Lieutenant-Colonel Pope.

Turkish field guns in the desert: Gallipoli Part III, ANZAC landing on 25th April 1915 in the First World War
As soon as his men landed Pope was directed to take this force up Monash Gully to fill the gap on Braund’s flank. At the head of Monash Gully Pope occupied the hill that then took his name, being called Pope’s Hill. Some of his men were diverted into the garrisons holding Steele’s Post and Courtney’s Post.
The position around Baby 700 when darkness came was that the ANZACs held the sea-ward side while the Turks held the land-ward side.
Both sides around Baby 700 were exhausted by the day’s fighting and although that night there were continuing exchanges of rifle fire there was little further movement.
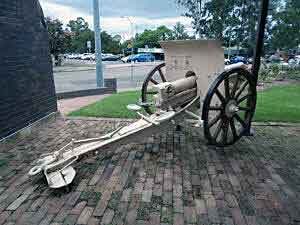
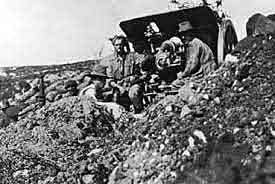
75 mm Turkish field gun at the War Memorial, Windsor, New South Wales, Australia: Gallipoli Part III, ANZAC landing on 25th April 1915 in the First World War
On the ANZAC right flank soldiers from ten of the twelve battalions of the 1st Australian Division spent the late afternoon in a desperate battle to hold the Second Ridge.
The ANZACs here were ordered to remain on the defensive and try to dig positions. This was difficult as the troops carried only light entrenching tools which were of little use on the matted scrub roots. 400 Plateau, the peak of the Second Ridge, was a target for the increasing Turkish artillery fire
The Turks brought a second mountain battery and three field batteries into action during the course of the day. There was little artillery support for the Australians.
A party of Australians on the eastern slope of 400 Plateau kept the Turkish infantry away with constant heavy rifle fire.
In the face of repeated requests from Colonel M’Cay for troops to fill the gap between his right and the sea General Bridges sent the Australian 4th Battalion to occupy the western end of Bolton’s Ridge at around 5pm.
M’Cay now held a series of posts and makeshift trenches from Bolton’s Ridge to the edge of 400 Plateau.
After dark the Australian party on the eastern side of 400 Plateau fell back on the main line leaving the summit of 400 Plateau unoccupied by either side. As on the northern flank the Turkish troops were as exhausted as the ANZACs.

Australian troops hauling up the cliff the one 18 pounder field gun to be landed on 25th April 1915 at Anzac Cove on Gallipoli: Gallipoli Part III, ANZAC landing on 25th April 1915 in the First World War
The final Turkish attack took place on the Australian right. A party of troops from the 27th Regiment advanced up the coast and overwhelmed an outpost of the Australian 6th Battalion on Pine Ridge. Coming under naval bombardment the Turks halted until after dark and then resumed their advance.
By this time the Australian 4th Battalion was in position between M’Cay’s flank and the cliffs above the sea. Around 9pm the Turks attacked the trenches of the 4th and 8th Battalions but were counter-attacked and driven back.
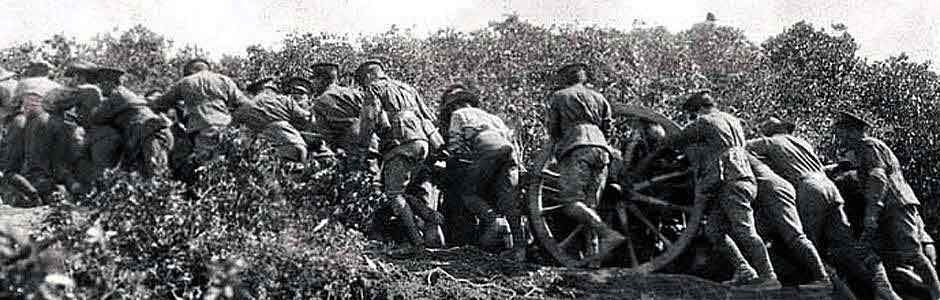
Australian troops hauling up the cliff the one 18 pounder field gun to be landed on 25th April 1915 at Anzac Cove on Gallipoli: Gallipoli Part III, ANZAC landing on 25th April 1915 in the First World War
All along the line the attacks came to a halt as darkness fell but throughout the night a constant fire was maintained by both sides.
It had been intended that the ANZAC infantry would be provided with artillery support during the landings on 25th April 1915. Two mountain batteries were to be put ashore before 9am and the rest of the corps’ artillery batteries to be landed during the day. Arrangements were made for the warships to provide gunfire support with artillery officers acting as shore based fire controllers.
In the event the nature of the ground and the failure to move far enough inland meant that there was no safe area in which to position guns not subject to direct rifle fire.

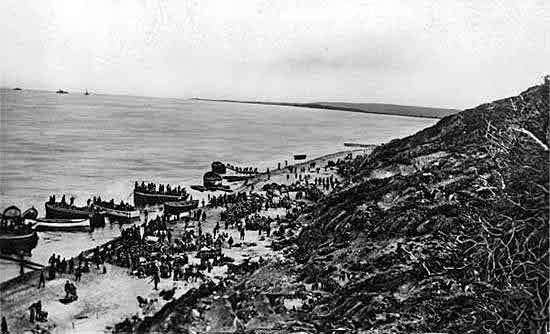
Australian engineers building a jetty at Anzac Cove on Gallipoli 25th April 1915: Gallipoli Part III, ANZAC landing on 25th April 1915 in the First World War
Only one mountain battery got ashore and then had great difficulty finding suitable gun positions. When the battery did come into action on the western slopes of 400 Plateau it was enfiladed by a Turkish battery on Chunuk Bair and forced out of action after suffering heavy casualties at around 2.30pm.
An 18 pounder field gun was landed and hauled up the hill. No other guns came ashore before 6pm.
Australian gunners with an 18 pounder field gun on Anzac: Gallipoli Part III, ANZAC landing on 25th April 1915 in the First World War
While the navy struggled to find lighters to transport the field guns and howitzers the position ashore became so uncertain that General Birdwood directed that no more guns were to be landed that day in case it became necessary to evacuate the troops.
As throughout the Gallipoli campaign the theory of naval gun support was widely invoked but the practicalities made it difficult to implement. The problem was one of communication.
The warships could not see what was going on ashore sufficiently clearly to make it safe to attempt fire tasks in support of the infantry from their own observations, the usual way of directing naval gunfire. The naval gun controllers needed definite and timely information. This had to come from forward observers. The difficulty was then one of communication. There was eventually radio link between the beach and the naval commander-in-chief, but messages from the frontline had to be taken to the beach by telephone line if one had been laid and was still intact or by runner. This was not a practical way of directing naval gunfire.
Only in one case was the fleet able to assist. The Australian troops on Pine Ridge were suffering from the shell fire of two Turkish guns positioned on Anderson’s Knoll from around 12 noon. It took until 5pm to get a coherent message through to the fleet and within 15 minutes the Turkish guns were silenced by naval gunfire.
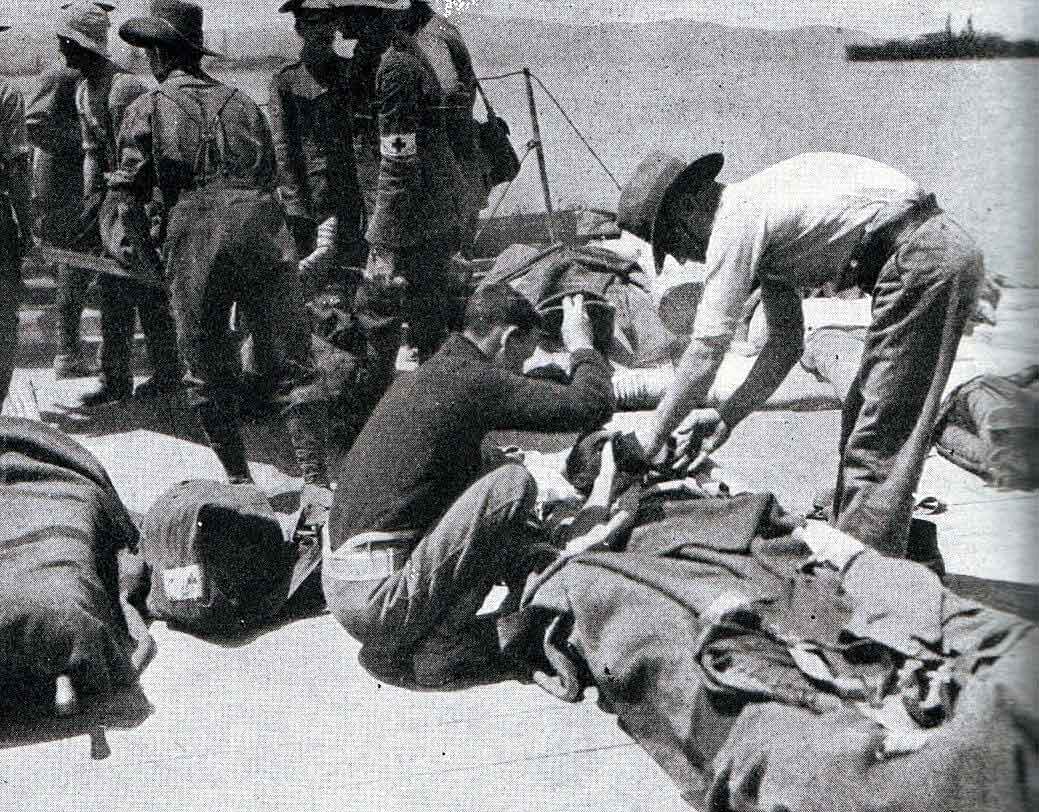
Australian wounded from Gallipoli on ship at the Greek Island of Lemnos 1915: Gallipoli Part III, ANZAC landing on 25th April 1915 in the First World War
A Turkish battleship in the Dardanelles Narrows shelled the ANZAC landing area from across the Peninsular. As the shelling became extremely awkward it suddenly stopped. It turned out that the battleship caught sight of the periscope of an Australian submarine and moved away.
The second ANZAC division commanded by Major-General Godley comprising the New Zealand Brigade and the 4th Australian Brigade arrived off Anzac Cove at around 5pm on 25th April 1915.
It was decided to commit this division to the left flank. While the Wellington Battalion of New Zealanders and the Australian 16th Battalion were promptly disembarked the rest of the division was retained on their ships for some hours and in the case of some units until the next day. The reason was that the senior generals feared that it might be necessary to evacuate the ANZAC landing altogether.
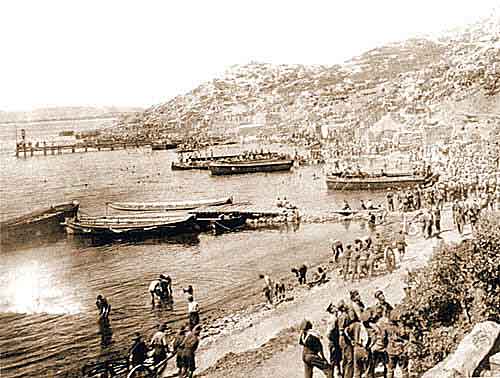
Anzac Cove showing the jetty built by Australian Engineers: Gallipoli Part III, ANZAC landing on 25th April 1915 in the First World War
There was considerable confusion ashore. Many of the soldiers finding themselves cut off from their battalions and without officers wandered back to the beach. The numbers of these soldiers caused considerable concern to the commanders. It was however only necessary to organise them into companies and they readily returned to the frontline. Spirits were high.
Three field companies of Australian Engineers landed during the day. Some of the 1st Company, carried away by the excitement of the day, rushed with the infantry to the top of Plugge’s Plateau and had to be rounded up and brought back to the beach to carry out their proper function.
During the day the engineers built a workable jetty which greatly aided the evacuation of the wounded. They also found sources of water and constructed a number of paths, much of this work being carried out under shrapnel fire from Turkish guns at Gaba Tepe.
In the event it proved unnecessary to withdraw and the landing of the rest of the Australian and New Zealand Division and the guns of the corps proceeded.
At the end of 25th April 1915 the ANZACs had established a defensible line of around 6,000 yards in length from Walker’s Ridge on the left (the north), to Russell’s Top (there was a worrying gap here) Quinn’s Post, Courtney’s Post, Steele’s Post, Mclaurin’s Hill, 400 Plateau and Bolton’s Ridge above the beach on the right (the south).
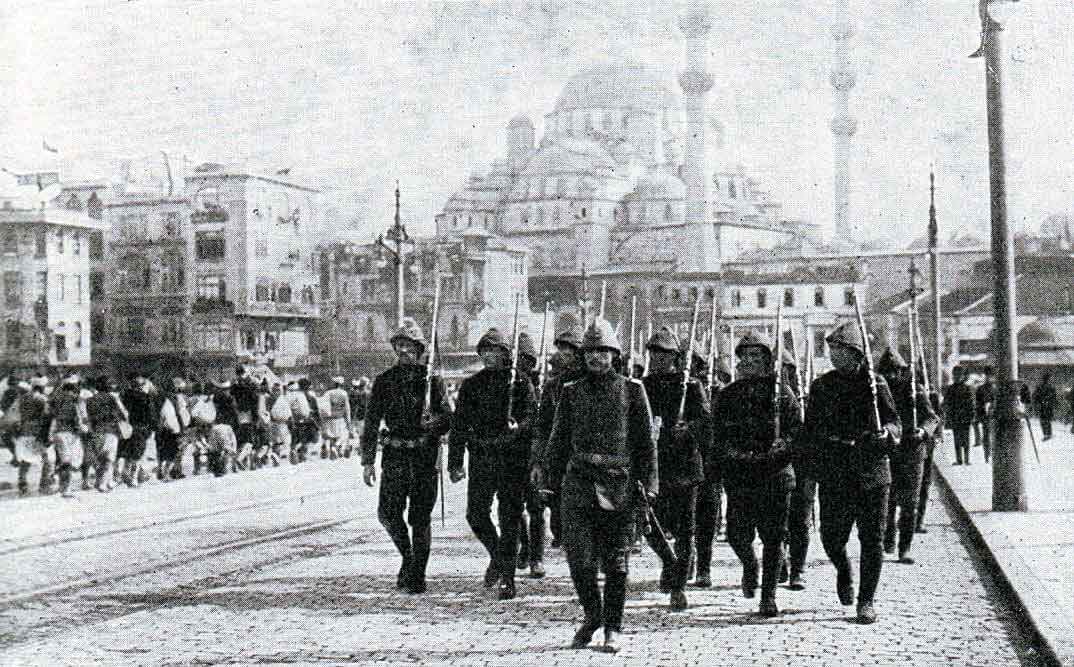
Ottoman Turkish troops: Gallipoli Part III, ANZAC landing on 25th April 1915 in the First World War
By 6pm on 25th April the ANZAC force ashore comprised 1st, 2nd and 3rd Australian Brigades, half the New Zealand Brigade, 2 Mountain Batteries, one 18 pounder field gun and other supporting arms.
Casualties of the day amounted to around 2,000 men of whom 1,500 were wounded and were evacuated.
The Turks were in considerable confusion and had suffered similar losses of around 2,000 men. Mustafa Kemal’s 19th Division was a ruin. All three battalions of the 57th Regiment had virtually ceased to exist. His 27th Regiment had suffered substantial casualties and was virtually incapable of further action. The 77th Regiment, composed of Arab soldiers of unreliable loyalty to the Ottomans, had been committed to an attack on Mclaurin’s Hill and on meeting the Australian rifle fire had broken and fled to Gun Ridge.
Kemal’s one reserve regiment the 72nd was also composed of Arab soldiers.
Both sides prepared themselves to renew the battle on 26th April 1915.
References for the Gallipoli Landings:
Times History of the First World War
Official History of Military Operations in Gallipoli by Brigadier Aspinall-Oglander
‘Mr Midshipman VC’: biography of Midshipman George Drewry, winner of the Victoria Cross during the landings from the River Clyde on 25th April 1915 at Gallipoli; written by Quentin Falk and published by Pen and Sword Maritime in 2018.
The previous battle of the First World War is Gallipoli Part II: Genesis of the land attack on the Gallipoli Peninsula
The next battle of the First World War is Gallipoli Part IV: First landings at Cape Helles and Y Beach on 25th April 1915