The close fought battle that ended on 27th February 1900 with the surrender of Cronje’s Boer army to the British
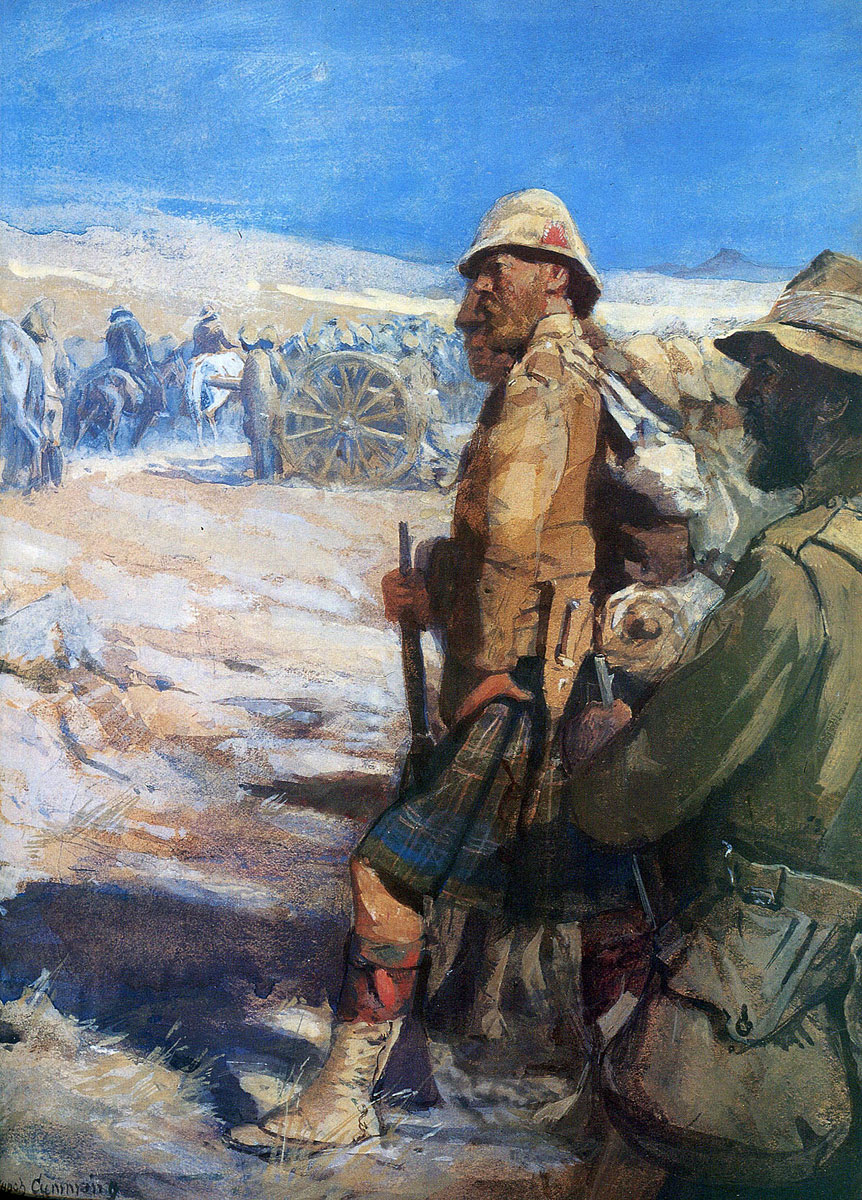
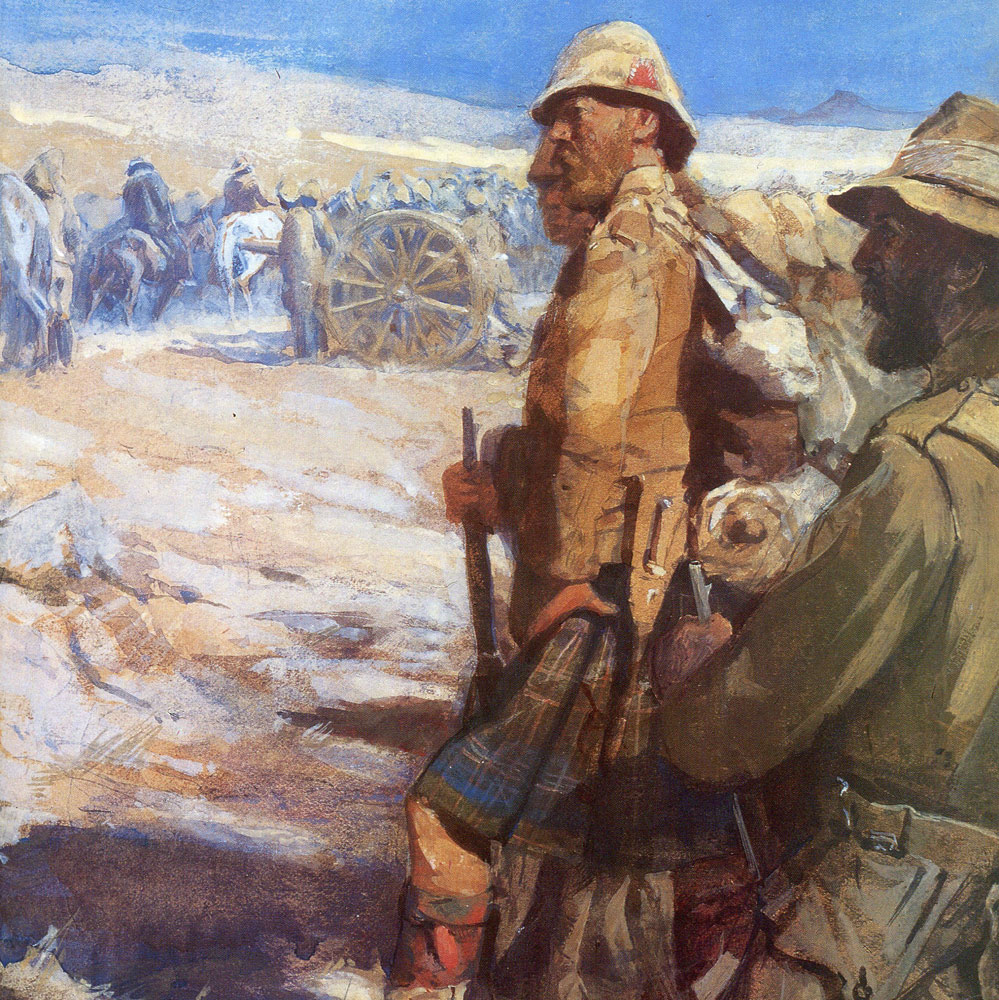
Highlanders at the Boer surrender: Battle of Paardeberg on 27th February 1900 in the Great Boer War: picture by Skeoch Cumming
![]()
The previous battle of the Great Boer War is the Battle of Pieters
The next battle of the Great Boer War is the Siege of Mafeking
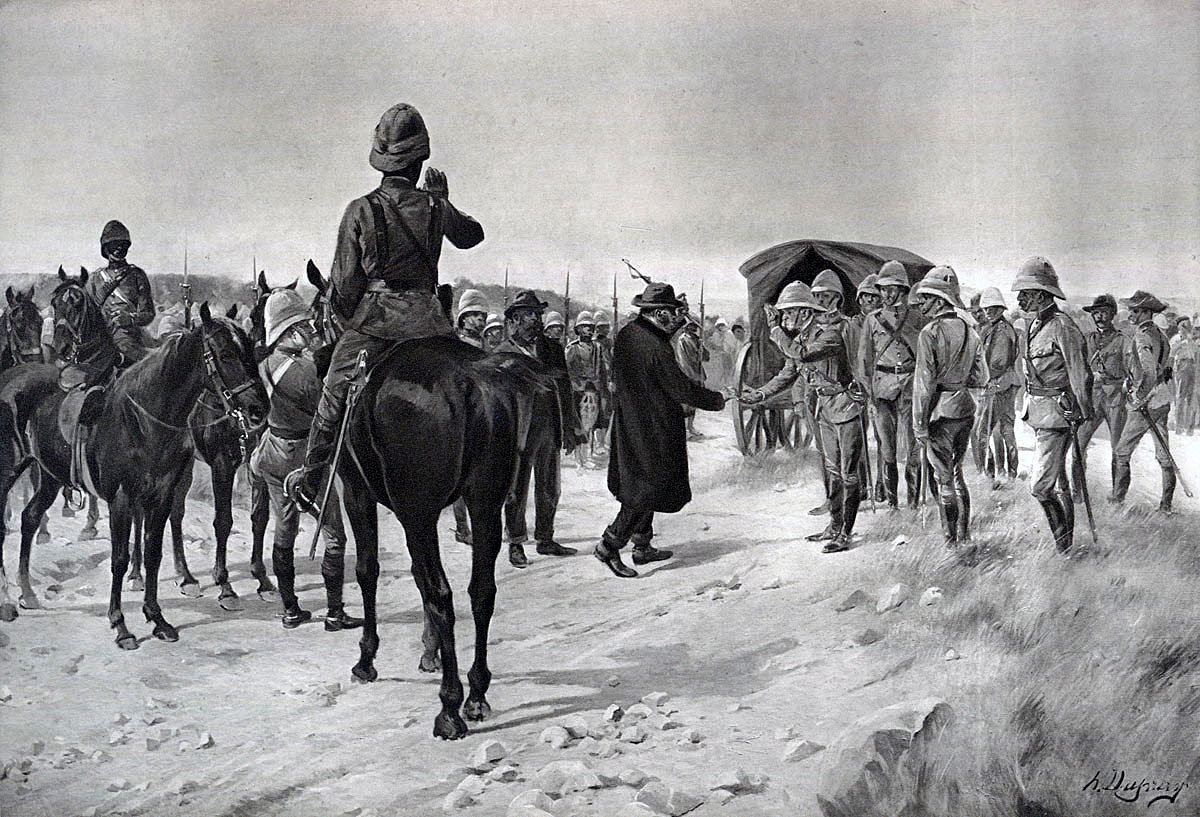
Piet Cronje, Boer Commander, surrenders to Lord Roberts at the Battle of Paardeberg on 27th February 1900 in the Great Boer War: picture by Henri Dupray
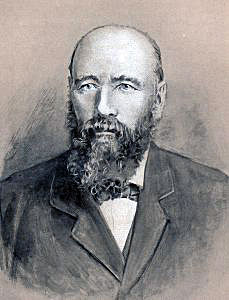
Piet Cronje, Boer Commander at the Battle of Paardeberg on 27th February 1900 in the Great Boer War
War: The Boer War.
Date of the end of the Battle of Paardeberg: 27th February 1900.
Place of the Battle of Paardeberg: North West of Cape Colony in South Africa on the border with the Orange Free State.
Combatants at the Battle of Paardeberg: British against the Boers.
Commanders at the Battle of Paardeberg: Lord Roberts and Lord Kitchener against General Cronje.
Size of the armies at the Battle of Paardeberg: 15,000 British troops against 7,000 Boers.
Uniforms, arms and equipment at the Battle of Paardeberg: The Boer War was a serious jolt for the British Army. At the outbreak of the war British tactics were appropriate for the use of single shot firearms, fired in volleys controlled by company and battalion officers; the troops fighting in close order. The need for tight formations had been emphasised time and again in colonial fighting. In the Zulu and Sudan Wars overwhelming enemy numbers armed principally with stabbing weapons were easily kept at a distance by such tactics; but, as at Isandlwana, would overrun a loosely formed force. These tactics had to be entirely rethought in battle against the Boers armed with modern weapons.
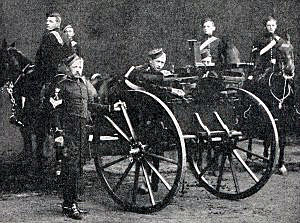
10th Hussars Nordenfeldt Gun detachment: Battle of Paardeberg on 27th February 1900 in the Great Boer War
In the months before hostilities the Boer commandant general, General Joubert, bought 30,000 Mauser magazine rifles and a number of modern field guns and automatic weapons from the German armaments manufacturer Krupp and the French firm Creusot. The commandoes, without formal discipline, welded into a fighting force through a strong sense of community and dislike for the British. Field Cornets led burghers by personal influence not through any military code. The Boers did not adopt military formation in battle, instinctively fighting from whatever cover there might be. The preponderance were countrymen, running their farms from the back of a pony with a rifle in one hand. These rural Boers brought a life time of marksmanship to the war, an important edge, further exploited by Joubert’s consignment of magazine rifles. Viljoen is said to have coined the aphorism ‘Through God and the Mauser’. With strong fieldcraft skills and high mobility the Boers were natural mounted infantry. The urban burghers and foreign volunteers readily adopted the fighting methods of the rest of the army.
16th Lancers at the Battle of Paardeberg on 27th February 1900 in the Great Boer War
Other than in the regular uniformed Staats Artillery and police units, the Boers wore their everyday civilian clothes on campaign.
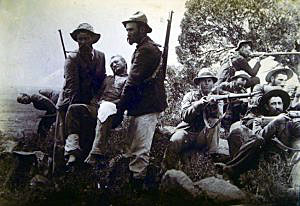
Boers at the Battle of Paardeberg on 27th February 1900 in the Great Boer War
After the first month, the Boers lost their numerical superiority, spending the rest of the formal war on the defensive against British forces that regularly outnumbered them.
British tactics, little changed from the Crimea, used at Modder River, Magersfontein, Colenso and Spion Kop were incapable of winning battles against entrenched troops armed with modern magazine rifles. Every British commander made the same mistake; Buller; Methuen, Roberts and Kitchener. When General Kelly-Kenny attempted to winkle Cronje’s commandoes out of their riverside entrenchments at Paardeberg using his artillery, Kitchener intervened and insisted on a battle of infantry assaults; with the same disastrous consequences as Colenso, Modder River, Magersfontein and Spion Kop.
Some of the most successful British troops were the non-regular regiments; the City Imperial Volunteers, the South Africans, Canadians, Australians and New Zealanders, who more easily broke from the habit of traditional European warfare, using their horses for transport rather than the charge, advancing by fire and manoeuvre in loose formations and making use of cover, rather than the formal advance into a storm of Mauser bullets.
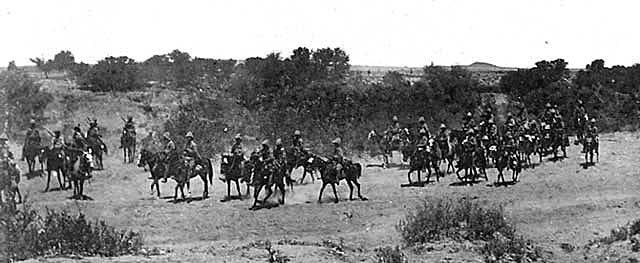
General French’s Cavalry Division at Klip Drift: Battle of Paardeberg on 27th February 1900 in the Great Boer War: picture by W.S. Small
Uniform: The British regiments made an uncertain change into khaki uniforms in the years preceding the Boer War, with the topee helmet as tropical headgear. Highland regiments in Natal devised aprons to conceal coloured kilts and sporrans. By the end of the war the uniform of choice was a slouch hat, drab tunic and trousers; the danger of shiny buttons and too ostentatious emblems of rank emphasised in several engagements with disproportionately high officer casualties.
Canadians at the Battle of Paardeberg on 27th February 1900 in the Great Boer War: picture by A.H. Hider
The British infantry were armed with the Lee Metford magazine rifle firing 10 rounds. But no training regime had been established to take advantage of the range, accuracy and speed of fire of the weapon. Personal skills such as scouting and field craft were little taught. The idea of fire and movement was unknown, many regiments still going into action in close order. Notoriously General Hart insisted that his Irish Brigade fight shoulder to shoulder as if on parade in Aldershot. Short of regular troops, Britain engaged volunteer forces from Britain, Canada, Australia and New Zealand who brought new ideas and more imaginative formations to the battlefield.
The British regular troops lacked imagination and resource. Routine procedures such as effective scouting and camp protection were often neglected. The war was littered with incidents in which British contingents became lost or were ambushed often unnecessarily and forced to surrender. The war was followed by a complete re-organisation of the British Army.
General French’s Cavalry Division: Battle of Paardeberg on 27th February 1900 in the Great Boer War: picture by Richard Caton Woodville
The British artillery was a powerful force in the field, underused by commanders with little training in the use of modern guns in battle.
The Royal Field Artillery fought with 15 pounder guns; the Royal Horse Artillery with 12 pounders and the Royal Garrison Artillery batteries with 5-inch howitzers. The Royal Navy provided heavy field artillery with a number of 4.7 inch naval guns mounted on field carriages devised by Captain Percy Scott of HMS Terrible.
Automatic weapons were used by the British usually mounted on special carriages accompanying the cavalry.
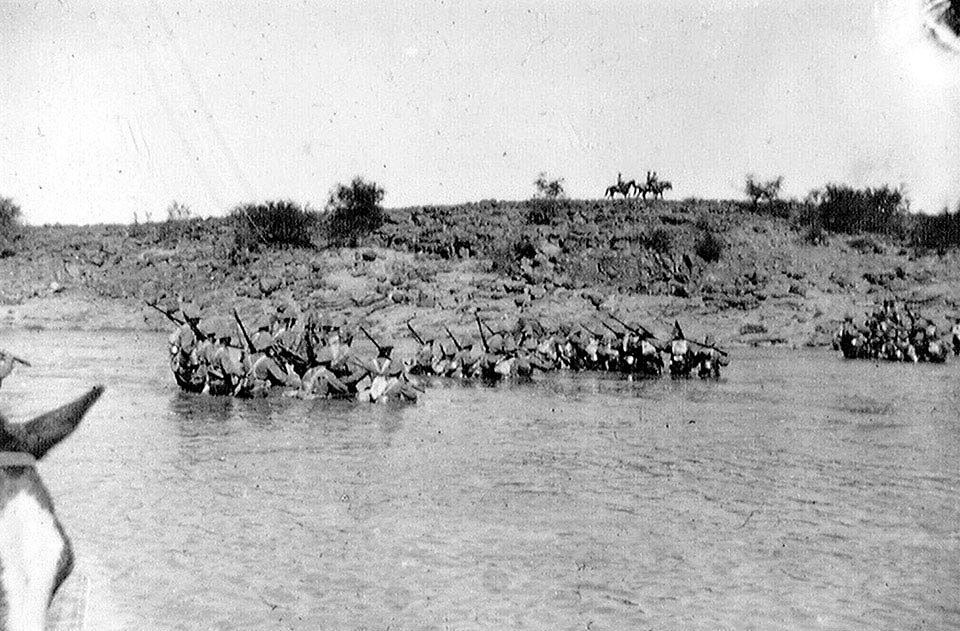
Canadian infantry crossing Paardeberg Drift at the Battle of Paardeberg on 27th February 1900 in the Great Boer War
Winner of the Battle of Paardeberg: The British
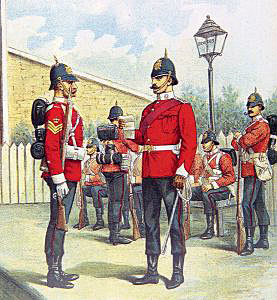
Wiltshire Regiment in Home Service Uniform: Battle of Paardeberg on 27th February 1900 in the Great Boer War: picture by Richard Simpkin
British Regiments at the Battle of Paardeberg:
Sixth Division (commanded by Lieutenant General Kelly-Kenny)
Twelfth Brigade:
2nd Bedfordshire Regiment.
1st Royal Irish Regiment.
2nd Worcestershire Regiment.
2nd Wiltshire Regiment.
Thirteenth Brigade (commanded by Major General Knox)
2nd East Kent Regiment (‘the Buffs’).
2nd Gloucestershire Regiment.
1st West Riding Regiment.
1st Oxfordshire Light Infantry.
Royal Field Artillery: 76th, 81st and 82nd Batteries.
Royal Engineers: 38th Company.
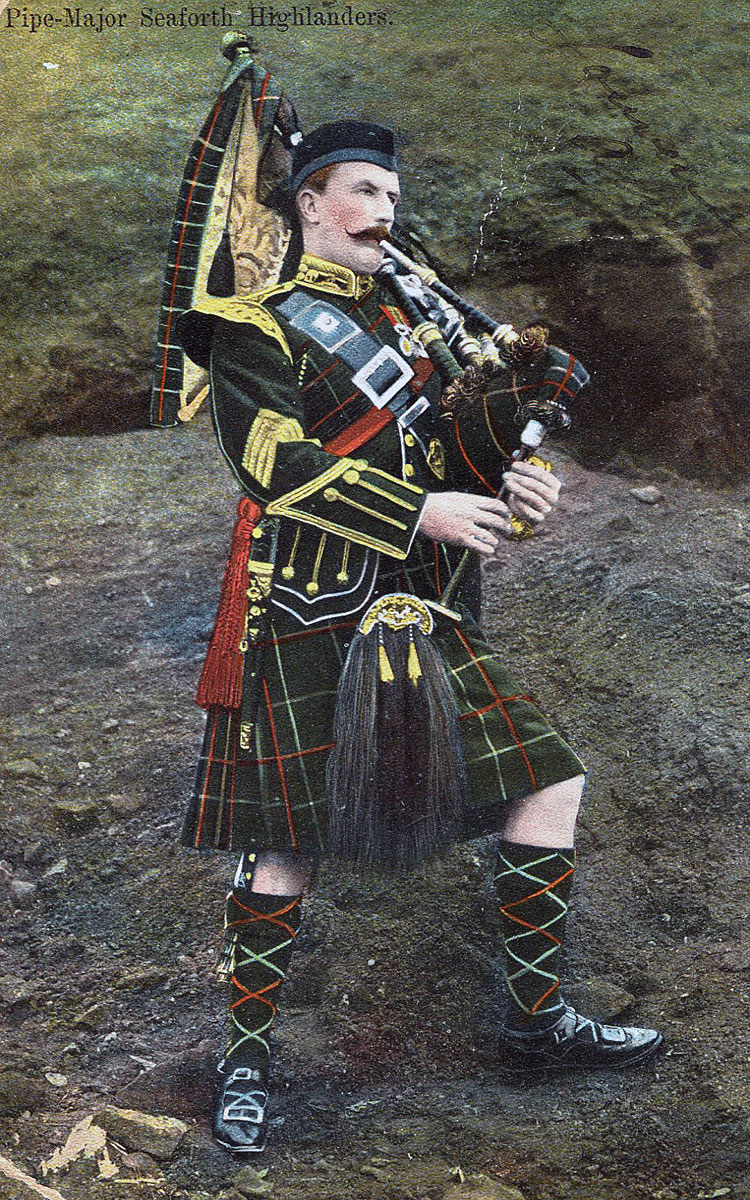
Pipe Major of the Seaforth Highlanders: Battle of Paardeberg on 27th February 1900 in the Great Boer War
Ninth Division (commanded by Major General Colville)
Third Highland Brigade (Major General McDonald)
2nd Black Watch.
1st Highland Light Infantry.
2nd Seaforth Highlanders.
1st Argyll and Sutherland Highlanders.
Eighteenth Brigade:
2nd Royal Warwickshire Regiment.
1st Yorkshire Regiment.
1st Welsh Regiment.
1st Essex Regiment.
The Cavalry Division (commanded by Lieutenant General French)
First Brigade (Broadwood)
Household Cavalry Regiment.
10th Hussars.
12th Lancers.
Second Brigade (Porter)
6th Dragoon Guards (Carabineers)
2nd Dragoons (Royal Scots Greys)
6th Dragoons (Inniskillings)
New Zealanders.
Australians.
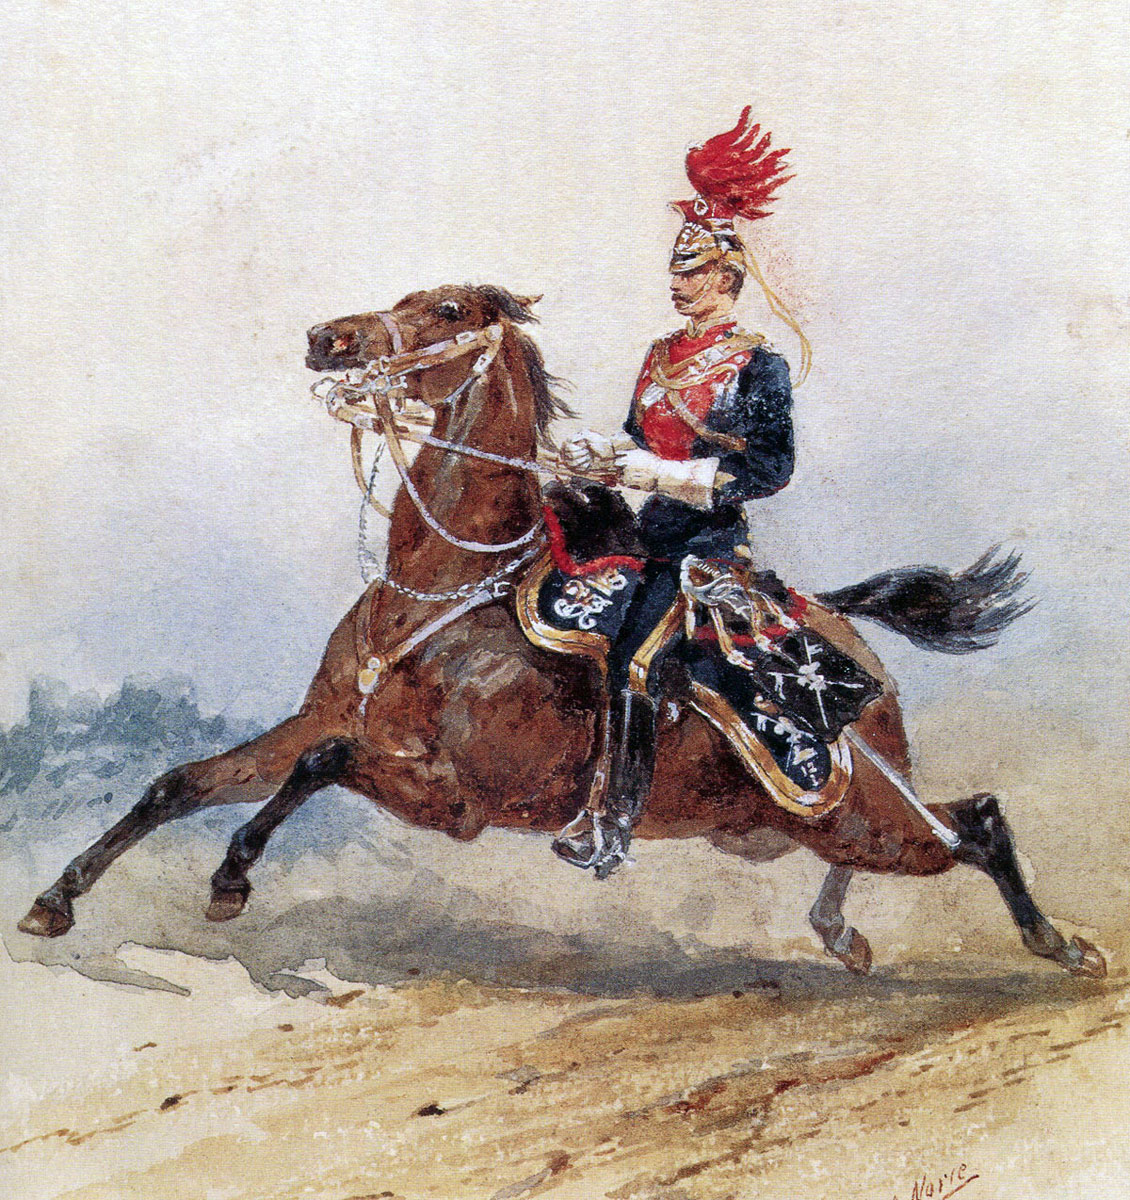
12th Lancer in Home Service Uniform: Battle of Paardeberg on 27th February 1900 in the Great Boer War: picture by Orlando Norie
Third Brigade (Gordon)
9th Lancers.
16th Lancers.
Royal Horse Artillery: G, P, O, R, Q, T and U Batteries.
Reserve:
2nd Duke of Cornwall’s Light Infantry.
2nd Shropshire Light Infantry.
2nd Gordon Highlanders.
Royal Canadian Regiment.
Robert’s Horse.
Kitchener’s Horse.
City of London Imperial Volunteers.
Royal Field Artillery: 2nd, 38th, 39th, 44th and 88th Field Batteries.
A Battery RHA.
37th and 65th Howitzer Batteries.
Three Royal Naval 4.7 inch guns.
Siege Train.
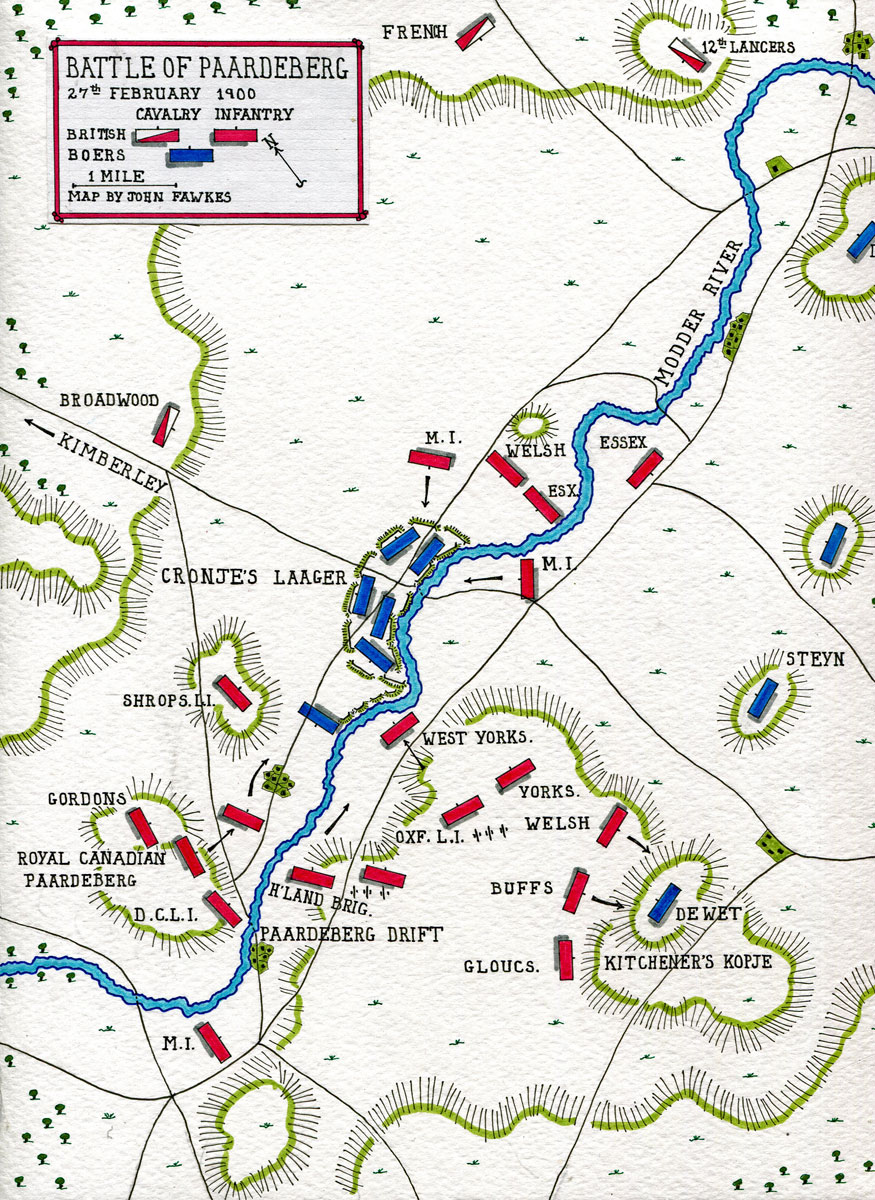
Map of the Battle of Paardeberg on 27th February 1900 in the Great Boer War: map by John Fawkes
Account of the Battle of Paardeberg:
In the last months of 1899, General Cronje’s Boer army fought a series of battles against General Lord Methuen’s British army that was advancing up the western border of the Orange Free State to relieve the important diamond town of Kimberley, held by a British garrison and under siege by the Boers.
At the battle of Magersfontein on 11th December 1899 Methuen was heavily defeated by Cronje and his advance halted.
With the arrival in South Africa at the beginning of 1900 of Lord Roberts, Lord Kitchener and substantial reinforcements and the British advance towards Kimberley, General Cronje resolved to abandon his position around the Magersfontein Hills and retreat east along the Modder River back to the Orange Free State.
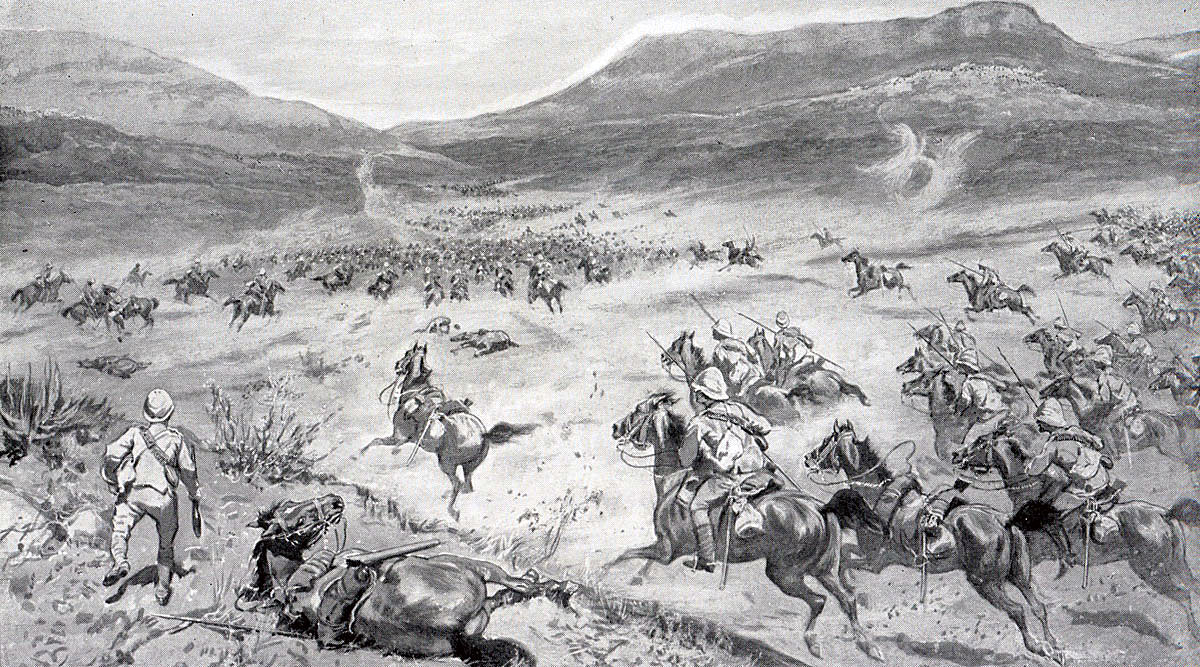
As Cronje made his preparations, General French swept past the Boer positions with the British Cavalry Division into Kimberley, ending the siege, although French’s ride across the Veldt came near to wrecking his regiments by its destruction of horses.
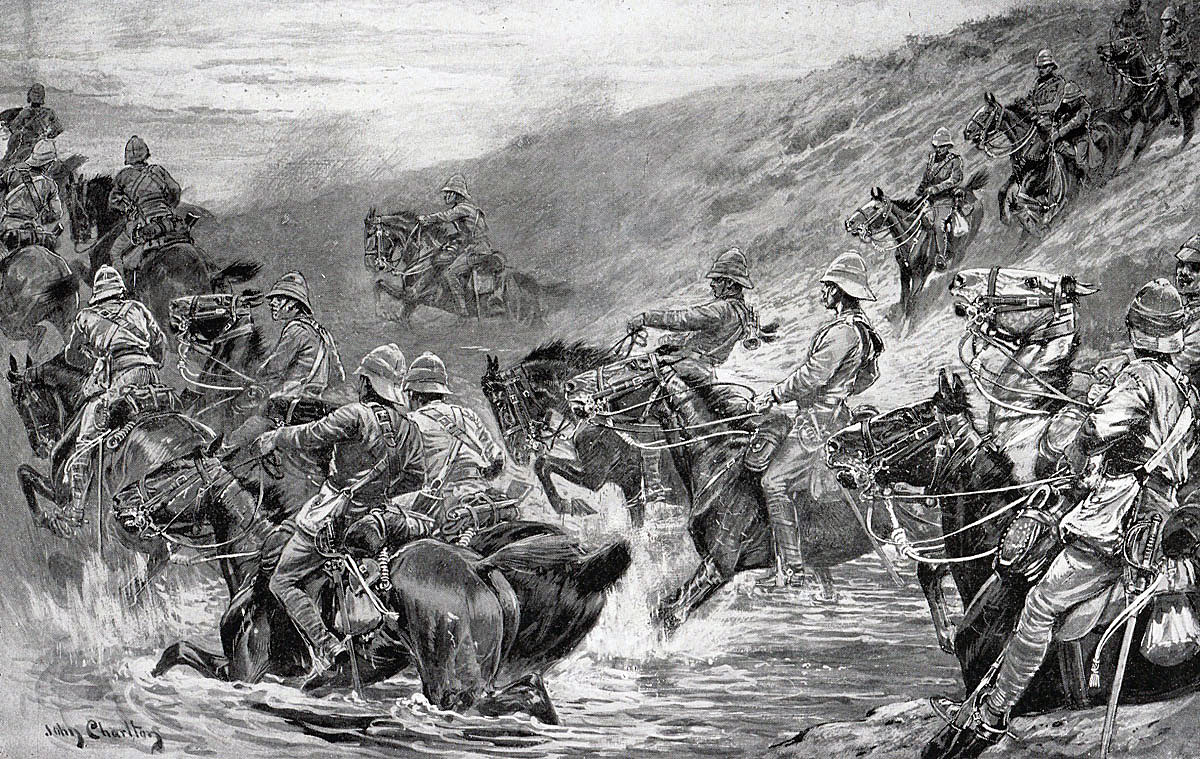
General French’s ride to Kimberley: Battle of Paardeberg on 27th February 1900 in the Great Boer War: picture by John Charlton
On 15th February 1900, General Cronje, his Boer army and an enormous column of ox drawn wagons started the slow march towards Bloemfontein, covering ten miles a day.
Cronje and his force marched around Lieutenant General Kelly-Kenny’s Sixth Division, encamped on the Modder River and continued east. General French, alerted by a mounted infantry patrol, pursued the cumbersome column with the remnants of his division and came up with it at Paardeberg Drift on the Modder River.
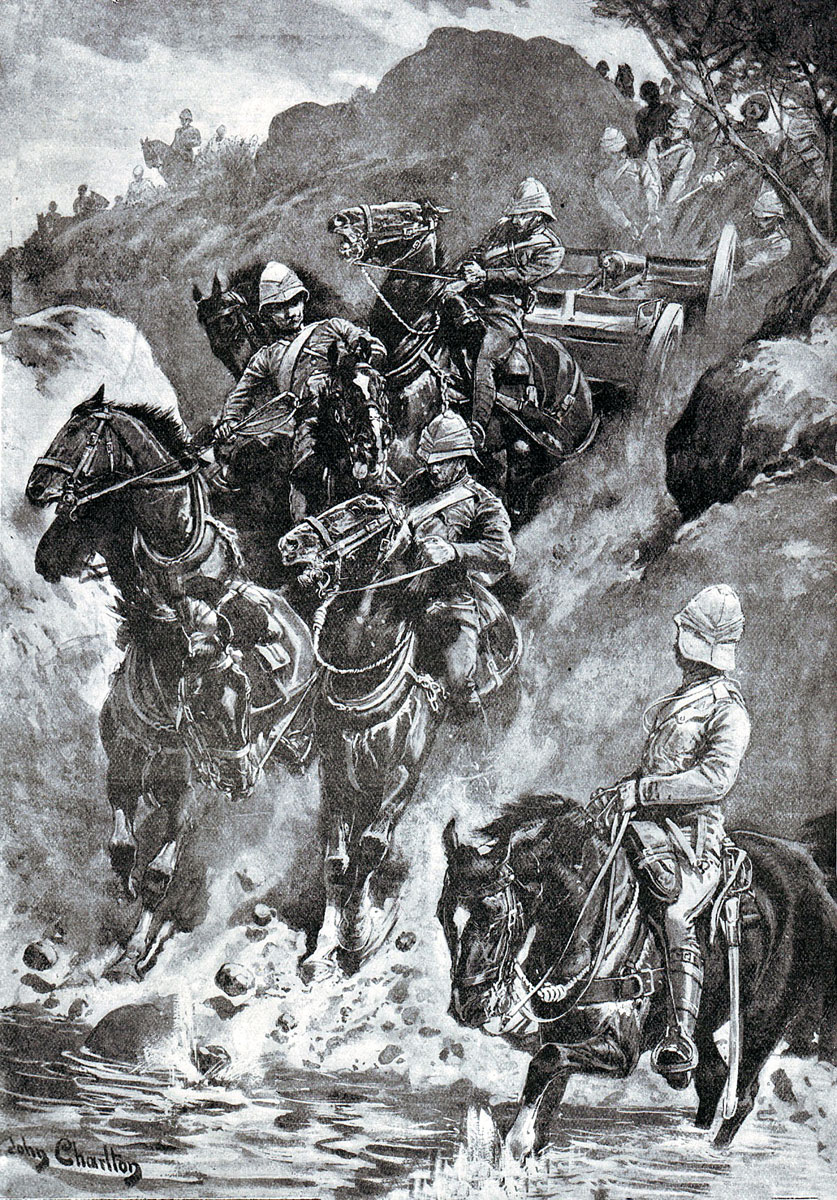
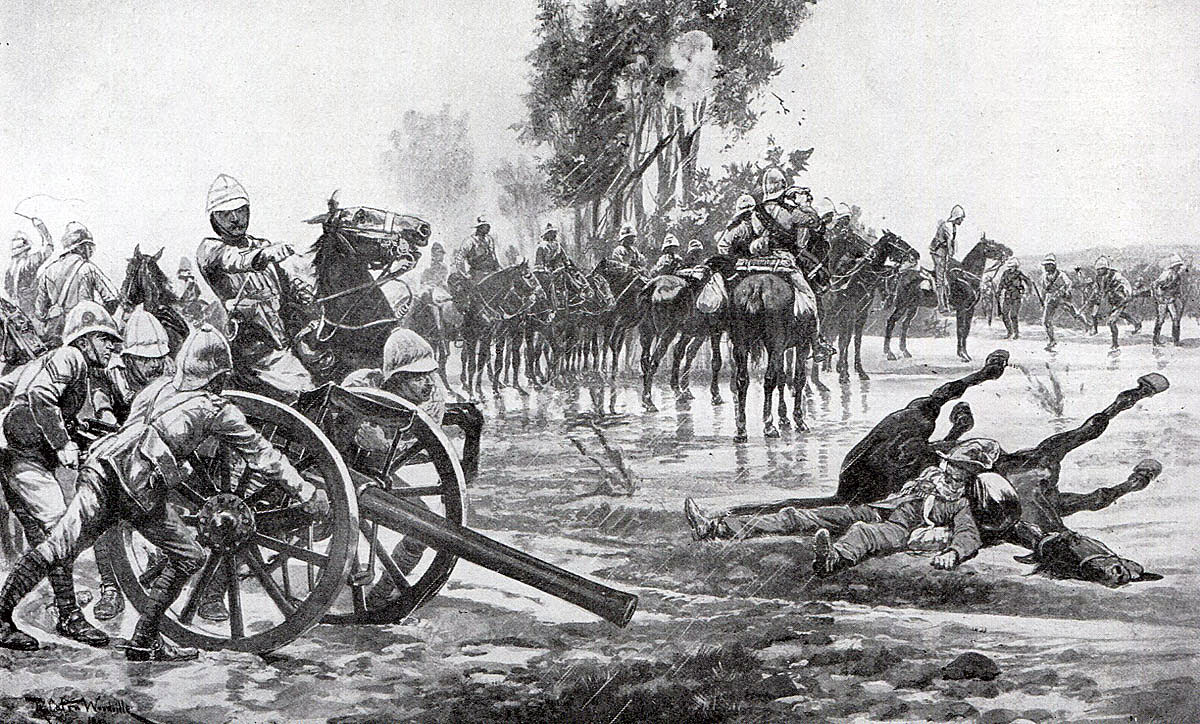
Royal Horse Artillery descending into a spruit during the Battle of Paardeberg on 27th February 1900 in the Great Boer War: picture by John Charlton
Cronje would probably have been able to push aside French’s small force of some 1,500 troopers, but chose to halt and entrench his Boer riflemen on the banks of the Modder River.
Cronje’s halt enabled Kelly-Kenny’s infantry division to march up and surround the Boer positions.
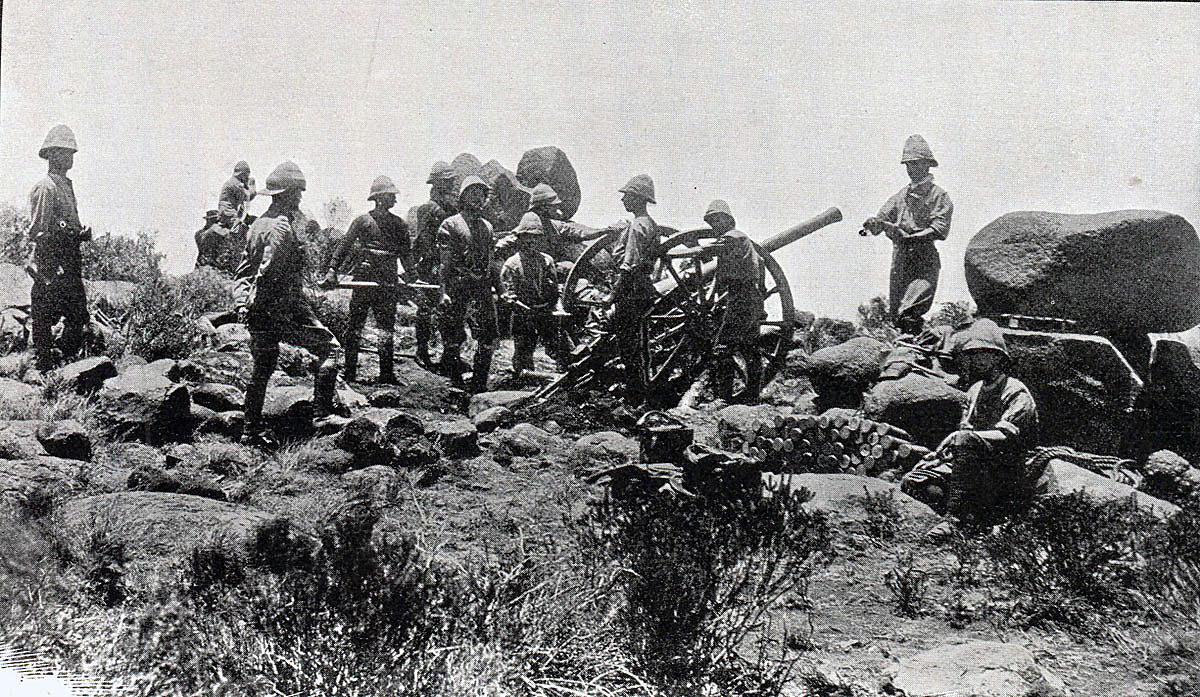
Royal Field Artillery 15 pounder in action: Battle of Paardeberg on 27th February 1900 in the Great Boer War
Kelly-Kenny had absorbed the painful lesson of the early battles of the war: that positions held by entrenched Boers, armed with magazine rifles and modern artillery, could only be attacked at great loss, with doubtful prospects of success. Kelly-Kenny’s plan was to use his overwhelming preponderance of artillery to bombard Cronje’s Boer force into submission.
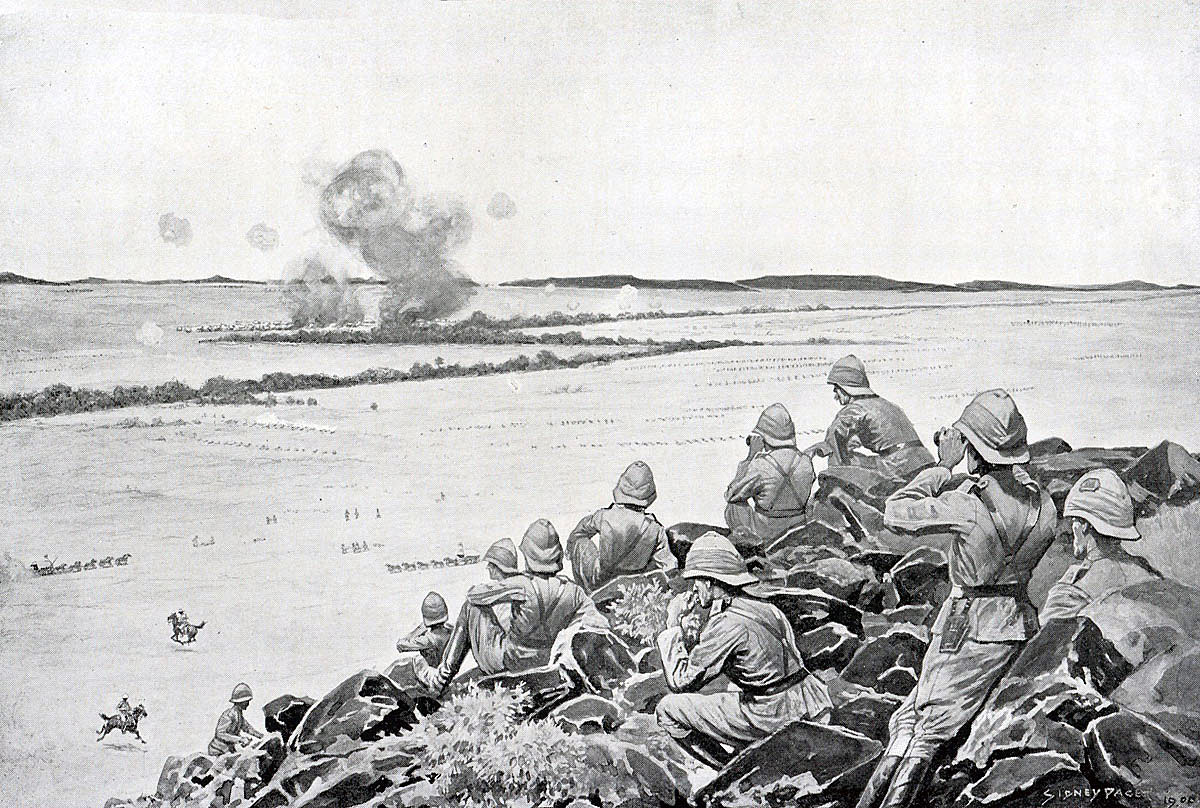
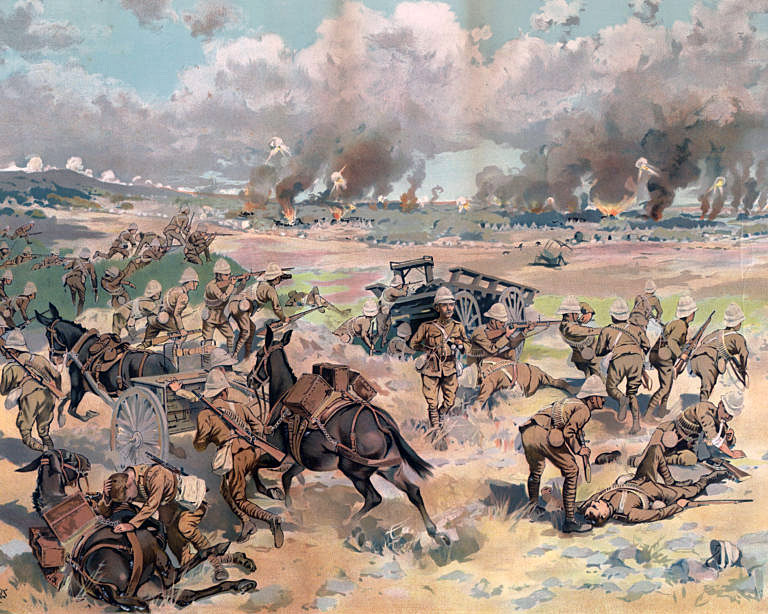
Battle of Paardeberg on 27th February 1900 in the Great Boer War; British shells can be seen exploding over the Boer laager: picture by Stanley Paget
The battle began in the early hours of Sunday 18th February 1900. The British artillery opened fire and the Boer positions becoming increasingly untenable, as numbers of wagons and oxen were blown to pieces.
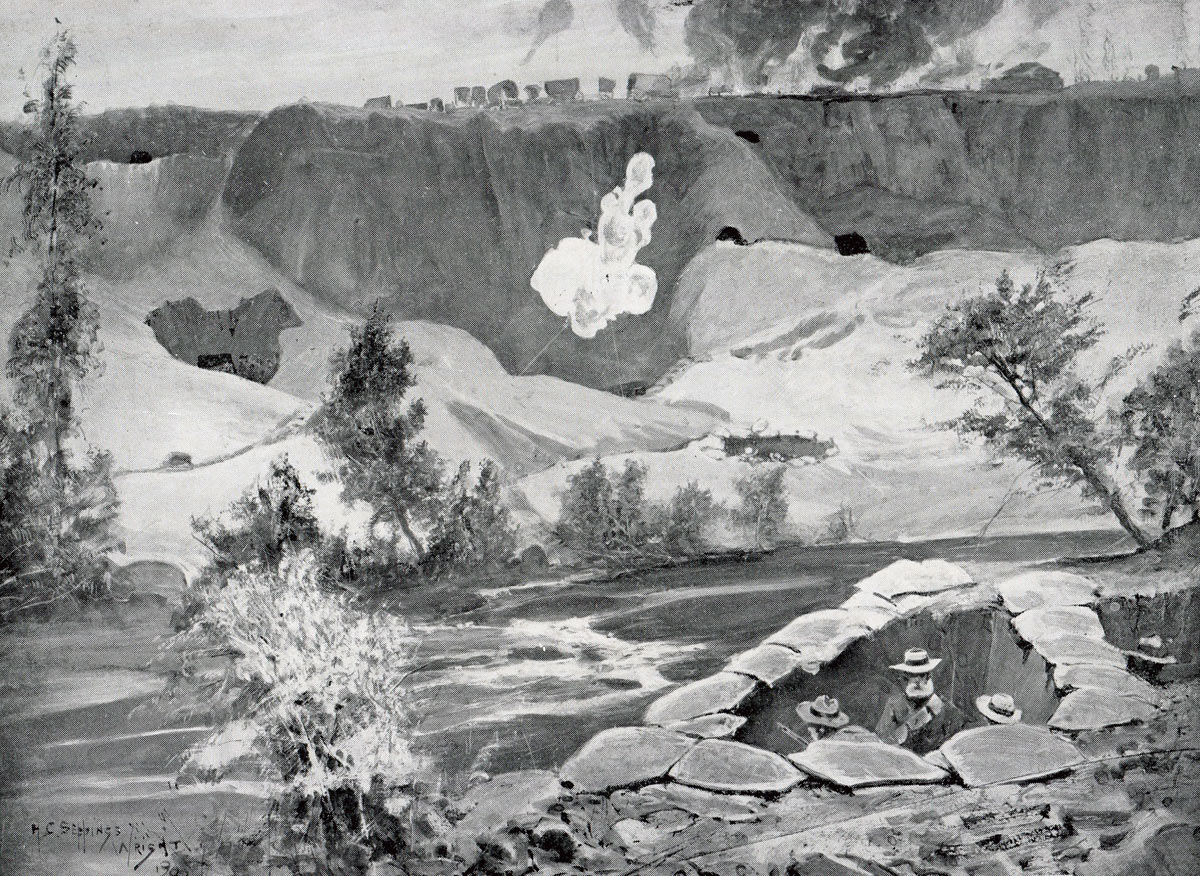
Boer positions on the Modder River at the Battle of Paardeberg on 27th February 1900 in the Great Boer War: picture by H.C. Seppings Wright
The Boers were temporarily reprieved by the arrival of Lord Kitchener, with orders from Lord Roberts putting him in overall command. With his military experience entirely in wars where the premium was on dash and aggression, Kitchener ordered a series of attacks against the Boer positions of the sort that had proved so costly for the British in almost every major battle of the war: Modder River, Magersfontein, Colenso and Spion Kop.
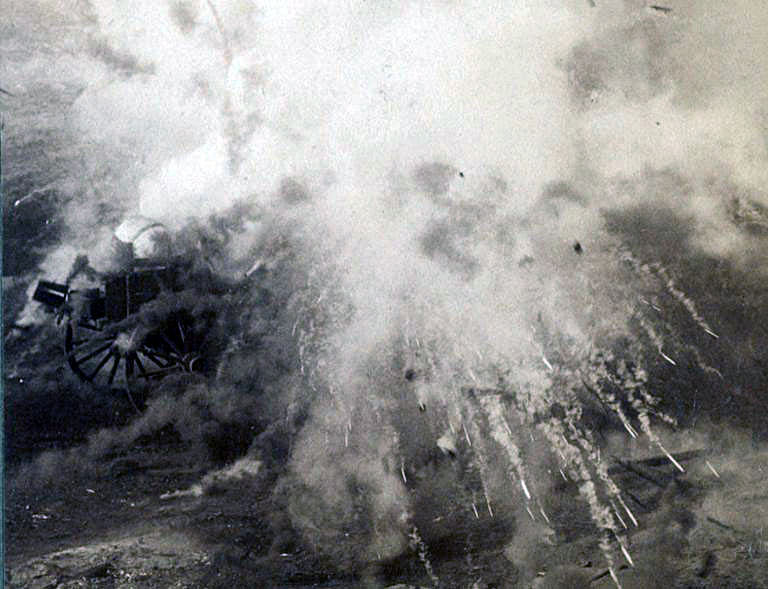
Photograph of a shell exploding in the Boer lines during the Battle of Paardeberg on 27th February 1900 in the Great Boer War
Responding to Kitchener’s orders, Kelly-Kenny’s Sixth Division attacked the Boer entrenchments on the Modder River from the south across open country, while two flanking attacks by Colville’s Ninth Division assaulted the Boers, from the west along the Modder and downstream from the east.
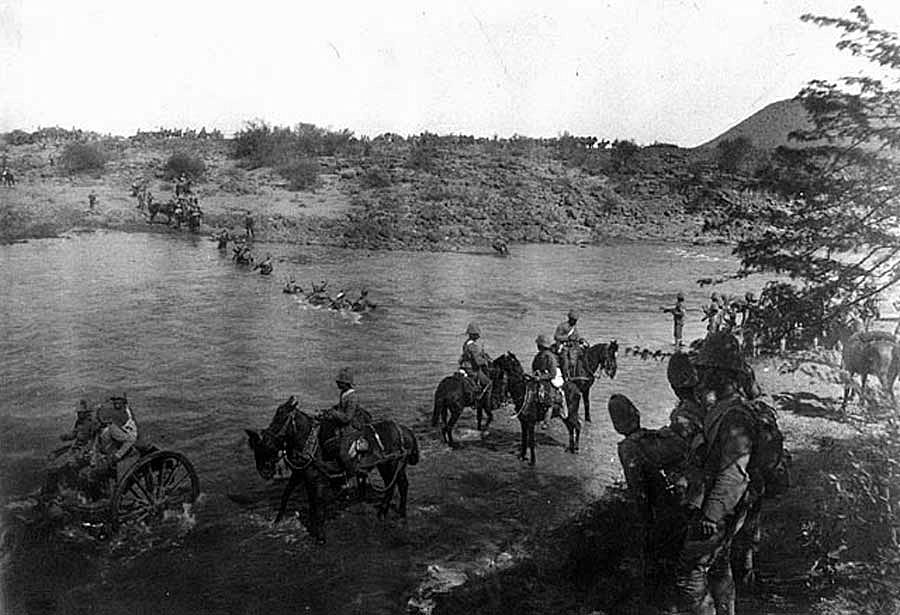
Royal Canadian Regiment crossing Paadeberg Drift during the the Battle of Paardeberg on 27th February 1900 in the Great Boer War
The Sixth Division assault reached the Modder River in places, but the British suffered heavy casualties from the hidden Boer riflemen, doing little damage in return. On the left of the line, the Highland Brigade repeated the experience of Magersfontein, advancing across the Veldt in the face of heavy fire. But the British infantry was learning fast and better use was made of whatever cover could be found. Kelly-Kenny issued orders that no unit of his division was to attempt to cross the river.
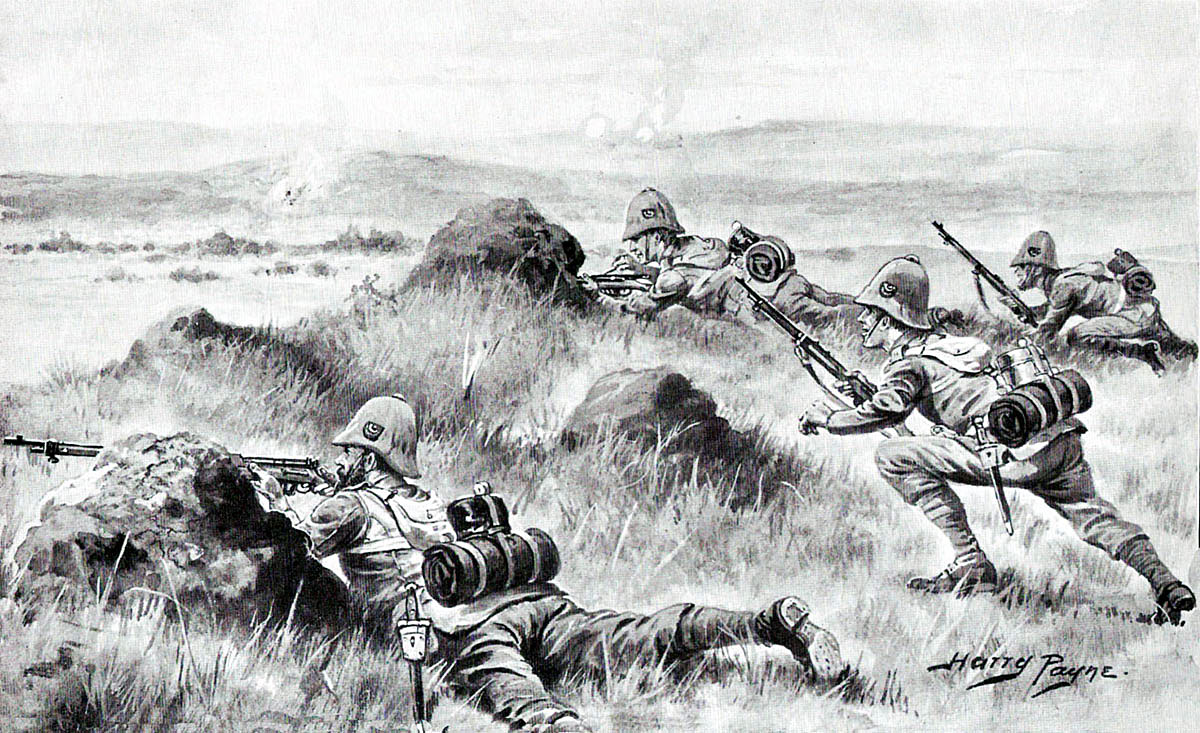
2nd King’s Shropshire Light Infantry at the Battle of Paardeberg on 27th February 1900 in the Great Boer War: picture by Harry Payne
Kitchener directed all the commanders to press their attacks. Kelly-Kenny was sufficiently senior to resist Kitchener and avoided making further frontal assaults with his division.
On Kitchener’s direct command a half battalion of Cornwalls, holding a key kopje on the south-eastern corner of the battle field, was brought forward and committed to the assault.
Once the Cornwalls moved, the Boer leader De Wet, who had been shadowing the battle from a distance with his commando, looking for an opportunity to assist Cronje’s embattled force, took the kopje, known thereafter as Kitchener’s Kopje and gave Cronje his one chance of escaping; a chance Cronje and his men refused to take. Every attempt by the British to displace De Wet failed and it was only when De Wet withdrew from the position that Cronje’s fate was finally sealed.
Canadian Infantry during the Battle of Paardeberg on 27th February 1900 in the Great Boer War
The last British attacks took place at around 5pm from the east. Following suicidal assaults by Colonel Hannay’s Mounted Infantry, the 1st Leinster Regiment attacked only to be forced back with considerable loss.
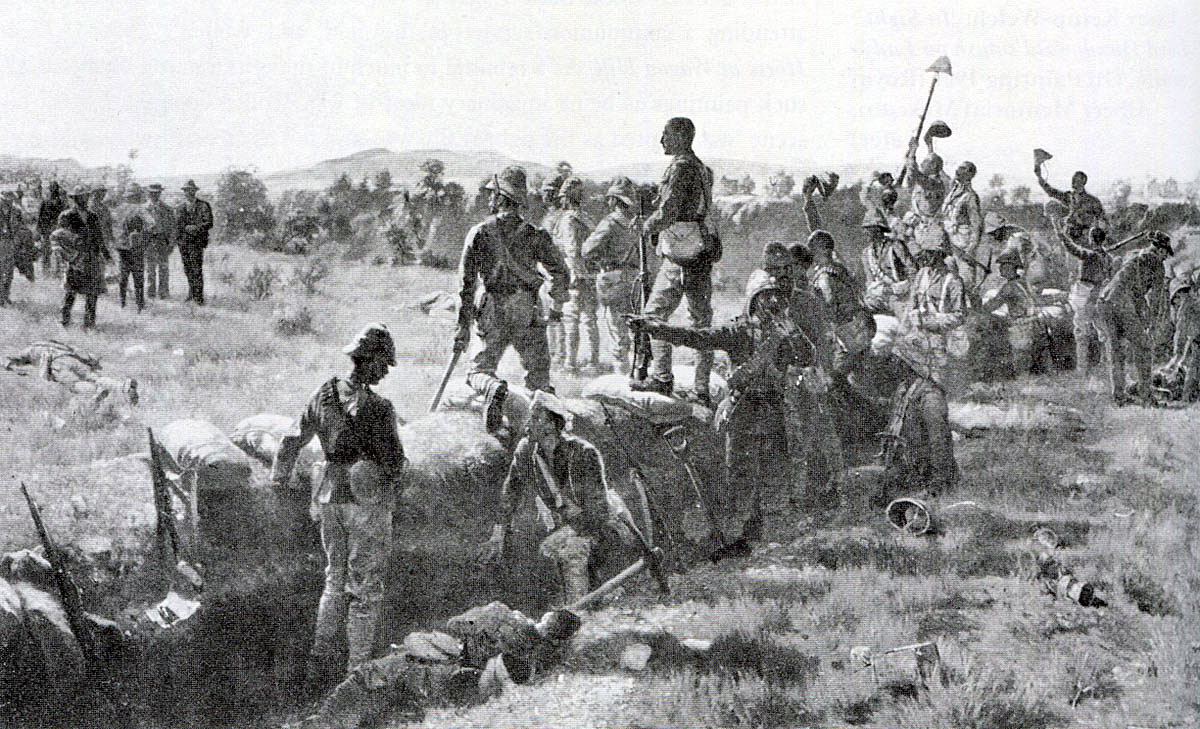
Victors of the Battle of Paardeberg on 27th February 1900 in the Great Boer War: picture by James Princip Beadle
Although the British force was in disarray following the day of costly and abortive assaults, the soldiers making their way back to camp for food and water, the Boers were in worse condition. Few Boers had become casualties but the lengthy bombardment had destroyed virtually all their wagons, oxen and horses.
Lord Roberts arrived on the field on Monday 19th February 1900.
Piet Cronje, Boer Commander, surrenders to Lord Roberts at the Battle of Paardeberg on 27th February 1900 in the Great Boer War: picture by Richard Caton Woodville
Overtures from General Cronje seeking an armistice prevented any further British attack on his laager, although desperate attempts to recover what came to be called ‘Kitchener’s Kopje’ were made against De Wet.
On the Wednesday, Roberts made the decision to retreat. He was saved from what would have been the greatest humiliation of the war by De Wet’s withdrawal from the kopje and Cronje’s surrender the next day, transforming Paardeberg from disaster to triumph.

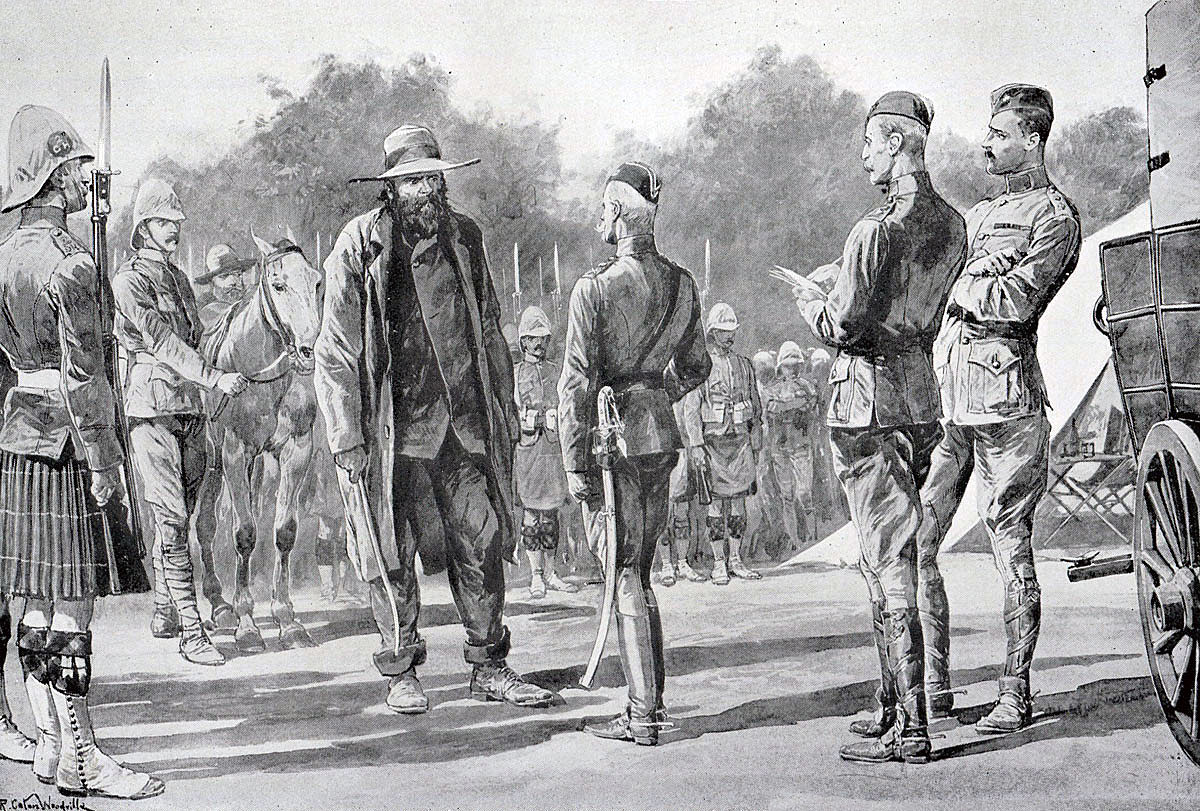
Boers surrender their weapons after the Battle of Paardeberg on 27th February 1900 in the Great Boer War: picture by Richard Caton Woodville
Casualties at the Battle of Paardeberg: British casualties were 1,270, the highest for any day in the war. Boer casualties in the fighting were negligible, but some 4,500 surrendered with Cronje.
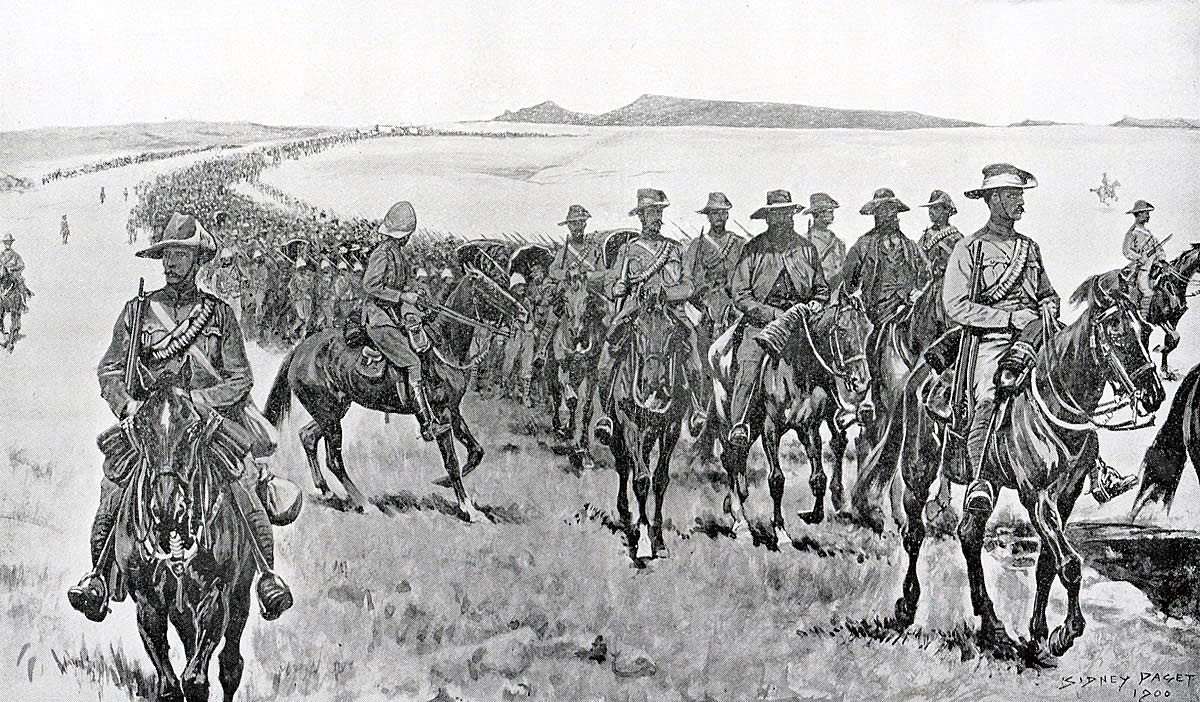
Boer prisoners under escort heading south after the Battle of Paardeberg on 27th February 1900 in the Great Boer War: picture by Sidney Paget
Follow-up to the Battle of Paardeberg: Following the battle and Cronje’s surrender, Lord Roberts marched to Bloemfontein and took the surrender of the capital of the Orange Free State. The period of formal fighting was nearing its end, leading to the extended period of guerrilla warfare.
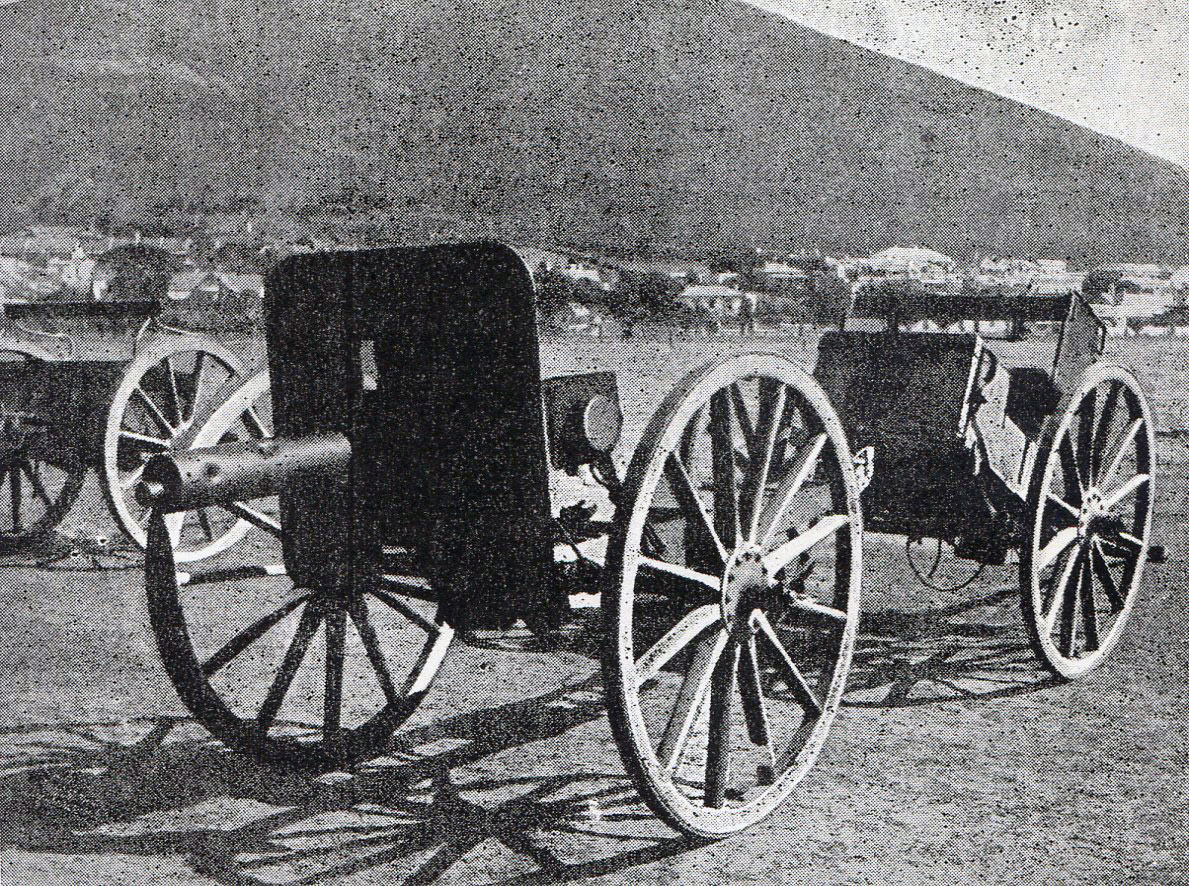
Boer maxim guns captured at the Battle of Paardeberg on 27th February 1900 in the Great Boer War
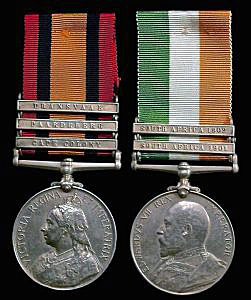
Queen’s South Africa Medal with clasp for ‘Paardeberg’ and King’s South Africa Medal: Battle of Paardeberg on 27th February 1900 in the Great Boer War
Battle Honours:
The Battle of Paardeberg is a battle honour for the British regiments that took part.
In addition British regiments that took part in the Boer War were awarded the battle honour ‘South Africa’ with the dates of their presence in the theatre.
‘Paardeberg’ is a clasp on the Queen’s South Africa Medal.
References for the Battle of Paardeberg:
The Boer War is widely covered. A cross section of interesting volumes would be:
The Great Boer War by Sir Arthur Conan Doyle
Goodbye Dolly Gray by Rayne Kruger
The Boer War by Thomas Pakenham
South Africa and the Transvaal War by Louis Creswicke (6 highly partisan volumes)
The previous battle of the Great Boer War is the Battle of Pieters
The next battle of the Great Boer War is the Siege of Mafeking
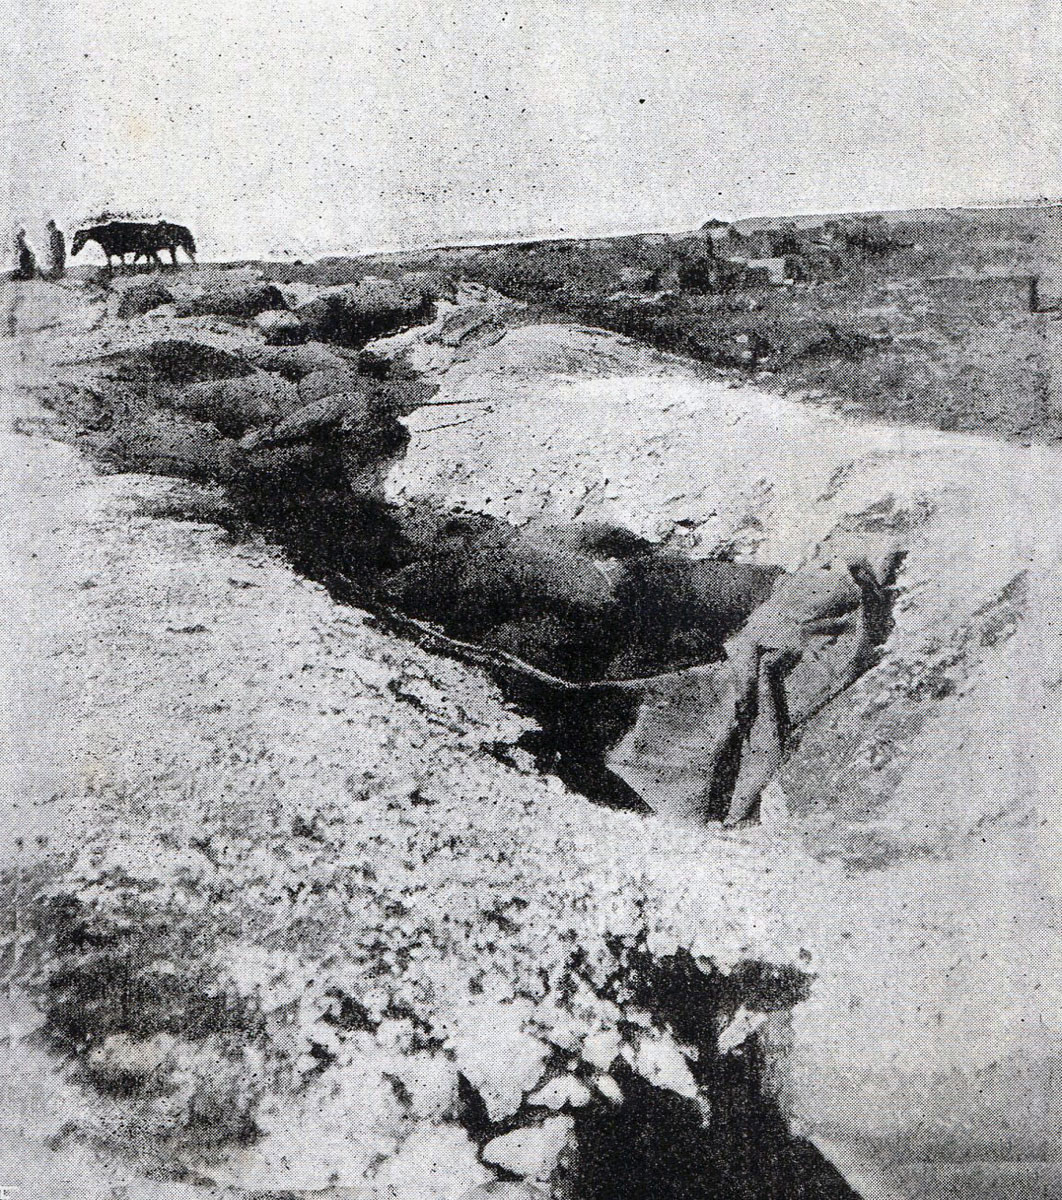
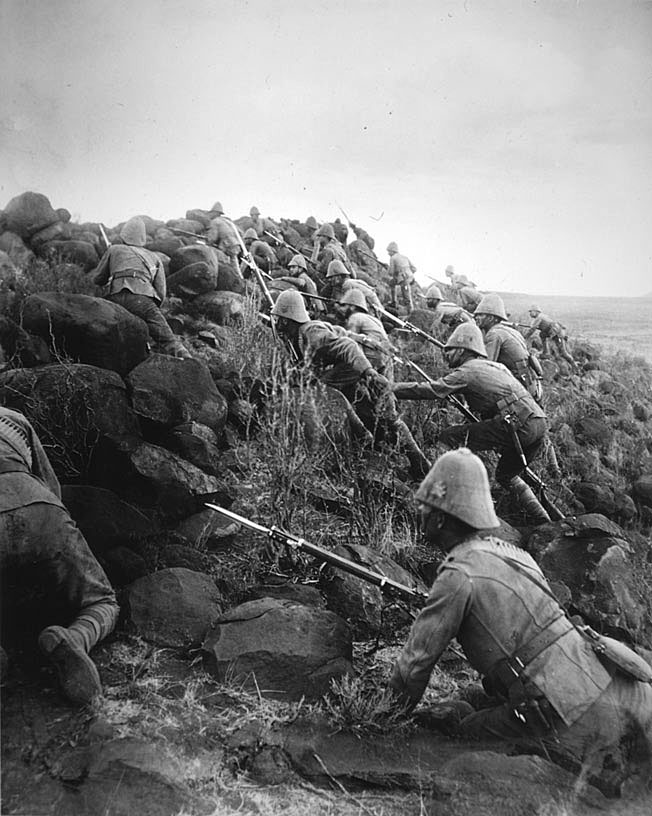
Boer positions at the Battle of Paardeberg on 27th February 1900 in the Great Boer War