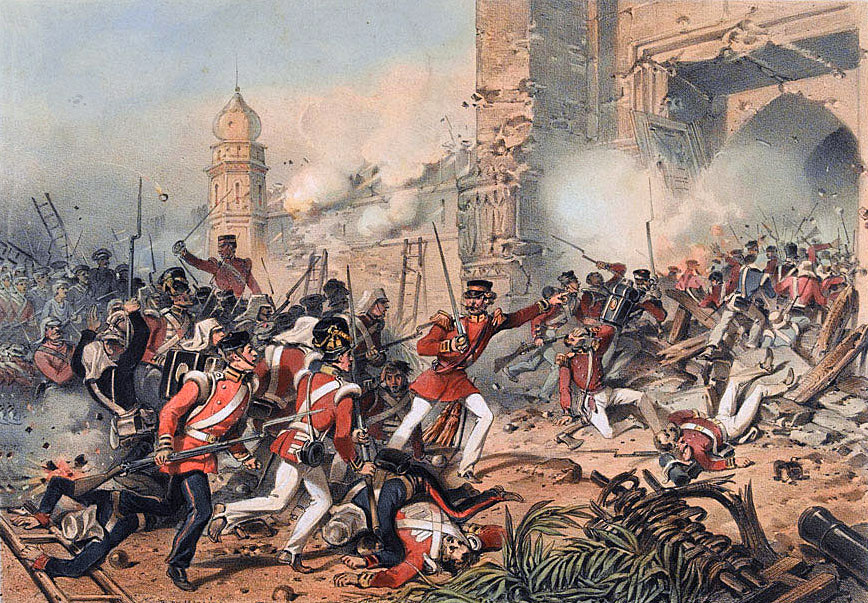
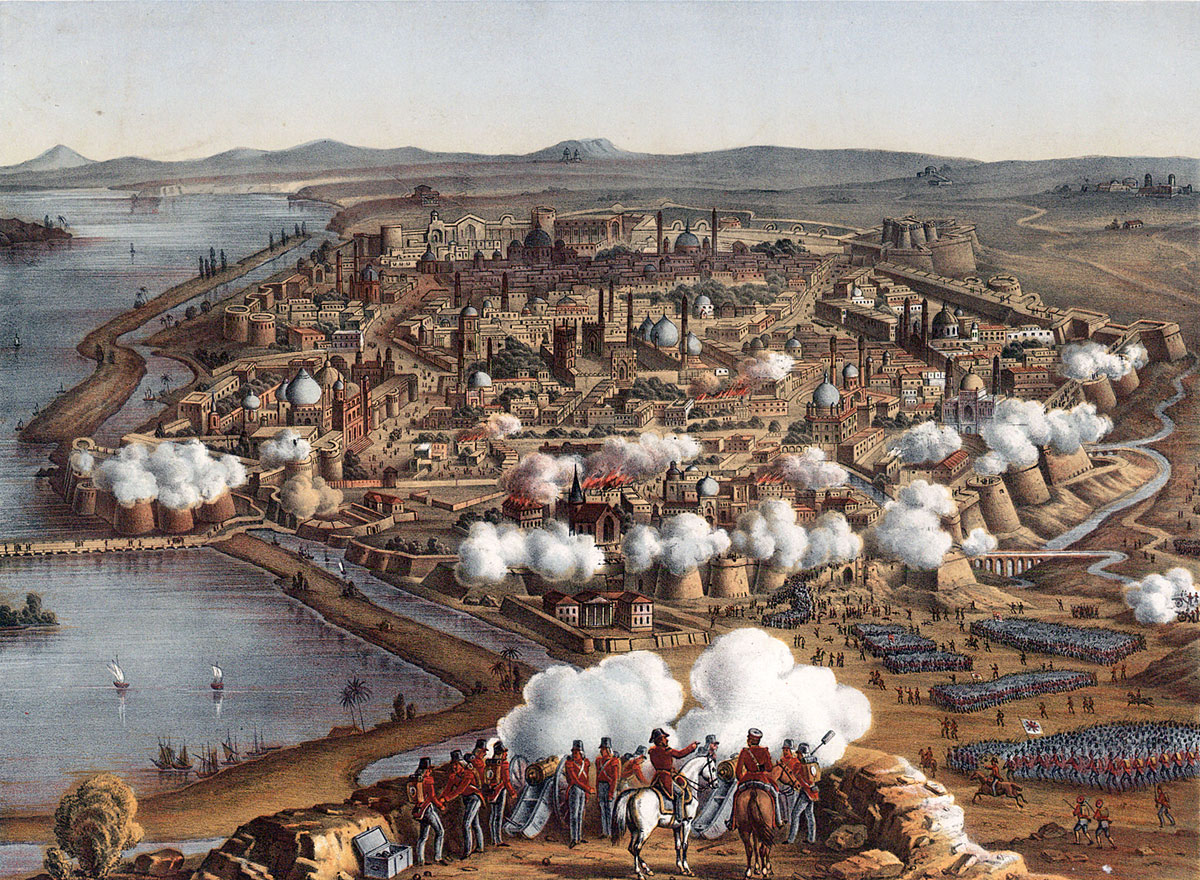
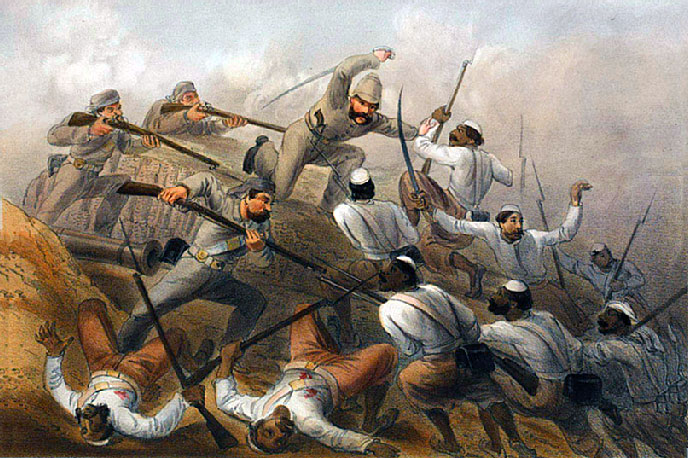
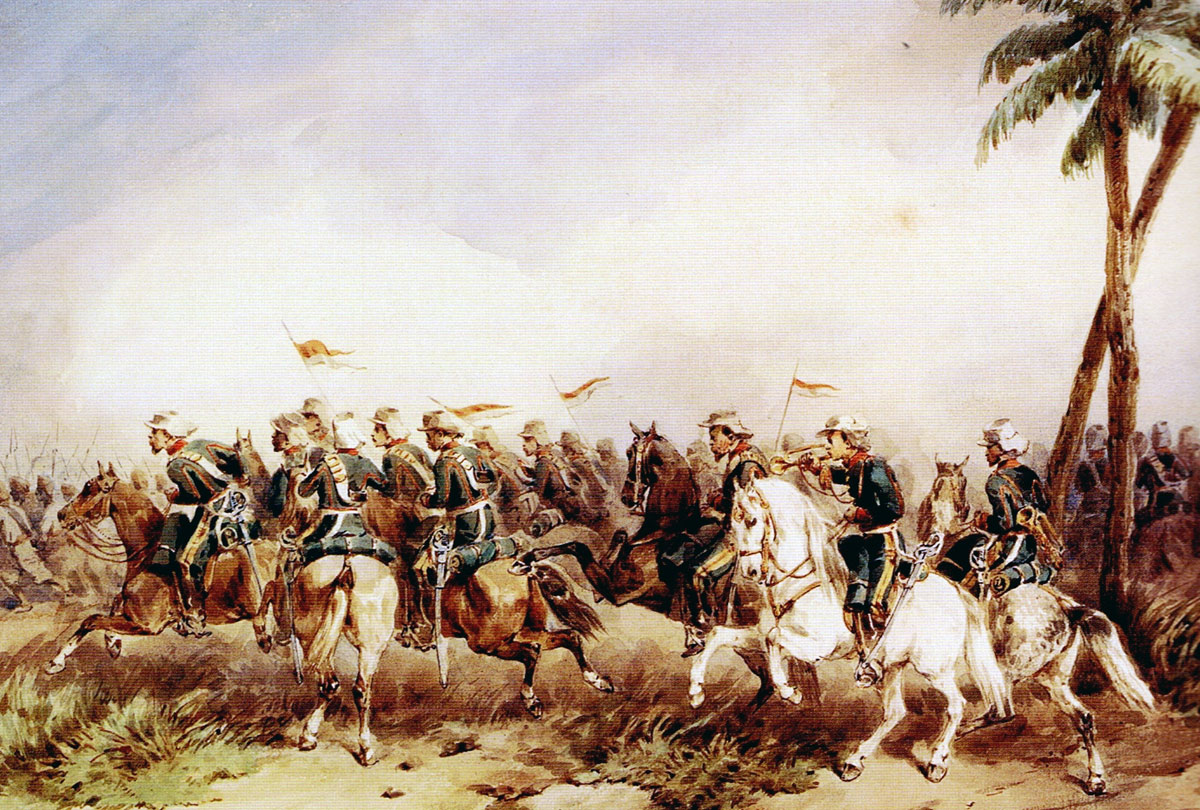
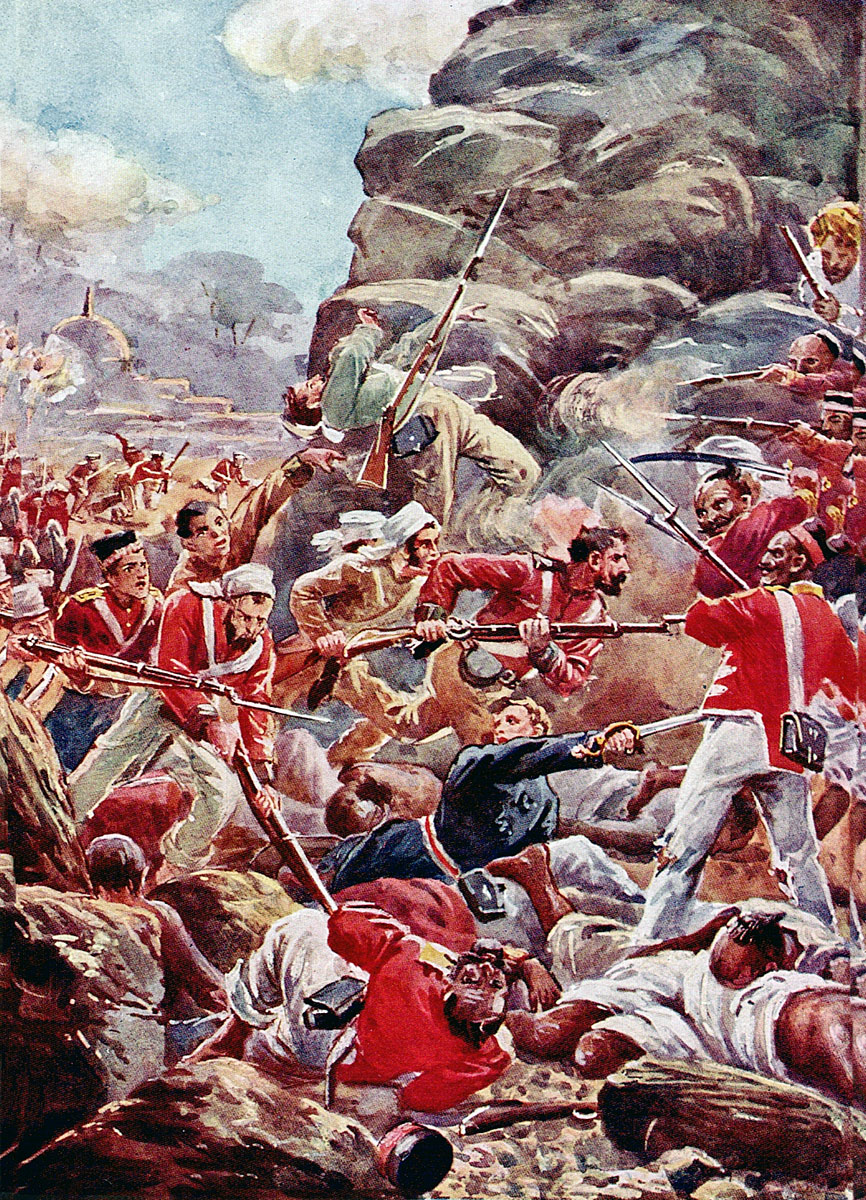
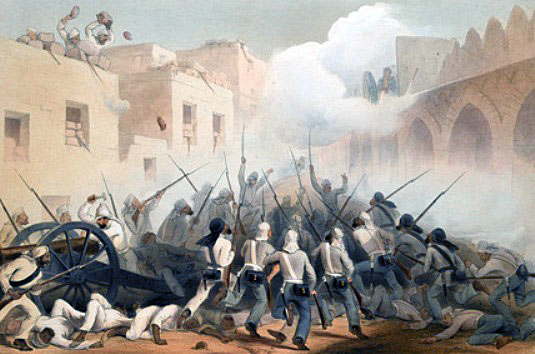
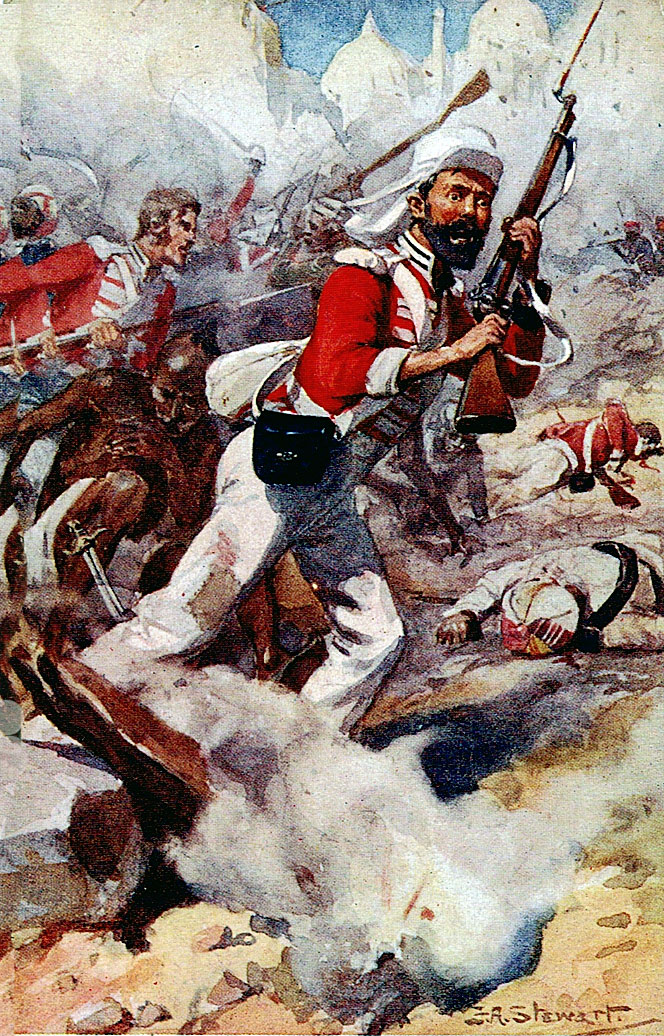
The recapture of Delhi from the Mutineers during the Indian Mutiny of 1857/8
The previous battle of the British Battles series is the Siege of Sevastopol
The next battle in the British Battles series is the Battle of Magdala
War: Indian Mutiny.
Date of the Siege of Delhi: 8th June 1857 to 20th September 1857
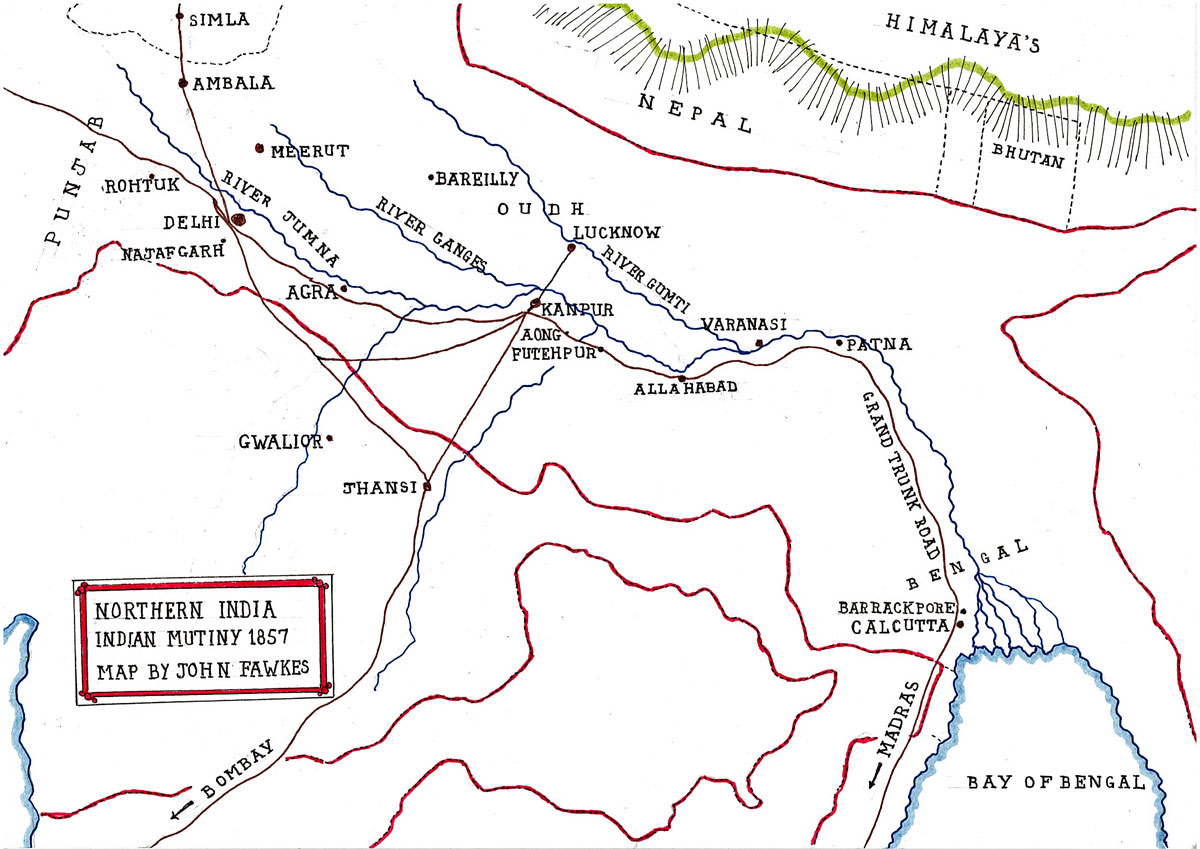
Place of the Siege of Delhi: Delhi, in northern India.
Combatants at the Siege of Delhi: British, Indian and Nepalese troops against the Hindu and Muslim Mutineers and the troops of a number of native rulers. Several other native rulers supported the British and provided them with troops.
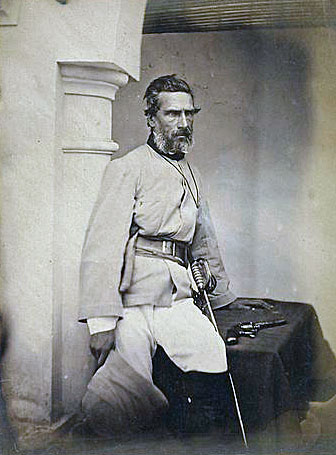
Commanders at the Siege of Delhi: A number of British officers commanded the British Delhi Field Force before Delhi, each one dying or becoming incapacitated by disease or wounds and giving way to his successor.
The Commander-in-Chief in India on the outbreak of the Indian Mutiny General George Anson was at the hill station of Simla.
On 26th May 1857, during the march on Delhi, Anson contracted cholera and died.
Anson was succeeded by General Sir Henry Barnard, a veteran of the Crimean War.
On 5th July 1857, Barnard also died from cholera and was succeeded by General Reed, who, due to his ill-health, handed the command of the Delhi Field Force to Brigadier-General Archdale Wilson.
Wilson commanded the Delhi Field Force for the rest of the campaign.
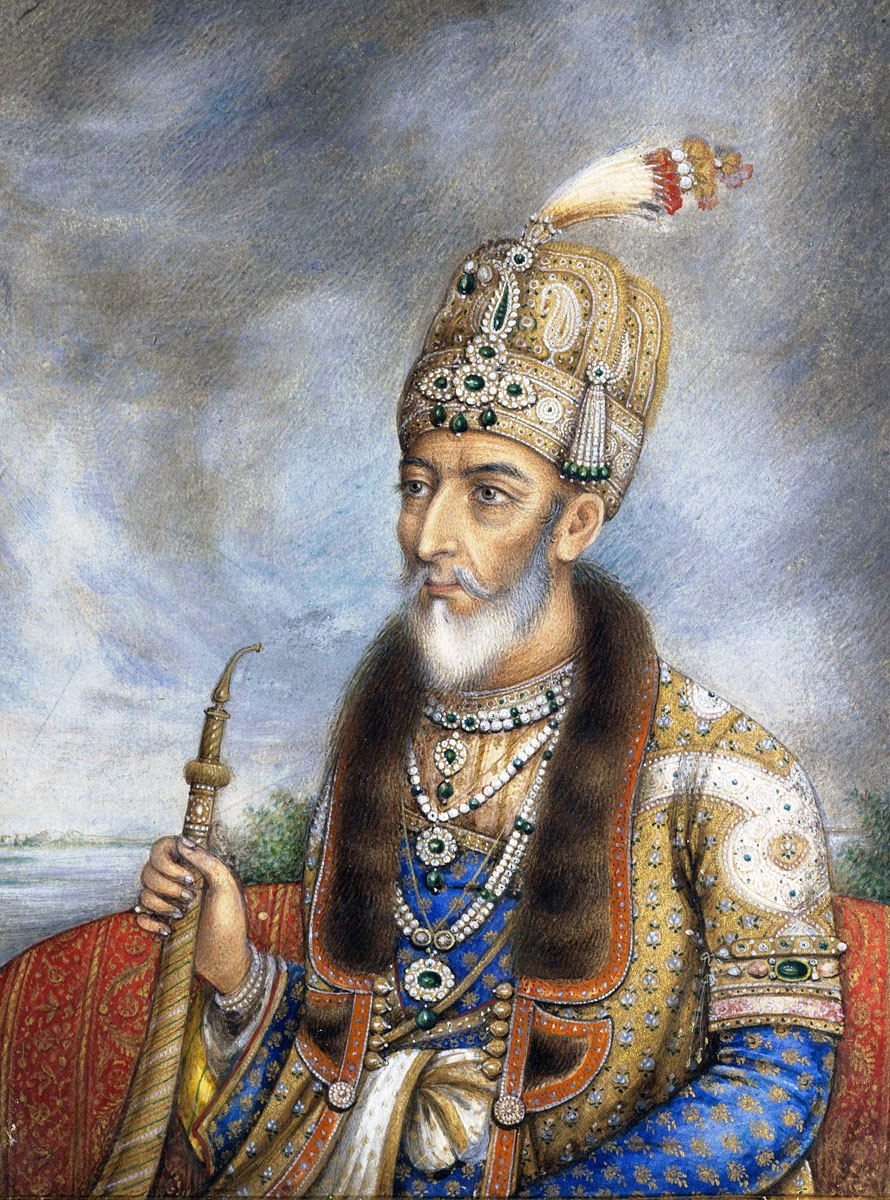
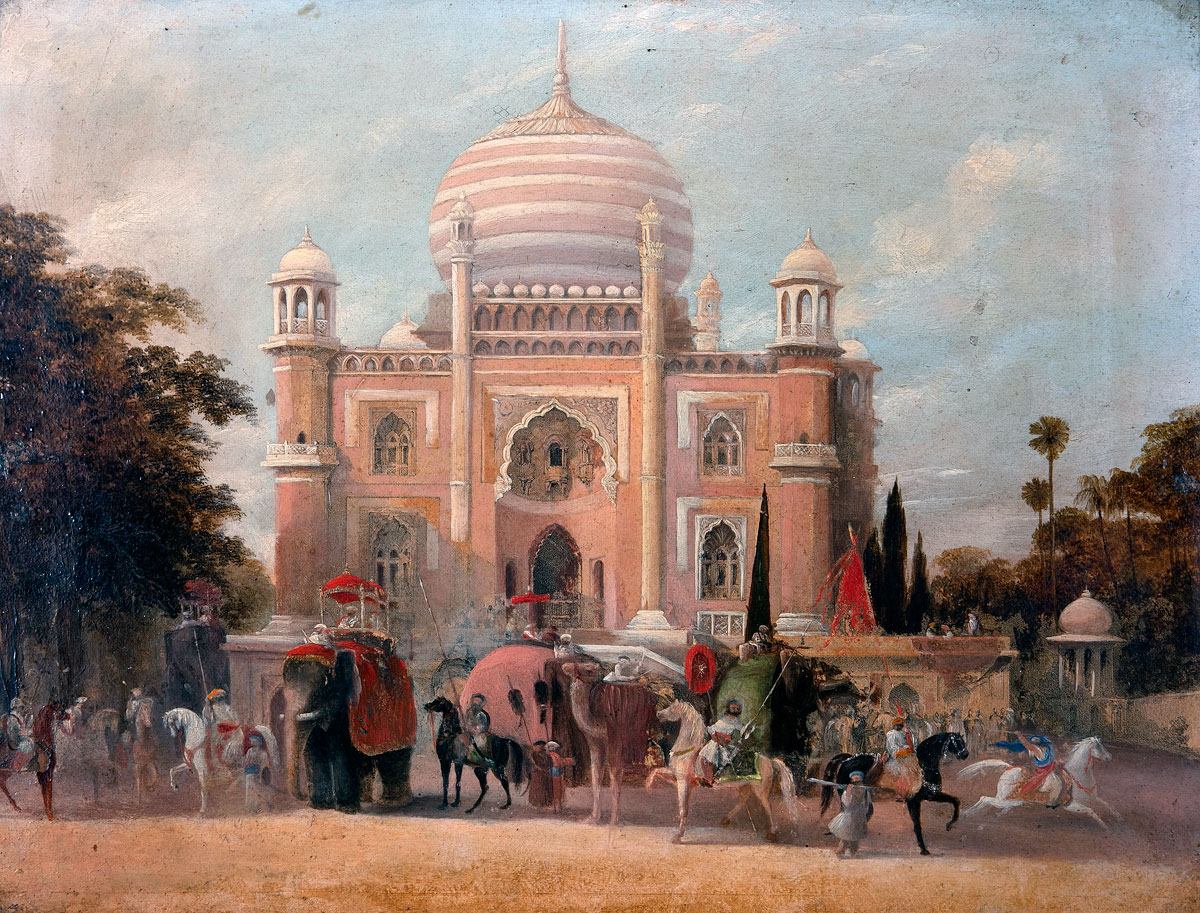
The Mutineers looked to the titular Mogul Emperor, Bahadur Shah, resident in Delhi, as their figurehead.
Bahadur Shah appointed various leaders of the Mutiny to high command during the Siege of Delhi, as set out in the text.
Mutineers’ leadership:
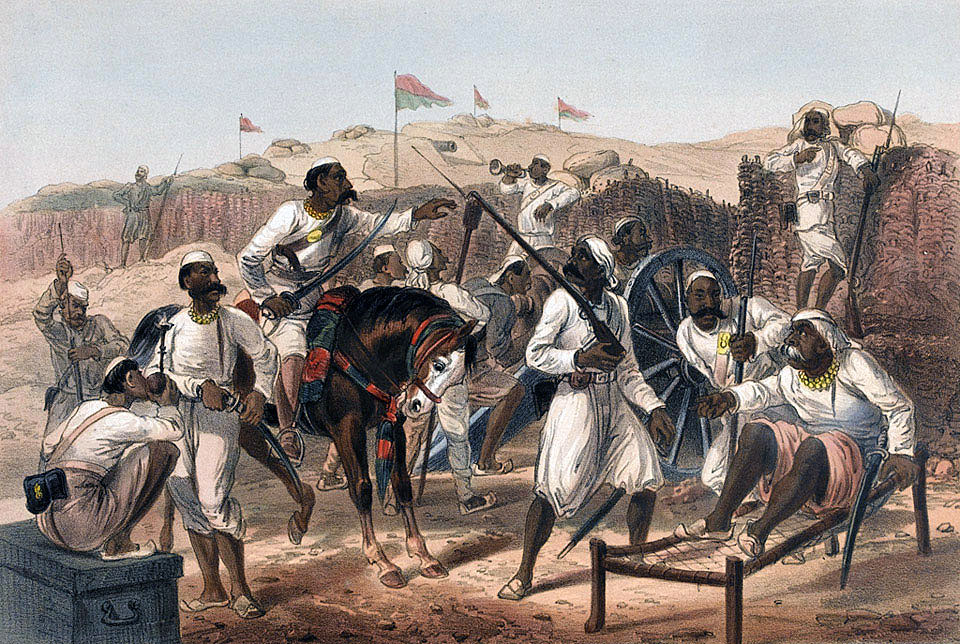
The Mutineers were defeated in their defence of Delhi by the British, in spite of fighting tenaciously and with skill and being equipped with the same weapons as their opponents with an apparently limitless supply of ammunition.
The reason for their failure would seem to lie in the lack of effective leadership.
The mutinies in the various Indian regiments were largely instigated and led by sepoys or low-ranking NCOs.
While Indian officers joined the mutinies in most regiments, they were often not the prime movers, leaving their regiments to be led by inexperienced and ill-educated soldiers.
Surendra Nath Sen in his book ‘Eighteen Fifty-Seven’ deals with the workings of the garrison of Delhi.
The residual Moghul Emperor, Bahadur Shah, living in the old fort in Delhi with his family, including his three sons, Mirza Moghul, Mirza Khizr Sultan and Mirza Abu Brka, was elderly and had no experience of rule when the Mutineers arrived in Delhi and made him their titular leader.
Bahadur Shah’s adviser, Hakim Ahsanullah, was convinced that the British would win and was unhappy at the position to which the mutinous sepoys elevated Bahadur Shah.
Sen says the mutineers did not trust Bahadur Shah and he did not trust the mutineers.
Nevertheless, the mutineers looked to Bahadur Shah to pay them and supply them with food.
Bahadur Shah attempted to form a council to administer and rule the city, but many of his appointees refused to act and the council was ineffectual.
The city was subject to significant disorder during the course of the siege.
Bahadur Shah’s oldest son, Mirza Moghul, was initially appointed commander of the Mutineers in the city, but he had no military experience and the Mutineers were not inclined to follow his orders.
An artillery subadar from the mutinous garrison of Bareilly, Bakht Khan, of noble birth, on his arrival in Delhi in early July 1857 was interviewed by Bahadur Shah and as a distant relative of the royal family and a soldier of forty years’ experience with service in the First Afghan War, was appointed commander-in-chief of the Mutineer army in place of Mirza Moghul.
Bakht Khan was unable to exercise proper control.
There was intense dislike and rivalry between the various mutinous regiments that came to Delhi and Sen reports ‘suicidal rivalry between Bakht Khan and Muhammad Ghaus Khan, the commander of the Nimach rebels’ and that Bakht Khan’s orders ceased to be obeyed.
Religious issues surfaced between Hindu and Muslim Mutineers, although these were not as intense as they might have been or that the British hoped for.
In contrast, the Delhi Field Force was officered at the middle level by a number of ruthlessly determined and resourceful officers who led disciplined and hard-fighting regiments, that were in several cases devoted to their British commanders.
Size of the armies at the Siege of Delhi: The size of the Delhi Field Force varied during the course of the siege, as casualties were suffered and reinforcements marched in. The numbers of troops at different stages of the siege are given in the narrative section.
The numbers of Mutineers in Delhi are very much a matter of conjecture and were probably not known to anyone. As native regiments mutinied across Northern India many of them were drawn to Delhi and marched into the city during the siege, increasing the size of the Delhi garrison.
The Mutineers suffered losses from battle casualties, disease and desertion.
At times complete Mutineer regiments left Delhi to return to their homes.
Estimates of the size of the Mutineer garrison in Delhi made by British sources varied from 40,000 to 70,000.
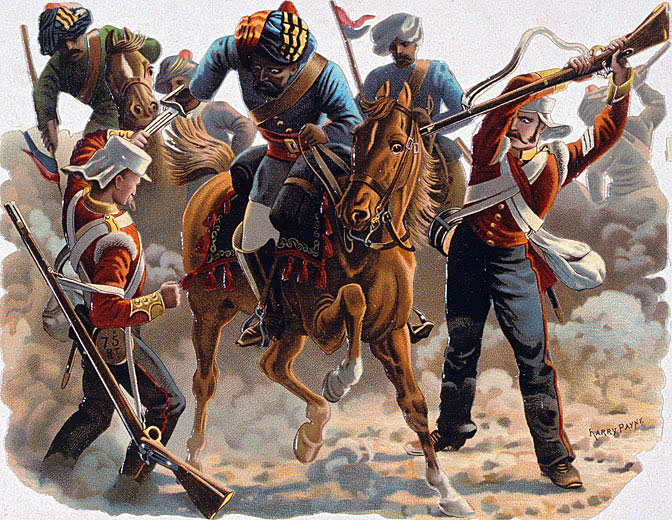
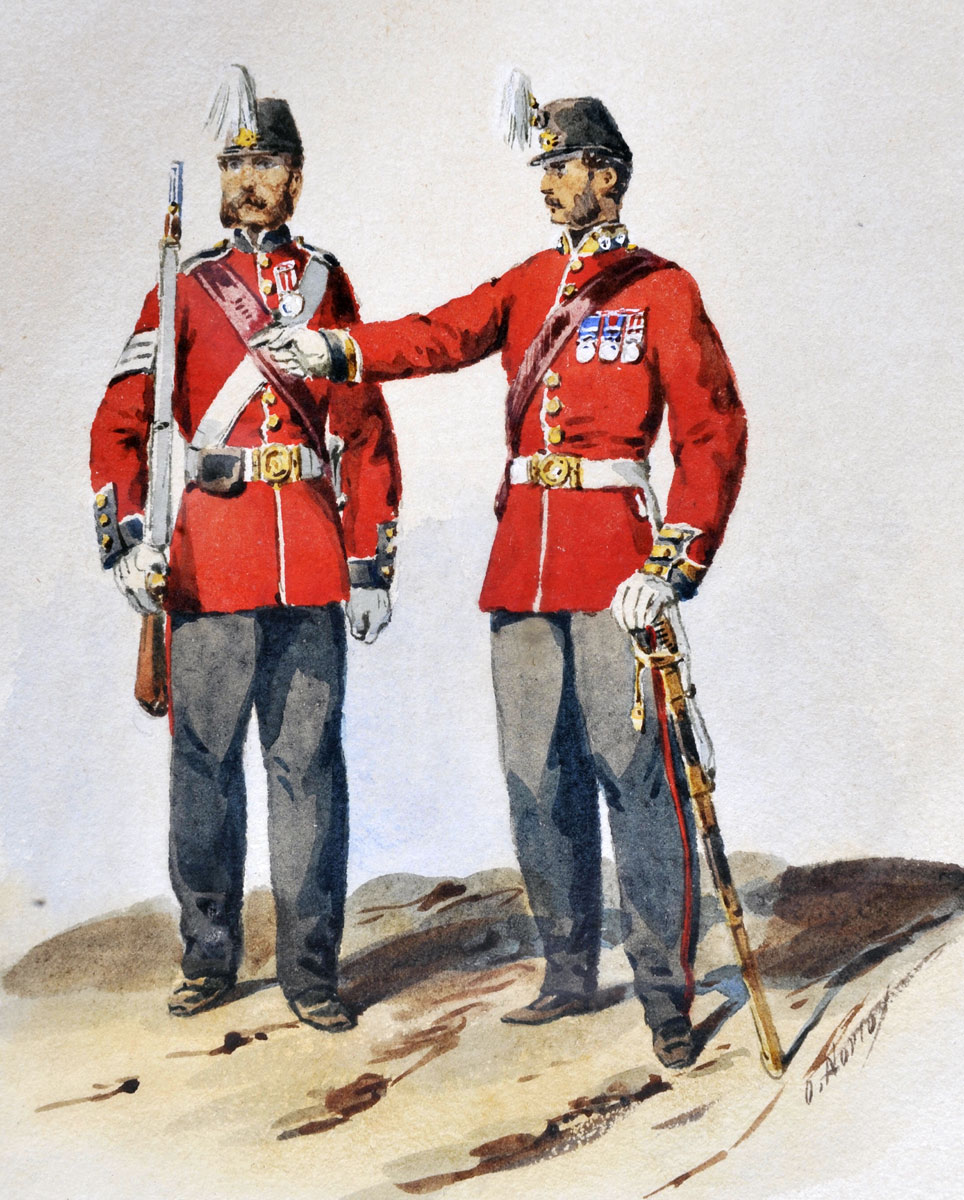
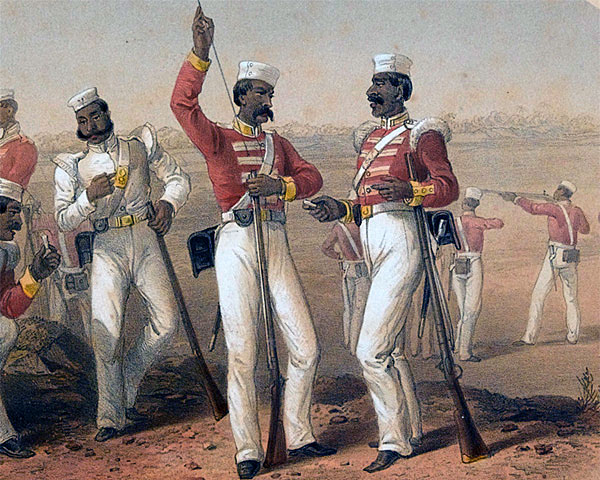
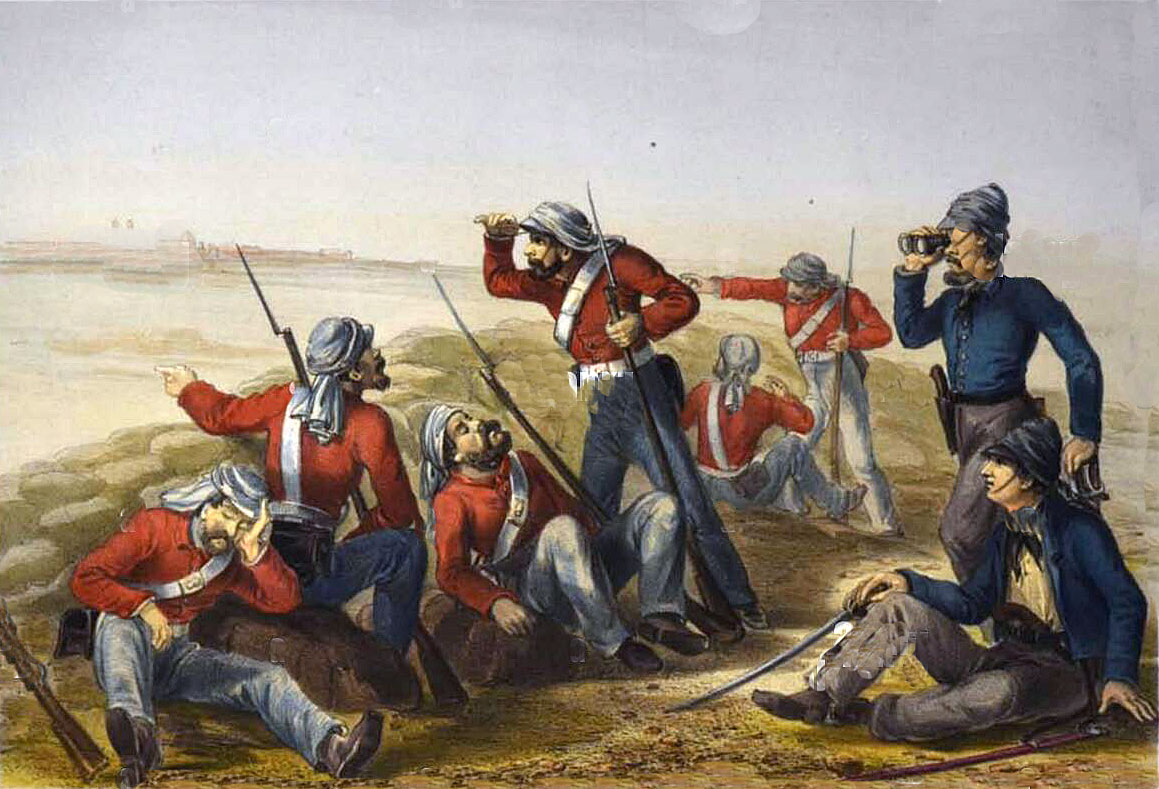
Uniforms, arms and equipment at the Siege of Delhi:
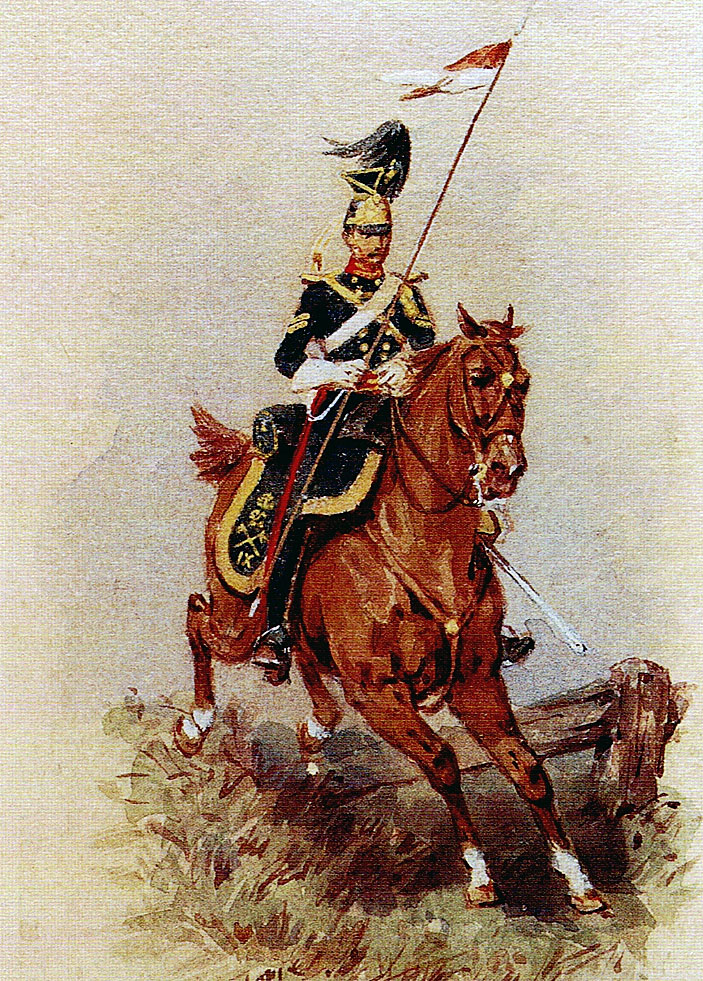
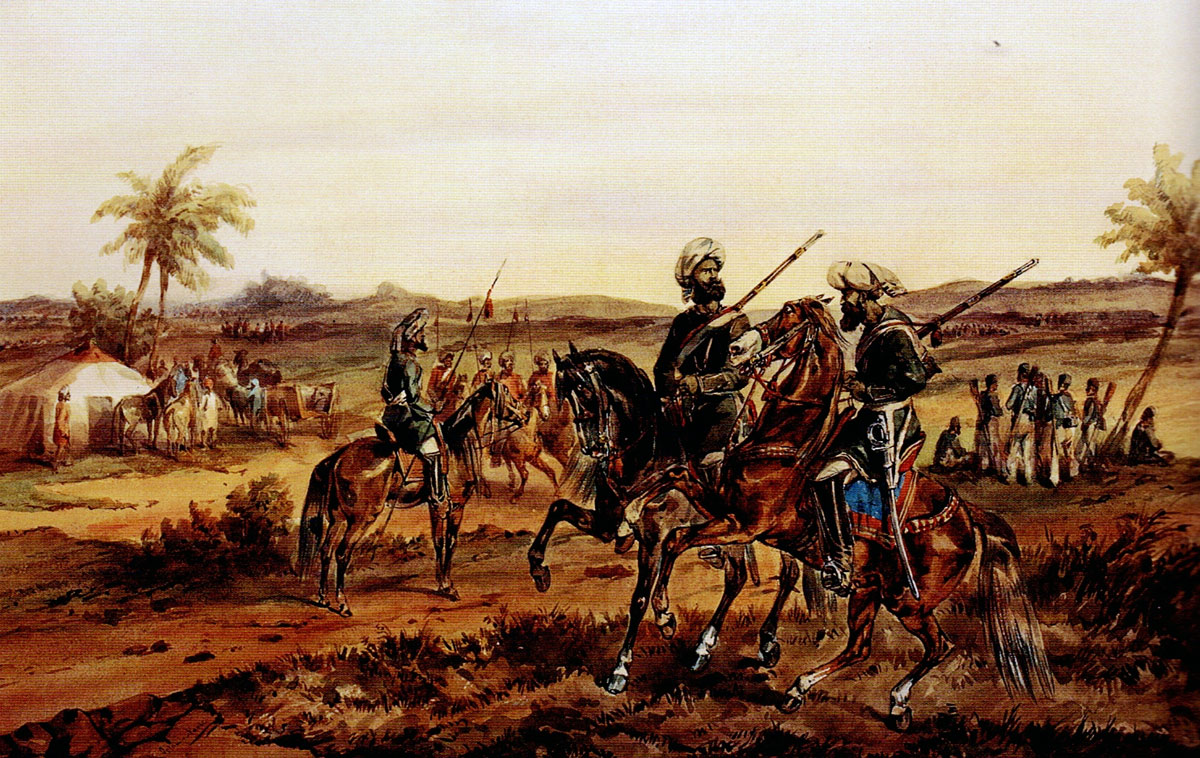
There were cavalry, infantry and artillery on both sides.
The cavalry was armed with lance, sword and muzzle-loading carbines.
The infantry of both sides was armed with the Brown Bess musket, with an effective accurate range of around 100 yards or the more modern Enfield rifled musket, a muzzle loading weapon with an effective accurate range of 300 yards. Both weapons carried a bayonet for close quarter fighting.
It is far from clear the extent to which conversion from the smooth bore musket to the Enfield rifled musket had progressed in either the British or the Indian regiments, both mutinous and loyal, when the Indian Mutiny broke out in early 1857.
However, the immediate trigger for the mutinies in several of the Bengal Native regiments in 1857 was the issue of the Enfield rifled musket and the requirement for the sepoys to bite open the new cartridges, indicating that the issue of the new weapon was under way in the Bengal Native Army in 1856-7.
Probably the Mutinous Indian regiments largely did not use the Enfield in the fighting during the Indian Mutiny, in view of their religious objections to the biting of the cartridges greased with animal fat.
Although the British troops in the Crimean War, 1853-6, were widely re-equipped with rifled muskets, either the Enfield or the French Minié, it would seem that this was not the case for the whole British Army, particularly where regiments were serving overseas; these regiments continuing to carry their Brown Bess smooth-bore muskets well past the general issue of Enfields in 1853.
British regiments are reported as being re-equipped with the Enfield rifled musket on arrival at Calcutta from Britain in 1857-8, in place of the Brown Bess.
Reports of battles in the Indian Mutiny describe British infantry as having an advantage over their Indian adversaries through being armed with the Enfield rifle, suggesting that the Mutineer infantry was armed almost entirely with the old smooth bore short range muskets.
It would seem however that not all British or loyal native Indian regiments were equipped with the Enfield even when in the front line.
Reports of the Relief of Lucknow describe certain British regiments as being given specific duties because they were armed with the more accurate and longer-ranged Enfield, suggesting that other British regiments retained the old Brown Bess smooth bored musket.
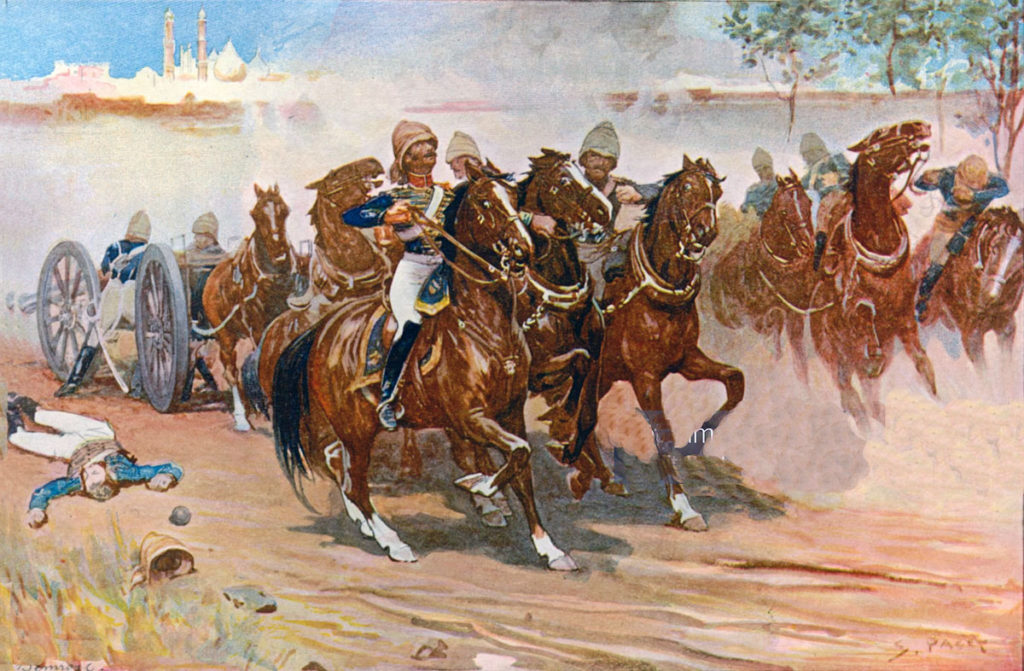
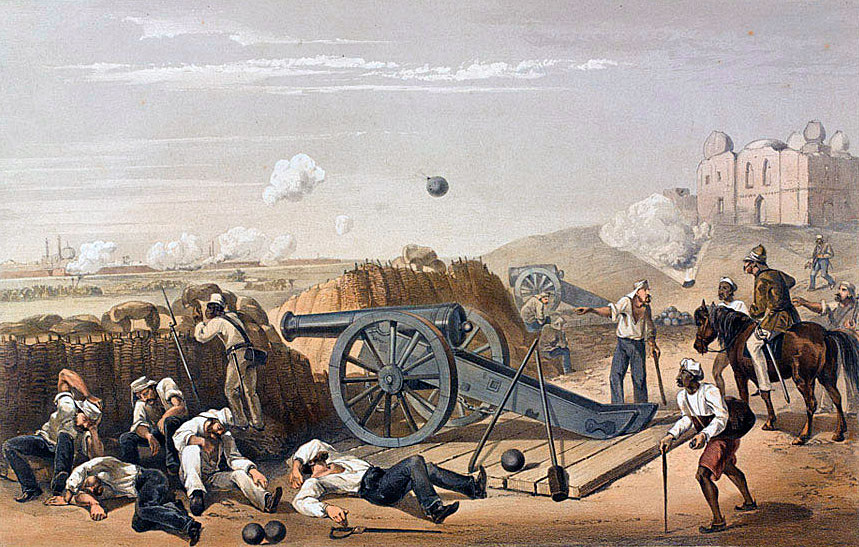
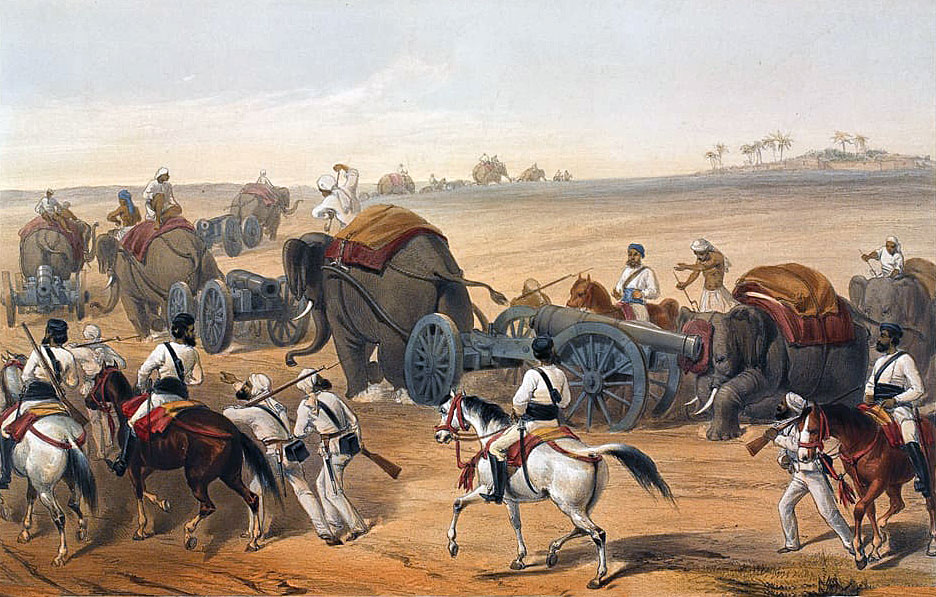
Large numbers of field guns were deployed by both sides in the Indian Mutiny with a wide range of sizes up to 24 pounder siege guns and some howitzers.
Guns were still almost entirely muzzle-loaded, firing either solid ball, grape-shot, case-shot or exploding shells.
Guns were horse-drawn or in the case of the larger guns drawn by slow-moving oxen. Many of the largest guns were drawn by elephant.
During the course of the siege, the Delhi Field Force was particularly reliant on the Bengal Horse Artillery armed with small calibre muzzle-loading guns.
A novel feature of the Indian Mutiny was the use of the Telegraph.
Lord Dalhousie, the Governor-General of India, caused the Telegraph to be introduced into India in the mid-1850s.
On the outbreak of the Indian Mutiny a Telegraph line was in operation between Calcutta, Delhi and the North-West of India.
News of the Mutiny in Delhi was transmitted to the British at both ends of the Telegraph line on the day of the outbreak enabling counter-measures to be put in place without delay.
Winner of the Siege of Delhi: The British recaptured Delhi in September 1857 after several months of heavy fighting.

Events leading to the Siege of Delhi:
On 29th March 1857, at Barrackpore, a garrison town immediately north of Calcutta, the British administrative capital of India, in the eastern state of Bengal, a sepoy of the 34th Native Infantry Regiment of the East India Company’s Bengal army turned his musket on the adjutant of his regiment, a British officer named Lieutenant Baugh.
This is the incident that is said to have started the Indian Mutiny.
The issues leading to the Mutiny were complex.
The British directly ruled the Bombay Presidency on the west coast of India, the Madras Presidency on the east coast, Bengal in the north-east of India, the Central Provinces and the area around Delhi in the north.
Native principalities of India covered as much land as the British areas, subject to varying degrees of British influence and control.
The British sovereign entity in India was the East India Company, a commercial organisation administered from London, not the British Crown.
Over the years the British Government increased its control over the East India Company and exercised a significant influence in the appointment of the Governor and other officials.
Senior military officers were seconded from the British army and a significant part of the garrison in India comprised regiments of the British army.
There was increasing interference by the British in Indian land administration and practices and the growth of evangelical religion in Britain led to an influx into India of Christian missionaries, leading to a fear that the British intended to replace the indigenous religions of Hinduism and Islam with Christianity.
The British continued to widen the area of India that they controlled.

It is considered that a major cause for the Mutiny was the final annexation of Oudh by the British.
The principality of Oudh covered much of northern Central India with its capital in the ancient city of Lucknow.
The British East India Company increased its control of Oudh incrementally, effectively deposing the rulers, the last of whom was removed to Calcutta under effective house arrest and replaced by a British Chief Commissioner, Sir Henry Lawrence.
The East India Company annexed Oudh in 1856, ending the fiction that it was still an independent state.
Many of the Bengal Army sepoys were from Oudh and bitterly resented the annexation of their homeland by the British.
Native Indian regiments in the service of the British East India Company, particularly in the Bengal army, tended to recruit high caste Hindu sepoys. For these sepoys the integrity of their Hindu faith was paramount.
One issue for the native sepoys was a change in the terms of service enabling regiments to be shipped overseas to fight wars in Persia and Burma: travel by sea causing a Hindu sepoy to lose his caste.
Another was the arming of the sepoys with the new 1853 Enfield rifled musket. In order to load this weapon a soldier was required to bite off the end of the cartridge before pouring the gun powder charge into the barrel of the firearm.
Cartridges for the Enfield were greased with fat, rumoured to be either cow or pig fat, taking of which into the mouth being major breaches of the Hindu and Muslim religions.

These two issues arose against a background of deteriorating morale and discipline in the Indian regiments over a period of years.
In addition, the British reputation for invincibility took a severe knock from the incompetence and defeats of the war in Afghanistan (First Afghan War 1839 to 1842).
The East India Company’s army comprised some 250,000 sepoys and around 5,000 British troops.
The two British Army cavalry regiments and twenty British infantry regiments posted to India to support the East India Company government were spread across the country with the strongest contingent in the Punjab and others in Persia and Burma.
The British Governor of India, Lord Dalhousie, repeatedly requested reinforcement by more British regiments, but this was not forthcoming from the British Government against a background of demand for troops created by the losses in the Crimean War.
Following the incident in Barrackpore, several Indian soldiers were tried for mutiny and some executed. The 19th Sepoy Infantry was disbanded.
At Ambala, near Delhi, the sepoy troops, in view of the rumours over the new rifles and cartridges, burnt down several buildings, including the British officers’ bungalows.
Word of the mutiny in these regiments spread quickly through the garrisons of northern India and several regiments, where they were not disbanded by British troops, mutinied.
In Delhi, Bahadur Shah, the titular head of the old Mogul dynasty held his court under sufferance from the British.
Bahadur Shah became the rallying point for many of the Mutineers, who marched to Delhi.
Several of the Indian native rulers took the opportunity to revolt against the British.
Significant among these Indian rulers were Nana Sahib and the Rani of Jhansi, causing a block of territory 100 miles on each side of the River Ganges from Allahabad to Delhi to be in revolt against the British.
The 34th Bengal Native Infantry was disbanded after a significant delay, while further acts of mutiny took place in the Calcutta area.
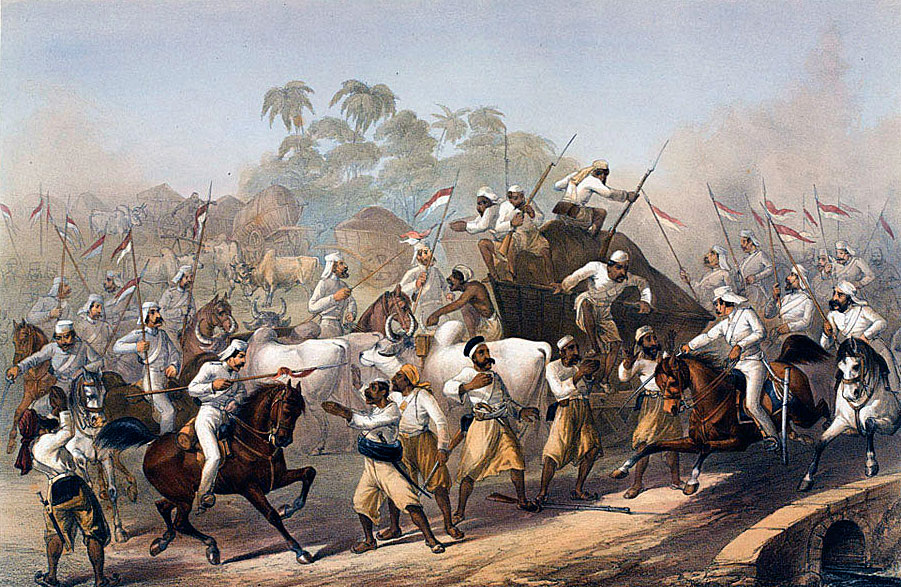
On 10th May 1857, at Meerut, the 3rd Bengal Light Cavalry and the 11th and 20th Native Infantry Regiments mutinied and attempted to massacre their officers at church parade.
The massacre was largely prevented but, due to the failure of senior British officers to act decisively, the Mutineers were enabled to march away, heading for Delhi.
Mounted Mutineers reached Delhi on 11th May 1857 and entered the city without being halted by the troops of the Indian garrison, the 38th, 54th and 74th regiments of Native Infantry.
The few British officials and officers in the garrison went on the alert.
The Mutineers released the prisoners from the gaol, entered the palace of the aged Moghul ruler, Bahadur Shah and called on him to lead them in the fight against the British.
The British men, women and children found in the palace were killed.
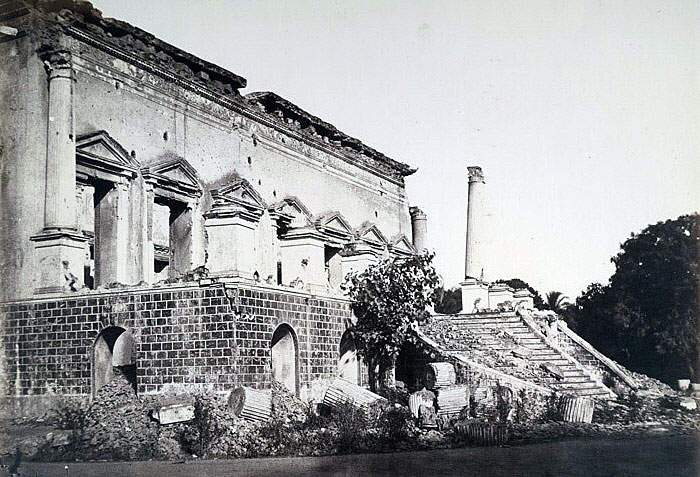
Parties of Mutineers searched out the European and Eurasian residents of the European Quarter of Delhi and killed them.
Lieutenant Willoughby, in charge of the Delhi magazine, where a substantial quantity of ammunition was stored, prepared the magazine for defence with his staff of 8 British soldiers.
From the cantonment to the north of Delhi, Brigadier-General Graves sent the 54th and other native infantry regiments to restore order in the city.
These troops joined the Mutineers at the city gate and fired on their British officers. the British survivors escaped into the countryside and made their way to various places thought to be safe havens, leaving Bahadur Shah as the restored ruler in the old Mogul Capital City of Delhi with a rapidly growing army of Mutineers.


One of the last acts of the British in Delhi was to blow up the Armoury in what is described as a ‘terrific explosion’, killing three of the seven British soldiers defending the Armoury; the others, including Lieutenant Willoughby who fired the charge, escaping into the countryside. Around 100 mutineers were also killed in the explosion.
Willoughby with some of his soldiers was murdered by the inhabitants in the village where they took refuge.
In Calcutta, due to the lack of reliable information, it was difficult For Lord Canning and the East India Company administration to assess the full implications of what was occurring.
On 12th May 1857, the news of what had taken place at Meerut and Delhi reached the British commander-in-chief, General George Anson at Simla in the north-west of India.
Such troops as were available were assembled for an attack to recover Delhi.
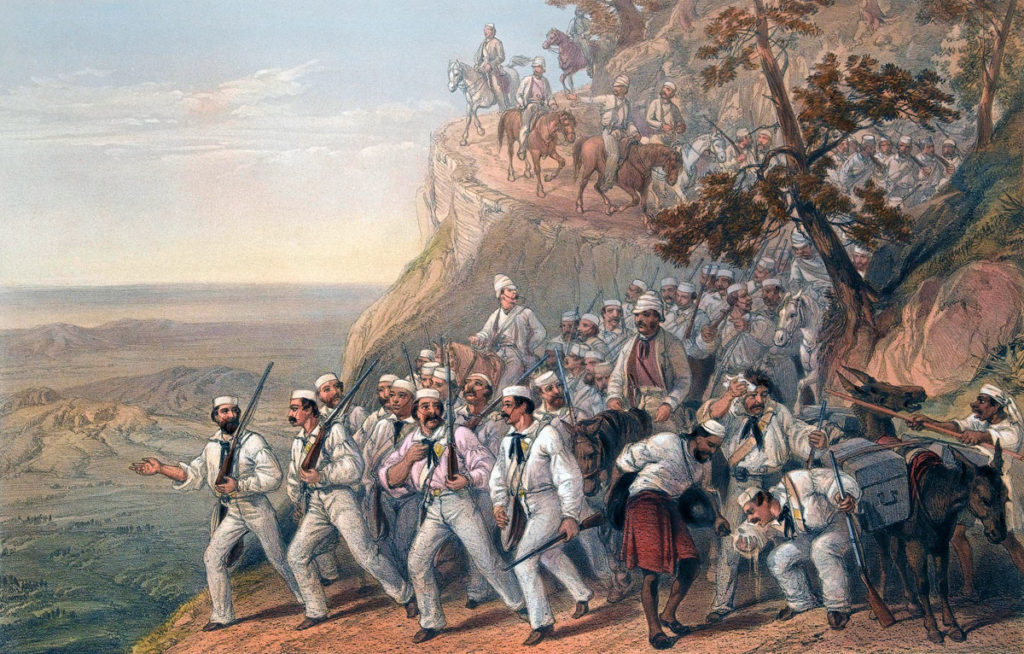
HM 75th Foot and the East India Company 1st Bengal (European) Fusilier and the 2nd Bengal (European) Fusilier regiments were ordered to march to Ambala, to the north of Delhi.
The Sirmoor Gurkha battalion moved to Meerut and a siege train with the Nasiri Gurkha battalion marched to Phillaur.
The garrison in Ambala comprised HM 9th Lancers, two batteries of horse artillery and three untrustworthy native regiments.
The primary target for General Anson was to recover Delhi from the Mutineers, an aim urged on him by John Lawrence the British Chief Commissioner in the Punjab.
Due to Dalhousie’s repeated reductions in military spending over the previous years, there was no transport for the various regiments’ baggage and they arrived in Ambala without tents, supplies or medical provision or sufficient ammunition for a prolonged military operation, imposing a significant delay on any advance to Delhi.
At Ferozepore three native regiments mutinied and although dispersed and partially disarmed many Mutineers made their way to join the Mutineers in Delhi.
A native regiment mutinied at Agra and escaped to Delhi, with further mutinies at Shahjahanpur, Bareilly, Budaon, Moadabad and Farakhabad.
On 4th June 1857 two native regiments mutinied at Jhansi and massacred the English population, with the connivance of the Rani of Jhansi.
On 6th June 1857 the garrison of a native regiment and an artillery battery in Allahabad mutinied.
The British Advance on Delhi:
John Lawrence, the Chief Commissioner in the Punjab repeatedly urged General Anson to advance on Delhi.
Anson’s inclination was to wait until he had organised a siege train from the guns held at Agra and ensured that his army was better equipped.
Canning, the Governor-General in Calcutta, equally required Anson to re-capture Delhi, a course of action Anson now felt bound to adopt, although against his better judgement.
Anson ordered the troops at Meerut and the siege train at Ludhiana to join him at Baghpat on the road to Delhi.
Anson himself marched out of Ambala on 25th May 1857 with HM 9th Lancers, two troops of Bengal Horse Artillery, HM 75th Foot, 1st Bengal (European) Fusiliers, 4 companies of the 2nd Bengal (European) Fusiliers and the 60th Native Infantry.
The 60th Native Infantry was suspect and was sent away soon afterwards, shortly before it mutinied.

On 26th May 1857, Anson’s column reached Karnal, where Anson died of cholera and was succeeded in command by General Sir Henry Barnard, a British army officer who had been chief-of-staff of the British army in the Crimea.
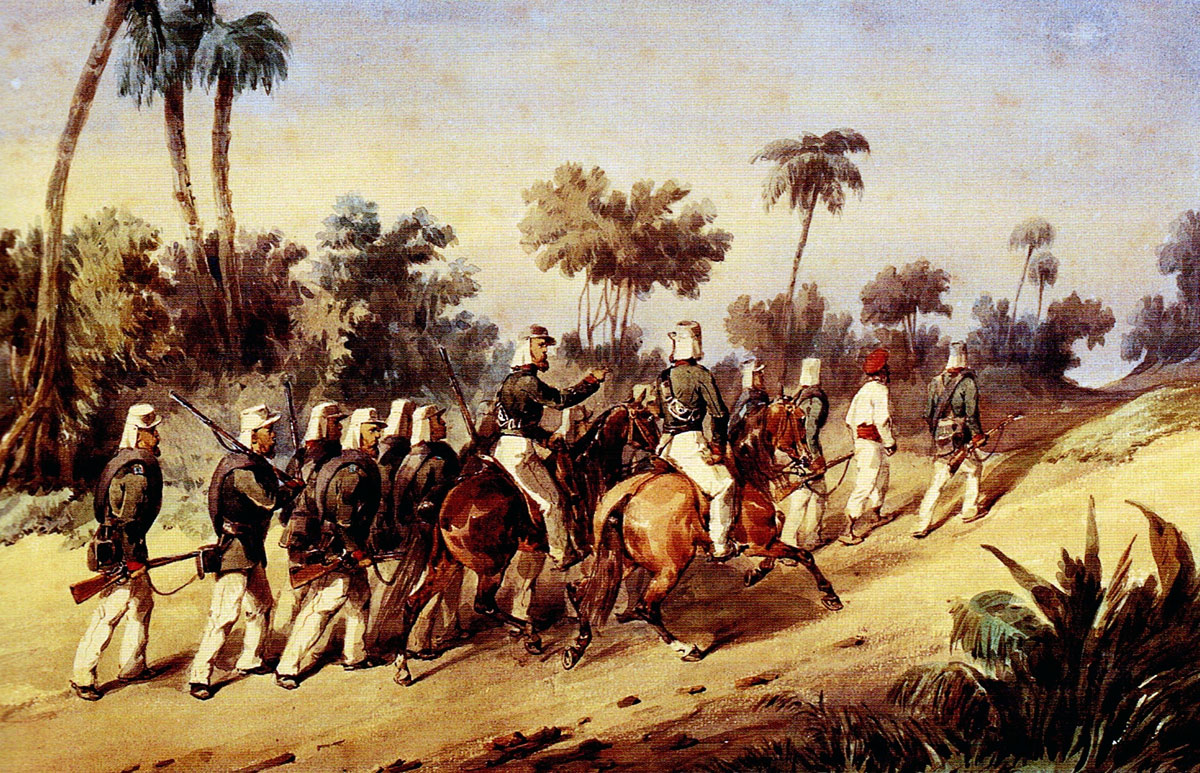
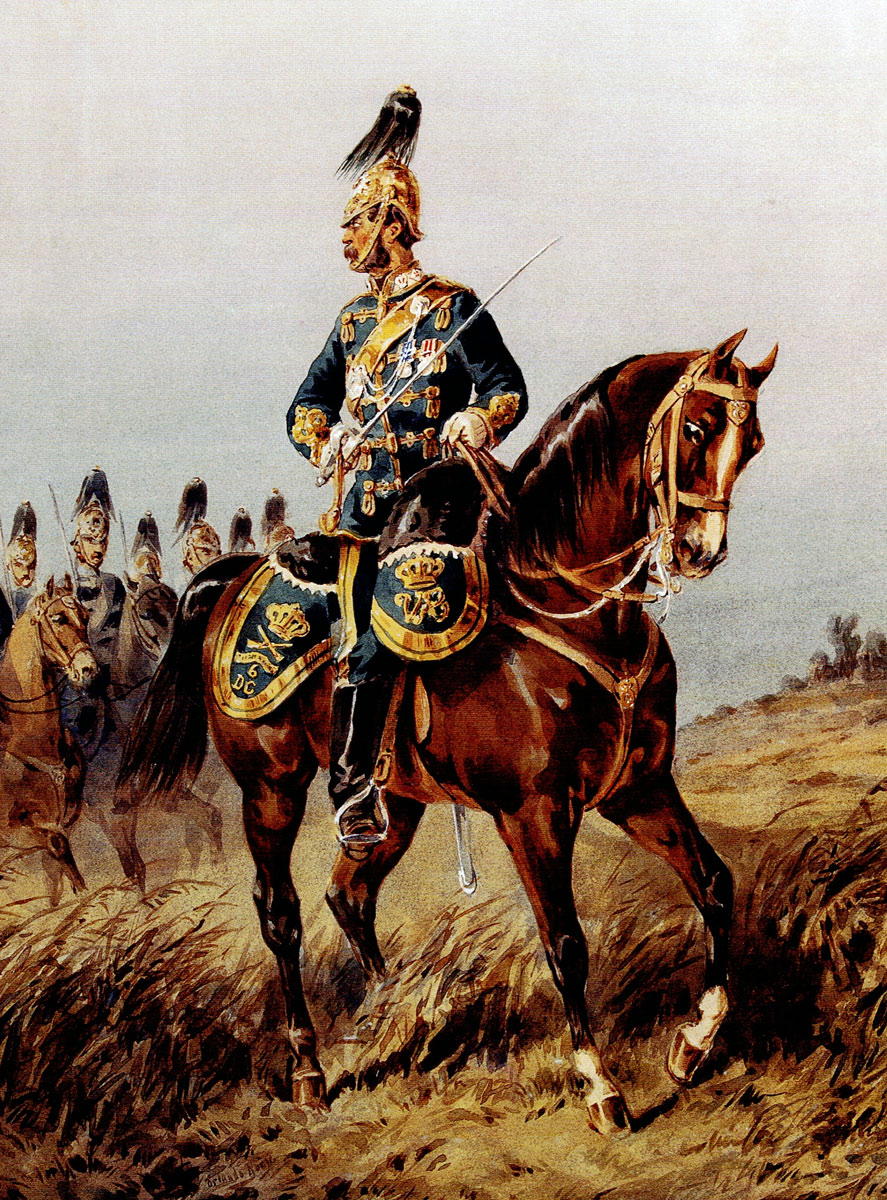
On 27th May 1857, Brigadier General Archdale Wilson marched out of Meerut with two squadrons of the Carabiniers (6th Dragoon Guards), a wing of the 60th Rifles, Tombs Bengal Horse Artillery troop, Scott’s field battery and some native sappers and irregular cavalry.
The Battle at Ghazi-ud-din Nagar:
On 30th May 1857, Wilson’s column reached Ghazi-ud-din Nagar, approaching the suspension bridge across the River Hindan, now dry.
A large force of Mutineers with guns was in a defensive position behind and in the dry river bed.
The odds against Wilson were said to have been 7 to 1.
At 4pm, Wilson’s column attacked the Mutineers’ positions along the river and drove them back, capturing five of the Mutineers’ guns.
The next day the Mutineers returned. After an artillery engagement lasting two hours the Mutineers fell back before an advance by the 60th Rifles.
On 1st June 1857, the Sirmoor Gurkha Battalion joined Wilson’s column and on 7th June 1857 Wilson reached Alipur and joined Barnard’s force.
The advance down the Grand Trunk Road to Delhi by the whole force began at midnight.
Lieutenant William Hodson, an officer of irregular horse, conducting a reconnaissance along the road to Delhi, found a powerful force of Mutineers in position halfway to Delhi, at the village of Badli-ki-Serai.
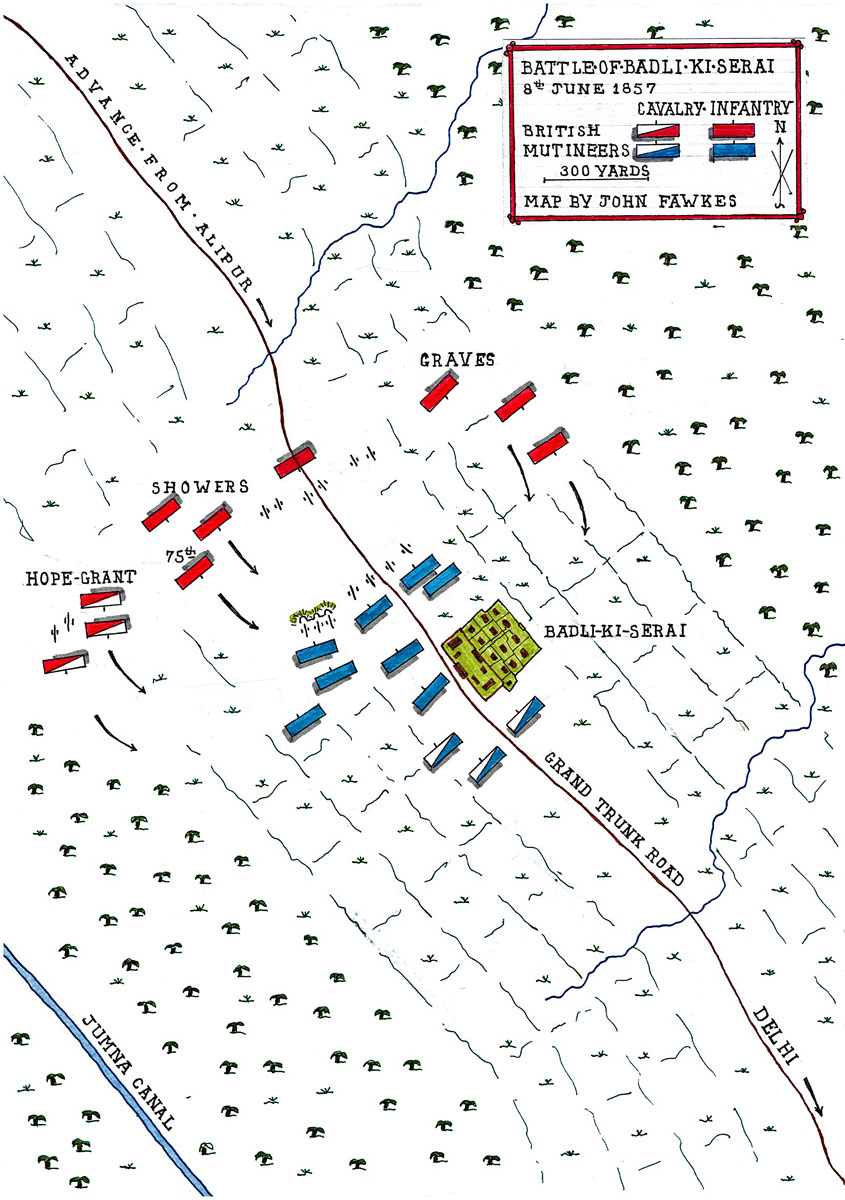
Battle of Badli-ki-Serai 8th June 1857:
The Mutineers, outnumbering the British force by 4 or 5 to 1, occupied a strong position across the Grand Trunk Road.
On the right of the Mutineers’ position was a serai or way-side inn and a walled village with two substantial stone gates.
In front of the village was an expanse of impassable swampy ground.
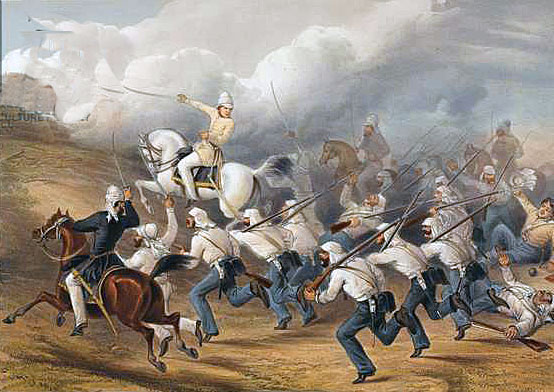
On the left of their position the Mutineers had constructed a sand-bagged battery with four heavy guns and an 8-inch mortar.
On either side of the road was a network of ditches through swampy ground.
At a mile distance to the west ran the Western Jumna Canal.
Barnard launched his attack on the Mutineers’ positions at daybreak on 8th June 1857.
Brigadier Hope-Grant with ten horse artillery guns, the Carabiniers (6th Dragoon Guards), three squadrons of 9th Lancers and fifty of Hodson’s Jhind Horse, commanded by Lieutenant William Hodson advanced around the Mutineers’ left flank.
This move was followed by an advance of the main body of the British force up the road towards the Mutineers’ position.
Once the lights from the Mutineers’ camp could be seen, Brigadier Showers with his First Brigade of the 75th Foot and the 1st Bengal (European) Fusiliers moved off to the right of the Mutineers’ position, while Colonel Graves led the 2nd Brigade of 1st Battalion 60th Rifles, 2nd Bengal (European) Fusiliers and the Sirmoor Gurkha battalion to the Mutineers’ left.
The British heavy guns remained on the road with a battery of field artillery on each flank.
Before the British guns could come into action they were subjected to a heavy fire by the Mutineers’ artillery, in place across the road.
The British guns were of a smaller calibre and unable to respond adequately to this bombardment, which inflicted many casualties on the British force and caused the native drivers to abandon the column with their bullocks, leaving the guns immobile, until they were rounded up and forced to return.
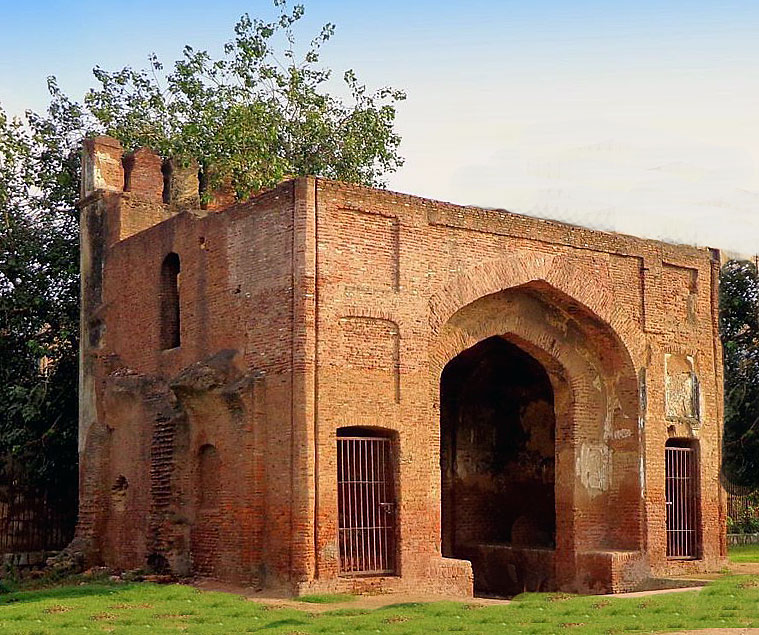
Barnard ordered Showers to charge the Mutineers’ guns, an assault carried out with considerable success by the 75th Foot, supported by the 1st Bengal Fusiliers, carrying the gun battery at the point of the bayonet, before crossing the road, bursting through the stone gatehouse and charging into Badli-ki-Serai, where a desperate fight took place leading to the destruction of the Mutineers holding the village.

Graves’ brigade appeared on the extreme right of the Mutineers’ position, after marching around the swampy ground, while the British cavalry and horse artillery advanced around the Mutineers’ left flank.
The Mutineers abandoned their positions in the village and Serai and retreated precipitately to Delhi, leaving their guns on the field to be taken by the British.
Under a hot sun, Barnard marched on to Delhi, reaching the parade ground of the abandoned British cantonments to the north-west of Delhi and to the north of the northern end of Delhi Ridge.
The Mutineers opened fire from the ridge, causing Barnard to divide his force in two and conduct sweeps from the northern and southern ends of the ridge, clearing it of the Mutineers.
The days casualties saw the Mutineers lose around a thousand men with the British column suffering 182 casualties, 60 of whom were taken by the 75th Foot.
The British captured thirteen of the Mutineers’ guns, two being 24 pounders.
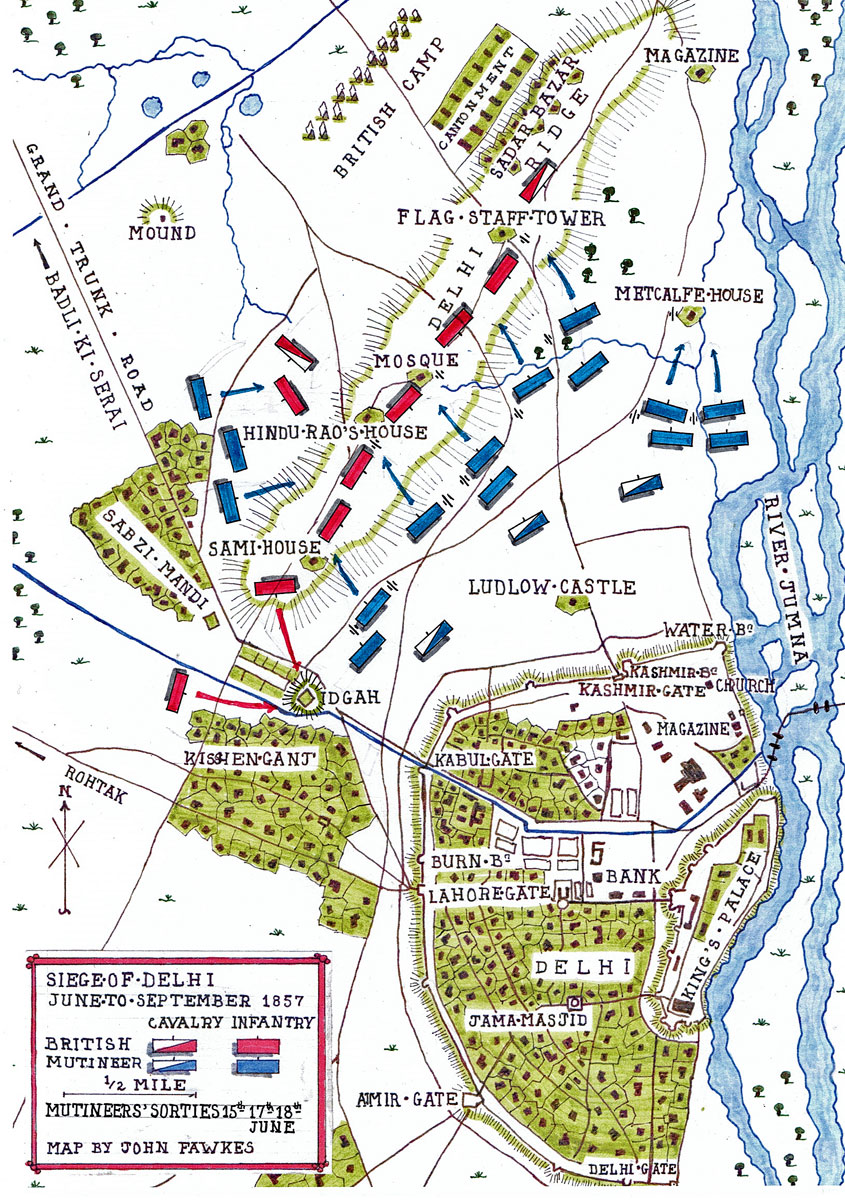
Barnard’s column, now referred to as the ‘Delhi Field Force’ took up positions on Delhi Ridge and the Siege of Delhi was under way.
In reality, for some time it was the Delhi Field Force that was besieged rather than the city.
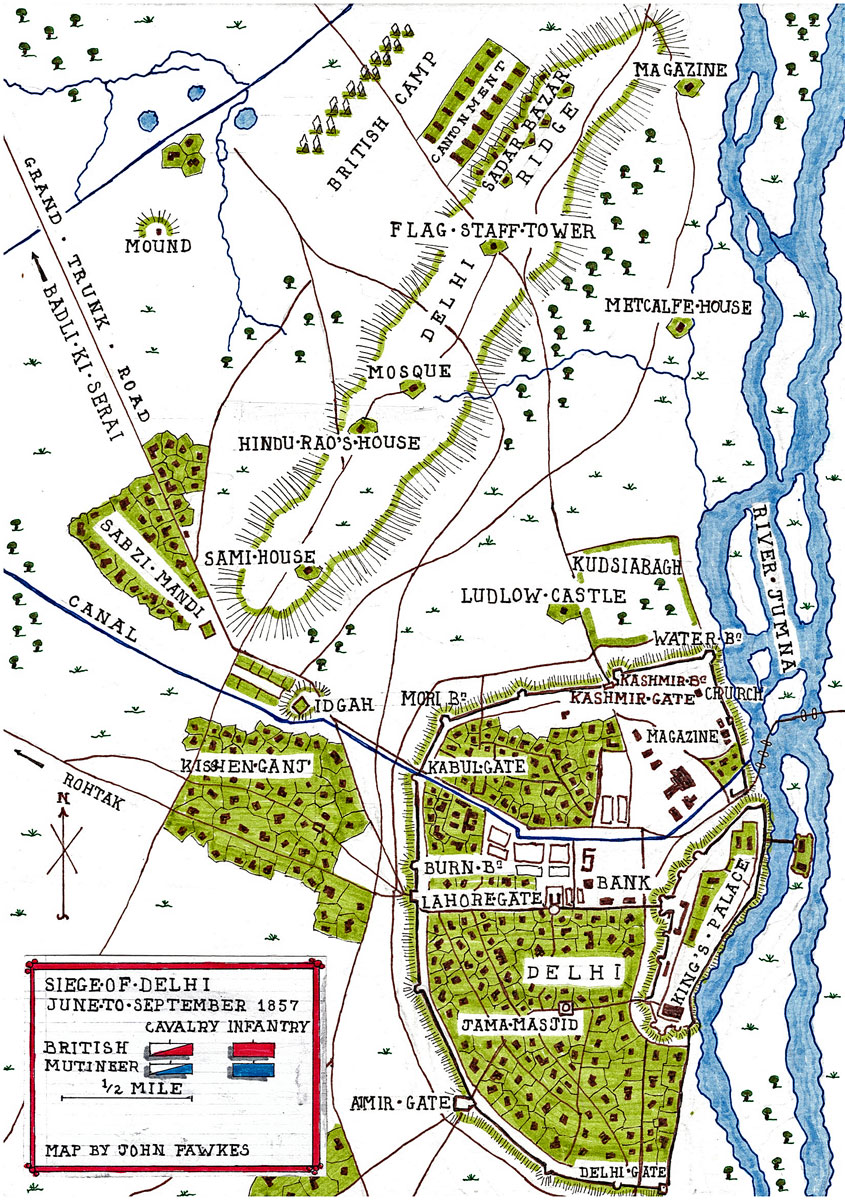
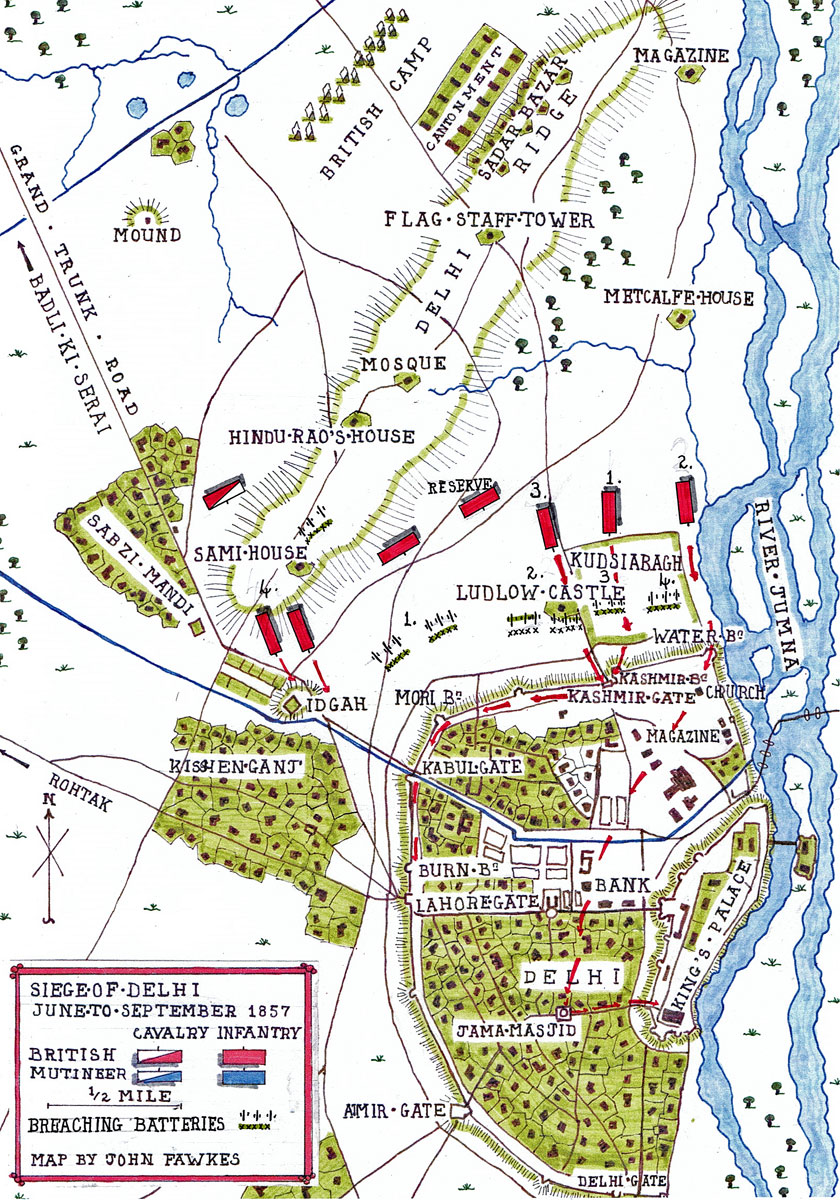
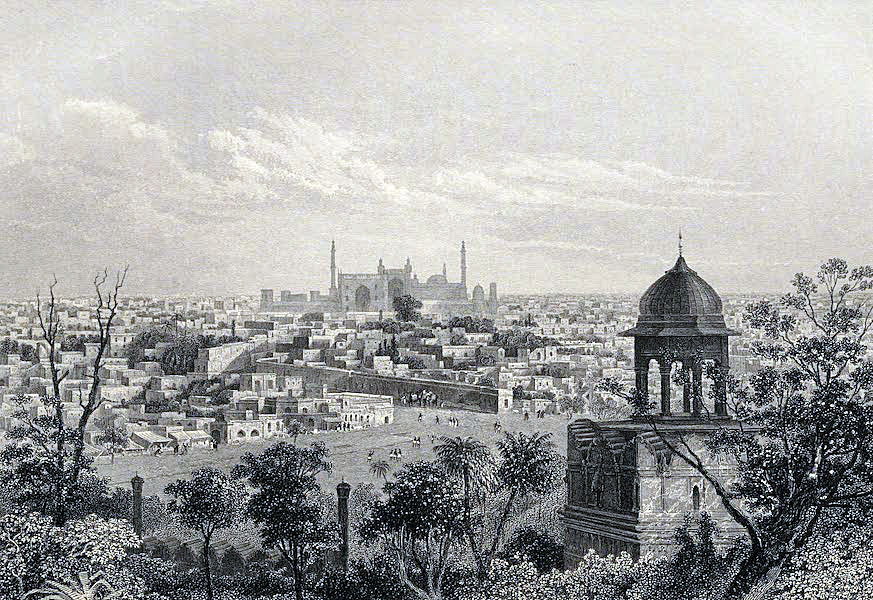
The Siege of Delhi:
Delhi Ridge, on which the British force was now positioned, lay along the northern side of Delhi, slanting from the west to the north-east of the city.
Delhi Ridge is around two miles in length, two hundred yards wide at the northern end to eight hundred yards wide at its southern end.
Delhi Ridge is around sixty feet in elevation, its northern end resting on the Jumna River, flowing down the eastern side of the city and unfordable from the rainy season, when the snow begins to melt in the Himalayan Mountains.
Immediately adjacent to the southern end of Delhi Ridge lay the Grand Trunk Road, the route from Delhi to the north-west of India and the Punjab, the main sources of supply and troop reinforcement for the Delhi Field Force.
The northern end of Delhi Ridge lay beyond the range of the many guns positioned by the Mutineers along the ramparts of the city.
For these various reasons the Delhi Field Force positioned its main camp to the rear of the northern end of Delhi Ridge in the old wrecked army cantonment and took up positions along the Ridge.
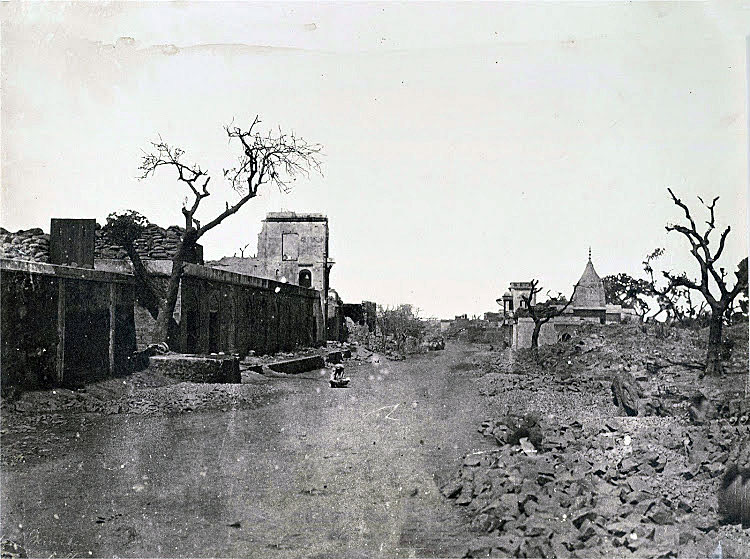
Behind the southern end of the Ridge lay the extensive suburb of Sabzi Mandi, its buildings a succession of houses and walled gardens, providing extensive cover for the Mutineers’ raids onto the south-western end of the Ridge during the course of the siege.
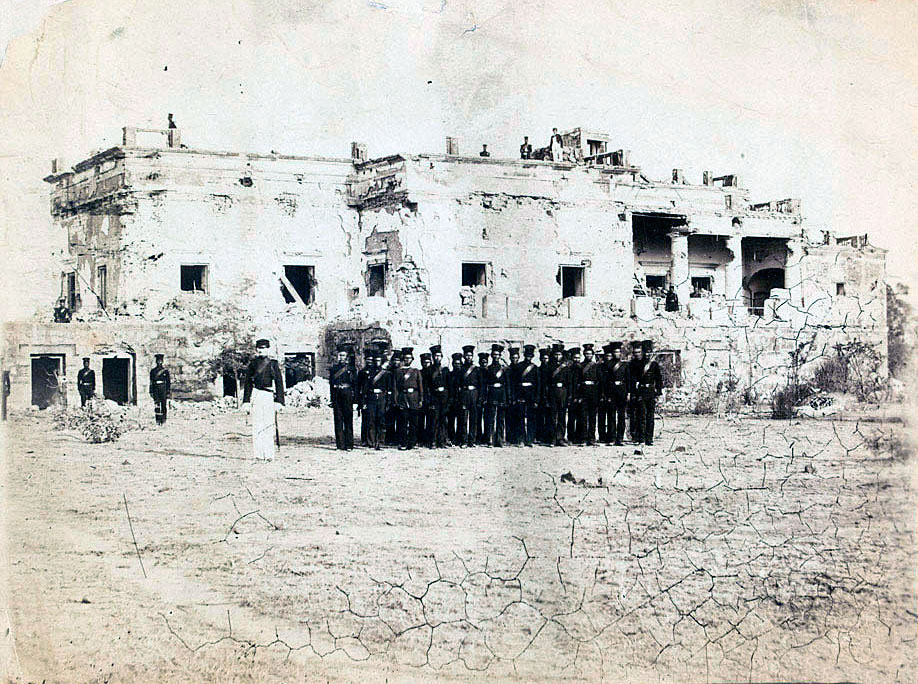
Approximately halfway along the Ridge stood a large house, the country residence of a Mahrattha chief, Hindu Rao’s House. The British occupied this building as their main piquet.
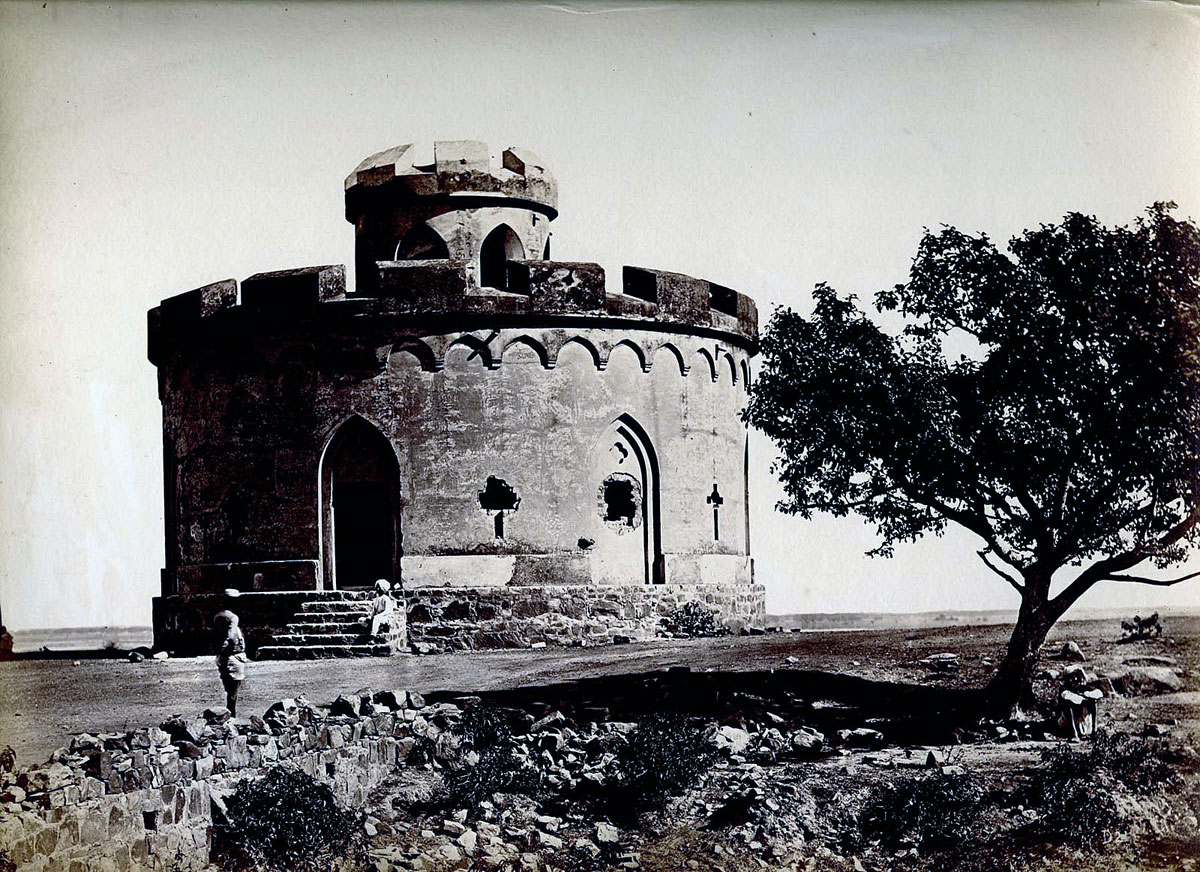
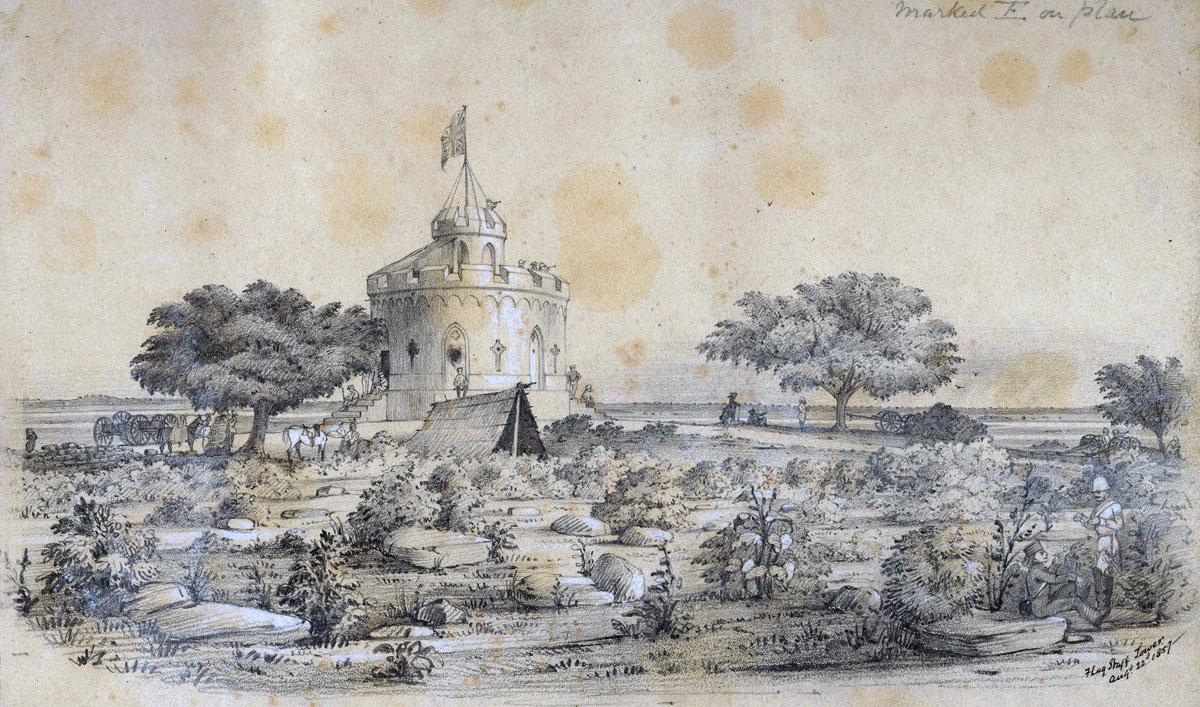
Two hundred yards along the Ridge, to the left of Hindu Rao’s House, a battery of heavy guns was positioned, with five hundred yards further along, in an old mosque, an infantry piquet with two guns and half a mile yet further, in the Flagstaff Tower, another infantry piquet with two guns.
On the right of the British position was an infantry piquet with three heavy guns fronted by a cavalry piquet with two horse artillery guns, overlooking the Grand Trunk Road.
The length of the British line was 2,600 yards, or around one yard per man of the British force, with odds against them of between twenty and forty to one.
General Barnard received pressing instructions from both Lord Canning, the Governor-General in Calcutta and Sir John Lawrence, the Chief Commissioner of the Punjab, to storm and take Delhi and, in addition, to despatch troops to relieve Lucknow and Cawnpore.
These were tall orders as Barnard barely had enough troops and guns to keep the Mutineers from overwhelming his defensive position on Delhi Ridge.
In addition to the casualties inflicted on his troops during the fighting on Delhi Ridge, the heat and demands on an undermanned force caused a great many additional casualties from exhaustion and disease, particularly cholera.
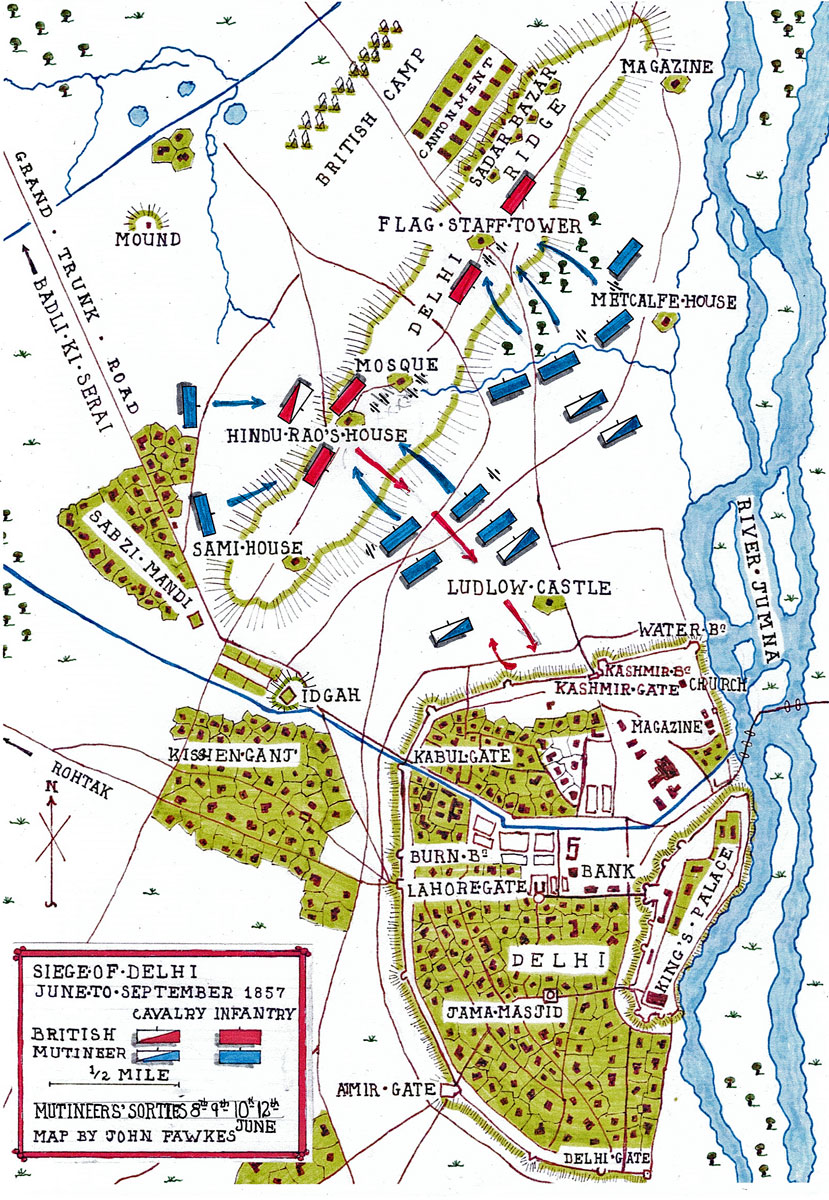
Mutineers’ attacks on 8th 9th 10th and 12th June 1857:
On 8th June 1857, the day the British occupied Delhi Ridge, the Mutineers sallied out of the city and attacked the British garrison in Hindu Rao’s House, but were driven off by the Sirmoor Gurkha battalion, two companies of the 60th Rifles and two of Scott’s guns.
On 9th June 1857, the Corps of Guides marched into the British camp after a march from the Punjab of six hundred miles, achieved in twenty-two days.
The Guides, after being inspected by General Barnard, helped repel an assault by the Mutineers on the Hindu Rao House that same afternoon.
The Guides pursued the Mutineers back to the walls of Delhi, where one of their officers, Lieutenant Quintin Battye, was mortally wounded.
The Mutineers began a cannonade using the heavy guns positioned on the north wall of the Delhi fortifications.
The British guns put in place on the Ridge were found to be inadequate to counter the bombardment by the heavier guns of the Mutineers.
The Mutineers launched further attacks on the Hindu Rao position on 9th and 10th June 1857, all of which were repelled by Major Reid and his Sirmoor Battalion of Gurkhas, with support from the 60th Rifles and the Guides.
On 12th June 1857, a body of Mutineers crept up on the Flagstaff Tower by way of a network of ravines at the base of the Ridge and launched an attack. The piquet, comprising two Horse Artillery guns and two companies of the 75th Foot, was about to be relieved by companies from the 2nd Bengal Fusiliers.
A thick fog descended on the Ridge, concealing the Mutineers as they rushed the Flagstaff Tower.
The Mutineers’ attack was repelled with difficulty, after two companies of the 60th Rifles came up to support the troops of the piquet.
Captain Knox of the 75th Foot was killed among the several British casualties in the fight.
Hard on the heels of this assault, the Mutineers launched a further attack on the Hindu Rao house, this time from the Sabzi Mandi suburb in the rear of the Ridge.
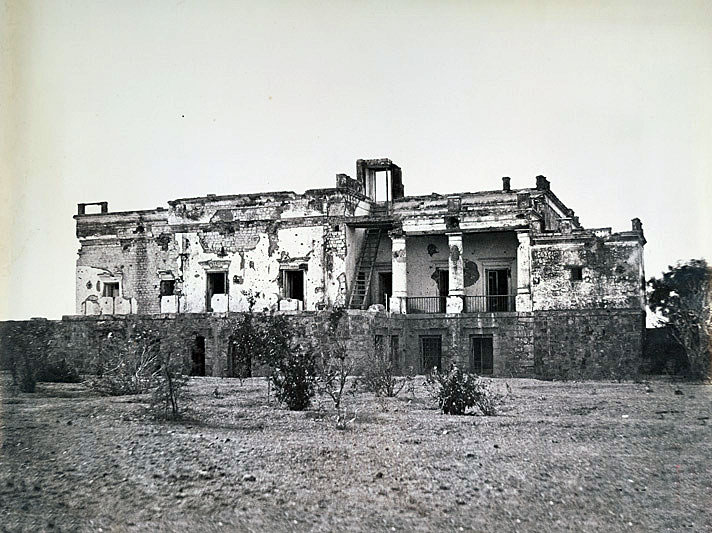
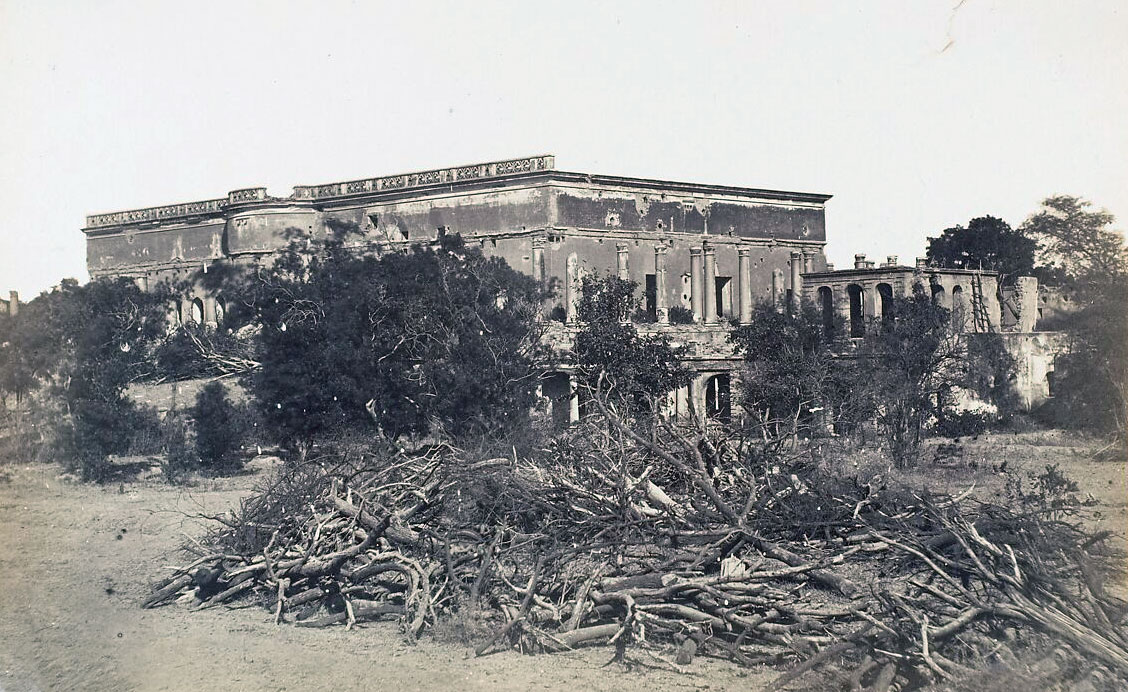
The Mutineers were only with difficulty repelled, causing the British to strengthen the defences on the north side of the Ridge facing Sabzi Mandi and on the south side with an additional advanced piquet in a building known as Metcalfe’s House, twelve hundred yards in advance of the Flagstaff Tower.
The small number of British troops in the Delhi Field Force meant that in each of these attacks virtually the whole British manpower was deployed, leaving little opportunity for rest and recovery.
In addition, the heat and the glaring sun were a substantial burden, with growing incidents of disease among the troops.
The aborted assault on the Delhi defences of 13th June 1857:
In accordance with the directions he was receiving from Lord Canning in Calcutta and Sir John Lawrence in the Punjab, General Barnard prepared an assault on Delhi.
Three junior British engineer officers were assigned to plan the assault in the utmost secrecy, under the directions of the commanding general.
The whole force was to be deployed in three columns.
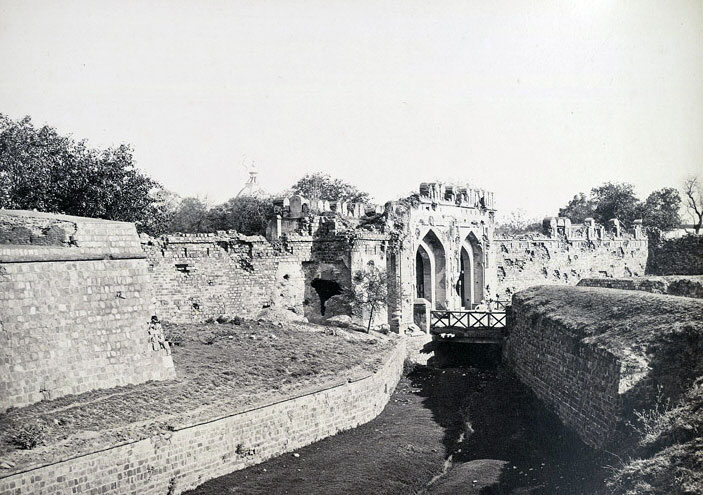
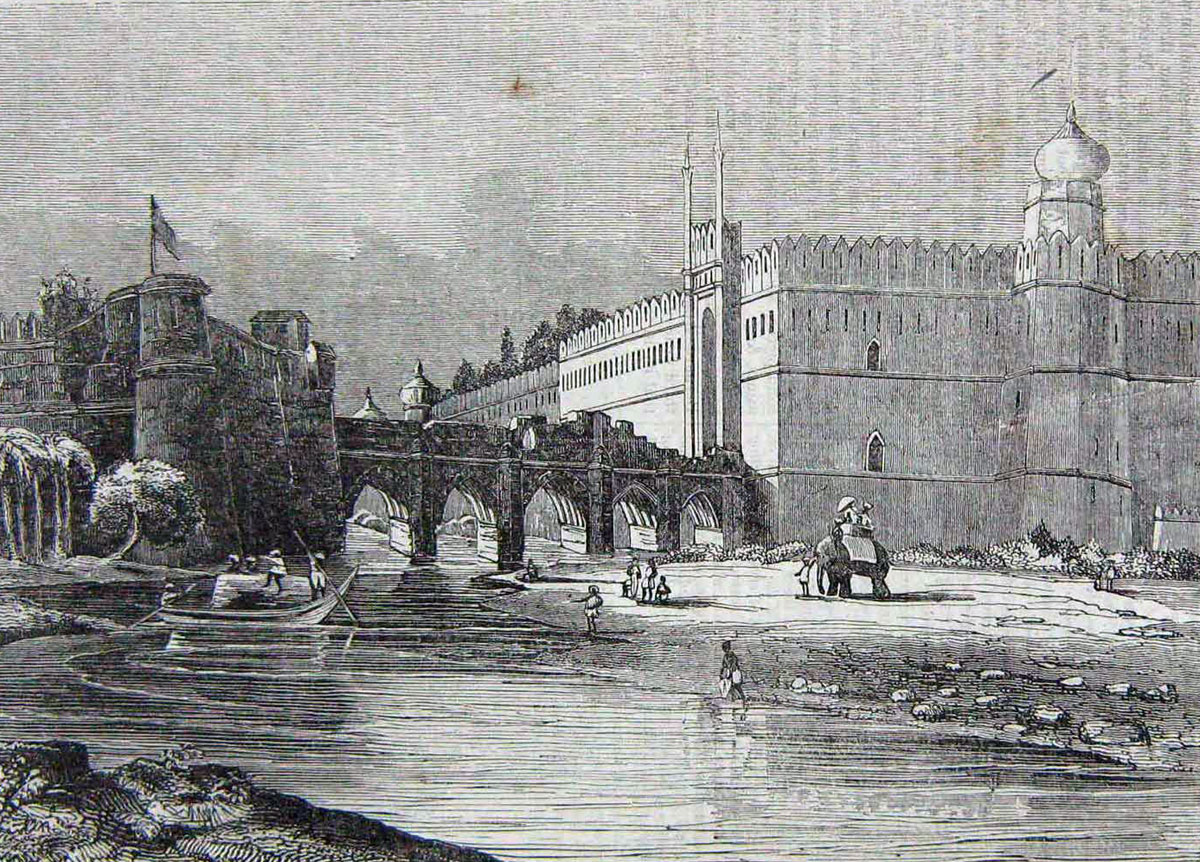
One column was to enter Delhi by the Kashmir Gate, the main entrance in the north wall of the city.
The second column was to enter by the Lahore Gate, situated in the western side of the city.
The third column was to make an assault over the city wall.
The three columns would move off from the British camp so as to arrive at the walls at daybreak.
No notice of the intended attack was given to the soldiers of the Delhi Field Force, even to the commanding engineer, whose officers were planning the operation.
At 1am on 13th June 1857, the day of the attack, the whole Delhi Field Force was suddenly paraded and ammunition given out.
At this point, the various senior officers commanding the columns were given their instructions.
It was then found that the 75th Foot, after pursuing the Mutineers from the attack on the Flagstaff Tower into the grounds of Metcalfe House had not been recalled and were still there, about a mile in front of the Tower.
By the time the 75th Foot returned to camp and been issued with ammunition it was dawn and too late to attempt the attack on the city. The operation was cancelled.
The general view seems to have been that the cancellation was a fortunate outcome as the attack had little chance of success and would have led to substantial British casualties.
Not until the Delhi Field Force received further reinforcements from the Punjab could an attack on Delhi succeed.
The Mutineers’ attacks of 15th 17th and 18th June 1857:
On 15th June 1857, a strong force of Mutineers attacked the Metcalfe House piquet but was driven back with considerable loss.
On 17th June 1857, the Mutineers launched attacks on Delhi Ridge from every direction.
It appeared that the assaults were to mask the building of a battery by the Mutineers at an Idgah, a large walled rectangular open-air place of muslim worship, on a hill a quarter of a mile in front of the southern limit of the Delhi Ridge, from where enfilading fire could be directed against the positions of the Delhi Field Force along the Ridge.
Barnard directed that the battery be attacked by two columns, one led by Major Tombs of the Bengal Horse Artillery with 400 men of the 60th Rifles and the 1st Bengal Fusiliers, 30 Guides Cavalry, his own battery and a party of Sappers and Miners.
the other column, led by Major, Reid comprising four companies of the 60th Rifles and some Gurkhas was to attack through Kishenganj on the left flank of the battery at the Idgah.
The two British columns converged on the Idgah, driving the Mutineers before them, blew open the gates and destroyed the battery, inflicting heavy casualties on the Mutineers.
On 18th June 1857, the Mutineers issued in great strength from Delhi and attacked all along the line of the British positions.
One force of Mutineers infiltrated through the suburbs on the British right and appeared in their rear.
The only troops available to repel this attack were some cavalry and light guns of Tombs Horse Artillery battery. The Mutineers were repelled with difficulty, following a further attack by a party of the 60th Rifles.

Mutineers’ attack of 23rd June 1857:
It seems to have been reported in the British camp that the Mutineers believed that the British Raj was destined only to last for 100 years and that period was to be computed from the date of Clive’s great victory at the Battle of Plassey on 23rd June 1757.
An attack on the Delhi Field Force on the anniversary of Plassey was consequently destined to succeed and would lead to the eviction of the British from India.
Further supporting this belief was the knowledge that it was a propitious date for both Hindus and Muslims.
Surendra Nath Sen queries whether this was in fact the Mutineer’s reasoning, pointing out that natives of India did not use the western calendar.
At 5am on 23rd June 1857, the Mutineers began a determined attack on the Delhi Ridge with some six thousand men.
The Mutineers’ heavy guns on the Delhi walls bombarded Hindu Rao’s House and the Ridge, while other guns in the western suburbs fired into the right flank of the British positions on the Delhi Ridge.
A series of determined attacks were then launched against the right flank and rear of the British line.
A small force of eight hundred British and Sikh troops arrived from the north-west of India and was thrown into the fighting, in spite of being exhausted from their hurried march in the heat.
After twelve hours fighting, the Mutineers were finally repelled, leaving the British, Gurkhas and Sikhs exhausted in the terrific heat, but elated by their success.
Virtually every soldier in the Delhi Field Force was drawn into the battle.
The Mutineers casualties are said to have been around 1,000 killed and wounded, while the Delhi Field Force loss was 160.
Casualty figures for the Mutineers during the Siege of Delhi are highly problematic.
The Mutineers kept no record of their casualties and some British authorities consider that figures given in British accounts after the various engagements exaggerated the number of Mutineer casualties by a significant margin.
The decision was then taken for the Delhi Field Force to occupy the Sabzi Mandi suburb.
A piquet of 180 men was established in Sabzi Mandi, occupying a serai on one side of the Grand Trunk Road and a Hindu temple on the other side, connected by a line of breastworks to the Hindu Rao piquets.
Mutineers’ attack of 27th June 1857:
On 27th June 1857, the Mutineers attacked the Metcalfe House in front of Delhi Ridge, the new Sabzi Mandi piquets and the batteries on Delhi Ridge.
The attack was repelled with British casualties of 62.
Mutineers’ attack of 30th June 1857:
On 30th June 1857, an attack was made on the Hindu Rao House.
Two British officers of the 4th Sikhs, Yorke and Packe, were wounded. The circumstances and nature of their wounds showed that they had been shot by their own men.
All the Hindustanis in the 4th Sikhs were disarmed and expelled from the British camp.
In that week the Monsoon burst, with rains flooding the area and causing severe outbreaks of disease.
At the beginning of July 1857, reinforcements arrived of guns, infantry and cavalry, bringing the strength of the Delhi Field Force to nearly 6,000 men.
Additional Mutineers arrived in Delhi from a number of towns across northern India, far outnumbering the modest addition to the British force.
The Mutineers from Rohikund could be seen marching over the Jumna River into Delhi by the Bridge of Boats, with their bands playing and colours flying.
Proposed assault on Delhi:
Due to the fears that there might be a rising against the British in the Punjab, the capture Delhi was being urgently pressed.
General Barnard reluctantly agreed to the assault and Lieutenant Alex Taylor, the acting commanding engineer, was given the task of planning the operation.
In the event, a conspiracy was discovered among the native troops and the assault abandoned.
On the day of the intended assault, Lieutenant-Colonel Baird-Smith of the Bengal Engineers joined the Delhi Field Force as its new chief engineer.
Mutineers’ attack of 3rd July 1857:
On 3rd July 1857, a force of Mutineers, around 5,500 strong, with several guns, occupied the suburbs to the right of the British position.
The Delhi Field Force turned out in strength in expectation of an attack on the British line.
Instead, once darkness fell, the Mutineer force marched off to the north towards Alipur, some twenty miles away.
Alipur was garrisoned by a squadron of the 5th Punjab Cavalry, commanded by Lieutenant Younghusband, with a few guns.
The Mutineers reached Alipur around midnight and instead of attacking immediately, opened a gun barrage, enabling the Punjabi sowars to mount and escape to Rhai, ten miles to the north.
Hearing the gunfire, a relief column under Major Coke was sent from the British camp.
Coke’s column intercepted the Mutineer force as it returned to Delhi with loot from Alipur and attacked them.
The Mutineers got away with their guns but abandoned a great deal of loot and ammunition.
Death of General Barnard on 5th July 1857:
On 5th July 1857, General Barnard succumbed to cholera and died within a few hours, much lamented by the Delhi Field Force.
Barnard was replaced as commander of the force by General Reed.
Mutineers’ attack of 9th July 1857:
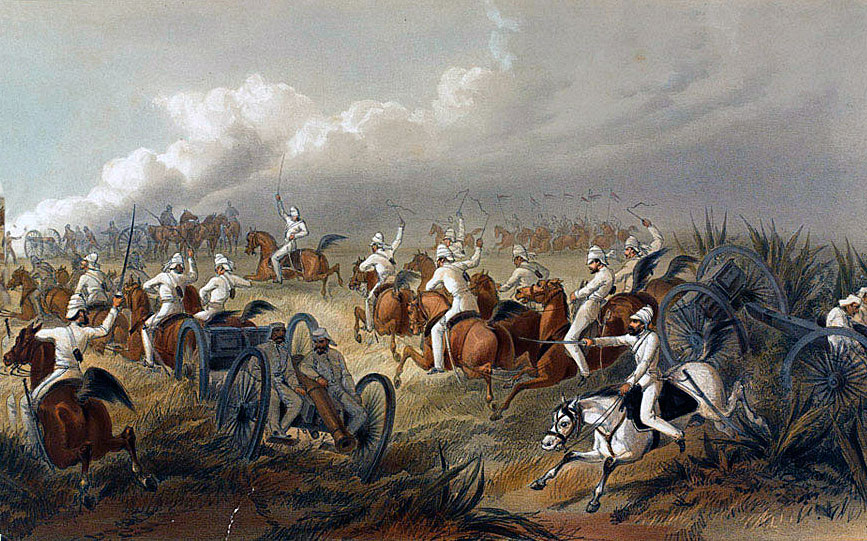
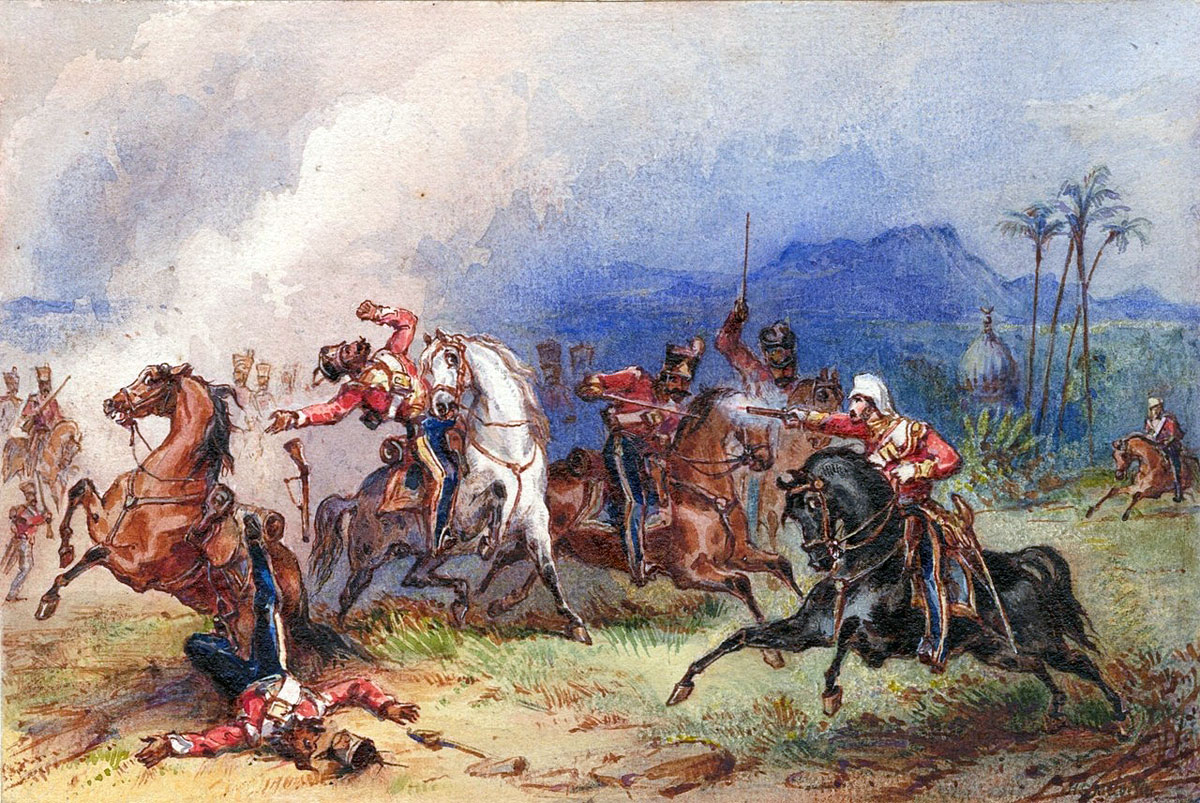
On 9th July 1857, the Mound Piquet, a position behind the British right flank overlooking the Grand Trunk Road, was held by two guns of Tomb’s troop of Indian horse artillery and a troop of Carabiniers/6th Dragoon Guards commanded by 2nd Lieutenant Hills and Lieutenant Stillman.
A piquet of the 9th Irregular Cavalry commanded by an Indian officer was further forward observing the Grand Trunk Road.
A sowar from the piquet informed the two British officers that a party of Mutineer cavalry was approaching. The sowar was sent on to warn the British camp. The main piquet mounted up and the gunners prepared their guns.
The British troops were surprised by the arrival of the Mutineer cavalry, the gunners still loading.
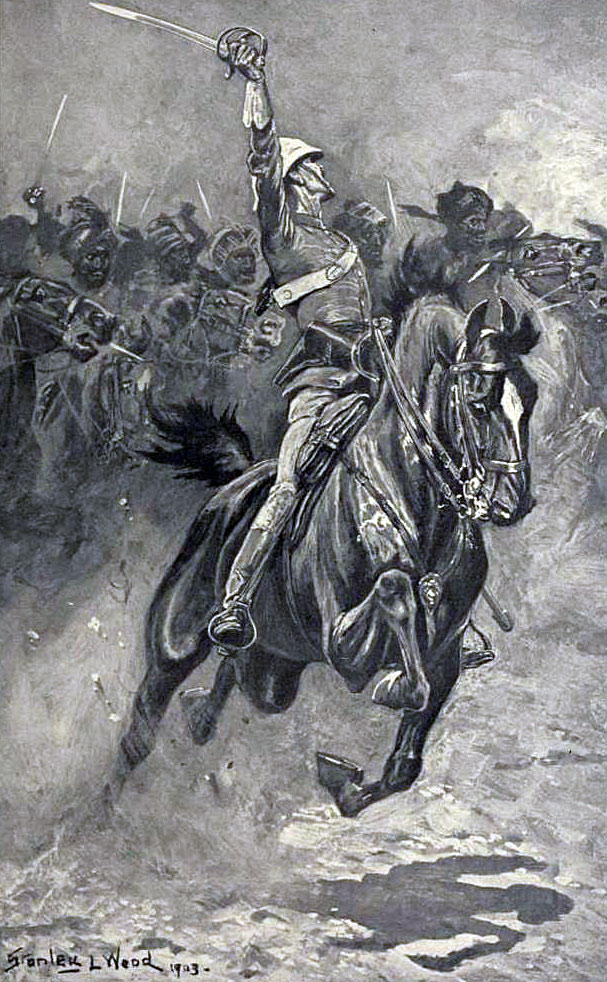
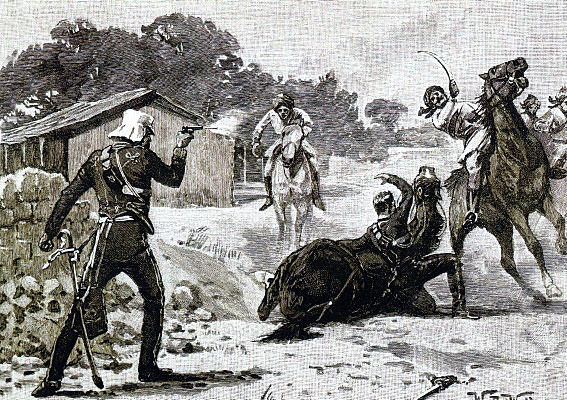
Hills ordered his guns to fire when ready and himself charged the head of the Mutineer column, cutting down the two leading Mutineers, before being ridden down.
Hills was further attacked by a group of Mutineers and only rescued by the arrival of Tombs who cut down his assailants.
The Mutineer cavalry attempted to persuade the native gunners of Tombs’ troop to join them. The gunners answered by firing at them, before escaping across the canal.
Hills and Tombs were awarded the Victoria Cross for their conduct in this action.
Mutineer infantry and guns were now in the suburbs beneath the Ridge, from where they were evicted by a column of 800 infantry and six guns commanded by General Chamberlain.
British casualties were 1 officer and 40 men killed, 8 officers and 163 men wounded with 11 men missing and likely to have been killed by the Mutineers, as neither side took prisoners.
It was clear that the piquet of 9th Irregular Cavalry had acted in concert with the Mutineers, as insufficient warning was given of the approach of the Mutineer cavalry. The sowars and NCOs of the piquet were not seen again and were assumed to have ridden off with the escaping Mutineers.
General Reed took the opportunity to disarm and discharge all the remaining Hindustanis in the force, to the relief of the remaining troops, both European and Native.
There was now a short lull indicating that the Mutineers had suffered significant casualties on 9th July 1857.
The established pattern was that the Mutineers would await the arrival of reinforcements before launching another attack, using the newly joined regiments.
Mutineers’ attack of 14th July 1857:
On 14th July 1857, the Mutineers emerged from Delhi in substantial numbers and attacked the Hindu Rao House and the Sabzi Mandi piquets.
A column, commanded by Brigadier Showers, was formed of what Roberts calls ‘the usual strength’, 800 infantry with six horse artillery guns and cavalry from the Guides and Hodson’s Horse. Brigadier-General Chamberlain accompanied the column.
Chamberlain leapt his horse into the first substantial compound held by the Mutineers, receiving a ball in the shoulder.
The troops followed Chamberlain and drove the Mutineers from the compound.
The Mutineers were driven with considerable difficulty out of a number of building and compounds, finally reaching the Lahore Gate, where the pursuing column met a heavy gun and musketry fire from the walls of the city.
The column was forced to withdraw to the lines on the Ridge, now pursued by the Mutineers, who continued to attack until the lines were reached.
The losses of the Delhi Field Force were 15 killed, 16 officers and 177 men wounded with 2 missing.
Mutineer losses were estimated at 1,000 killed.
Roberts describes how the Mutineers spent hours carrying their dead back to Delhi in carts after this engagement.
Termination of General Reed’s command:
On 17th July 1857, the health of Major-General Reed had deteriorated to such an extent that he was forced to give up command of the Delhi Field Force, being replaced by Brigadier Archdale Wilson.
Roberts describes how Wilson’s introduction of a more systematic organisation for the relief of piquets provided a considerable relief to the troops and improved their overall morale and health.
Mutineers’ attack of 18th July 1857:
On 18th July 1857, the Mutineers mounted a general attack on the batteries along the Delhi Ridge and the Sabzi Mandi piquets.
By this time considerable work had been carried out by the Delhi Field Force in clearing way the old serais and walled gardens of the Sabzi Mandi, depriving the Mutineers of the cover they had used to such effect on several occasions and giving the Sabzi Mandi piquets clear fields of fire.
In the afternoon a column set out to drive the Mutineers away, consisting of four horse artillery guns, 750 infantry and the Guides Cavalry, commanded by Colonel Jones of the 60th Rifles.
Jones forced the Mutineers back, but did not make the mistake of approaching the city walls, remaining in a position before Sabzi Mandi.
Of the Delhi Field Force, 1 officer and 12 men were killed, 3 officers and 66 men wounded with 2 men missing.
Mutineers’ attack of 23rd July 1857:
The Mutineers did not make a further attack on the positions of the Delhi Field Force for some five days and then the assault was on its left flank, at the far end of the Delhi Ridge from the suburbs.
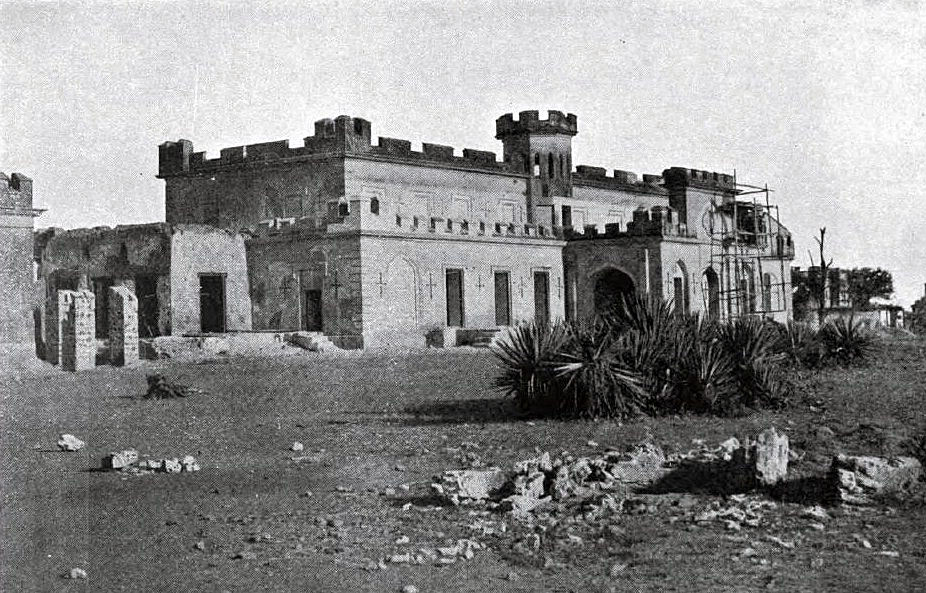
On 23rd July 1857 the Mutineers emerged from the Kashmir Gate and occupied Ludlow Castle.
From there the Mutineers’ artillery opened a barrage on Metcalfe House and the Stable Piquet and the Mosque Piquet on the Ridge.
A counter-barrage by the British guns was unable to silence the Mutineers’ guns and a column was sent to push the Mutineers out of Ludlow Castle, in case they intended to set up a permanent battery.
The column comprised six horse artillery guns, 400 British infantry, 360 men of the 1st Punjab Infantry and a troop of Guides Cavalry. They were joined by 250 men from the Metcalfe House piquet.
The column approached Ludlow Castle, initially apparently unnoticed, but was then subjected to a heavy fire of grapeshot.
The column swept the Mutineers out of the position and pursued them to the walls of the city, where as so often happened in these pursuits, the pursuers were subjected to a damaging fire from the city walls, forcing a precipitous retreat, during which Brigadier Showers was wounded.
Mutineers’ attack of 23rd July 1857:
On 23rd July 1857 a strong force of Mutineers marched to Alipur with the purpose of establishing a bridge over the cut to intercept the Delhi Field Force’s communications with Meerut and the Punjab.
A column followed from the Dehi Field Force and waited to repel the crossing over the bridge.
In the event, monsoon raid caused heavy flooding and the half-finished bridge was washed away.
The Mutineers marched back to Delhi and, being joined by a strong force from the city, began a night-long attack on the right flank of the Delhi Field Force at Sabzi-Manji.
Mutineers’ attack of 1st August 1857:
This period was a Mohammedan festival at which it was the custom for the King of Delhi to pray at the Idgah.
The festival was replaced by a particularly determined attack by both Hindu and Muslim Mutineers.
After lengthy prayers by each denomination during the morning of 1st August 1857, the Mutineers, shouting religious battle cries, marched out of every city gate and attacked the British positions on the Ridge.
The attacks were repeatedly made and thrown back throughout the night and the next day, until the Mutineers finally gave up and returned to the city.
British casualties were 1 officer and 9 men killed with 36 men wounded, the troops being well protected by the breastworks along the Ridge.
The Mutineers’ casualties were reported to have been heavy.
News was reaching Delhi of the approach of Nicholson’s ‘Movable Column’ from the Punjab, as a reinforcement for the Delhi Field Force.
Many of the Mutineers despaired of winning the fight against the British at Delhi and left the city for their homes.
There was increasing disorder in the city, with the absence of any strong leadership either military or civil, the only authority being the elderly king.
The Mutineers still outnumbered the Delhi Field Force by eight or nine to one.
During this period, information was arriving at the Delhi Field Force from the Punjab and elsewhere across India, usually written in Greek characters on scraps of paper sewn into a native’s shoe or clothing.
The Delhi Field Force learned that Lucknow held out against the Mutineers and that British troops were being sent to India.
In particular the British governor at the South African Cape was ordering all the troop ships stopping in Capetown on their way to China to take their regiments to Calcutta.
Mutineers’ attack of 11th August 1857:
On 11th August 1857, the Mutineers made a further attempt to overwhelm the Metcalfe House piquet.
Guns were brought out of the Kashmir gate and positioned at Ludlow Castle and the Kudsiabagh.
The Mutineers began a bombardment, with heavy musketry, from the jungle at the foot of Delhi Ridge.
While casualties to the Delhi Field Force were not high it was considered dangerous to leave the Mutineers unchallenged so far forward.
Brigadier Showers led a force to drive the Mutineers back into the city, comprising British, Sikh and Gurkha infantry, a troop of Horse Artillery, a squadron of the 9th Lancers and the Guides cavalry.
Showers’ orders were to ‘move up silently and take the guns at Ludlow Castle’.
Showers’ column approached the Mutineers’ position at dawn on 12th August 1857.
A Mutineer sentry called ‘Ho come dar?’ and was promptly shot down.
After an exchange of musketry, the Mutineers were overwhelmed. 250 Mutineers were killed and four of their guns captured.
Casualties in Showers’ column were 1 officer and 19 men killed, 7 officers and 85 men wounded, with 5 men missing.
Showers himself was wounded with Major Coke, the commandant of the 1st Punjab Infantry (Coke’s Rifles).
The captured Mutineer guns were pushed back to the British lines by cheering soldiers.
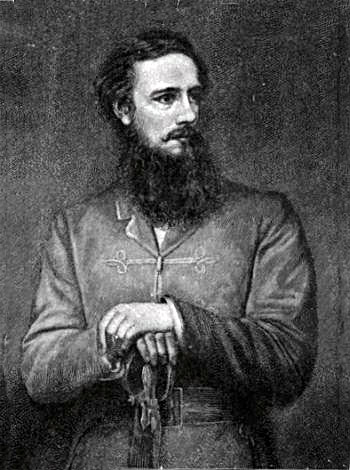
The next day the Punjab Movable Column, commanded by Brigadier-General John Nicholson, marched into the Delhi Field Force camp.
Nicholson was a legendary character among the Punjabi and Sikh troops referred to as ‘Nickal Seyn’.
His force comprised the British 52nd Light Infantry, a wing of the 1st Baluch regiment and the 2nd Punjab Infantry, with 200 Multani Cavalry and 500 Military Police.
The strength of the Delhi Field Force was now 8,000 troops of all arms.
Hodson at Rohtak:
On 14th August 1857, the day of Nicholson’s column’s arrival, a body of Mutineer cavalry was seen to leave Delhi on the Grand Trunk Road heading north-west.
The Delhi Field Force was now strong enough for a pursuit to be mounted and Captain William Hodson followed the Mutineers with a body of Guides Cavalry and his own Hodson’s Horse.
Hodson’s column came up with a group of irregular horse who had failed to return to duty, although not obviously active Mutineers. They were wiped out.
Hodson continued to the town of Rohtak. The town and its neighbouring fort were occupied by the Mutineers.
After venturing into Rohtak, Hodson withdrew and made as if to return to Delhi Ridge.
The Mutineer cavalry pursued Hodson’s column, which suddenly turned and launched a charge, entirely overwhelming the pursuing Mutineers.
On his return to camp Hodson was highly commended for his success.
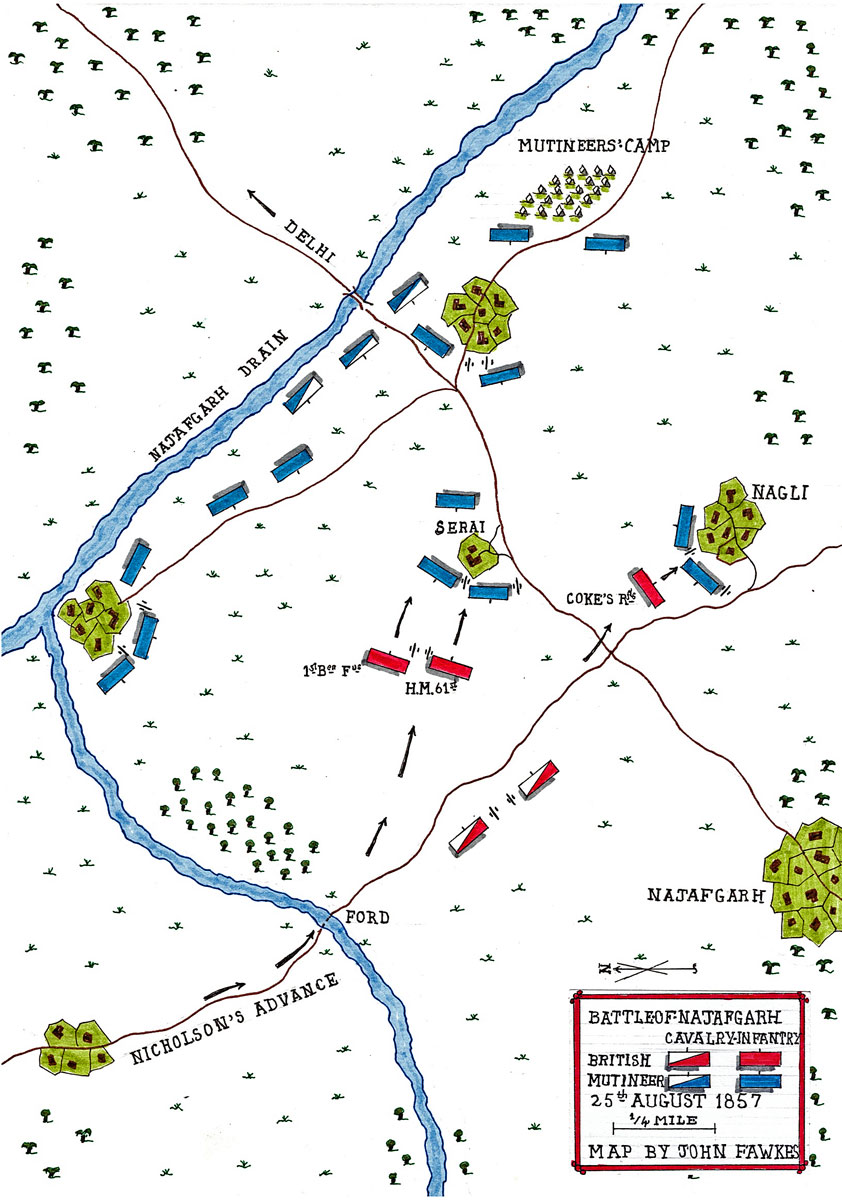
Battle of Najafgarh:
A British siege-train with powerful guns was on its way from Ferozepore and other parties of troops were known to be marching to join the Delhi Field Force.
On 24th August 1857, a formidable contingent of Mutineers marched west from Delhi, intent on intercepting the siege train.
On 25th August 1857, Nicholson left camp with sixteen horse artillery guns, 1,600 infantry and 450 cavalry with orders to overtake the Mutineers and bring them to action.
Nicholson caught up with the Mutineers at 4pm outside the town of Najafgarh, after marching for twenty miles in pouring rain along roads turned to quagmires. Two swamps had to be crossed.
The Mutineers were occupying a position a mile and three-quarters long in front of a wide and deep drainage ditch.
A Serai or large country inn stood in front of this position, held by four guns.
On each flank the Mutineers occupied a village, strongly held.
A branch of the drainage ditch ran along the Mutineers’ right flank.
A bridge in the rear of the Mutineers’ position carried the road in from Delhi.
Nicholson approached by a side road that came in on the right of the Mutineers’ position.
The branch of the drainage ditch ran between Nicholson’s advance and the Mutineers’ position, crossed by a ford.
The heavy rain had made the drainage ditch a dangerous obstacle, chest-high even at the ford.
Nicholson’s men crossed the ditch with some difficulty, subjected to a heavy fire from the Serai.
Nicholson carried out a short reconnaissance of the Mutineers’ position before launching his attack on the Serai.
Nicholson addressed the soldiers of HM 61st Regiment and the 1st Bengal (European) Fusiliers, urging them to hold their fire until the last moment in the charge.
Under cover of a barrage from the horse artillery guns, the British infantry took the Serai and swept up the Mutineers’ line behind the Serai, driving them over the bridge towards Delhi.
The battle was over by the evening, leaving thirteen guns to be captured by the British, with a large quantity of ammunition, camels, horses and other supplies.
The Mutineers gave their casualties as 800 men killed and wounded.
British losses were 2 officers and 23 men killed, with 3 officers and 68 men wounded. 2 of the wounded British officers died.
The Mutineers left in Delhi assumed that the preponderance of the Delhi Field Force must have marched to Najafgarh. The city Mutineers launched an attack on the Ridge the next day, 26th August 1857, but were beaten off, with small loss.
The storming of Delhi by the Delhi Field Force:
By 6th September 1857, the Siege Train reached the camp of the Delhi Field Force on Delhi Ridge.
A contingent sent by the Maharajah of Kashmir of 2,200 men and four guns joined the force.
The Raja of Jhind arrived in the camp with several hundred of his troops, to take part in the capture of Delhi.
No further assistance could be expected.
It was felt by the Delhi Field Force that the attack on the city must now be made, while the army was at its strongest and before it was again whittled away by the casualties caused in holding the positions on Delhi Ridge and by disease.
By that date 2,977 men were in the hospital.
In the course of three weeks, HM 52nd Light infantry had dwindled from 600 healthy men to 242 men fit for duty due in part to battle casualties, but primarily to disease.
Brigadier-General Archdale Wilson, the Commander of the Delhi Field Force was not confident that he could take the City of Delhi, held by the Mutineers with an army numbering in excess of 40,000 men and equipped with many more guns than he commanded, but the pressure on Wilson to mount the assault was now irresistible.
Lawrence in the Punjab and Canning, the British Governor-General in Calcutta, had been clamouring for some time for Wilson to assault Delhi.
It was becoming increasingly clear that the prospects for the British of winning the war against the Mutineers and the various rebelling princes depended on the re-capture of Delhi.
Wilson was under daily pressure from his own senior subordinates to mount the assault.
Nicholson was threatening to remove Wilson as the commander of the Delhi Field Force by force if he prevaricated any longer.
Wilson turned to his senior military engineer Lieutenant-Colonel Baird-Smith for his advice.
Baird-Smith, supported by all the influential subordinate officers in the Force, strongly advised Wilson to storm the city without delay.
At a Council of War held on 6th September 1857, Wilson announced that an attack on Delhi would be made.
Preparations were already under way; a trench had been dug with a battery of two 9-pounders and two 24-pounders at the right of the British line, to prevent the Mutineers from intervening in the preparation of batteries further along the British line with sorties from the Lahore and Kabul gates.
This field work had the unlooked-for effect of causing the Mutineers to believe that the assault on Delhi was to be launched from that end of the British line, the right, when the reverse was the case.
Wilson issued an order on 7th September 1857, directing that preparations for the assault on Delhi be commenced immediately.
‘Ground was broken’ that evening, commencing the building of the gun batteries that would lay the ground for the assault.
Battery No. 1 was begun 700 yards from the Mori Bastion at the north-west corner of the city walls. The right half of the battery, with five 18-pounders and one 8-inch mortar, was to silence the Mutineers’ guns in the Mori Bastion, while the left end of Battery No. 1, with four 24-pounders was to engage the Kashmir Bastion.

Battery No. 1, commanded by Major James Brind of the Bengal Artillery, was completed and opened fire at sunrise the next day, having endured several hours of heavy bombardment by the Mutineers’ guns during the early hours of daylight.
By the afternoon, the Mori Bastion was a heap of rubble from the British bombardment, with its guns silenced.
No 2 Battery was constructed at Ludlow Castle, 500 yards from the Kashmir Gate, one of the key points for the planned assault on Delhi.
While the battery was built in two parts, with seven heavy howitzers and two 18-pounders on the right and nine 24-pounders on the left, the whole battery on the morning of 11th September 1857 opened fire on the Kashmir gate.
Nos 3 and 4 Batteries were situated in the Kudsiabagh and fired on the Kashmir bastion.
Baird-Smith’s plan selected the left flank as the point of attack, the River Jumna acting as a barrier to prevent a flanking counter-attack by the Mutineers.
Throughout the barrage on the city walls, the Mutineers’ guns on the walls returned a heavy fire and attempted unsuccessfully to silence the batteries of the Delhi Field Force.
By the evening of the 13th September 1857, the guns in the British batteries had completed their task of breaching key sections of the city’s northern defences.
Nicholson, with the engineer Taylor and four junior engineer officers, inspected the defences and reported at midnight that the breaches were practicable for the assault. Colonel Baird-Smith passed this report to General Wilson, who issued orders for the storming of the Delhi walls to take place at daybreak the following morning.

There were to be four attacking columns. No 1 column, commanded by Brigadier-General Nicholson, comprising HM 75th Foot, 1st Bengal Fusiliers and 2nd Punjab Infantry, was to storm the breach in the Kashmir Bastion.
No 2 column, commanded by Brigadier Jones, comprising HM 8th Foot, 2nd Bengal Fusiliers and 4th Sikhs, was to storm the breach in the Water bastion.
No 3 column, commanded by Lieutenant-Colonel Campbell, comprising HM 52nd Light Infantry, the Kumaon Gurkha battalion and 1st Punjab Infantry, was to storm the Kashmir Gate, once it was blown.
No 4 column, commanded by Major Reid, comprised the Sirmoor Gurkha Battalion, the Guides Infantry and detachments from the piquets. With the Kashmir Contingent, this column was to attack the suburbs of Kisenganj and Paharibur and storm the Kabul gate.
A reserve column was formed under Brigadier-General Longfield, comprising HM 61st Foot, 4th Punjab Infantry and a wing of the Baluch Battalion with some of the Jhind contingent. This column would provide support where needed.
200 men of the 60th Rifles would cover Nicholson’s advance and then join the reserve.
The strength of the attacking force was 5,000 men and took up a significant part of the Delhi Field Force.
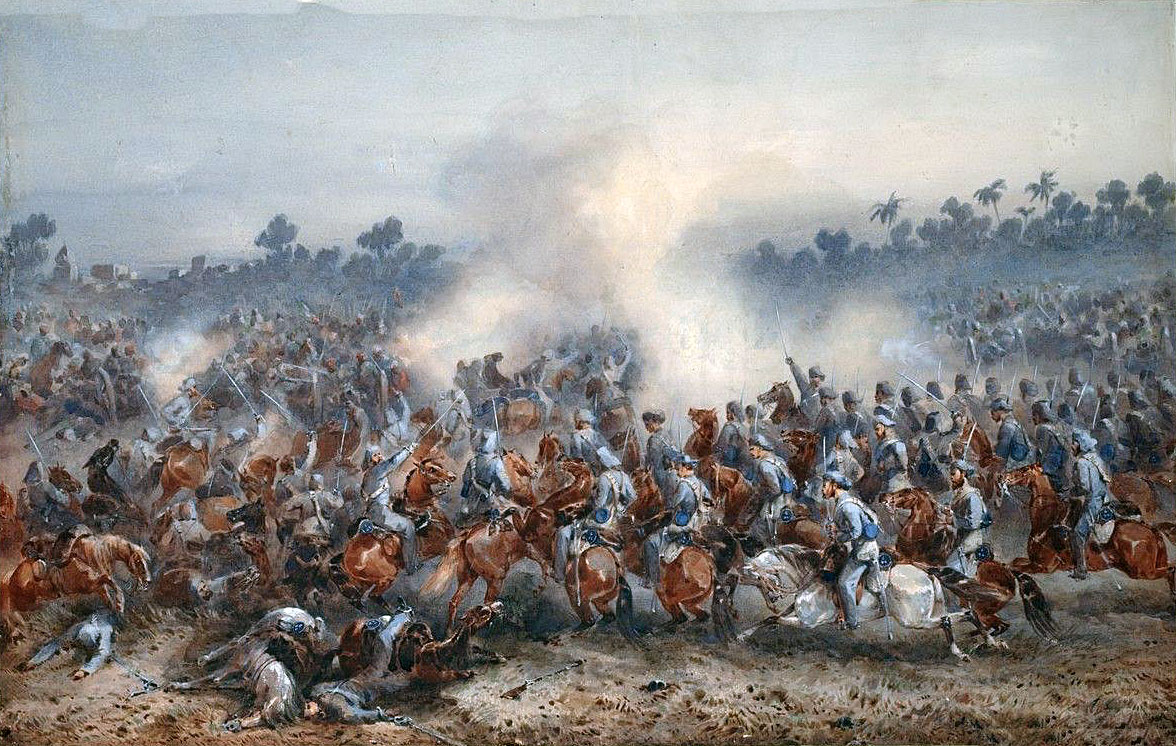
The Attack on Delhi on 14th September 1857:
It took time for many of the men allocated to the attacking columns to find their way back from duty on the piquet lines.
In addition, it was necessary to mount a brief additional bombardment to remove repairs to the defences installed over night by the Mutineers.
The British breaching batteries suddenly ceased firing and the column commanders gave the signal for the attack.
The 60th Rifles gave a loud cheer echoed by the other troops.
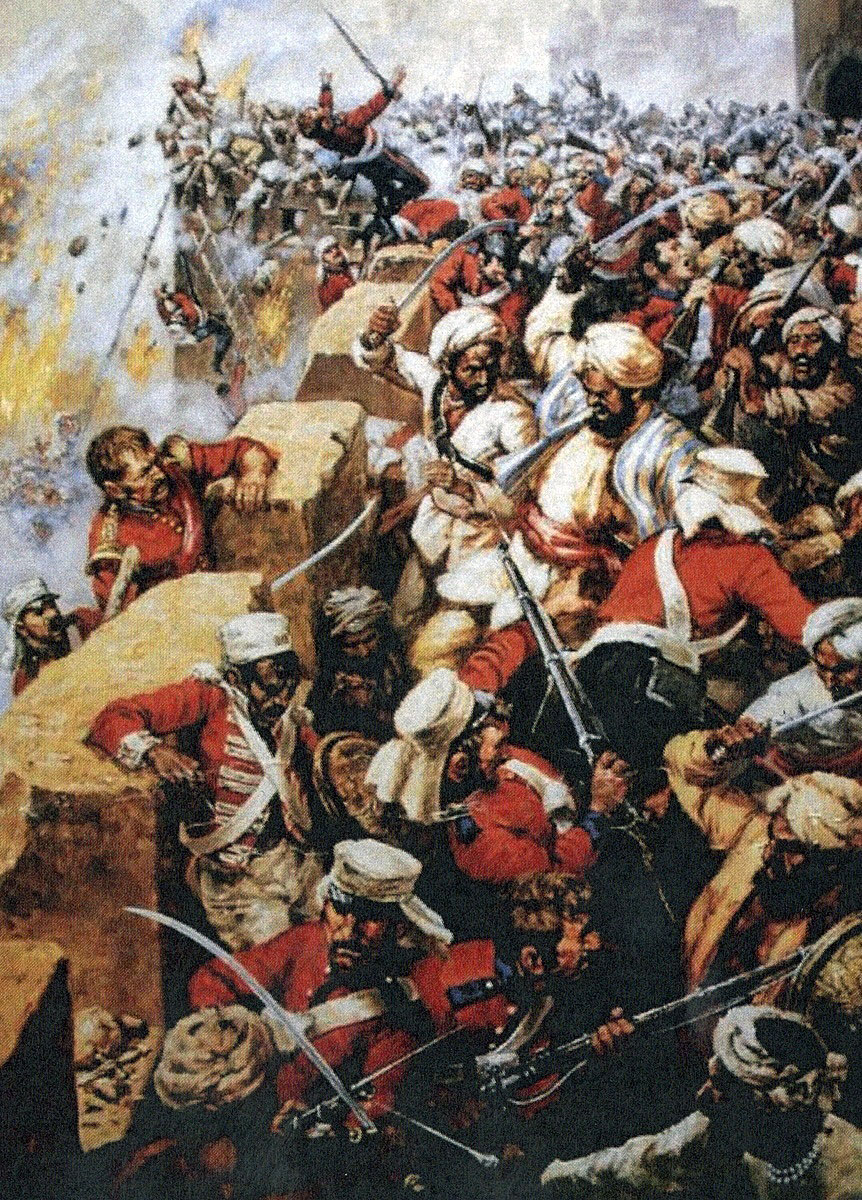
As the front of each column rose to its feet and rushed forward, they were met by a storm of gunfire and musketry from the Mutineers on the walls of Delhi.
Most of the men carrying the storming ladders were shot down, but were quickly replaced and the ladders planted against the walls.
The Kashmir bastion was soon taken by No 1 column, as was the Water bastion by No 2 column.
No 3 column advanced towards the Kashmir gate and halted while the two engineer officers went forward with the explosive charges to blow the gate, reaching the gatehouse by crossing a plank over the ditch, all that remained of the bridge.
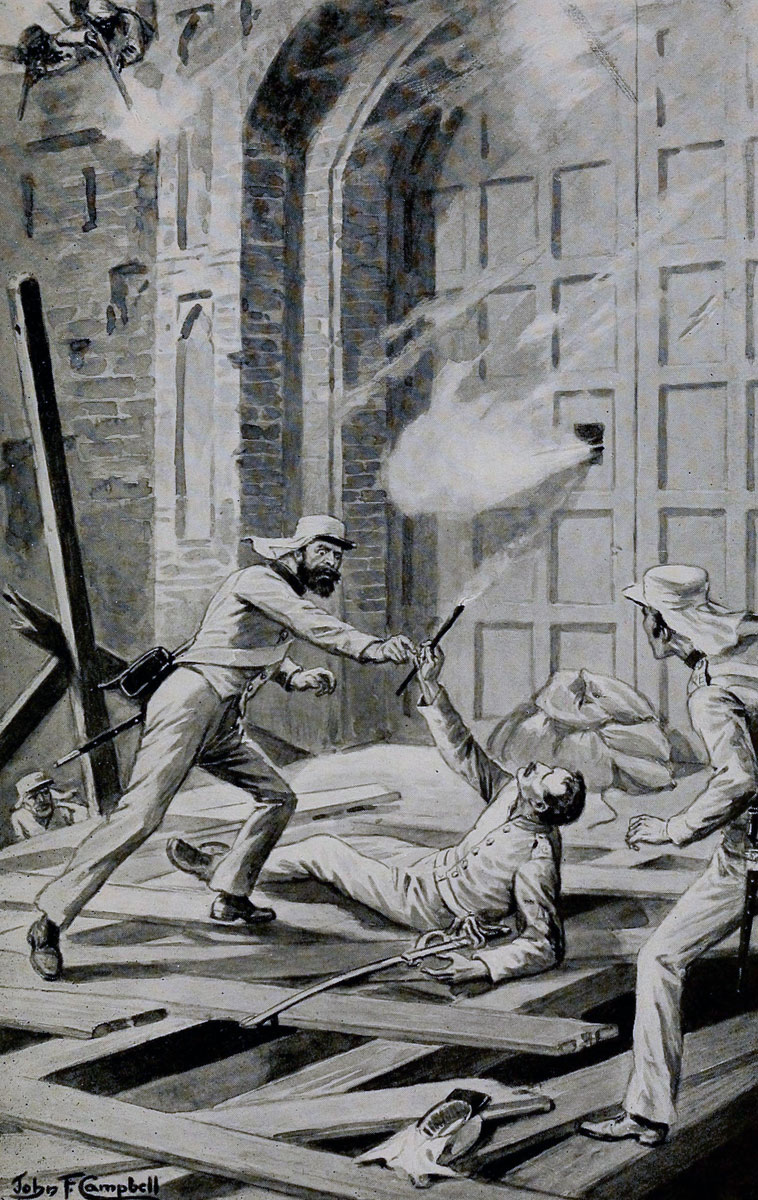
Under a heavy fire, Lieutenant Home and his men attached the explosive charges to the gate.
Lieutenant Salkeld came up with his firing party. Salkeld was shot in the leg and handed the slow-match to Corporal Burgess.
Burgess lit the fuse and fell mortally wounded.
The explosion blew the gate in and Bugler Hawthorne sounded the regimental call of the 52nd.
Colonel Campbell did not hear the call or the explosion, so great was the noise of the assault, but was already bringing his column forward.
The troops crossed the ditch by the single plank and rushed through the gate.
Inside was an 18-pounder gun with its Mutineer crew scorched and killed by the explosion.
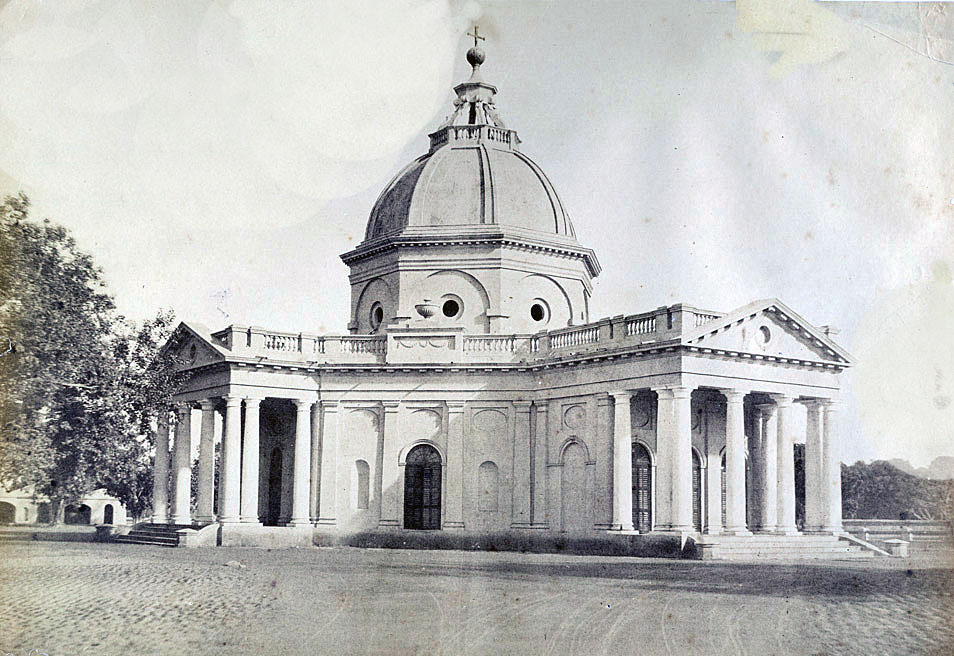
No 3 column poured through the Kashmir gate to meet up with the No 1 and No 2 columns which had surged through their respective breaches and joined up in the area between the Kashmir gate and the Church.
To the west of the city, the No 4 column advanced from Sabzi Mandi towards Kisenganj and Paharipur.
It would seem that the Mutineers were expecting the weight of the British attack to be made here with an attack on the Kabul gate at the north-western point of the Delhi city walls.
The Mutineers were in great strength here and moved forward to line the bank of the Jumna canal.
The commander of No 4 column, Major Reid, was wounded early in the fighting and there was confusion as to who was now in command.
The column was pushed back and it seemed for a time that the Mutineers might break through to the British camp.
Seeing how the battle was developing, Brigadier Hope-Grant brought up the British cavalry brigade.
The horse artillery opened a destructive fire on the Mutineers and the appearance of the cavalry held the Mutineers back, enabling the Kashmir contingent to withdrew from the Idgah and the rest of No 4 column to retire to the Hindu Rao House.
The three storming columns were reforming inside the walls and the guns in the captured Water and Kashmir bastions were being turned on the Mutineers inside the city.
The orders were for Nicholson’s 1st column to attack along the inside of the city wall towards the Ajmir gate in the south-west of the city.
Jones’ 2nd column was to take the Kabul gate at the head of the Grand Trunk Road in the north-west corner of the city.
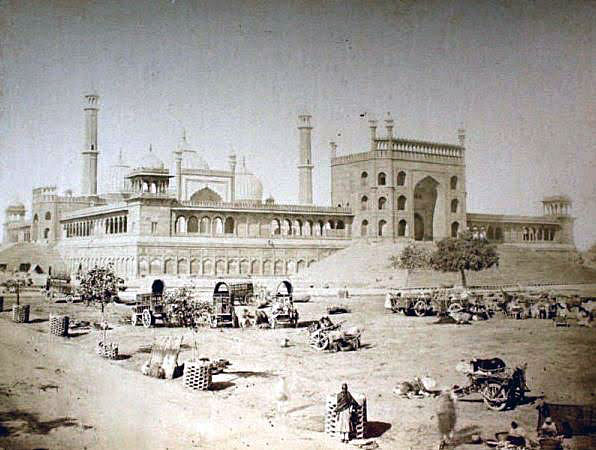
Campbell’s 3rd column was to head for the Jama Masjid, the large mosque in the centre of Delhi.
The 1st and 2nd columns became intermingled and advanced along the wall past the Kabul gate, capturing all the guns positioned on the rampart.
Nicholson became separated from his men and joined Campbell’s push towards the Jama Masjid, until they were halted by the Mutineers’ resistance at the Burn bastion, just short of the Lahore gate.
The Mutineers brought up a gun and subjected Campbell’s men to such a heavy fire that they were forced to withdraw to the Kabul gate.
Nicholson here re-joined his men and ordered a further attack on the Burn bastion.
The column made its attack down the lane that ran parallel to the wall.
In this lane Major Jacob, commanding the 1st Bengal Fusiliers, was mortally wounded. He ordered his men to leave him and press the attack. Nicholson rushed to the front of the column, where he too was mortally wounded.
The column fell back again to the Kabul gate where the 1st and 2nd columns spent the night.
Campbell’s 3rd column was guided by Sir Theophilus Metcalfe, who from his pre-Mutiny office of Magistrate and Collector of Delhi knew the city well.
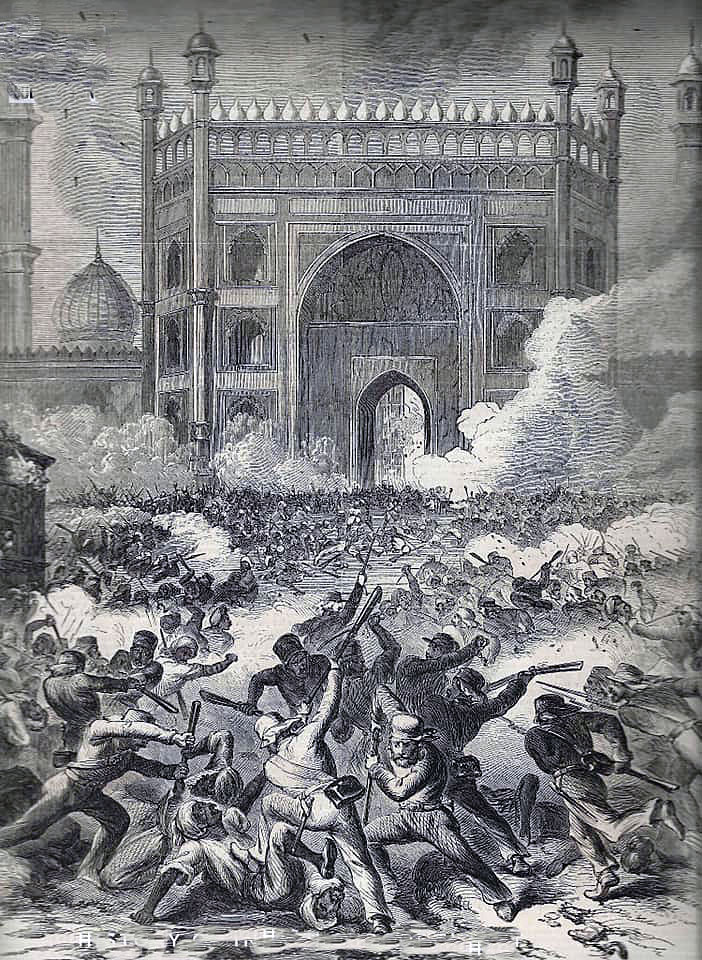
Metcalfe led the column by roads that avoided the worst of the Mutineers’ fire to the Jama Masjid.
The column had no guns or explosives to blow in the gate and after half an hour fell back to the Church in the north-east corner of Delhi, where the 3rd column was joined by the 4th Punjab Infantry from the Reserve column.
General Wilson having watched the successful entry of his troops into Delhi, rode into the city to the Church.
Information reached him that the cavalry had suffered heavy losses and that Hope-Grant and Tombs were both dead.
Captain Frederick Roberts was sent to discover the truth and returned with the news that both these officers were unwounded and that the Mutineers had been repelled in their attack on the right wing of the Delhi Field Force.
Wilson was ill and greatly depressed by the heavy casualties and the apparent failure of the various columns to gain their objectives.
He was inclined to call off the attack and withdraw his forces to the Ridge.
Before giving the order Wilson referred to Baird-Smith for his opinion.
Baird-Smith’s reply was an uncompromising ‘We must hold on’. Similar urgings came from Neville Chamberlain commanding the Hindu Rao House piquet and from the mortally wounded Nicholson.
Wilson resolved to continue the attack on the city.
At the end of 14th September 1857, the Delhi Field Force had a tenuous hold on a small section of the city walls.
Three of the four column commanders had been wounded and 66 officers and 1,104 soldiers had been killed or wounded.
The night was spent resting the troops and re-organising the columns.
The Mutineers failed to take advantage of the exhausted condition and disorder in the British ranks, other than a movement early in the evening which caused the band of the 4th Punjab Infantry to strike up with the song ‘Cheer, Boys, Cheer!’
Cheering broke out in the ranks of the Punjabis and spread to neighbouring regiments.
Any intended move by the Mutineers was abandoned.
Attack on the city on 15th September 1857:
One of the hazards in the attack was the amount of alcohol found.
It was believed that quantities of drink had been left in the streets by the Mutineers to hamper the attacking columns. On the previous day many British soldiers had become intoxicated.
A determined effort was now made to destroy all the alcohol found in the city.
Guns were brought up and a bombardment attempted of the Mutineers’ positions across the city. This was found to be of little impact.
On 16th September 1857 Wilson, completely exhausted, handed over command of the attack on the city to Brigadier-General Sir Neville Chamberlain.
The Mutineers withdrew from their positions in the suburbs into the city.
Here the troops of the Delhi Field Force steadily pushed them back.
The magazine, near to the church in the north-east corner of the city, was taken by the British.
On 17th September 1857, the Bank, a building south of the church, was taken by the British.
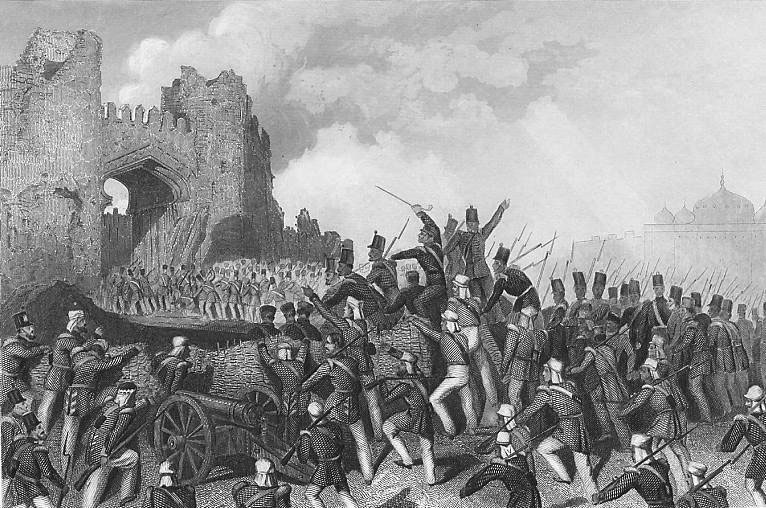
After several days of sapping through the walls of houses to enable the advance to be made without the troops being exposed in the streets, on 20th September 1857, the British advance was resumed.
The Burn bastion was taken, followed by the capture of the Lahore gate.
The 1st and 2nd columns pushed into the centre of Delhi, towards the Jama Masjid Mosque.
Here they found that Campbell’s 3rd column had made its way through the streets from the north-east of the city to the Jama Masjid, which had been taken by 4th Punjab Infantry.

The columns pushed on to the Moghul Red Fort, the palace occupied by the Ex-Emperor Bahadur Shah and the headquarters of the Mutineers’ resistance.
The 60th Rifles was given the honour of storming the Red Fort, as a mark of respect for the prominent part the regiment had played in the Siege.
Lieutenant Home, one of the team that blew the Kashmir gate, blew in the outer gate of the fort.
A second gate was forced and the 60th Rifles and the 4th Punjab Infantry rushed into the fort.
Delhi had been re-taken by the British.
Casualties at the Siege of Delhi:
Casualties are set out in the text of the siege as they occurred and where known.
Overall the British Delhi Field Force suffered 3,854 officers and men killed and wounded.
In the final 6 days of the storming of Delhi, the Delhi Field Force suffered 1,347 officers and men killed and wounded.
Follow-up to the Siege of Delhi:

The Delhi Field Force, after capturing Delhi, pillaged the city and committed extensive atrocities on the civil population, which fled into the surrounding countryside and lived in poverty until it was deemed safe to return.
In due course the British administration imposed fines on every household in Delhi, regardless of whether it had supported the Mutineers.
Bahadur Shah initially fled to the Qutb, a complex south of Delhi.
With the imminent collapse of the defence of Delhi, Bakht Khan advised Bahadur Shah to follow the main body of the Mutineers to Oudh.
The King’s courtier Mirza Ilahi Baksh advised Bahadur Shah to negotiate his surrender to the British to secure the future of the Queen, her son and her father.
Ilahi Baksh urged Bahadur Shah to move to Humayun’s Tomb, the imposing resting place of the Moghul Emperors south of Delhi.
Ilahi Baksh was providing information to Hodson and informed Hodson of the King’s whereabouts.
Hodson was authorised by General Wilson to negotiate the King’s surrender against a guarantee of his life.
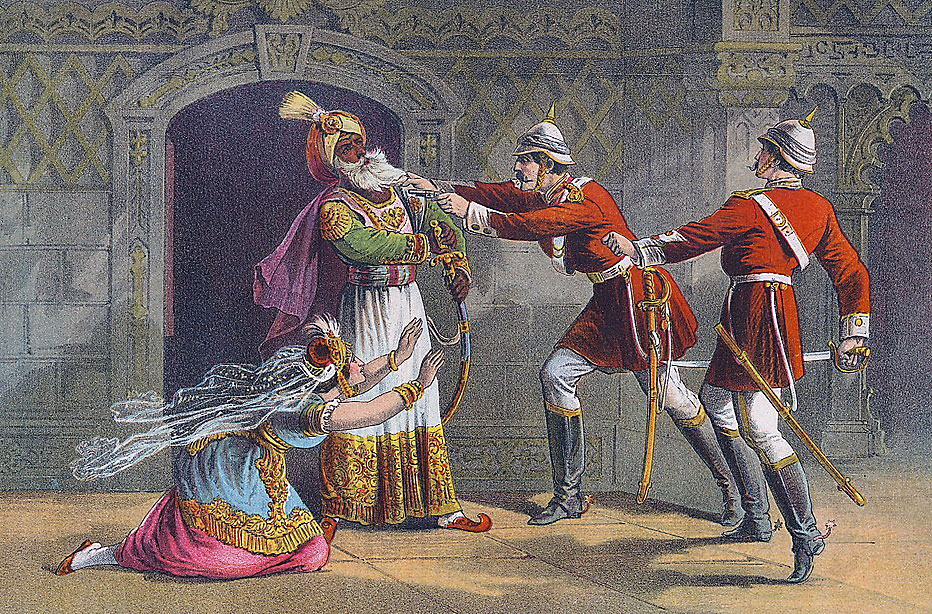
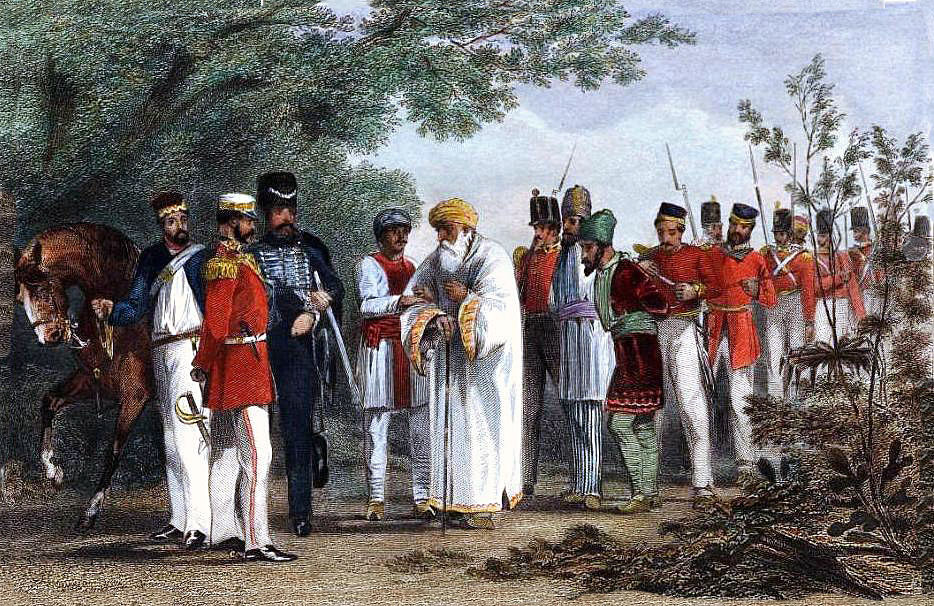
On 21st September 1857, Hodson went to Humayun’s Tomb and took Bahadur Shah, his youngest son and his father-in-law into custody.
On 22nd September 1857, Hodson returned to Humayun’s Tomb and demanded the surrender of the three princes, Mirza Moghul, Mirza Khizr Sultan and Mirza Abu Bakr.
Hodson specifically refused to extend the amnesty to guarantee the lives of the three princes.
On the way back to Delhi, Hodson himself shot the three princes dead.
Bahadur Shah was, after a considerable delay, subjected to a form of trial and banished to Rangoon where he died on 7th November 1862.
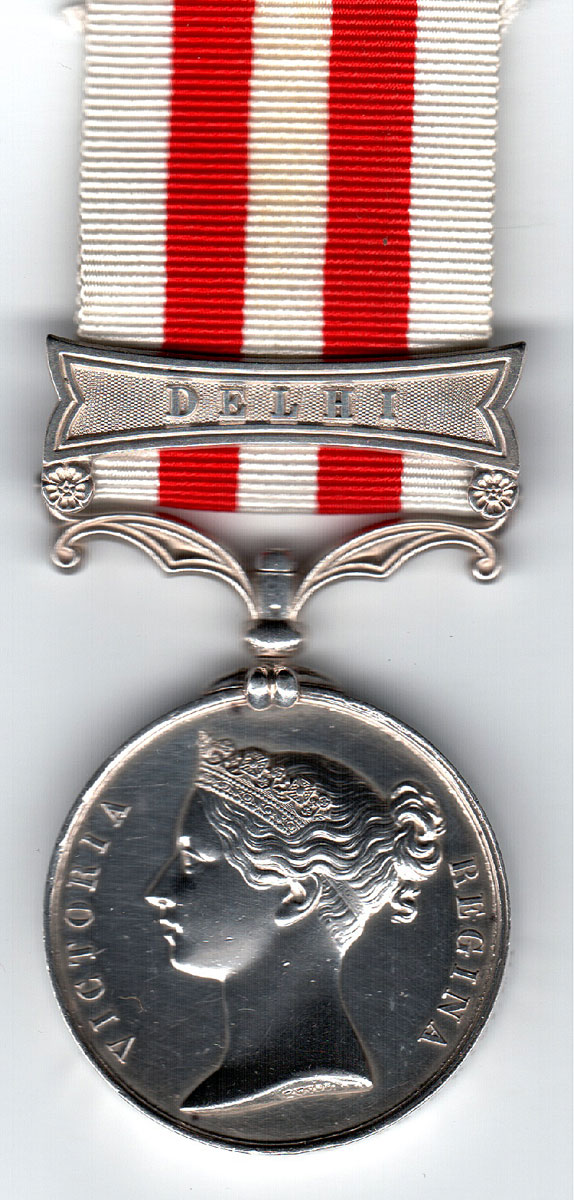
British and Indian regiments in the Delhi Field Force awarded the Battle Honour ‘Delhi 1857’:
Her Majesty’s Regiments
6th Dragoon Guards, Carabiniers
9th Lancers
8th King’s Regiment of Foot
52nd Light Infantry
60th Rifles
61st Regiment of Foot
75th Regiment of Foot
East India Company Regiments
1st Bengal (European) Fusiliers
2nd Bengal (European) Fusiliers
1st Regiment Hodson’s Horse
2nd Regiment Hodson’s Horse
1st Punjab Irregular Cavalry
2nd Punjab Irregular Cavalry
5th Punjab Irregular Cavalry
Corps of Guides
Corps of Bengal Sappers and Miners
Punjab Pioneers
4th Sikh Infantry
1st Punjab Infantry
2nd Punjab Infantry
4th Punjab Infantry
1st Baloch Battalion
Sirmoor Battalion (Gurkhas)
Kumaon Battalion (Gurkhas)

Anecdotes and traditions from the Siege of Delhi:
- 35 Victoria Crosses were awarded for valorous conduct by British soldiers during the operations around Delhi. Native soldiers were not at that time eligible for the award nor could it be awarded posthumously.
- In the early days of the Siege, the British became so short of ammunition for the guns that General Barnard offered a reward for every 24-pounder round shot recovered from the battlefield.
- During the desperate fighting on the Delhi Ridge in the first half of June 1857, Major Tombs of the Bengal Horse Artillery was wounded in the shoulder and had five horses killed under him.
- Field-Marshal Roberts, in his book ‘Forty-one years in India’ comments wryly on how well served the Mutineers’ guns were by their British-trained gunners.
- Lieutenant Quintin Battye is reported by Lord Roberts to have intoned the Latin motto ‘dulce et decorum est pro patria more’ on his deathbed. Battye was a member of a renowned British family with strong links to India. Battye’s brother Major Wigram Battye died leading the Guides Cavalry at the Battle of Futtehabad on 2nd April 1879 in the Second Afghan War. A memorial to the two brothers is in St Paul’s Cathedral.
- In the attack on the Hindu Rao House on 10th June 1857, the Mutineers crept up to the Ridge and called out to the Gurkhas that they wanted them to join the Mutiny. The Gurkhas replied that they were coming, before discharging a volley at close range hitting some thirty Mutineers.
- The British Crown took over the rule of India from the East India Company after the Indian Mutiny.
- The European regiments in the East India Company service were incorporated into the British army. The 1st and 2nd Bengal Fusiliers became the 101st and 104th HM regiments from 1862.
- After the Indian Mutiny, the Sirmoor Battalion of Gurkhas became the 2nd Gurkha Regiment in the Bengal Army. In 1901 the Regiment became King Edward VII’s Own Gurkha Rifle. In 1947 the Regiment transferred from the Indian Army to the British Army, subsequently becoming part of the Royal Gurkha Rifles. The Sirmoor Battalion was awarded a silver Queen’s Truncheon for its conduct during the Siege of Delhi, which the regiment carried in place of colours.
- Due to the close association of the Sirmoor Battalion and HM 60th Rifles during the Siege of Delhi, at the request of the 60th, the Sirmoor Battalion, or 2nd Gurkha Regiment, became a Rifle Regiment. A change adopted by all ten Gurkha regiments in the Indian Army.
- The 9th Queen’s Royal Lancers became known as the ‘Delhi Spearmen’ for their conduct in the Indian Mutiny.
References for the Siege of Delhi:
The Indian Mutiny by Julian Spilsbury
For Valour: The Complete History of the Victoria Cross Volume 2 the Indian Mutiny (1857-1859) by Michael Charles Robson
History of the British Army Volume XIII by Fortescue
Forty-one years in India by Field-Marshal Lord Roberts
Eighteen Fifty-Seven by Surendra Nath Sen
British Battles by Grant.
The previous battle of the British Battles series is the Siege of Sevastopol
The next battle in the British Battles series is the Battle of Magdala