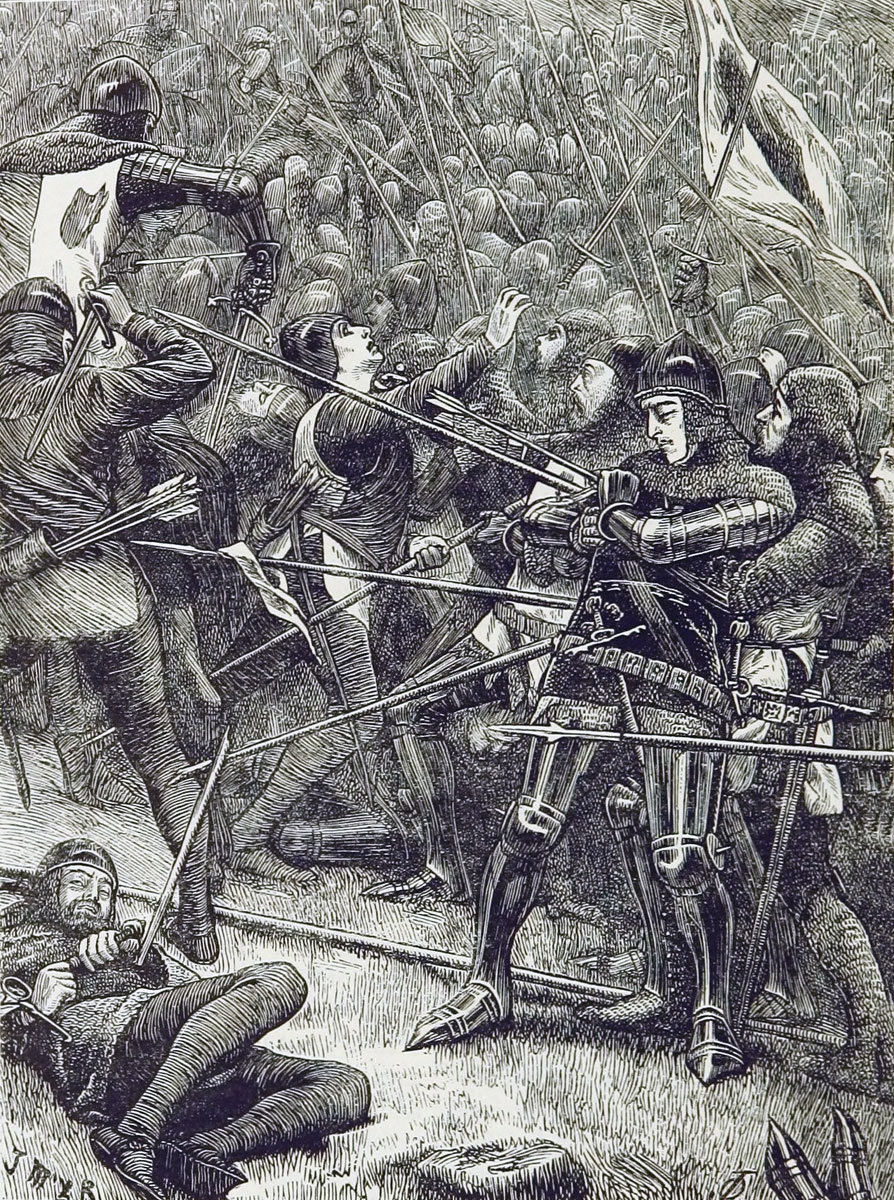
The heavy defeat of the Scots outside Berwick on 19th July 1333 by the English army of King Edward III, one of the first uses of massed longbows by the English
The previous battle in the Scottish Wars of Independence is the Battle of Dupplin Moor
The next battle in the British Battles series is the Battle of Sluys
To the Scottish War of Independence index
Date of the Battle of Halidon Hill: 19th July 1333.
Place of the Battle of Halidon Hill: to the north of Berwick-upon-Tweed on the Scots-English border.
Combatants at the Battle of Halidon Hill: an invading Scots army against an English army.
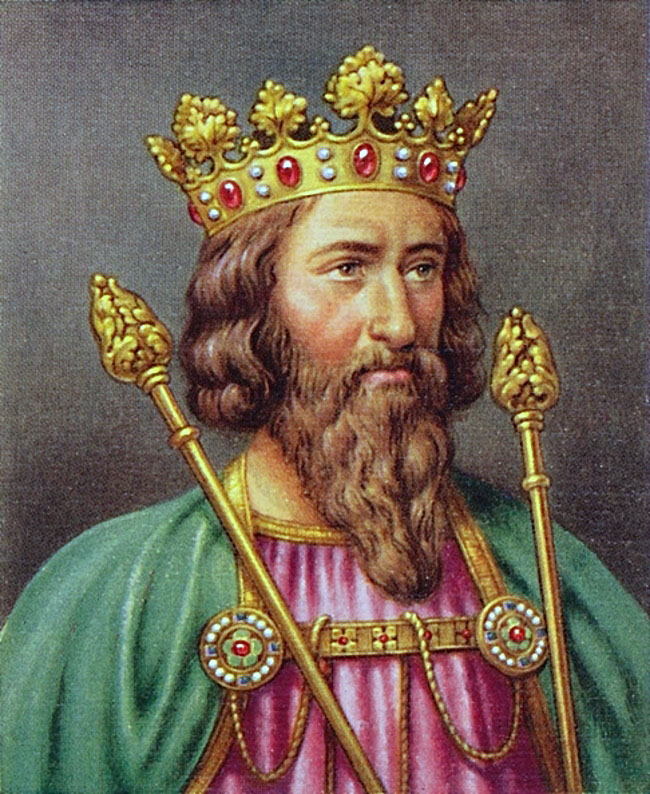
Commanders at the Battle of Halidon Hill: The Scottish Guardian, Sir Archibald Douglas, Lord of Galloway, against the English King Edward III.
Size of the armies at the Battle of Halidon Hill: According to the historian James Ross, contemporary records put the Scottish army at 55 knights, 1,100 men-at-arms and 13,500 common soldiers together with earls and other great lords and barons, making 14,655 in all.
The English army is said to have been around 6,000 men.
Uniforms, arms and equipment at the Battle of Halidon Hill: The Scots army was made up of a small core of noblemen and knights on horseback, equipped with armour, lance, shield, sword and dagger.
Depending upon wealth and rank a mounted knight wore jointed steel armour incorporating back and breast plates, a visored bascinet helmet and steel plated gauntlets with spikes on the back; the legs and feet protected by steel greaves and boots, called jambs. Weapons carried were a lance, shield, sword and dagger. Over the armour a knight wore a jupon or surcoat emblazoned with his arms and an ornate girdle.
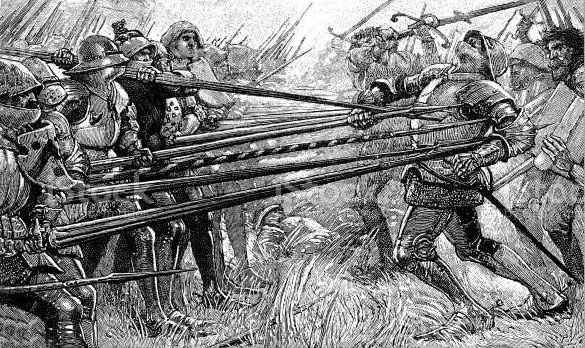
The majority of the Scots soldiers were fighting men armed with a wide range of striking weapons and pikes formed into ‘schiltrons’ or divisions.
While there were archers in the Scots army they were not as numerous or as effective as the English archers.
As was frequently the practice once battle was closed the Scots divisions dismounted and fought on foot.
The English army was similar in make-up except that it comprised a substantial force of archers, many experienced fighting men.
The weapon of the English archers was a six-foot yew bow discharging a feathered arrow a cloth metre in length. Arrows were fired with a high trajectory, descending on the approaching foe at an angle. The rate of fire was up to one arrow every 5 seconds. For close quarter fighting the archers used hammers or daggers to batter at an adversary’s armour or penetrate between the plates.
the particular strength of the English army lay in its archers with their life-time of training in the use of the longbow enabling them to deliver a storm of arrows at a high rate of fire.
Winner of the Battle of Halidon Hill: The English army decisively.

Background to the Battle of Halidon Hill:
In December 1332 Edward Balliol, the self-appointed King of Scotland and cypher of King Edward III of England, was forced by the Guardian of Scotland, Archibald Douglas, acting in the interests of the young King David II, heir to Robert the Bruce, to flee to England.
To restore Balliol to the Scottish throne, two English armies invaded Scotland, one commanded by Edward Balliol from Carlisle in March 1333 and the main army commanded by Edward III from Newcastle in April 1333.
The two English armies converged on the Scottish Border fortress/town of Berwick and placed it and its Scots garrison under siege.
Edward and Balliol subjected Berwick to a number of assaults and repeated bombardment by catapult, destroying much of the town and inflicting heavy casualties on its garrison.
On 28th June 1333 the Warden of Berwick, Sir Alexander Seton, after negotiations, agreed to surrender the town if it was not relieved by a Scottish Army by 11th July 1333.
The terms do not appear to have fully defined what would constitute ‘relief’.
Hostages were delivered to King Edward III to ensure the garrison kept to the agreement. Among the hostages was the son of Sir Alexander Seton.
Archibald Douglas, the Guardian of Scotland marched to the English border with a large Scottish army with the purpose of relieving Berwick.
It was a maxim of the late King Robert (Robert the Bruce) that the Scots should avoid giving open battle to English armies.
Applying this maxim Douglas attempted to lure the English army from its purposeful siege of Berwick by various diversions.
The Scots burnt Tweedmouth, the town on the southern bank of the Tweed Estuary to try and lure Edward III’s army away from Berwick.
A party of Scots soldiers crossed the Tweed into Berwick, commanded by Sir William Keith, where Keith took over command of the town.
Douglas marched to Bamburgh and attacked the castle, where Edward had left his wife, Queen Philippa, for safety. The Scots did not have the time or the equipment to conduct a full siege and the castle held out without difficulty.
Edward could not be diverted from his purpose of capturing Berwick.
With the passing of 11th July 1333, the English declared the Scots garrison to be in breach of the surrender agreement by continuing their resistance.
Keith claimed that his arrival in the town amounted to a relief and that the terms no longer bound the Scottish garrison.
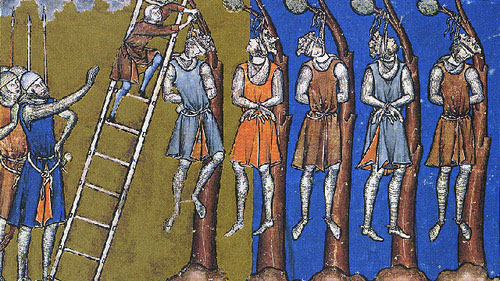
Edward rejected this contention and began to hang the Scots hostages at the rate of two a day, starting with Seton’s son.
This was the third of Seton’s sons killed in the fighting against the English.
Further terms of surrender were agreed. This time the agreement specified that relief would be constituted by the Scots winning a battle against the English outside Berwick or by inserting a force of 200 men into the town by 20th July 1333, otherwise the town would surrender and the inhabitants and garrison would be permitted to leave.
Details of the agreed terms of surrender were taken by Keith to Douglas who was forced to face the reality of battle with the English army.
On 19th July 1333 Douglas re-crossed the River Tweed with the Scots army and approached Berwick from the north-west.
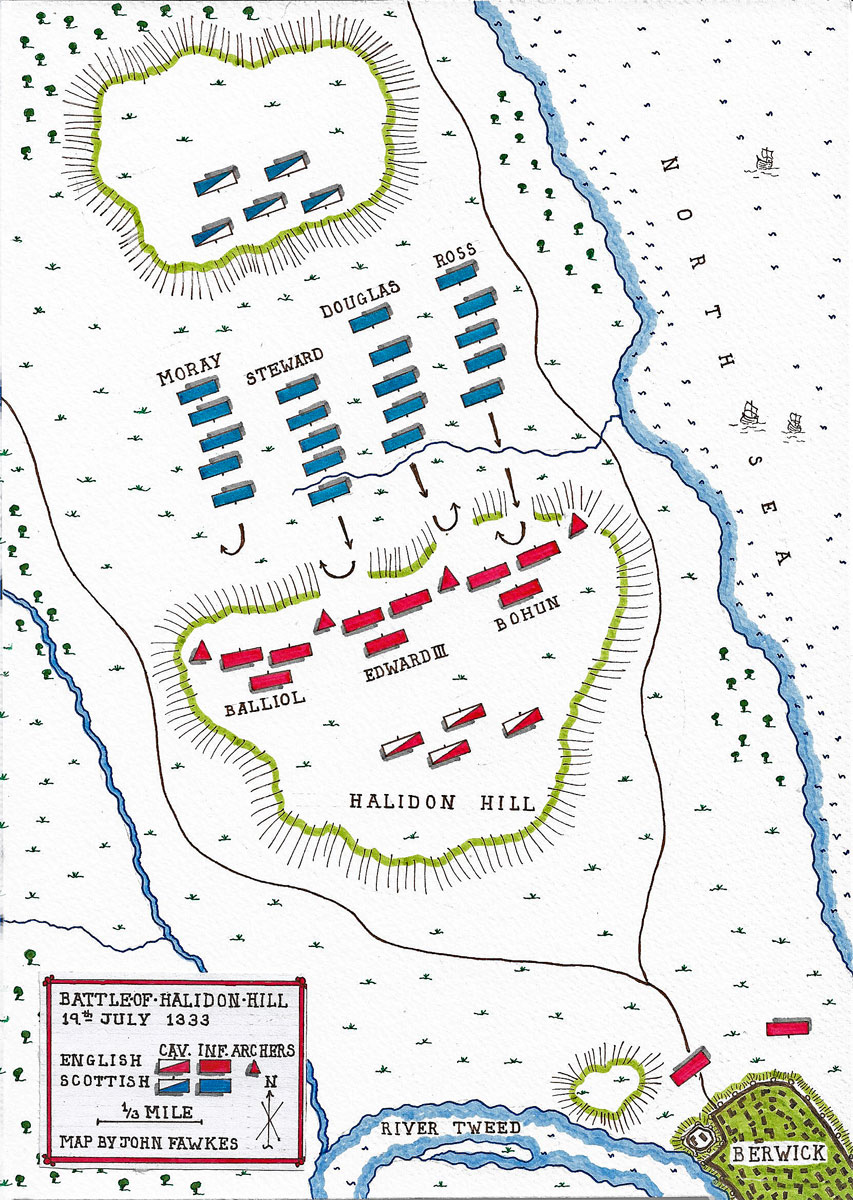
Account of the Battle of Halidon Hill: Edward III’s English army took up positions on Halidon Hill, two miles to the north-west of Berwick, leaving a 500-man rearguard to watch the town.
The English adopted the formation devised by Balliol and Beaumont and used so effectively at the Battle of Dupplin Moor in 1332, with dismounted men-at-arms interspersed by bodies of archers.
The English army was arrayed in three divisions, each comprising a main body of dismounted knights and men-at-arms, each with archers pushed forward on either flank.
Edward Balliol commanded the left division, King Edward III the centre and Sir Edward Bohun the right division.
The Scots army was formed in four schiltrons or divisions of spearmen; the first commanded by the Earl of Moray with John and Simon Fraser; the second commanded by the Steward of Scotland with Sir James Stewart of Rosyth; the third by the Guardian, Sir Archibald Douglas and the Earl of Carrick and the fourth by the Earl of Ross.
As the Scots garrison in Berwick was required to surrender the town to Edward III the next day, 20th July 1333, unless the Scots fought a victorious battle, Douglas was bound to fight the English army.
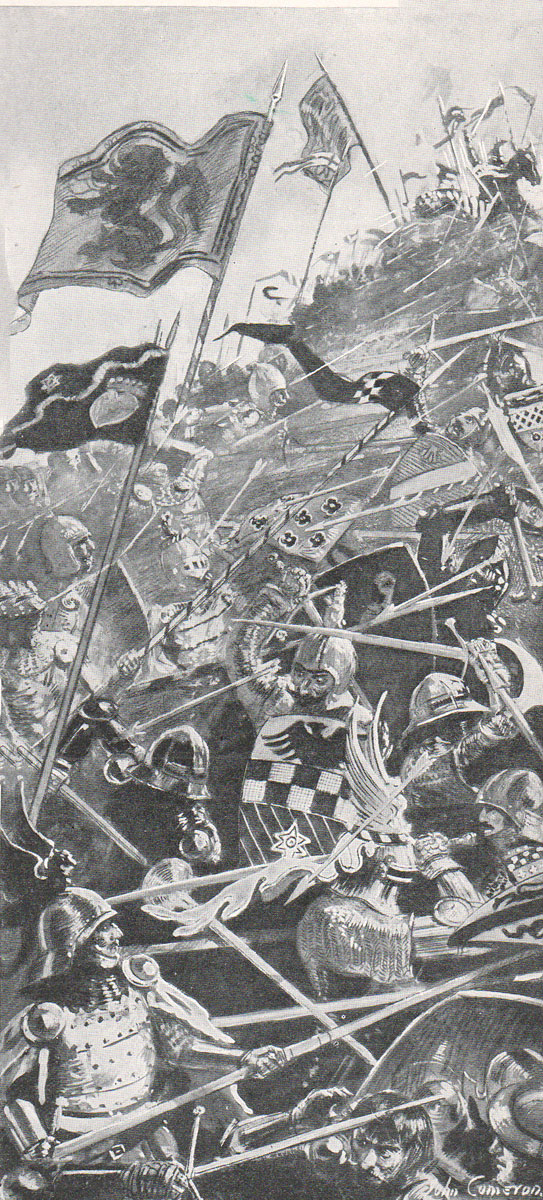
After a long pause, in which each side waited for the other to launch an attack, the Scots army advanced from its position on high ground, across the intervening boggy valley and up the side of Halidon Hill towards the English positions.
The Scots army was considerably larger than Edward III’s English army and the Scots pressed forward, confident of victory, to storm the English positions on Halidon Hill.
The English archers began the battle with a storm of arrows discharged at the advancing Scots, who, according to contemporary chroniclers, turned their heads away in an effort to avoid the English arrows.
Heavy casualties were inflicted on the advancing Scottish schiltrons, already slowed down by the boggy ground and the necessity of climbing the hillside to reach the English positions, their formations becoming dispersed.
When the leading Scots reached the English line, the English men-at-arms in their static lines and retaining their close formation easily repelled the scattered and exhausted Scots soldiers.
After a short hand-to-hand engagement the Scots schiltrons began to fall back and retreat, the last to go being the fourth schiltron of the Earl of Ross, which had been attempting to bypass the main battle and march to the relief of the Berwick garrison.
Mounted English knights took up the pursuit of the Scots and their retreat soon became a rout, with many Scots soldiers killed.
Casualties at the Battle of Halidon Hill: Scottish casualties in the battle and particularly in the subsequent pursuit were heavy. The Guardian, Douglas, was mortally wounded and captured. The Earls of Sutherland and Menteith were captured. Among the dead were the Earl of Ross, Malcolm, Earl of Lennox, Alexander Bruce, the Earl of Carrick, John Campbell, the Earl of Atholl, John Graham, Alexander Lindsay, the two Frasers and John, James and Alan Stuart.
No reliable figure for casualties at the battle appears to be available. It would seem that the Scots suffered several thousand casualties, while the English only a few hundred, if that many.
Sumption states that it was characteristic of a Medieval battle for casualties to be relatively low until one side broke and fled when heavy losses were liable to be inflicted on the fleeing side during the pursuit.
Few of the Scots were taken prisoner and those that were were executed the next day on the orders of King Edward III.
Follow-up to the Battle of Halidon Hill: The victory at Halidon Hill enabled Edward Balliol to invade Scotland and take the throne although his hold was tenuous and was finally lost to King David II in 1336.
King Edward III turned his attention to war against France.
Berwick surrendered to the English King the day after the battle in accordance with the terms of surrender and the Scots population was enabled to leave with their belongings.
Berwick became an English town, but changed hands several times until 1482 when it finally came under English control, giving rise to the curious state of affairs whereby the county of Berwickshire remained in Scotland, while its erstwhile county town of Berwick became part of England.

Anecdotes and traditions from the Battle of Halidon Hill:
- The English considered the Battle of Bannockburn, won by Robert the Bruce against King Edward II in 1314, to have been avenged at the Battle of Halidon Hill.
- When pressed by the English to surrender Berwick or risk the hanging of his third son, the Guardian, Sir Alexander Seton, is said to have been urged by his wife, Lady Seton, not to do so, saying ‘I can always give you more sons but you cannot recover your honour.’
- It is said that the Battle of Halidon Hill began with a single combat between champions of each side. The Scots champion, Raoul Turnbull, rushed forward with his mastiff dog, both reputed to be substantial in stature. The English champion, Sir Robert Benhale, is reported as dispatching first the dog and then Turnbull with a two-handed sword. Turnbull is reputed to have received his name for saving Robert the Bruce from a charging bull.
References for the Battle of Halidon Hill:
Trial by Battle, Volume I of the four volume record of the Hundred Years War by Jonathan Sumption.
The Art of War in the Middle Ages Volume Two by Sir Charles Oman.
The Hundred Years War by Robin Neillands.
British Battles by Grant.
The previous battle in the Scottish Wars of Independence is the Battle of Dupplin Moor
The next battle in the British Battles series is the Battle of Sluys
To the Scottish War of Independence index