The battle won by William Wallace over the English invaders on 11th September 1297
The previous battle in the British Battles series is the Battle of Evesham
The next battle of the Scottish Wars of Independence is the Battle of Falkirk
To the Scottish Wars of Independence index
War: Scottish Wars of Independence.
Date of the Battle of Stirling Bridge: 11th September 1297
Place of the Battle of Stirling Bridge: In Central Scotland at the town of Stirling on the River Forth.
Combatants at the Battle of Stirling Bridge: An English army against a Scots army.

Commanders at the Battle of Stirling Bridge: The army of the English King Edward I was commanded by John de Warenne, Earl of Surrey and Sussex and Hugh Cressingham, the Treasurer of the English administration in Scotland.
The Scots army was commanded by William Wallace.
Size of the armies at the Battle of Stirling Bridge: The English army numbered around 9,000 men. The Scottish army numbered around 6,000 men.
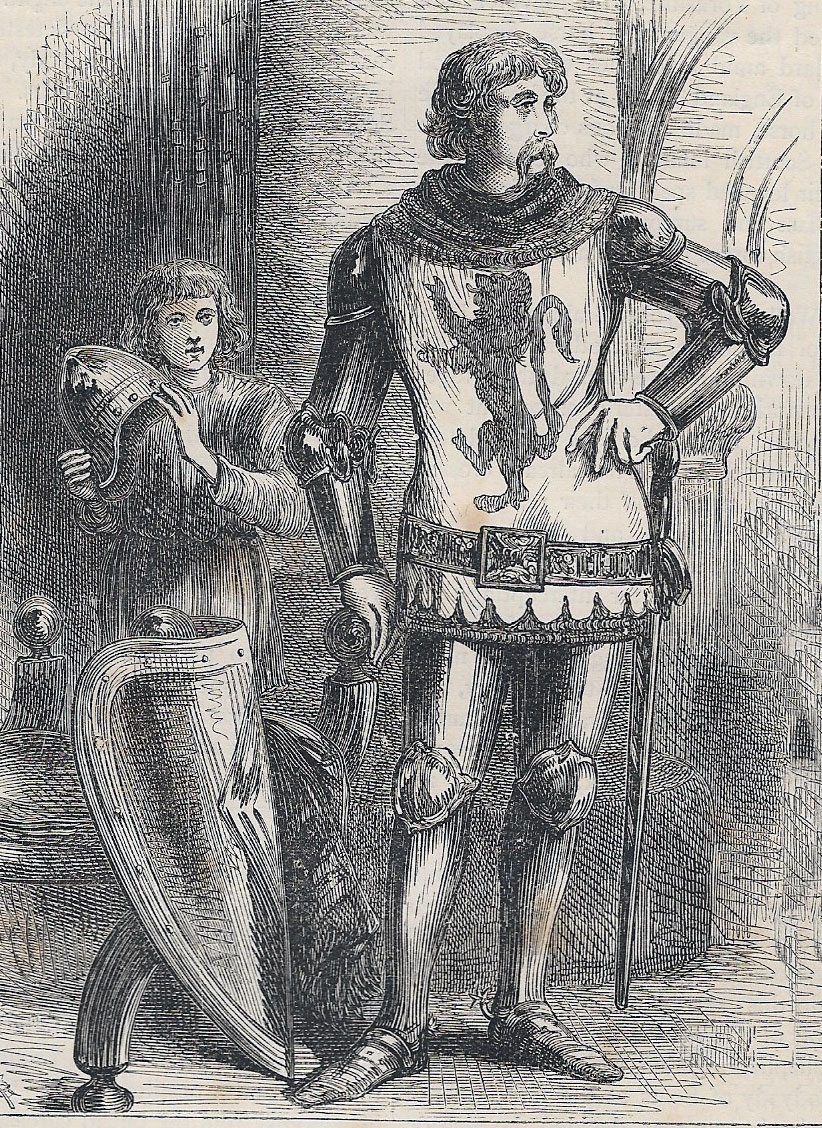
Uniforms, arms and equipment at the Battle of Stirling Bridge: The English knights wore chain mail reinforced with steel elbow and knee pieces and steel helmets. They fought with spears, shields, maces, and swords.
The wealthier knights and nobles were beginning to acquire steel plate armour in place of chain mail.
The English infantry carried a wide range of weapons; spears, maces, swords and daggers. The wealthier among them wore items of chain mail or leather jerkins and steel helmets.
The Scottish knights were armed much as their English opponents.
The mass of Scottish infantry carried spears, swords and daggers.
There were archers on each side in the infantry, although the bow was not the primary battle weapon for the English it was to become in the next century.
Winner of the Battle of Stirling Bridge: William Wallace’s army heavily defeated the English army, routing it and driving it from the battlefield while inflicting heavy casualties.
Events leading to the Battle of Stirling Bridge:
In 1286 the king of Scotland, Alexander III, died in a riding accident near Edinburgh. The death of his son, Prince Alexander in 1284 ensured that the death of the king left Scotland with no obvious royal heir.
Two candidates emerged for the vacant Scottish throne: John Baliol and Robert Bruce.
Selection of the new king from these two was awarded to King Edward I of England.
Edward selected the candidate most likely to further his own plans to take over Scotland; John Baliol.
Baliol did fealty to King Edward, effectively recognising him as the overall lord of Scotland.
English garrisons were already in place in the principal fortresses of the country.
In 1296 Scotland rose in rebellion against Baliol.
Edward’s troops overran much of Scotland, with considerable violence and an English administration was installed to rule the country, with John de Warenne, 6th Earl of Surrey, as governor and Hugh Cressingham as financial administrator.
English rule was ‘infamously and cruelly enforced with the sword’.
In early 1297, the Scots again rose in rebellion against the English, under the leadership of William Wallace.
Wallace is described as an incomparable guerrilla leader, but lacking in the experience and judgement needed for larger-scale warfare.
Wallace was implacably opposed to the English occupation.
Wallace’s wife and children had been burnt in a Lanarkshire farmhouse by the English and his father, brother and other kinsmen killed in the fighting for Scotland’s independence.
Warenne and Cressingham assembled a large army, said to be around 9,000 men-at-arms and foot soldiers, and marched north through the Scottish Lowlands.
Wallace was besieging Dundee with a force of around 6,000 men.
Wallace abandoned the siege of Dundee and marched south to meet the English army.
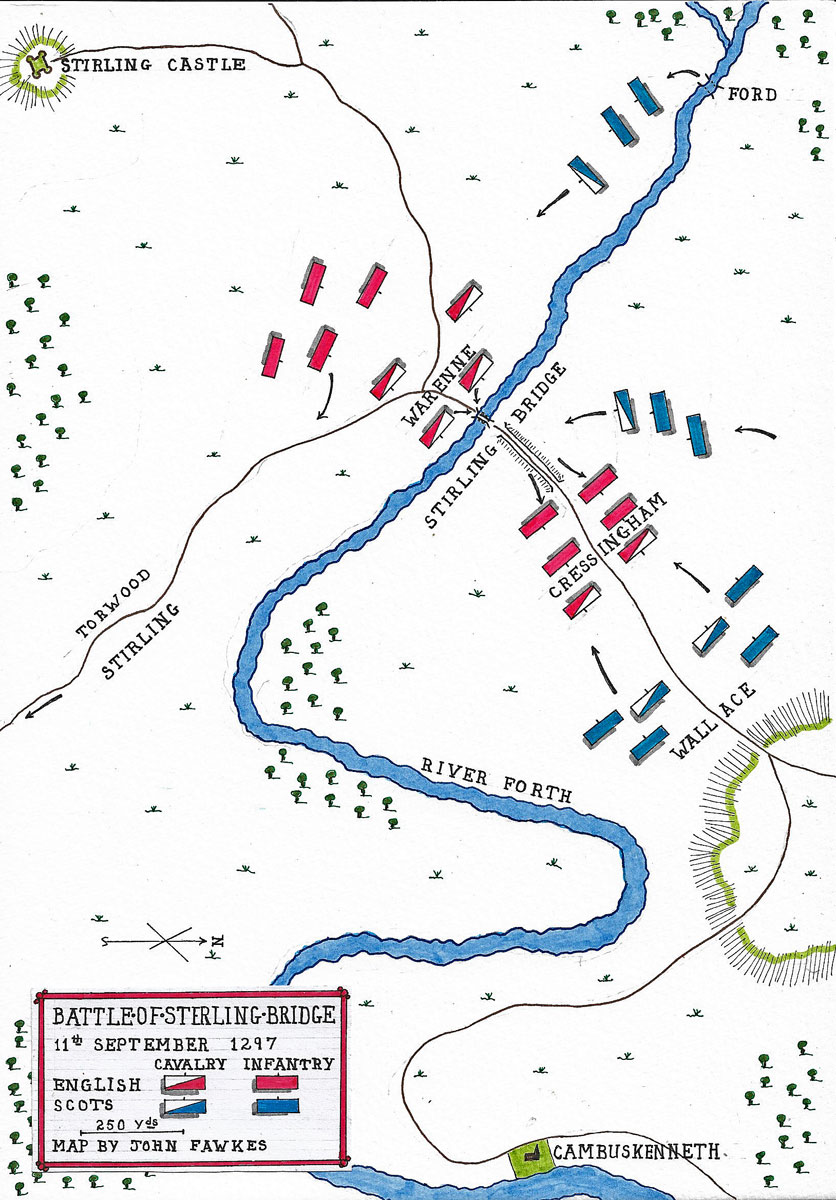
The two armies approached each other on either side of the upper reaches of the River Forth, just north of Stirling.
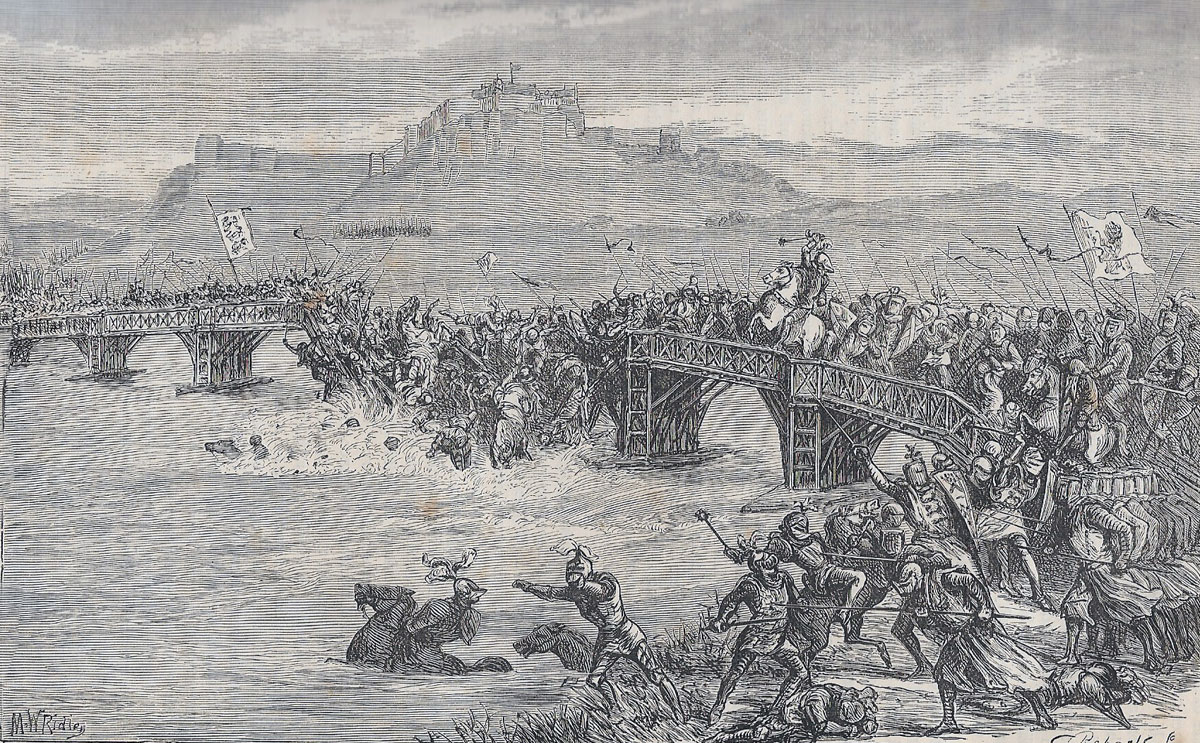
To attack Wallace’s Scottish army, Warenne needed to cross the River Forth.
A bridge lay across the river, but it was a bridge with a wooden walkway on stone pillars, built for travellers on foot and parties of pack-horses, wide enough for only two persons to pass or cross walking side by side.
Warenne considered his position.
He needed to attack Wallace’s Scottish army, which could be seen gathered at the far end of the causeway leading from the far end of the bridge to the slope of the neighbouring hills.
To make his attack Warenne proposed to pass his army across the bridge.
A Scottish knight serving in the English army, Sir Richard Lunday, was emphatic in his opposition to this plan.
Lunday knew the area and informed Warenne that there was a ford some two miles upstream, where the road to the north-east crossed the River Forth.
At this ford the English army could cross the river fifty abreast, thereby ensuring that there was no point at which a small part of the army would be isolated and exposed to the Scottish attack.
Warenne, primarily an administrator, was not particularly keen to give battle to Wallace, a soldier with a fiercesome reputation.
Warenne had in his army a number of Scots adherents of Baliol, among them the Earl of Lennox, whose reliability was questionable,
In addition, Warenne believed that King Edward I was about to replace him with Brian Fitzalan, making him less inclined to take risks on the king’s behalf.
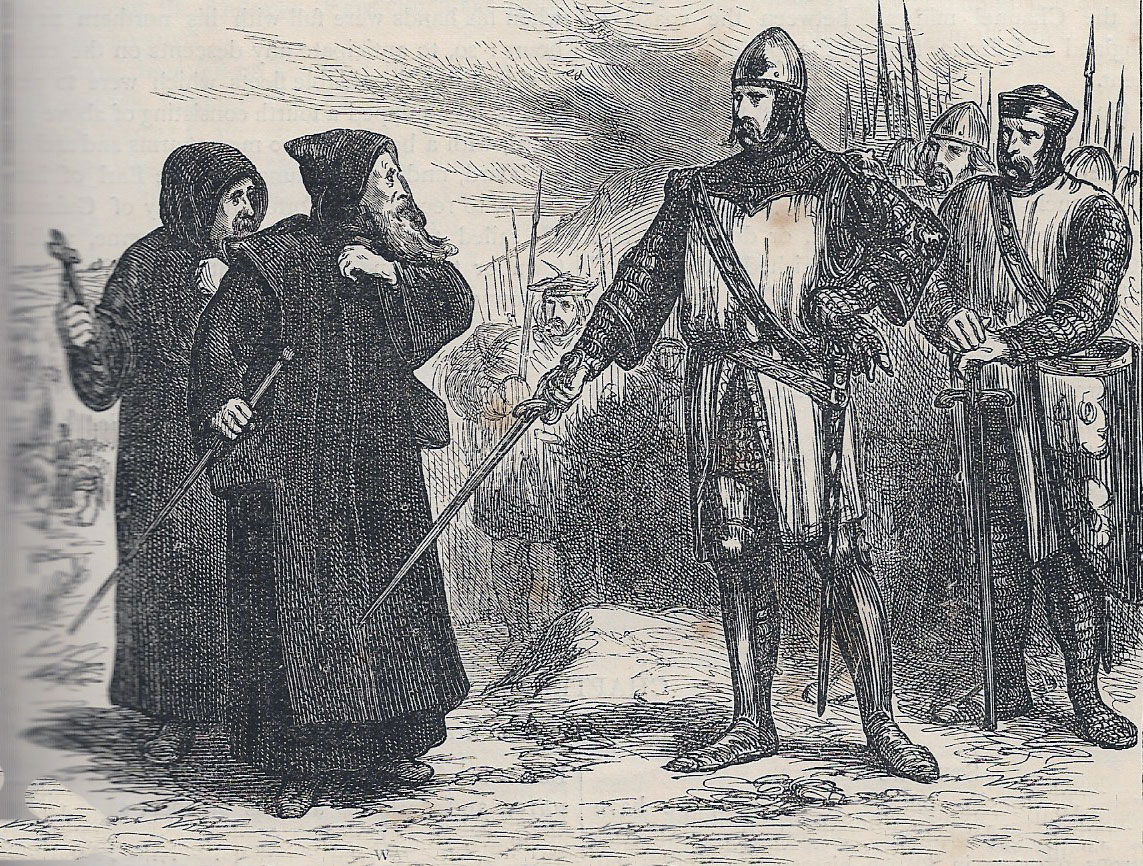
In an attempt to avoid battle, Warenne sent two local Dominican friars to Wallace with a message urging him to submit to the English army.
Wallace sent the friars back to Warenne with the reply ‘.. We come here with no peaceful intent, but ready for battle, determined to avenge our wrongs and to set our country free. Let your masters come and attack us; we are ready to meet them beard to beard.’
Enraged by this reply, the English knights clamoured to attack without further delay.
Lunday offered to lead 500 horse and some foot across the up-stream ford and take the Scots in the flank.
Warenne still hesitated, causing Cressingham to declare: ‘Why do we thus protract the war and waste the king’s treasure? Let us fight. It is our bounden duty.’
Account of the Battle of Stirling Bridge:
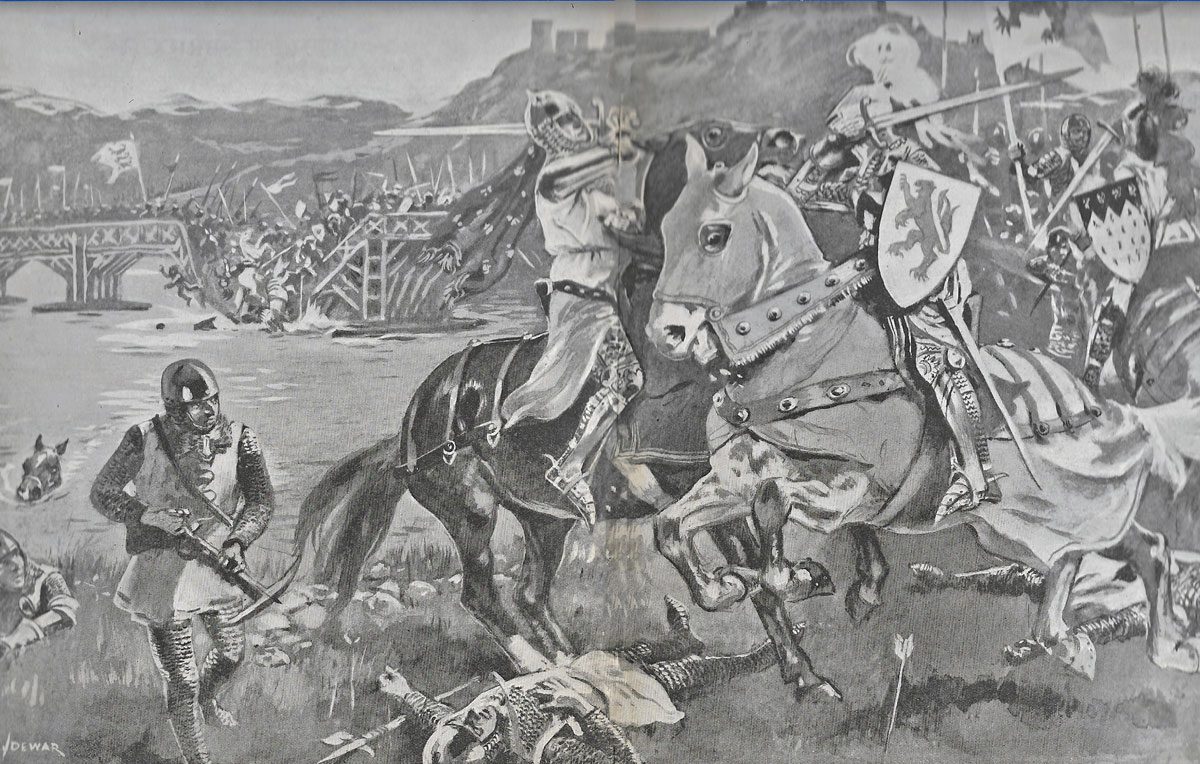
Warenne gave way and before dawn on 11th September 1297 the English army began to file across the narrow rustic bridge.
Lunday’s offer to lead a force across the ford was not taken up.
On the Scottish side a strong guard was sent to block ford.
Such was the difficulty of crossing the bridge that by 11am only half the English army was on the far side of the River Forth.
The English vanguard was led by Cressingham and Sir Marmaduke de Tweng, a knight of North Yorkshire.
With the English war cry of ‘For God and St George of England’, the vanguard launched a charge against the Scots spearmen formed on the hill.
The English cavalry was unable to penetrate the Scottish formations and, losing many men to the Scottish archers, fell back towards the river.
A Scots contingent, moving around the English flank, cut the English off from the bridge, while the main body of Scottish horsemen led by Wallace, Sir John Grahame of Dundaff, Ramsay of Dalhousie and other Scots nobles, charged the recoiling vanguard led by Cressingham and Tweng.
The English knights and infantrymen were driven back to the river bank and the bridge and many were killed or forced into the river and drowned.
From the far bank, Warenne urged the remnant of his army across the bridge to support the vanguard.
The bridge was packed with armoured men and horses pushing to cross, while fleeing men from the vanguard forced their way across the bridge in the opposite direction.
At this point the centre of the wooden bridge collapsed, throwing the English troops into the river and cutting off the movement of the English army in both directions.
At about this time the Scottish force at the ford crossed the river and attacked the rear of Warenne’s army.
The English army ceased to be a disciplined force and many of the English troops were killed or drowned in the river.
The Scots barons serving with the English took this moment to change sides and joined in the savage slaughter of the English troops who were pursued and killed for miles from the point of the battle.
Casualties at the Battle of Stirling Bridge:
Casualties in the English army were high, many being drowned in the river or cut down as they fled the field.
Casualties among the Scots are said to have been slight.
Sir Andrew Moray was mortally wounded.
As Jonathan Sumption points out it was a characteristic of the period that in many battles casualties were not heavy in the initial clash. It was when one side broke in flight, that large numbers of the fleeing side were cut down by their pursuers, leading on many occasions, as at the Battle of Stirling Bridge, to extremely high casualties for the losing side and low casualties for the victor. This was particularly the case if the battle was not in the loser’s home country, leaving the fleeing troops with no nearby refuge.
Cressingham’s body was found by the Scots on the battlefield and mutilated.
Follow-up to the Battle of Stirling Bridge:
Warenne attempted unsuccessfully to rally his army in the Torwood, before hurriedly retreating to Berwick, from where he sent news of his defeat to King Edward I.
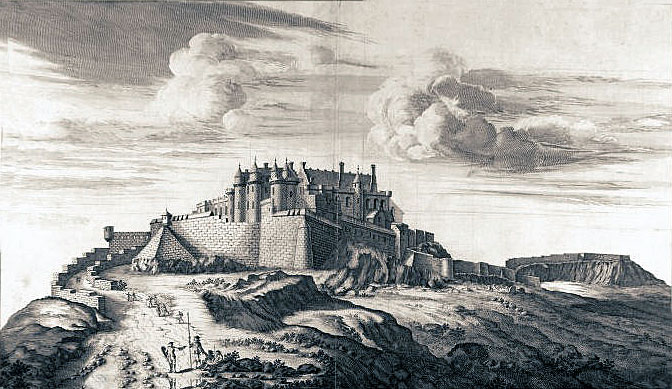
Sir Marmaduke de Tweng escaped across the bridge and made his way to Stirling Castle where he took command of the garrison, before being compelled to surrender the castle to Wallace.
Following the battle Wallace was made Protector of Scotland.
Scottish armies drove the English out of all parts of Scotland, except for Roxburgh and Berwick, where the garrisons of the castles resisted the Scots attack until relieved by Warenne.
Anecdotes and traditions from the Battle of Stirling Bridge:
- Cressingham’s body is said to have been mutilated and flayed by the Scots in retribution for his flaying of Scots prisoners. Pieces of Cressingham’s skin were distributed to Scots soldiers as reminders of the man they hated. It is alleged that Wallace had a baldric made from Cressingham’s skin to carry his sword.
- Scots records of the Battle of Stirling Bridge claim that the timber bridge was sawn through by Scotsmen and the broken pieces allowed to fall into the River Forth by a man hidden under the bridge who removed a wedge at the key moment.
- English sources claim that the bridge was broken by Warenne to facilitate his retreat.
- It seems likely that neither account is correct and that probably the rickety old pedestrian bridge broke unexpectedly under the excessive weight of an army several thousand strong marching and riding across it in the stress of battle.
References for the Battle of Stirling Bridge:
British Battles by Grant.
The Art of War in the Middle Ages Volume Two by Sir Charles Oman
The previous battle in the British Battles series is the Battle of Evesham
The next battle of the Scottish Wars of Independence is the Battle of Falkirk
To the Scottish Wars of Independence index