The first defeat of the British in the Boer War, also known as Lombard’s Kop and Nicholson’s Nek and fought on 29th October 1899 in the Boer War, leading to the Siege of Ladysmith
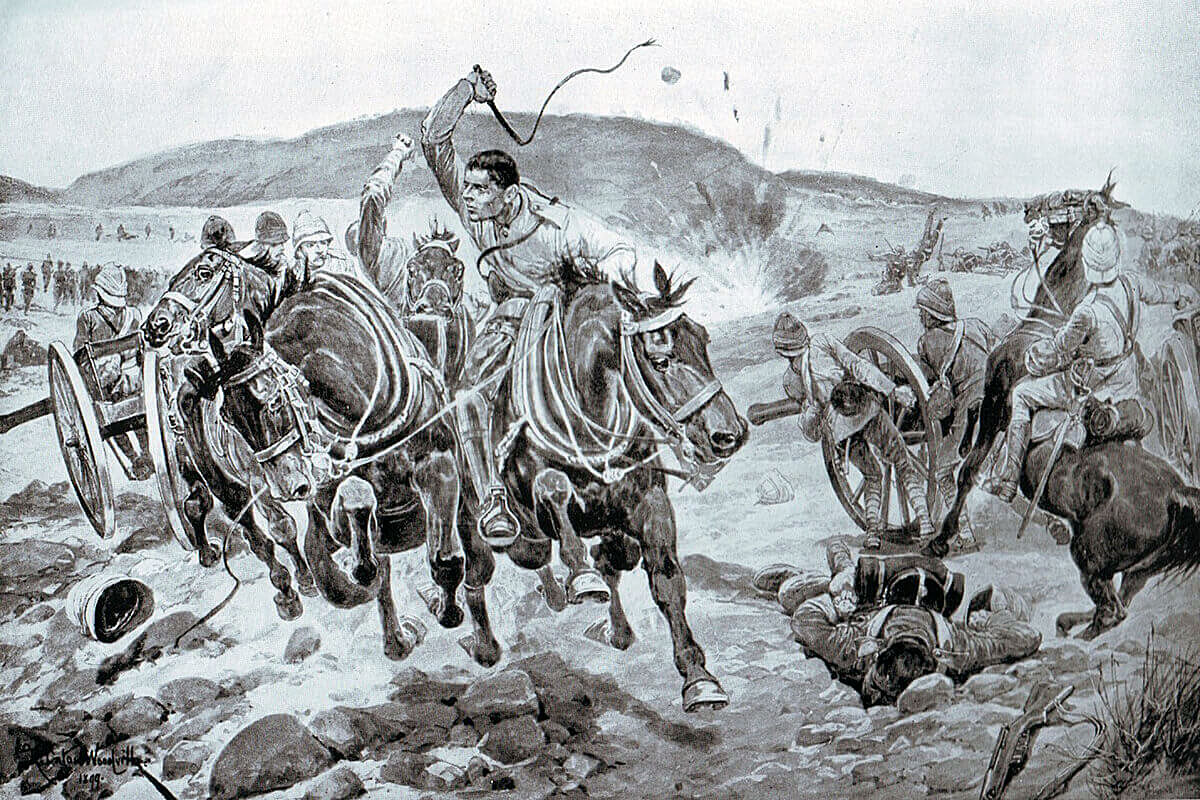
Bringing off the guns at the Battle of Ladysmith or Lombard’s Kop on 30th October 1899 in the Boer War: picture by John Charlton
The previous battle in the Boer War is the Battle of Elandslaagte
The next battle in the Boer War is the Battle of Belmont
Battle: Ladysmith
War: The Boer War
Date: 29th October 1899
Place: Northern Natal in South Africa
Combatants: British against the Boers
General Joubert, Boer commander at the Battle of Ladysmith on 30th October 1899 in the Boer War
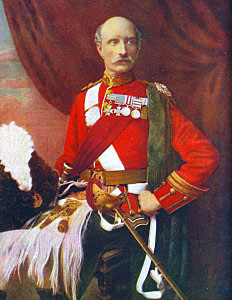
Lieutenant General Sir George White VC DSO GCB British commander-in-chief at the Battle of Ladysmith on 30th October 1899 in the Boer War
Generals: Lieutenant General Sir George White against General Joubert with General Erasmus as his immediate subordinate. Other Boer leaders present at the battle were Louis Botha in command of the Johannesburg Commando and Christian de Wet.
Size of the armies: 12,000 British against around 30,000 Boers.
Uniforms, arms and equipment: The Boer War was a serious jolt for the British Army. At the outbreak of the war British tactics were appropriate for the use of single shot firearms, fired in volleys controlled by company and battalion officers; the troops fighting in close order. The need for tight formations had been emphasised time and again in colonial fighting. In the Zulu and Sudan Wars overwhelming enemy numbers armed principally with stabbing weapons were kept at a distance by such tactics, but, as at Isandlwana, would overrun a loosely formed force. These tactics had to be entirely rethought in battle against the Boers armed with modern weapons.
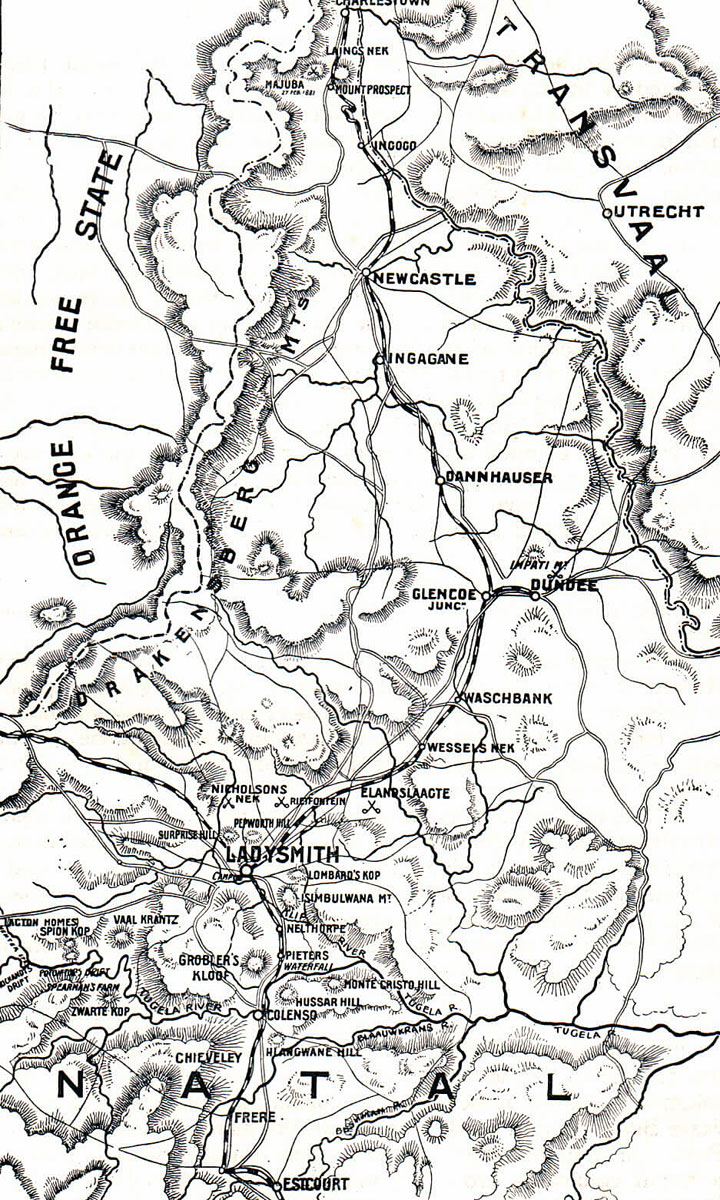
Map of Northern Natal: Battle of Ladysmith or Lombard’s Kop on 30th October 1899 in the Boer War
In the months before hostilities the Boer commandant general, General Joubert, bought 30,000 Mauser magazine rifles, firing smokeless ammunition, and a number of modern field guns and automatic weapons from the German armaments manufacturer Krupp, the French firm Creusot and the British company Maxim. The commandoes, without formal discipline, welded into a fighting force through a strong sense of community and dislike for the British. Field Cornets led burghers by personal influence not through any military code. The Boers did not adopt military formation in battle, instinctively fighting from whatever cover there might be. Most Boers were countrymen, running their farms from the back of a pony with a rifle in one hand. These rural Boers brought a life time of marksmanship to the war, an important advantage further exploited by Joubert’s consignment of smokeless magazine rifles. Viljoen is said to have coined the aphorism “Through God and the Mauser”. With strong field craft skills and high mobility the Boers were natural mounted infantry. The urban burghers and foreign volunteers readily adopted the fighting methods of the rest of the army.
Other than in the regular uniformed Staats Artillery and police units, the Boers wore their every day civilian clothes on campaign.
After the first month the Boers lost their numerical superiority, spending the rest of the formal war on the defensive against British forces that regularly outnumbered them.
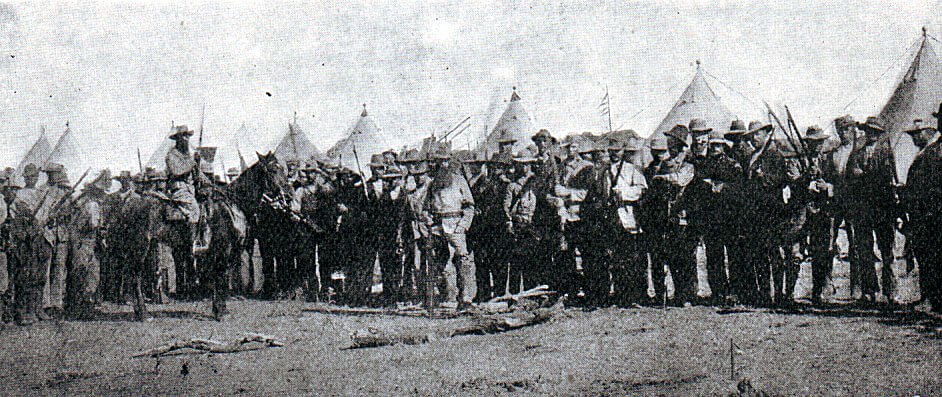
Boer Commando in the South African War 1899 to 1901: Battle of Ladysmith or Lombard’s Kop on 30th October 1899 in the Boer War
British tactics, developed on the North-West Frontier of India, Zululand, the Sudan and in other colonial wars against badly armed tribesmen, when used at Modder River, Magersfontein, Colenso and Spion Kop were incapable of winning battles against entrenched troops armed with modern magazine rifles. Every British commander made the same mistake; Buller; Methuen, Roberts and Kitchener (Elandslaagte was a notable exception where Hamilton specifically directed his infantry to keep an open formation). When General Kelly-Kenny attempted to winkle Cronje’s commandoes out of their riverside entrenchments at Paardeburg using his artillery, Kitchener intervened and insisted on a battle of infantry assaults, with the same disastrous consequences as earlier in the war.
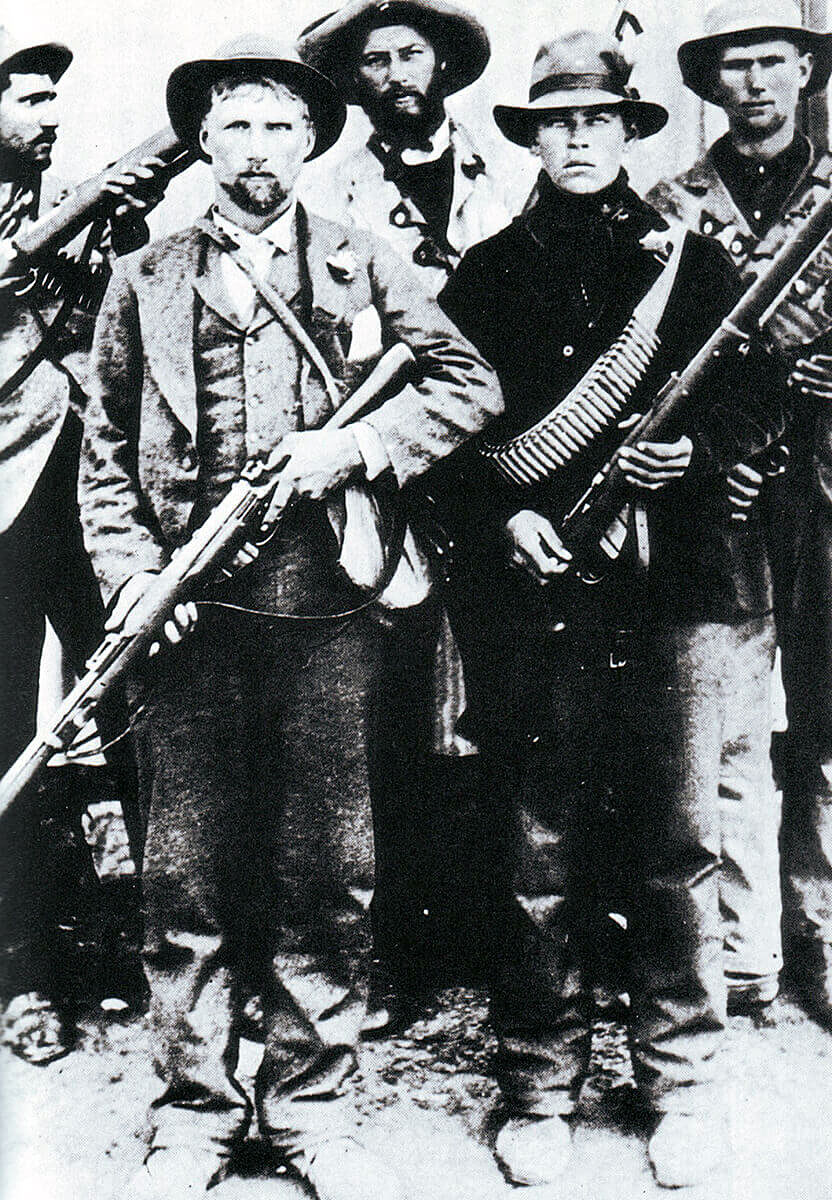
Boers in the field: Boer War 1899-1901
Some of the most successful British troops were the non-regular regiments; the Imperial Light Horse, City Imperial Volunteers, the South Africans, Canadians, Australians and New Zealanders, who more easily broke from the habit of earlier British colonial warfare, using their horses for transport rather than the charge, advancing by fire and manouevre in loose formations and making use of cover, rather than the formal advance into a storm of Mauser bullets.
Uniform: The British regiments made an uncertain change into khaki uniforms in the years preceding the Boer War, with the topee helmet as tropical headgear. Highland regiments in Natal devised aprons to conceal coloured kilts and sporrans. By the end of the war the uniform of choice was a slouch hat, drab tunic and trousers; the danger of shiny buttons and too ostentatious emblems of rank emphasised in several engagements with disproportionately high officer casualties.
The British infantry were armed with the Lee Metford magazine rifle firing 10 rounds. But no training regime had been established to take advantage of the accuracy and speed of fire of the weapon. Personal skills such as scouting and field craft were little taught. The idea of fire and movement was largely unknown, many regiments still going into action in close order. Notoriously General Hart insisted that his Irish Brigade fight shoulder to shoulder as if on parade in Aldershot. Short of regular troops, Britain engaged volunteer forces from Britain, Canada, Australia and New Zealand who brought new ideas and more imaginative formations to the battlefield.
The British regular troops lacked imagination and resource. Routine procedures such as effective scouting and camp protection were often neglected. The war was littered with incidents in which British contingents became lost or were ambushed often unnecessarily and forced to surrender. The war was followed by a complete re-organisation of the British Army, with emphasis placed on personal weapon skills and fire and movement using cover.
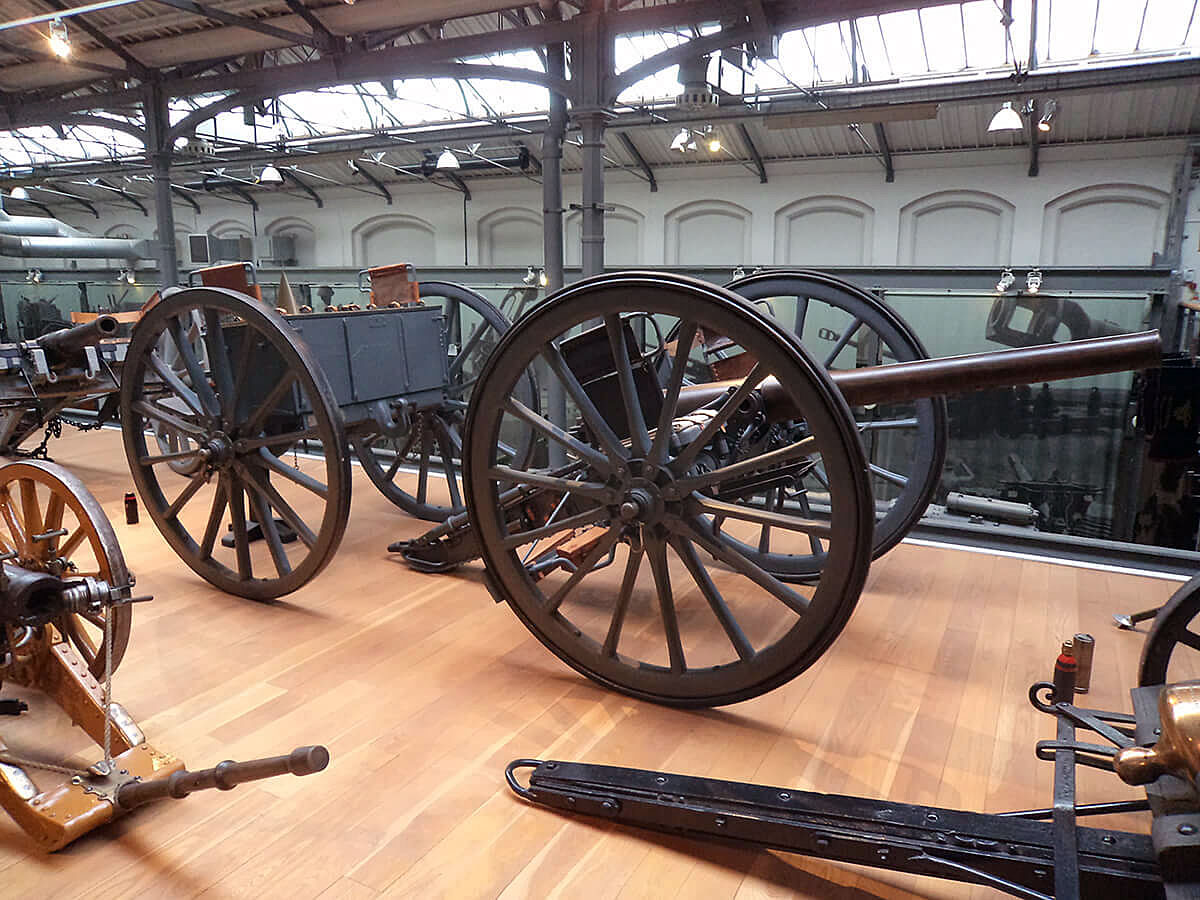
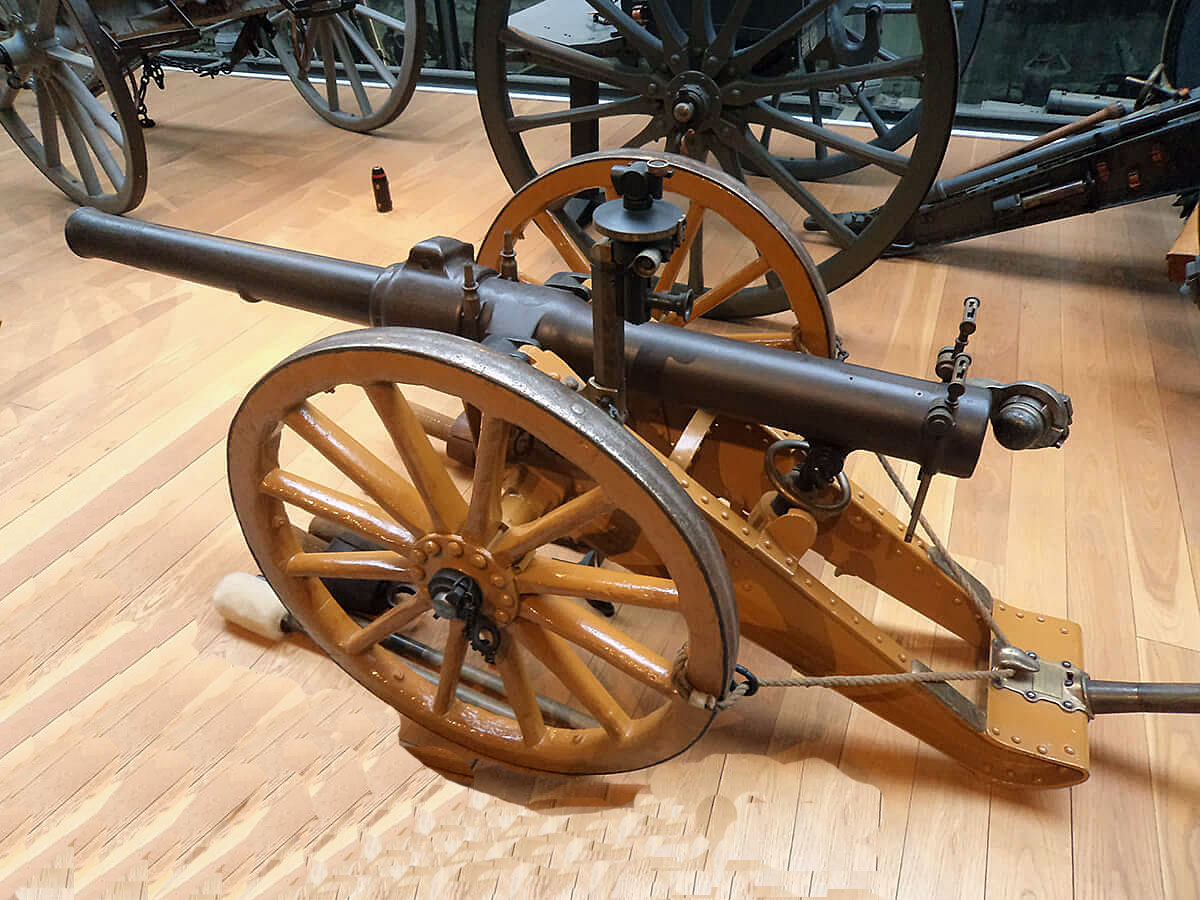
British 15 pounder RBL field gun 1901: Battle of Ladysmith or Lombard’s Kop on 30th October 1899 in the Boer War
The British artillery was a powerful force in the field, underused by commanders with little training in the use of modern guns in battle. Pakenham cites Pieters as being the battle at which a British commander, surprisingly Buller, developed a modern form of battlefield tactics: heavy artillery bombardments co-ordinated to permit the infantry to advance under their protection. It was the only occasion that Buller showed any real generalship and the short inspiration quickly died.
The Royal Field Artillery fought with 15 pounder guns; the Royal Horse Artillery with 12 pounders and the Royal Garrison Artillery batteries with 5 inch howitzers and mountain guns. The Royal Navy provided heavy field artillery with a number of 4.7 inch naval guns mounted on field carriages devised by Captain Percy Scott of HMS Terrible.
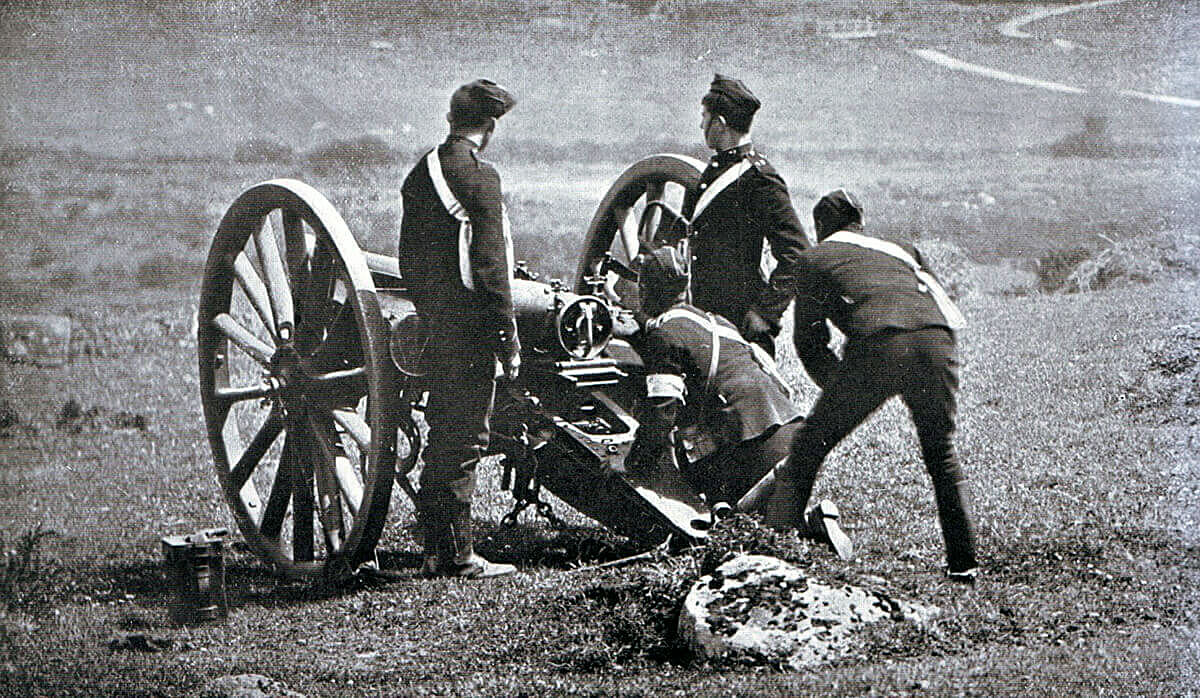
Royal Field Artillery gun crew about to fire a 15 pounder RBL field gun on exercise in Britain: Boer War 1899-1901: Battle of Ladysmith or Lombard’s Kop on 30th October 1899 in the Boer War
Automatic weapons were used by the British usually mounted on special carriages accompanying the mounted infantry or cavalry.
Winner: The Boers.
British Regiments:
5th Dragoon Guards: from 1922 5th Inniskilling Dragoon Guards and now the Royal Dragoon Guards
18th Hussars: from 1922 the 13th/18th Royal Hussars and now the Light Dragoons.
19th Hussars: from 1922 the 15th/19th King’s Royal Hussars and now the Light Dragoons.
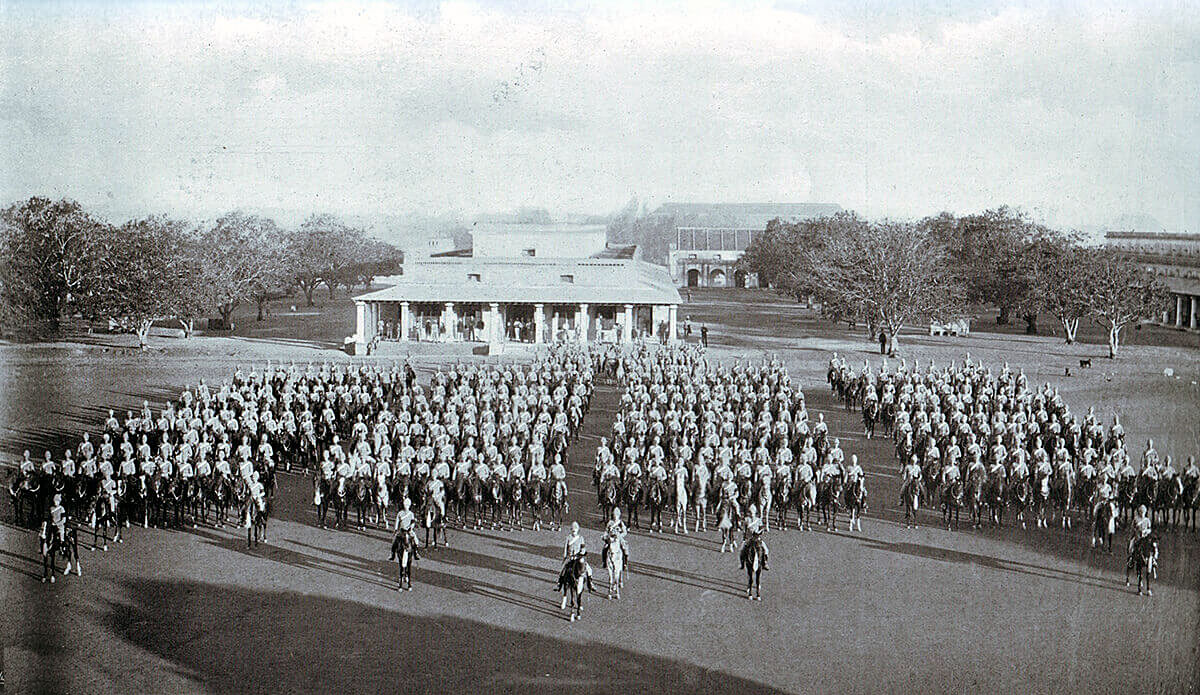
19th Hussars on parade in India before leaving for South Africa and forming part of General French’s cavalry brigade at the Battle of Ladysmith or Lombard’s Kop on 30th October 1899 in the Boer War
5th Lancers: from 1922 the 16th/5th Lancers and now the Queen’s Royal Lancers.
Royal Field Artillery: 13th, 18th, 21st, 42nd, 53rd and 69th Batteries. No 10 Mountain Battery
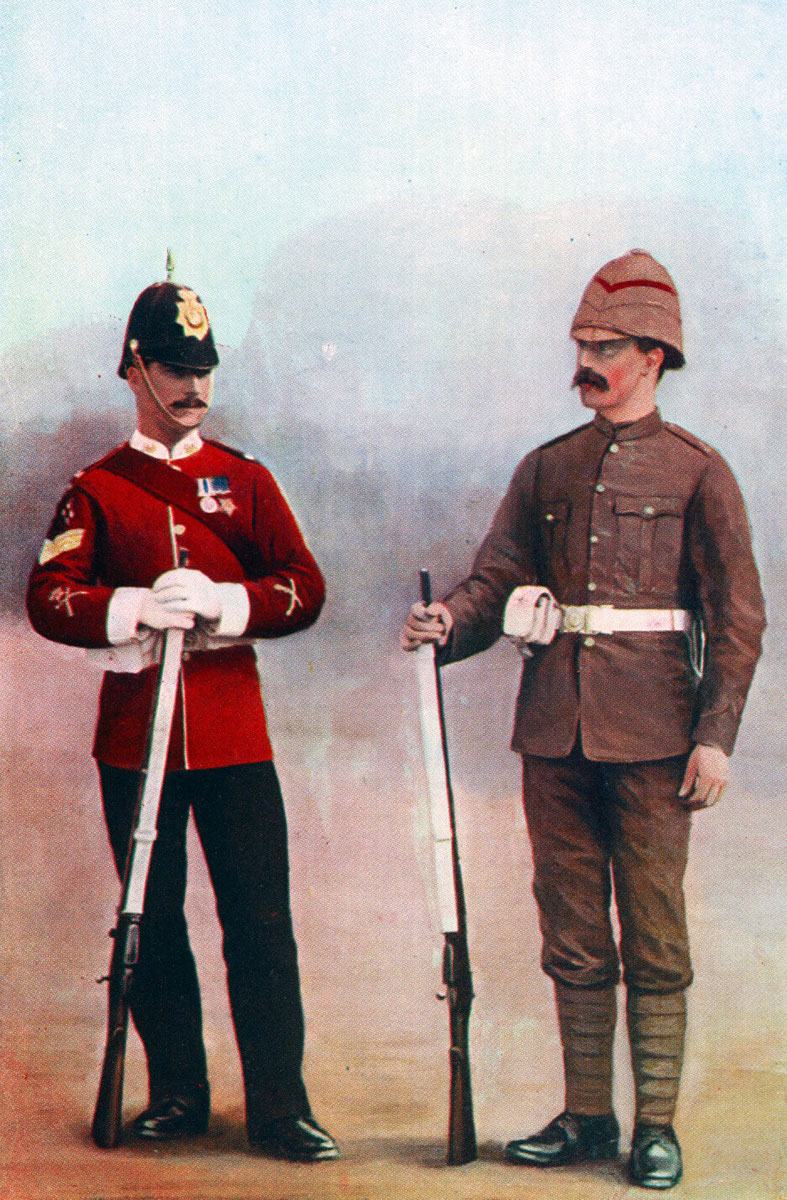
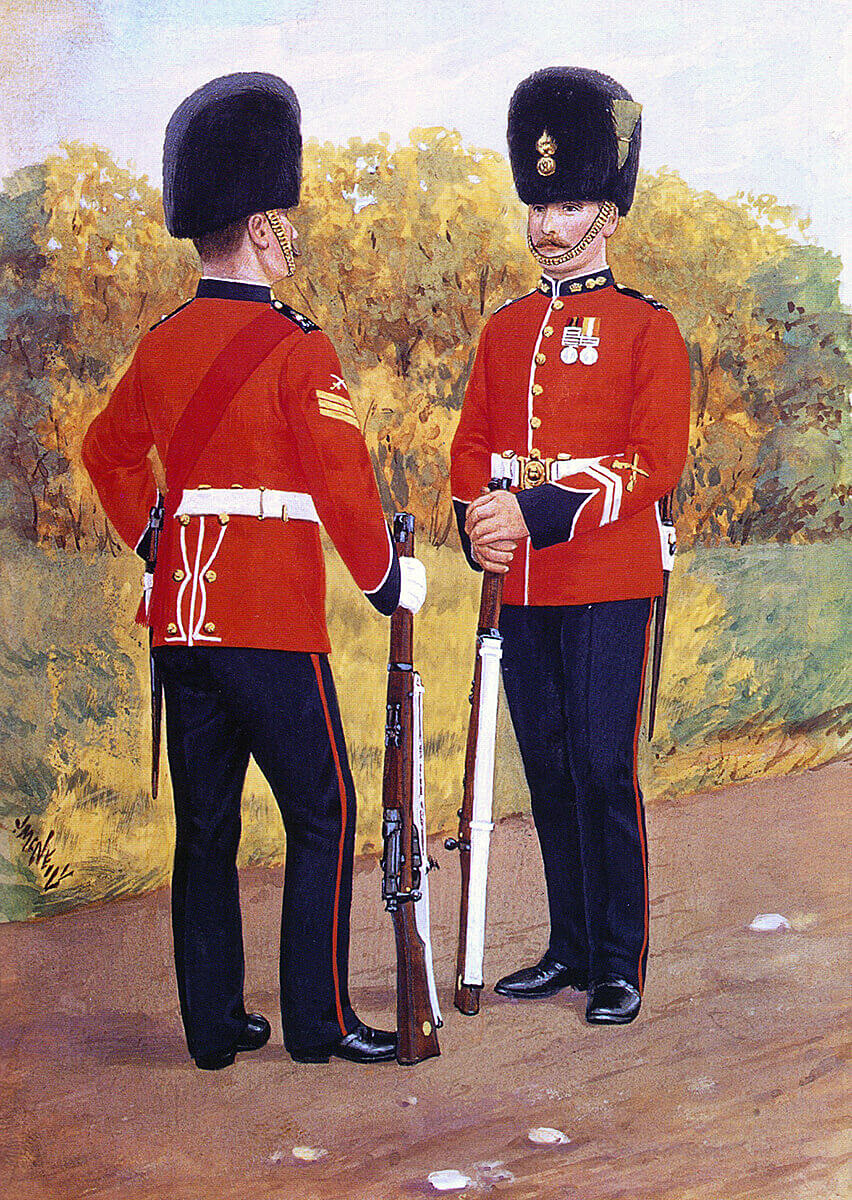
Gloucester Regiment Colour Sergeant in home service uniform and Private in uniform for service in South Africa in the Boer War
1st King’s Liverpool Regiment: later the King’s Regiment and now merged into the Duke of Lancaster’s Regiment.
1st Devonshire Regiment: later the Devon and Dorset Regiment and now merged into the Rifles.
1st Leicestershire Regiment: now the Royal Anglian Regiment.
1st Gloucestershire Regiment: later the Royal Gloucestershire, Berkshire and Wiltshire Regiment and now merged into the Rifles.
1st and 2nd King’s Royal Rifles: later the Royal Green Jackets and now merged into the Rifles.
1st Manchester Regiment: later the King’s Regiment and now merged into the Duke of Lancaster’s Regiment.
2nd Gordon Highlanders: later the Highlanders and now 4th Battalion the Royal Regiment of Scotland.
1st Royal Irish Fusiliers: disbanded in 1922.
2nd Royal Dublin Fusiliers: disbanded in 1922.
Natal Volunteer Artillery.
Account:
The British won two victories at the beginning of the campaign, Talana Hill or Dundee on 20th October and Elandslaagte on 21st October l899. Each battle was against small contingents of Boers moving in advance of the main Boer armies of the Transvaal and the Orange Free State.
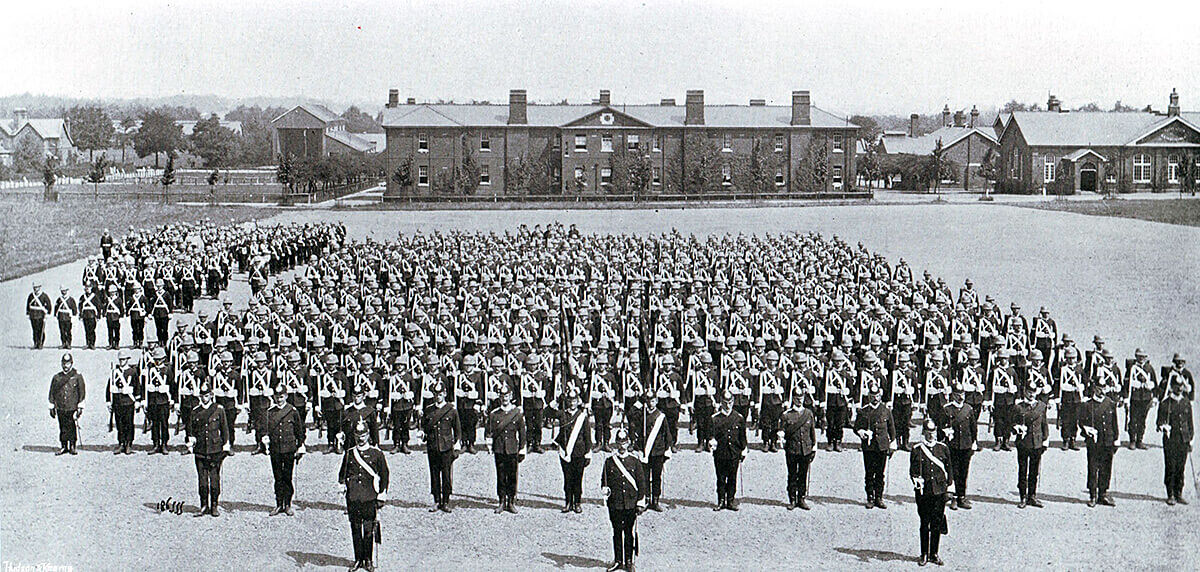
1st Manchester Regiment on parade in Britain before leaving for South Africa. 1st Manchesters formed part of Colonel Ian Hamilton’s brigade at the Battle of Ladysmith or Lombard’s Kop on 30th October 1899 in the Boer War
Command of the Dundee force passed with the fatal wounding of General Penn Symons to Brigadier General Yule, the commanding officer of the 1st Devonshires. Yule remained in the Dundee camp while the Boers moved down the main north-south road from Newcastle and gathered on the neighbouring hills overlooking Dundee. The Boer commander Erasmus positioned a Creusot siege gun on Impati Hill to the north-west of Dundee and began a bombardment of the British camp and the town, indiscriminately putting shells into the military hospital, where General Penn Symons and the British and Boer casualties from the Talana Hill battle lay.
5th Royal Irish Lancers: Battle of Ladysmith or Lombard’s Kop on 30th October 1899 in the Boer War
Yule, an older regimental officer propelled into the command by the wounding of Penn Symons, was not a dynamic commander. He attempted to improve his position but his force was of insufficient strength to carry out any meaningful offensive operation.
Yule’s position deteriorated further when Lieutenant General Sir George White, acting on erroneous reports that Ladysmith was threatened by a large force of Orange Free State Boers from the west and that General Joubert was advancing on Elandslaagte with the main force of Transvaal Boers, ordered General French’s force that had just won the Battle of Elandslaagte to withdraw to Ladysmith. So precipitate was this retreat that large quantities of supplies with captured Boer weapons and prisoners were left behind. In addition to damaging the morale of the British soldiers involved the road from Dundee to Ladysmith was lost to Yule.
The route for communicating between Dundee and Ladysmith was now a track over the Biggarsberg hills. Yule enquired what he was to do. White dithered and finally told Yule to fall back to Ladysmith.
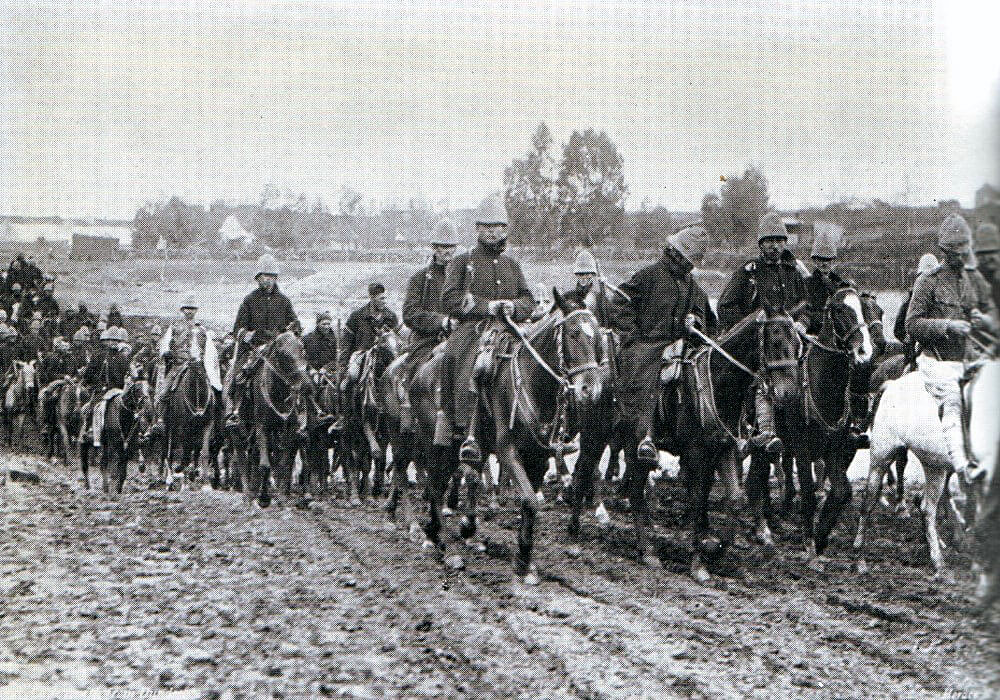
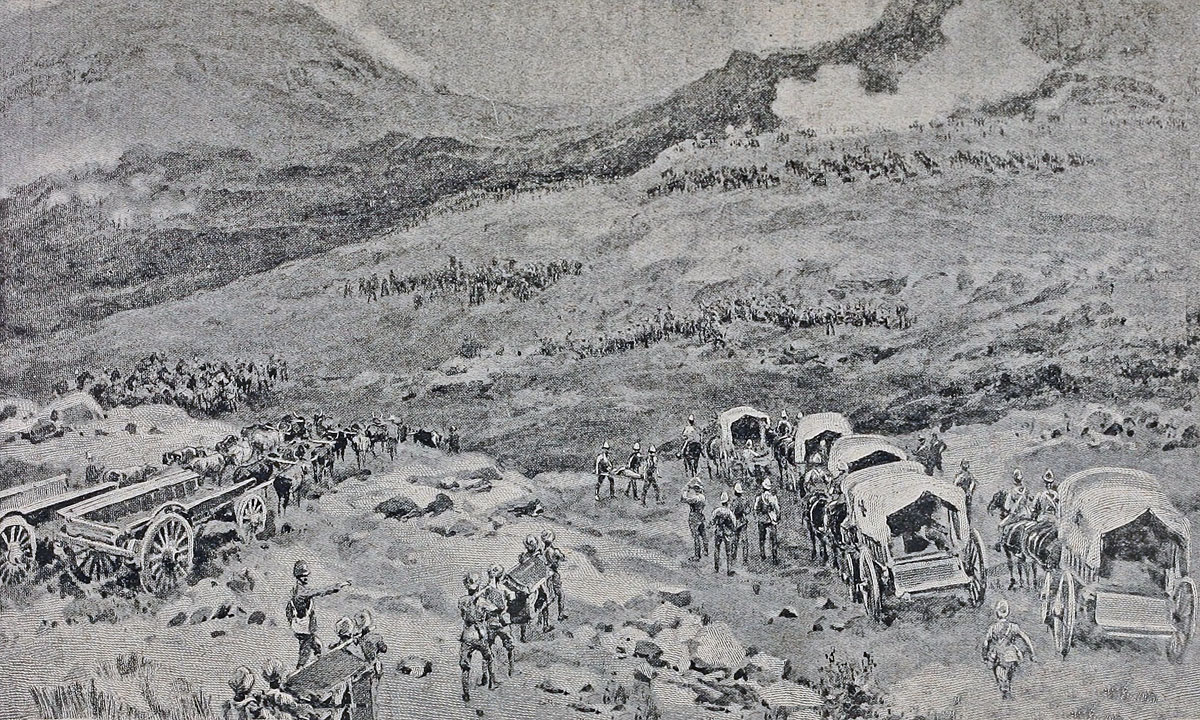
Brigadier General Yule’s force retreating from Dundee to Ladysmith 22nd to 26th October 1899: Battle of Ladysmith or Lombard’s Kop on 30th October 1899 in the Boer War
On the night of Sunday 22nd October 1899 Yule’s force marched out of Dundee heading south. The British camp was left standing and the wounded remained in the hospitals with some of the medical staff. The residents of Dundee were left in ignorance of the British retreat. Yule’s men covered ten miles before halting for the remainder of the night.
In the morning the Boers discovered that the British had left Dundee and ransacked the British camp and the town.
General Penn Symons, on the verge of death, was distraught to find that he had been abandoned to the Boers with the rest of the British wounded. Fortunately for the British the Boers conducted no determined pursuit of Yule’s brigade.
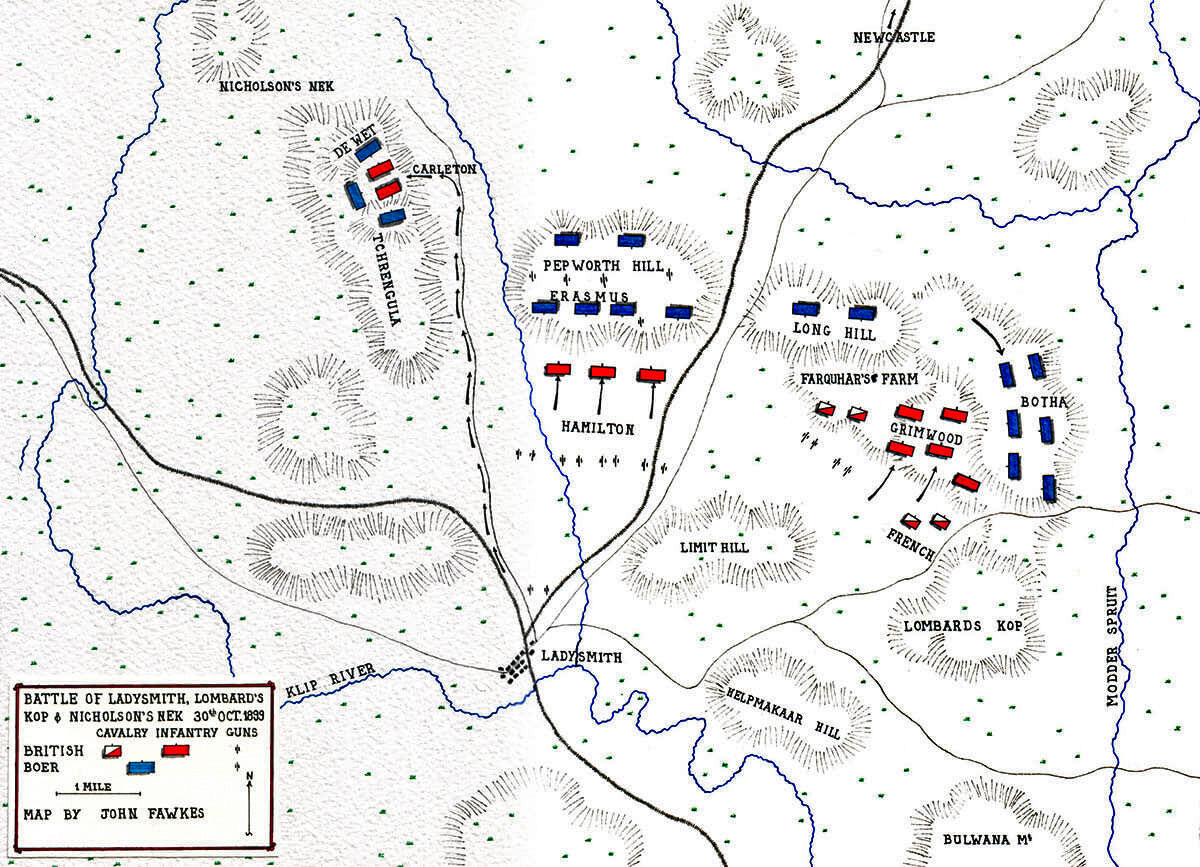
Map of the Battle of Ladysmith or Lombard’s Kop on 30th October 1899 in the Boer War: map by John Fawkes
On the second day of Yule’s march White sent a force of three batteries of guns, four battalions of infantry and five cavalry and mounted regiments to carry out a diversionary attack on the Boers at Rietfontein on the road to Elandslaagte, with the purpose of distracting them from any pursuit of Yule. During the course of this operation the commanding officer of the Gloucesters, Lieutenant Colonel Wilford, precipitately led one of his companies in a charge against the Boer position suffering substantial casualties and losing his own life. British killed, wounded and missing were 114, Gloucesters amounting to 63 of these, and the Boer casualties around 35.
Battle of Rietfontein on 24th October 1899: Battle of Ladysmith or Lombard’s Kop on 30th October 1899 in the Boer War
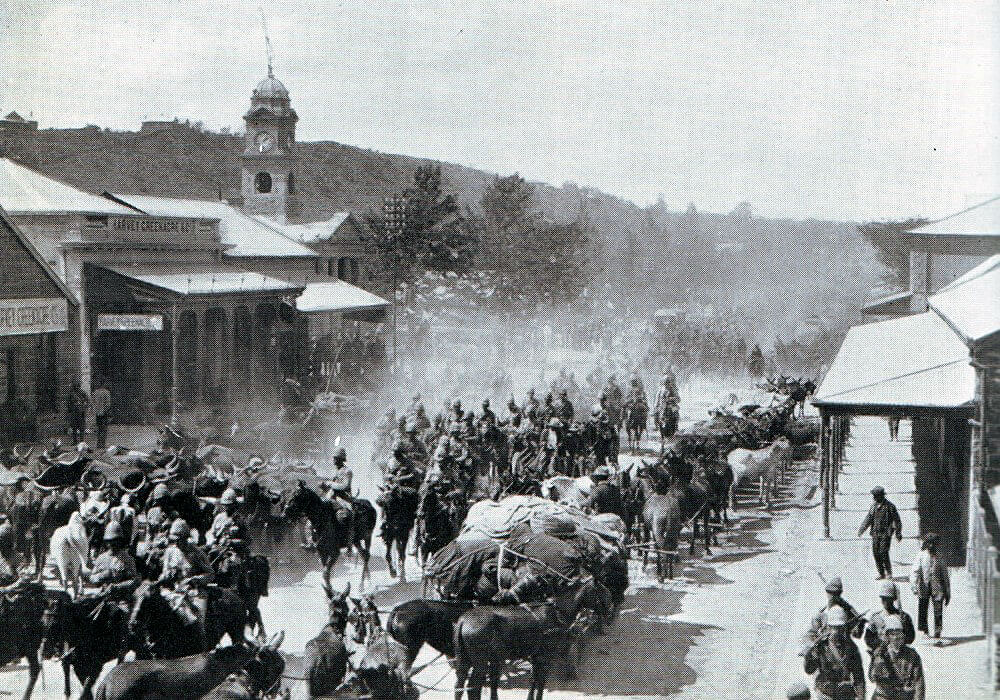
At noon on 26th October 1899 Yule’s force reached Ladysmith in a state of exhaustion.
With the withdrawal from Dundee, Ladysmith became the most advanced British position. Large quantities of supplies were being brought up by train from Durban, Natal’s port, and stored around the town.
Ladysmith lay on the north bank of the Klip River. A range of hills ringed the town on the north side making it a difficult place to defend against the Boers converging on the hills from north and west.
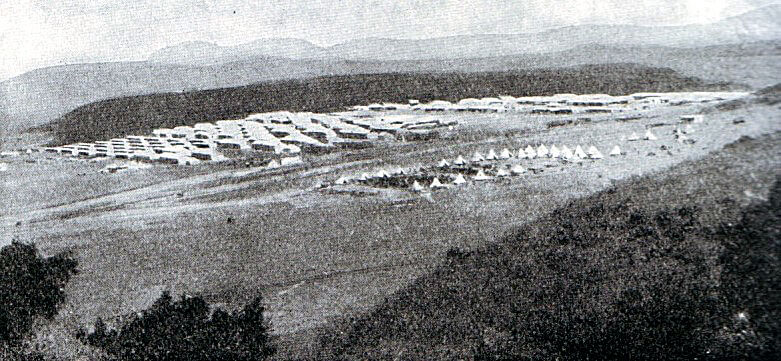
British Army Camp at Ladysmith October 1899 in the Boer War: Battle of Ladysmith or Lombard’s Kop on 30th October 1899 in the Boer War
General Buller, on his way to Natal to take overall command of British forces in the colony, urged that White should withdraw the British forces south and take up positions on the Tugela River. This proposal was initially strenuously opposed by Hely-Hutchinson, the British Governor of Natal, who resisted any abandonment of British territory.
Between 26th and 29th October 1899 Joubert’s Transvaal Boers reached the range of hills to the north of Ladysmith and began to prepare for their attack on the town. The central Boer position was on Pepworth Hill, around 4 miles north of Ladysmith. The Boers advancing from the Orange Free State threatened Ladysmith from the west but were still some distance from the town.

Royal Artillery on Lombard’s Kop at the Battle of Ladysmith or Lombard’s Kop on 30th October 1899 in the Boer War
The Boers brought up a number of their newly acquired European guns and positioned them on Pepworth Hill. It is not clear what guns the Boers deployed during this battle, but it would seem that their artillery included one, possibly two, of the large Creusot heavy siege guns, known as ‘Long Toms’, quick firing field guns bought from Schneider-Canet and Krupp and a light automatic gun built by Vickers-Maxim, given the nickname of a ‘pom-pom’. Other pieces were brought up during the battle.
The larger Boer guns far outranged the 15 pounders of the Royal Field Artillery batteries in White’s army. On the other hand the Boers lacked trained gunners and relied upon high explosive shells rather than the shrapnel used almost exclusively by the British RFA. It was the experience of the war that high explosive shells were largely ineffective and that casualties were inflicted with air burst shrapnel.
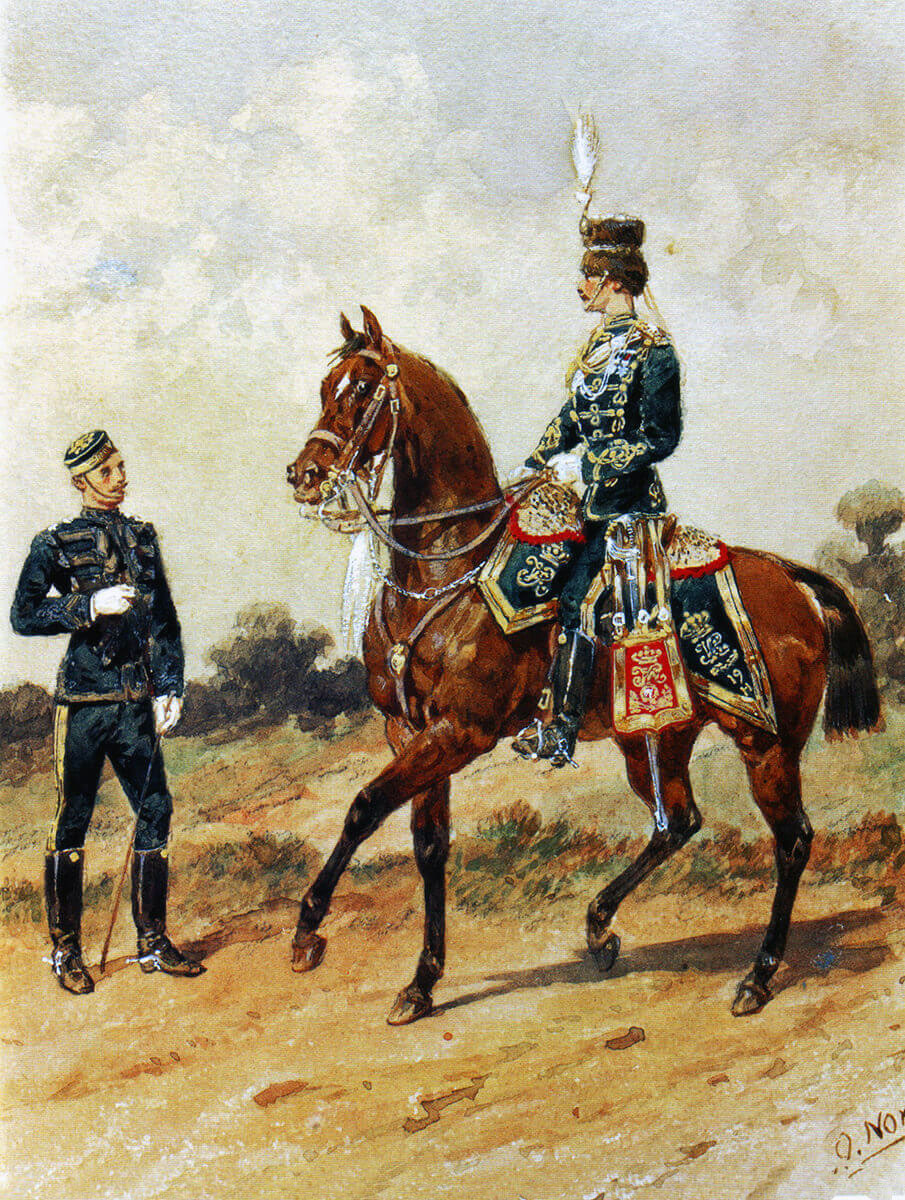
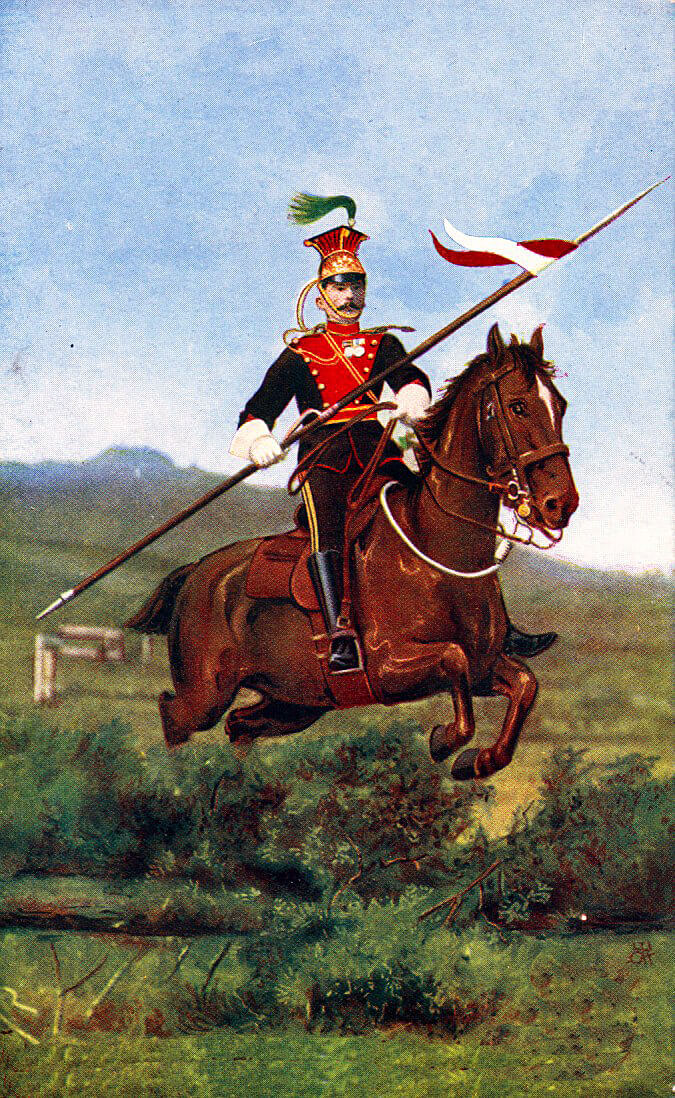
19th Prince of Wales’ Hussars: Battle of Ladysmith or Lombard’s Kop on 30th October 1899 in the Boer War: picture by Orlando Norie
While at times frightening to the inexperienced British soldiers and particularly to the civilian inhabitants of Ladysmith the Boer guns did little damage.
The Boers dug entrenchments on Pepworth Hill and occupied its lower extension to the east, Long Hill. The whole Boer position extended for a considerable distance along the semi-circle of hills some four miles to the north of Ladysmith.
The British force in Ladysmith was substantially outnumbered and a counsel of caution would have caused White to entrench and hold off the Boers until the Army Corps that was being shipped by sea from Britain to Durban arrived and came to his assistance. For whatever motive White determined to attack the Boer forces gathering in front of him which he seriously underestimated.
General White resolved to attack the Boer positions using much the same tactics that had been used at Talana and Elandslaagte, an artillery bombardment followed by a frontal and a flanking infantry attack.
On 29th October 1899 a newly arrived balloon from England, crewed by the Royal Engineers, was sent up, to the amazement of the inhabitants of Ladysmith, to observe the Boer dispositions.
The Orange Free State Boers were still to the west of Ladysmith, although it was feared that they would soon join their Transvaal brothers creating an army significantly stronger that White’s force in Ladysmith.
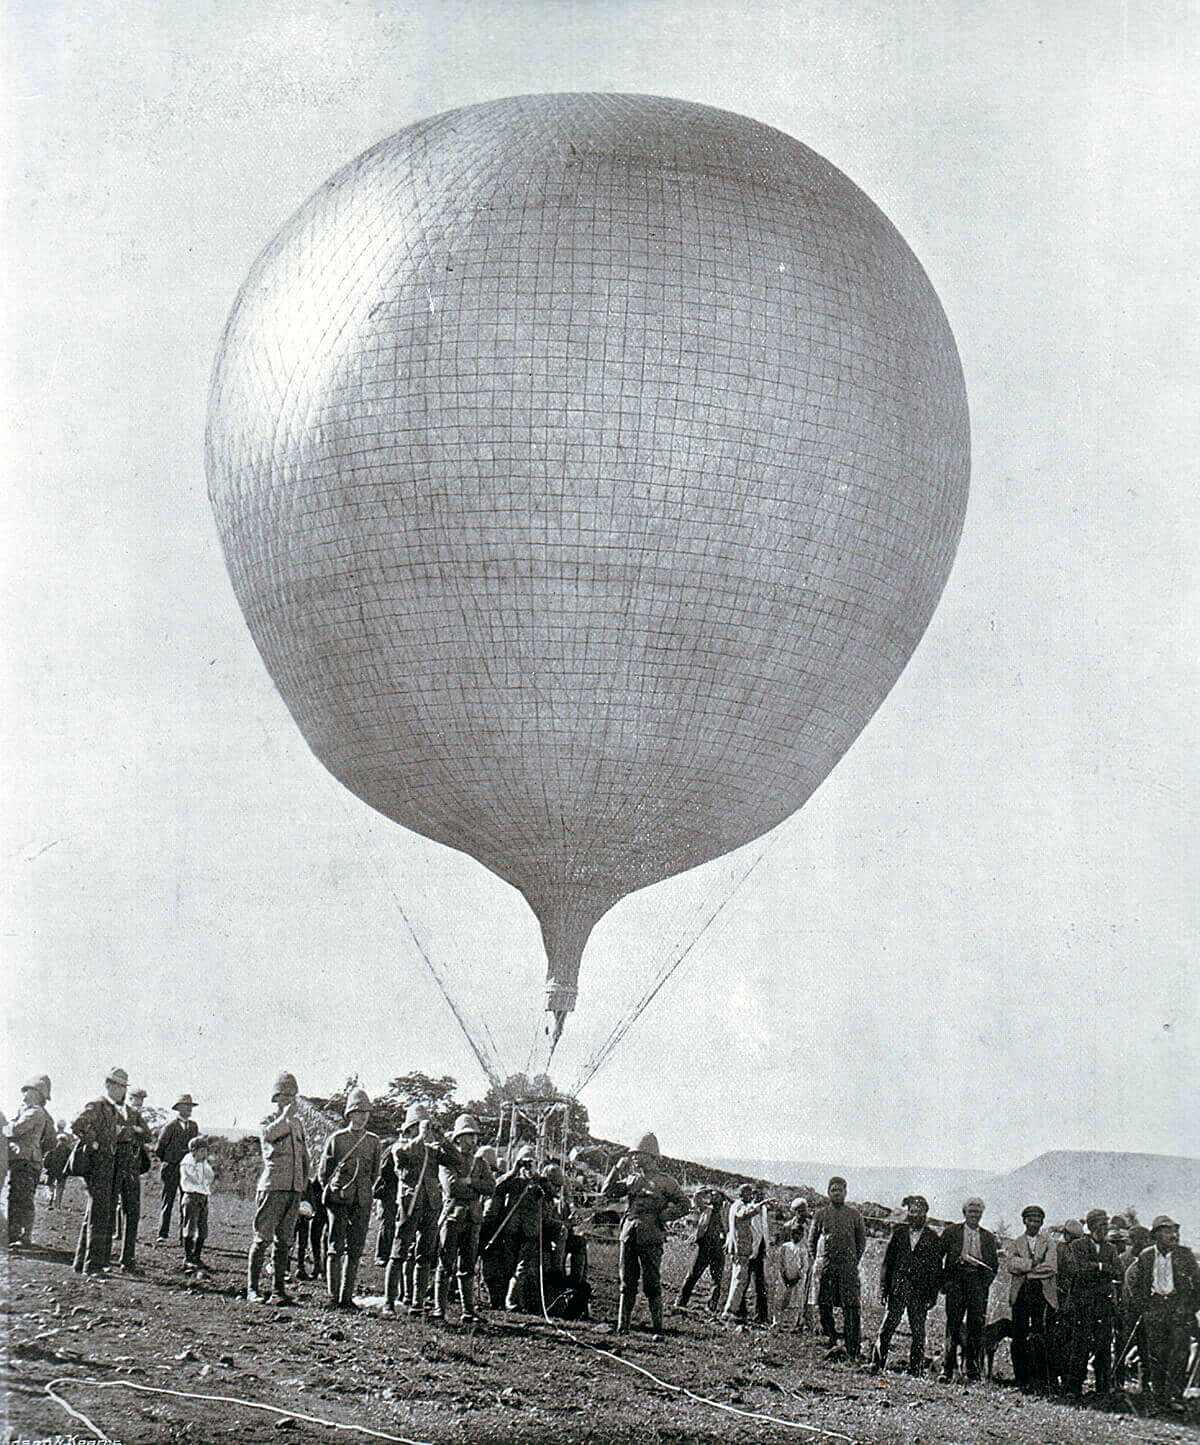
Royal Engineers’ Balloon in Ladysmith 1899 to 1900 in the Boer War
White’s plan was based on the assumption that Pepworth Hill and Long Hill were the Boers’ main position and that they would remain there during the course of any attack the British might make. White appears to have considered he would be able to defeat the Boers in much the same way that his subordinates had beaten them at Talana Hill and Elandslaagte. The difference now was that the Boers were present in substantially greater strength than was available to White and were commanded by an effective and resourceful general in Erasmus.
White had made his name and won the Victoria Cross in the Second Afghan War of 1874, twenty-five years before. He had spent his military career since then in India and had no experience of fighting a sophisticated well armed army such as that fielded by the Boers. In addition he was probably too old and exhausted after a lifetime in the field and a serious leg injury. No training he had received or any previous experience made him ready to deal with the highly mobile and skilled marksmen of the Boer army.
White’s aims were to keep the forces of the two Boer states separate, to drive the Transvaal Boers from the range of hills to the north of Ladysmith and to cut off their retreat, thereby enabling him to inflict on them a decisive defeat.
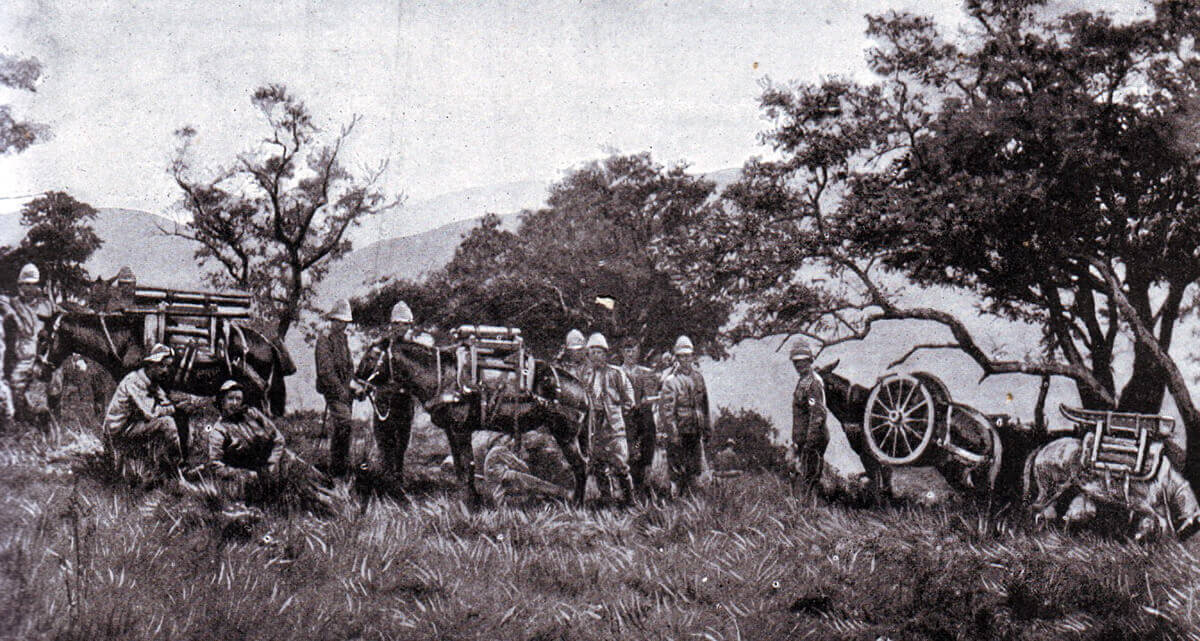
Royal Garrison Artillery Mountain Battery on mules in South Africa 1899 in the Boer War
White divided his army into three forces. Two of these would mount attacks on the Boer positions on Pepworth and Long Hills. White assumed the Boers would remain in position while he advanced on them.
A major difficulty for the British that does not seem to have been given its due weight was that Ladysmith was known to be riddled with Boer spies. It was very unlikely that any movement of troops could be undertaken without the Boers becoming aware of it.
General Yule was sick after his harrowing march from Dundee. Command of his brigade fell to the senior battalion commanding officer, Lieutenant Colonel Grimwood. Grimwood’s force comprised the 1st Leicesters, 2nd Royal Dublin Fusiliers, 1st and 2nd King’s Royal Rifle Corps and 1st King’s Liverpools with two batteries of guns, the Royal Field Artillery 13th and 69th Batteries. French’s cavalry, comprising 5th Lancers, 18th and 19th Hussars and the Imperial Light Horse, provided support. Grimwood, backed by French’s cavalry, was to ascend Lombard’s Kop a hill to the east of Ladysmith forming part of the ridge of hills and turning to the north-west to attack the left flank of the Boer force on Long Hill and then Pepworth Hill.
Colonel Ian Hamilton led the central brigade comprising the battalions he had commanded at Elandslaagte; 1st Devons, 1st Manchesters and 2nd Gordon Highlanders.
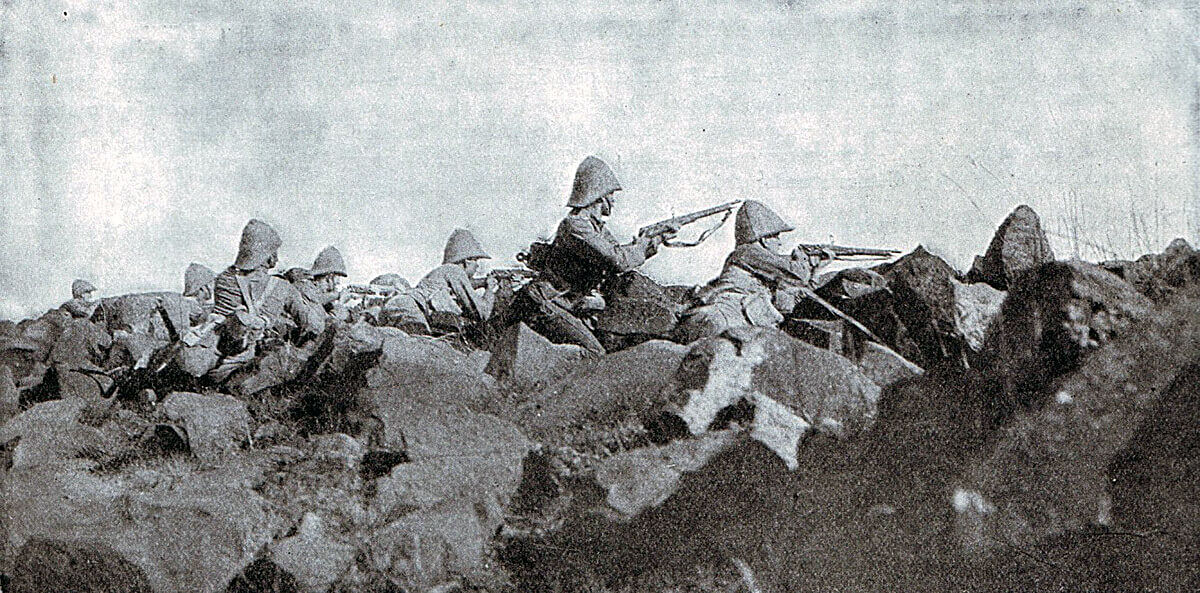
Devons on Pepworth Hill during the Battle of Ladysmith on 30th October 1899 in the Boer War
The balance of White’s substantial artillery, comprising four Royal Field Artillery batteries with twenty-four 15 pounder guns, was to form a gun line in the plain.
The battle was to begin with an artillery bombardment of Long Hill and Pepworth Hill. Hamilton would mount the attack frontally on Pepworth Hill from Ladysmith while Grimwood worked his way along the ridge from the right.
Royal Irish Fusiliers in 1905. The soldier facing is wearing the Queen’s South African medal and the King’s South African medal. 1st Royal Irish Fusiliers was one of the two infantry battalion forced to surrender at Nicholson’s Nek on 30th October 1899, ‘Mournful Monday’ in the Boer War
The third force commanded by Lieutenant Colonel Carleton comprised one thousand men from the Gloucester Regiment and the Royal Irish Fusiliers with 10th Mountain Gun Battery of the Royal Garrison Artillery. Carleton was to march north to the left of the axis of advance and occupy the gap in the hills at Nicholson’s Nek. From there he was expected to cut off the retreat of the Boers from Pepworth Hill in expectation of a successful attack on the main Boer positions on Pepworth and Long Hills and to prevent a junction with the Orange Free State Boers approaching from the west.
White’s plan suffered from a number of misconceptions. He had not grasped the mobility of the Boers, all mounted and skilled horsemen, as against the slowness of his infantry and he continued to underestimate the impact of Boer marksmanship equipped with the most modern magazine rifles.
In addition the Boer artillery was a surprise. With recently acquired guns the Boers were still novices in their use and many of the Boer gunners were simply burghers in arms lacking the training and discipline of the British gunners. But the Boers were equipped with the most modern guns Europe could provide, made in France and Germany, and several of them were large guns with a range greater than the outdated British field guns, firing from the concealment provided by the broken ground on Pepworth Hill against the British guns deployed in the open plain.
White’s plan to launch Carleton on his perilous night march through the Boer positions was viewed with apprehension by his staff, even though White allocated his experienced intelligence staff officer Major Adye to accompany the force and advise on the route with the assistance of local farmers.
Carleton was the first to move. Late in the evening of Sunday 29th October 1899 Carleton led his force out of Ladysmith following the road to the north leading to Newcastle and Dundee. Carleton’s mountain artillery and reserve ammunition was carried by two hundred mules. The order of march was that the Royal Irish Fusiliers led the column followed by the mountain battery with the Gloucesters in the rear. His destination was the gap in the hills to the north-west called Nicholson’s Nek.
British 10 pounder jointed RBL mountain gun ‘Screw Gun’
Carleton marched past the main Boer positions on Pepworth Hill and then, fearing that he would be caught on the road in the valley well short of his destination of Nicholson’s Nek by the rising sun, he resolved to take his force up the hill on his left, Tchrengula or Hog’s Back, and spend the rest of the night there. While his troops were struggling up the hillside which became progressively steep several mounted Boers rode down the hill and through the column, firing as they went, with the result that the artillery mules bolted back down the track through the Gloucesters, who thought they were under attack and fired on the mules. The artillery mules raced through the Gloucester column taking the mules carrying the small arms ammunition reserve with them and disappeared into the night. Many of the gunners were dragged away with them.
The Gloucesters reformed with some difficulty and continued on up the hill. The British troops occupied positions around what they thought was the summit of the hill and built stone sangars for protection. With daylight it became apparent that Carleton’s column, without any workable guns and only the ammunition they carried, were on a plateau overlooked by a number of higher peaks. The Boers assembled on these points and opened fire on the British troops. During the course of the fire fight the outlying positions held by the Gloucesters were driven in and ammunition ran low. At around 2pm bugles sounded the ‘Cease Fire’ and the British force surrendered.
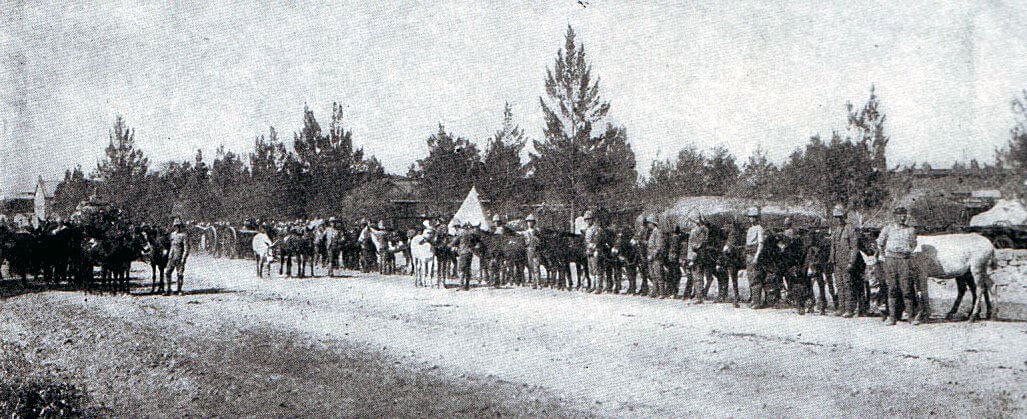
British army mules in Ladysmith in 1899 in the Boer War
Controversy surrounds the surrender. Many of the officers and soldiers present considered it to be premature. Although the fire was heavy British casualties were low and they appeared to be confronted by a Boer force that was only slightly larger, or possibly smaller, than the British. Officers of the Royal Irish Fusiliers broke their swords in protest. It would seem that the first decisions to surrender were taken by junior officers whose men thought they were the only British left on the hill and that once the surrender began it was endorsed by the senior officers including Major Adye, who expected to have been relieved some hours earlier following successful British attacks on the Pepworth and Long Hill positions.
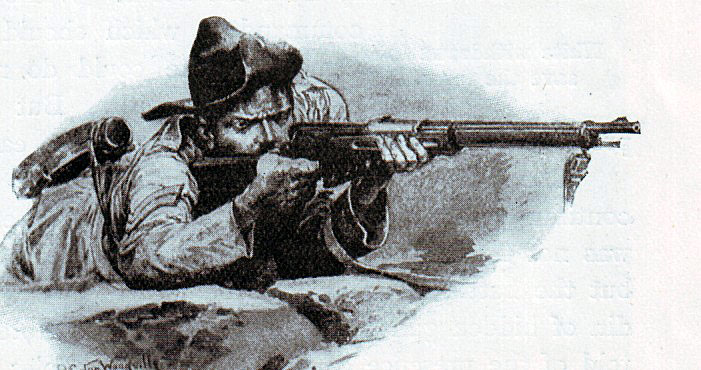
Boer rifleman in the Boer War
These attacks began at dawn when the first shots were being fired on Tchrengula. The Boer artillery on Pepworth Hill began to bombard Ladysmith. The British Royal Field Artillery guns attempted counter-battery fire, but found it difficult to work out the positions of the Boer guns, although for a time they managed to force the Boer gunners off the Long Tom siege gun.
Many of the accounts of the battle attribute the difficulties of the British gunners to the use by the Boers of smokeless ammunition. The British gunners had little experience of counter-battery fire, being more used to action against native tribesmen, as in the Sudan and on the North-West Frontier of India. They had the added difficulty that they were firing from the open plain against concealed Boer guns.
During the night Grimwood marched his force out of Ladysmith and onto Lombard’s Kop at Farquhar’s Farm where he waited for dawn. With daylight Grimwood found that part of his force including his two batteries of guns was missing and French’s cavalry was not positioned to support him. Once these problems were sorted out Grimwood’s men moved along Lombard’s Kop to attack the supposed Boer flank on Long Hill.
The Boers were no longer on Long Hill. They had moved round during the night so that they were positioned on Grimwood’s right flank in the hills he was moving across. The Boers in question were the Johannesburg Commando now led by Louis Botha in place of Meyer.
As Grimwood’s men moved forward the Boers opened a heavy fire into their right flank, taking the British troops by surprise and causing considerable confusion. Instead of conducting an attack along the ridge and rolling up the Boer flank the British found themselves in a desperate struggle to maintain their position on the hill under a withering fire from hidden Boer riflemen.
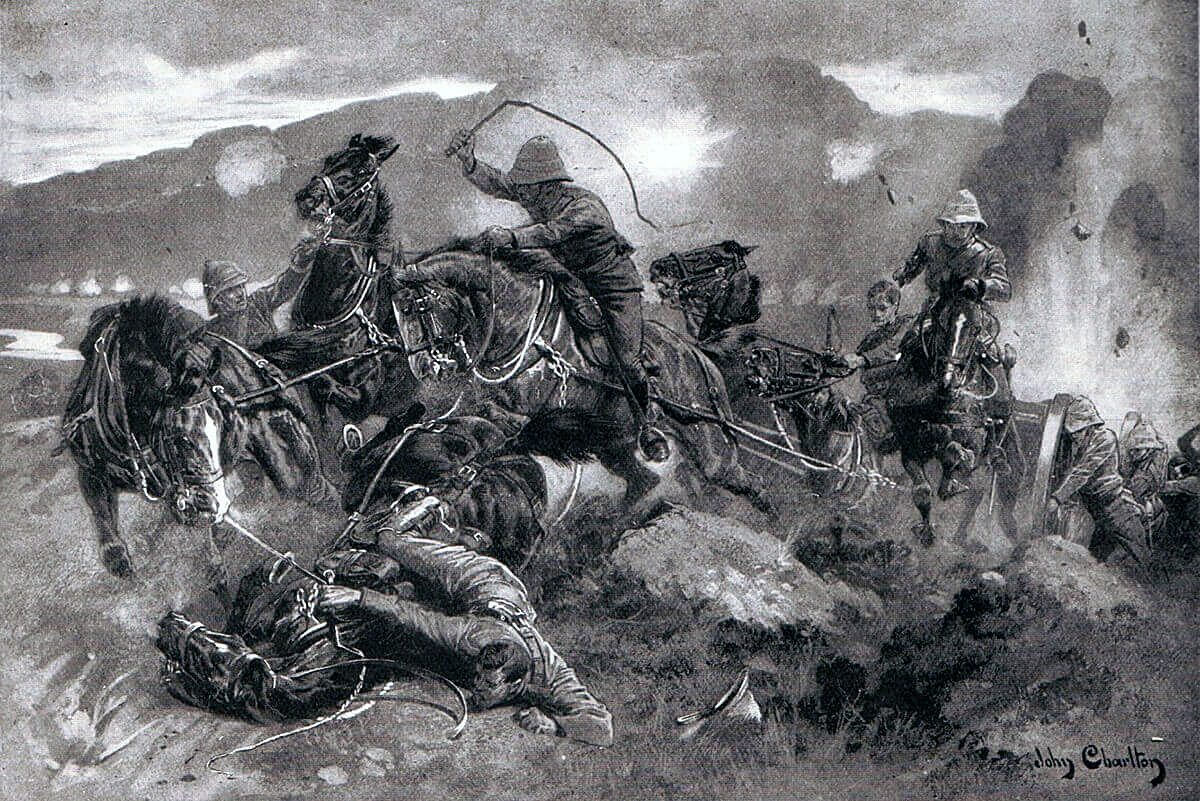
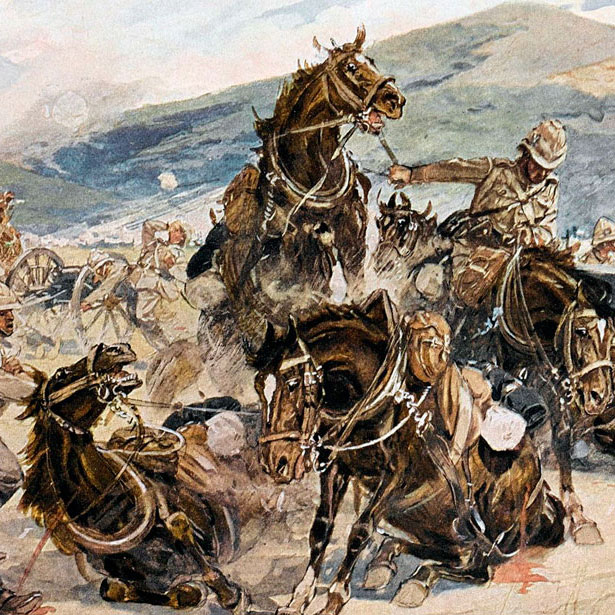
Guns taking up a new position during the Battle of Ladysmith or Lombard’s Kop on 30th October 1899 in the Boer War: picture by John Charlton
In the centre Long Tom fired on Ladysmith, causing panic in the town, although not a great deal of damage. British counter battery fire was unable to track down the long ranged French artillery piece, firing modern smokeless rounds.
Hamilton launched his frontal infantry assault on Pepworth Hill but was unable to make headway against the heavy Boer rifle fire.
Waiting in Ladysmith amidst the increasing civilian panic at the Boer artillery barrage, White received a trickle of indicators from stray mule drivers and British gunners that Carleton’s force, that was meant to be holding the gap at Nicholson’s Nek, was in trouble. Signals by heliograph were not answered; Carleton’s heliograph was on the back of one of the stampeded mules. White sent a patrol of officers to find out what had happened, but they were unable to get through the Boer lines.
Thoroughly unnerved by the failure of Hamilton and Grimwood to take the hills and the steady fire of Long Tom, together with his anxiety about Carleton at Nicholson’s Nek and rumours of an impending attack on the town by the Orange Free State Boers, White ordered his commanders to disengage and retire into Ladysmith.
British troops arriving back in Ladysmith after the Battle of Ladysmith or Lombard’s Kop on 30th October 1899 in the Boer War
Grimwood’s infantry, in cover on the hillside and attempting to return the Boer rifle fire, were forced to leave their positions and hurry down into the plain under intense fire. The withdrawal was in considerable confusion which became worse as the troops streamed down the hillside. The dire situation was retrieved by the steadiness of the two RFA batteries, the 13th and the 53rd, conducting a fighting withdrawal to cover the infantry, interposing themselves between the infantry and the Boers, moving and firing in turn.
The withdrawal of French’s cavalry from the hillside was as disorganised as the infantry and again the situation was retrieved by the steadiness of the Royal Field Artillery.
There was one episode of respite for the British. A train arriving in the morning brought a number of naval guns and personnel from HMS Powerful in Durban; 280 officers and sailors, four long naval 12 pounders and two 45 pounder 4.7 inch guns mounted on field gun carriages devised by Captain Percy Scott RN. One 12 pounder was put out of action but another put a round on the Long Tom and rendered it inoperative.
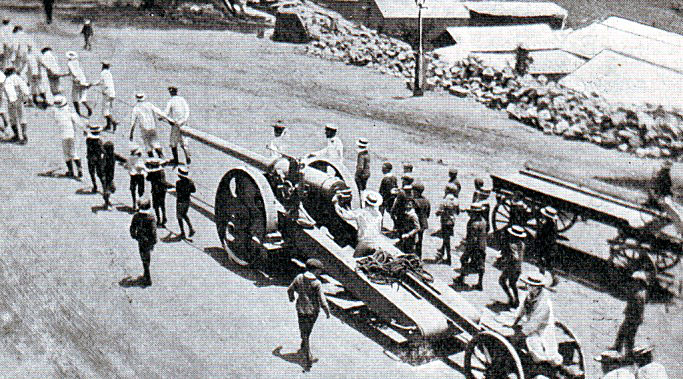
Royal Naval 4.7 inch gun on a field carriage: Battle of Ladysmith or Lombard’s Kop on 30th October 1899 in the Boer War
By mid-afternoon the action was over and the British troops were streaming back into Ladysmith, other than those of Carleton’s force taken prisoner and on their way by train to Pretoria.
Within days the Boers cut the railway line south of Ladysmith and the siege of the town began.
Casualties:
British losses from Grimwood’s and Hamilton’s brigades were 60 killed and 240 wounded.
Of Carleton’s force at, or short of, Nicholson’s Nek, 29 officers and 898 men were taken prisoner with four mountain guns. 52 men were killed and 150 wounded. Around 80 men escaped from Tchrengula and returned to Ladysmith, mainly gunners and drivers who were carried along by the bolting mules. Total British casualties were around 1,400.
The Boers are said to have suffered around 200 casualties.
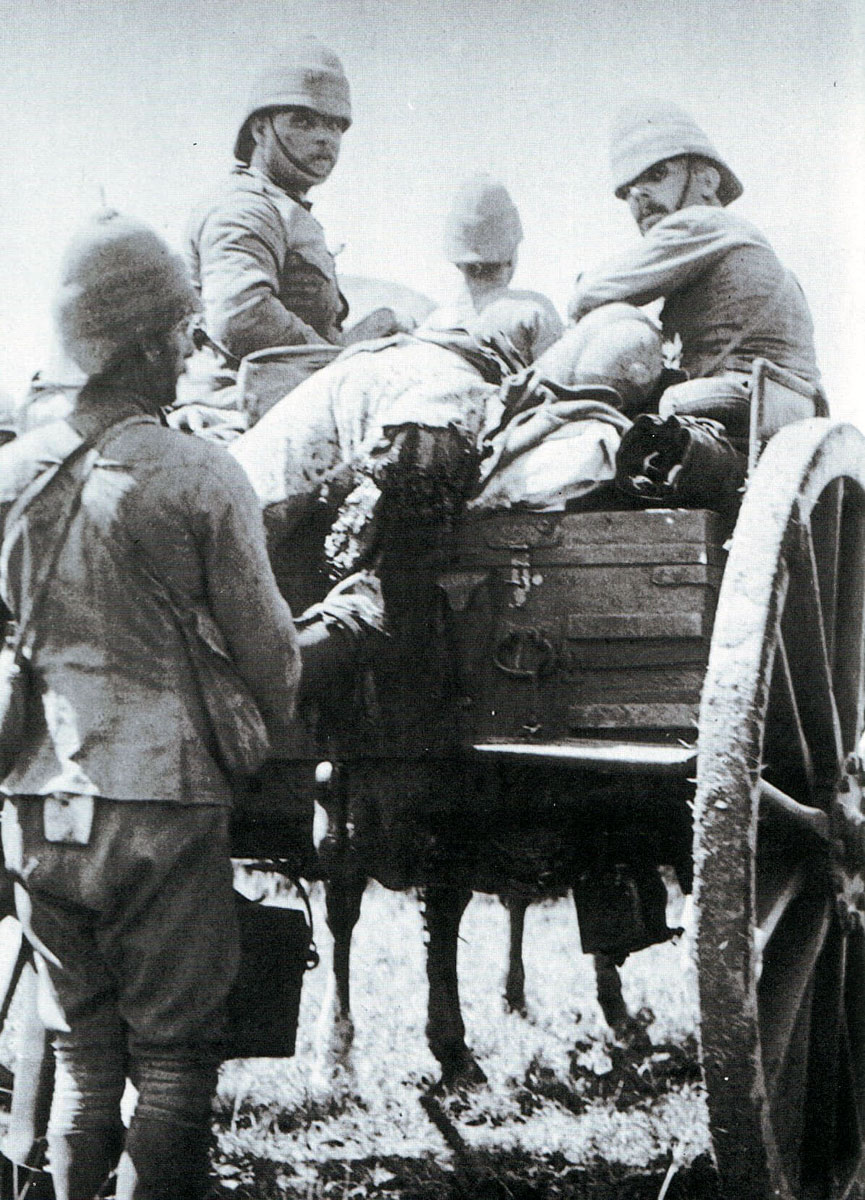
British casualties being removed from the field after the Battle of Ladysmith or Lombard’s Kop on 30th October 1899 in the Boer War
Follow-up: Due to a combination of strategic rashness in permitting his outnumbered force to be too far north when the Boers invaded Natal and timidity in conducting operations, White permitted a substantial British force to be locked up in Ladysmith. Attempting to preserve the illusion that he still commanded a field force, White refused to allow his cavalry regiments to escape the siege and join Buller to the south of the Tugela River, where they would have been invaluable. Instead they languished inactive in Ladysmith for the months of the siege. Finally the garrison ate the horses.
Buller’s strategy was hamstrung by the necessity to relieve Ladysmith; it being inconceivable that such a large force be permitted to fall into Boer hands. At every turn the Boers knew that Buller’s strategic imperative was to relieve Ladysmith. White did little to assist Buller; nearly losing Ladysmith to a vigorous Boer attack through his failure to ensure that the town was properly defended.
However Denys Reitz makes the point that the siege of Ladysmith was a major distraction for the Boers from the main task of invading Natal. While the Ladysmith garrison contained a substantial British force, proportionally to the Boer population the resources required to besiege them were much greater.
Battle Honours:
The Battle of Ladysmith, as opposed to the Defence and Relief of Ladysmith, is not a battle honour. All the regiments that fought in South Africa received the battle honour ‘South Africa’ with the dates of presence in the country.
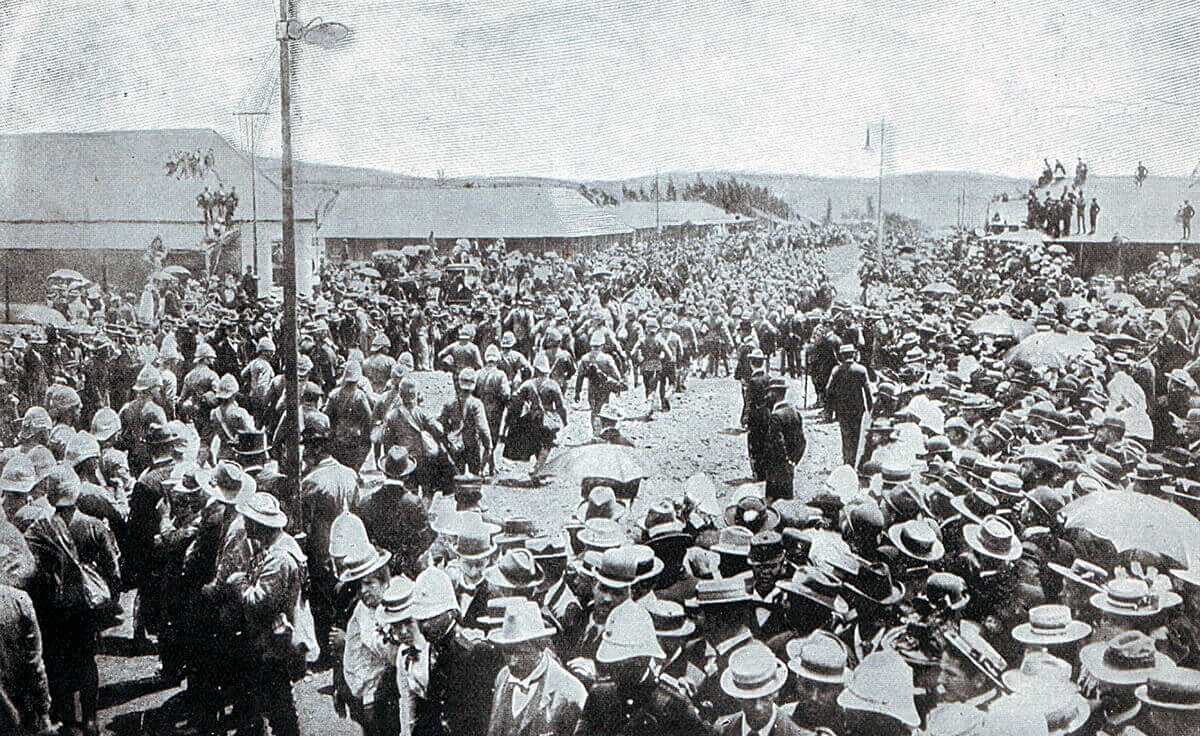
British prisoners from Nicholson’s Nek on 30th October 1899 arriving at Pretoria Racecourse in the Boer War
Regimental anecdotes and traditions:
- 31st October 1899, the day of the Battle of Ladysmith, Lombard’s Kop and Nicholson’s Nek, was known in Britain as ‘Mournful Monday’.
- White’s army was saved from much greater disaster by the steadfastness of the Royal Field Artillery 53rd and 13th batteries. Major Abdy interposed his 53rd Battery between Grimwood’s retreating infantry and the Boers. When the 53rd Battery came to withdraw, one of the gun limbers and horse teams was destroyed by a Boer artillery shot. Lieutenant Thwaites extracted the gun with a new team. Lieutenant Higgins retrieved an overturned gun.
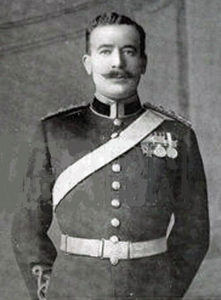
Captain John Norwood, 5th Dragoon Guards, won the Victoria Cross at the Battle of Ladysmith or Lombard’s Kop on 30th October 1899 in the Boer War as a second lieutenant. Norwood was killed on 8th September 1914 in France
- Second-Lieutenant John Norwood of the 5th Dragoon Guards received the Victoria Cross for galloping back 300 yards under heavy fire to recover a wounded man during the final retreat to Ladysmith. Private William Sibthorpe received the Distinguished Conduct Medal for returning to assist Norwood bring the wounded man in. Norwood reported Sibthorpe’s conduct but not his own which was disclosed by Sibthorpe.
- General French, with his adc Major Haig, both to achieve supreme command in the First World War, was ordered to leave Ladysmith to take up his appointment commanding all the cavalry in South Africa. French and Haig came out on the last train before the siege began and were under fire during the journey.
- The Royal Engineers balloon proved of considerable use during the siege in spotting Boer guns and was frequently fired on by the Boers, although never brought down.
- Joubert, the Boer commander, came under heavy criticism from his men for permitting the British troops under Hamilton and Grimwood to withdraw into Ladysmith without a more vigorous pursuit. When urged to order a general assault on the retreating British Joubert is reputed to have said “When God holds out a finger don’t take the whole hand.”

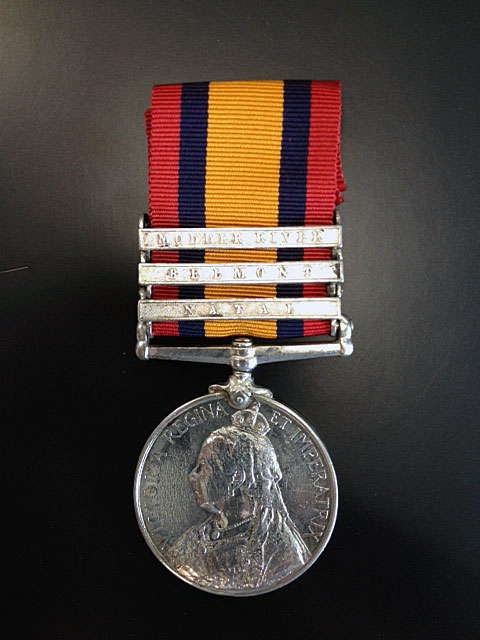
Queen’s South Africa Medal with clasps for ‘Natal’ ‘Belmont’ and ‘Modder River’ in the Boer War
References:
The Boer War is widely covered. A cross section of interesting volumes would be:
The Times History of the War in South Africa
The Great Boer War by Sir Arthur Conan Doyle
Goodbye Dolly Gray by Rayne Kruger
With the Flag to Pretoria by HW Wilson
The Boer War by Thomas Pakenham
South Africa and the Transvaal War by Louis Creswicke (6 highly partisan volumes)
Books solely on the fighting in Natal:
Buller’s Campaign by Julian Symons
Ladysmith by Ruari Chisholm
For a view of the fighting in Natal from the Boer perspective:
Commando by Denys Reitz.
![]()
The previous battle in the Boer War is the Battle of Elandslaagte
The next battle in the Boer War is the Battle of Belmont
© britishbattles.com.