

The siege of the diamond-mining town in the north-west of South Africa, between 14th October 1899 and 15th February 1900 in the Boer War, whose relief dominated the strategy of the western British forces
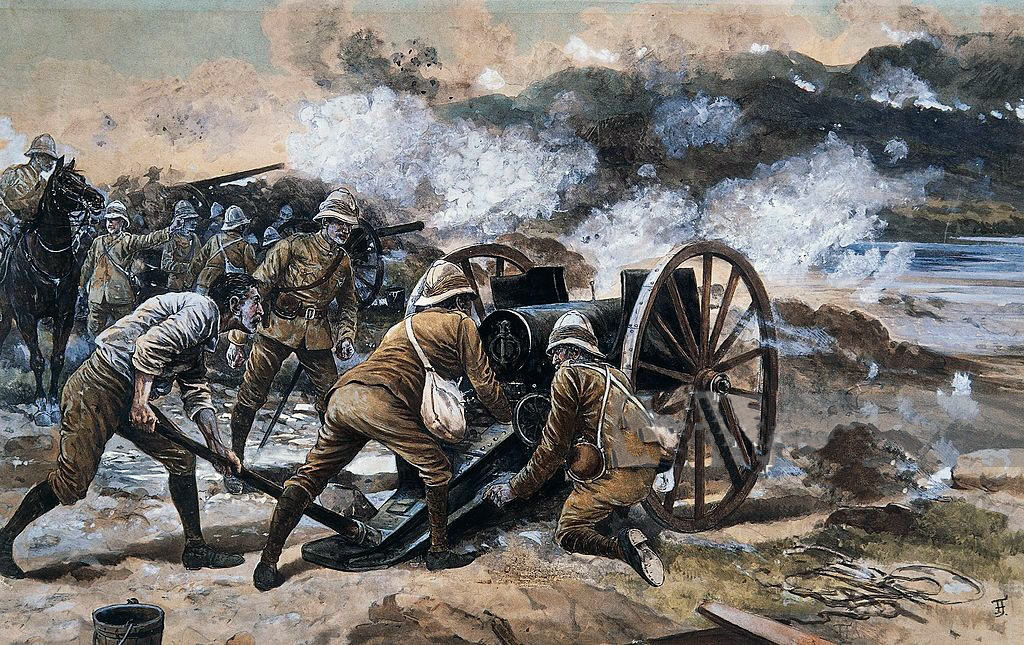
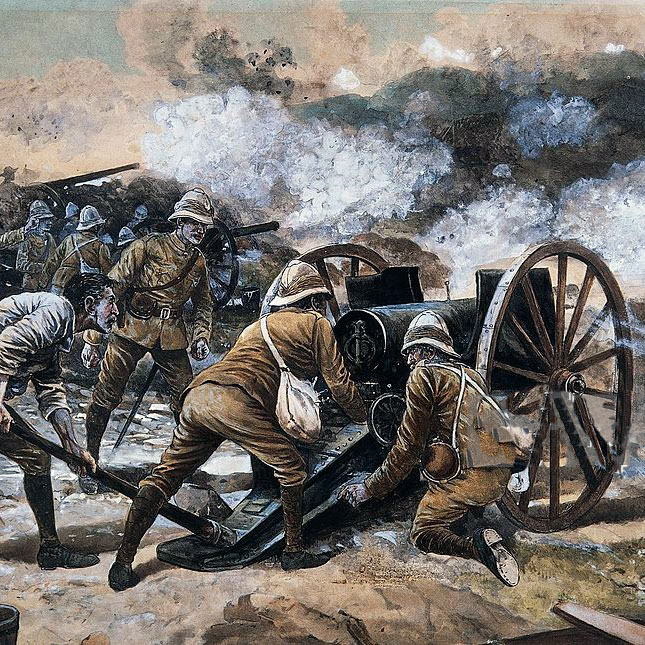
British Guns at Siege of Kimberley, 14th October 1899 to 15th February 1900 during the Great Boer War: picture by Frank Feller
The previous battle of the Great Boer War is the Siege of Mafeking
The next battle of the Great Boer War is the Siege of Ladysmith
War: The Great Boer War
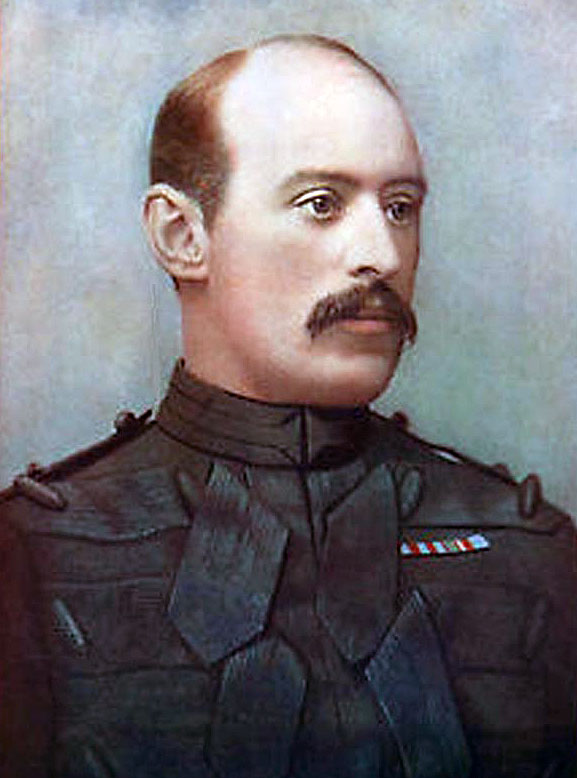
Lieutenant Colonel Robert Kekewich, British commander at the Siege of Kimberley, 14th October 1899 to 15th February 1900 during the Great Boer War
Dates of the Siege of Kimberley: 14th October 1899 to 15th February 1900.
Place of the Siege of Kimberley: Northern Cape Colony in South Africa, on the border of the Orange Free State.
Combatants at the Siege of Kimberley: British and South African colonial troops against the Boers.
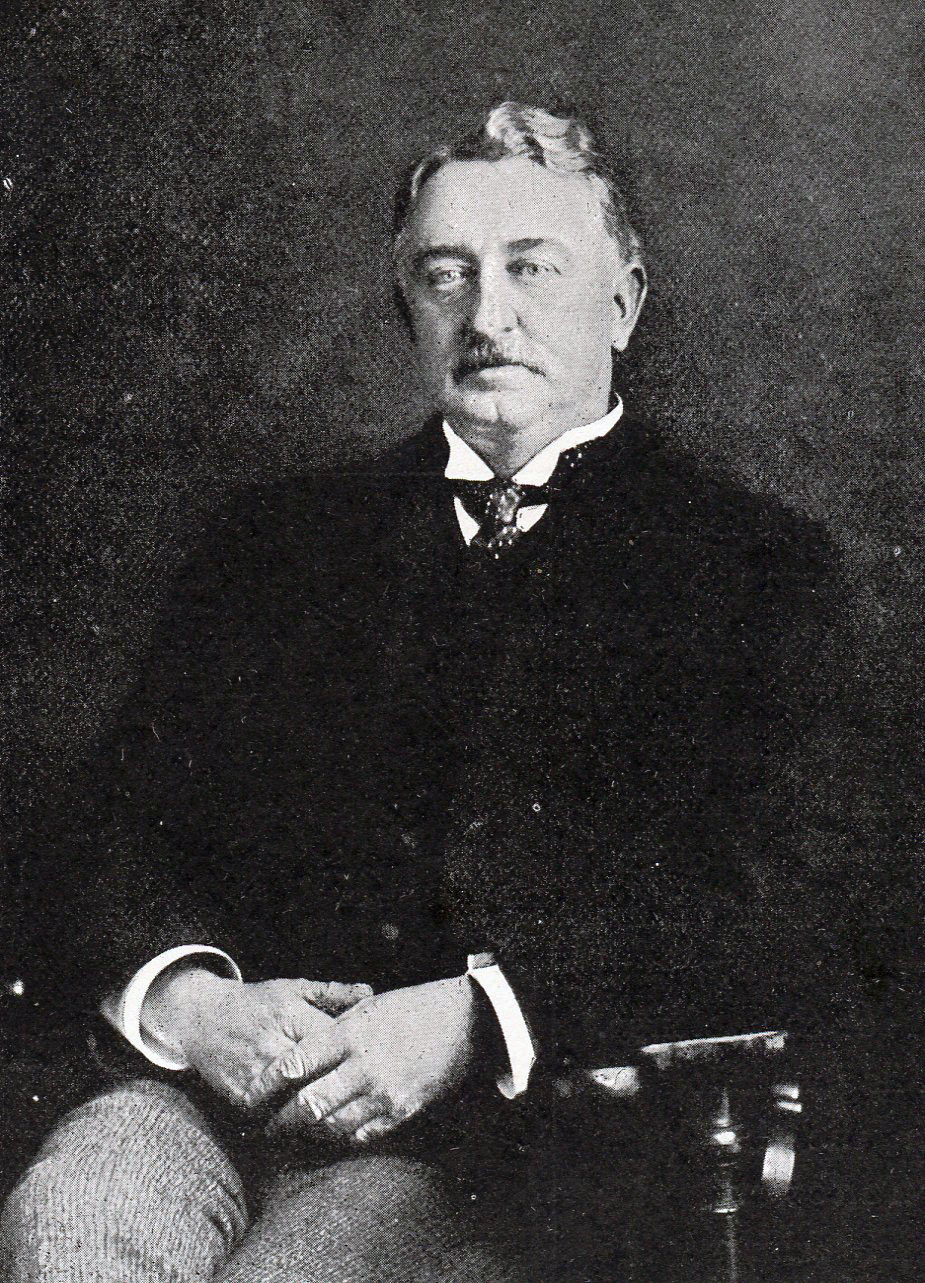
Commanders at the Siege of Kimberley: The British garrison was commanded by Lieutenant Colonel Kekewich of the Loyal North Lancashire Regiment, assisted (or impeded) by Cecil Rhodes. The Boer forces were commanded by General Cronje.
Size of the armies at the Siege of Kimberley: 1,624 British troops against a Boer besieging force, that varied around 6,500 men with several guns.
Right Honourable Cecil Rhodes: Siege of Kimberley, 14th October 1899 to 15th February 1900 during the Great Boer War
Uniforms, arms and equipment at the Siege of Kimberley: The Boer War was a serious jolt for the British Army. At the outbreak of the war British tactics were appropriate for the use of single shot firearms, fired in volleys controlled by company and battalion officers; the troops fighting in close order. The need for tight formations had been emphasised time and again in colonial fighting. In the Zulu and Sudan Wars overwhelming enemy numbers armed principally with stabbing weapons were easily kept at a distance by such tactics; but, as at Isandlwana, would overrun a loosely formed force. These tactics had to be entirely rethought in battle against the Boers armed with modern weapons.
In the months before hostilities the Boer commandant general, General Joubert, bought 30,000 Mauser magazine rifles and a number of modern field guns and automatic weapons from the German armaments manufacturer Krupp and the French firm Creusot. The commandoes, without formal discipline, welded into a fighting force through a strong sense of community and dislike for the British. Field Cornets led burghers by personal influence not through any military code. The Boers did not adopt military formation in battle, instinctively fighting from whatever cover there might be. The preponderance were countrymen, running their farms from the back of a pony with a rifle in one hand. These rural Boers brought a life time of marksmanship to the war, an important edge, further exploited by Joubert’s consignment of magazine rifles. Viljoen is said to have coined the aphorism ‘Through God and the Mauser’. With strong fieldcraft skills and high mobility the Boers were natural mounted infantry. The urban burghers and foreign volunteers readily adopted the fighting methods of the rest of the army.
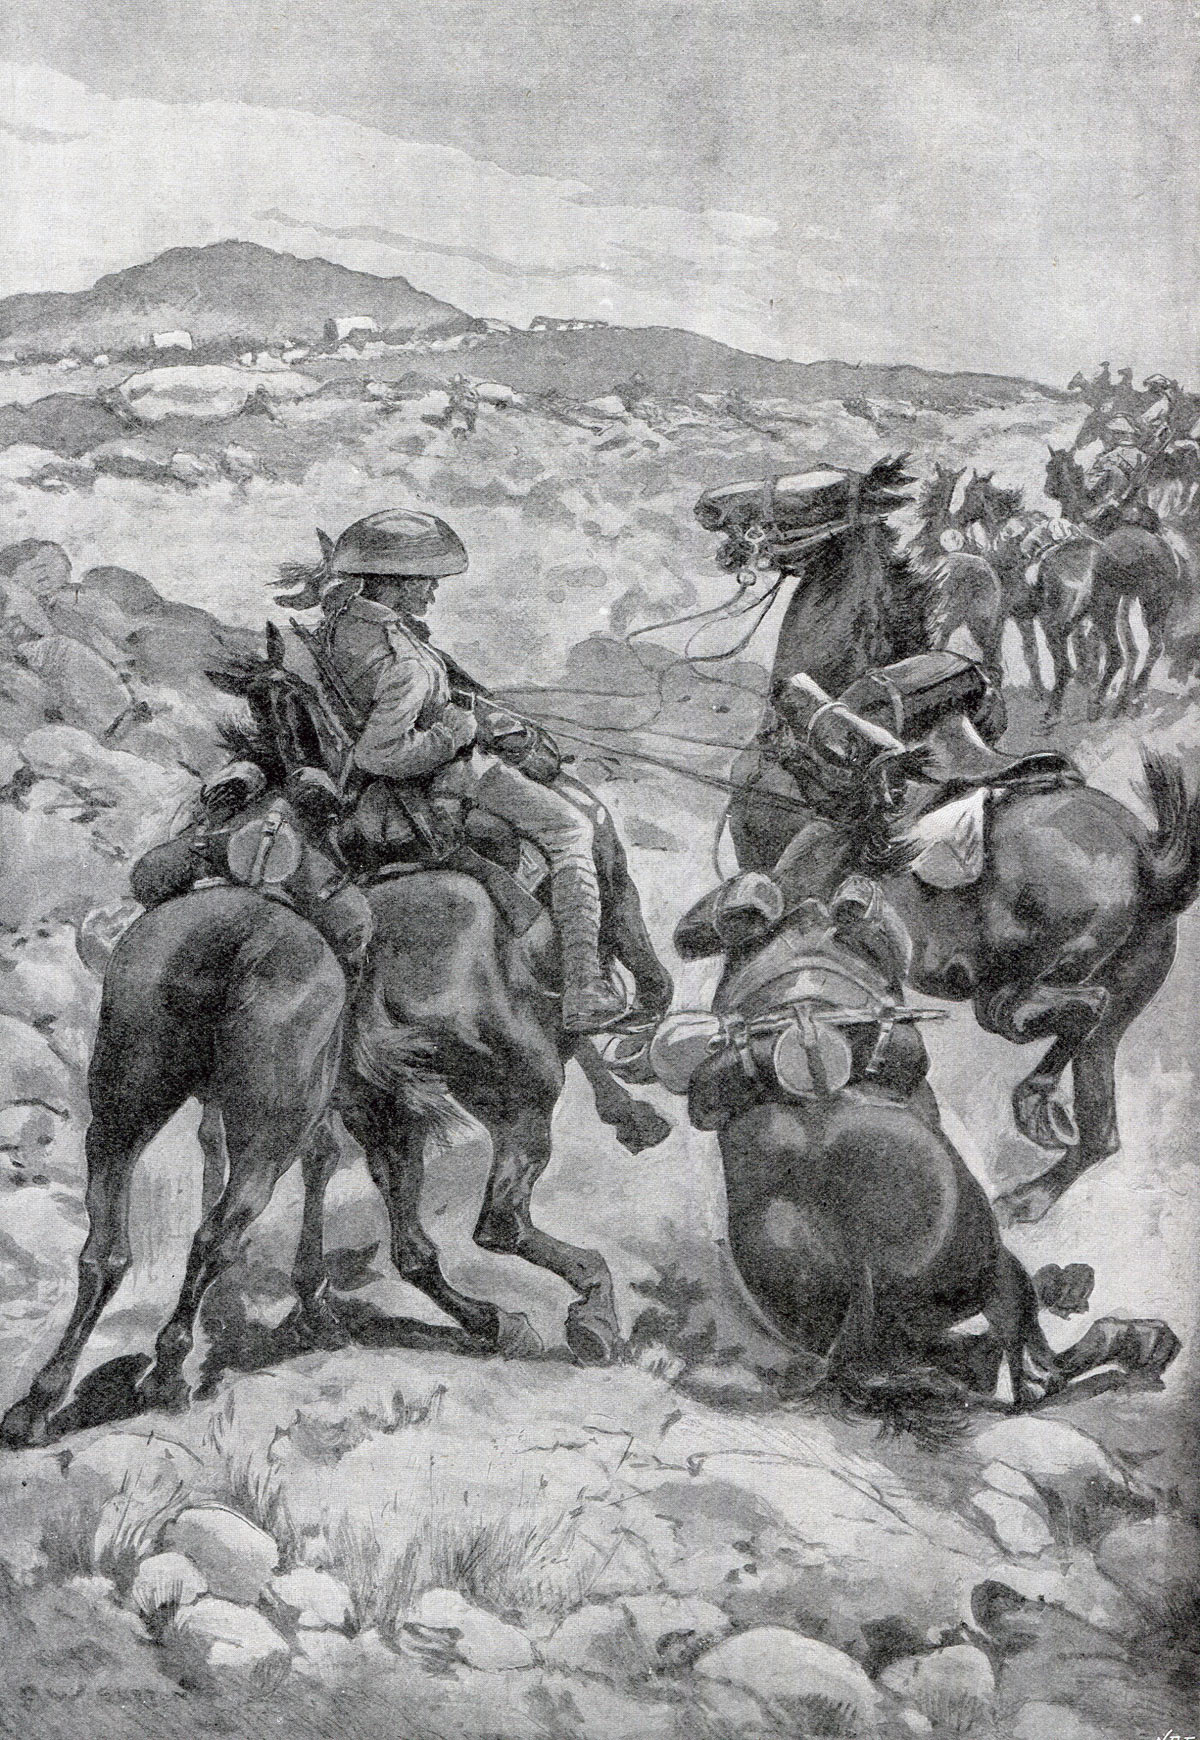
British Mounted Infantry in action: Siege of Kimberley, 14th October 1899 to 15th February 1900 during the Great Boer War: picture by F.W. Burton
Other than in the regular uniformed Staats Artillery and police units, the Boers wore their everyday civilian clothes on campaign.
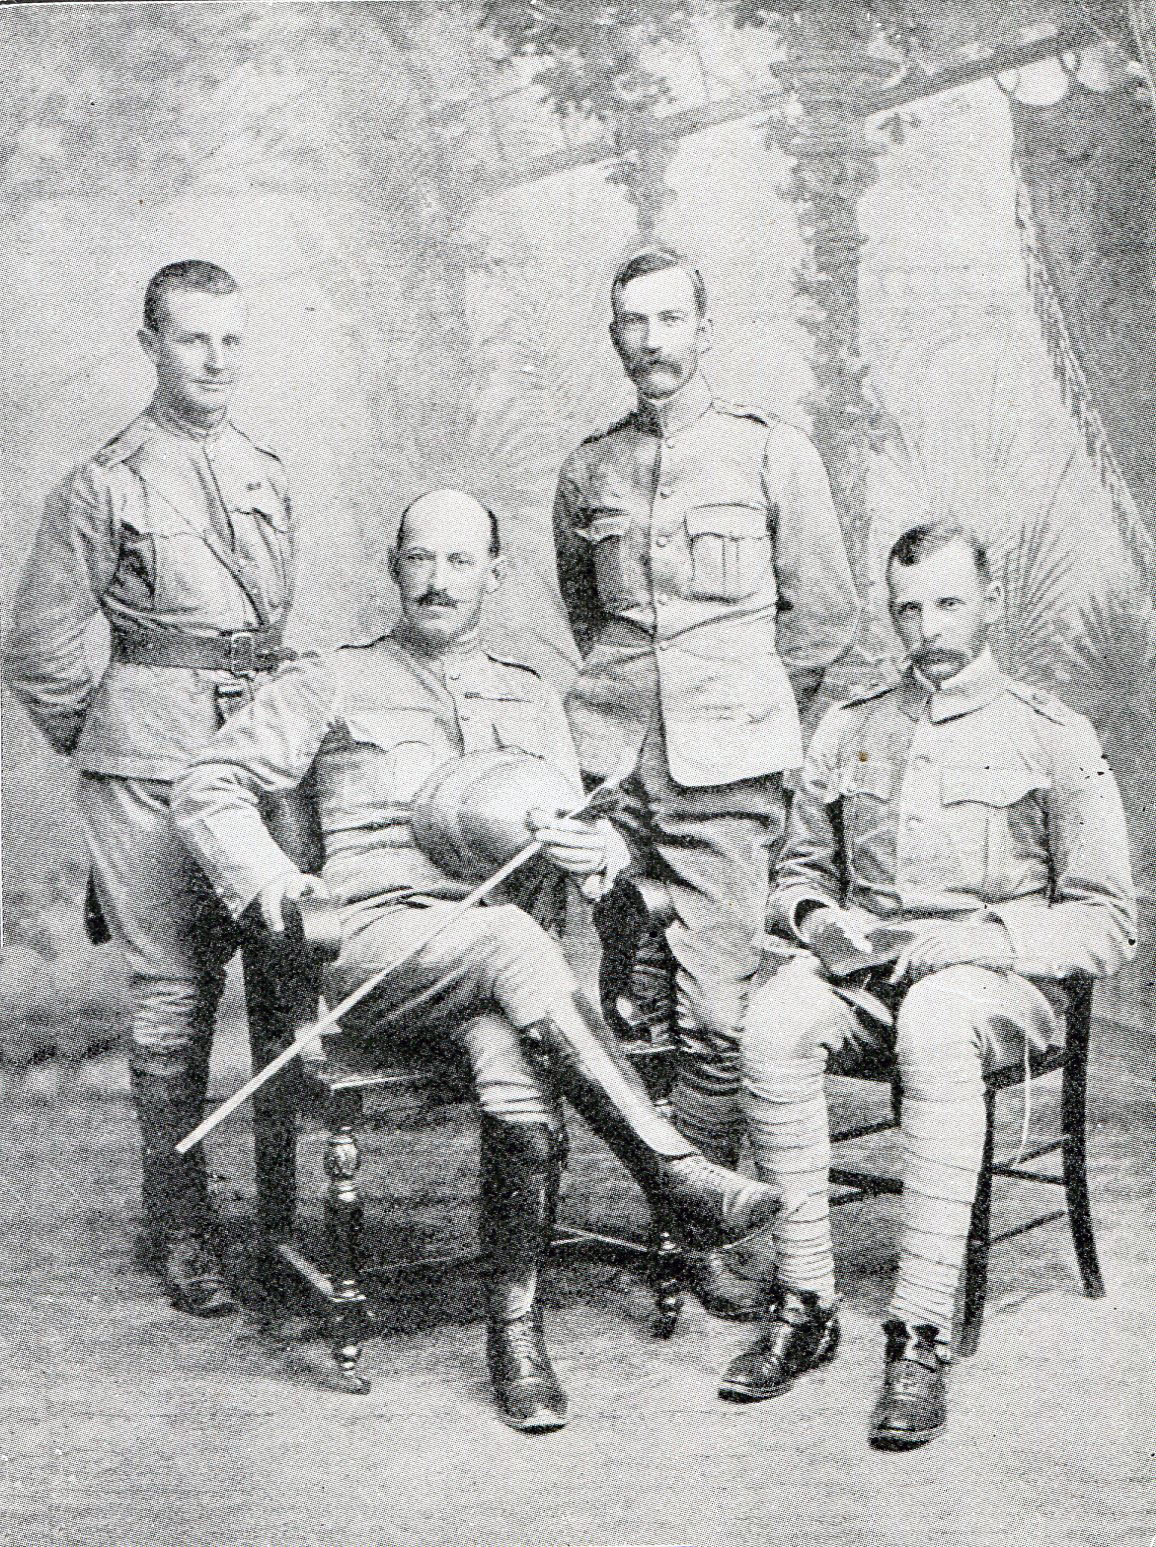
Colonel Kekewich and Lieutenant Colonel Scott-Turner: Siege of Kimberley, 14th October 1899 to 15th February 1900 during the Great Boer War
After the first month, the Boers lost their numerical superiority, spending the rest of the formal war on the defensive against British forces that regularly outnumbered them.
Some of the most successful British troops were the non-regular regiments; the City Imperial Volunteers, the South Africans, Canadians, Australians and New Zealanders, who more easily broke from the habit of traditional European warfare, using their horses for transport rather than the charge, advancing by fire and manoeuvre in loose formations and making use of cover, rather than the formal advance into a storm of Mauser bullets.
Uniform at the Siege of Kimberley:
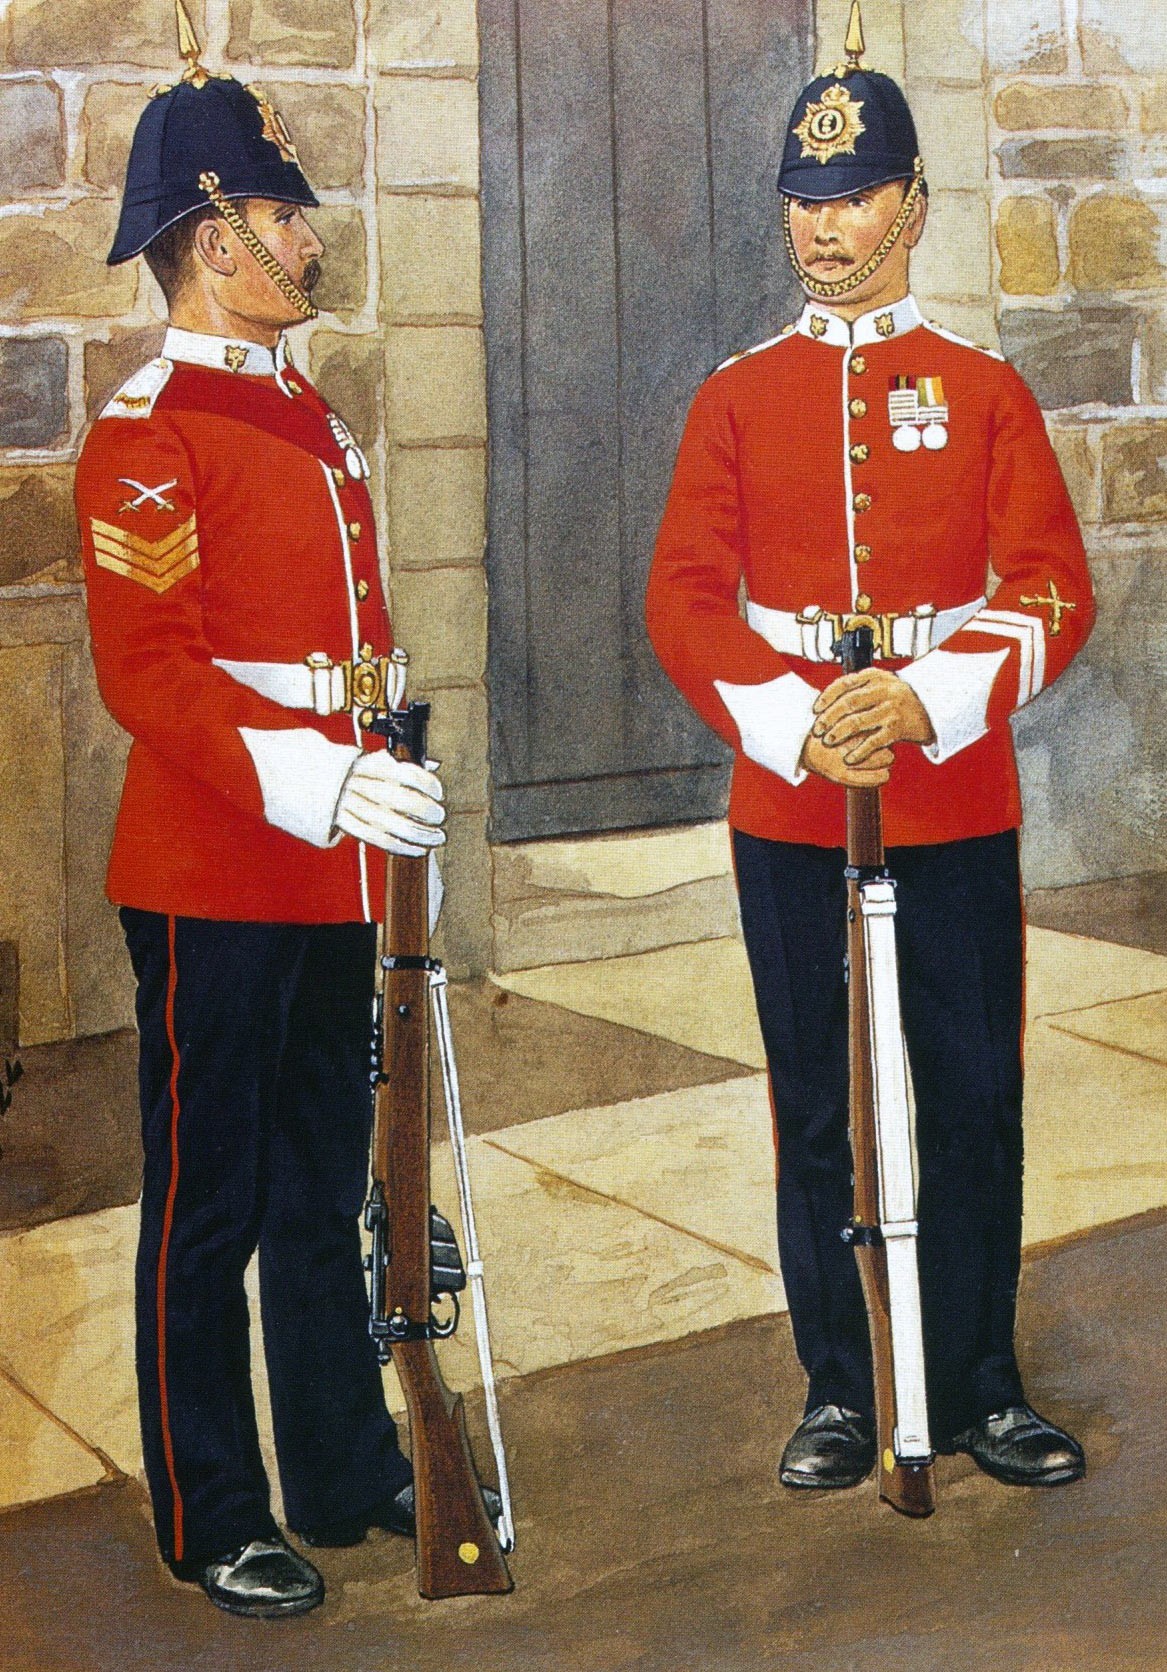
The British regiments made an uncertain change into khaki uniforms in the years preceding the Boer War, with the topee helmet as tropical headgear. Highland regiments in Natal devised aprons to conceal coloured kilts and sporrans. By the end of the war the uniform of choice was a slouch hat, drab tunic and trousers; the danger of shiny buttons and too ostentatious emblems of rank emphasised in several engagements with disproportionately high officer casualties.
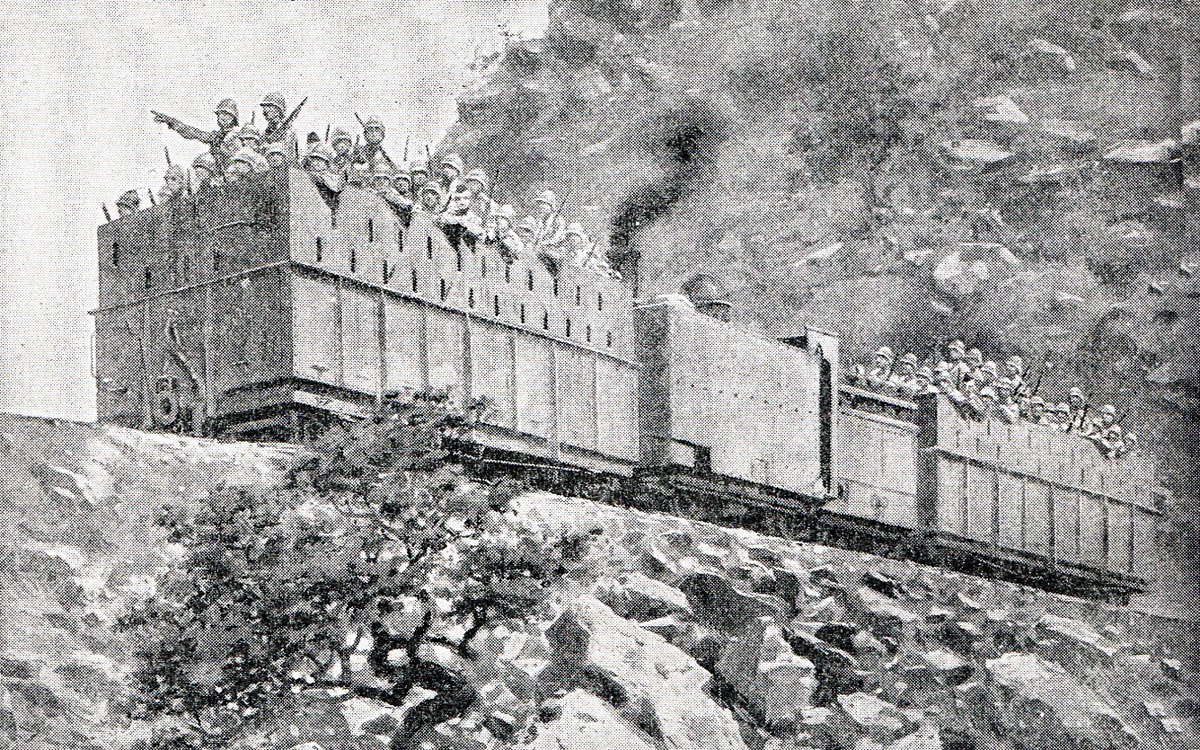
Armoured Train: Siege of Kimberley, 14th October 1899 to 15th February 1900 during the Great Boer War
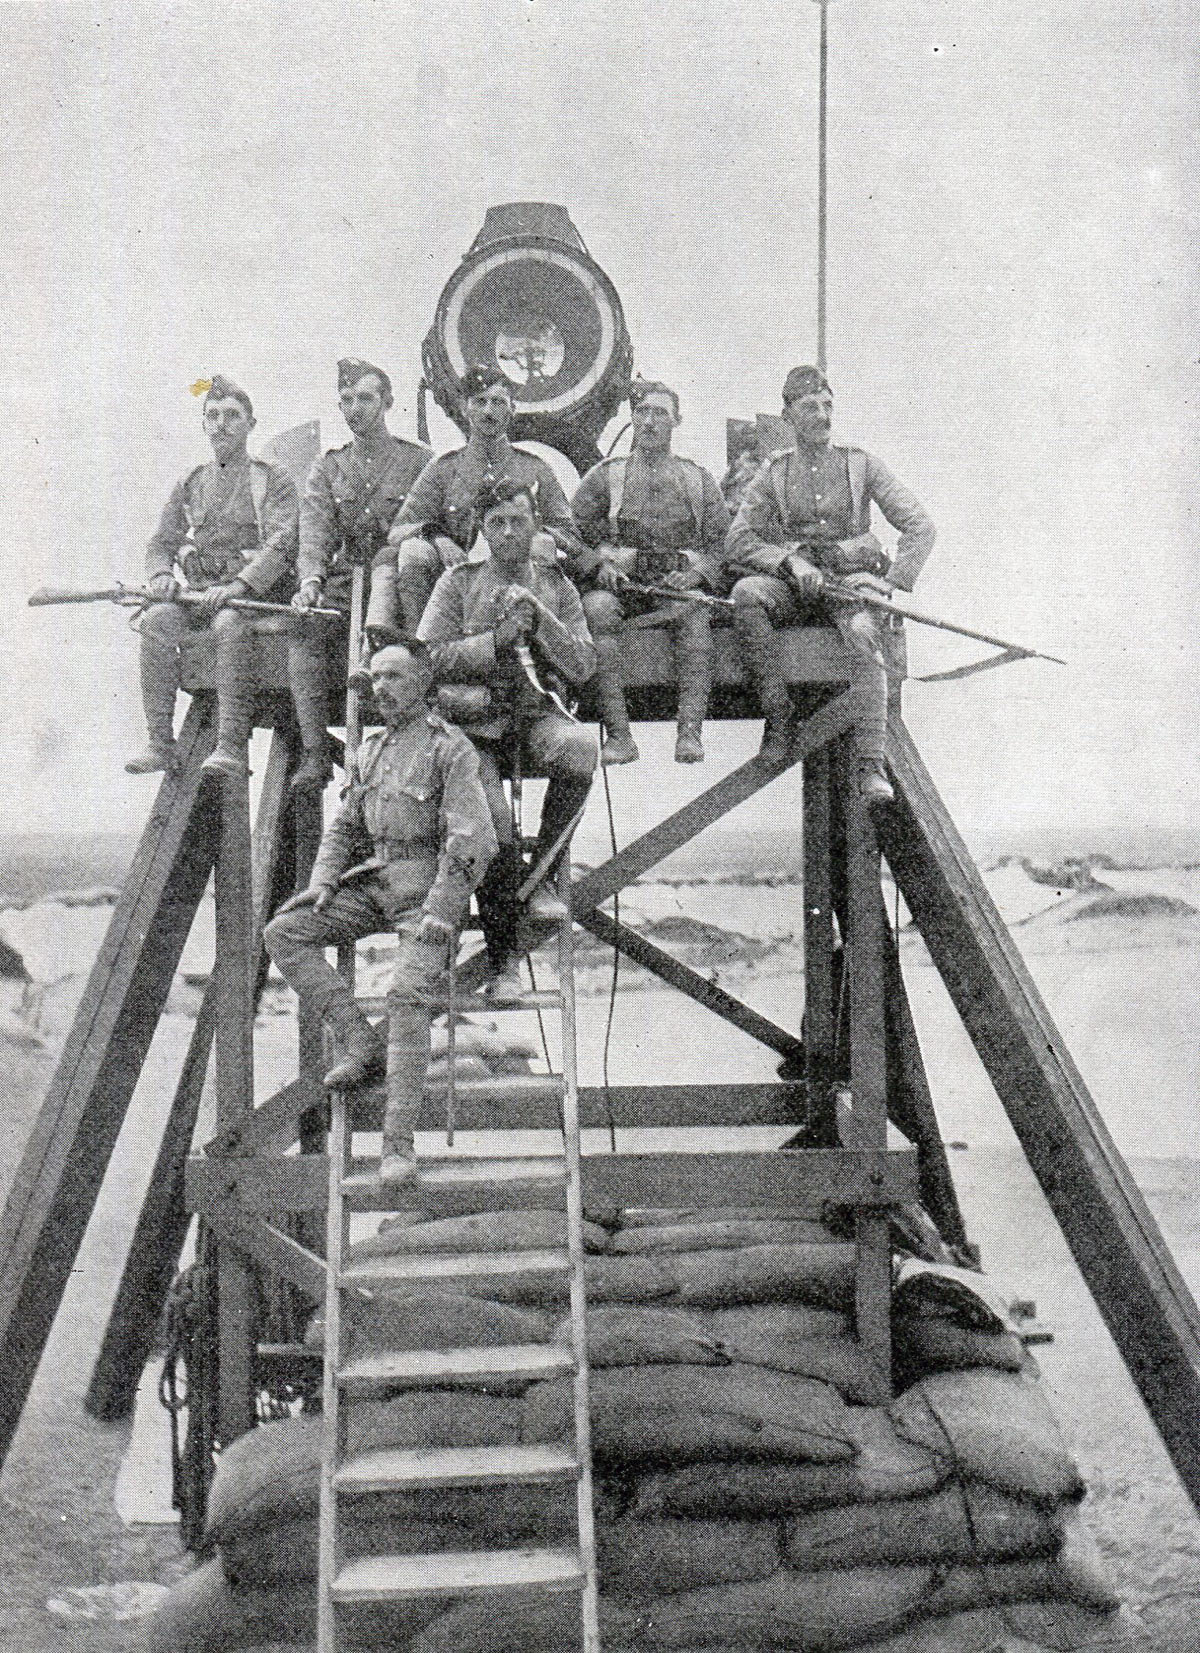
De Beers searchlight used to signal to the relief force: Siege of Kimberley, 14th October 1899 to 15th February 1900 during the Great Boer War
The British infantry were armed with the Lee Metford magazine rifle firing 10 rounds. But no training regime had been established to take advantage of the accuracy and speed of fire of the weapon. Personal skills such as scouting and field craft were little taught. The idea of fire and movement was unknown, many regiments still going into action in close order. Notoriously General Hart insisted that his Irish Brigade fight shoulder to shoulder as if on parade in Aldershot. Short of regular troops, Britain engaged volunteer forces from Britain, Canada, Australia and New Zealand who brought new ideas and more imaginative formations to the battlefield.
The British regular troops lacked imagination and resource. Routine procedures such as effective scouting and camp protection were often neglected. The war was littered with incidents in which British contingents became lost or were ambushed often unnecessarily and forced to surrender. The war was followed by a complete re-organisation of the British Army.
Boers with captured British guns: Siege of Kimberley, 14th October 1899 to 15th February 1900 during the Great Boer War
The British artillery was a powerful force in the field, underused by commanders with little training in the use of modern guns in battle. The Royal Field Artillery fought with 15 pounder guns; the Royal Horse Artillery with 12 pounders and the Royal Garrison Artillery batteries with 5-inch howitzers. The Royal Navy provided heavy field artillery with a number of 4.7-inch naval guns mounted on field carriages devised by Captain Percy Scott of HMS Terrible.
Loyal North Lancashire Regiment in 1910: Siege of Kimberley, 14th October 1899 to 15th February 1900 during the Great Boer War
Automatic weapons were used by the British usually mounted on special carriages accompanying the cavalry.
Winner: The Boers failed to take Kimberley, finally relieved by the advancing British forces.
British Regiments at the Siege of Kimberley:
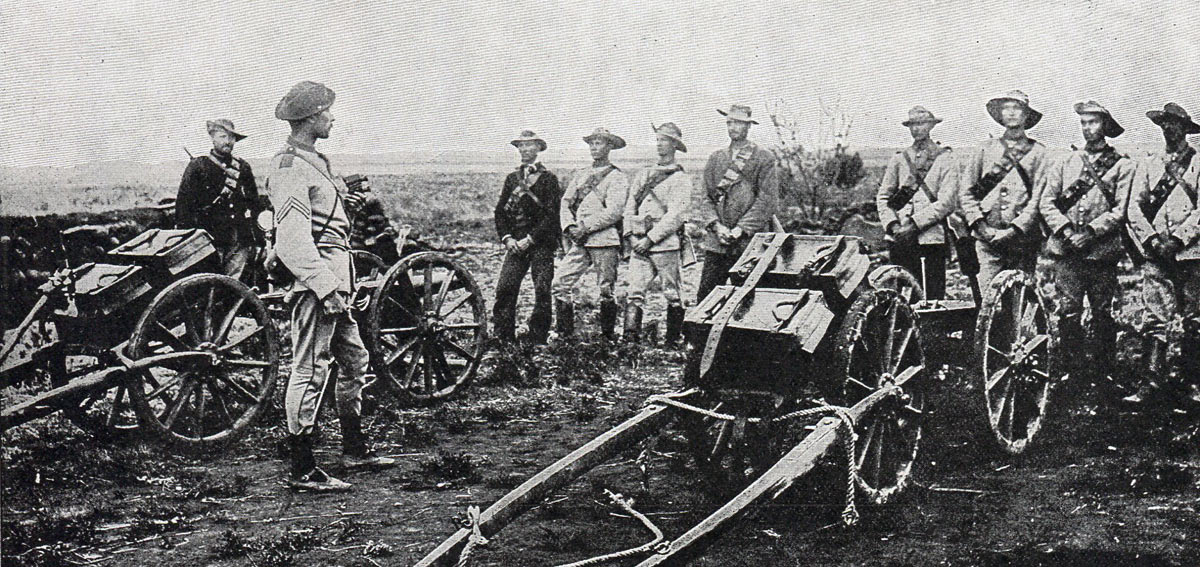
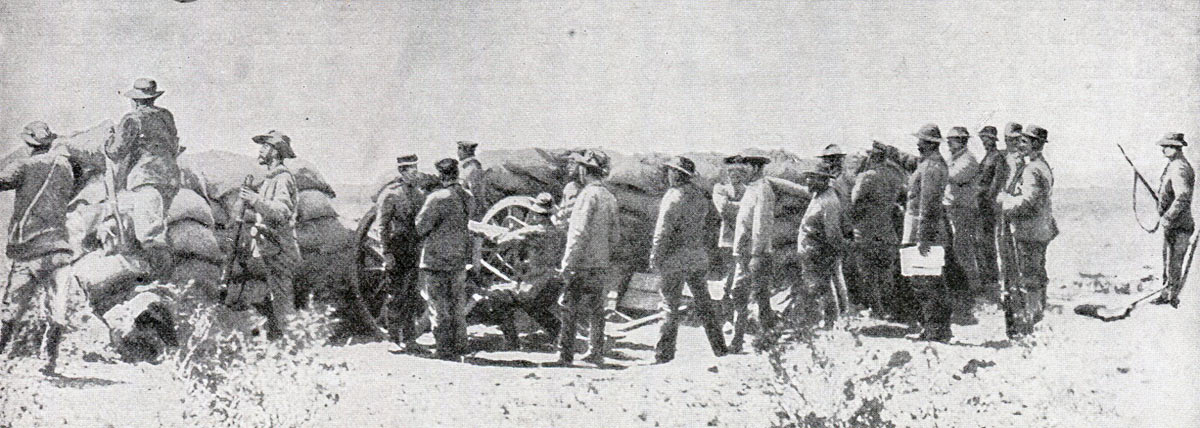
Royal Garrison Artillery: 23rd Company with six 7 pounder mountain guns commanded by Major Chamier
Royal Engineers: 1 section of 7th Field Company commanded by Lieutenant McClintock
Army Service Corps company commanded by Captain Gorle
Headquarters and 4 companies of the 1st Battalion Loyal North Lancashire Regiment commanded by Major Murray.
Diamond Fields Artillery: six 7 pounder guns commanded by Major May.
Diamond Fields Horse commanded by Major Rodger.
Kimberley Regiment commanded by Colonel Finlayson.
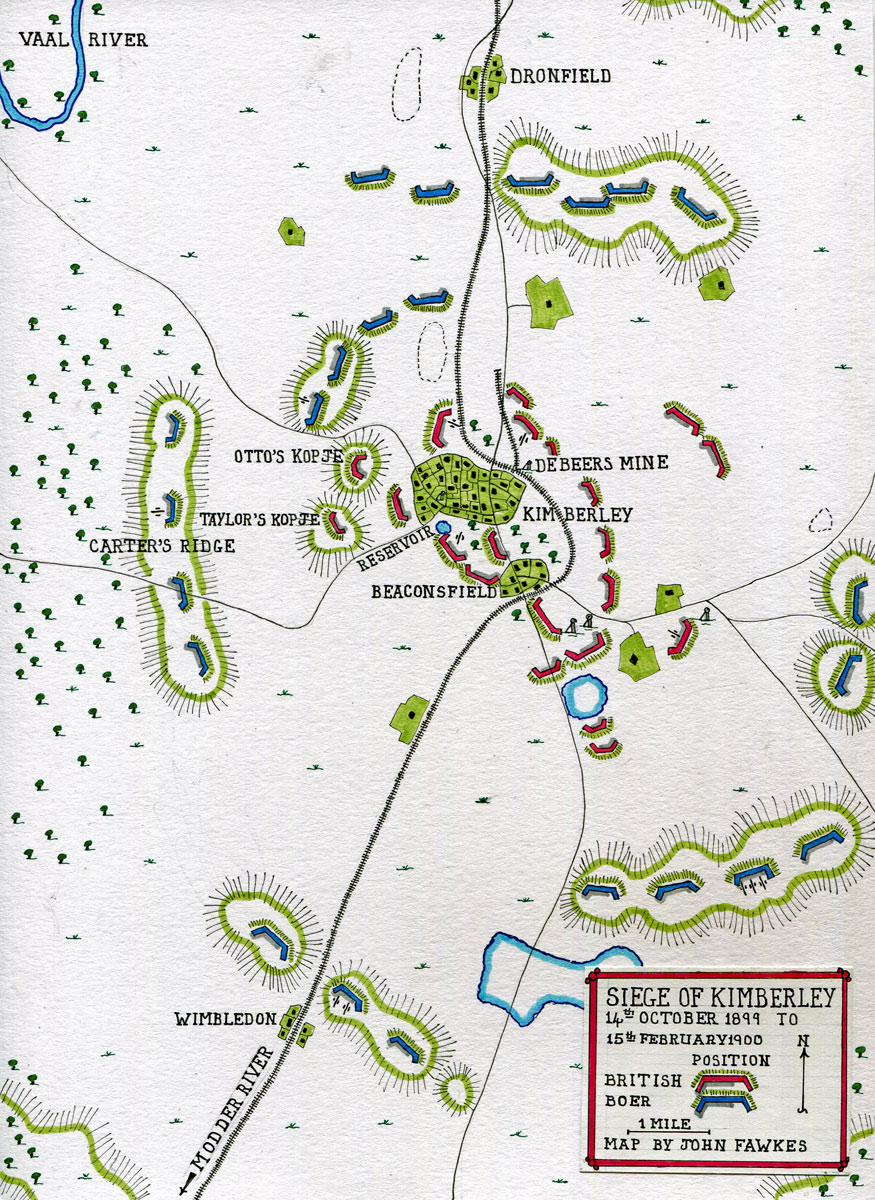
Map of the Siege of Kimberley, 14th October 1899 to 15th February 1900 during the Great Boer War: map by John Fawkes
Account of the Siege of Kimberley:
Lying in the north-west of Cape Colony on the western border with the Orange Free State, Kimberley was the centre of Cecil Rhodes’ De Beers diamond mining empire.
Rhodes was a colossus on the South African political scene and a major player in the slide to war between Britain and the two Boer republics. As war became imminent, Rhodes moved from Cape Town to Kimberley, forcing the commander-in-chief to send Lieutenant Colonel Kekewich with half his battalion of the North Lancashire Regiment to defend the town, that would otherwise have been left to the advancing Boers.
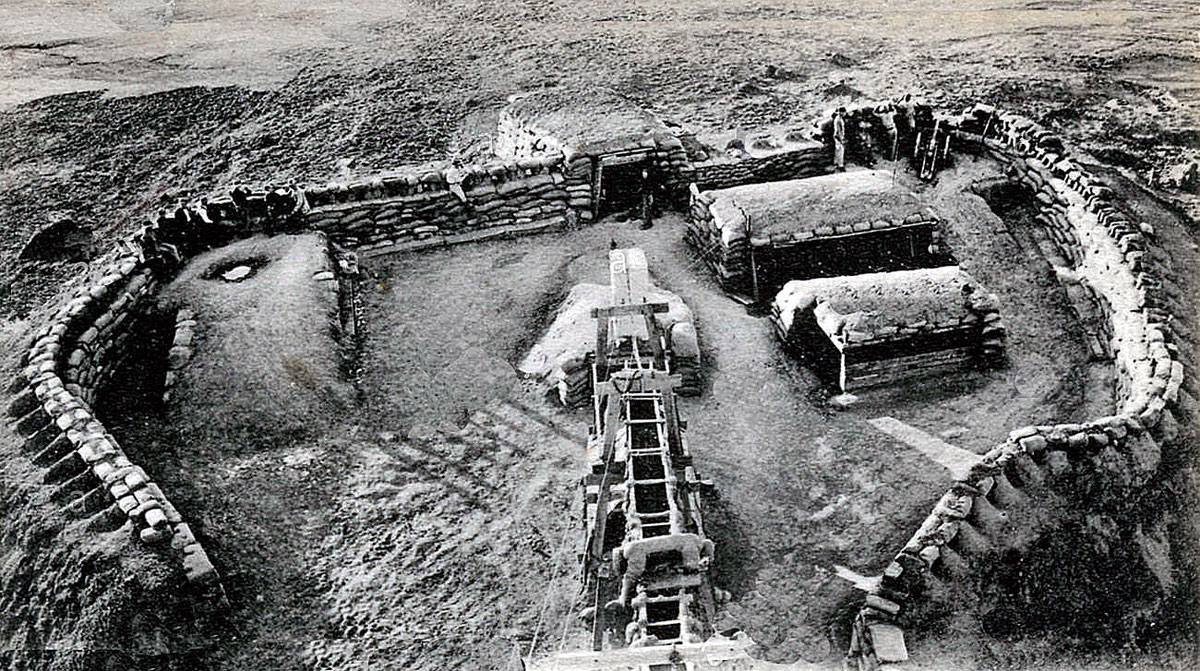
British Redoubt: Siege of Kimberley, 14th October 1899 to 15th February 1900 during the Great Boer War

De Beers Mine: Siege of Kimberley, 14th October 1899 to 15th February 1900 during the Great Boer War
The obligation to relieve Kimberley, stridently demanded by Rhodes, hamstrung the actions of the British in the West, although not to the extent that the need to relieve Ladysmith dictated Buller’s strategy in Natal.
A capable and resourceful officer, Kekewich found he had nothing like the free hand enjoyed by Baden-Powell in Mafeking. Kimberley was De Beers; with most of the garrison made up of De Beers employees. The essential resources of the town were controlled by De Beers and therefore by Rhodes. Rhodes dictated the course of the defence as much as did Kekewich.
George Labram, chief engineer of De Beers and a key member of the garrison until his death, provided many services; a water supply from the mine, building a gun in the De Beers workshops, ‘Long Cecil’, assembling an armoured train and manufacturing ammunition.
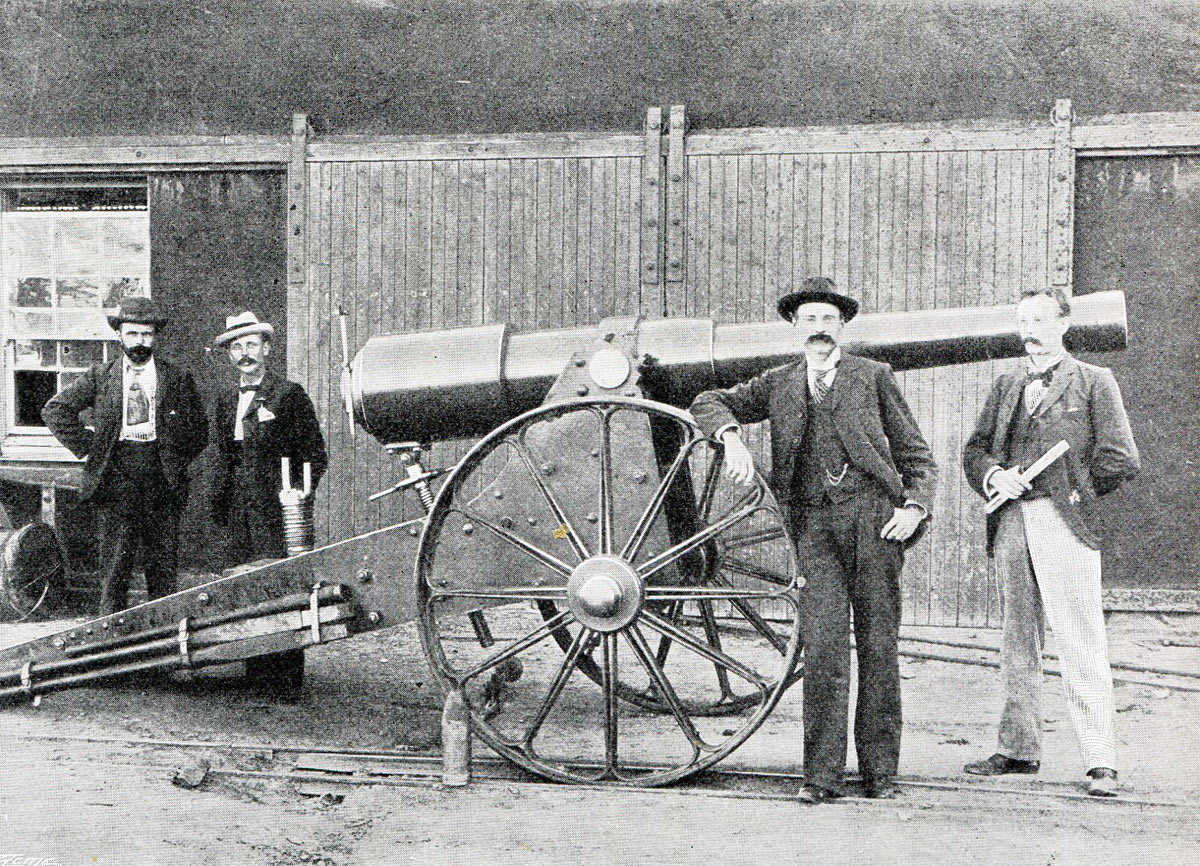
‘Long Cecil’ 4.1 inch gun made in the De Beers Workshop: Siege of Kimberley, 14th October 1899 to 15th February 1900 during the Great Boer War
On 14th October 1899, the Boers invaded the northern Cape Colony and surrounded Kimberley, beginning the siege.
On 6th November 1899, the Boers opened their bombardment of the town.
Boer gunners firing into Kimberley: Siege of Kimberley, 14th October 1899 to 15th February 1900 during the Great Boer War
On 21st November 1899, the British commander in western South Africa, Lord Methuen, began his march north from Orange River to relieve Kimberley.
The garrison noticed groups of Boers from the besieging force leaving for the South, to reinforce their brothers on the Modder River. Cronje left to command the Transvaal forces opposing Methuen.
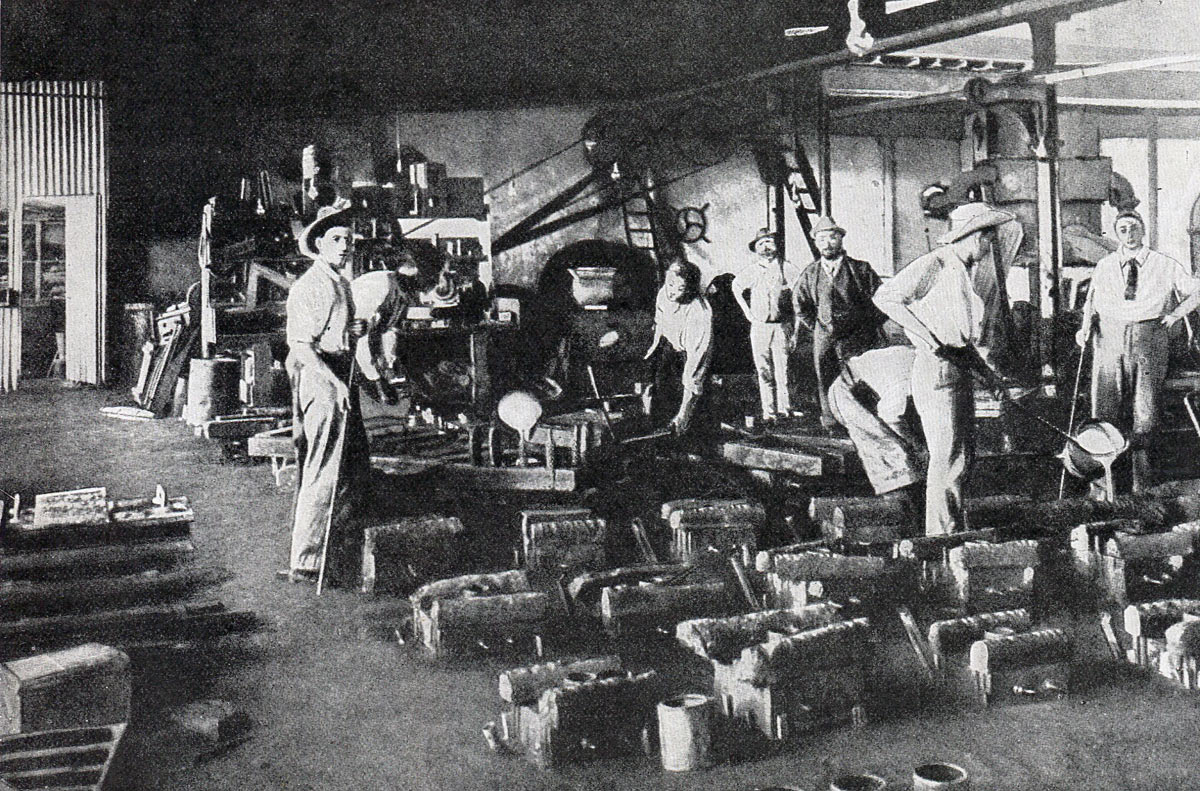
Casting shells in the De Beers Workshop: Siege of Kimberley, 14th October 1899 to 15th February 1900 during the Great Boer War
On 25th November 1899, the garrison launched a sortie on Carter’s Ridge to the south-west of the town, attempting to capture the Boer artillery established on the high ground. The attack was a limited success, catching the Boers by surprise, but failing to take any of the guns.

The attack on the Boer lines on 25th November 1899: Siege of Kimberley, 14th October 1899 to 15th February 1900 during the Great Boer War: picture by F.J. Waugh
Kekewich attempted a repeat attack, trying again for the guns, on 28th November 1899. He directed the officer commanding the assault, Lieutenant Colonel Scott-Turner, only to attack the position if it was lightly held. The attack was maintained, in spite of the heavy reinforcements the Boers had introduced, killing Scott-Turner and many of his men.
The siege continued with the garrison anxiously noting Methuen’s progress north up the railway line towards Kimberley.

Royal Artillery 7 pounder mountain guns: Siege of Kimberley, 14th October 1899 to 15th February 1900 during the Great Boer War
On 11th December 1899, Methuen suffered the severe reverse of Magersfontein, destroying the prospects of early relief for the town. Rhodes showered Buller, the British commander-in-chief in South Africa, with hysterical complaints.
In the new year of 1900, Lord Roberts, accompanied by Lord Kitchener, arrived in South Africa with substantial reinforcements, taking over the command in chief from General Buller.
On Wednesday 7th February 1900, the Boers opened fire on Kimberley with one of the Creusot Long Tom guns. The bombardment caused panic in the population, provoking a lengthy crisis between Rhodes and Kekewich. One of the casualties in the first days of the bombardment was Labram, killed by a shell.
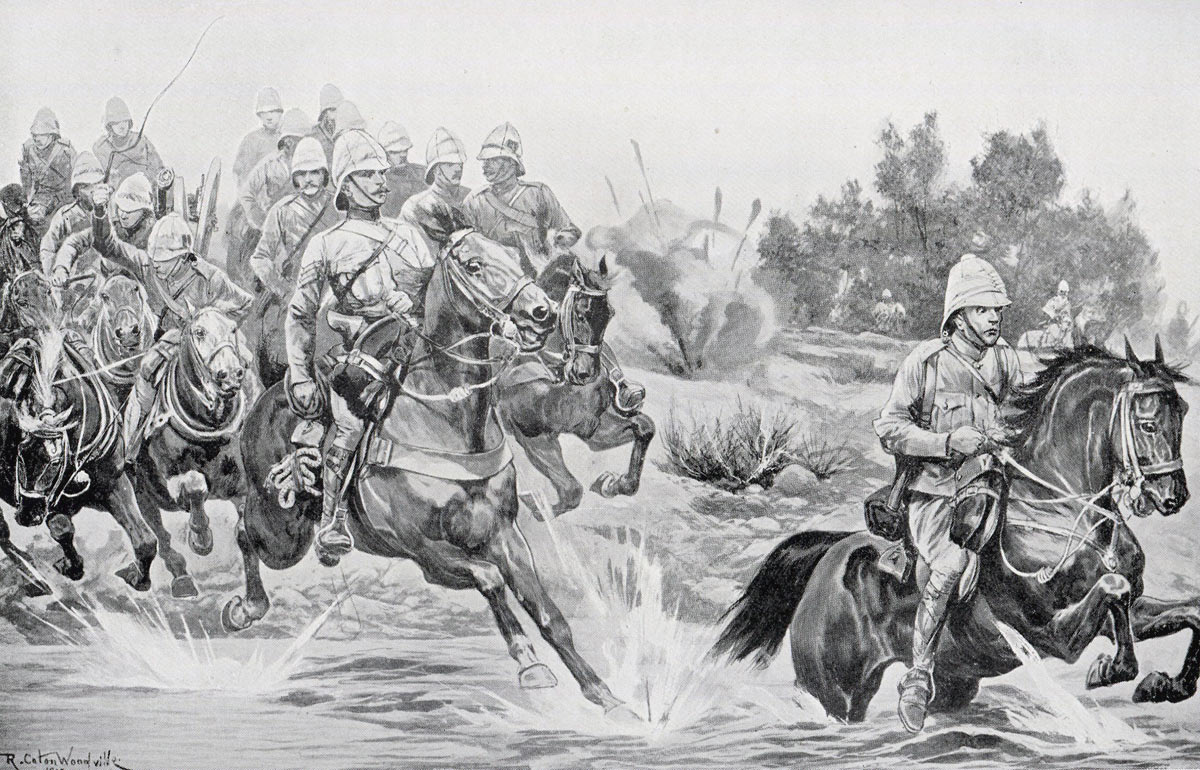
Royal Horse Artillery of French’s Cavalry Division: Siege of Kimberley, 14th October 1899 to 15th February 1900 during the Great Boer War: picture by Richard Caton Woodville
Kimberley was relieved on 15th February 1900 by General French’s spectacular gallop across the Veldt with his Cavalry Division. This dramatic action caused the loss of a high proportion of the cavalry horses, overloaded and unused to the conditions, leaving the Cavalry Division seriously weakened.
On his arrival, acting on Rhodes’ prompting, French sacked Kekewich as the garrison commander, before leaving with his division.
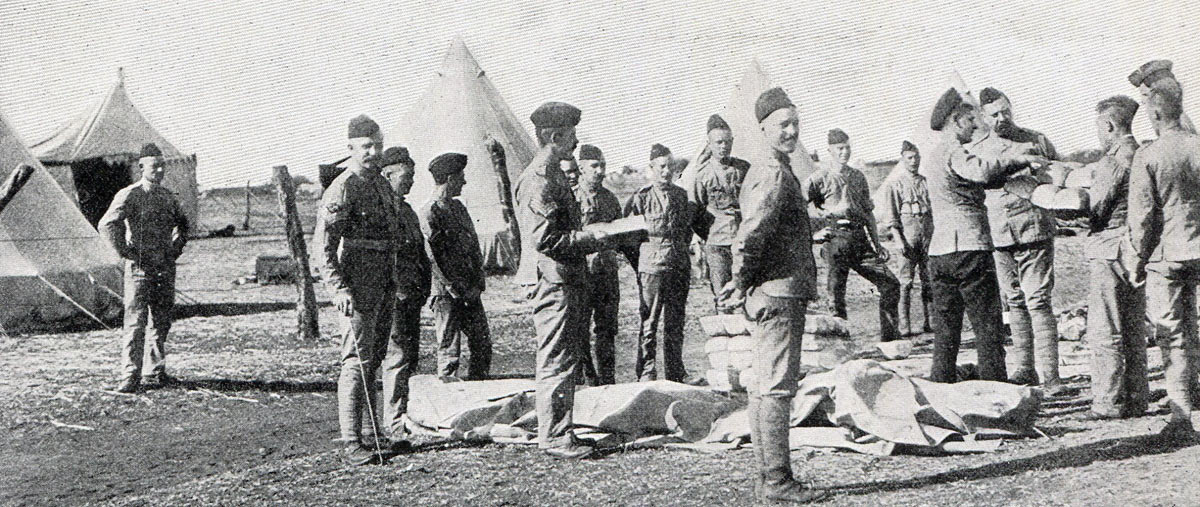
‘Loyals’ receiving rations: Siege of Kimberley, 14th October 1899 to 15th February 1900 during the Great Boer War
Follow-up to the Siege of Kimberley:
The lifting of the siege of Kimberley had little impact on the progress of the war, other than to reduce significantly the number of mounted troops available to Lord Roberts, following French’s rash gallop across the Veldt (likened to the progress of a torpedo).
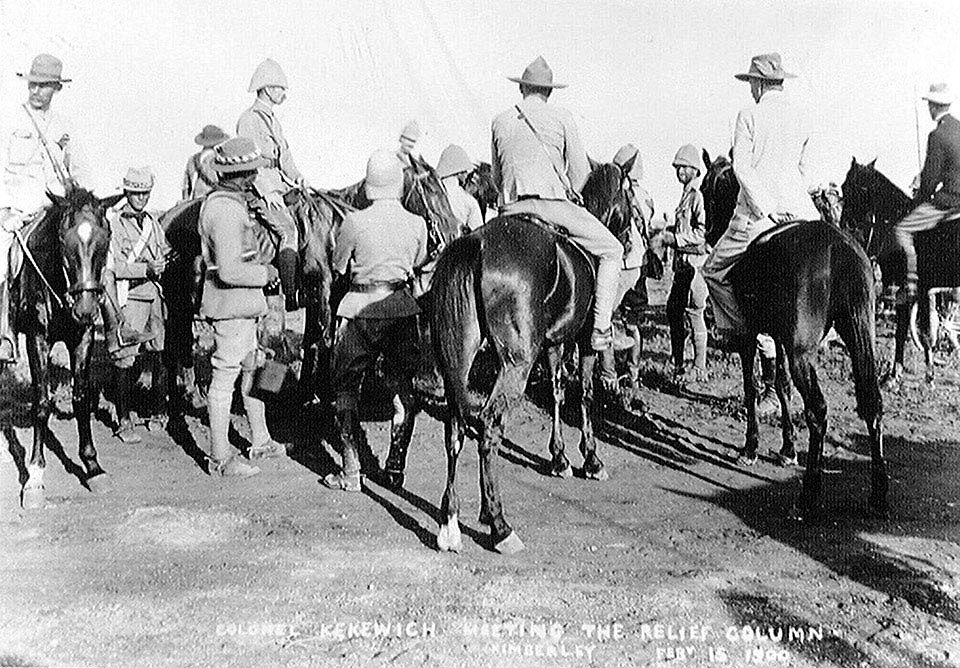
Colonel Kekewich greeting the relief column on 15th February 1900: Siege of Kimberley, 14th October 1899 to 15th February 1900 during the Great Boer War
Rhodes was released to make himself a nuisance on a wider stage; but his influence was significantly reduced by his involvement in bringing about the disastrous war.
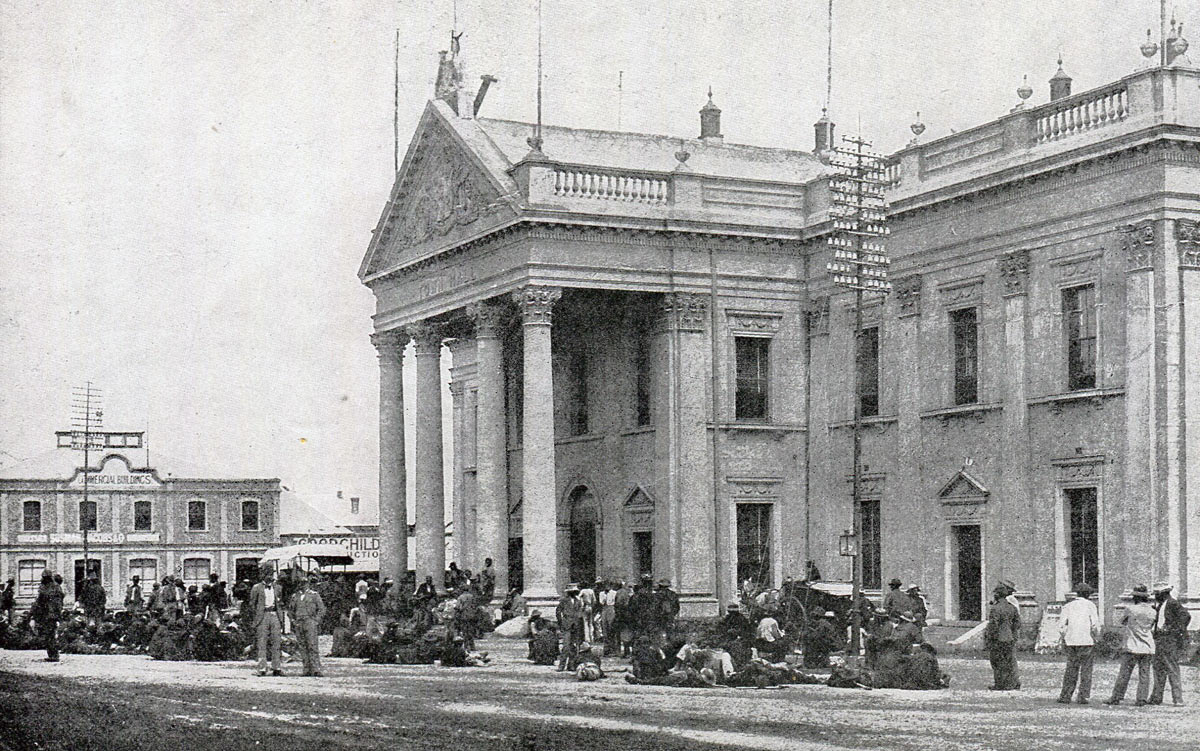
Kimberley Town Hall: Siege of Kimberley, 14th October 1899 to 15th February 1900 during the Great Boer War
Battle Honours and Medal Clasps:
‘Defence of Kimberley’ is a Battle Honour for the Loyal North Lancashire Regiment, the only British regular regiment in the garrison.
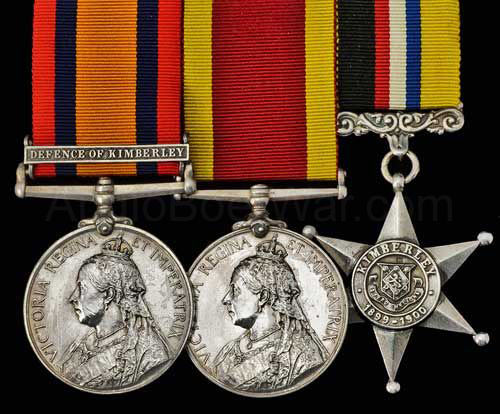
Queen’s South Africa Medal with clasp ‘Defence of Kimberley’ and Kimberley Star: Siege of Kimberley, 14th October 1899 to 15th February 1900 during the Great Boer War
‘Relief of Kimberley’ is a Battle Honour for the British regular cavalry regiments of French’s Cavalry Division and for the British regular infantry regiments of Kelly-Kenny’s Sixth Division, that took part in the relief of Kimberley.
The Siege of Kimberley is commemorated by a clasp on the Queen’s South Africa Medal ‘Defence of Kimberley’. The Kimberley Town Council also issued a siege medal, the ‘Kimberley Star’. As the town’s medal was not an official army medal it can not be worn as a decoration in uniform.
References for the Siege of Kimberley:
The Boer War is widely covered. A cross section of interesting volumes would be:
The Great Boer War by Sir Arthur Conan Doyle
Goodbye Dolly Gray by Rayne Kruger
The Boer War by Thomas Pakenham
South Africa and the Transvaal War by Louis Creswicke (6 highly partisan volumes)
The previous battle of the Great Boer War is the Siege of Mafeking
The next battle of the Great Boer War is the Siege of Ladysmith