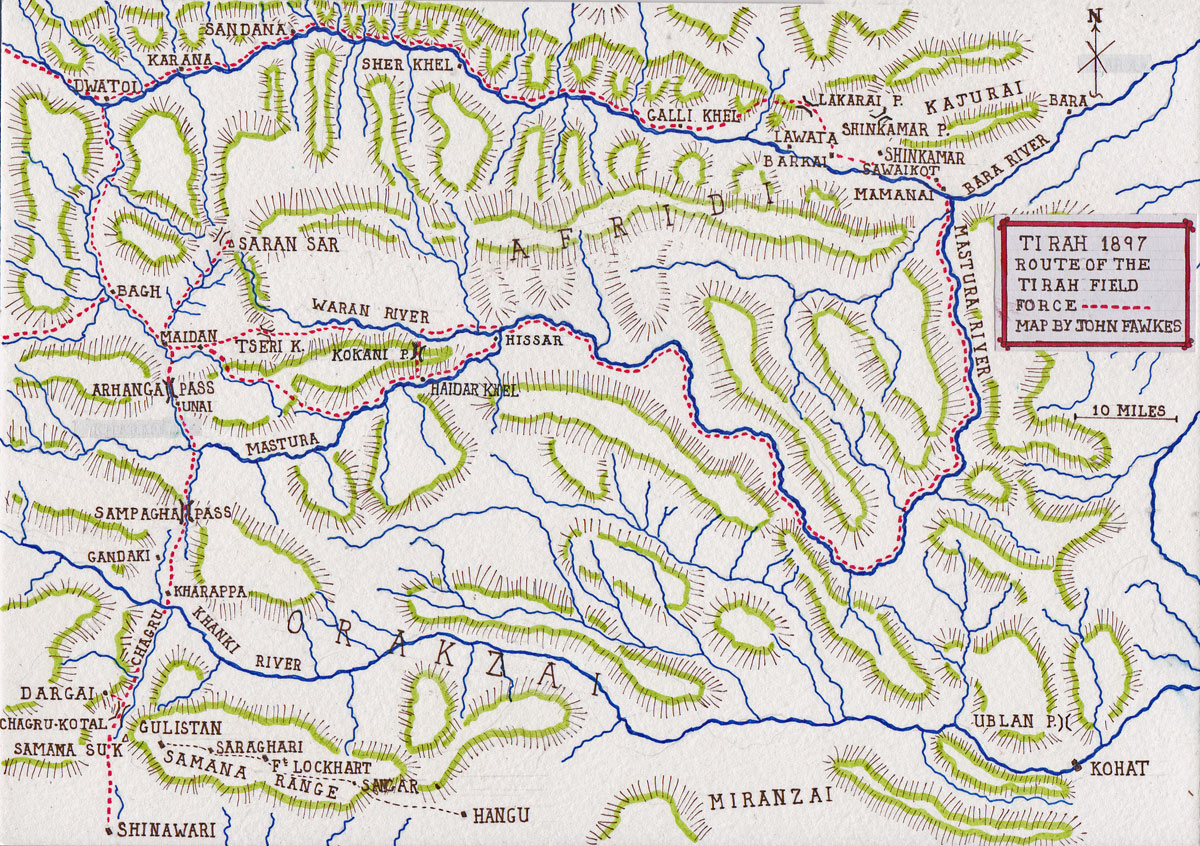
The extensive operation in the Tirah to the south of the Khyber Pass that followed the attacks by the Afridi tribes in the Khyber Pass and the attacks by the Orakzais on the Samana Range forts, part of the risings that engulfed the North-West Frontier of British India in 1897
The previous battle of the North-West Frontier of India is the Mohmand Field Force 1897
The next entry in the British Battles sequence is British Expeditionary Force (BEF) in the First World War
To the North-West Frontier of India index
War: North-West Frontier of India.
Dates of the Tirah operation: October 1897 to May 1898
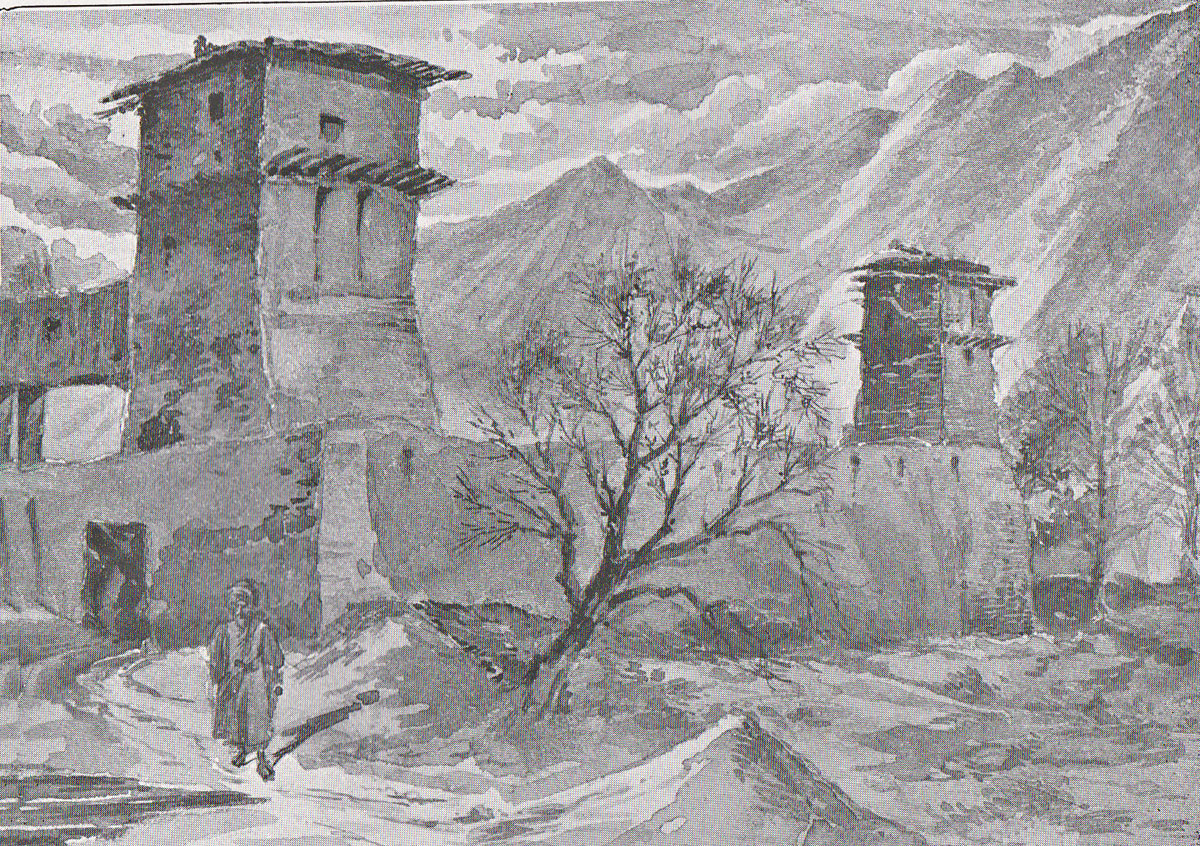
Place of the Tirah: The mountainous area immediately to the south of the Kabul River (all now in the North-West Frontier Province of Pakistan).
Combatants in the Tirah: British and Indian troops against the Afridi and Orakzai Pathan tribes on the Afghanistan border with British India.
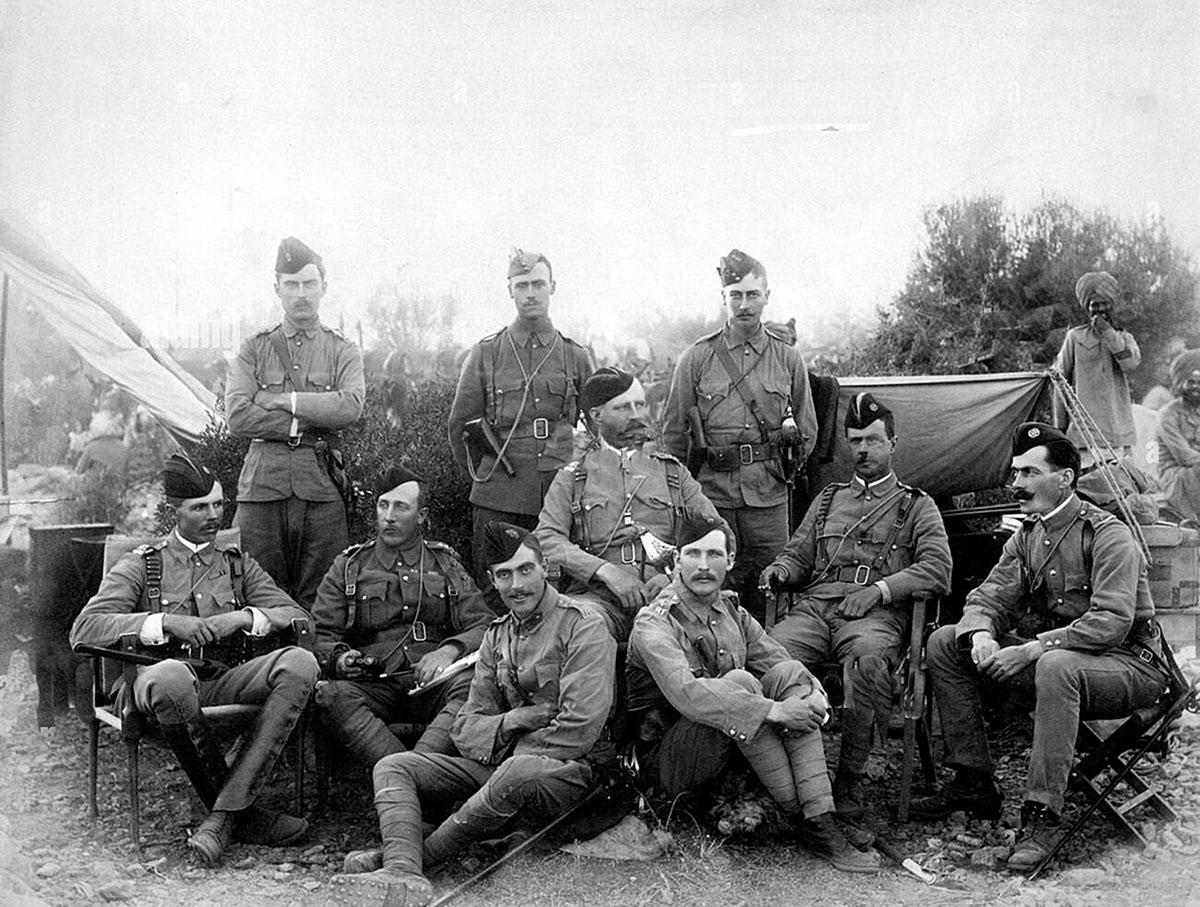
Commanders in the Tirah: The British Tirah Field Force was commanded by Lieutenant General Sir William Lockhart.
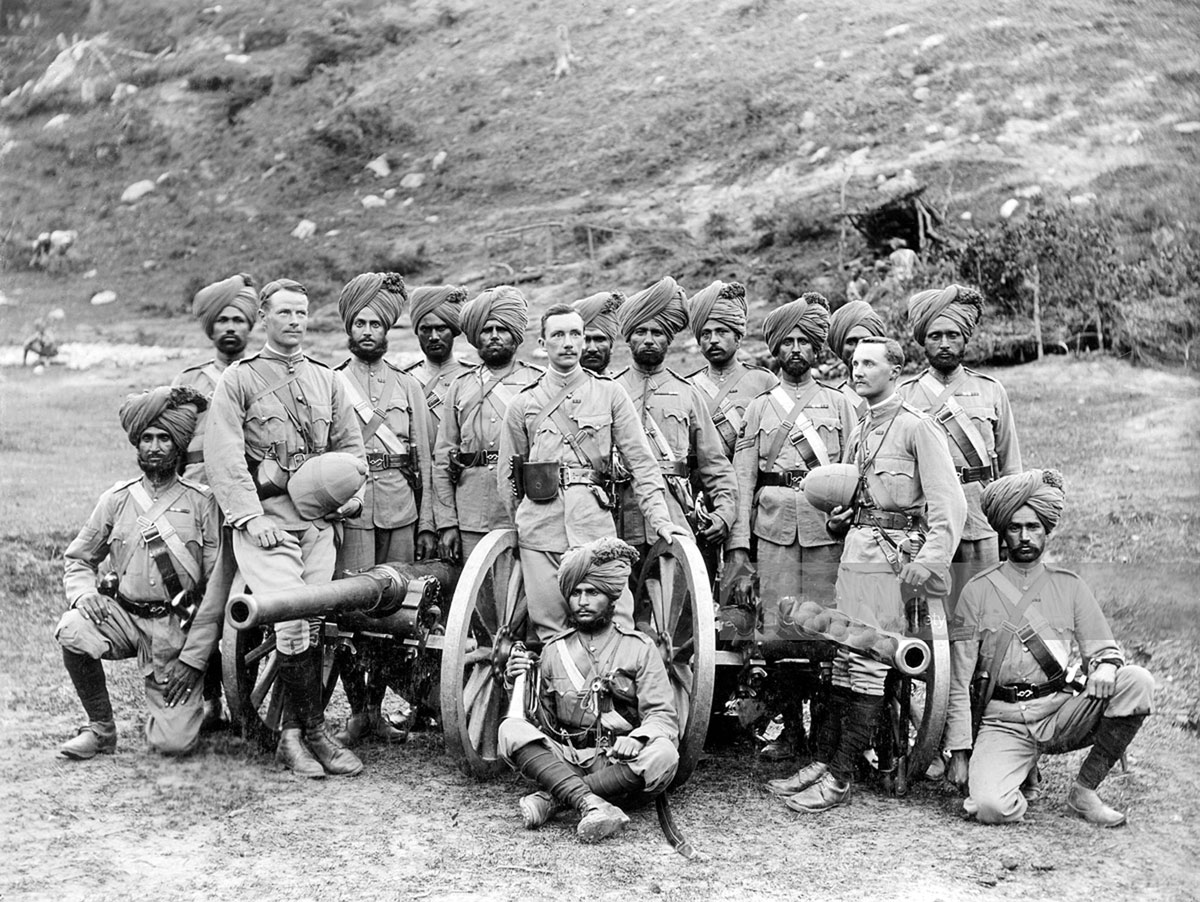
British and Indian Army Regiments in the Tirah:
Order of Battle of the Tirah Field Force:
General Officer Commanding: Lieutenant-General Sir William Lockhart
First Division: commanded by Major-General W. Penn Symons
First Brigade: commanded by Colonel Hamilton replaced on wounding by Brigadier-General Hart VC
2nd Derbyshire Regiment, 1st Devonshire Regiment, 30th Punjabis and 2nd/1st Gurkhas
Second Brigade: commanded by Brigadier-General Gaselee
2nd Yorkshire Regiment, 1st Queen’s Surreys, 3rd Sikhs and 2nd/4th Gurkhas
Divisional Troops:
18th Bengal Lancers, No1 Mountain Battery RGA, No1 Kohat, No 2 Derajat Mountain Batteries, 28th Bombay Infantry, Sappers and Field Hospital
Second Division: commanded by Major-General Yeatman-Biggs
Third Brigade: commanded by Brigadier-General Kempster
1st Gordon Highlanders, 1st Dorsetshire Regiment, 15th Sikhs and 1st/2nd Gurkhas
Fourth Brigade: commanded by Brigadier-General Westmacott
2nd King’s Own Scottish Borderers, 1st Northamptonshire, 36th Sikhs and 1st/3rd Gurkhas
Divisional Troops:
18th Bengal Lancers, Nos’s 8th and 9th Mountain Batteries RGA, No 5 Bombay Mountain Battery, Machine Gun Det 16th Lancers,21st Madras Infantry Pioneers, Sappers and Field Hospital
Line of Communication Troops:
22nd Punjab Infantry, 2nd/2nd Gurkha Rifles, 39th Gharwal Rifles, 2nd Punjab Infantry PFF, 2nd Bengal Cavalry, Jeypore Transport Corps and Gwalior Transport Corps
Peshawar Column: commanded by Brigadier General Hammond
2nd Royal Iniskilling Fusiliers, 2nd Oxfordshire Light Infantry, 9th Gurkha Rifles, 45th Sikhs, 57th Battery Royal Garrison Artillery, No 3 Mountain Battery RA, 9th Bengal Lancers and No 5 Co Bengal Sappers and Miners
Kurram Moveable Column: commanded by Colonel Hill
12th Bengal Infantry, Nabha Imperial Service Infantry, 3rd Battery Royal Garrison Artillery, 6th Bengal Cavalry and Central India Horse
Rawalpindi Reserve Brigade: commanded by Brigadier General Macgregor
2nd King’s Own Yorkshire Light Infantry, 1st Duke of Cornwall’s Light Infantry, 27th Bombay Light Infantry, 2nd Hyderabad Infantry and Jodhpur Imperial Service Lancers
Strengths:
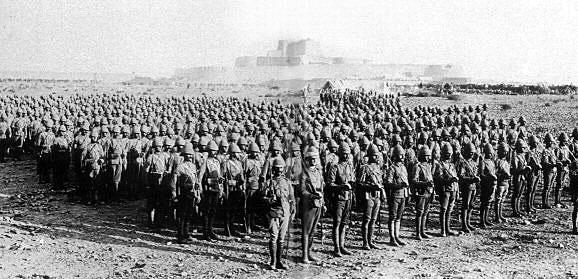
1,010 British officers, 10,882 British troops, 22,614 Indian troops and 19,934 non-combatants.
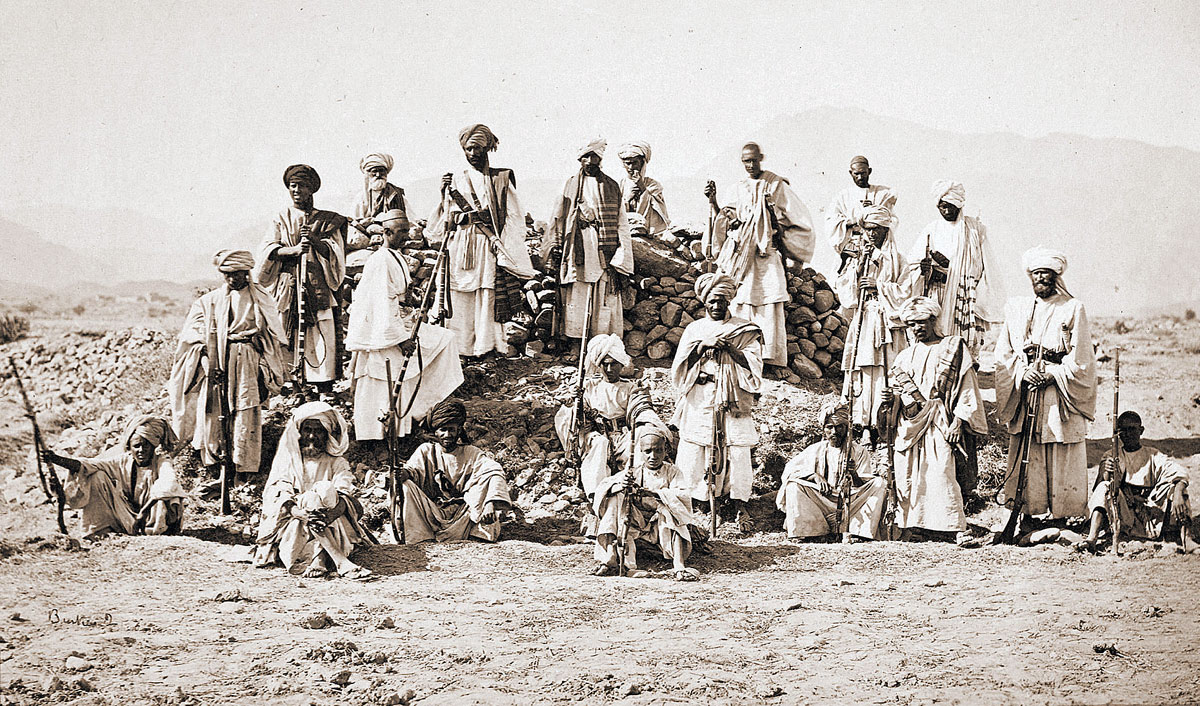
There were probably around 40,000 Orakzai and Afridi tribesmen available to fight against the British incursion. The numbers at each of the engagements were significantly lower than this overall figure.
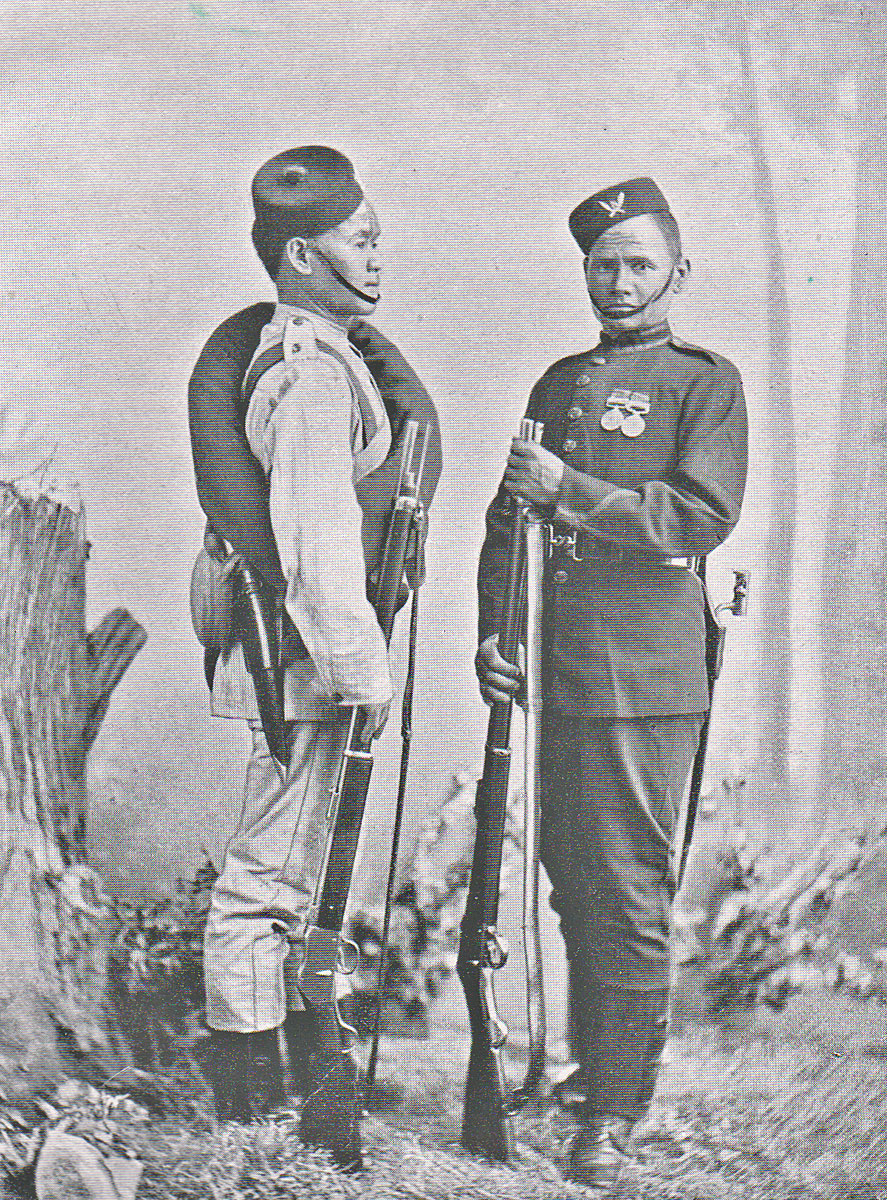
By the end of the 19th Century tribesmen on the North-West Frontier of India were widely equipped with breech loading rifles, some with the recently introduced Lee Metford.
Ammunition was either looted from the British, purchased in illicit deals or manufactured in workshops across the region.
Winner of the Tirah: The various clans of the two main tribes finally submitted to payment of the indemnities imposed by the British authorities after one of the hardest fought campaigns of the North-West frontier.
Uniforms, arms and equipment in the Tirah:
The British military forces in India fell into these categories:
- Regiments of the British Army in garrison in India. Following the Indian Mutiny of 1857, India became a Crown Colony. The ratio of British to Indian troops was increased from 1:10 to 1:3 by stationing more British regiments in India. Brigade formations were a mixture of British and Indian regiments. The artillery was put under the control of the Royal Artillery, other than some Indian Army mountain gun batteries.
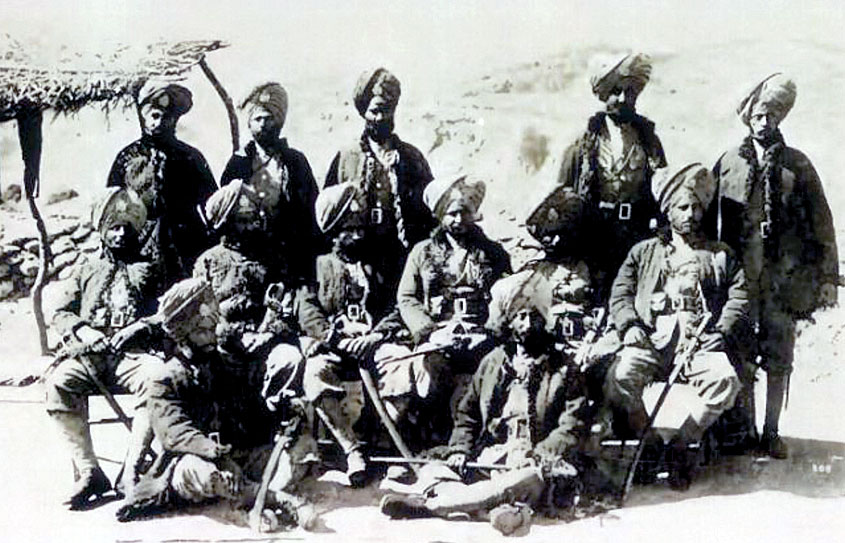
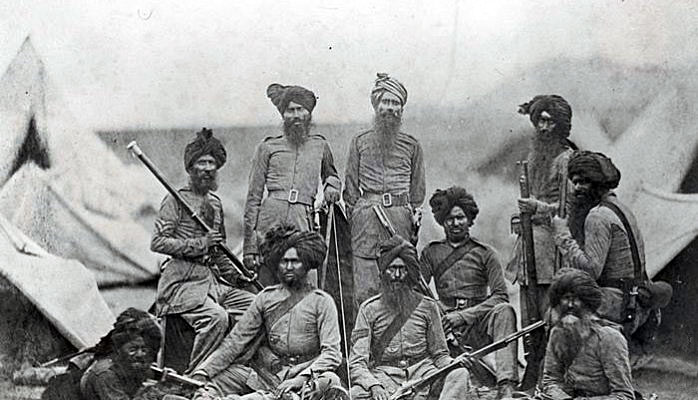
- The Indian Army comprised the three armies of the Presidencies of Bombay, Madras and Bengal. The Bengal Army, the largest, supplied many of the units for service on the North-West Frontier. The senior regimental officers were British. Soldiers were recruited from across the Indian sub-continent, with regiments recruiting nationalities, such as Sikhs, Punjabi Muslims, Pathans and Gurkhas. The Indian Mutiny caused the British authorities to view the populations of the East and South of India as unreliable for military service.
- The Punjab Frontier Force: Known as ‘Piffers’, these were regiments formed specifically for service on the North-West Frontier and were controlled by the Punjab State Government.
- Imperial Service Troops of the various Indian states, nominally independent but under the protection and de facto control of the Government of India. The most important of these states for operations on the North-West Frontier was Kashmir.
A British infantry battalion comprised 10 companies with around 700 men and some 30 officers. A battalion had a maxim machine gun detachment of 2 guns and around 20 men.
Indian infantry battalions had much the same establishment, without the Maxim gun detachment. Senior officers were British, holding the Queen’s Commission. Junior officers were Indian.
In 1897, Indian infantry regiments carried the single shot, drop action Martini-Henry breech loading rifle. British regiments were issued with the new Lee Metford bolt action magazine rifle from 1894.
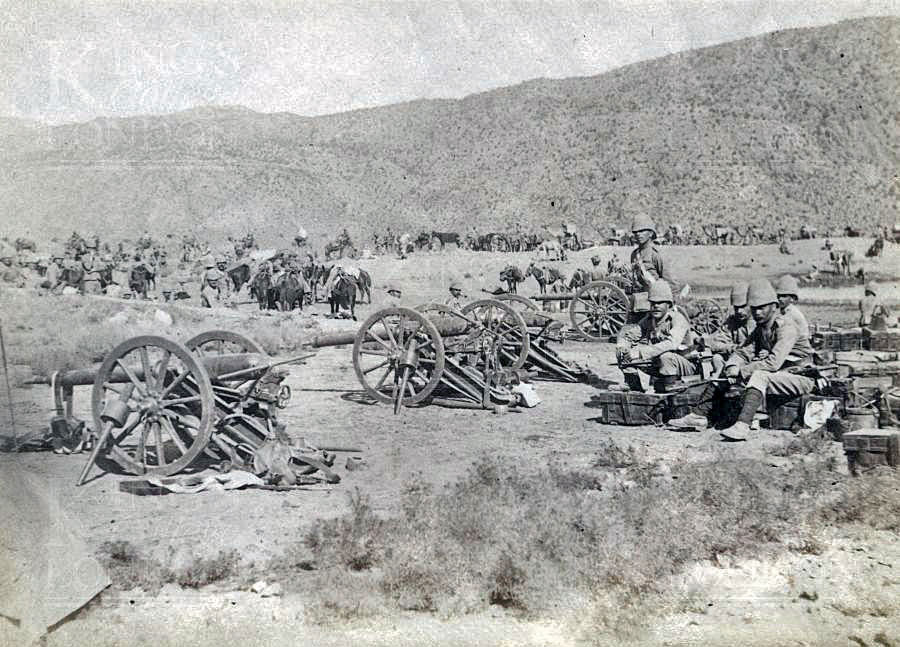
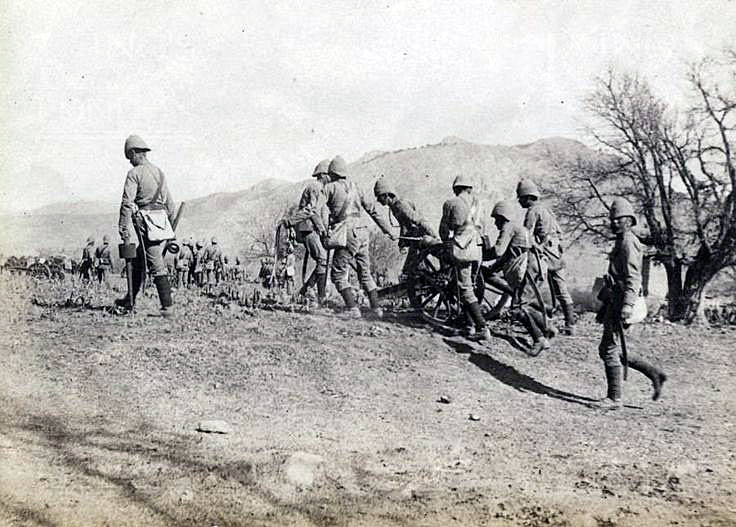
By 1897, both Indian and British Royal Garrison Artillery Mountain Batteries used the RML (Rifled Muzzle Loading) 2.5 inch gun, the successor to the small, basic and unreliable RML 7 pounder gun, which had gone out of service in the British batteries in the early 1880s and, finally, in the Indian batteries in around 1895. The 2.5 inch had the nickname of ‘the Screw Gun’ as the barrel came in two sections that were screwed together for firing. The gun was dismantled for transport and carried by mules (see Kipling’s poem ‘the Screw Guns’).
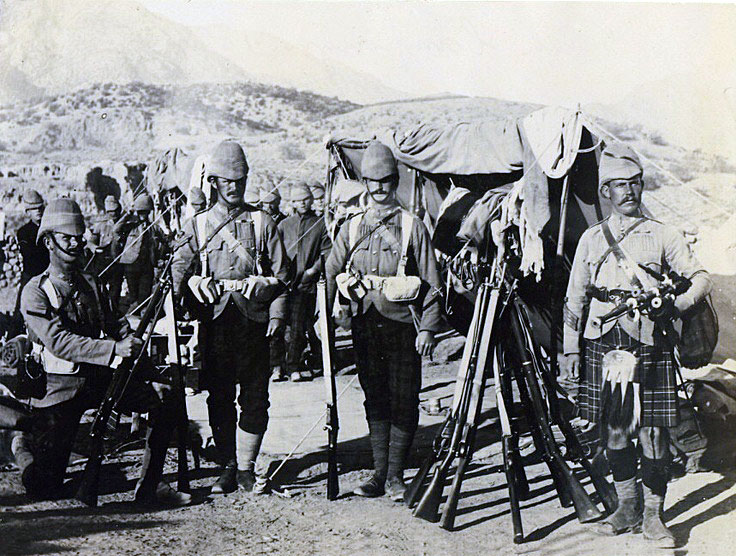
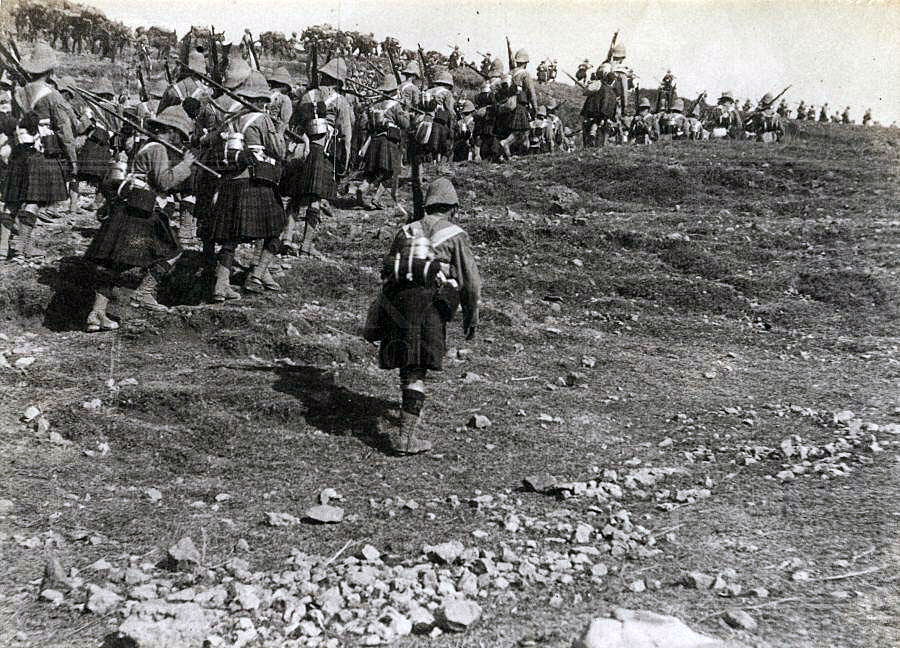
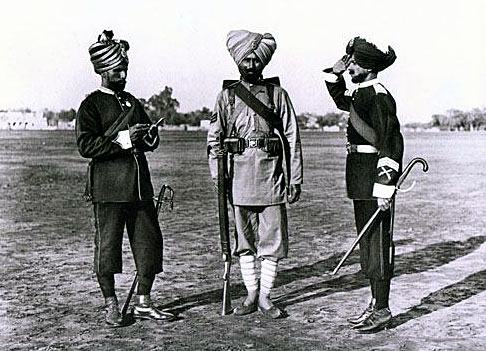
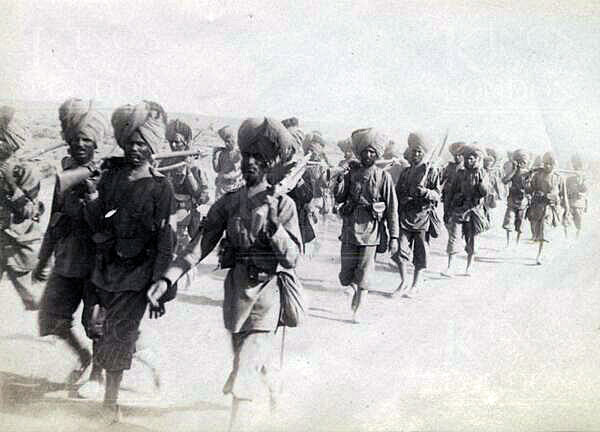
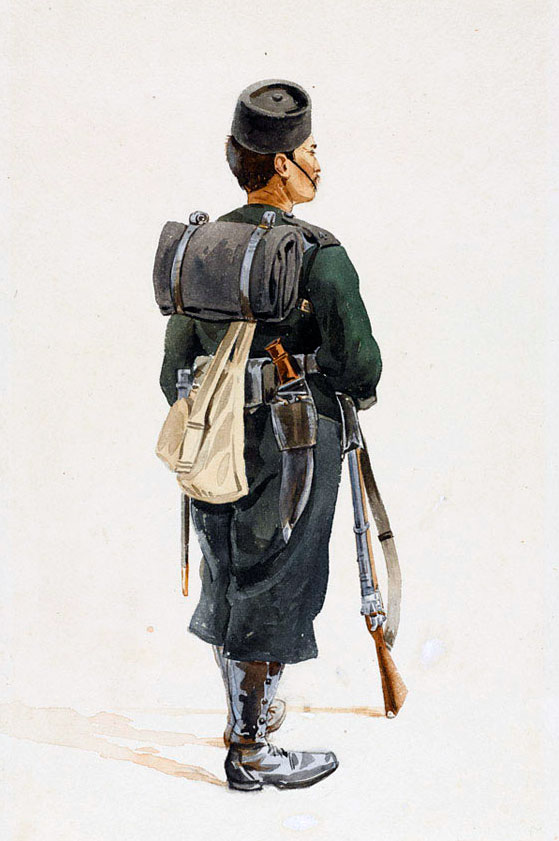
British and Indian troops in 1897 wore khaki field dress when campaigning, with a leather harness to carry equipment and ammunition. British troops wore a pith helmet. Indian troops were largely turbaned. Gurkha troops wore a pill box hat. Scottish Highland regiments wore the kilt. Scottish Lowland Regiments, such as the Highland Light Infantry and the King’s Own Scottish Borderers, wore tartan trews.
The Indian cavalry regiments were armed with lance, sabre and carbine.
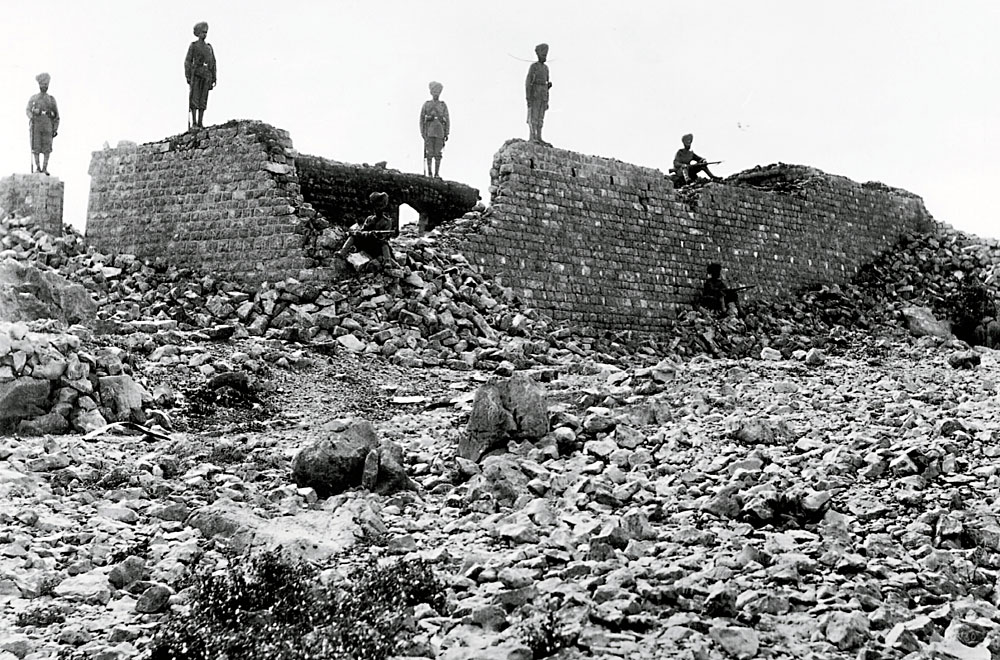
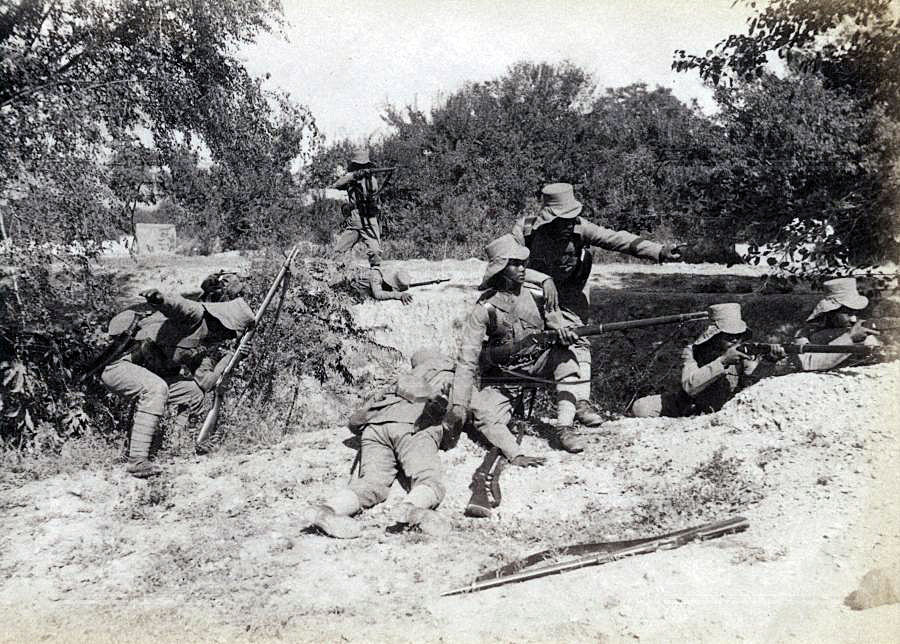
The standard tactic used by the British and Indian armies on the North-West Frontier of India, as with other so-called ‘semi-civilised enemies’, was to deliver a frontal attack, discharging controlled volleys of rifle fire and charging home with the bayonet. When stationary under fire, cover was taken behind sangars or low, stone-built walls.
Supporting fire was provided by artillery, where available. Cavalry conducted scouting duties and, in suitable circumstances, delivered mounted charges, which were particularly effective against loose formations of tribesmen caught in flat open country. The Indian cavalry regiments were adept at mixing mounted action with dismounted, in which carbine fire was used against tribesmen, particularly during a withdrawal.
When a military column moved through hostile country, great care had to be taken to ensure that flanking high ground was occupied in strength, until the column was clear of the area.
Withdrawal was when troops became most vulnerable. Experienced units made sure that withdrawal was made by alternate leaps, so that there was always a force providing covering fire for the troops moving back. Pathan tribes were quick to follow up British withdrawals and any error was immediately exploited. Many of the problems in battle for the British arose from inexperienced regiments failing to comply with the exacting requirements of frontier warfare.
A feature of warfare on the North-West Frontier of India was the ability of tribesmen to assemble in large numbers with little warning and to move at disconcerting speed across mountainous terrain, even at night.
Colonel HD Hutchinson in his book ‘The Campaign in the Tirah, 1897/98’ published in 1898 stated ‘it must be remembered that never before on our North-West Frontier have we had to deal with an enemy armed with long-ranging breech-loaders, as these Afridis are. It may be argued where they got them from, but the fact remains that they possess them. The majority have Martini-Henry rifles, with which they shoot very straight up to 1200 and 1500 yards. But in addition they have a few Lee-Metfords, fifty or sixty probably, taken or stolen from us at various times, notably on 9th and 16th November, and their supply of ammunition is apparently unlimited. Consequently the work thrown on flanking parties now is extremely heavy. In the days when the enemy had nothing better than the jezail and a few Enfields and Sniders, it was practically enough to keep them a good half-mile clear of the line of march. Now, the flankers must go much farther afield than that, and points have to be occupied and held fully a mile away on either hand before the road can be considered safe.’
Background to the Tirah:
In 1897, the North-West Frontier of India erupted in warfare, the tribes along the border attacking British garrisons and Indian villages. The reaction to this uprising was a series of incursions by the British into tribal territory in 1897 and 1898.
The Government of India identified several factors leading to the uprisings. The Amir of Afghanistan in the late 1880s penned a book urging Muslims in the border regions to wage ‘jihad’ against the British. The Amir claimed to the British that the book was to preserve his own precarious position amongst fanatical Afghans.
Numbers of Muslim mullahs in the independent tribal regions along the border of India preached ‘jihad’ against the British and invoked the Amir’s book.
The Government of India concluded that the immediate trigger for the uprisings was the victory of the Turks over the Greeks in the eastern Mediterranean, a potent symbol of Muslim success over the Christian infidel.
Of considerable importance was the concern of the Pathan border tribes at the threat to their independence from the increasingly intrusive British presence in the area and the marking of a border between British India and Afghanistan by the Durand Commission accompanied by a strong Indian Army escort. This operation had finally to be abandoned in the face of the increasing hostility from the border tribes.
The British found tribal dissatisfaction hard to reconcile with the growing prosperity of the area from the increase in trade with British India during the 1890s.
The incidents on the North-West Frontier leading to the general outbreak of war along the Frontier were, on 10th June 1897, an attack at Maizar in the Tochi on a political officer with his military escort by tribesmen of the Madda Khel.
This incident was followed by the massed attack on the garrisons in Malakand and Chakdara on 26th July 1897, leading to the mounting of the British advances north of the Khyber River.
On 7th August 1897 the Hadda Mulla with some 5,000 mainly Mohmand tribesmen mounted an attack on Shabkadar Fort and burnt the frontier village of Shankargarh.
With these uprisings, the Government of India watched with some trepidation to see what the powerful Khyber tribes of Orakzai and Afridis would do.
Two reserve brigades were assembled at Rawalpindi, in addition to the Malakand Field Force, moving up to relieve the Malakand and Chakdara and to take punitive action against the tribes in the Swat Valley.
A movable column, the Mohmand Field Force, advanced to relieve Shabkadar Fort and to drive the Hadda Mulla and his supporters back into the mountains.
Various of the border forts were re-inforced.
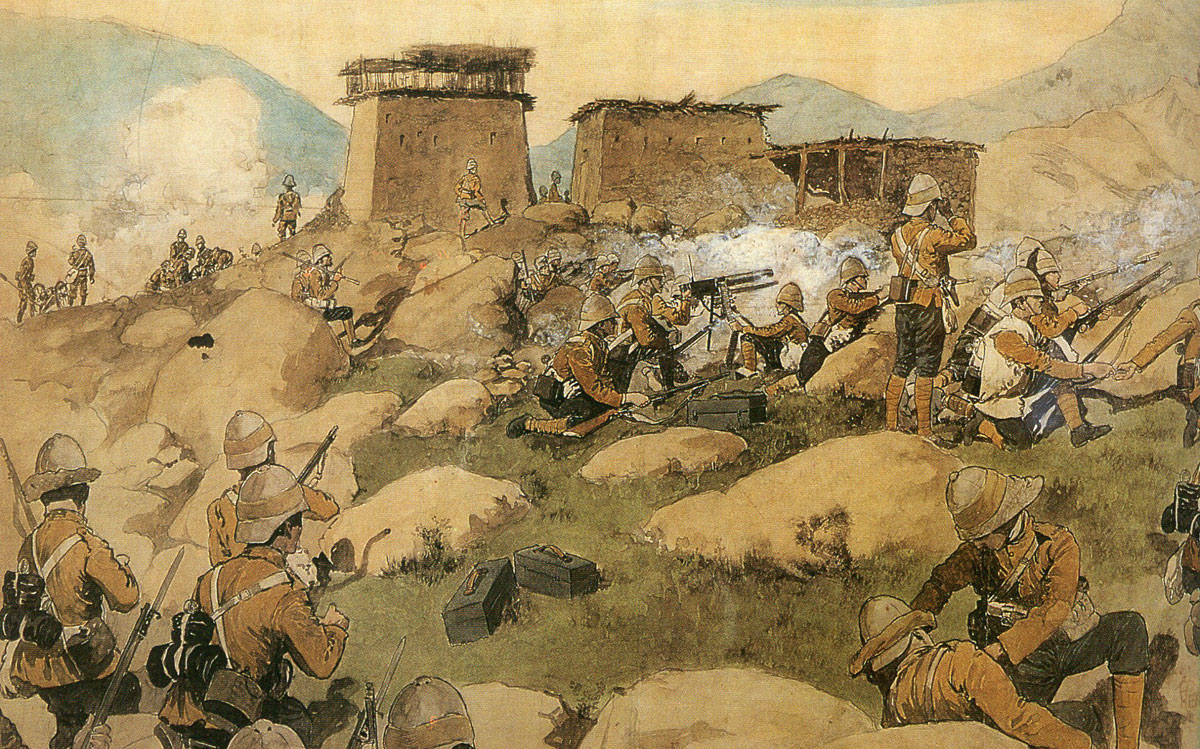
The Orakzai attack on the Samana Forts:
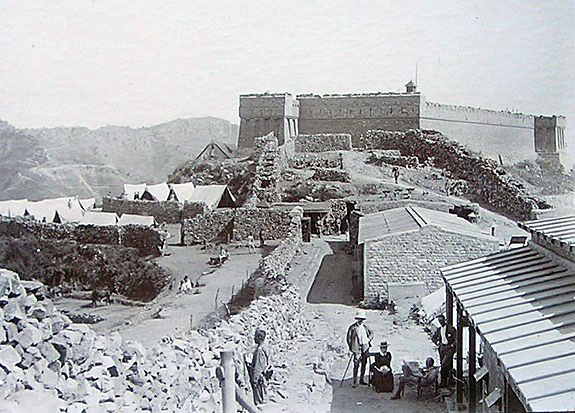
In the southern Tirah, following the First Miranzai Expedition in 1891, the decision was taken to establish a row of posts and forts on the crest of the Samana Range along the southern side of the Khanki Valley to act as a restraint on the Orakzai tribes in the area.
The western fort was Gullistan, the eastern was Fort Lockhart with a subsidiary post on the mountain crest called Saragarhi, providing a heliograph signalling link between the two main forts. A mule road was built linking the posts with each other and with the main government position at Hangu in the Miranzai valley.
On 26th August 1897 Afridi tribesmen advanced down the Ublan Pass appearing to be intending an attack on police posts in the main Miranzai Valley in the vicinity of Kohat.
On 27th August 1897 Major General Yeatman-Biggs led a column into the Ublan Pass and reinforcements were brought up from Kohat.
At the same time the Orakzai became active on the Samana Ridge, surrounding the post at Lakka held by local levies.
Between 26th and 29th August 1897 tribesmen captured and destroyed police posts at Lakka, Saifaldarra and Shinawari.
On 1st September 1897 the focus of attention shifted to Sadda and Parachinar, 70 and 90 miles up the main valley road to the west where attacks were threatened and the British military presence was weak.
With the absence of the preponderance of the force based in Kohat and Hangu on the operation to deal with this threat, the Orakzai launched attacks along the Samana Ridge against the British posts.
At the end of August 1897, the position on the Samana Ridge was that a number of small posts were occupied by tribal police and local levies on behalf of the British authorities: Saraghari, Crag Piquet, Sangar Piquet, Sartop and Dhar.
The two larger forts of Gullistan and Fort Lockhart were garrisoned each by two companies of the 36th Sikhs; Gullistan commanded by Major de Voeux, who had with him his wife, children, including a baby daughter and a nanny and Fort Lockhart commanded by Lieutenant Colonel Haughton, the commandant of the 36th Sikhs.
On 3rd September 1897 a heliograph message was received in Fort Lockhart from Gullistan that the tribesmen were advancing on the fort in strength from Samana Sukh.
Colonel Haughton took a force of 50 men from the Fort Lockhart garrison and advanced along the ridge towards Gullistan.
15 of these men were left in the Saraghari post while the rest of the force continued, now under heavy fire from the tribesmen, up to the fort.
The attackers’ standards were within 150 yards of the south wall.
A thorn hedge positioned to keep attackers back from the post was repeatedly set on fire by the tribesmen and extinguished by volunteers sallying from the fort under a continuous heavy rifle-fire.
As at 8pm the tribesmen were clearly gathering for an assault, two Sikh sepoys rushed out of the fort and set fire to a bonfire positioned to illuminate any such attack.
The rifle-fire on the fort was maintained until midnight, but the garrison in return inflicted heavy losses on the tribesmen who withdrew, pulling back from the fort completely during the day.
Colonel Haughton returned with his party to Fort Lockhart.
On the evening of 4th September 1897, the tribesmen renewed their attack on Gullistan but were again driven off.
The tribesmen’s losses had been significant and they withdrew from the Samana Ridge for a time, although continuing with their raids into British territory.
Until now the assault on the Samana posts was the work of the Orakzais whose territory lay around the Samana Ridge.
Information now came in to Major General Yeatman-Biggs at Hangu that the Afridis intended to join the Orakzais in a combined attack on the Samana posts.
On 7th September 1897 General Yeatman-Biggs with a strong force marched out of Hangu to re-supply the Samana posts.
On 10th September 1897 the defences of Fort Gullistan were improved by the Bombay Sappers and Miners of the column.
On the same day the main Afridi lashkar joined the Orakzais, the rest arriving on 11th September 1897. 10,000 tribesmen with 22 standards were seen to be moving down the Khanki Valley.
It seemed likely that an attack on Hangu or Shahu Khel in the main Miranzai valley was about to be launched by the tribesmen.
Half the lashkar turned back up the Khanki valley.
Engagements took place between the tribesmen and the rear-guard of the relief column as it withdrew to the Miranzai valley, comprising two companies of 2nd Gurkhas, with a column of 51 laden baggage camels. Deserted by their drivers, the camels had to be abandoned and were mostly captured by the tribesmen.
The troops suffered 6 killed and an officer and 8 men wounded. The tribesmen acknowledged the loss of 100 dead and wounded.
With some difficulty and harassed by the pursuing tribesmen, General Yeatman-Biggs’ column withdrew to Hangu.
The whole lashkar now turned on the Samana forts.
The first post attacked, during the night of 11th September 1897, was Sangar, held by 44 soldiers of the 36th Sikhs. This post was situated on high ground with little cover for the attackers and they were driven off by the garrison, with the loss of a standard.
In the morning the tribesmen moved on to attack the post of Saraghari.
Saraghari was not strongly constructed, nor well situated for defence against such an overwhelming number of attackers, there being cover for the attackers to approach close to the post.
The garrisons in Gullistan and Fort Lockhart could see Saraghari and were able to follow each stage of the assault, although unable to assist due to their small numbers; Fort Gullistan being itself under heavy attack.
The first attack on Saraghari was driven off with 60 tribal casualties, but two tribesmen remained in a dead angle against a corner of the wall, where they could not be seen by the garrison.
These two tribesmen pulled down the wall creating a hole.
The activities of the two tribesmen, unseen by the Sikhs in Saraghari, were visible to the troops in Fort Lockhart and Gullistan.
Attempts were made to signal a warning from Fort Gullistan but was apparently not seen.
At around noon a party was sent out from Fort Lockhart in an attempt to divert the tribesmen from their attack on Saraghari. This was without effect.
At around 3pm the signaller in Saraghari heliographed to Fort Lockhart that ammunition was running low in the post.
Colonel Haughton with Lieutenant Munn and 93 soldiers from the Fort Lockhart garrison attempted to fight through to Saraghari.
Haughton was three quarters of the way to Saraghari when the tribesmen finally overwhelmed the post’s garrison.
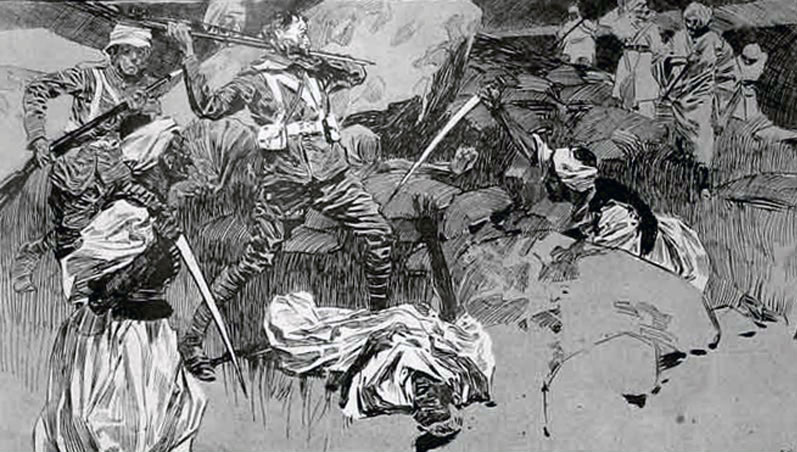
At around 3.40pm the tribesmen rushed the hole made in the corner of the post’s wall by the two unseen tribesmen, forced the main door and climbed in over the walls.
The garrison was wiped out. The last man held out in the guardroom, where he is said to have killed around 20 tribesmen, who admitted to a total of 180 killed in the attack on the post.
The tribesmen stripped and mutilated the bodies of the Sikhs and destroyed the post before turning their whole strength on Fort Gullistan.
Gullistan was built in the same style as the post at Saraghari with the same areas of dead ground at the corners.
Major de Voeux caused further barricades to be built inside the corners, in case the walls were broken down at these points.
A heavy fire was maintained against the fort for the whole night and dawn revealed the tribesmen entrenched in newly built sangars within 20 yards of the fort’s walls.
Major De Voeux decided that it was essential to carry out a sortie to undermine the morale of the besieging tribesmen and encourage his own men.
A tribal standard was planted in a sangar within 20 yards of the south-west end of the hornwork. Major De Voeux decided that this standard was to be captured.
Colour Havildar Kala Singh and his section of 16 men volunteered for the raid.
While the garrison maintained a heavy fire on the tribesmen, Kala Singh’s party left the hornwork by the southern gate and crept around the wall to the point opposite the sangars and charged.
There were now three standards displayed from the sangars and so heavy was the tribesmen’s fire, that Kala Singh’s party was forced into cover.
A further party of 11 men led by Havildar Sundar Singh leapt the hornwork wall and the combined party of Sikh soldiers captured the sangars and the three standards.
The party returned to the fort with the standards, to find that two wounded Sikhs had been left in the sangars.
Three Sikh soldiers went back to the sangars and brought the wounded men back.
Of the combined party, 13 had been wounded, 2 mortally.
The effect of the capture of the standards was to raise the morale of the garrison and discourage the attacking tribesmen, of whom the Mamuzai, whose standards had been taken, had lost heavily.
The attack on Gullistan continued during the rest of the day and the following night, but it was not pressed to a storming as at Saranghari.
The next day at around noon the relieving column commanded by Major General Yeatman-Biggs could be seen and the Gullistan garrison opened a heavy fire on the tribesmen, no longer needing to husband their ammunition. The tribesmen dispersed to their homes.
It was considered that the lack of enthusiasm shown by the Orakzais during the subsequent operations was heavily influenced by their failure at Gullistan.
Account of the Tirah:
During early 1897 It became apparent to the Government of India that outbreaks of violence by the Pathan tribes along the frontier were likely. Of particular concern were the Afridis and Orakzais living to the south of the Kabul River.
Two brigades were concentrated at Rawalpindi and another at Peshawar.
The Khyber Pass itself was garrisoned and policed by levies from the local tribes considered reliable from the British perspective.
In mid-August information became available to the British that an Afridi lashkar was proposing to attack the garrison at Jamrud and that the Orakzais was intending to follow the Afridi lead by attacking the Samana forts.
The British garrisons at Kohat and Peshawar were reinforced.
Further information followed that a force of some 10,000 Afridis was moving into the Khyber Pass with the intention of attacking the posts held by tribal levies in the service of the British.
At the end of August 1897, the Afridis took the Khyber posts of Fort Maude, Ali Masjid and Landi Kotal.
It was considered in British official circles that the hostile operations by the Orakzais and Afridis constituted such a fundamental threat to British rule of the area that a substantial invasion of the Tirah must take place and continue until the tribes were humbled and forced to accept humiliating terms dictated to them in the heart of their country.
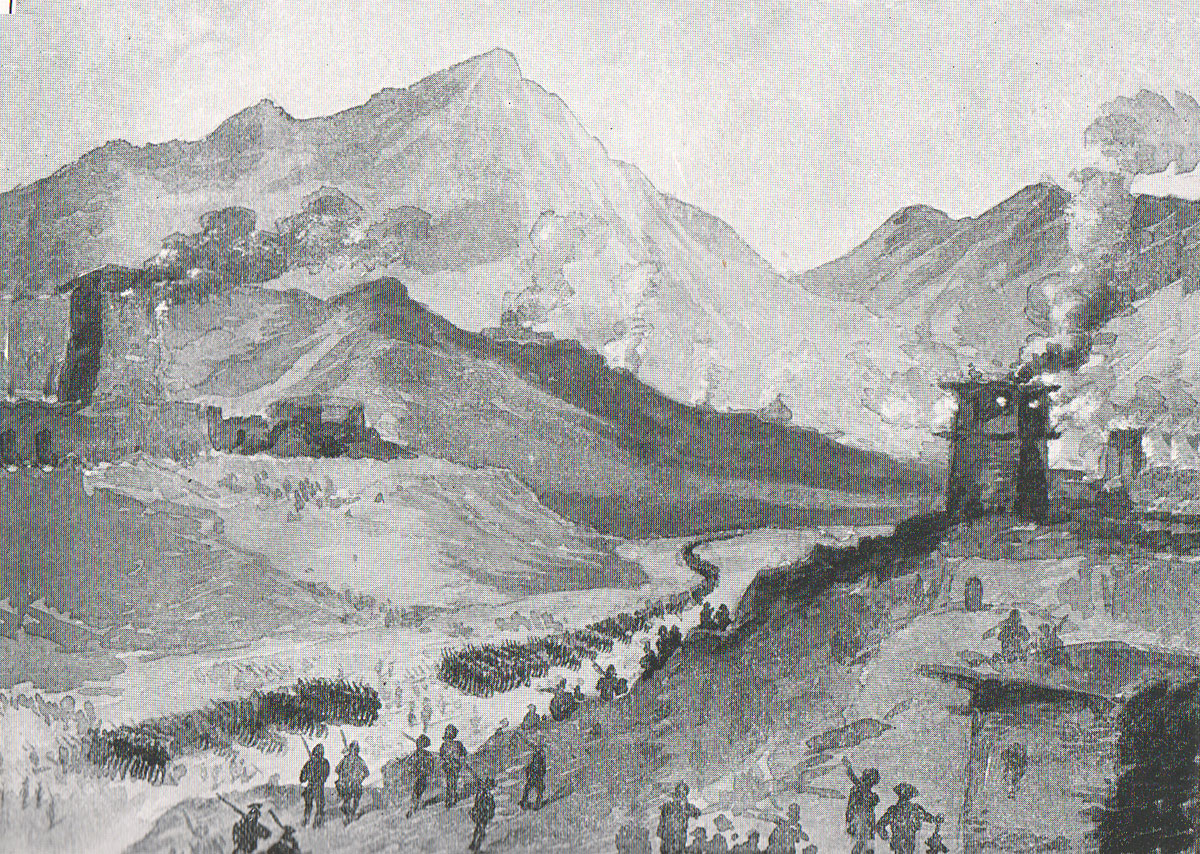
On 3rd September 1897 orders were given for the assembly of a British force for the invasion of the Tirah, a force that would be the largest so far deployed on the North-West Frontier of India.
It was considered that punitive action must be taken without delay even though the best time to invade tribal territory was in the spring while the crops were still growing and could be destroyed, thereby ensuring the maximum impact, not in the autumn when harvesting was already complete and the troops faced the hardship of winter in the mountains.
The date of 12th October 1897 was fixed for the commencement of operations, it being hoped that the end of the operations north of the Kabul River would free up troops and transport animals for use in the Tirah.
In the event these operations were not complete in time and only one brigade with its transport became available instead of the two brigades expected.
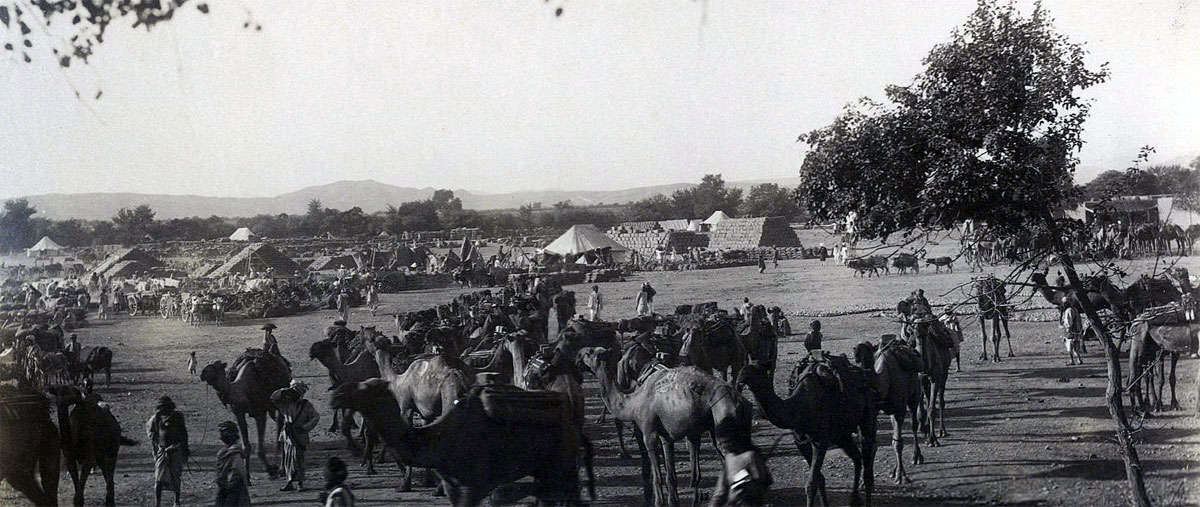
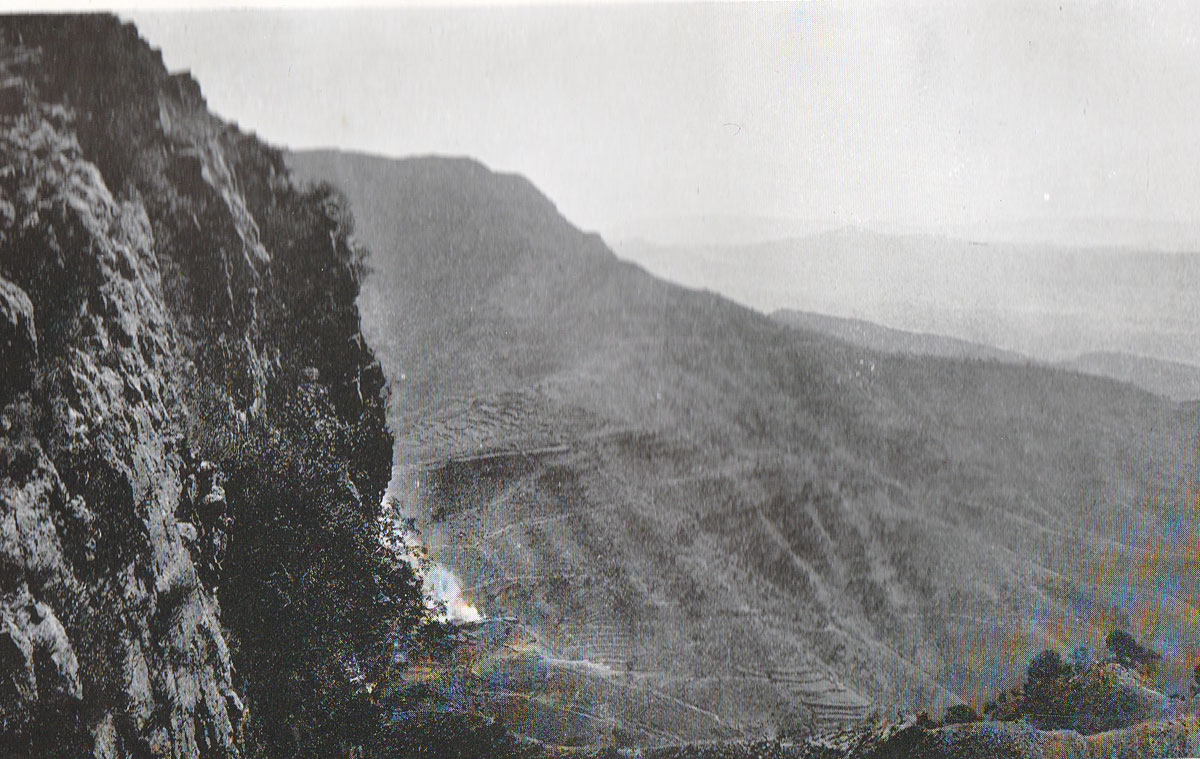
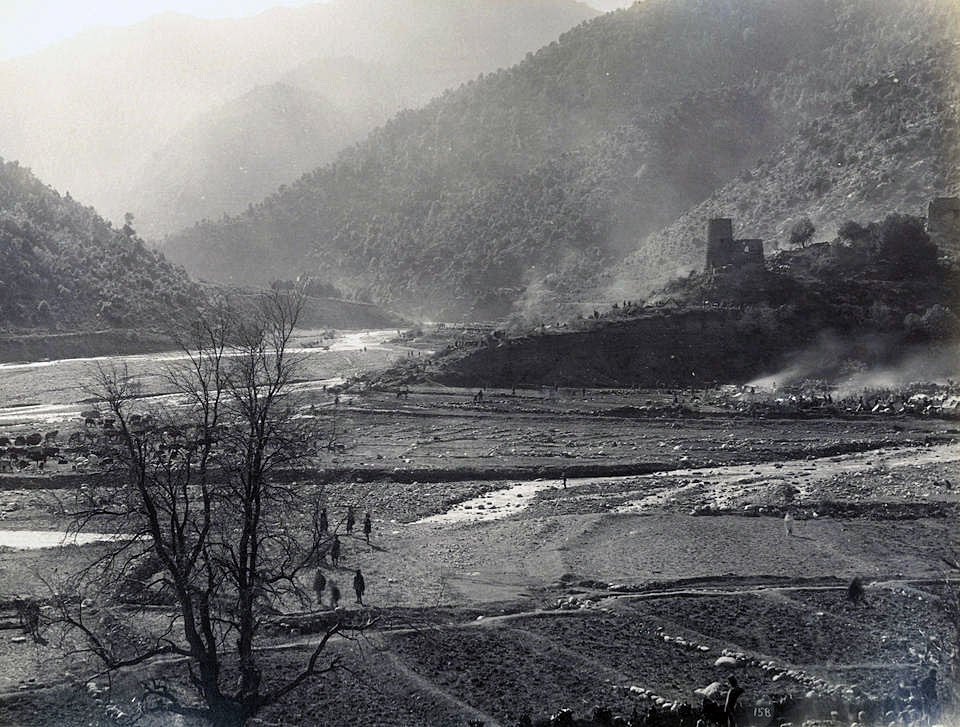
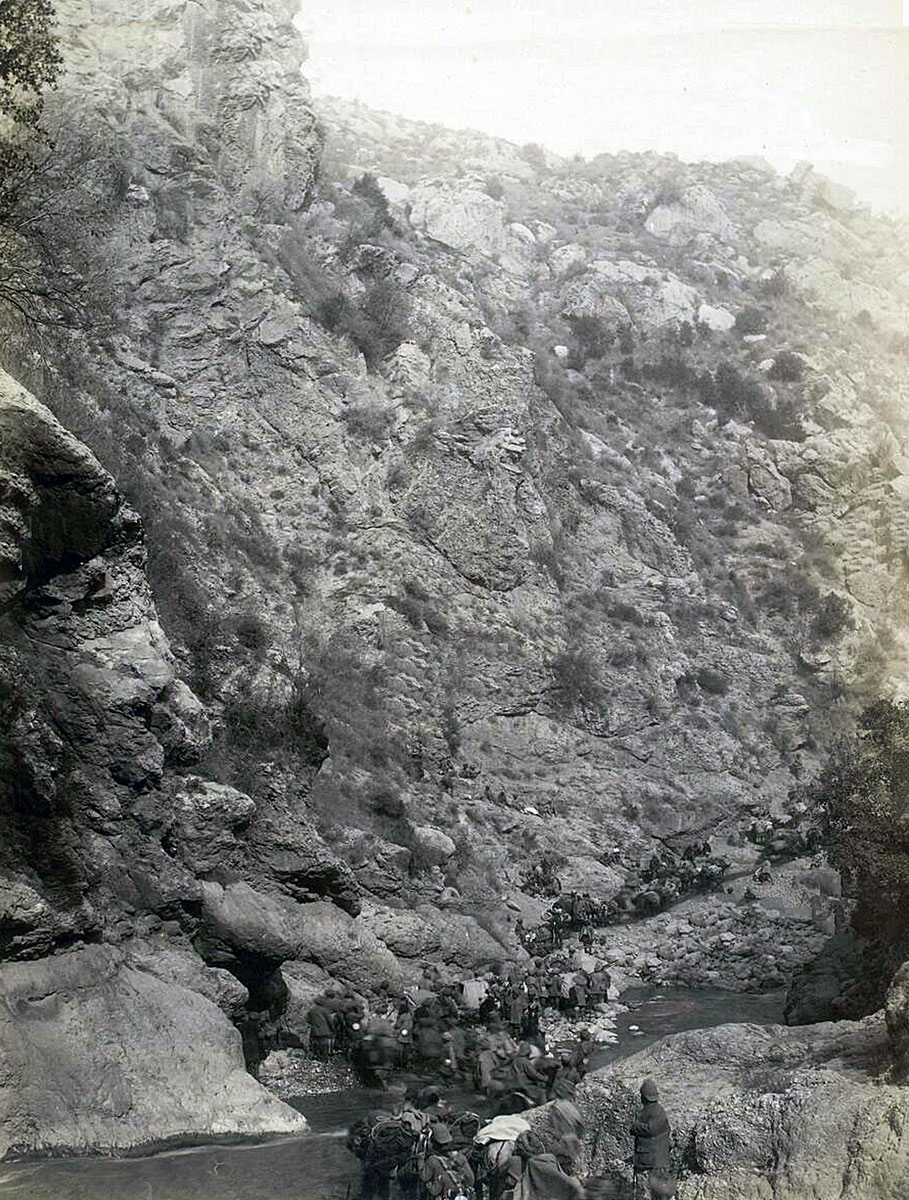
The routes into the Tirah were by way of the courses of the Bara, Mastura and Khanki Rivers. All were difficult and in places impassable even to mules.
It was expected the tribesmen would make their stands in either the Sampagha or Arhanga Passes.
It was decided that the British operations be based on the frontier town of Kohat rather than Peshawar, further north, Kohat being further to the west, only 30 miles from the advanced base at Shinawari and with a better road.
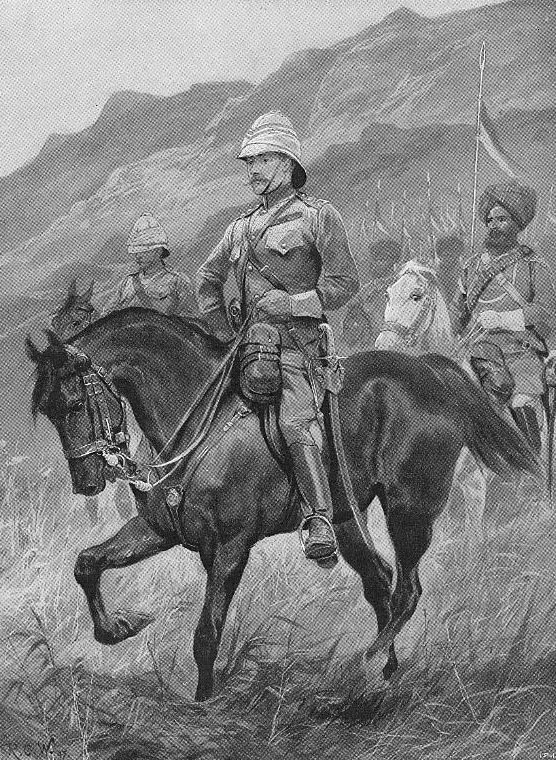
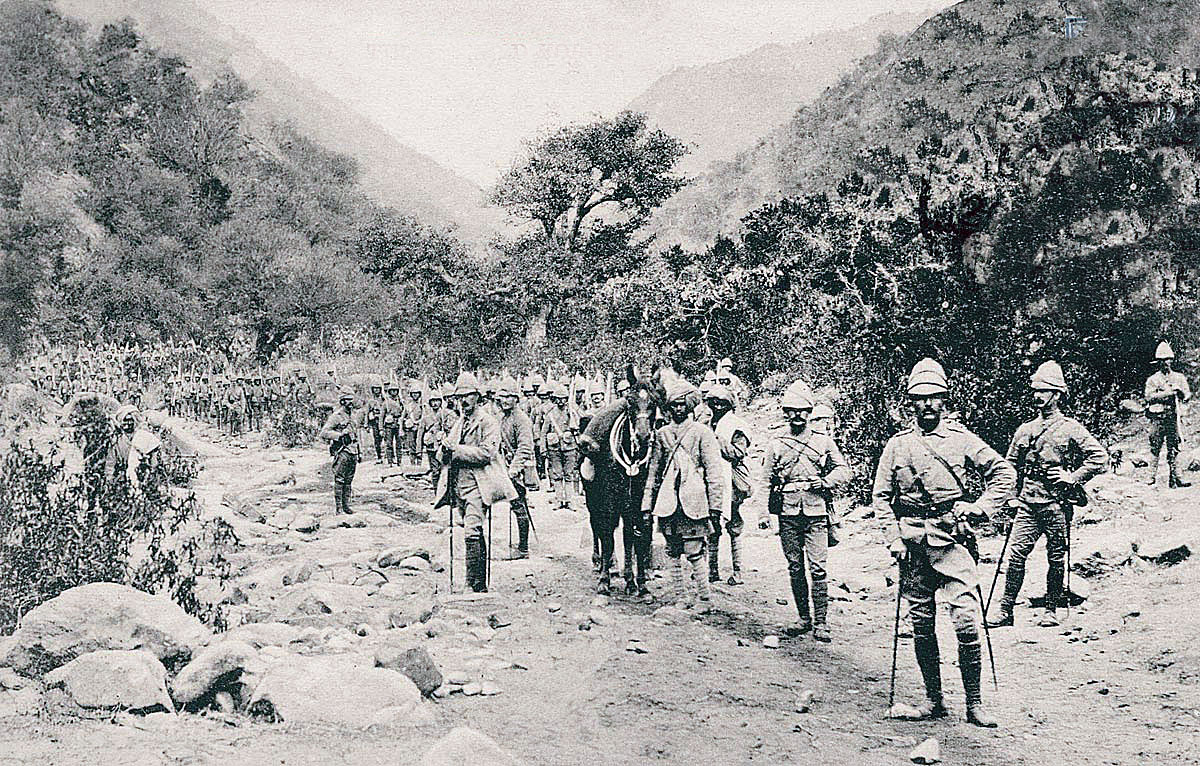
The British force assembled for the operation into the Tirah comprised 44,000 combat troops under Lieutenant-General Sir William Lockhart, The British Commander-in-Chief in the Punjab.
Lockhart was peremptorily recalled from furlough in England.
Lockhart’s force was formed into a main column of two divisions, each of two infantry brigades and two subsidiary columns. A reserve brigade was to be held in Rawalpindi.
The main column, commanded by Lockhart, would conduct the invasion of the Tirah from Kohat, via the Sampagha and Arhanga Passes.
The two subsidiary columns would operate from Peshawar and the neighbouring area.
General Lockhart arrived in theatre on 4th October 1897, taking over command from Major General Yeatman-Biggs.
The one major aspect of the expedition that remained to be completed was the collection of a sufficient transport.
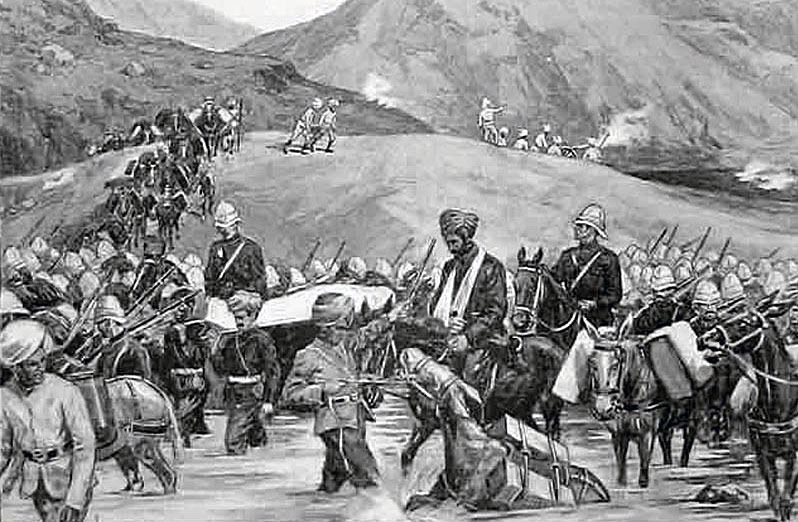
Up to Shinawari the road was practicable for carts, but from that point into the Tirah only pack animals could be used, mules, ponies and donkeys. Even camels were too slow and cumbersome.
From the beginning of October 1897, while preparations for the advance into the Tirah were being completed a number of minor engagements took place with cavalry reconnaissance parties being ambushed by parties of tribesmen.
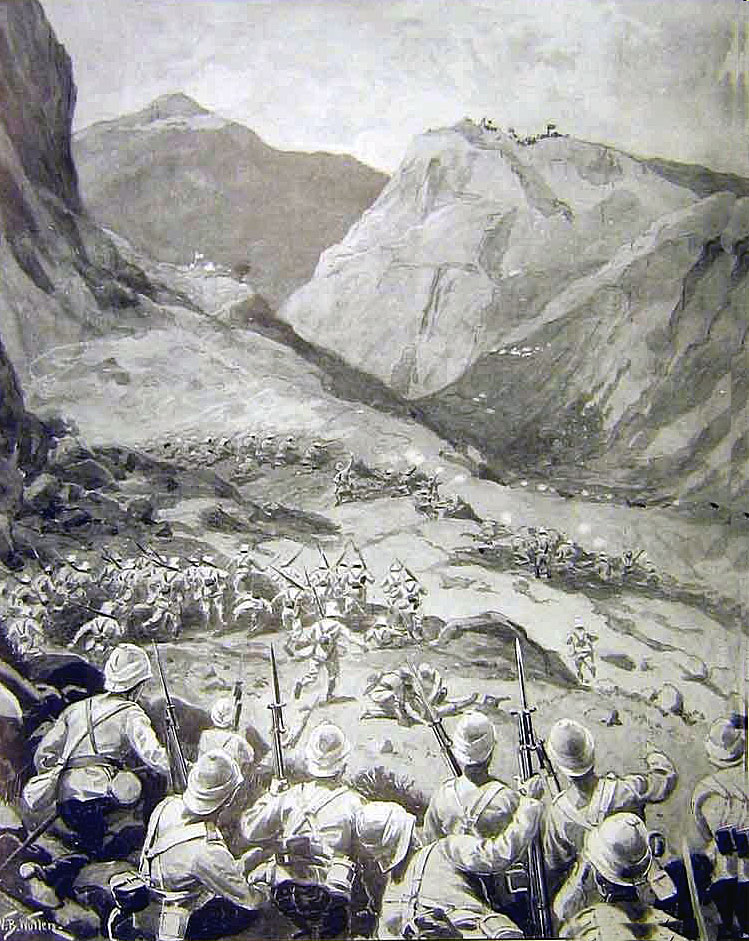
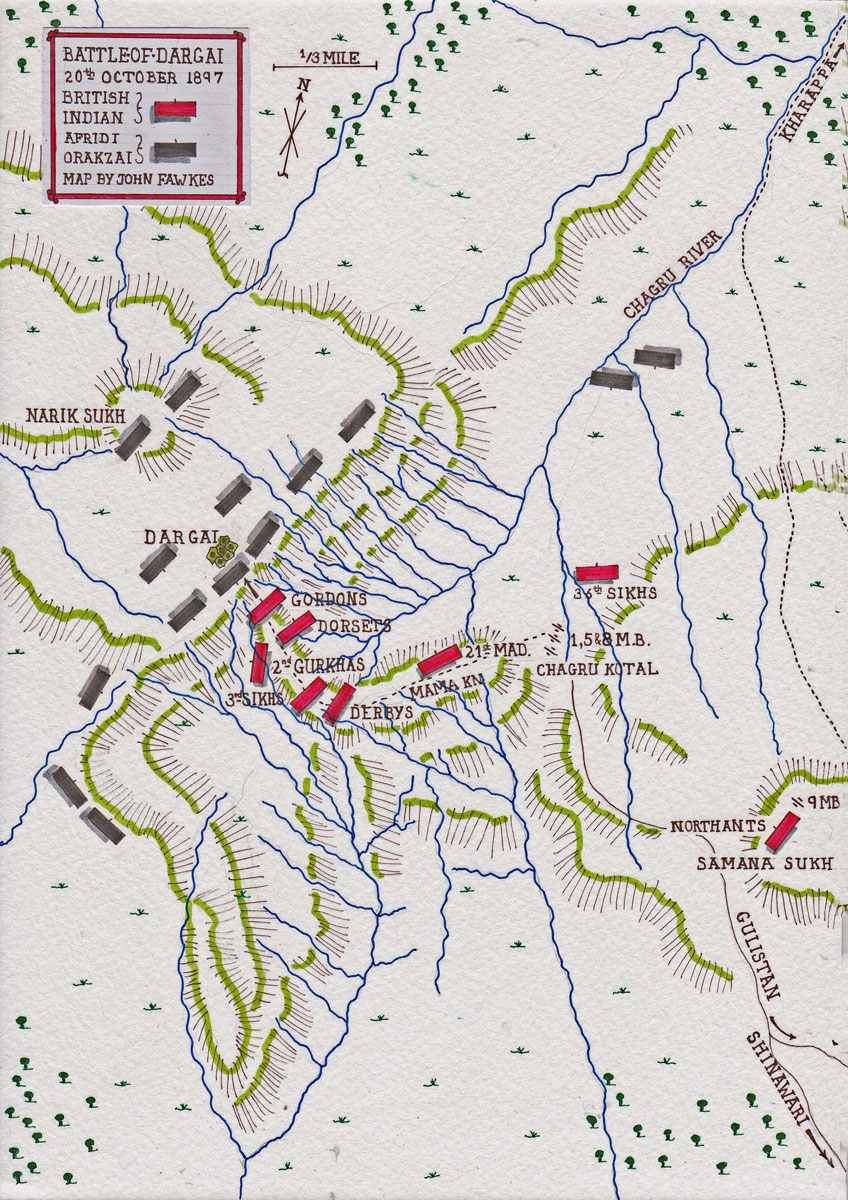
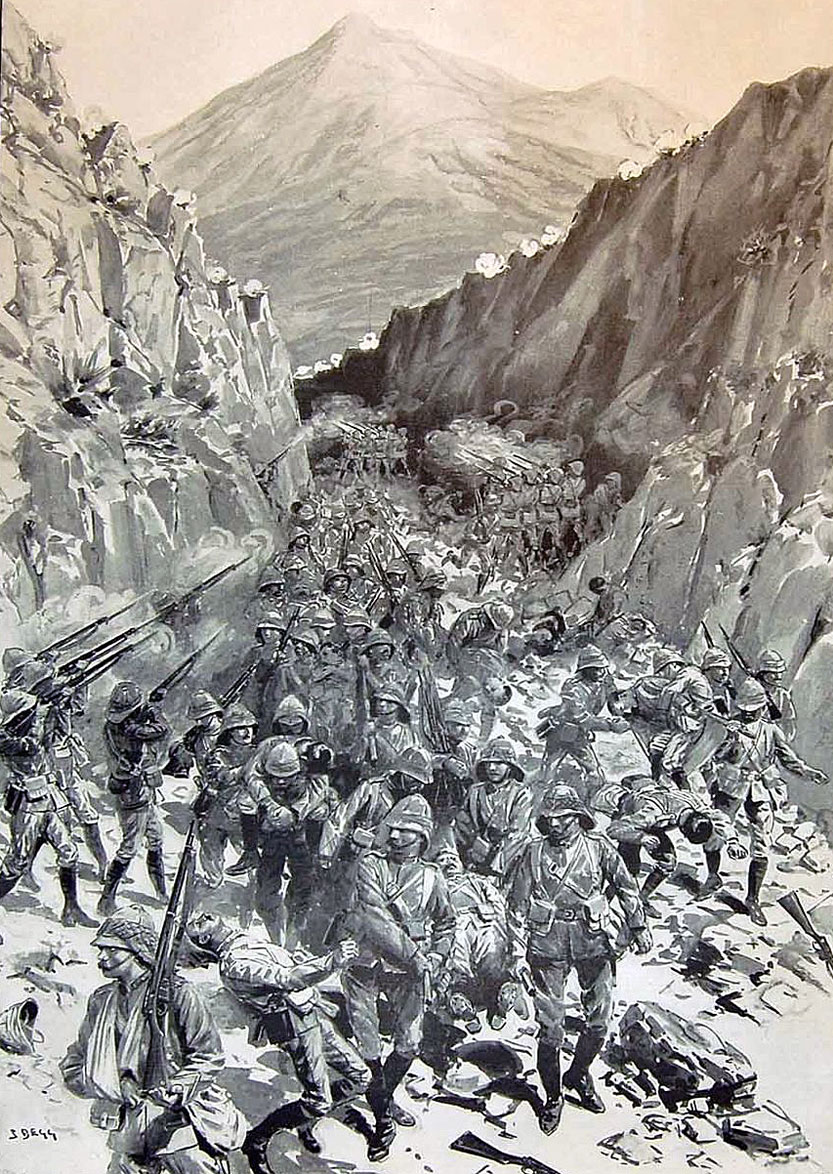
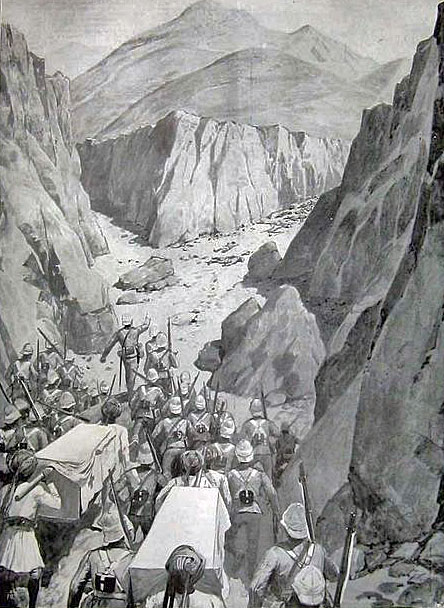
First Action at Dargai:
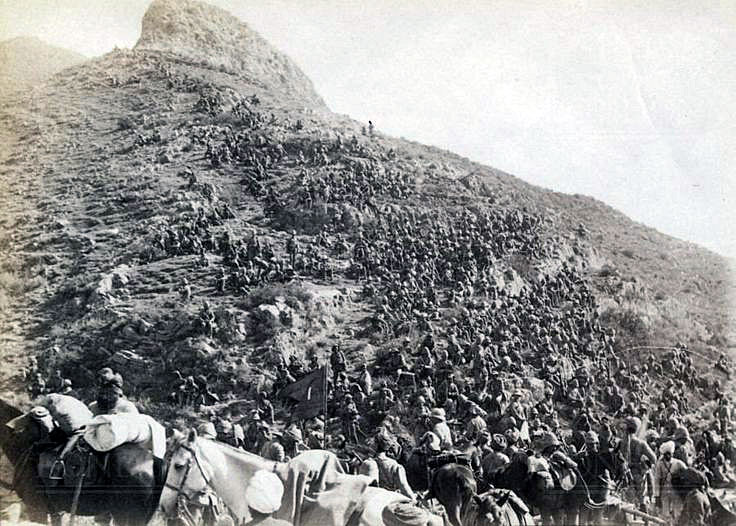
By 16th October 1897, the road from Shinawari over the Chagru Kotal towards Kharappa was sufficiently improved to take transport to the top of the Kotal (pass), making it necessary to dislodge the tribesmen from the village of Dargai and the ridges in the area, to enable the work to continue.
On 18th October 1897 Major General Sir Power Palmer, in command at Shinawari, marched his troops out to deliver the attack in two columns.
The first column, commanded by Brigadier General F.J. Kempster, comprised 1st Gordon Highlanders, 1st Dorsets, 1st/2nd Gurkhas, 15th Sikhs, No 4 Madras Sappers and Miners, No 8 Mountain Battery Royal Garrison Artillery Machine Gun Detachment of the 16th Lancers and Scouts from 5th Gurkhas.
The second column, commanded by Brigadier General R. Westmacott, comprised 2nd KOSB, 1st/3rd Gurkhas, No 5 Mountain Battery and a rocket troop Royal Artillery.
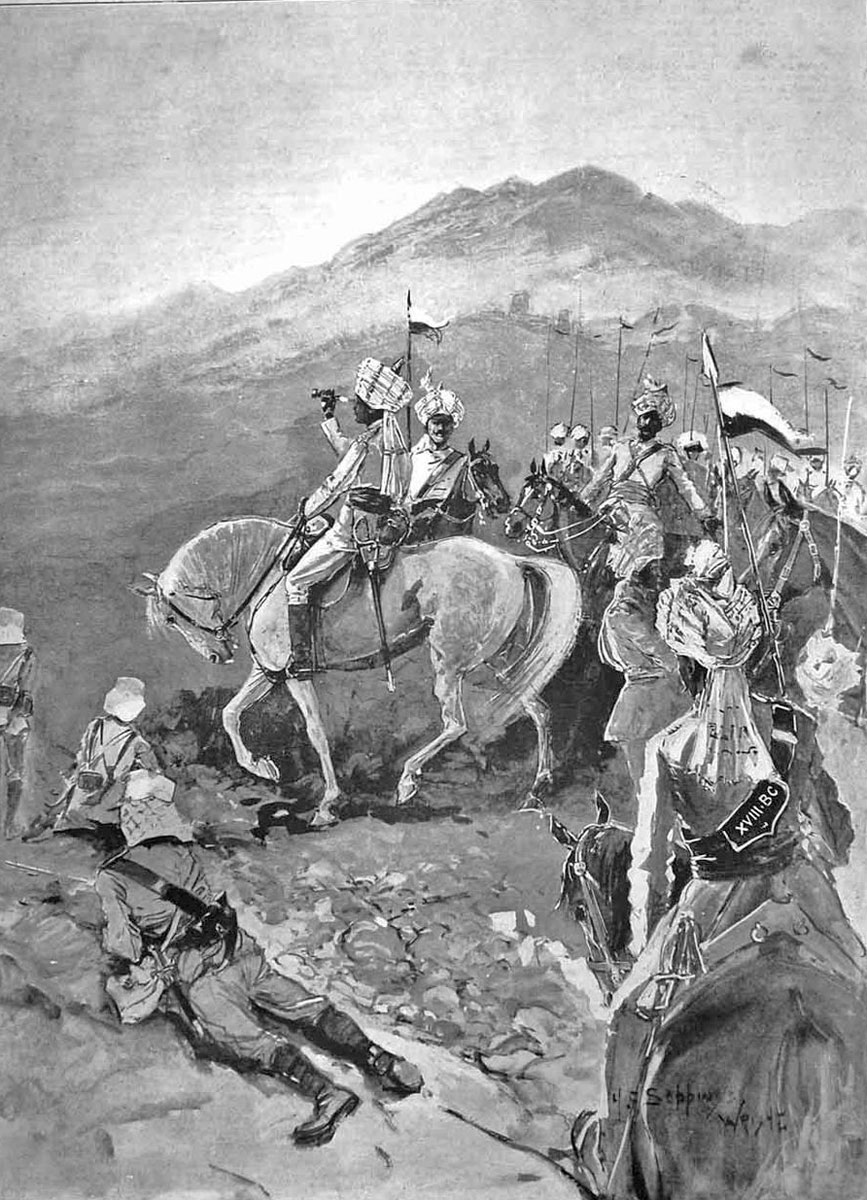
General Palmer accompanied the first column. General Lockhart watched the advance from the Samana Sukh, a neighbouring area of high ground.

The main column left the main camp at Shinawari at 4.30am. Its approach march was along a spur running north-west from Shinawari into ground that would bring the column behind the right of the tribal position around the village of Dargai.
The second column was tasked to march directly to the summit of the Chagru Kotal or pass and from there to launch its attack on Dargai. The second column left the Shinawari camp at 5am, reaching Chagru Kotal at 8.30am where it was joined by additional troops, 1st Northamptons and No 9 Mountain Battery RA, marching up from Fort Lockhart to the south-east.
Few tribesmen could be seen in the Dargai position and it was decided to launch an attack by the second column without waiting for the support of the first column.
At 9am the 3rd Gurkhas began the advance supported by the KOSB, with the Northamptons in reserve.
The mountain batteries remained on the Chagru Kotal, firing in support of the advance.
Increasing numbers of tribesmen began to appear and opened fire on the second column troops as they reached the feature called Mama Khan.
The troops advanced towards Dargai from Mama Khan, moving below the ridge for 900 yards, thereby avoiding the tribesmen’s fire. At the end of this advance, the troops were forced to move to the top of the ridge and into the tribesmen’s line of sight and fire.
A path climbed up the near sheer cliff to the plateau on which lay the village of Dargai.
The supporting troops opened a heavy fire on the tribesmen at the top of the cliff and in the surrounding positions while the 3rd Gurkhas advanced by alternate rushes into the dead ground at the base of the cliff.
From there, closely supported by the KOSB, the 3rd Gurkhas climbed the path and stormed the Dargai position.
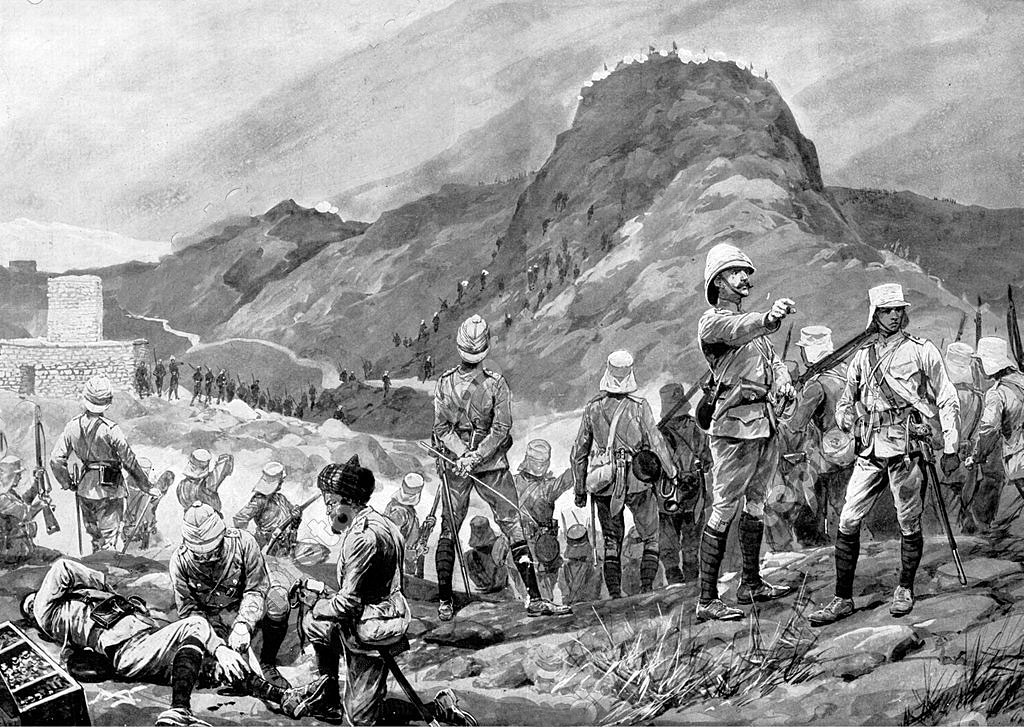
The tribesmen, now aware of the approach of the main column around their right flank, put up little resistance in Dargai, before making off towards the Khanki valley.
The second column occupied the Dargai position and the peak behind the village, Narik Sukh.
The tribesmen left 20 dead in the field but removed their wounded and probably some dead.
British casualties were 2 killed and 13 wounded.
While the second column was in action against the Dargai position the main column was advancing up the river valley to the left of Dargai.
After some five miles of marching the track deteriorated to such an extent that it was no longer feasible to continue with the mules carrying the supplies and in particular the guns of No 8 Mountain Battery.
All the mules were returned to the Shinawari Camp escorted by the Dorsets and 2 companies of Sikhs.
The main column continued its advance along the track, led by 1st/2nd Gurkhas and the 5th Gurkha scouts. The column turned east and began its encircling movement round behind the Dargai position.
At around 11am communication was established by heliograph with the second column.
At around midday the advanced guard reached the peak of Khand Talao, 2 ½ miles west of Dargai and there the column halted to permit the troops to close up.
From the peak the 1st/2nd Gurkhas opened fire on the tribesmen falling back from the Dargai position.
At 2.30pm the main column was sufficiently closed up to continues its advance, but by now considerable bodies of tribesmen had gathered along the heights to the north of the main column’s line of advance and harassed the rear-guard.
Some 4,000 Afridis could be seen advancing on Dargai from the Khanki Valley.
By 3.10pm the main column was arriving at Dargai and joining the second column as the second column began its withdrawal.
No 5 Mountain Battery gave covering fire from Chagru Kotal, while No 9 Mountain Battery moved to the top of the Samana Sukh, escorted by the Northamptons, to continue the covering fire for the withdrawal of the two columns.
A favoured tactic of the frontier tribes was to press hard on a withdrawing British force and this is what followed, giving the rear-guard of the two British columns a hard fight to extricate themselves from the Dargai position and fight their way back down the route taken by the second column in its advance that morning.
The rear-guard is reported as ‘showing so steady a front and were so well supported by the accurate fire of the mountain guns that the advance of the enemy was soon checked and the further retirement of the main column to Shinawari via the Chagru Kotal was unmolested’.
Major R.D. Jennings Bramly of the Gordon Highlanders was killed with two soldiers. 3 officers and 10 men were wounded.
The Second Attack on Dargai:
It was clearly a major miscalculation for the British force to capture Dargai and then withdraw from the position when it lay on the route to be taken once the invasion of the Tirah got underway two days later.
The immediate result of the British attack was to draw substantial numbers of Afridi tribesmen to Dargai.
These tribesmen would now have to be displaced and Dargai captured again, with the tribesmen fully aware of the likely plan for the British approach to the position.
It is not clear whether the British plan for the attack on the 18th October 1897 included consideration of maintaining a force in Dargai until the invasion proper began on 20th October.
The official Indian Government account of the campaign states that it would not have been possible to maintain the position due to the lack of a water supply or fire wood and that the troops had no supplies or equipment other than what they carried.
It could be thought that it required little insight to ensure that once the strong Dargai position had been taken relatively easily and with few casualties it should be held until the British force marched through.
The tribesmen were now occupying the Dargai position in strength. As Dargai overlooked the route for the transport column through to the Khanki River valley, considerable effort having been expended in improving the path for the transport animals, additional troops were made available to General Yeatman-Biggs; 3rd Sikhs, the Derbyshire Regiment and No 1 (Kohat) Mountain Battery.
Presumably addressing this snag, on 19th October 1897 General Yeatman-Biggs changed the force’s line of advance away from the Chagru defile, which would require a retaking of the Dargai position and orders were issued to this effect.
At midnight on 19th October and within hours of the commencement of the march, General Lockhart reversed this decision on the basis that once the troops emerged from the Chagru ravine the Afridis would retire from Dargai as their flank would be threatened.
Lockhart’s reasoning was undermined by the decision then taken that the troops should not advance beyond the Chagru Kotal until Dargai had been again taken from the tribesmen.
The political officer, Mr Donald, informed locals, who he knew would pass the information on to the tribesmen, that a substantial British force would repeat the flank march from the west. The information was passed on, causing a considerable number of tribesmen to be positioned to the west of Dargai, where they took no part in the defence to the actual attack on the village.
The British left Shinawari Camp to begin the invasion of the Tirah on 20th October 1897.
The British advanced guard marched out of Shinawari Camp at 4.30 am, comprising 3rd Gurkha scouts, 1st/2nd Gurkhas, 1st Dorsets, No 4 co Madras Sappers and Miners, Nos 8 & 5 Mountain Batteries, Maxim Det, 1st Gordons and 15th Sikhs.
The main body followed, comprising No 1 Mountain Battery, 2nd Derbys, 3rd Sikhs, 21st Madras Pioneers, sappers and a rocket troop.
The baggage train followed the main body.
The rear guard was found by the KOSB and 3rd Gurkhas.
The length of the column was such that the rear guard did not clear Shinawari camp before nightfall.
The advanced guard reached the Chagru Kotal at around 8am. At about the same time No 9 Mountain Battery, escorted by the Northamptons, arrived in position on the Samana Sukh.
The tribesmen could be seen to be in considerable strength around Dargai and on Narikh Sukh, behind the village.
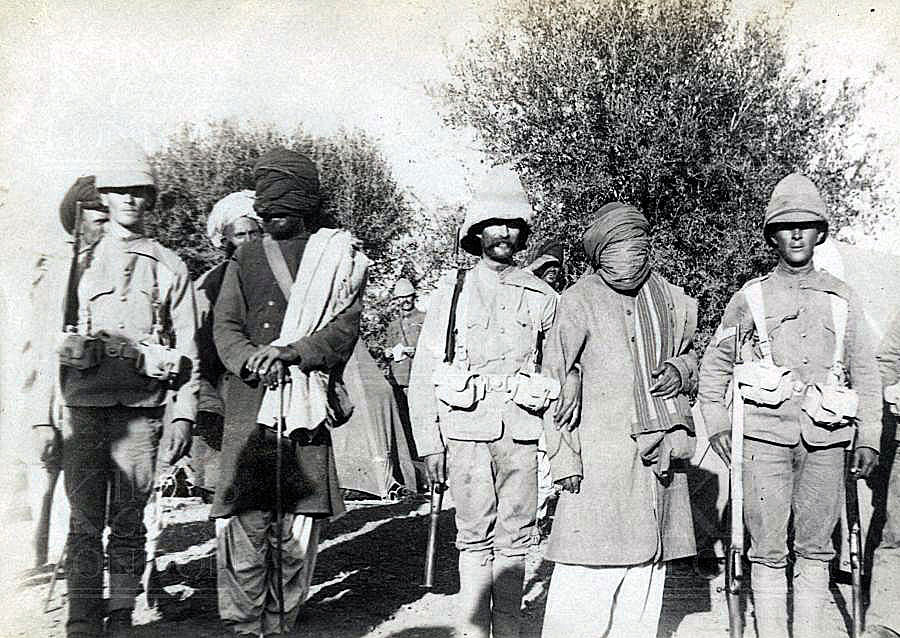
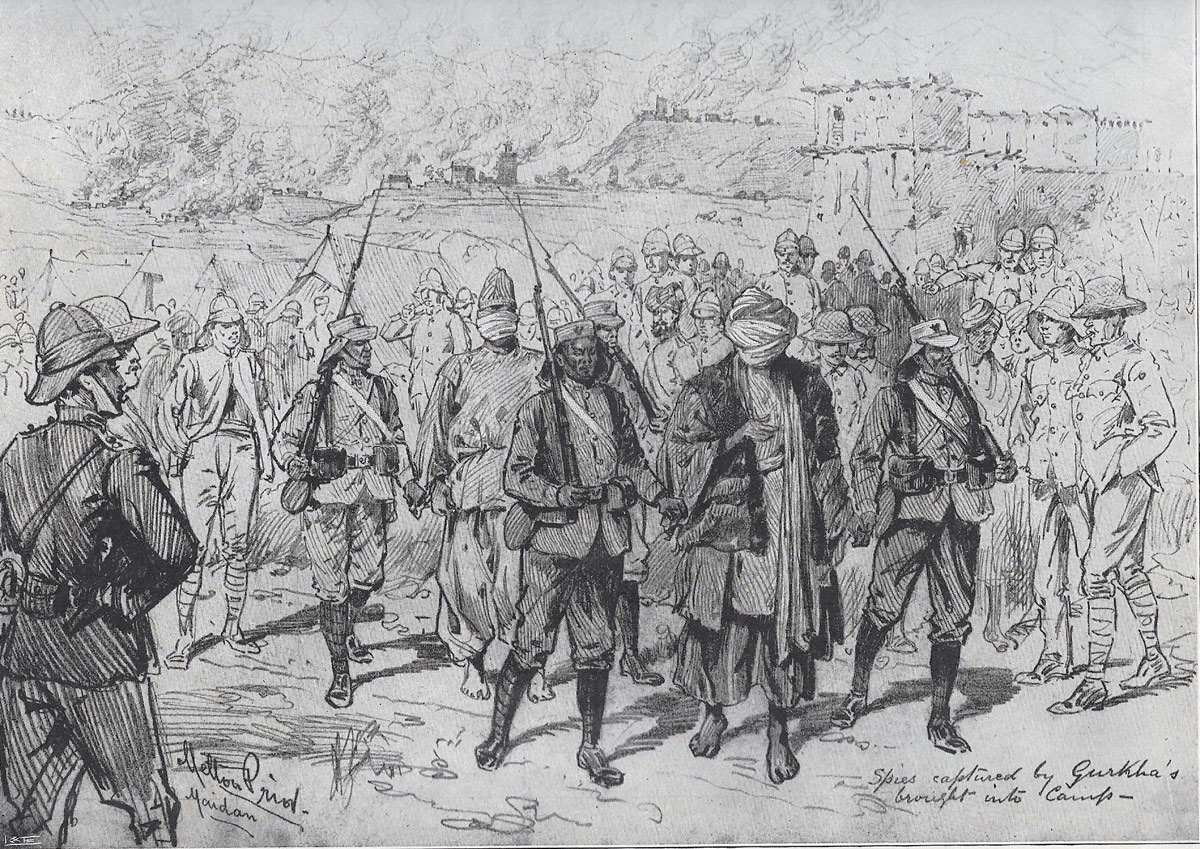
29 standards were counted among the tribesmen and a ‘reliable spy’ brought in the information that among the tribesmen were Ali Khel, Mamuzai and Alisherzai Oarakzais, Malikdin Khel, Kambar Khel, Kamrai, Zakha Khel, Sipah and Kuki Khel Afridis.
Later information gave the gathering as amounting to some 12,000 tribesmen, over half being Afridis.
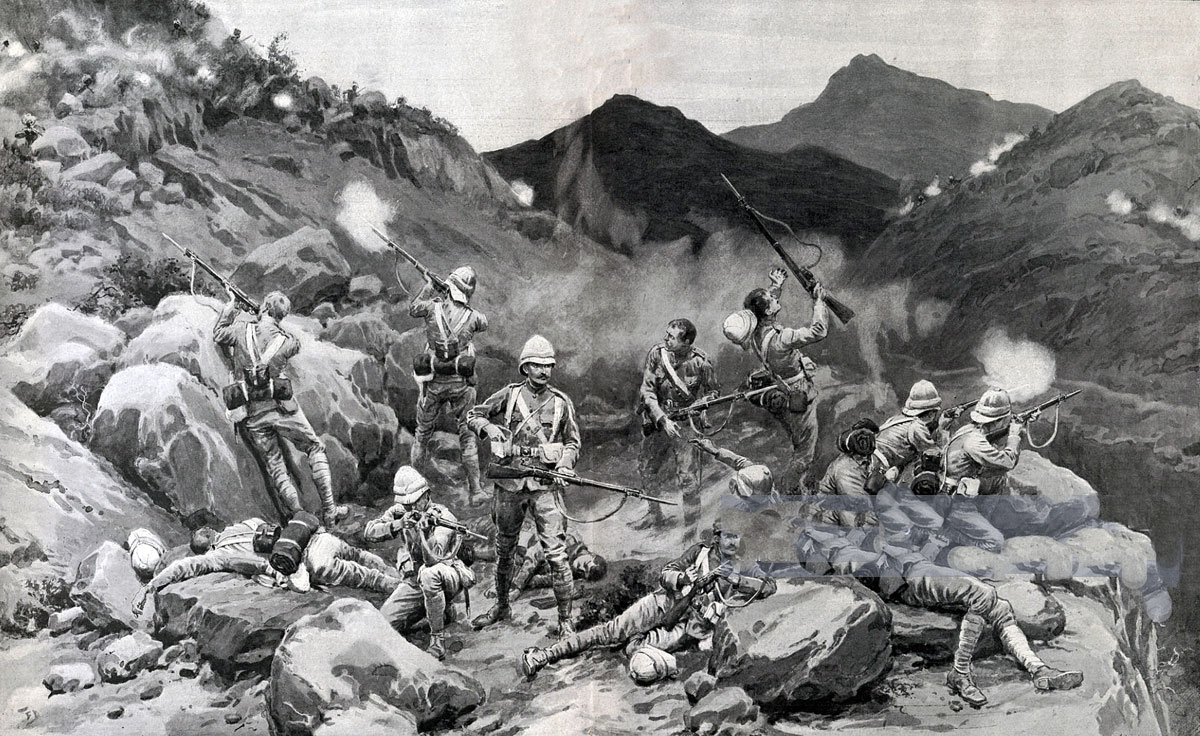
At 9am, General Yeatman-Biggs came up with the main body and ordered Brigadier General Kempster to clear the Dargai ridge.
The attacking force moved off at 9.30am, following the same route as the assault on 18th October 1897, comprising 1st/2nd Gurkhas and 3rd Gurkha scouts in the first line with the Dorsets in support and Derbys in reserve.
The Gordons and the maxim detachment provided fire support from the Mama Khan ridge, 1,100 yards to the rear, with the Nos 1, 5 and 8 Mountain Batteries laying down artillery fire from the northern side of Chagru Kotal at 1,800 yards and No 9 Mountain Battery firing from Samana Sukh, 3,300 yards distant.
At 11.45am, the Gurkha scouts, led by Lieutenant Tillard, with men from 1st/2nd Gurkhas rushed towards the base of the cliff beneath Dargai.
The tribesmen opened a heavy and accurate fire on these men who were followed by a second party of 1st/2nd Gurkhas led by Major Judge.
Both parties suffered heavily from the tribesmen’s fire.
A third party was led forward by Captain Robinson, who was mortally wounded.
The Gurkhas now began to take casualties from a flanking fire from cliffs to the west as well as the fire from in front and above, leaving them pinned down.
Gurkha casualties stood at 3 officers and over 50 men lost.
At 2.15pm the Dorsets advanced to relieve the Gurkhas.
A small party dashed across the fire-swept zone, but virtually every man was hit, including the leading officer, Captain Arnold.
Another party followed, but every man was hit except the officer, Lieutenant Hewitt.
Further small parties from the Dorsets and Derbys continued to dash across the exposed area, but suffered heavy casualties.
During the battle, parties of tribesmen came up from the Khanki Valley and opened fire on the troops on the Samana Sukh, but were driven off by the 36th Sikhs.
At 2.20pm, Lieutenant Colonel Piercy of the Dorsets heliographed to General Yeatman-Biggs that such was the fire they were under, no further advance was possible without reinforcements.
In response to this message the Gordons and 3rd Sikhs were ordered forward, with a wing of the 21st Madras Pioneers taking over the position on the Mama Khan, and additional troops taking on the protection of the mountain batteries.
Arrangements were made for the guns to lay down a concentrated fire on the tribesmen’s positions for 3 minutes on a given signal, to be followed by an assault by the Gordons on Dargai.

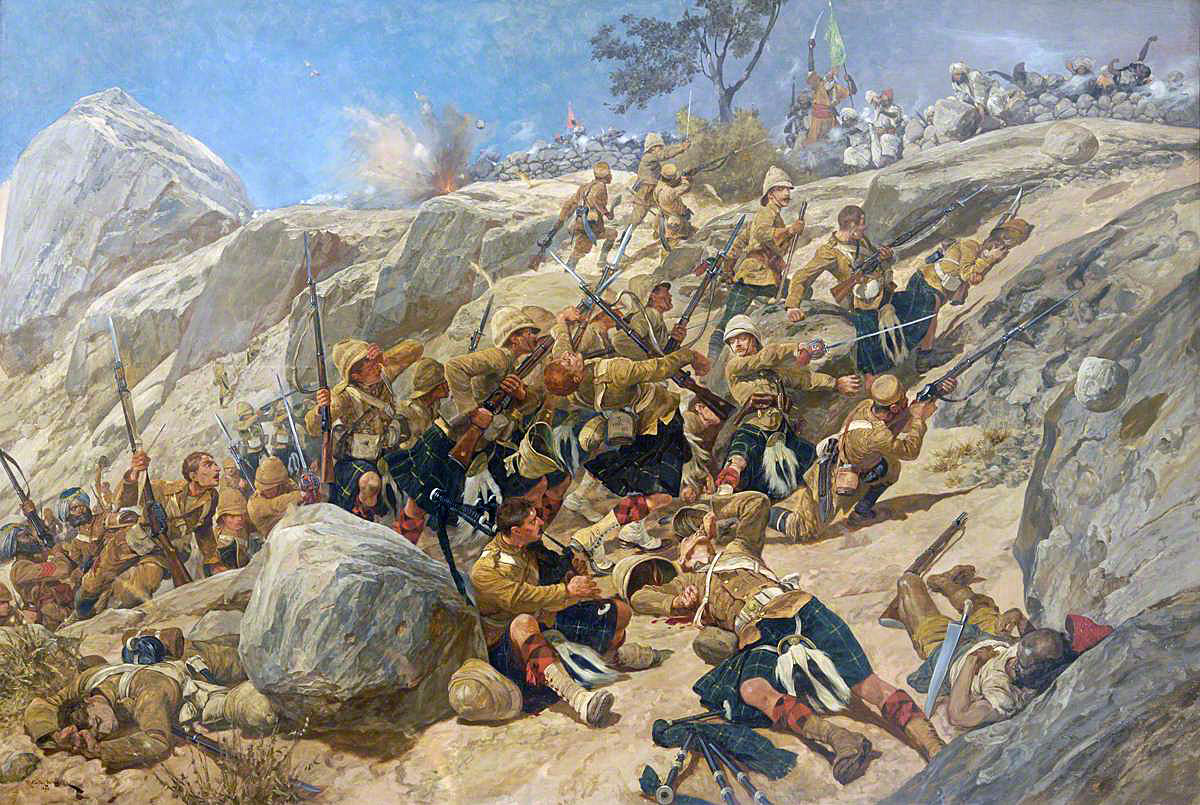
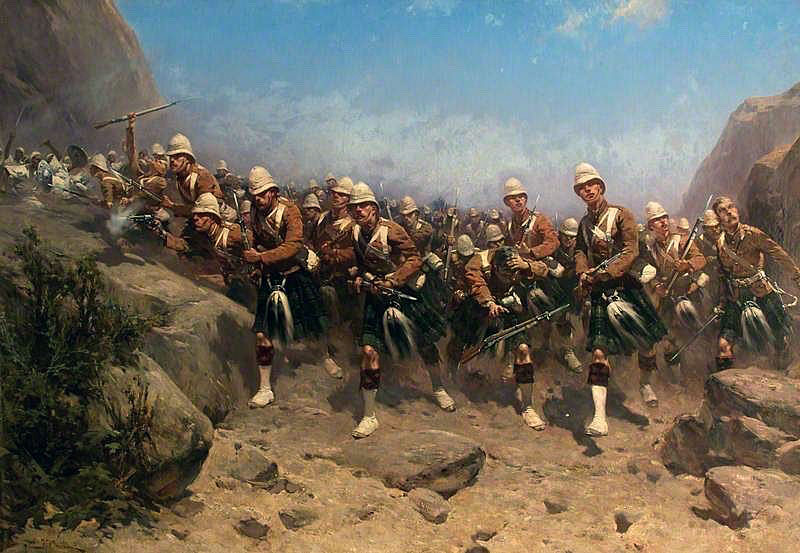
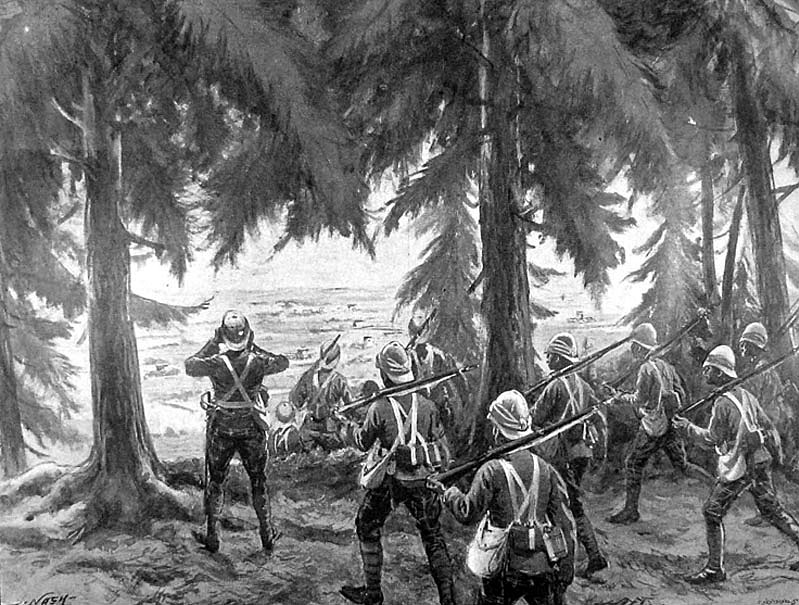
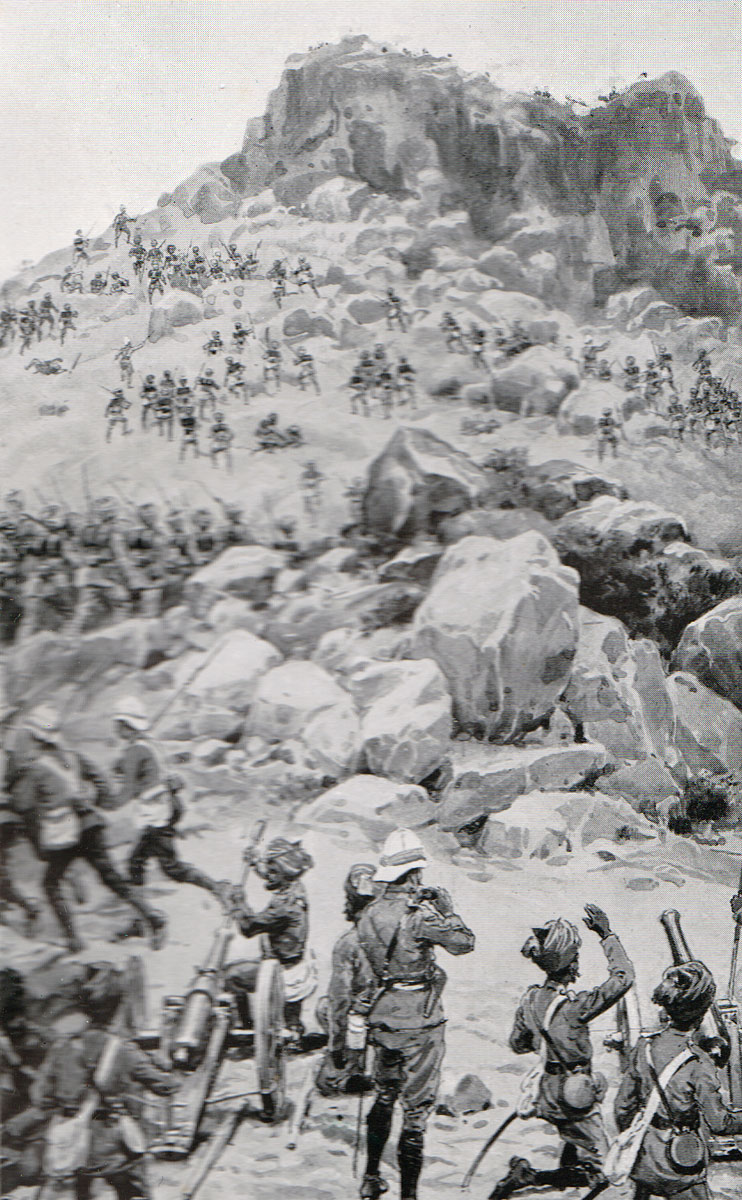
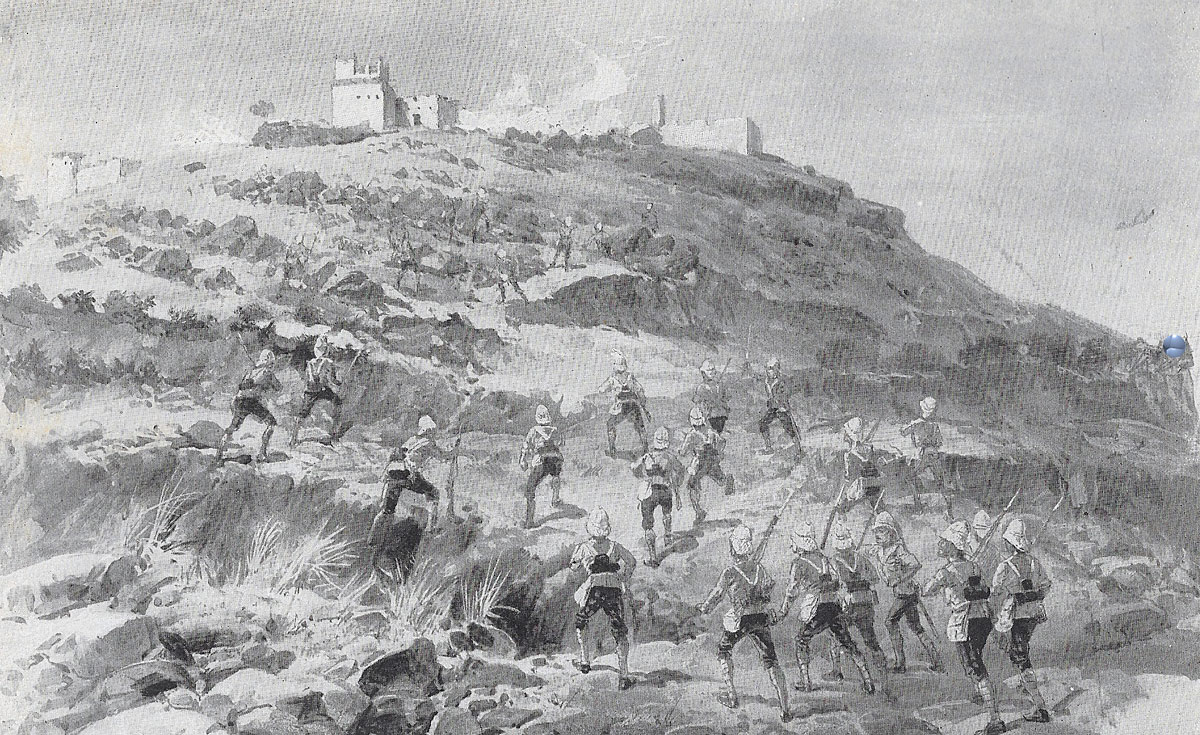
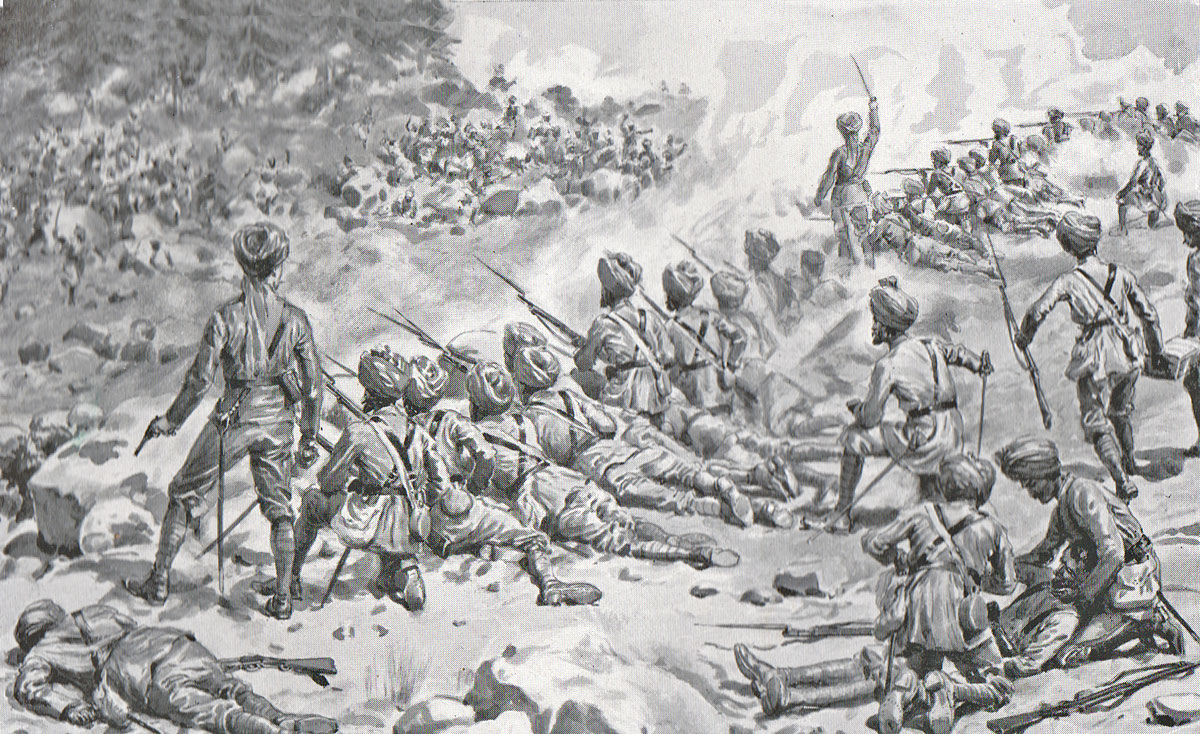
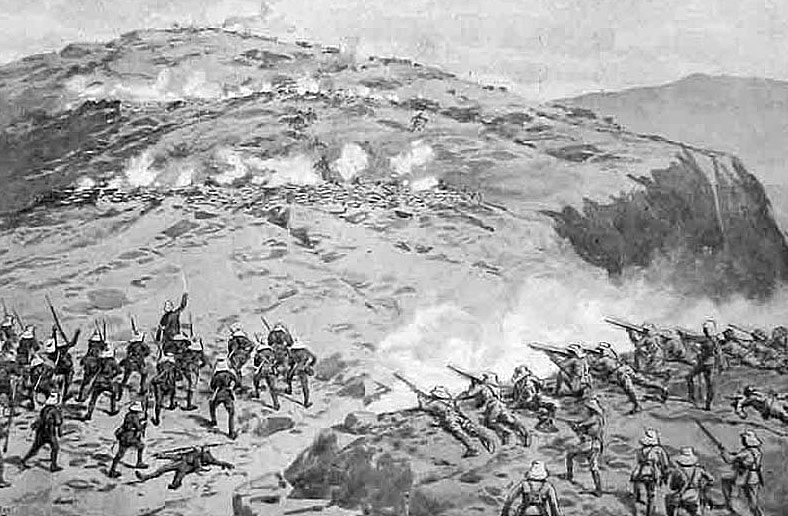
At 2.45pm, following the artillery bombardment, Lieutenant Colonel Mathias led his Gordon Highlanders, with their pipers playing, in an attack across the exposed area at the base of the cliff and up the steep slope into Dargai.
The tribesmen did not await the final assault but withdrew towards the Khanki Valley, pursued by volleys from the troops.
For the assault on Dargai, Victoria Crosses were awarded to Lieutenant Colonel Mathias, Lance-Corporal Milne leading the Gordon pipers, Piper Findlater and Private Lawson of the Gordons, Lieutenant Pennell and Private Vickery of the Derbyshire Regiment.
British casualties amounted to 4 officers and 34 men killed and 14 officers and 147 men wounded.
No further advance towards Kharappa was made on 20th.
Overnight, the Dargai heights were occupied by the Dorsets, Derbys and 3rd Sikhs. The ridge was held by the Gordons and the Samana Sukh was held by the 21st Madras Pioneers.
The rest of the force encamped around the Chagru Kotal.
The Northamptons, 36th Sikhs and No 9 Mountain Battery returned to the Samana Forts.
March to Kharappa:
The advance of the British force was resumed on 21st October 1897.
The advanced guard reached the Khanki River, where the tribesmen fired a few shots, otherwise offering no resistance.
General Lockhart brought up a contingent, joining the rest of the force at Kharappa, on the north bank of the Khanki River.
Due to the difficulty of the mountain tracks much of the baggage did not finally come up until midday on 23rd October 1897.
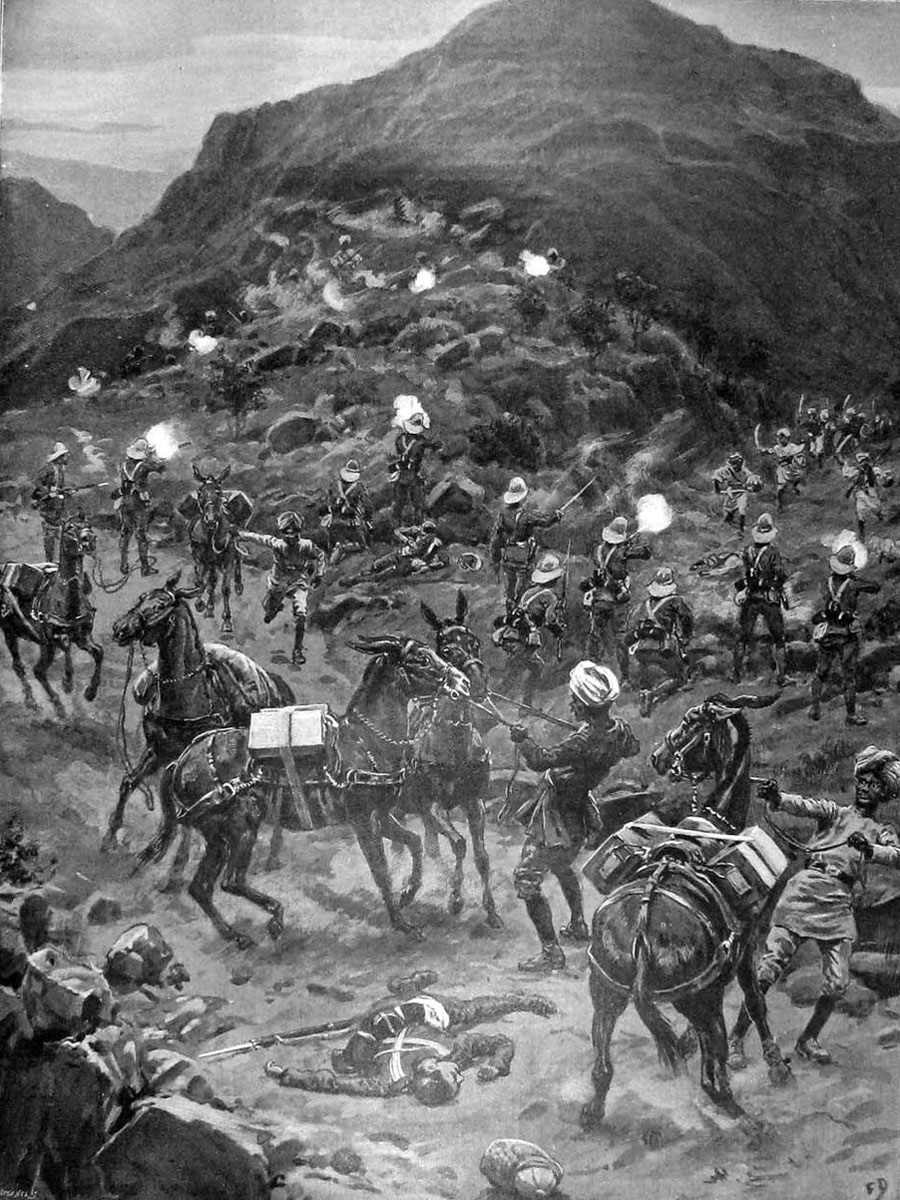
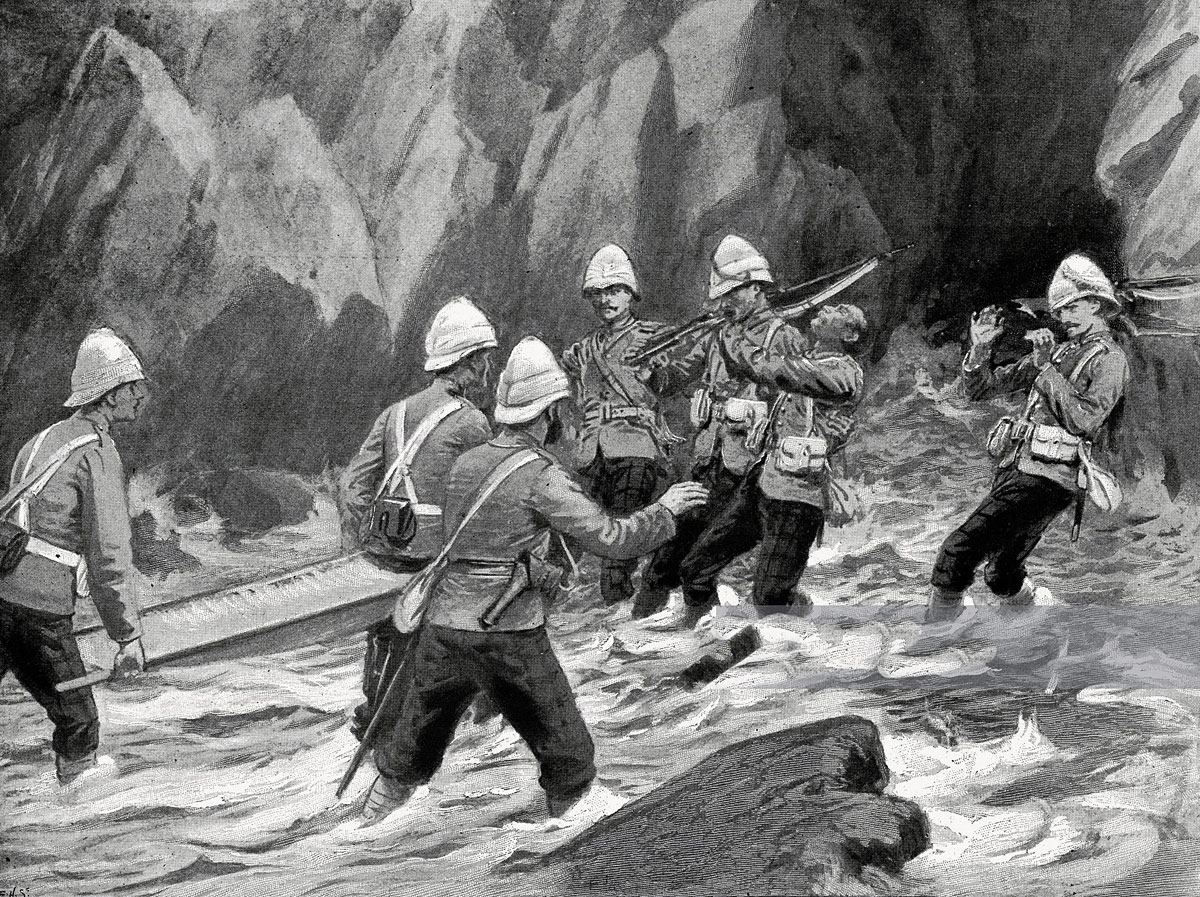
On 25th October 1897 a foraging party comprising half-battalions from the Devons, the Derbys and 2nd/1st Gurkhas with No 1 Mountain Battery marched some 3 ½ miles up the Khanki River. As they returned, the party was attacked by tribesmen who followed the troops up closely, a favoured tactic on the frontier.
The foraging party reached the camp at 4.30pm where the pursuit turned into a full raid, the tribesmen firing into the camp, causing casualties among the troops and the transport animals.
British casualties were 2 officers wounded, 1 soldier killed and 36 wounded.
As a precaution against further incidents of this type, the next morning working parties built sangars on the surrounding heights, the effect of which was to keep marauding tribesmen away from the camp.
March to Ghandaki:
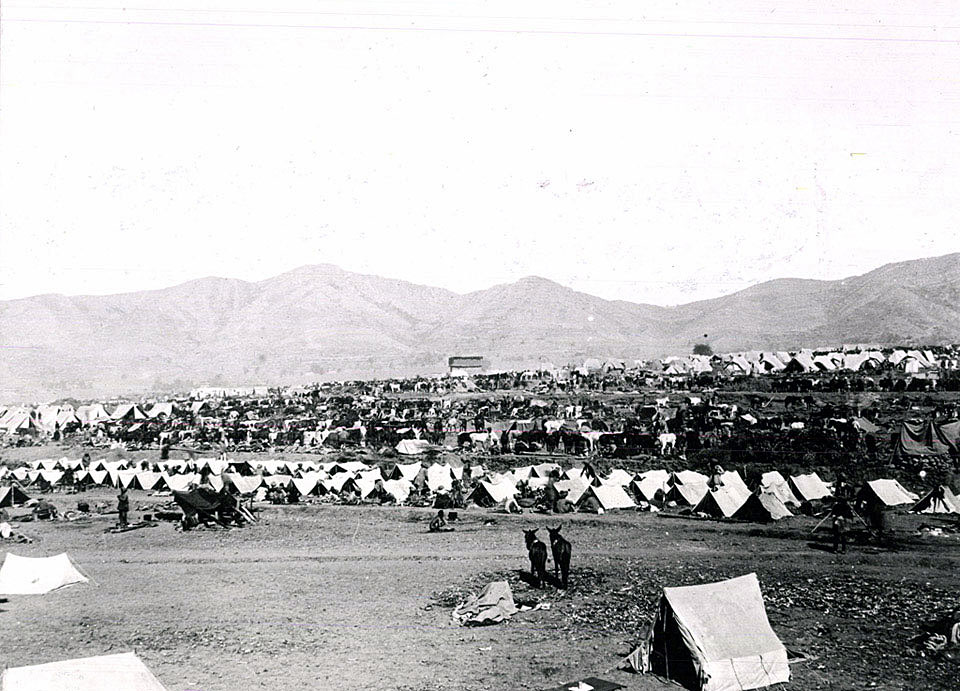
On 28th October 1897, the force, now numbering 17,600 troops with the same number of followers, marched out to Ghandaki, a distance of only a couple of miles, from where it would storm the Sampagha Pass.
In the afternoon, Brigadier General Hart, having taken over the 1st Brigade of the 1st Division on the injury of General Hamilton, advanced with a strong reconnaissance party to the base of the Sampagha Pass.
Large numbers of tribesmen were found to be holding the lower reaches of the pass and Hart’s reconnaissance party was fired on as it withdrew to camp.
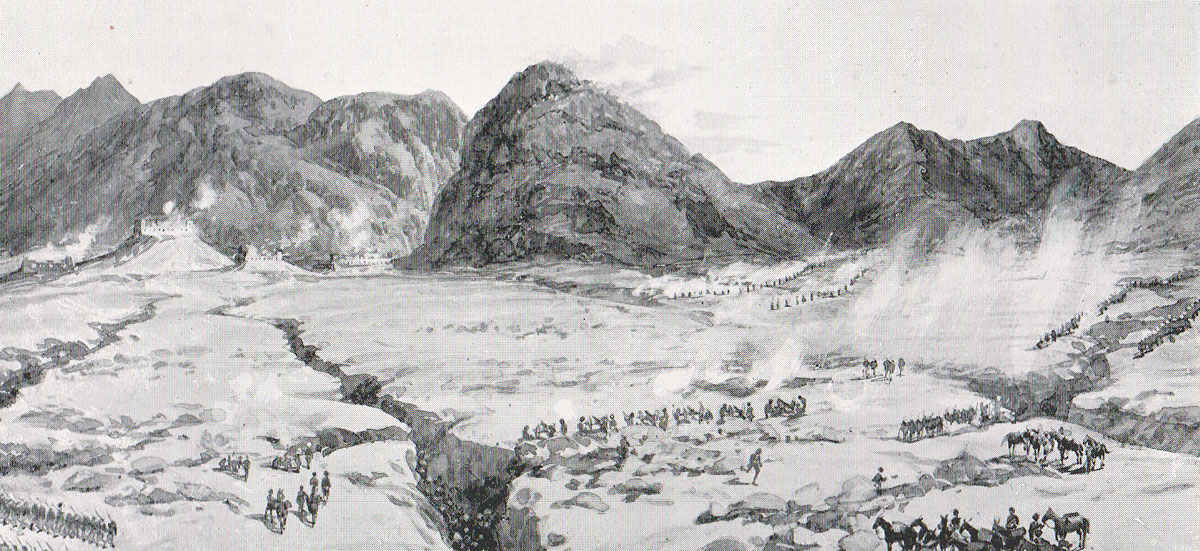
Storming of the Sampagha Pass:
On 29th October 1897 the attack on the Sampagha Pass began at 5am, the 1st Division with all the artillery leaving camp.
The Devons marched out to the right to take the village of Nazeno and the neighbouring spurs. The Derbys escorted the artillery to take an isolated hill at the base of the Sampagha Pass and the 2nd/1st Gurkhas advanced on the Kandi-Mishti villages on the left.
With daylight it could be seen that the tribesmen were in greater force to the west of the pass than in the pass itself, having decided the British attack would be in that direction, the advance of the 1st/2nd Gurkhas against them apparently confirming that mistaken view.
In fact, the British command considered the sides of the pass to be too steep to be assailed.
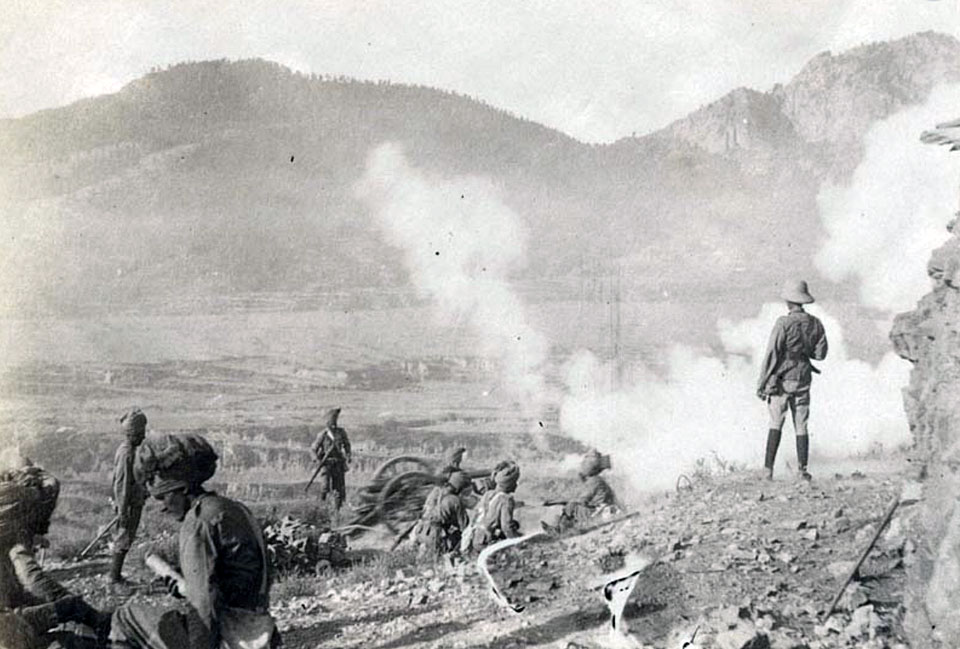
At 7.30am the 1st Division artillery came into action, firing straight up the valley at the tribesmen’s advanced sangars positioned on an isolated hill about a mile into the valley.
The main body of troops advanced up the centre of the pass and took this isolated hill, from which the other batteries shelled the summit of the pass, until the position was masked by the advancing British infantry.

The Queen’s regiment took the summit of the pass, but the tribesmen continued to occupy sangars to the north-west and north-east, from which they fired on the troops climbing the main path through the pass.
The 5th and 9th Mountain Batteries advanced to the top of the pass and put down a supporting fire while British infantry regiments stormed these sangars; the Queen’s and 3rd Sikhs on the right and the KOSB and 36th Sikhs on the left.
By 11.30am, all tribal resistance in the Sampagha Pass was overcome.
British casualties in the day’s action were 1 officer (Captain DeButts, commanding No5 Mountain Battery) killed, 1 officer wounded: 1 soldier killed and 29 wounded.
Advance to the Arhanga Pass:
After the storming of the Sampagha Pass, the troops rested before the advance was resumed.
With the resumption of the advance, the 3rd Brigade led, with the 15th Sikhs as advanced guard and companies from the Yorkshire Regiment and the 3rd Sikhs occupying the heights on each side of the top of the pass.
The whole force advanced some two miles into the Mastura Valley where a new bivouac was formed.
The 1st Brigade under General Hart remained at the southern end of the pass until all the baggage had gone through.
The steepness of the Sampagha Pass hindered the movement of the baggage train causing the force to remain halted in the Mastura Valley camp while the baggage came up.

The time was well spent, gathering in forage from the valley and inspecting the villages, largely destroyed by the tribesmen, and mapping the area.
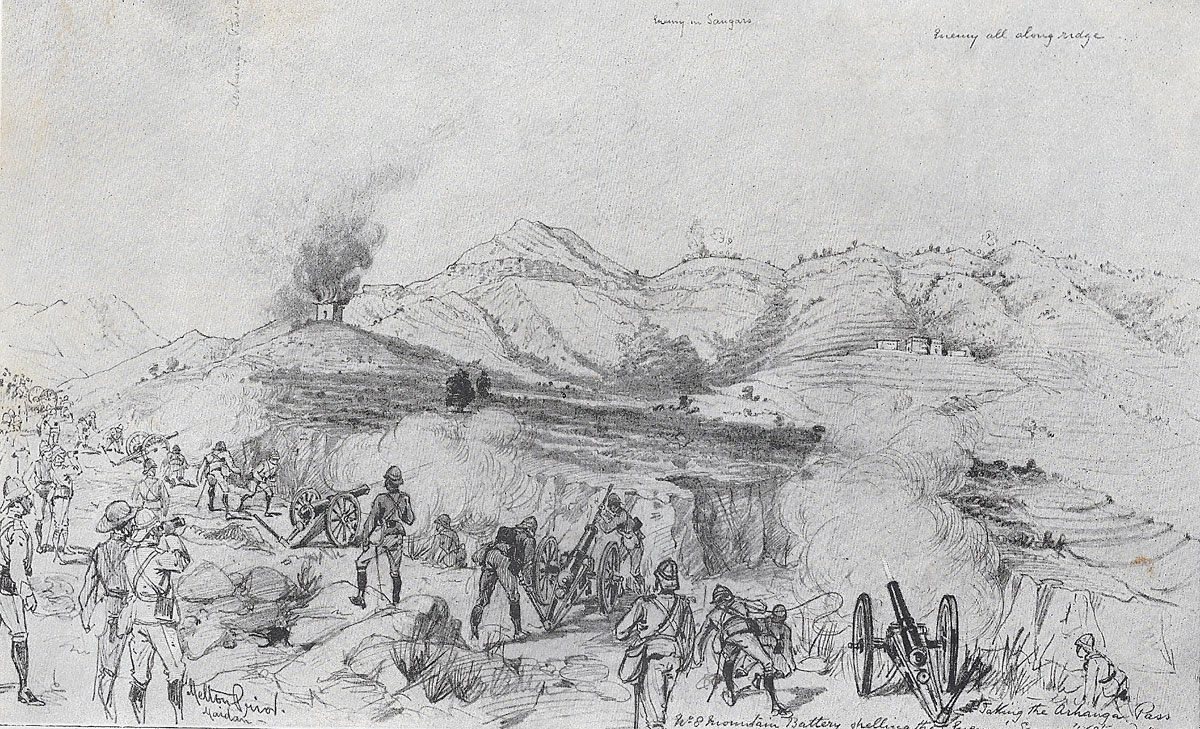
In the meantime, General Lockhart reconnoitred the Arhanga Pass with the 3rd Brigade, five miles further on, finding the pass lightly held by the tribesmen.
On 31st October 1897 the British force resumed the advance to the Arhanga Pass, the 4th Brigade under General Westmacott leaving to make the frontal attack on the pass, with Gurkha scouts, the KOSB, 1st/3rd Gurkhas, the Northamptons, 36th Sikhs and a company of Sappers and Miners.
The KOSB took the village of Unai at the foot of the pass, which was occupied by the 2nd Division artillery and a fire opened on the main tribal position at the summit of the pass at a range of 1,350 yards.
Lockhart reported that the path up the pass was the ‘steepest and worst yet encountered’.
The artillery of the 2nd Division was reinforced with the three batteries of the 1st Division and under cover of a bombardment by all these guns, the 4th Brigade moved up the pass to the attack, while the 2nd Brigade climbed a ravine on the east side of the pass and the 3rd Brigade threatened the west side.
There was little opposition and the pass was in British hands by 10am.
Casualties were 1 officer and 1 soldier wounded and a driver from No 8 Mountain Battery killed.
The hills on the far side of the pass were occupied and piqueted and the advance resumed.
The advanced guard reached Maidan at 3pm where the next camp was established.
In spite of efforts to hurry the baggage, much of it failed to reach camp by nightfall and were subject to raids in which drivers were killed and the tribesmen captured rifle ammunition.
The occupation of Maidan and Bagh:
On 1st November 1897 an advanced guard of the KOSB, 1st/3rd Gurkhas and No 8 Mountain Battery marched a further 3 miles to Bagh, the political centre of the Tirah, with the Mosque of Mullah Said Akbar, a prominent leader in the tribal insurgency.
A further skirmish took place against tribesmen coming down from the hills to collect supplies.
The Mosque of Mullah Said Akbar was said to have been the place where the tribal uprising was decreed and was an important symbol for both sides.
The official history of the Tirah, contained in Volume 2 of the government record of military ‘Frontier and Overseas Expeditions from India’ reports of the Mosque that being a place of worship it was not damaged, but a grove of trees surrounding it was ‘ringed’ by cutting the bark, ensuring the death of the trees.
The caption for the illustration from the contemporary Graphic illustrated newspaper (see above) states that the mosque was ‘blown up by General Hart’s troops’. Major A.C. Yate in his biography of Lieutenant Colonel John Haughton published in 1900 and himself an Indian Army officer expressed considerable outrage at the ‘ringing of the trees’ by Gurkha and other Hindu troops, considering it to be a religious desecration, but made no mention of the Mosque building being physically damaged.
On the other hand, the Mosque was clearly looted as the pulpit and other artefacts were photographed in the British/Indian camp.
From Maidan, the British political officers sent messages out to the various tribes summoning the tribal jirgas to negotiate terms of surrender.
The messages conveyed the threat that in the absence of submission the tribes faced the destruction of their villages and crops.
On 12th November 1897 the Orakzai tribes, which had shown little fight following the battle at Dargai, came into the Maidan camp and accepted the British peace terms, with substantial fines to be settled in money and firearms. The payments agreed were made by 20th November 1897.
Other than keeping a watchful eye on them, the British discounted the Orakzais as a further threat in the campaign.
Matters were less easy with the Afridis. Many of the Afridi clans negotiated a settlement reluctantly and after a considerable period of bargaining.
The Zakha Khels remained irreconcilably hostile to the British and prevailed on the smaller Aka Khel clan also to continue the fight against the British.
The line of communication for the British force stretched 100 miles from Kushalgarh to Maidan. During the period of negotiations, the tribes launched almost daily attacks on the supply columns coming up to Maidan, although these attacks were confined to the section of the route north of the River Mastura in the proximity of Maidan.
Two officers were killed, one wounded and several drivers and transport animals were killed and injured.

The attack on Saran Sar:
From the Maidan camp the British could see the tribesmen were using a track leading to the mountain of Saran Sar, at the eastern end of the Maidan valley, to pass into the next valley and down to the Bara River, a significant area of Afridi Zhaka Khel population.
The mountain of Saran Sar rises to some 8,000 feet.
The track across the Maidan to Saran Sar lay along a nullah or river bed, which at this time of year was dry. Along the length of the nullah subsidiary stream beds fed into it. In places the sides of the nullah rose to 70 to 100 feet.
At the base of Saran Sar, the nullah curled around the northern side of a conical hill and petered out.
From the nullah, the track continued up the mountainside to near the top of Saran Sar, where it ran around the southern side of the final sheer cliff leading to the mountain peak and descended on the far side of the mountain into the Bara valley.
The distance from the British camp to Saran Sar was only 3 miles but the route was difficult, with numbers of hills on which stood the abandoned homes of the tribesmen, many of them fortified towers, past which the subsidiary nullahs worked their way down to the main nullah in the bottom of the valley.
Progress through the valley involved either marching along the bottom of the main nullah, or moving across the hillside, with frequent crossings of the subsidiary nullahs.
In the face of the Zakha Khel intransigence, on 9th November 1897, a reconnaissance was mounted to Saran Sar, to survey the area prior to an advance into the Bara valley.
The reconnaissance force, commanded by General Westmacott, comprised 1st Dorsets, 1st Northamptons, 15th Sikh Infantry, 36th Sikh Infantry, Nos 5 and 8 Mountain Gun Batteries and No 4 Co Madras Sappers and Miners.
This force marched out of Maidan Camp at 7am on 9th November1897 heading east for the Saran Sar Mountain.
Within two miles of camp the British force encountered opposition from the tribesmen and dispositions were made for the assault on Saran Sar.
The Dorsets were directed to advance on the left flank, up a spur to the north of Saran Sar Mountain, while the Northamptons and Sappers advanced up Saran Sar, supported by the 36th Sikhs on the right.
The gun batteries marched to the top of the conical hill at the bottom of the mountain, escorted by the 15th Sikhs.
Tribesmen, occupying well-built sangars at the end of the nullah, opened rifle-fire on the Northamptons as they debouched from the nullah and began to climb the mountain.
General Westmacott became concerned with the lack of progress of the Dorsets, whose role was to cover the left flank of the Northamptons as they climbed and occupied Saran Sar.
The general despatched several members of his staff to find the Dorsets and urge them up the mountainside.
It emerged later that the Dorsets had become lost in the difficult country.
Fire from the mountain batteries on the conical hill forced the tribesmen to abandon the sangars and withdraw up the mountainside, enabling the Northamptons to continue the climb.
A thousand feet further up, the Northamptons reached a knoll on which a single tree stood. They here came under rifle-fire again.
The Northamptons pushed on up the steep mountainside and reached the base of the final ridge, where five of their companies circled around to the left and onto the peak, while the other three companies followed the track around the base of the final ridge to the right, emerging onto the far side of the mountain, where the Bara valley opened in front of them.
Throughout this advance the mountain battery guns on the conical hill fired in support of the Northamptons.
The top of Saran Sar was covered with the remains of an extensive campsite where the tribesmen were living. It was clear that the tribesmen had abandoned the camp on the approach of the British reconnaissance force.
Westmacott was considerably concerned at the failure of the Dorsets to appear on the Northampton’s left flank, leaving unoccupied an area of thick woods near the top of the mountain, from which the tribesmen could be heard calling to each other.
It was notorious that the tribes on the North-West Frontier awaited the point at which punitive forces began their withdrawal to camp, particularly down a difficult mountainside, to launch their most aggressive and persistent attacks, harrying the troops downhill, sniping and following them up closely so that parties that became isolated could be overwhelmed before the main force was aware of their difficulty. The attacks became additionally dangerous if the British force was unable to complete its retreat in daylight.
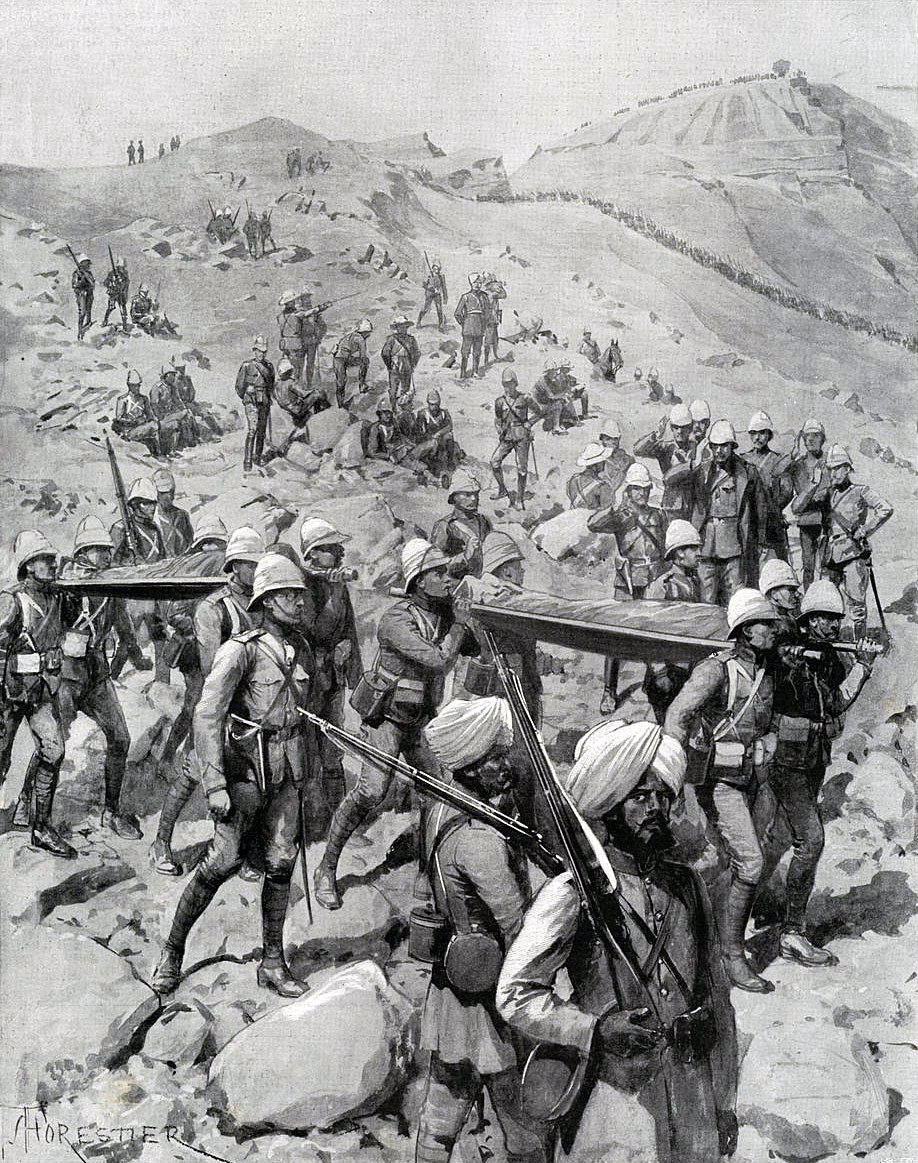
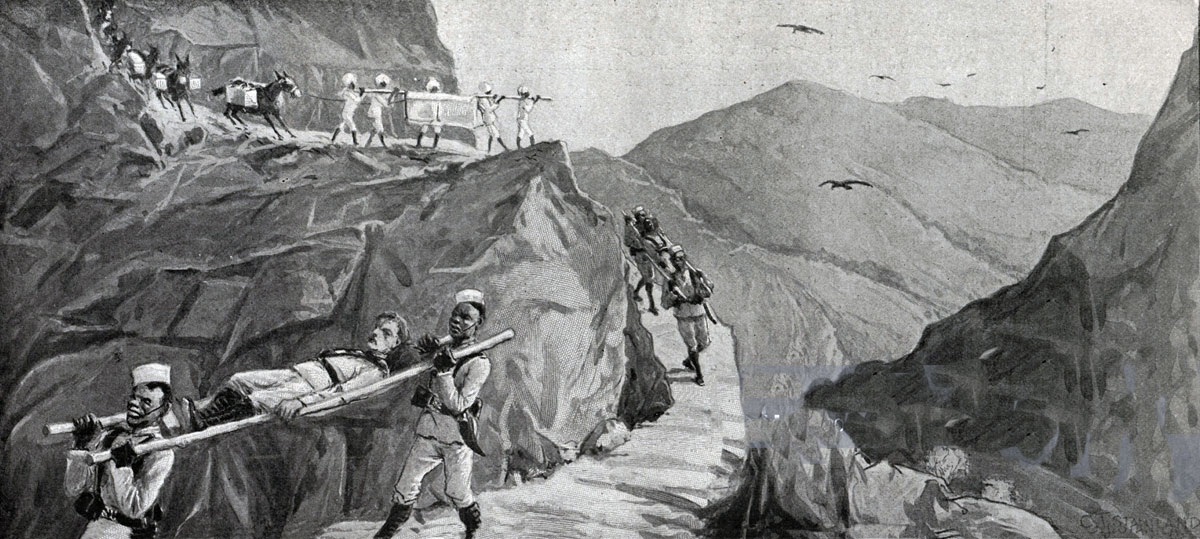
Soldiers wounded in these attacks had to be rescued, to save them from mutilation and death, often involving a halt and a counter-attack. Each wounded man took several soldiers to carry him, creating a vulnerable bunching, removing the rescuers from the firing line and slowing the retirement.
Each wounded man could take up to five soldiers out of the firing line, depending on the nature of the wound suffered.
These were the occasions when inexperienced troops were particularly vulnerable and several of the English county regiments fell into this category: officers had little idea of how to fight in this unforgiving country and the soldiers easily became disorientated and demoralised.
There seems to have been no formal arrangements for training British regiments due for service on the North-West Frontier, such training taking place through the initiative of the senior ranks of the battalions concerned, if at all.
The Indian Army regiments, being permanently based in the country and with many of them regularly taking part in such operations, did not have the same handicap.
By 12.15pm, General Westmacott considered that sufficient surveying work had been conducted and it was time for his force to withdraw from Saran Sar to the camp in the Maidan.
It was an essential precaution for a reconnaissance of this sort on the North-West Frontier to leave ample time to return to camp before darkness fell.
The 36th Sikhs began the withdrawal at 12.30pm, reaching the first cover point, the knoll with the solitary tree.
Information then reached Westmacott that General Lockhart was coming up to the top of Saran Sar to conduct a personal reconnaissance, causing the withdrawal to be halted, it being necessary to provide cover for the general’s mounted party.
Lockhart spent time on the summit before riding back down the mountain with his staff, enabling the withdrawal to resume at around 2pm.
The three companies of Northamptons on the track withdrew down the mountain at the double, joining the 36th Sikhs at the solitary tree.
Once these three companies were clear, the five companies of Northamptons on the summit were directed to withdraw.
Of these five companies, G Company was nearest to the wooded slope that should have been occupied by the absent Dorsets.
The tribesmen opened a sudden fire on G Company, inflicting casualties and thereby placing them in the situation where withdrawal became so difficult, even for experienced frontier troops, which the Northamptons most definitely were not.
A Company attempted to provide covering fire but could not see the tribesmen in the woods.
It was clear that the Northampton companies on the peak were in considerable difficulties, unable to retreat with their casualties.
Westmacott sent the 36th Sikhs back up the hill and the experienced Sikh Regiment brought the Northampton companies to the bottom of the mountain, albeit under a continuing and damaging rifle-fire from the tribesmen.
At this stage, the Northamptons were encumbered with around a dozen casualties, each requiring the assistance of several other soldiers, who were thereby taken out of the firing line.
Groups of soldiers assisting a wounded man moved slowly and were particularly prominent targets for the tribesmen.
It was almost dusk when the troops reached the bottom of the mountain.
The guns were withdrawn and the tribesmen crept forward in increasing numbers.
Encumbered by so many wounded, the Northamptons withdrew along the main Nullah with two companies of the 15th Sikhs holding one side and the Dorsets holding the other. The 36th Sikhs moved away to the left having the obligation to cover that flank.
The Northamptons became strung out along the Nullah, the rear part of the regiment lagging well behind the cover provided by the Dorsets and the 15th Sikhs.
It was only once Westmacott’s force reached camp at 7.30pm and the rolls were called it was discovered that a party of the Northamptons, comprising Second Lieutenant Mcintyre, Colour Sergeant Luck and eleven privates was missing.
The official Indian Government history describes how, in the gathering darkness, the companies of Northamptons lost contact with each other and the battalion became strung out over two miles on its journey back along the main nullah, the rearmost companies being slowed down through having to carry their wounded. There was a failure to take the precaution of posting men on the rims of the nullah to keep the tribesmen away.
The tribesmen gathered along the nullah edge and fired down on the Northamptons making their way along the bottom of the nullah.
In the ensuing melee the battalion failed to keep in touch with all its units and Mcintyre’s group at the rear of the column became isolated and was overwhelmed.
Westmacott’s brigade marched out again the next morning and the bodies of Mcintyre and his men were discovered in the Nullah where they had been cut off and killed by the tribesmen, their rifles and ammunition taken.
Total casualties for the day were 2 British officers, 17 British soldiers and 1 Indian soldier killed and 3 British officers and I Indian, 35 British and 7 Indian soldiers wounded.
The infantry component of Westmacott’s reconnaissance force was 50:50 British and Indian infantry battalions (two of each) and yet the casualties were British 55 and Indian 9. This perhaps reflects the inexperience and lack of training of the two British battalions for North-West Frontier operations.
If the Northamptons had not been extracted from the summit of Saran Sar by Colonel Haughton’s experienced 36th Sikhs their casualties would have been significantly greater.
Second Reconnaissance to Saran Sar:
On 11th November 1897 General Lockhart conducted a second reconnaissance onto Saran Sar to complete the survey begun on 9th November 1897 and to destroy more Zakha Khel property.
A further attempt to impede the British withdrawal to camp was beaten off with casualties inflicted on the tribesmen.
British casualties were one officer wounded and one soldier killed.
Foraging party from Mastura Camp on 13th November 1897:
On 13th November 1897 a foraging party of five companies of the Derbyshire Regiment commanded by Major Smith-Dorrien from Mastura Camp, situated between the Sampagha and Archanga Passes was attacked by Orakzai tribesmen.
The attackers were fought off with British casualties of two officers and four men wounded.
The Orakzai Jirgas had accepted peace terms the day before and it was explained that there had been insufficient time to warn the tribesmen in the hills of the settlement.
Raid on the Zakha Khels:
Also, on 13th November 1897 a force left the Maidan Camp to carry out a raid on the Zakha Khel villages near Tseri Kandao. The force was commanded by Brigadier General Kempster and comprised 1st Gordon Highlanders, 1st Dorsets, 1st/2nd Gurkhas, 15th Sikhs, 36th Sikhs, Nos 5 and 8 Mountain Gun Batteries and two companies of Sappers.
Part of the purpose of the raid was to overawe the subordinate Aka Khels.
Leaving the 36th Sikhs to hold the Tseri Kandao pass into the Waran Valley, Kempster’s force camped in the valley.
The Aka Khel Jirga had the day before conceded that they would accept the peace terms offered and that they had no objection to the British troops entering their valley.
Aka Khel tribesmen could be seen on the mountainsides watching the passage of the troops, but offering no resistance.
During the evening of 14th November 1897 numbers of Zakha Khel tribesmen came into the Waran Valley with the aim of inciting the Aka Khels in attacking the British camp.
A reconnaissance took place on 15th November 1897 and as the force retired to camp and during that night the British troops were fired on by Zakha Khel tribesmen.
The assumption of the British senior officers was that the Zakha Khel intended the British to assume they were being fired on by the Aka Khel and to take revenge on the Aka Khel villages, thereby causing the Aka Khel to resume their resistance to the British troops.
On 16th November 1897 General Kempster’s force marched to the Maidan Camp.
The transport and main body of the force reached the Maidan Camp without difficulty.
Matters were otherwise for the rear-guard.
For the final withdrawal, the 36th Sikhs moved from the top of the Tseri Kandao pass to a position on the Maidan side, while the 15th Sikhs took up position on the heights on either side of the pass.
The rear-guard of the 1st/2nd Gurkhas was to move through the pass, when the 15th Sikhs would take over as the rear-guard and on moving through the 36th Sikhs would in turn pass the duty of rear-guard to that regiment for the rest of the journey to the Maidan Camp.
As the 1st/2nd Gurkhas approached the pass they were attacked by increasing numbers of tribesmen and by the time the regiment reached the pass, it had lost one officer and three soldiers killed and four wounded.
Once 1st/2nd Gurkhas passed the Tseri Kandao pass, the 15th Sikhs were positioned with two companies to the south of the pass, two to the north of the pass and two on the edge of the forested spur down from the Saran Sar.
The commanding officer, Lieutenant-Colonel Abbott, held the pass itself with one company, the remaining company holding raised ground to the rear.
The two Sikh companies on the edge of the forested spur, as they began their withdrawal were now attacked.
These Sikh companies inflicted heavy casualties on the tribesmen who were driven off, but the Sikhs suffered a number of casualties, leaving the companies unable to move without abandoning their wounded.
Colonel Abbott’s company was joined by a number of other companies of his regiment and came under an attack in force.
Abbott found himself with a number of wounded who could not be safely withdrawn without assistance.
On being informed of Abbott’s situation, General Kempster ordered the 36th Sikhs and two companies of Dorsets to return and assist the 15th Sikhs in their withdrawal.
Lieutenant-Colonel Haughton of the 36th Sikhs was already moving his men back to the Tseri Kandao pass to assist the 15th Sikhs.
One of the Dorset companies was posted in a house overlooking the road to cover the eventual retreat.
With the reinforcement, the rear-guard was enabled to withdraw to the bottom of the hill with its casualties, who were then sent on to Maidan Camp while the rear-guard, commanded by Colonel Haughton, Colonel Abbott being wounded, collected its stragglers. It was now dark.
The remaining rear-guard, numbering only some 200 men, was surrounded by the tribesmen, who occupied a group of ruined houses overlooking the road in the rear.
Haughton’s men fixed bayonets and charged the houses, driving the tribesmen off.
The Sikhs spent the rest of the night occupying one of the houses and in the morning continued their withdrawal to Maidan Camp, meeting a relieving force on the way.
The company of Dorsets that had occupied the house overlooking the track seems to have left the building during the night and been promptly attacked and overwhelmed by tribesmen. The two officers and nine men were killed, with several wounded. The surviving soldiers were brought into camp by the senior sergeant.
Total British casualties in this reconnaissance were 4 British officers and 25 men killed, with 3 British and 3 Indian officers and 38 men wounded.
Tribal losses were estimated at 300 among the Zakha Khels, Aka Khels, Kamrai and Sipah clans.
On 17th November 1897 General Lockhart gave a briefing to some of the troops on how to conduct operations against tribesmen in the mountains. The briefing was published in written form on the next day.
British move to a new camp at Bagh:
On 18th November 1897 a move was begun of the British camp to Bagh at the western end of the Maidan valley. Bagh being the religious centre of the area it was considered that the new siting of the camp would put pressure on the local tribes to come to an accommodation with the British.
Brigadier General Penn Symons’ 2nd Brigade with some divisional troops began the move.
In the expectation that the British would at the end of the day withdraw to the Maidan camp the tribesmen offered no resistance to the advance, intending to mount their usual attack when the force returned to camp.
Once it became clear that this was a permanent transfer the tribesmen launched a full out assault on the troops and later on the new camp at Bagh.
During the heavy fighting the troops suffered five killed and 19 wounded with the loss of some transport animals.
Between 19th and 21st November 1897, the whole British force with its supplies moved to the new camp at Bagh.
On 20th November 1897, the 15th Sikhs, much reduced by casualties and sickness and considered too weak for continued duty with the force, returned to Shinawari with a special complimentary order issued by General Lockhart.
On the same day the terms proposed for the tribes to agree peace were published by the British (a fine, surrender of a number of rifles with the return of all rifles and equipment captured by the tribesmen). The tribes were given a week to accept the terms.
The reconnaissance to Dwatoi:
On 22nd November 1897 General Lockhart took a force on a three-day reconnaissance down the Bara River to Dwatoi in Kuki Khel country.
The main body reached Dwatoi on the Bara River at 4pm and came under fire from the hills to the north, which were stormed by the 28th Pioneers.
The baggage failed to catch up with the troops and was parked for the night on the road, protected by piquets formed from the 36th Sikhs, commanded by Lieutenant Colonel Haughton.
The force spent the 23rd November 1897 in destroying Kuki Khel fortifications and improving the pathway along the river.
On 24th November 1897 the force left Dwatoi for the return to Bagh.
The force marched at daybreak with the 1st/2nd Gurkhas and the Yorkshire Regiment holding the flanking mountains. The tribesmen did not develop their attack until the 36th Sikhs, forming the rear-guard, marched out of Dwatoi. Attacks were also made on the flanking regiments.
The 36th Sikhs suffered a number of wounded and hospital mules were sent back to provide transport.
The force returned to the camp at Bagh having suffered losses of 1 British officer and 4 men killed and 2 British officers and 28 men wounded.
The advance to the West:
Correspondence from some of the Afridi clans suggested that they might negotiate a settlement, but they also made threats designed to prevent the making of a road along the bank of the Bara River that would make their territory more accessible to British troops advancing into their territory from Kohat.
The Orakzais showed clear signs of wanting a settlement, other than their most westerly clans which appeared to assume they were beyond the reach of the ‘Sirkar’.
General Lockhart considered that from the new camp at Bagh it was entirely feasible to reach these western clans and on 26th November 1897 he marched against them.
The force left Bagh, commanded by Brigadier-General Gaselee, for the Khurmana valley, comprising Gurkha scouts, 2nd/4th Gurkhas, 1st Queen’s Surreys, 3rd Sikhs, 28th Bombay Pioneers, the Kohat 1st Mountain Battery and 2 companies of Sappers and Miners.
The column was attacked soon after leaving camp and a running fight developed with the Kambar Khels and Malikdin Khel Afridis, although their jirgahs were in camp discussing terms with the British.
Camp was pitched about four and a half miles from Bagh after a day in which the British suffered 1 killed and 8 wounded.
On 27th November 1897 the column continued over the Durbi Khel Kotal with little opposition.
The road was difficult and required considerable work by the Sappers and Miners, part of the force reaching Tambu while the remainder camped on the summit, most of the baggage remaining at the base of the kotal.
During the day General Lockhart came up from Bagh Camp with an additional force comprising 2nd Yorkshire Regiment, 4 companies of Royal Scots Fusiliers, 1st/2nd Gurkhas and No 2 Derajat Battery of mountain artillery. This march was contested by the tribesmen throughout and 25 Kambar Khel villages were destroyed in retaliation.
On 28th November 1897 General Gaselee reached Dargai, 5 miles from the summit of Durbi Khel Kotal. (This is not the Dargai, scene of the battles on 16th and 19th October 1897).
General Lockhart on the same day reached Tambu. The difficulty of the route meant that his troops were strung out from Tambu back to the summit of the Kotal and down the eastern slope, the rear-guard being harassed by the Kambar Khel tribesmen.
On 29th November 1897, General Lockhart, escorted by 2nd/4th Gurkhas joined General Gaselee at Dargai where a Samil Massuzai Jirgah came in and promised to comply with the settlement terms on offer.
Communication by heliograph was established with the Kurram Moveable Column coming up from Sadda and arrangements made for the two forces to meet the next day.
During the day, the rear-guard commanded by Lieutenant Colonel Spurgin was repeatedly attacked as it climbed the wooded eastern side of the Durbi Khel Kotal, reaching the camp at Dargai at 2am on 30th November 1897, suffering two men killed and 3 officers and 14 men wounded. Tribal casualties were reported as 100.
Fortunately for the British column the tribal attack ceased once the troops crossed the summit of the kotal.
General Gaselee took a force of 1st/2nd Gurkhas with companies from the Queen’s and 3rd Sikhs with No 2 Derajat Battery into the Lozaka defile where the Gar Massuzais handed in rifles as an instalment for the settlement fine.
At the same time, Colonel Hill marched a column to the Khani Khel Chamkanni principal village of Thabai, before retiring under heavy attack in the afternoon.
Gaselee’s force resumed the occupation of Thabai the next day, destroying buildings and stores. The Chamkanni tribesmen put up a ferocious resistance in a succession of sangars from which they were driven by the Gurkha scouts, leaving some 30 dead.
A further raid was carried out on the Lozaka valley against the Massuzais which was not resisted.
On 3rd December 1897 the two British columns parted, Colonel Hill marching for Sadda and General Gaselee marching for Khanki Bazar.
General Lockhart advanced to Miran Khel where he took the submission of the Alisherzai jirga.
Move to the Bara valley:
Before leaving for the Chamkanni area, General Lockhart issued a proclamation to the Afridis warning them that he proposed to move his force out of the Tirah to avoid the worst of the winter weather, but that he had not finished his punitive actions against them.
During the raid on the Orakzais and Chamkannis the baggage at Bagh camp was packed up and moved back to Shinawari for despatch to the Kohat area and back up the Bara valley to meet the 1st and 2nd Divisions marching down the Mastura and Bara River valleys.
On 7th and 8th December 1897, the British troops left Bagh camp. Brigadier General Gaselee’s brigade joined the rest of the 1st Division under Major General Penn Symons in the Mastura valley for the march north to the Bara River.
General Lockhart accompanied the 2nd Division, comprising what were now designated the 3rd and 4th Brigades, for its march north to the Bara River and along the river to the east to link up with 1st Division advancing up the Mastura valley from the south.
Brigadier General Westmacott’s 4th Brigade reached Dwatoi, where the Shaloba River, running north from Bagh, flowed into the Bara River, during the morning of 7th December 1897. The advance was unopposed.
The 4th Brigade remained at Dwatoi the next day to allow the 3rd Brigade to march up from Bagh.
The track was slippery from the rain and progress was slow, the 3rd Brigade being held up by the 4th Brigade rear-guard, the whole division assembling at Dwatoi by nightfall on 9th December 1897.
While the force was advancing to Dwatoi, General Lockhart, on 9th December 1897, took a force of 1,000 men and a battery of mountain guns on a march up the Rajgul valley west from Dwatoi, foraging and destroying fortifications.
On 10th December 1897 the 2nd Division marched out of Dwatoi, the 4th Brigade in the lead heading for Sandana, the 3rd Brigade making for Karana, 3 miles short of Sandana. The fortified villages passed through on the journey were destroyed.
Both brigades reached their destinations, from where they marched out on 11th December 1897, heading east along the Bara River for Sher Khel, ten miles from Sardana.
Rain fell steadily and the steep paths out of Karana became difficult for the baggage animals, leading to significant delays.
The plan was for the rear brigade to begin its march ¾ hour before the leading brigade, with the baggage to its front, thereby causing the column to close up during the march.
Due to the delays with the baggage column in the saturated conditions, the rear-guard of the 3rd Brigade was unable to leave camp until 11am
Notice of the delay could not be passed by heliograph to General Westmacott at the head of the column due to a thick mist that accompanied the rain.
The Afridis took advantage of the breakdown in the British march plan by ambushing the baggage column. Under a heavy fire many of the baggage drivers abandoned their animals and headed on up the track to Sher Khel.
British march practice was for the leading brigade to leave its piquets on the mountains overlooking the track until their positions were taken over by piquets from the following brigade.
Finding there were no troops following ready to take over the 4th Brigade piquet positions, Westmacott simply withdrew his brigade’s piquets and continued his march to the camp at Sher Khel, which he reached in good time, having no opposition to delay him. This left the 3rd Brigade with the difficulties of shepherding the disintegrating baggage train along the muddy track under heavy attack and having to re-picquet the hill-tops that the 4th Brigade was expected to be holding, leading to repeated delays with resulting casualties and losses among the baggage animals and handlers that would have been avoided if the 4th Brigade piquets had remained in place.
Many of the mule drivers and doolie-bearers left the main column and attempted to find their own way into camp, causing them to become bogged down in the rain-soaked hillsides and eventually overtaken by darkness.
A message was passed back to Brigadier General Kempster giving him the discretion whether to press on to the Sher Khel camp in the dark or halt and camp where he was.
Kempster chose to press on rather than impose on his troops the additional burden of making a separate camp.
Most of Kempster’s force reached Sher Khel, other than the rear portion of the rear-guard, comprising soldiers from the Gordons, Dorsets, 2nd Punjab Infantry and 1st/2nd Gurkhas under Major Downman of the Gordons.
This party reached a point 3 miles from Sher Khel (not that they knew how far out they were), where they found numbers of transport animals caught in the rice-fields, where their drivers had left them in their flight.
Downman’s party stormed a nearby house in which they established themselves for the night and where they were subject to constant rifle-fire by the tribesmen.
With dawn on 12th December 1897, General Kempster returned with two battalions and a battery and brought Major Downman’s party and the missing transport animals in to Sher Khel camp.
Otherwise, the force remained halted at the Sher Khel camp on 12th December 1897.
Combatant casualties on 11th and 12th in the British regiments were 7 killed and 35 wounded.
The 2nd Division continued its march on 13th December 1897 from Sher Khel to Shinkamar.
The piqueting strategy was adapted to deal with the problems that had arisen on 11th December 1897.
The 3rd Brigade lead the advance with the 4th Brigade as the rear-guard and having to cope with the difficulties of the baggage column between the two brigades.
A battalion from the leading brigade piqueted both flanks, keeping the picquets in place until the whole force had passed. Once that battalion was fully deployed another battalion provided the additional piquets required, so that battalions were kept together.
Additional guards were attached to the baggage train to keep the civilian drivers in place.
The distance to Shinkamar was expected to be about 7 miles, but turned out to be much further, around 12 miles, with the result that the 2nd Division did not reach camp by the end of the day’s march.
The first three miles of the march to Galli Khel were along the river bed. The track then turned to the north, over the Lakarai Kotal and down to Sawaikot. A junction was planned with the Peshawar Column, which had marched up the river from the opposite direction, at Barkai a couple of miles short of Sawaikot.
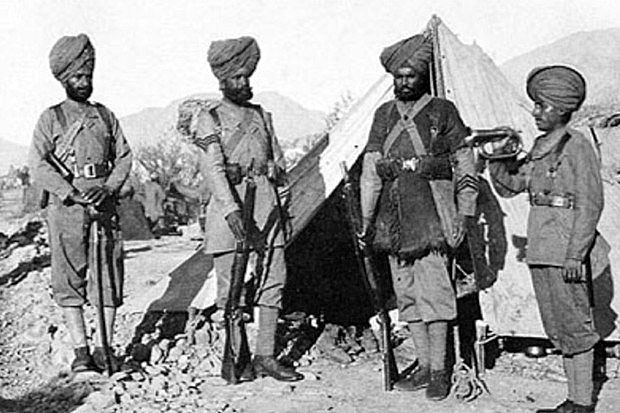
The tribesmen launched their first attacks with great determination as the rear-guard of the 4th Brigade left camp at the beginning of the march.
A halt was forced on the column as the baggage struggled to emerge from the track in the river bed at Galli Khel.
The tribesmen charged across the river bed to attack the baggage train, but were repulsed with heavy casualties by a cross fire from the artillery and infantry of the two brigades.
As the march continued the tribesmen pressed their attack on the column.
The fall of darkness caught the Second Division well short of its intended destination for the day of Shinkamar.
Westmacott’s 3rd Brigade halted on a ridge crossing the line of march, a couple of miles behind the 4th Brigade, which had stopped half a mile short of Lakarai Kotal.
The 3rd Brigade was there rushed by the tribesmen in a determined attack which was driven off with considerable loss.
The 2nd Division suffered some 70 casualties during the day’s heavy fighting.
Neither brigade’s overnight camp was near a water source and, as the baggage drivers had been too panicked to fill their carriers, the troops suffered a night largely without water.
For the 3rd Brigade, their discomfort was increased by much of the brigade baggage being mixed with the leading brigade’s column and going on to its camp.
The Peshawar Column commanded by Brigadier General Hammond was already at Sawaikot, where communication was established by heliograph with the 2nd Division. Hammond immediately marched out with 300 doolie-bearers to assist in bringing in the 2nd Division wounded.
On 14th December 1897, the 3rd Brigade marched at daybreak for Sawaikot without being attacked.
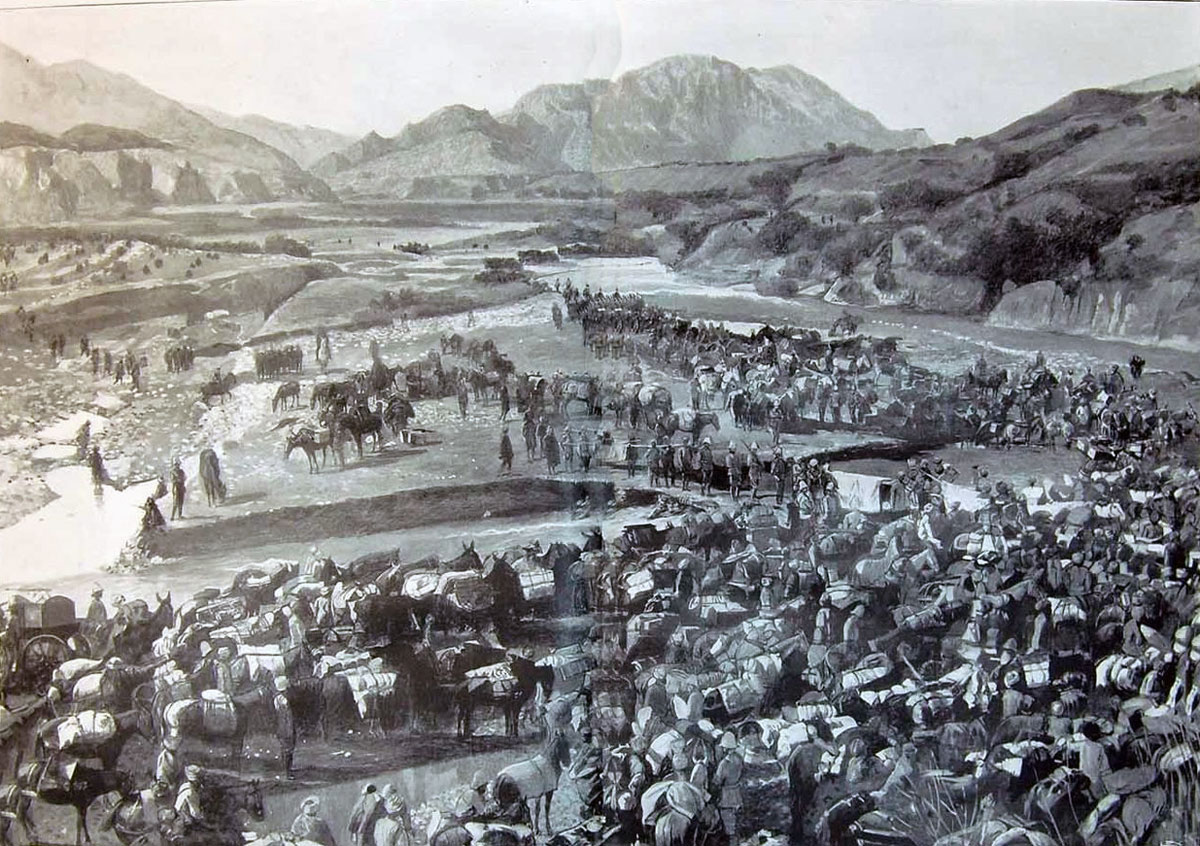
Having passed through Barkai on the riverbank, the 3rd Brigade water-mules were sent back to the 4th Brigade, which was attacked by the tribesmen until it reached Lakarai Kotal. From there the brigade was subjected to limited attack by small numbers of tribesmen.
The 3rd Brigade met the advanced piquets of the Peshawar Column 4 miles from Sawaikot, before marching on to its camp at Mamanai without interference from the tribesmen.
On 17th December 1897 the 3rd Brigade marched on to Bara, where it remained until 12th February 1898, while the 4th Brigade remained at Mamanai.
Actions of the 1st Division from 9th December 1897:
While the 2nd Division moved eastwards down the Bara River, the 1st Division’s route was initially eastwards along the more southerly Mastura River, before following that river north to rendezvous with the 1st Division and the Peshawar Column on the Bara River, into which the Mastura flowed, in the area of Mamanai.
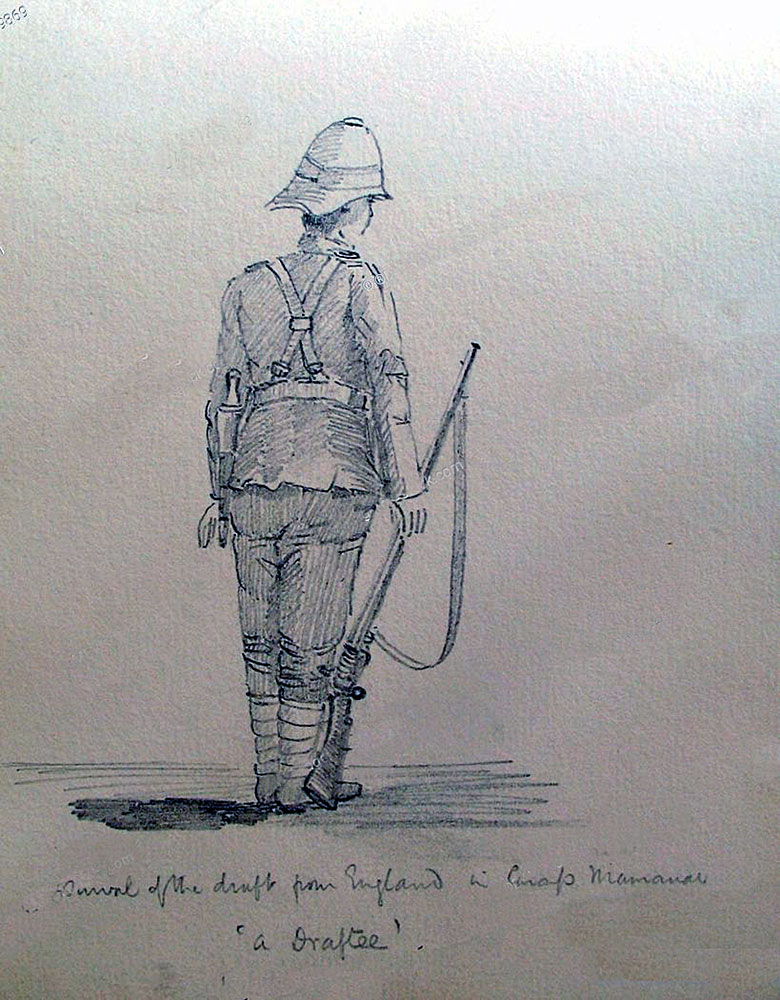
Before the 1st Division moved off to the east along the Mastura River on 9th December 1897 it was resolved to conduct a punitive raid into Aka Khel country in the Waran Valley to punish the tribe’s decision to throw its lot in with the hostile Zakha Khels in their operations against the British columns.
On the same day a force commanded by Brigadier General Hart VC, comprising companies from the 2nd/1st Gurkhas, the Derbys, the Devons, the Nabha Regiment, 21st Madras Pioneers, 30th Punjab Infantry and Bengal Sappers and Miners with two Mountain Gun Batteries marched out from Haidar Khel on the punitive raid, heading for the Waran Valley, the crest of the Kokanni Pass being seized by the 1st Gurkhas earlier in the morning.
Hart’s force destroyed around 150 fortified houses belonging to different sections of the Aka Khels.
The troops then withdrew down the valley to Hissar, followed by Aka Khel and Zakha Khel tribesmen who were kept at a distance by artillery and rifle fire.
Casualties of the raid were 1 dead and 4 wounded.
The 1st Division continued its march down the Mastura River to its junction with the Bara River at Mamanai, the 1st Brigade arriving on 13th December 1897, with the division concentrating at Ilamgudar on 17th December 1897, a further 15 miles along the Bara River to the east.
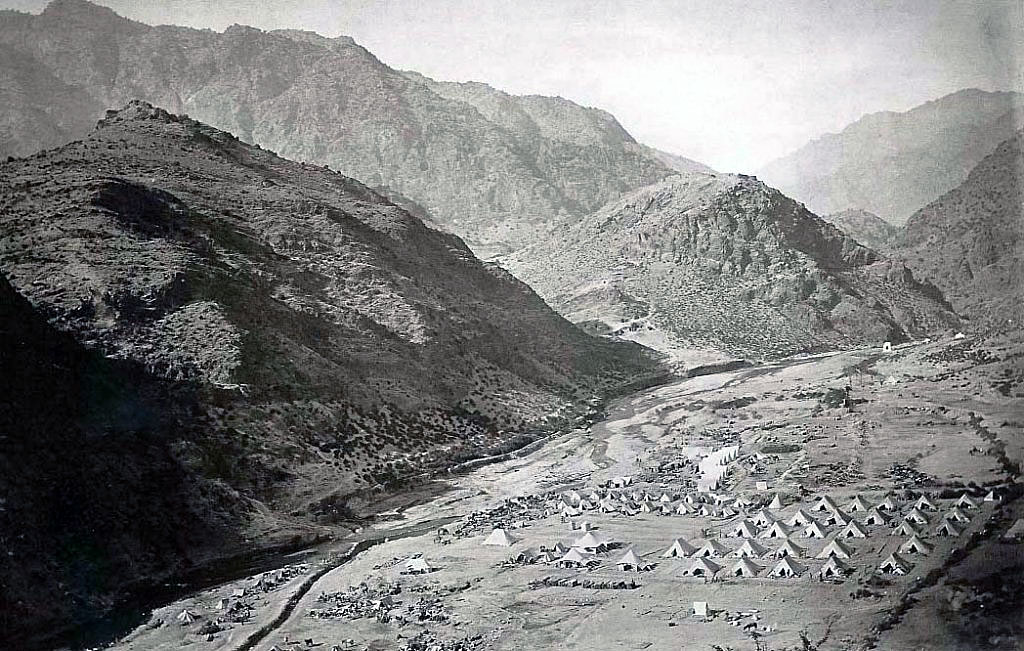
Operations in the Khyber and Bazar Valleys:
As the 2nd Division had been heavily engaged during its march along the Bara River, it was left to guard the line of the Bara valley while the 1st Division and the Peshawar Column undertook operations in the Bazar and Khyber Valleys, carrying out punitive raids on the Zakha Khel and Malikdin and re-opening the Khyber Pass with the re-occupation and repair of the Khyber forts taken and destroyed by the tribesmen.
The Peshawar Column was allotted the Khyber Pass while the 1st Division marched into the Bazar Valley.
Of the 2nd Division, the 4th Brigade remained at Mamanai and the 3rd Brigade moved to Fort Bara, some 20 miles to the east along the Bara River.
The 1st Division and the Peshawar Column concentrated at Jamrud Fort at the base of the Khyber Pass.
Major General Yeatman-Biggs was invalided to Peshawar and replaced in command of the 2nd Division by Major General Sir Power Palmer.
On 25th December 1897 the 1st Division entered the Bazar Valley in two columns. After destroying houses and towers the Division returned to Jamrud on 28th December 1897.
Between 18th and 28th December 1897, the Peshawar Column re-occupied Fort Maude and Ali Masjid and advanced up the Khyber Pass.
Between 1st and 3rd January 1898 engagements took place at the entrance to the Bori Pass from the Khyber, in which the Peshawar Column suffered a small number of casualties.
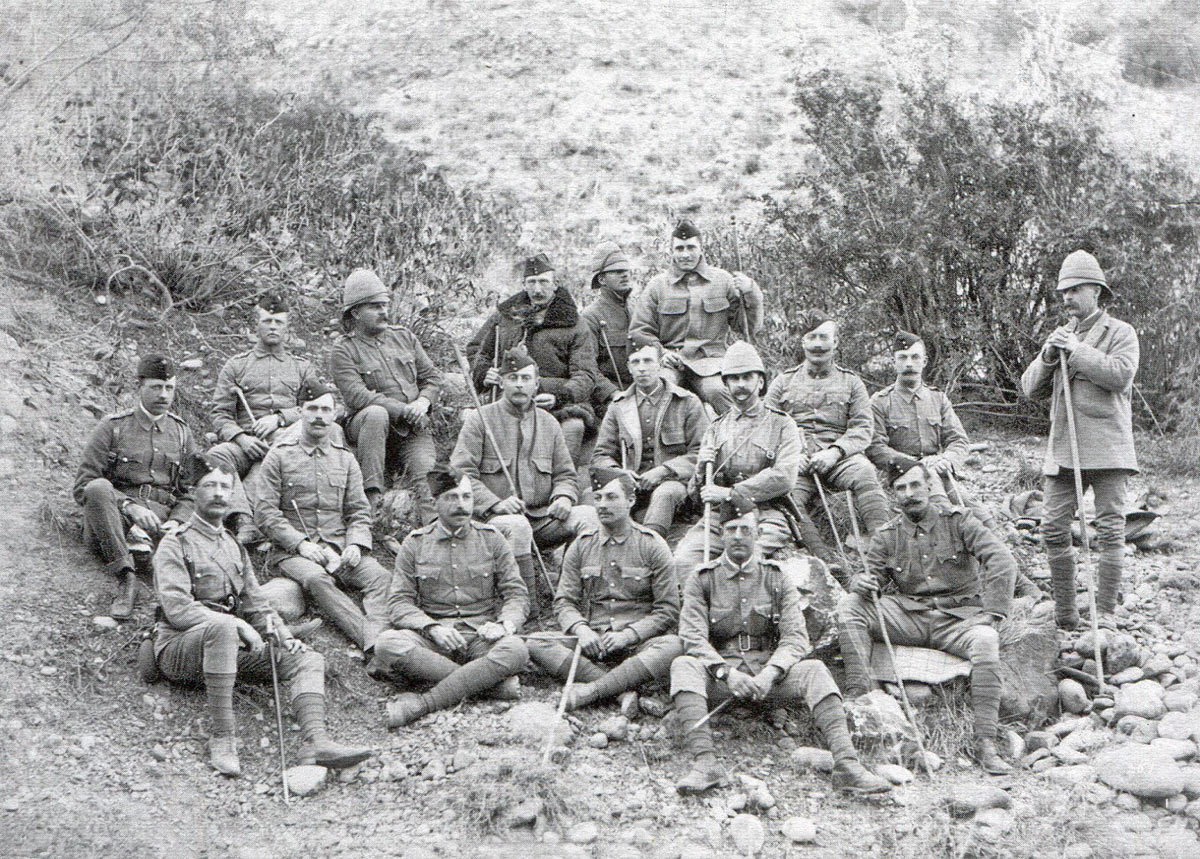
Engagement at Shinkamar on 29th January 1898:
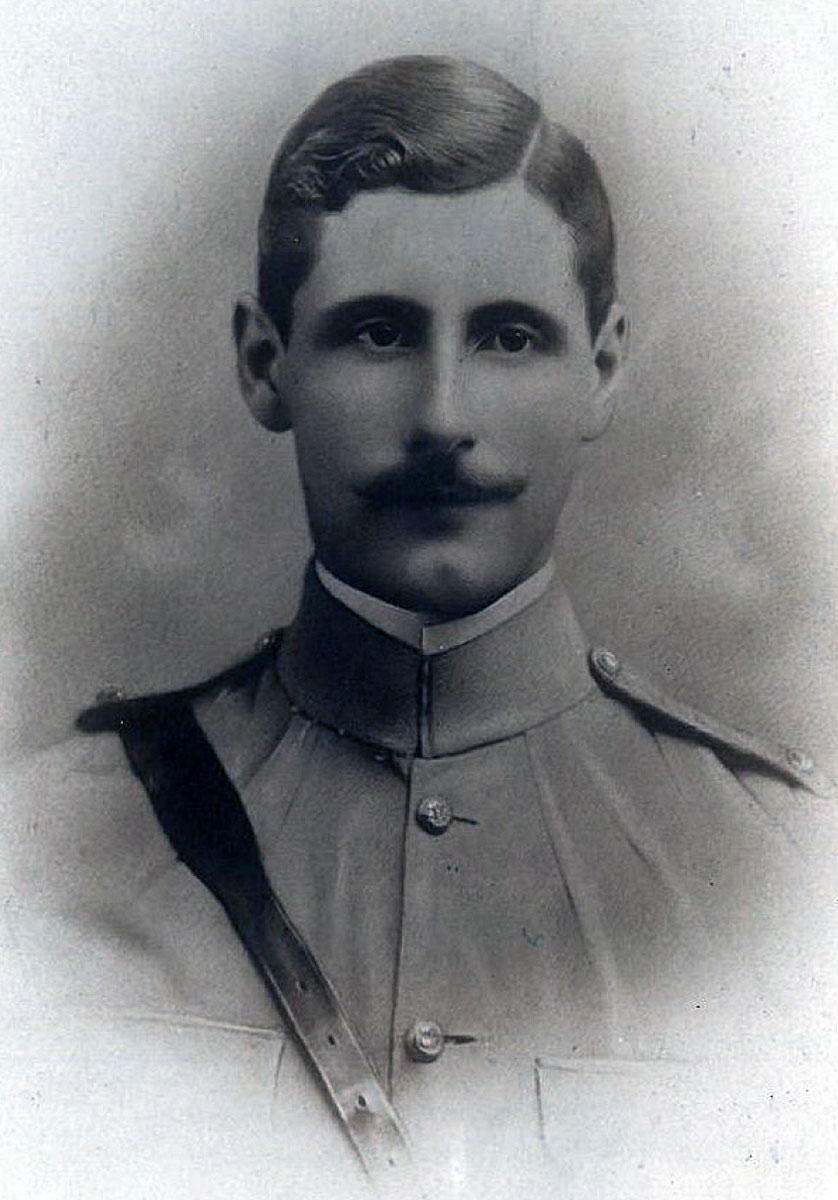
In late January 1898 General Lockhart received information that the Afridis were bringing their cattle down to graze on the Kajurai Plain, immediately to the north of the Bara River at Mamanai.
General Lockhart resolved to bring the Afridis to terms by capturing these cattle.
His plan was that the 1st Brigade would occupy the line of the Chora River to the north-west of the plain, while the 2nd Brigade held the Ghakhe Pass and the heights to the west of the Besai Hill at the north-eastern entrance to the plain. The 4th Brigade at Mamanai would send out a column to block the Shinkamar Pass at the western end, with the 3rd Brigade marching out of Bara to drive the herds westwards across the plain to the Shinkamar Pass.
The orders were that the positions were to be taken up early in the morning and that if nothing was seen by 1pm the columns were to return to camp, giving plenty of time for the withdrawal before darkness.
There was little opposition to the columns, but no cattle were found on Kajurai Plain, the troops returning to camp after an uneventful day. That is other than the Mamanai column, which found itself fighting what the official government history described as ‘one of the hardest actions of the campaign.’
The 4th Brigade column comprised 427 men of the King’s Own Yorkshire Light Infantry, 200 men from the 36th Sikhs and 2 guns from No 5 Mountain Battery RA.
The column was commanded by Lieutenant Colonel Seppings of the KOYLI with Lieutenant Colonel Haughton of the 36th Sikhs.
The column set out from Mamanai Camp at 5am and reached the crest of the Shinkamar Kotal by 8am without major resistance.
The high points to the west of the pass were piqueted by the 36th Sikhs and the high points to the east by two companies of KOYLI. A company of 1st/3rd Gurkhas held a position between the column and Mamanai Camp to provide cover for the withdrawal of the column at the end of the day’s operation.
Colonel Haughton, commanding the advance guard, pushed on down the reverse side of the pass to some caves from where he dispatched an orderly to bring forward more men from the main body of his regiment in the pass.
The orderly mistakenly delivered Haughton’s order to join the advanced guard to the Indian officer commanding the piquet on the west side of the pass. The Indian officer complied, bringing his piquet down into the pass and forward to join the advanced guard.
The high ground to the west of the pass, now without a piquet, was quickly occupied by tribesmen who brought a heavy fire down on all the troops in the pass.
Colonel Seppings ordered a company of KOYLI under Lieutenant Dowdall to retake the high point abandoned by the Sikhs.
Dowdall advanced up the hillside but the heavy fire from the tribesmen brought his company to a halt 150 yards from the crest and the officer was killed.
A second KOYLI company was sent to reinforce Dowdall’s, but could get no further forward, its company commander Lieutenant Walker also being killed.
The two companies were now in considerable difficulties, unable to advance and unable to retire due to the number of wounded men that had to be carried back.
Colonel Haughton at this point returned from the far side of the pass with his advanced guard.
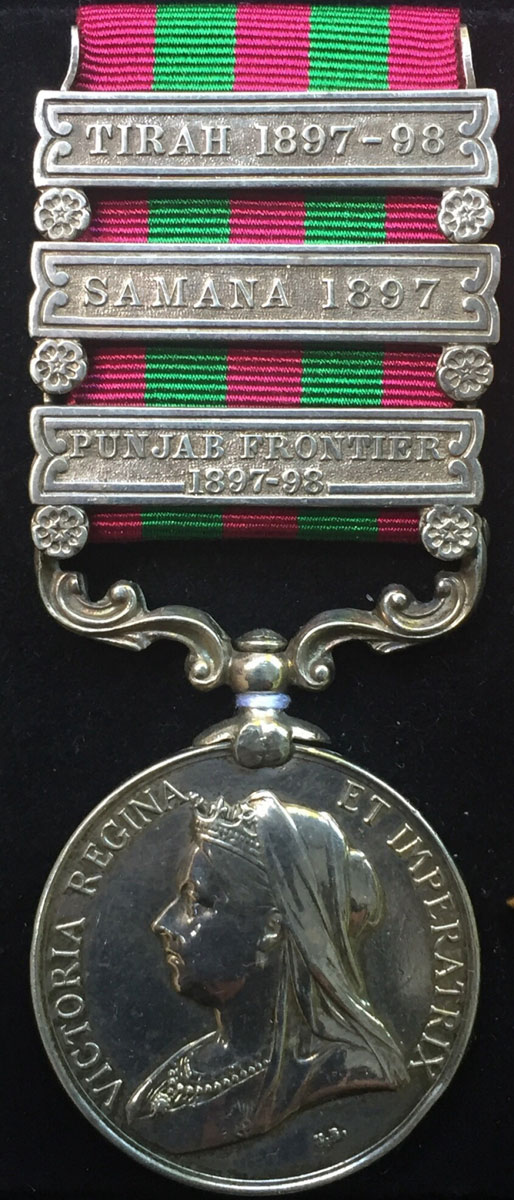
Ordering his regiment to take up positions to provide cover, Colonel Haughton with his adjutant Lieutenant Turing, advanced with one of his companies to extricate the two KOYLI companies.
The tribesmen were rushing in on the KOYLIs, now without officers. Haughton’s Sikhs fixed bayonets and charged the tribesmen, but both Haughton and Turing were shot dead, Haughton fighting with one of his men’s rifles.
Further reinforcements from the KOYLI enabled the two companies to be withdrawn to the hillside to the east of the pass before a general retirement was carried out.
Due to the difficulties of the steep ground and the confusion the column was in, it was not possible to bring down the bodies of the soldiers killed in the action including the four officers.
Hearing the heavy firing, General Westmacott marched out of Mamanai Camp with a strong force from the 3rd Brigade and brought the column back into camp.
On 30th January 1898 General Westmacott marched out of Mamanai Camp with a column reinforced with troops from the 4th Brigade at Bara, while a further column advanced towards the eastern entrance of the Shinkamar Kotal from Bara. Westmacott was able to recover 22 bodies of casualties from the fighting on the previous day.
The casualties of the 3rd Brigade column on 29th January 1898 were 5 officers and 28 men killed and 3 officers and 34 men wounded.
One badly wounded KOYLI was returned by the Afridis, but died of his injuries.
Follow-up to the Tirah:
During the rest of 1898 the various Afridi clans largely came to terms with the British authorities and the Tirah campaign was concluded.
Casualties in the Tirah: Theseare set out in the narrative above.
Battle Honour and decorations for the Tirah:
The battle honour ‘Tirah’ was awarded to these regiments: Queen’s, Devons, Yorkshire, Royal Scots Fusiliers, King’s Own Scottish Borderers, Dorsets, Derbyshire, Northamptons, Gordon Highlanders, 18th Bengal Lancers, No 1 Kohat, No 2 Derajat, No 5 Bombay Mountain Batteries, Bengal Sappers and Miners, Madras Sappers and Miners, Bombay Sappers and Miners, 15th Ludhiana Sikhs, 30th Punjab Regiment, 36th Sikhs, 3rd Sikhs PFF, 2nd Punjabis PFF, 21st Madras Pioneers, 28th Bombay Pioneers, 1st, 2nd, 3rd and 4th Gurkha Rifles.
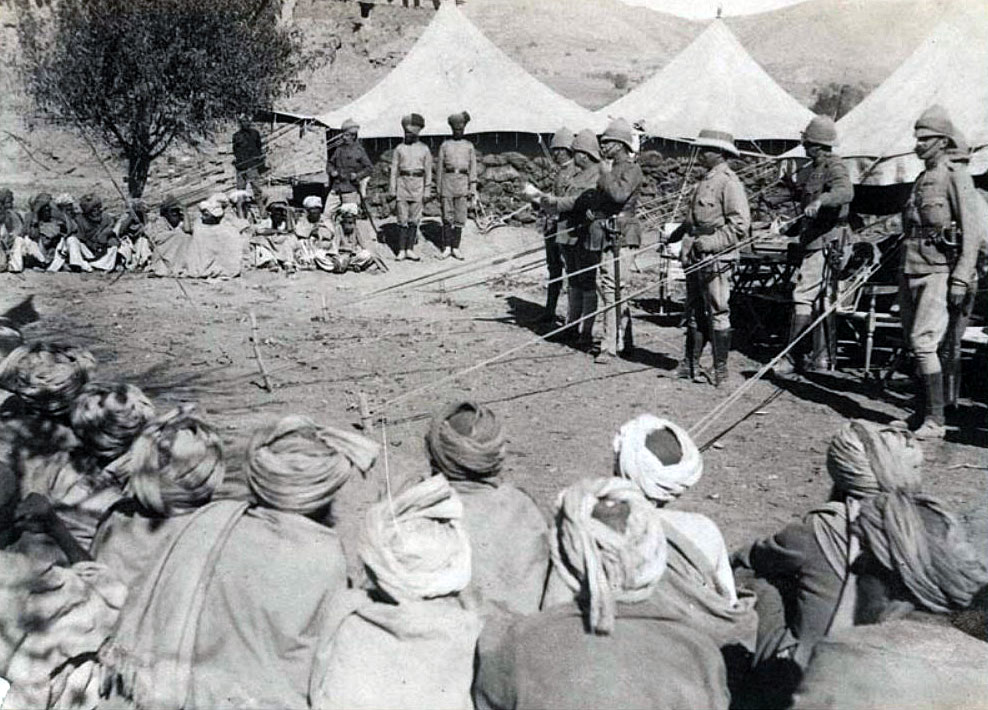
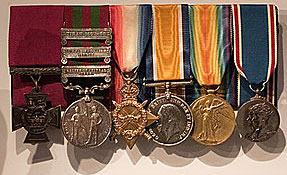
The Indian Medal was issued to all troops who took part in the Tirah operations.
Anecdotes and traditions from the Tirah:
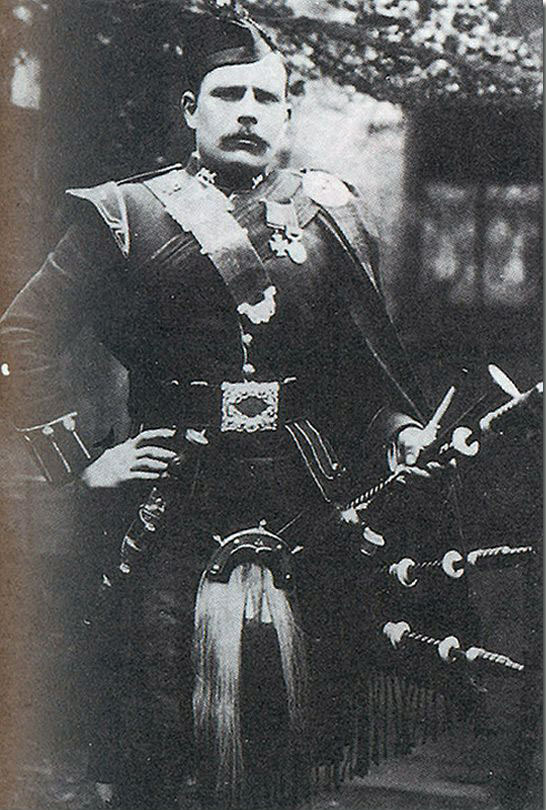
- The 21 Sikh soldiers of the 36th Sikhs killed in the attack on Saraghari Post on 12th September 1897 were awarded posthumous Indian Orders of Merit, the highest decoration available to non-commissioned soldiers of the Indian Army.
- The 3rd Gurkhas in the storm of Dargai on 16th October 1897 were led by Lieutenant WGL Beynon, the author of ‘With Kelly to Chitral’, the campaign in 1895 for which he was awarded the DSO. Beynon in his early career was reputed to have had more experience of fighting on the North West Frontier than any other British officer.
- Following the assault on Dargai on 20th October 1897, HM Queen Victoria sent a telegram to the force commander stating: Balmoral, 22nd October 1897 ‘Please express my congratulations to all ranks, British and Native troops, on their gallant conduct in action on 18th and 20th. Deeply deplore loss of precious lives among officers and men of my army. Pray report condition of wounded, and assure them of my true sympathy.’
- Colonel H.D. Hutchinson in his book published in 1898 stated of the proceedings on Saran Sar on 9th November 1897: ‘. the simple truth is that the Northamptons themselves had not the training and experience, and the practical knowledge of the enemy’s methods and tactics, necessary to enable them to carry out successfully that most delicate and difficult operation of war, namely a retreat closely pressed by a savage foe, and conducted, encumbered by wounded, through a terribly difficult country. It was no question of dispositions by the General, of support by other troops, or of valour shown by themselves. It was simply lack of the right kind of experience which led into errors, such as entering the ravine at all. The result was disastrous….’
- Major A.C. Yate of the Indian Army in his biography of Lieutenant-Colonel John Haughton of the 36th Sikhs wrote of the Saran Sar incident: ‘Had the retirement not been delayed, darkness would not have overtaken the troops before they reached camp, and the mishap of the Northamptons would not have occurred. It must, however, be noted that the 36th Sikhs, who covered the retirement of the Northamptons, suffered scarcely any loss. Several of the mishaps in the Tirah campaign were undoubtedly due to the inexperience and ignorance of frontier warfare of the officers and soldiers of our British regiments.
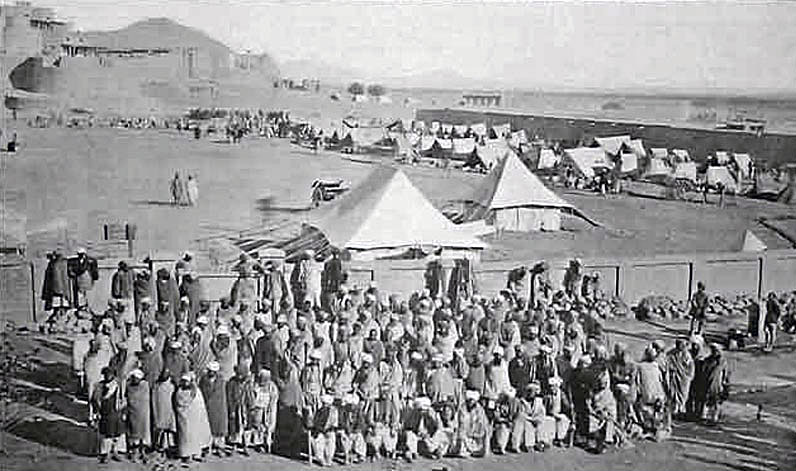
- A young officer with the KOSB in the Tirah, who later rose to the rank of general in the Indian Army, wrote home saying ‘The Northamptons, I see, are having a great fuss made over them at home for some reason. They are a perfectly rotten Regiment and unable to look after themselves. On the 13th and 14th when we had that rear-guard action, & were retiring by companies etc, the Northamptons did not cover us, the Sikhs or Gurkhas at all, but immediately we retired on them they used to retire at the same time, & they were absolutely helpless with their wounded men.’
- Lieutenant Colonel John Haughton of the 36th Sikhs wrote in a letter from Mamanai Camp to Sir Charles Gough on 16th January 1898, shortly before his death: ‘I think the general impression in the force is that things would have been better managed had Sir W. Lockhart not been in such bad health. He has constantly been down with fever, etc., and I believe has really been ill all the time….….I was also very much struck with the unfitness to march of most regiments, especially British regiments, at the beginning of the campaign. Of course, at the end of the hot weather, there is some excuse for this, but not in the case of regiments that have been quartered in the hills. I think the King’s Own Scottish Borderers and the Gordons had benefited much by the Chitral campaign, although there was so little fighting in it..’
- Major Horace Smith-Dorrien, who led the companies of the Derbyshire Regiment on the 11th November 1897 reconnaissance, in the opening year of the First World War commanded the British II Corps. Smith-Dorrien was one of the British officers to escape from the disaster at Isandlwana in the Zulu War of 1878. In 1898 Smith-Dorrien commanded a battalion of Sudanese infantry at the Battle of Omdurman. He served as one of the few general officers in the Great Boer War to emerge with an enhanced reputation. His military career was ended in 1914 due to the enmity of Sir John French the British Commander-in-Chief.
- Piper George Findlater achieved considerable fame in Britain for his role in the Gordon’s attack at Dargai on 20th October 1897, continuing to play his pipes after being incapacitated by a rifle shot in the leg. Findlater’s wound caused him to be invalided out of the army. Findlater supplemented his pension and Victoria Cross gratuity by playing the pipes in London Music Halls, to the outrage of the military establishment. After a tour of the USA and Canada, Findlater took to farming in Scotland. Findlater re-joined the Army in the First World War and served as sergeant piper to the 9th Battalion, Gordon Highlanders, before again being invalided out after the Battle of Loos.
- The pipe tune ‘Heights of Dargai’ celebrates the battle at Dargai. The Gordon Highlanders pressed the authorities to make ‘Dargai’ a battle honour in its own right, rather than being subsumed into the campaign battle honour of ‘Tirah 1897’. This was refused.
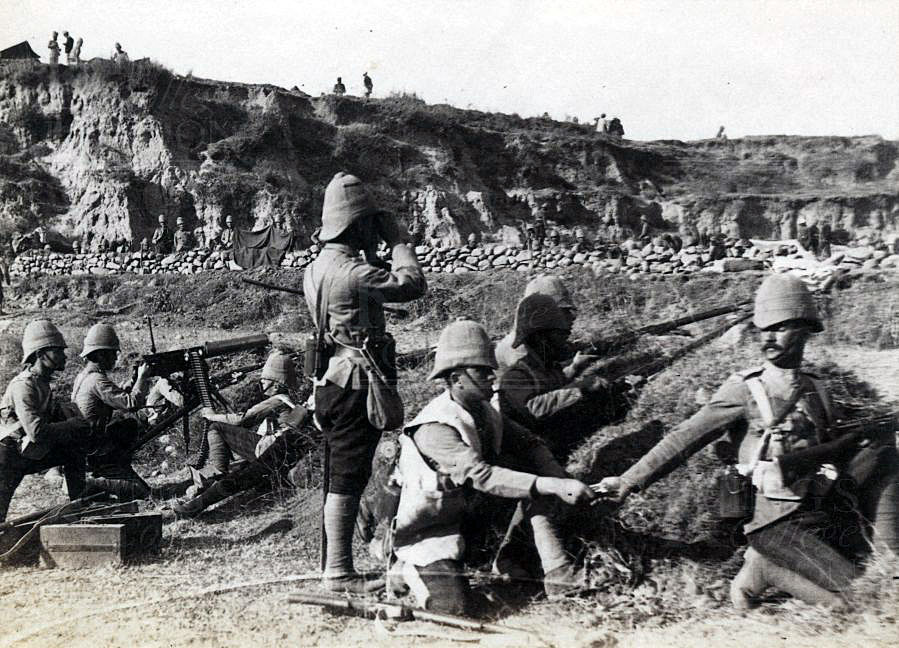
References for the Tirah:
The Campaign in Tirah 1897-1898 by Colonel H.D. Hutchinson
The Indian Frontier War 1897 by Lionel James
Frontier and Overseas Expeditions from India Volume 1 published by the Government of India
North West Frontier by Captain H.L. Nevill DSO, RFA
The North-West Frontier by Michael Barthorp
The Frontier Ablaze, the North-West Frontier Rising 1897-1898 by Michael Barthorp
The previous battle of the North-West Frontier of India is the Mohmand Field Force 1897
The next entry in the British Battles sequence is British Expeditionary Force (BEF) in the First World War
To the North-West Frontier of India index