Rowland Hill’s resourceful destruction of the fortified French bridge of boats at Almaraz over the River Tagus on 19th May 1812, during the Peninsular War
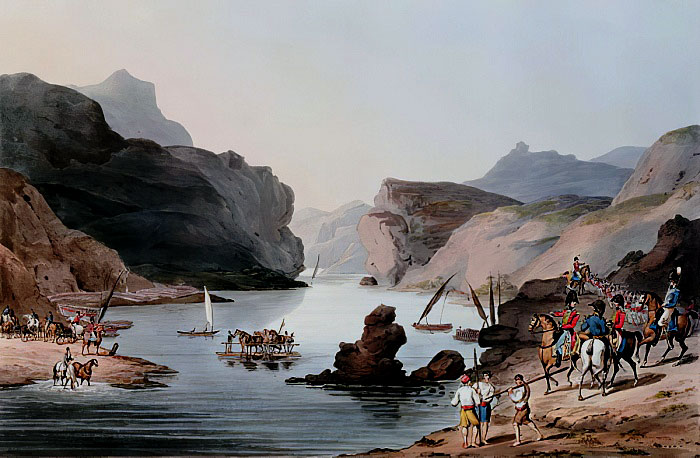
River Tagus: Battle of Almaraz on 19th May 1812 in the Peninsular War: picture by Thomas Staunton St Clair
31. Podcast on the Battle of Almaraz: Rowland Hill’s resourceful destruction of the fortified French bridge of boats at Almaraz over the River Tagus on 19th May 1812 during the Peninsular War: John Mackenzie’s britishbattles.com podcasts
The previous battle of the Peninsular War is the Battle of Villagarcia
The next battle of the Peninsular War is the Battle of Salamanca
Battle: Almaraz
War: Peninsular War
Date of the Battle of Almaraz: 19th May 1812
Place of the Battle of Almaraz: on the River Tagus in Western Central Spain.
Combatants at the Battle of Almaraz: British and Portuguese against the French.
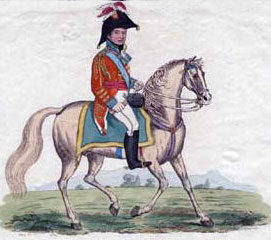
General Sir Rowland Hill: Battle of Almaraz on 19th May 1812 in the Peninsular War
Commanders at the Battle of Almaraz: Major General Sir Rowland Hill against the French officer, Major Aubert.
Size of the armies at the Battle of Almaraz: 6,000 British and Portuguese troops against some 1,500 French troops with 26 guns.
British order of battle at the Battle of Almaraz:
Commander: Major General Sir Rowland Hill
13th Light Dragoons
Howard’s Brigade: 50th, 71st, 92nd, 1 Co 5th/60th Rifles.
Wilson’s Brigade: 28th, 34th, 1 Co 5th/60th Rifles.
Ashworth’s Brigade: 6th and 18th Portuguese Infantry and 6th Caçadores.
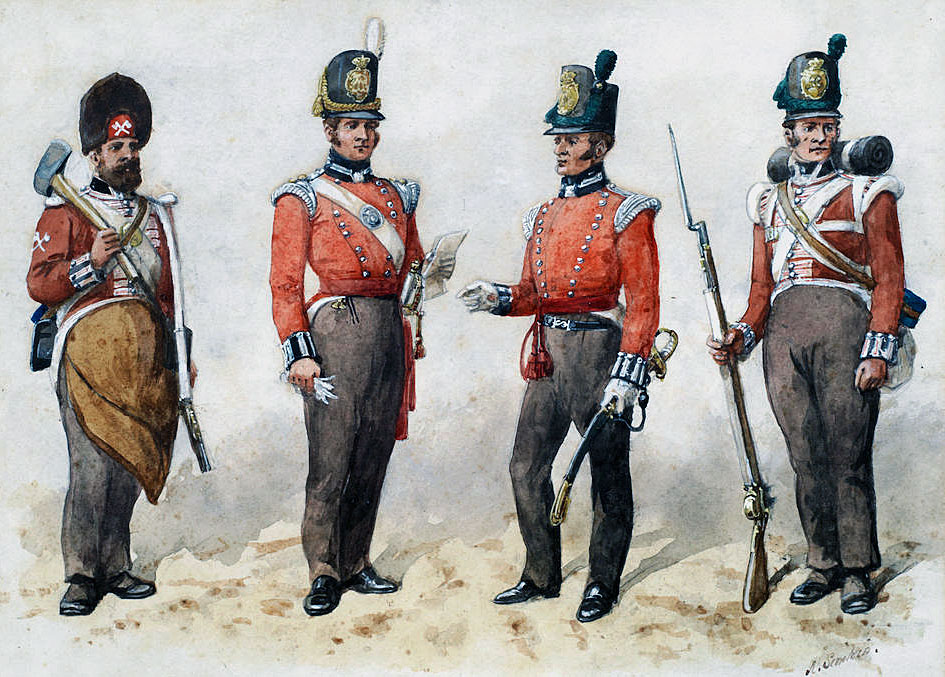
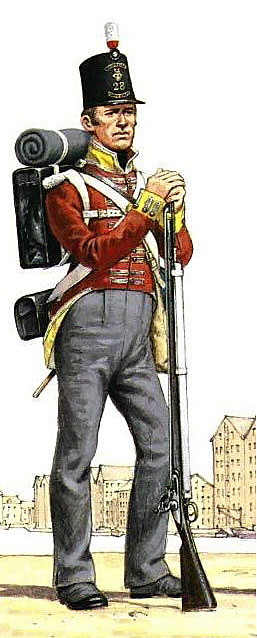
British 50th Regiment: Battle of Almaraz on 19th May 1812 in the Peninsular War: picture by Richard Simkin
Background to the Battle of Almaraz:
With the successful British capture of the Spanish border cities of Ciudad Rodrigo and Badajoz in early 1812, Wellington planned to march into Spain and capture the Spanish capital city of Madrid.
Marshal Soult, the French commander in Andalusia in the south of Spain, feared that Wellington’s next step would be to attack him.
Soult clamoured for Massena with his ‘Army of Portugal’, positioned in the north-west of Spain, to march south and assist his ‘Army of the South’ in resisting Wellington.
On 30th April 1812, Wellington wrote to Hill, at Almendralejo, to the north-west of Badajoz, with his division, that he was to march with a suitable force north-east to the River Tagus and capture and destroy the fortified bridge held by the French at Almaraz.
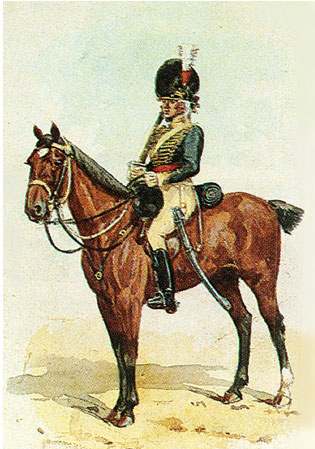
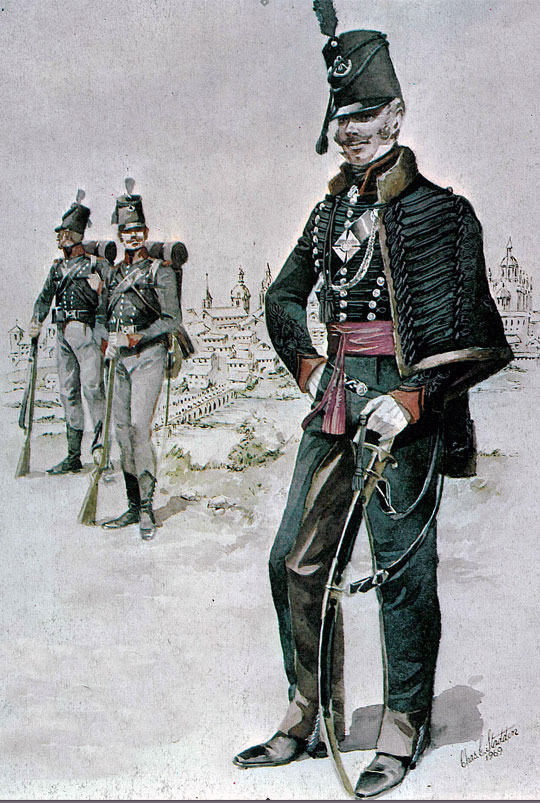
British 13th Light Dragoons: Battle of Almaraz on 19th May 1812 in the Peninsular War: picture by Richard Simkin
Soult’s pontoon train had been captured by the British in Badajoz, leaving the Almaraz bridge as the only point at which a French army could cross the River Tagus between Toledo and the Portuguese frontier.
The destruction of the Almaraz bridge, planned by Wellington since the beginning of 1812, would cut the most direct route by which Massena in the north-west of Spain could send reinforcements to Soult in Andalusia in the south of Spain and vice versa.
On 12th May 1812, Hill marched out of Almendralejo with the force selected for the operation, leaving Sir William Erskine in command of the balance of his division.
Later that day, Hill arrived at Merida on the north bank of the River Guadiana, where he was joined by a British contingent from Elvas, comprising six heavy guns, three field guns and a party of engineers with pontoons.
Hill marched north, reaching Truxillo on 15th May 1812, where the force left its baggage, before marching on to Jaraicejo at the foot of the Sierra de Mirabete.
Warned of Hill’s advance on Almaraz by D’Erlon and receiving false information that Wellington was still at Elvas, Soult became seriously alarmed that the British and Portuguese were about to invade Andalusia.
Soult called on Joseph in Madrid and Marmont for re-inforcements and support by way of an attack on what Soult conceived to be Wellington’s left flank.
British 28th Regiment: Battle of Almaraz on 19th May 1812 in the Peninsular War
A report from D’Erlon dated 16th May 1812 gave Hill’s force as around 16,000 men with 18 guns and its position as Maiadas, whereas Hill was by then approaching Almaraz.
Soult was confident that Marmont was marching towards the River Tagus to support him and that he would be better placed to deal with the threat to French communications posed by Hill’s raid than he was.
A complex system of fortifications, erected by Marmont, protected the bridge of boats at Almaraz, although they were far from complete.
On the north bank, overlooking the bridge of boats, stood an arsenal and stone tower surrounded by fortifications, with the name of Fort Ragusa.
A smaller field work had been built nearer the bridge.
On the south bank of the River Tagus, a fortified bridgehead protected the bridge, with a redoubt named Fort Napoleon standing on the high ground overlooking the bridge.
Portuguese 6th Caçadores: Battle of Almaraz on 19th May 1812 in the Peninsular War
Fort Napoleon comprised an outer fortification and a central loop-holed tower surrounded by a ditch and palisade.
The garrison for the works immediately around the bridge of boats consisted of 1,000 men and 18 guns under the command of Major Aubert.
Access to the river at Almaraz from the south was by way of the main road from Truxillo, crossing over the rugged Sierra de Mirabete.
Six miles south, on the main road to Truxillo, at the summit of the Sierra de Mirabete, stood a castle, with a large house nearby on the road itself, all fortified as defensive positions and garrisoned by the French. The castle held eight guns.
The various fortifications around the bridge of boats and at the summit of the Sierra de Mirabete required a significant amount of further work.
A second pass, La Cueva, three miles to the east of the main road was crossed by a goat track. This pass contained no French defensive positions.
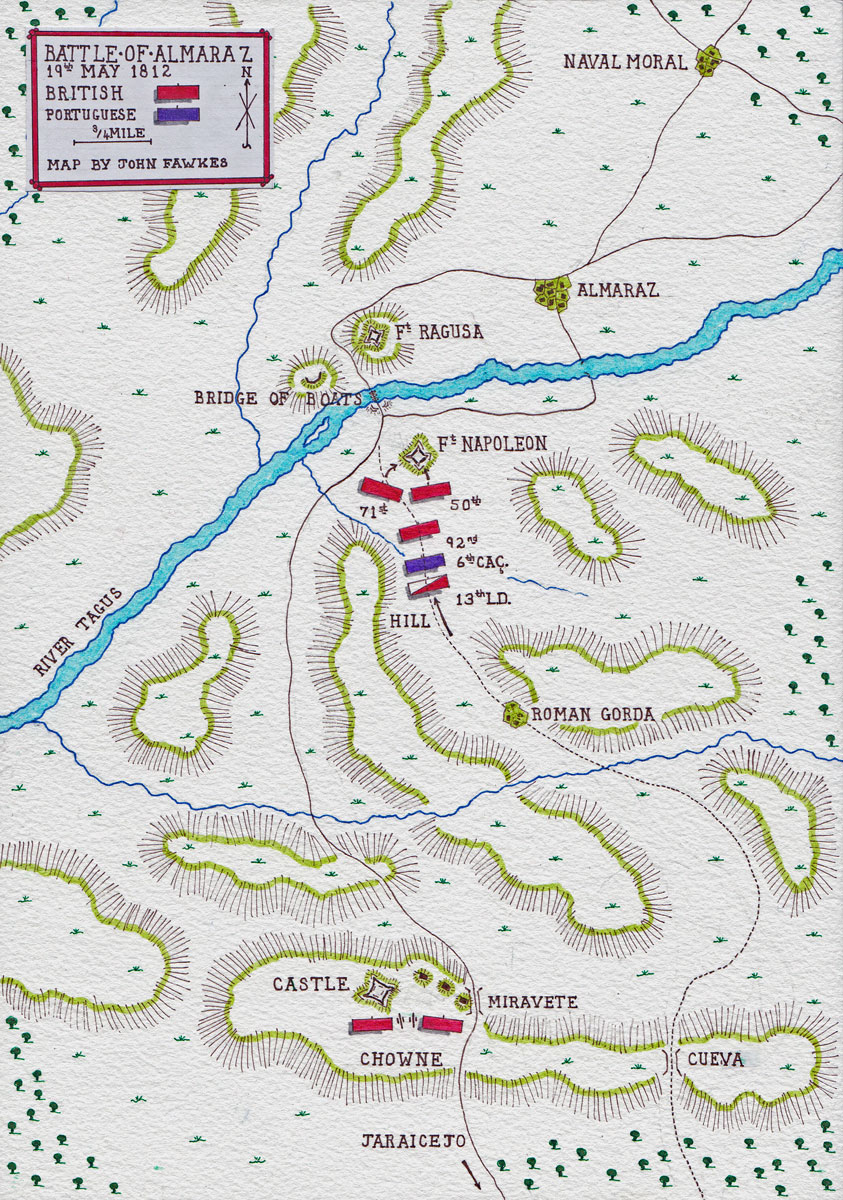
Map of the Battle of Almaraz on 19th May 1812 in the Peninsular War: map by John Fawkes
The attack on the Bridge at Almaraz:
The French commander of the garrison, Major Aubert, after receiving warnings of the approach of Hill’s force from Truxillo, reinforced the garrison of Fort Napoleon with troops from the north of the river and removed the two central boats from the bridge of boats, leaving a gap.
Hill reached Jaraicejo on 16th May 1812. There he divided his force into three columns.
The left column, commanded by General Chowne and comprising the 28th, 34th and 6th Caçadores, was to attack the castle at the summit of the Sierra de Mirabete.
The centre column, comprising two Portuguese regiments and the artillery, was to attack the house and the French fortifications on the road through the pass.
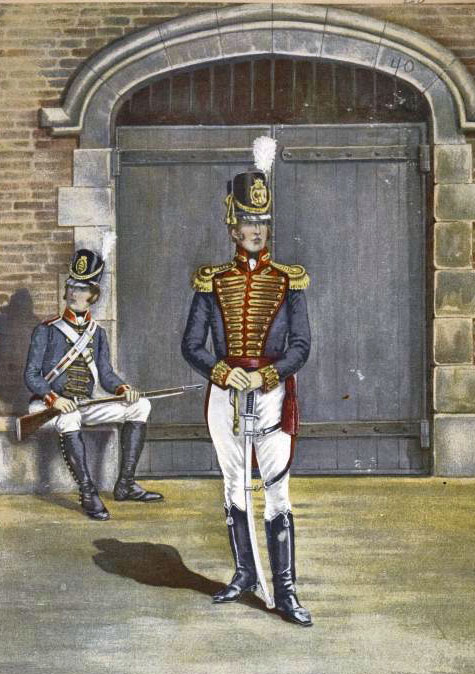
British 5th/60th Rifles: Battle of Almaraz on 19th May 1812 in the Peninsular War
The right column, led by Hill and comprising Howard’s Brigade, was to advance on the Almaraz bridge by way of the goat track over the Cueva Pass, bypassing the French advanced defences on the Sierra de Mirabete.
The three columns marched out of Jaraicejo at dusk on 16th May 1812, in the expectation that they would reach their targets before dawn and launch surprise attacks in the dark.
The routes turned out to be more difficult than was expected and the columns arrived shortly before dawn, ruling out a surprise night-time attack.
Without a surprise attack it was clear that there was no possibility of capturing the French positions at the top of the pass and, unless they were taken, the British and Portuguese guns could not continue to the Almaraz bridge.
Hill spent the rest of the 17th and the 18th May 1812 attempting to find a way for his guns to pass the French positions and continue along the road to the bridge over the Tagus, without success.
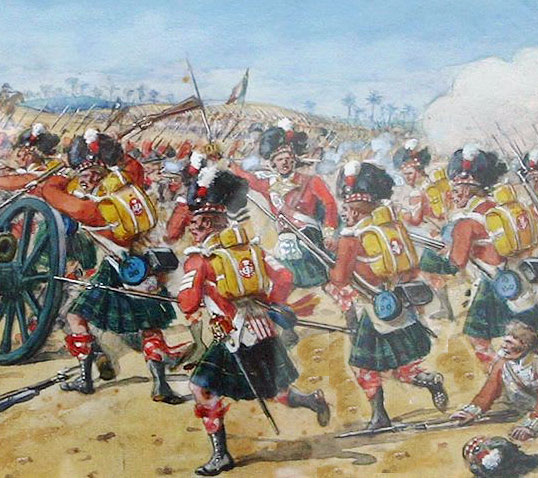
92nd Highland Regiment: Battle of Almaraz on 19th May 1812 in the Peninsular War: picture by Richard Simkin
Hill decided to continue the attack with the right column alone, leaving the other columns to demonstrate against the French in the pass in the hope of distracting attention from the right column, which on 19th May 1812, took the goat track over the Cueva Pass through the village of Roman Gorda to Fort Napoleon and the bridge.
The Caçadores and a company of the 5th/60th Rifles were transferred to the right column, together with the artillerymen of the Centre Column to enable Hill to make use of any captured guns.
On the evening of the 18th May 1812, Hill’s right column began the difficult climb down through the Cueva Pass to the bottom of the Sierra.
The scaling ladders carried by the British troops had to be cut into halves to manipulate them round the steep corners of the narrow, winding pass.
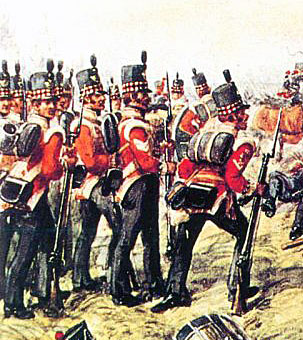
71st Highland Light Infantry: Battle of Almaraz on 19th May 1812 in the Peninsular War: picture by Richard Simkin
Chowne opened a bombardment on the French positions on the crest of the Sierra de Mirabete, while the garrison of Fort Napoleon crowded onto the parapets to watch Chowne’s attack.
Emerging from the goat track, the British 50th Regiment and a wing of the 71st made a rush for Fort Napoleon.
The British were met by a storm of artillery fire from Fort Ragusa on the north side of the river and musketry from Fort Napoleon.
The attacking British troops reached Fort Napoleon, jumped into the ditch and put ladders against the far side.
The ladders, in their cut-down condition, proved to be too short and had to be spliced together.
The attackers climbed out of the ditch, scaled the rampart and closed with the garrison.
The French troops fled out of Fort Napoleon, without defending the central blockhouse and made for the bridge, pursued by the British, where several Frenchmen fell through the gap in the centre of the bridge and were drowned.
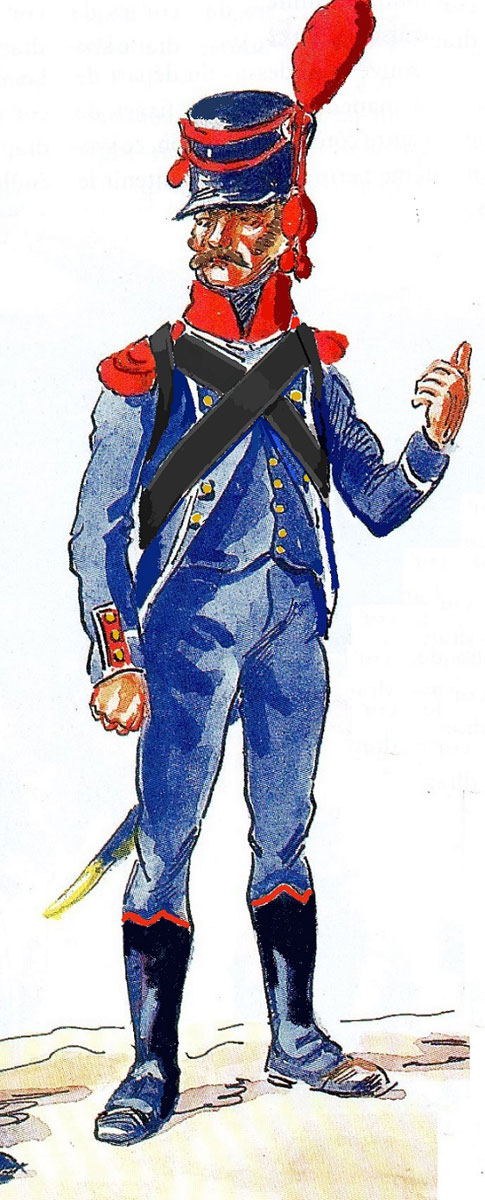
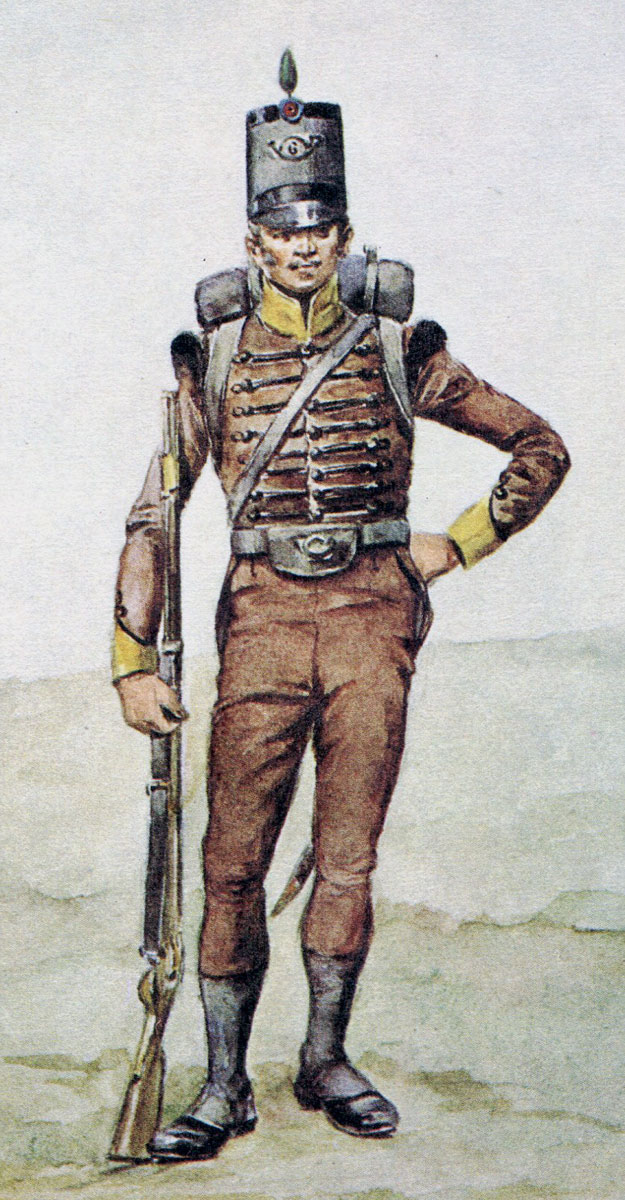
Carabinier of French 6th Light Regiment: Battle of Almaraz on 19th May 1812 in the Peninsular War
The French troops in Fort Napoleon should not have been surprised, as they clearly were, as French pickets had seen a British cavalry patrol on the 17th May 1812 in the Pass of Roman Gorda and a Spanish woman specifically warned the French troops that the British were on their way over the Cueva Pass.
The French gunners in Fort Ragusa turned their fire on Fort Napoleon and were met by a counter-fire by the British gunners using the captured French guns in the fort.
The panic infecting the French troops in Fort Napoleon seems to have spread to the garrison in Fort Ragusa, as they soon abandoned their positions and fled up the road to the town of Naval Moral, 10 miles distant.
Grenadiers of the British 92nd swam across the river and brought back boats from the far bank, enabling the bridge to be completed and crossed by Hill’s column.
Hill had captured the bridge at Almaraz in a matter of minutes.
During the rest of that day and the next the British troops dismantled the bridge and burnt it, along with the substantial amount of stores found in the arsenal of Fort Ragusa.
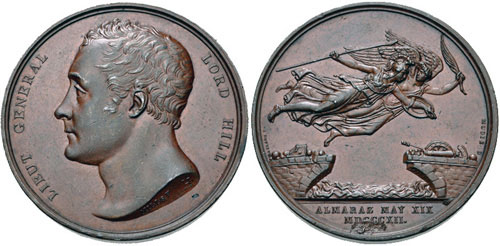
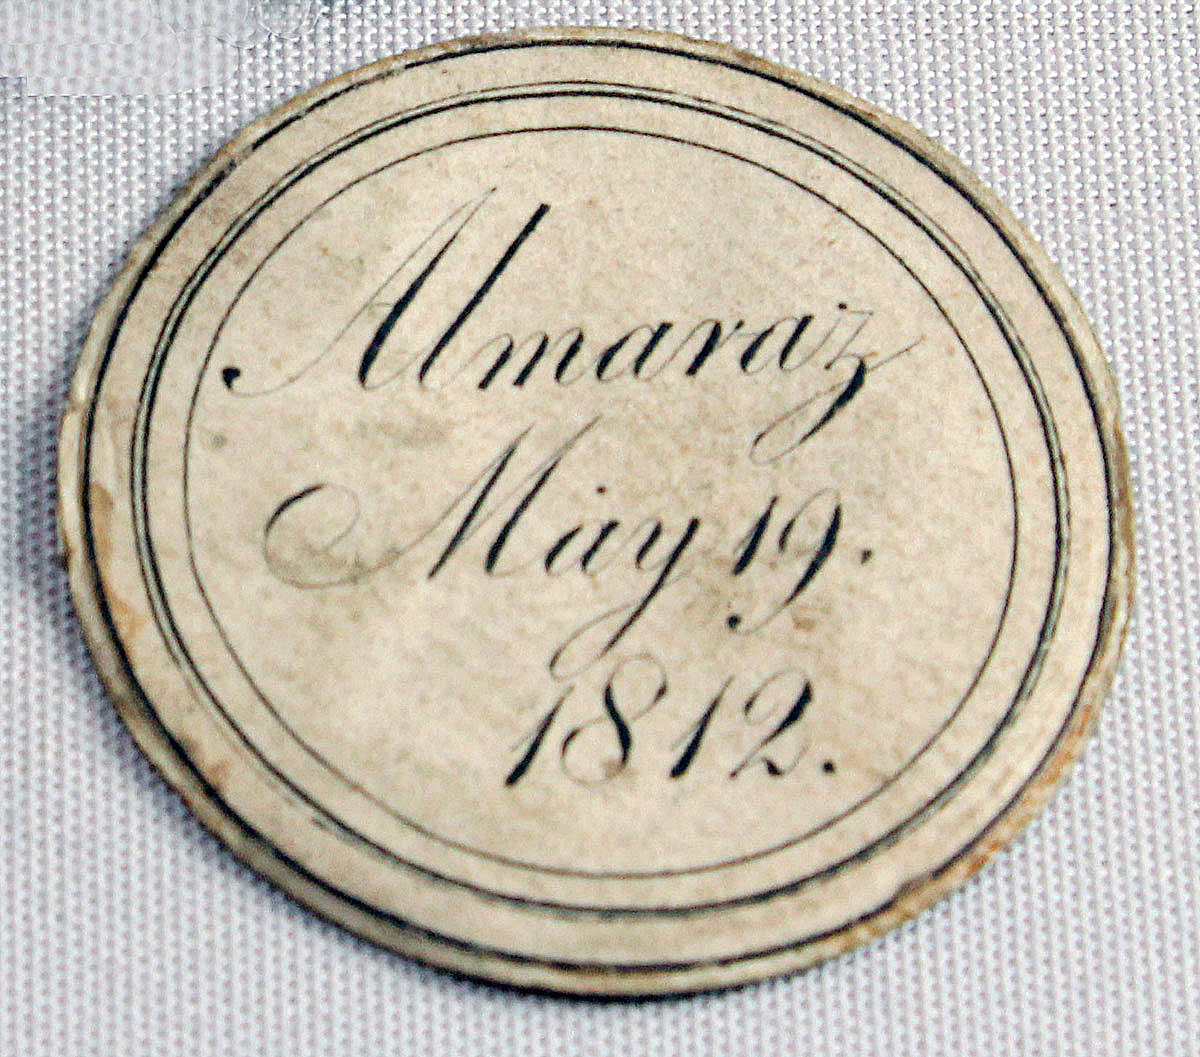
Medal commemorating the Battle of Almaraz on 19th May 1812 in the Peninsular War
Casualties at the Battle of Almaraz:
British and Portuguese casualties were 33 killed and 144 wounded.
Captain Candler was killed leading the Grenadiers of the 50th Regiment in the attack on Fort Napoleon.
An officer of the Royal Artillery was killed by a mine.
The French casualties were probably around 400 killed or wounded and 259 taken prisoner, including Major Aubert and 16 other officers.
Follow-up to the Battle of Almaraz:
General Foy, hearing of Hill’s advance on the bridge at Almaraz, had ordered General Chemineau to march with the 6th Light Regiment to the relief of the French troops holding the Almaraz bridge.
Chemineau was too late, meeting the fugitives from Almaraz as he was leaving Naval Moral. Chemineau thereupon withdrew to Oropesa.
Following the taking of the bridge, Hill returned to the French positions at the top of the pass over the Sierra de Mirabete with the guns taken from the French, intending to capture all the remaining French positions.
D’Erlon began a movement against the British outposts at Medellin, causing Erskine to fear that he was about to be attacked and to call for help.
In the face of the aggressive move by D’Erlon, Graham withdrew his two divisions into Badajoz, causing Hill to fear that he would be cut off and to abandon his attack on Mirabete, withdrawing to Truxillo and then back to the British lines.
Foy re-inforced the garrison in the castle at Mirabete on 23rd May 1812, rendering it safe from further attack.
With Hill’s destruction of the bridge at Almaraz the nearest bridge across the Tagus available for use by the French was at Toledo, some 50 miles to the east.
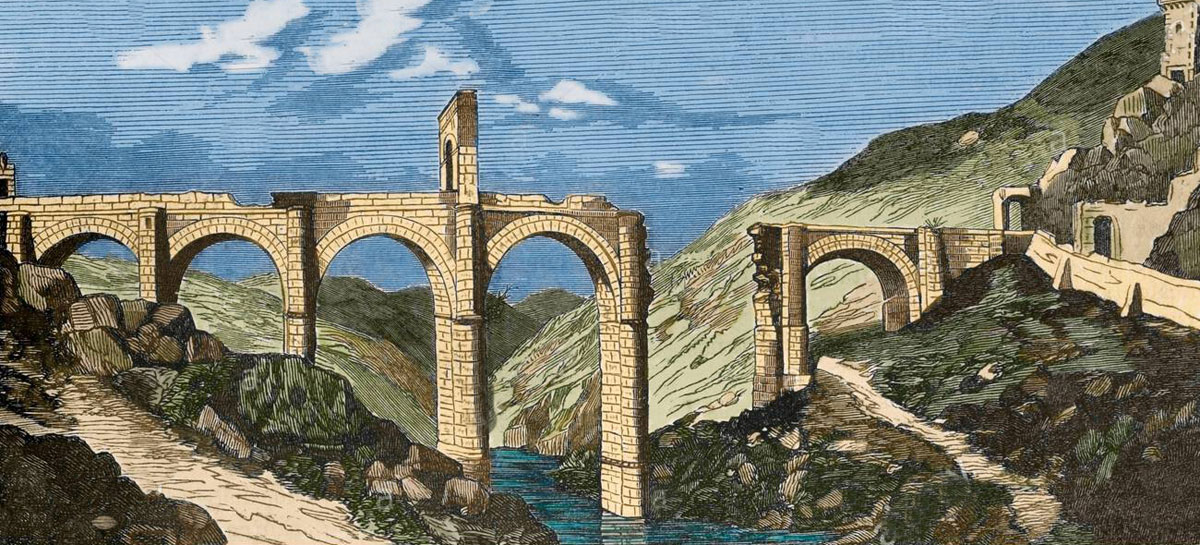
Roman Bridge at Alcantara damaged in 1809: Battle of Almaraz on 19th May 1812 in the Peninsular War
At the same time Wellington caused his engineers to restore the broken bridge at Alcantara, 60 miles to the west of Almaraz on the River Tagus, shortening his route from south to north by 100 miles.
Royal Artillery: Battle of Almaraz on 19th May 1812 in the Peninsular War
Medal and Battle Honour for the Battle of Almaraz:
The Battle of Almaraz was not a clasp on the Military General Service Medal 1848 nor a British Regimental Battle Honour.
Anecdotes and traditions from the Battle of Almaraz:
- Hill appeared to consider the destruction of the bridge at Almaraz to be one of his most significant military achievements. When Hill was elevated to the peerage, he added Almaraz to his title, becoming Viscount Hill of Almaraz.
- In restoring the broken bridge at Alcantara, the British engineer officer, Major Sturgeon, relying on his experiences in India, spanned the broken arch with a form of suspension bridge, installing wooden platforms supported by lengths of cable, said to be Europe’s first suspension bridge.
References for the Battle of Almaraz:
See the extensive list of references given at the end of the Peninsular War Index.
The previous battle of the Peninsular War is the Battle of Villagarcia
The next battle of the Peninsular War is the Battle of Salamanca
31. Podcast on the Battle of Almaraz: Rowland Hill’s resourceful destruction of the fortified French bridge of boats at Almaraz over the River Tagus on 19th May 1812 during the Peninsular War: John Mackenzie’s britishbattles.com podcasts