
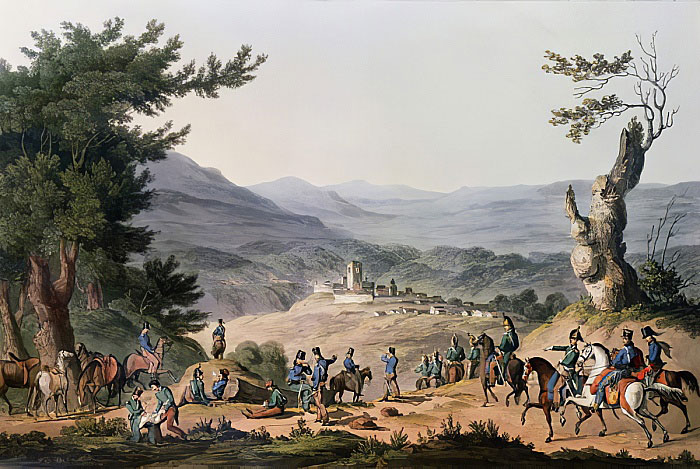
The brilliant Peninsular War action fought on 3rd April 1811 by the Light Division against Reynier’s French Second Corps on the north-eastern border of Portugal during Massena’s retreat to Spain

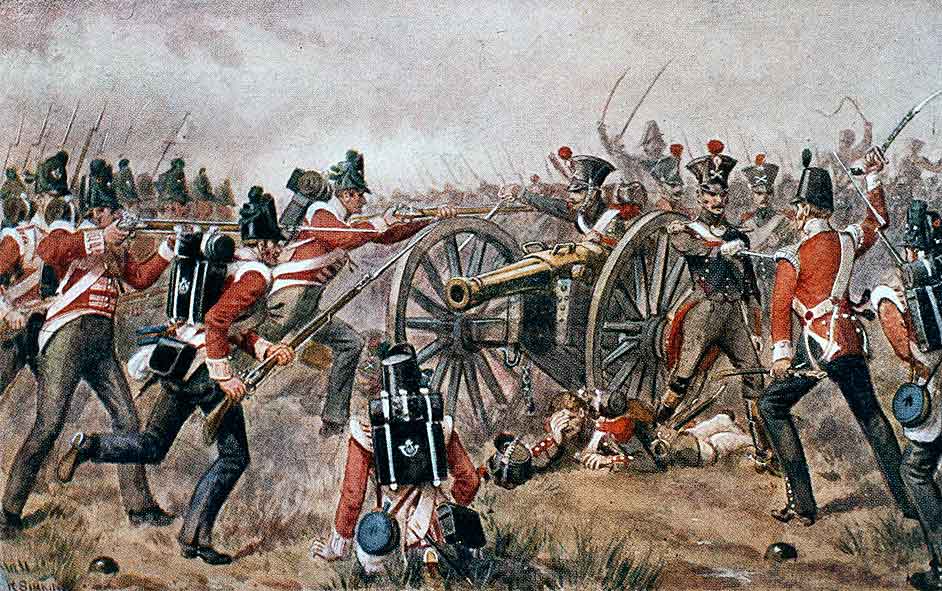
British 43rd Light Infantry fighting for the French howitzer at the Battle of Sabugal on 3rd April 1811 in the Peninsular War: picture by Richard Simkin
- Podcast of the Battle of Sabugal: The Peninsular War action fought on 3rd April 1811: John Mackenzie’s britishbattles.com podcasts.
The previous battle in the Peninsular War is the Battle of Redinha or Pombal
The next battle in the Peninsular War is the Battle of Fuentes de Oñoro
Battle: Sabugal
War: Peninsular War
Date of the Battle of Sabugal: 3rd April 1811
Place of the Battle of Sabugal: In North-East Portugal near the Spanish border
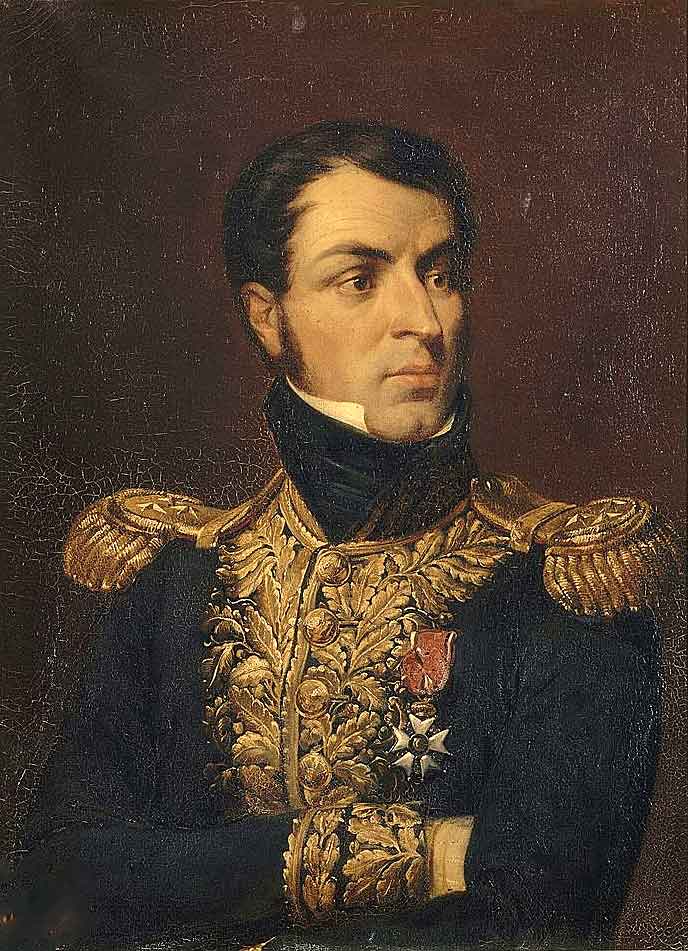
General Jean-Louis Reynier, French commander at the Battle of Sabugal on 3rd April 1811 in the Peninsular War
Combatants at the Battle of Sabugal: British and Portuguese army against the French.
Commanders at the Battle of Sabugal: Lieutenant General Viscount Wellington against Marshal André Massena, Prince of Essling and Duke of Rivoli.
Size of the armies at the Battle of Sabugal: Wellington’s army was around 37,000 men, of whom only around 2,000 were in action against the French at Sabugal. Massena’s army comprised around 40,000 men of whom only Reynier’s Second Corps and other detached units, some 6,000 men, were involved in the battle.
Uniforms, arms and equipment at the Battle of Sabugal:
The British infantry wore red waist-length jackets, grey trousers, and stovepipe shakos. Fusilier regiments wore bearskin caps. The two rifle regiments, the 60th and 95th, wore dark green jackets and trousers.
The Royal Artillery wore blue tunics.
British heavy cavalry (dragoon guards and dragoons) wore red jackets and ‘Roman’ style helmets with horse hair plumes.
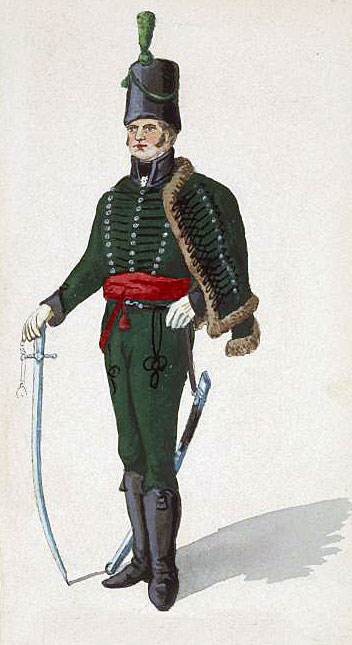
The British light cavalry was increasingly adopting hussar uniforms, with some regiments changing their titles from ‘light dragoons’ to ‘hussars’.
The Portuguese army uniforms increasingly during the Peninsular War reflected British styles. The Portuguese line infantry wore blue uniforms, while the Caçadores light infantry regiments wore green.
The French army wore a variety of uniforms. The basic infantry uniform was dark blue.
The French cavalry comprised Cuirassiers, wearing heavy burnished metal breastplates and crested helmets, Dragoons, largely in green, Hussars, in the conventional uniform worn by this arm across Europe, and Chasseurs à Cheval, dressed as hussars.
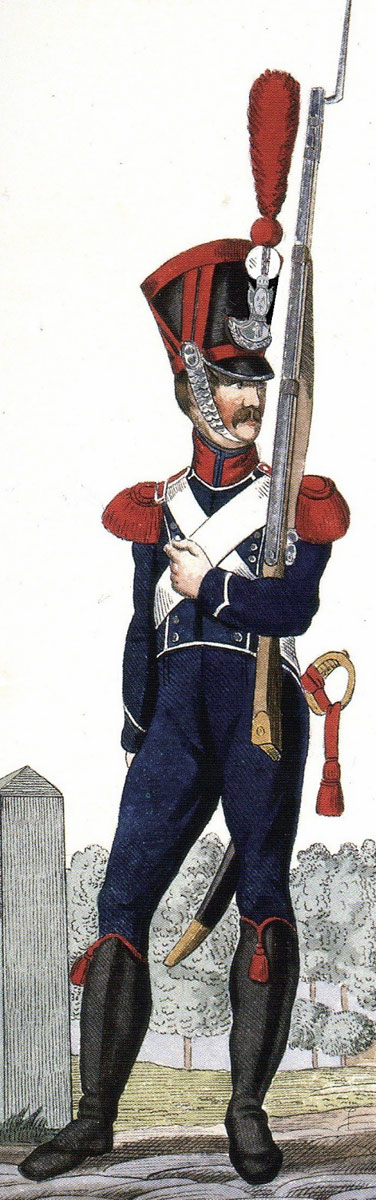
Carabinier of French 4th Light Regiment: Battle of Sabugal on 3rd April 1811 in the Peninsular War
The French foot artillery wore uniforms similar to the infantry, the horse artillery wore hussar uniforms.
The standard infantry weapon across all the armies was the muzzle-loading musket. The musket could be fired three or four times a minute, throwing a heavy ball inaccurately for a hundred metres or so. Each infantryman carried a bayonet for hand-to-hand fighting, which fitted the muzzle end of his musket.
The British rifle battalions (60th and 95th Rifles) carried the Baker rifle, a more accurate weapon but slower to fire, and a sword bayonet.
Field guns fired a ball projectile, of limited use against troops in the field unless those troops were closely formed. Guns also fired case shot or canister which fragmented and was highly effective against troops in the field over a short range. Exploding shells fired by howitzers, yet in their infancy. were of particular use against buildings. The British were developing shrapnel (named after the British officer who invented it) which increased the effectiveness of exploding shells against troops in the field, by exploding in the air and showering them with metal fragments.
Throughout the Peninsular War and the Waterloo campaign, the British army was plagued by a shortage of artillery. The Army was sustained by volunteer recruitment and the Royal Artillery was not able to recruit sufficient gunners for its needs.
Napoleon exploited the advances in gunnery techniques of the last years of the French Ancien Régime to create his powerful and highly mobile artillery. Many of his battles were won using a combination of the manoeuvrability and fire power of the French guns with the speed of the French columns of infantry, supported by the mass of French cavalry.
While the French conscript infantry moved about the battle field in fast moving columns, the British trained to fight in line. The Duke of Wellington reduced the number of ranks to two, to extend the line of the British infantry and to exploit fully the firepower of his regiments.
The inability of the French infantry to fire volleys from a line was particularly disadvantageous in the Battle of Sabugal. The use of the column was inappropriate for such a battle and contributed to their defeat.
Winner of the Battle of Sabugal:
The British attack forced General Reynier into a precipitate retreat. However, Wellington’s scheme to entrap Reynier’s Second Corps did not succeed, partly due to the appalling weather.

52nd Light Infantry at the Battle of Sabugal on 3rd April 1811 in the Peninsular War: picture by Charles Hamilton Smith
British Regiments in action at the Battle of Sabugal:
Hawker’s Cavalry Brigade:
Royal Dragoons
14th Light Dragoons
Light Division:
43rd Light Infantry
1st and 2nd Battalions 52nd Light Infantry
95th Rifles
Third Division:
5th Regiment
French Regiments in action at the Battle of Sabugal:
2nd, 36th, 47th and 70th Regiments of the Line
4th, 17th and 31st Light Regiments
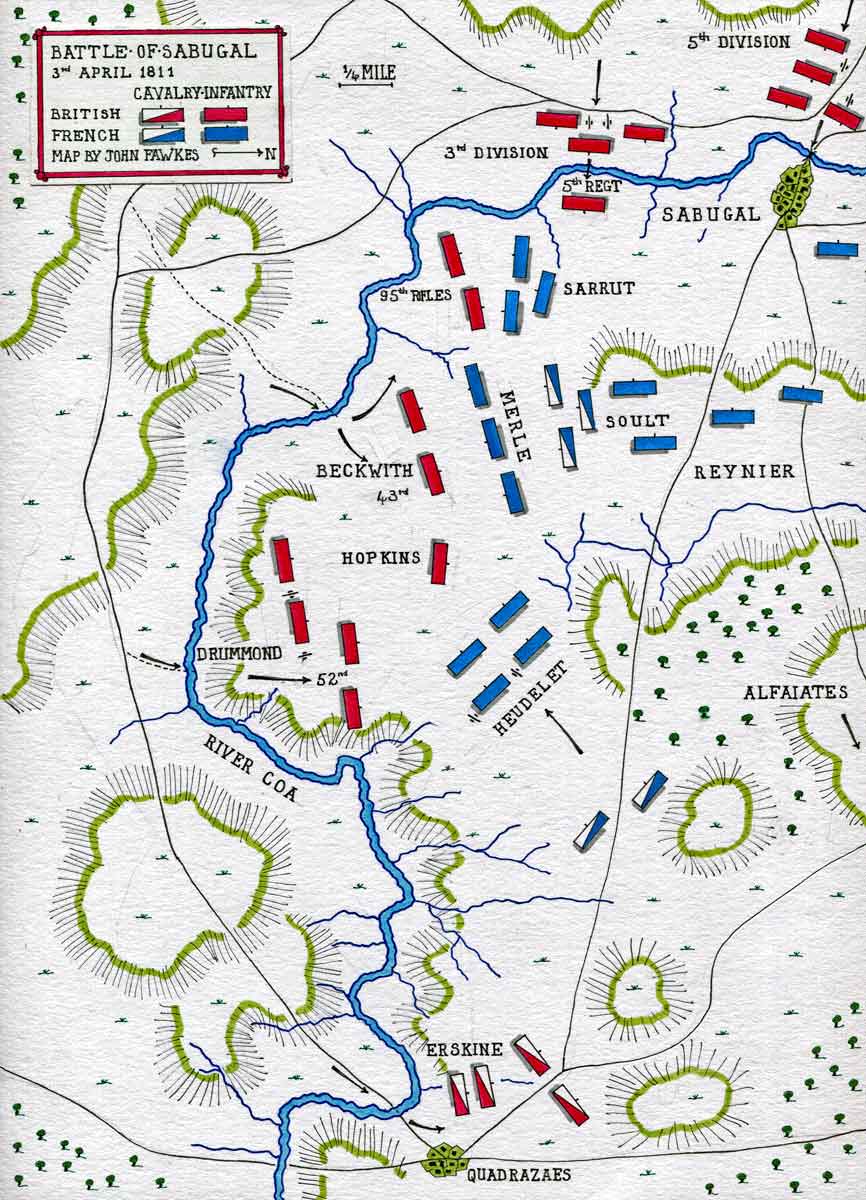
Map of the Battle of Sabugal on 3rd April 1811 in the Peninsular War: map by John Fawkes
Account of the Battle of Sabugal:
In early 1811, Marshall Massena was forced to retreat from the Line of Torres Vedras, where Wellington kept the French from capturing the Portuguese capital city of Lisbon over the winter of 1810-11, back to the Spanish frontier.
The French army was starving, as it marched across the inhospitable mountainous Portuguese hinterland in a north-eastern direction, up the valley of the River Mondego, pursued by Wellington’s British and Portuguese army.
Throughout his retreat, Massena attempted to bring the British and Portuguese to battle on his terms, but was thwarted by his subordinates, principally Ney and D’Erlon, who intended to hurry the march to Spain, where full magazines would replenish their soldier’s food and ammunition supplies.
On 2nd April 1811, Massena’s army took up positions on the east bank of the north-south flowing River Coa at Sabugal, intending to remain there briefly, before completing the last few miles of the march to Spain.
Reynier’s French Second Corps encamped along the heights to the east of Sabugal, parallel to the River Coa.
To the south of Reynier’s camp, the River Coa turned sharply east, creating a right-angled bend.
Officer of British 95th Rifles: Battle of Sabugal on 3rd April 1811 in the Peninsular War
Massena did not expect the British to interfere with his short halt, but, late on 2nd April 1811, Wellington’s divisions began to come up and Reynier reported an increase in the number of bivouac fires opposite his camp, on the far side of the River Coa.
Massena ordered the artillery of the Second Corps to withdraw to Alfaiates. He also suggested that Reynier should follow with the rest of his corps without delay.
Reynier agreed to retreat, but decided to leave his departure until sunset, preferring to move his troops in the dark, so as to be less easily tracked by the British.
Wellington intended to overwhelm Reynier’s corps before it could get away.
Wellington’s plan involved the Light Division and Hawker’s Cavalry Brigade, both commanded by Major General Sir William Erskine, marching along the southern limb of the River Coa, crossing at points well in the rear of Reynier’s left flank and attacking him in the flank and rear.
The rest of the British and Portuguese army would cross the River Coa at various points around the town of Sabugal and launch a frontal attack on Reynier.
The British Third Division would cross the River Coa above Sabugal and attack Reynier’s left flank.
The British Fifth Division would cross the River Coa directly opposite Sabugal, march through the town and attack Reynier’s centre.
The initial assaults were to be those carried out by Hawker’s cavalry brigade on the extreme right, the Light Division, crossing short of Hawker and the Third Division crossing the Coa by a ford a mile above Sabugal.
Only once these initial attacks were launched were the other Divisions to cross the River Coa and force their way into Sabugal or up onto the high ground behind the town.
3rd April 1811 began with fog and rain storms, not uncommon in that mountainous hinterland of the Iberian Peninsula.
In the early hours, General Erskine’s force set off on the road to Quadrazeas, east-bound along the south bank of the River Coa.
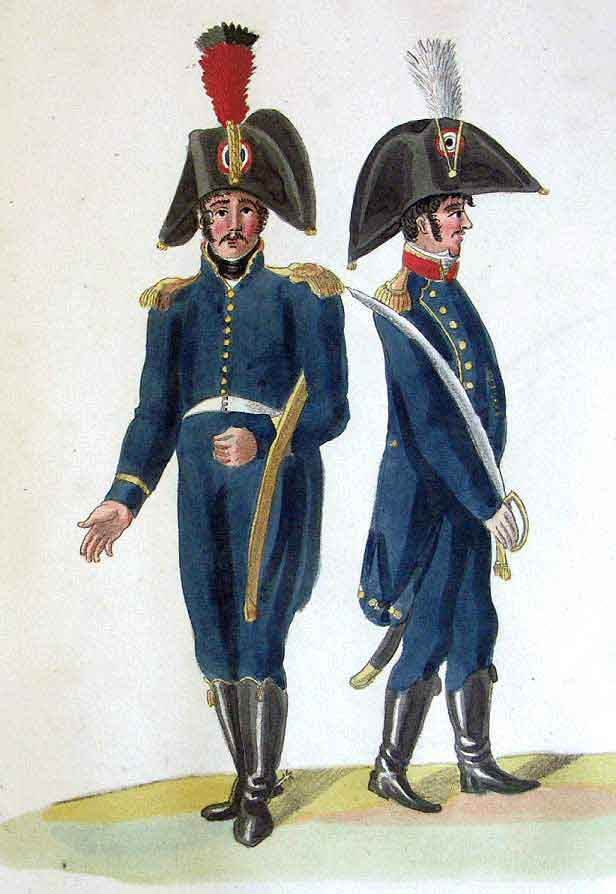
French Infantry Officers: Battle of Sabugal on 3rd April 1811 in the Peninsular War: picture by Suhl
After about one third of the journey, the Light Division turned to the left and marched up to a ford over the River Coa that would put the division well in the left rear of Reynier’s Corps.
At some stage it was realised that Colonel Beckwith’s brigade of the Light Division was not in the column.
Beckwith’s brigade comprised the 43rd Light Infantry and 4 companies of his own regiment the 95th Rifles.
A staff officer rode back down the road and found Beckwith’s men formed up, but with no orders as to what they were required to do.
Blame for this omission was, according to Fortescue, laid on Erskine or his staff.
As soon as the staff officer directed Beckwith to march up the road, he did so. But instead of continuing up the main route, Beckwith took his brigade to a nearer ford across the River Coa, some 4 miles above Sabugal.
The ford Beckwith chose was difficult to cross. The river was deep and swollen by heavy rain and the far bank steep and covered with thick vegetation. Possibly, Erskine had rejected this ford for the crossing point, committing the division to marching further along the river to an easier point.
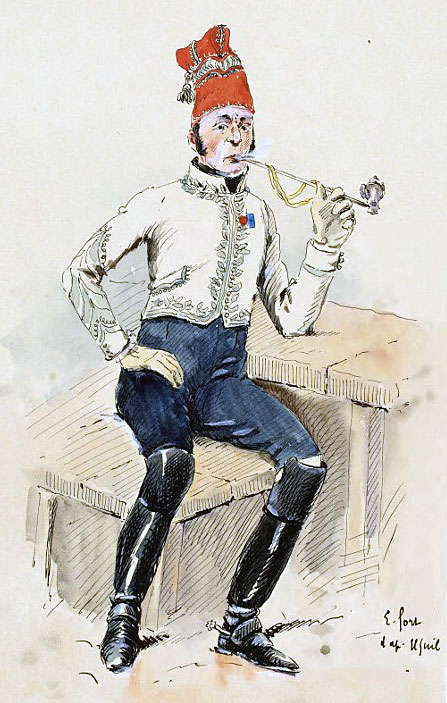
Officer of the French 4th Light Regiment: Battle of Sabugal on 3rd April 1811 in the Peninsular War
Beckwith’s men crossed the river with the water up to their armpits. A French piquet, guarding the ford, fired on the British as they crossed and hurried off to give the alarm.
The 43rd climbed to the top of the hill on the far side of the river, where they halted, while the 4 companies of 95th Rifles followed the retreating French piquet.
Visibility was much reduced by swirling fog and rain.
On receiving news of the British crossing of the River Coa on his left, Reynier sent the brigade of General Sarrut (2nd and 36th Regiments) and the 4th Light from General Merle’s division to block Beckwith’s advance.
At the same time, French cavalry commanded by General Pierre Soult moved to Reynier’s threatened flank.
The companies of the 95th Rifles attacked the French 4th Light and inflicted heavy casualties, before falling back on the 43rd, which was coming up in support.
The French 4th Light appeared on the heights above the 43rd, which exchanged volleys with the French and attacked with the bayonet, driving the French off the hill top, across the valley and up onto the next ridge.
On the brigade’s right flank, Captain Hopkins of the 43rd saw a large French force approaching from the right. This force comprised two regiments of infantry, the 17th Light and the 70th of the Line, forming the First Brigade of Heudelet’s Division, called up from Alfaiates to support General Reynier.
Hopkins halted his company on a hill top and awaited the advance of the French.
Battle of Sabugal on 3rd April 1811 in the Peninsular War: sketch made at the scene
The French brigade commander launched a strong force against Captain Hopkins’ company, which met it with a volley before driving the French back down the hill. A second volley and charge despatched the French detachment back the way it had come.
In the meantime, Beckwith was leading the rest of his brigade against Genera Sarrut’s brigade.
The fog lifted sufficiently for Beckwith to see the size of the French force he was confronting, outnumbering him probably three to one. Nevertheless, Beckwith launched his attack.
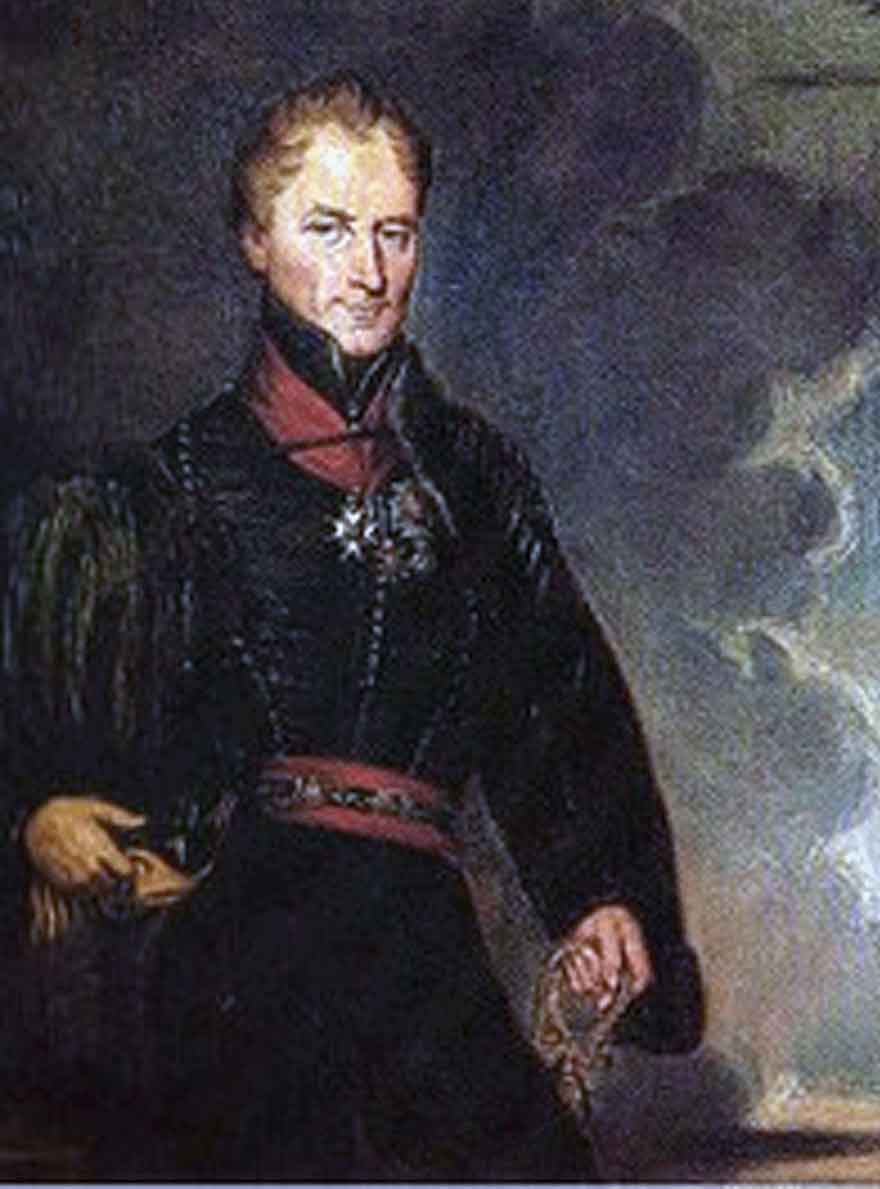
Colonel Sydney Beckwith of the 95th Rifles, British commander at the Battle of Sabugal on 3rd April 1811 in the Peninsular War
At this point, a heavier shower of rain made all firing impossible and the British troops retired to the hill from which the 4th Light had been driven, in line with Captain Hopkins’ company.
Beckwith rode over to Hopkins and congratulated him on his conduct, urging him to take any further independent action he found to be necessary.
Sarrut opened fire on the British brigade with two howitzers brought up by Heudulet and sent his skirmishers forward to take up positions along a stone wall to the front of Beckwith’s men.
From the wall, Sarrut launched three columns of infantry to attack Beckwith, while a fourth column prepared to assault Hopkins.
Both sides are described as being by now ‘furiously excited’, the French columns urged on by drummers beating the ‘pas de charge’ and the officers shouting and waving their swords some distance to the front of their men.
The 43rd and 95th held their fire until the French were close, discharging several devastating volleys before charging and driving the French columns down the slope.
The British pursued the French back to their starting position and overran one of the two howitzers, the other being removed in time to avoid capture.
The tide of battle almost immediately turned against Beckwith’s men, as General Pierre Soult launched his cavalry against them, driving the British back to the stone wall.
The British rallied behind the wall and as the French troopers rode up and attempted to fire their pistols over the wall, they were met with volleys that left barely a man in his saddle.
In the meantime, a party of French troops was attempting to remove the threatened howitzer, but, with the cavalry disposed of, Beckwith’s men turned their fire on this party and drove it back.
A see-saw action began, with each side attempting to retrieve the stranded howitzer. This continued for an hour, with fighting of a savagery that Fortescue states was not seen again until the Battle of Inkerman in the Crimean War in 1854.
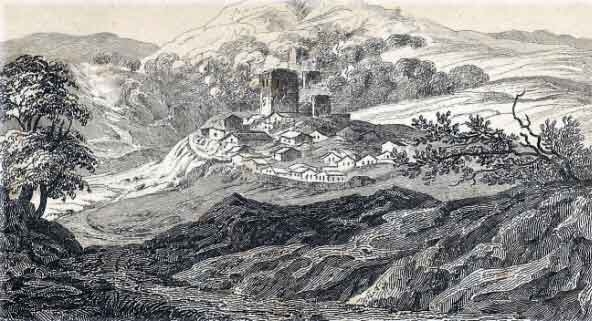
Sabugal on the River Coa: Battle of Sabugal on 3rd April 1811 in the Peninsular War: picture by Thomas Staunton St Clair
Both sides were now strongly reinforced; the French by the arrival of Heudelet’s second Brigade and the British as General Drummond’s brigade of the Light Division marched up.
The 2nd/52nd Light Infantry, a newly raised battalion just arrived in Portugal, came up on Beckwith’s right flank alongside Hopkins’ company.
The British line, in skirmishing order, moved forward through the heavy rain into a wood.
The French tactics of deploying skirmishers mixed with cavalrymen appeared to disorder the inexperienced soldiers of the 2nd/52nd.
The rest of Drummond’s brigade came up and formed a second line, together with two guns, which opened fire on the French.
The rain ceased and the mist lifted, revealing to Reynier how small the British force was that was attacking him.
Reynier despatched a force of infantry to attack Beckwith’s unguarded left flank, but his move was too late.
The British Third Division was crossing the River Coa, pushing aside the French vedettes along the hill line. The British 5th Regiment launched an attack on the French force despatched to take Beckwith in the left flank and drove it back.
Reynier hastily formed a rear-guard of the 31st Light and 47th of the Line and drew his Second Corps off towards Alfaiates.
Helped by the appalling weather, Reynier was finally enabled to break off the action and extract his corps.
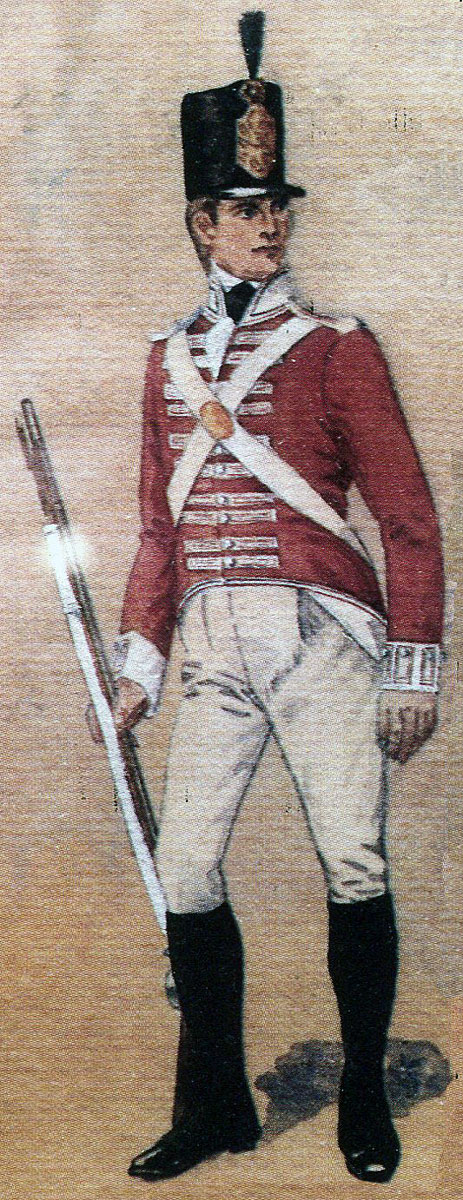
Soldier of the 43rd Light Infantry: Battle of Sabugal on 3rd April 1811 in the Peninsular War
Casualties at the Battle of Sabugal:
British casualties were around 70 killed and 145 wounded. Half of these casualties were taken by the 43rd Light Infantry.
French casualties were 760 men, of whom 180 were prisoners taken by the British. The French lost some 60 officers, a high proportion, which suggests that they were not readily followed by their men.
Follow-up to the Battle of Sabugal:
Following the Battle of Sabugal, Massena concentrated his three corps at Alfaiates, short of the Spanish border and that night continued the retreat, the three corps fanning out to enter Spain by different routes; the Second Corps heading north-east, to cover the 20 miles to Fuentes de Oñoro, the others marching in more easterly directions.
While the Battle of Sabugal was a striking display of fighting ability by the British Light Division, the battle was an overall disappointment. Wellington’s plan to trap Reynier’s Second Corps with the outflanking attack failed, Reynier being warned of the attack by Beckwith’s premature crossing of the River Coa.
Blame for the failure was generally placed on General Erskine, although responsibility for ensuring that both Light Division brigades marched at the right time and to the right place would presumably fall principally on the divisional commander.

Copenhagen Medal awarded to a member of the 95th Rifles
Anecdotes and traditions from the Battle of Sabugal:
- Lord Wellington described the Battle of Sabugal, in which Beckwith’s brigade attacked and drove back a force around three times its own size, as ‘one of the most glorious that British troops were ever engaged in’.
- Beckwith attributed the success of his brigade in the battle to Captain Hopkins.
- As a major, Thomas Sydney Beckwith commanded the 95th Rifles that served on the fleet at the Battle of Copenhagen in 1807. Fortescue says this of Beckwith at the Battle of Sabugal: ‘He gave no regular word of command, but signified his wishes by running conversation: ‘Now my lads, we’ll just go back a little, if you please.’ ‘No. I don’t mean that (as the men began to run), we are in no hurry- we’ll just walk quietly back, and you can give them a shot as you go.’ Then, when the men had reached their old position on the hill, ‘Now my men, this will do- let us show them our teeth again’: and, shaking his fist in the face of the advancing columns, he dared them to come on.’ After the war, Beckwith reached the rank of lieutenant-general in command of the Bombay Army. He died of fever in India in 1830.
References for the Battle of Sabugal:
See the extensive list of references given at the end of the Peninsular War Index.
The previous battle in the Peninsular War is the Battle of Redinha or Pombal
The next battle in the Peninsular War is the Battle of Fuentes de Oñoro
- Podcast of the Battle of Sabugal: The Peninsular War action fought on 3rd April 1811: John Mackenzie’s britishbattles.com pod