The knife-edged battle, fought on 6th October 1879 and won by the courage and resource of the British and Indian troops, that opened the way for Roberts to Kabul
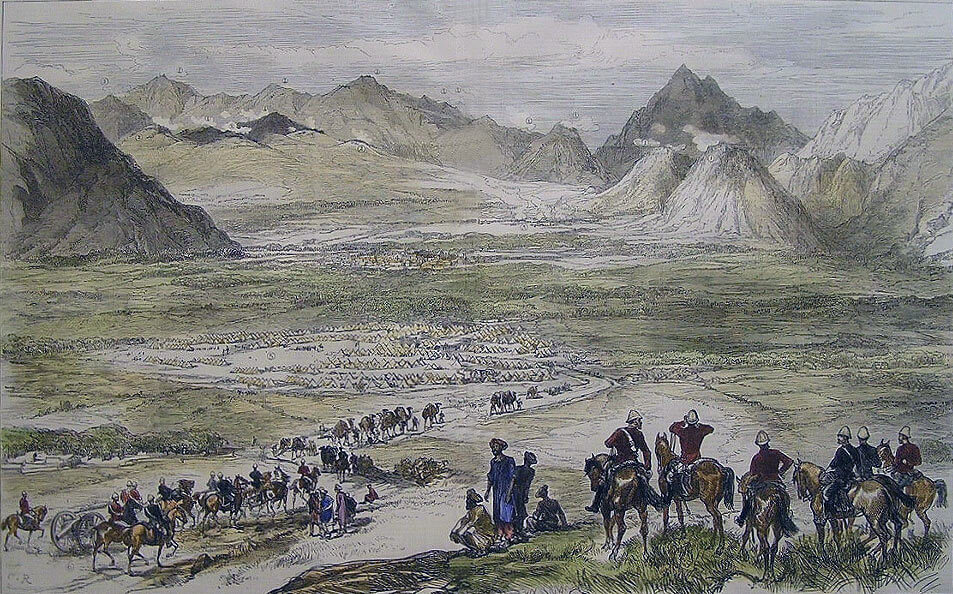
View of the Battle of Charasiab on 9th October 1879 in the Second Afghan War: the River Logar is beyond the mountains on the right
The previous battle of the Second Afghan War is the Battle of Futtehabad
The next battle of the Second Afghan War is the Battle of Kabul
To the Second Afghan War index
Battle: Charasiab
War: Second Afghan War.
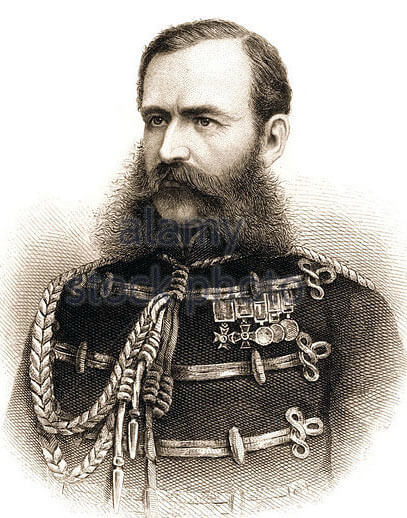
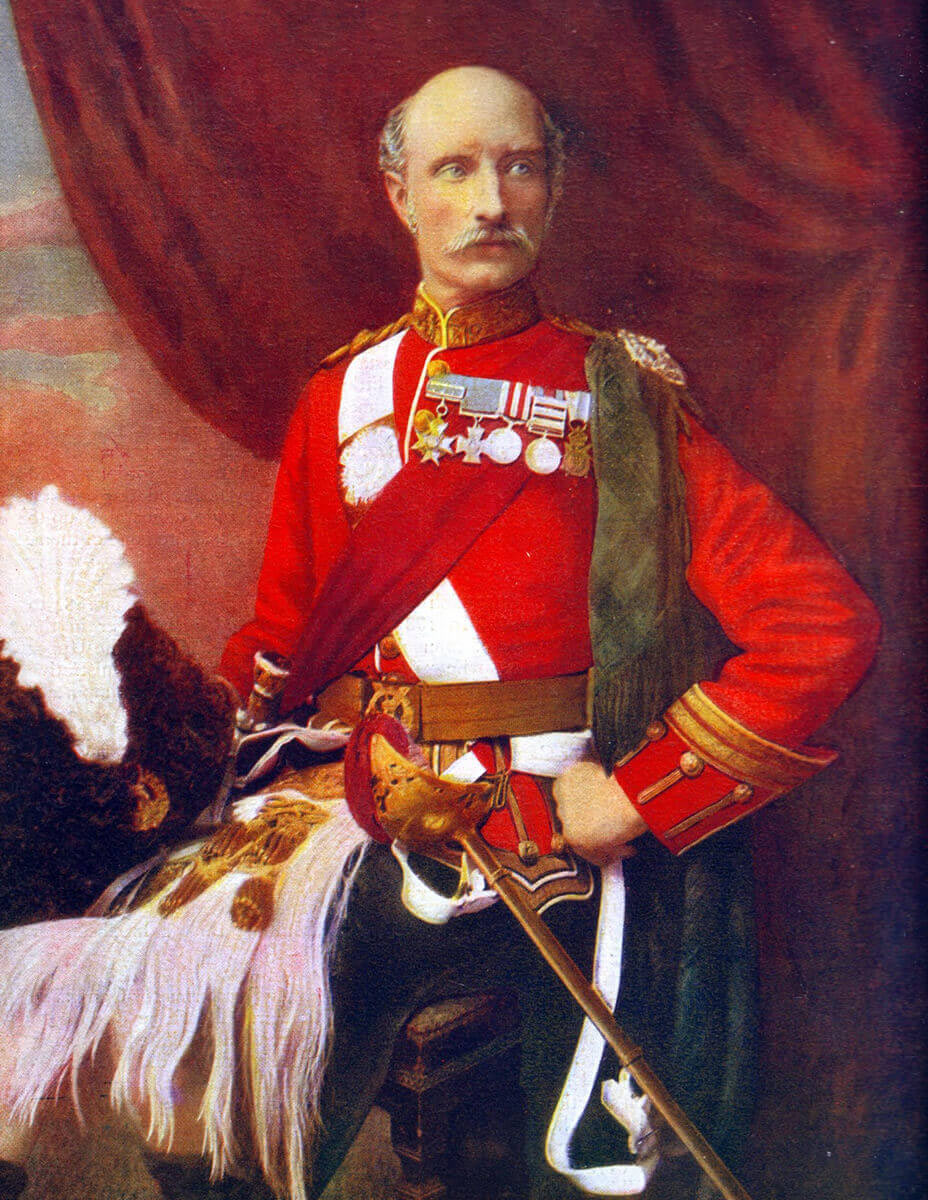
Lieutenant General Sir Frederick Roberts VC, British commander at the Battle of Charasiab on 9th October 1879 in the Second Afghan War
Date of the Battle of Charasiab: 6th October 1879
Place of the Battle of Charasiab: South of Kabul in Afghanistan.
Combatants at the Battle of Charasiab: British and Indians against Afghan troops and tribesmen.
Generals at the Battle of Charasiab: Major General Frederick Roberts VC against Nek Mohammed Khan, uncle of the Ameer and Governor of Kabul.
Size of the armies at the Battle of Charasiab: 3,800 British and Indian troops against 12,000 regular Afghan troops and tribesmen.
Uniforms, arms and equipment at the Battle of Charasiab:
The British and Indian forces were made up, predominantly, of native Indian regiments from the armies of the three British presidencies, Bengal, Bombay and Madras, with smaller regional forces, such as the Hyderabad contingent, and the newest, the powerful Punjab Frontier Force.
The Mutiny of 1857 had brought great change to the Indian Army. Prior to the Mutiny, the old regiments of the presidencies were recruited from the higher caste Brahmins, Hindus and Muslims of the provinces of central and eastern India, principally Oudh. Sixty of the ninety infantry regiments of the Bengal Army mutinied in 1857 and many more were disbanded, leaving few to survive in their pre-1857 form. A similar proportion of Bengal Cavalry regiments disappeared.
The British Army overcame the mutineers with the assistance of the few loyal regiments of the Bengal Army and the regiments of the Bombay and Madras Presidencies, which on the whole did not mutiny. But principally, the British turned to the Gurkhas, Sikhs, Muslims of the Punjab and Baluchistan and the Pathans of the North-West Frontier for the new regiments with which Delhi was recaptured and the Mutiny suppressed.
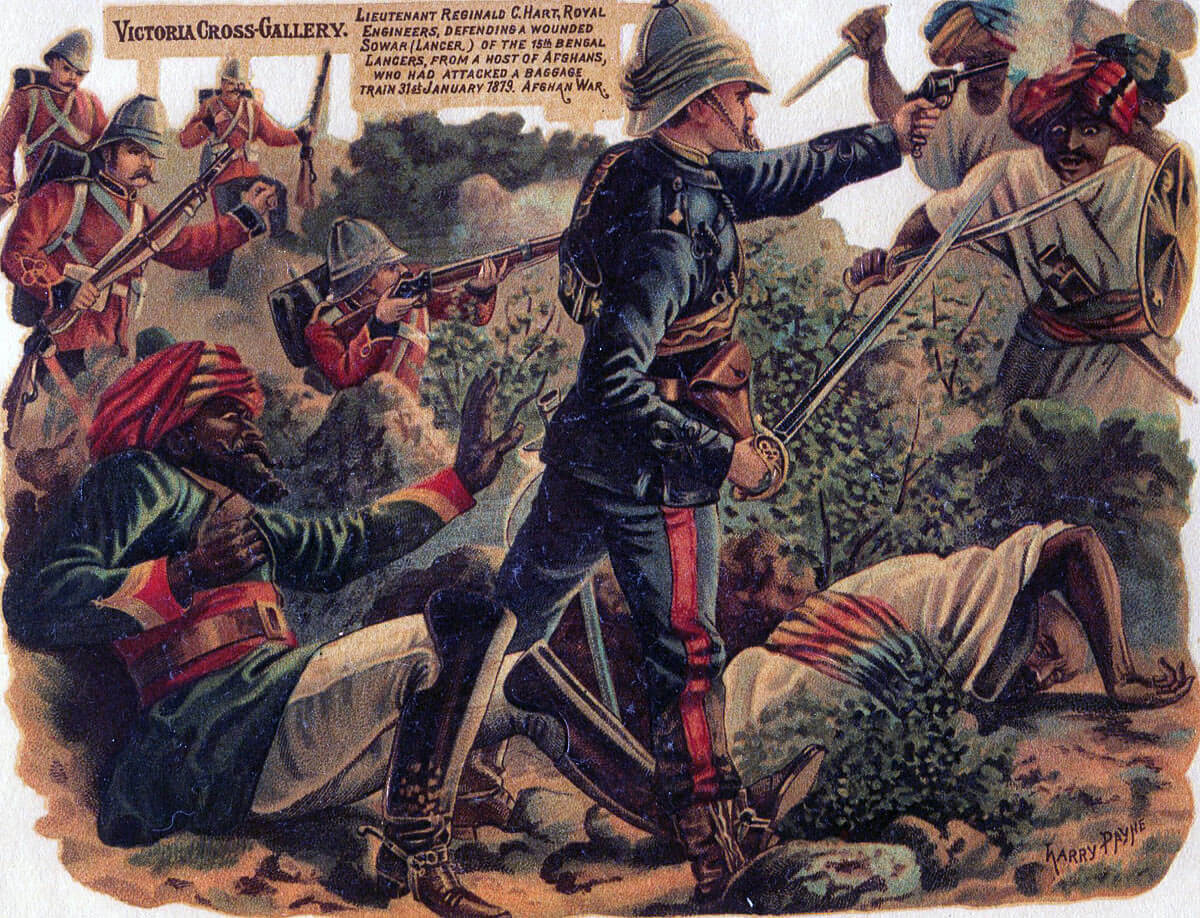
Lieutenant Hart Royal Engineers winning the VC: Battle of Charasiab on 9th October 1879 in the Second Afghan War: picture by Harry Payne
After the Mutiny, the British developed the concept of ‘the Martial Races of India’. Certain Indian races were more suitable to serve as soldiers, went the argument, and those were, coincidentally, the races that had saved India for Britain. The Indian regiments that invaded Afghanistan in 1878, although mostly from the Bengal Army, were predominantly recruited from the martial races; Jats, Sikhs, Muslim and Hindu Punjabis, Pathans, Baluchis and Gurkhas.
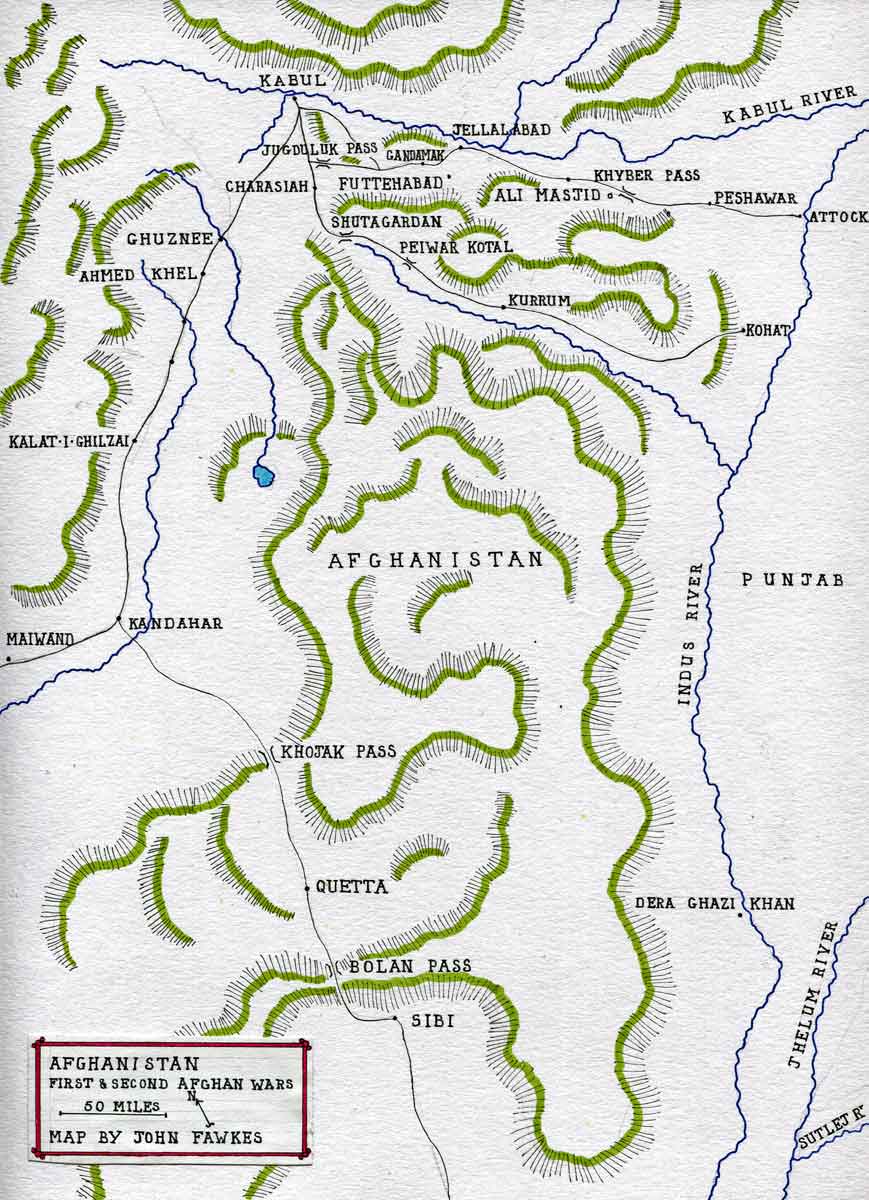
Map of Afghanistan by John Fawkes
Prior to the Mutiny, each Presidency army had a full quota of field and horse artillery batteries. The only Indian artillery units allowed to exist after the Mutiny were the mountain batteries. All the horse, field and siege batteries were, from 1859, found by the British Royal Artillery.
In 1878, the regiments were beginning to adopt khaki for field operations. The technique for dying uniforms varied widely, producing a range of shades of khaki, from bottle green to a light brown drab.
As regulation uniforms were unsatisfactory for field conditions in Afghanistan, the officers in most regiments improvised more serviceable forms of clothing.

Indian Mountain Battery: Battle of Charasiab on 9th October 1879 in the Second Afghan War: map by John Fawkes
Every Indian regiment was commanded by British officers, in a proportion of some 7 officers to 650 soldiers, in the infantry. This was an insufficient number for units in which all tactical decisions of significance were taken by the British and was particularly inadequate for less experienced units.
The British infantry carried the single shot, breech loading, .45 Martini-Henry rifle. The Indian regiments still used the Snider; also a breech loading single shot rifle, but of older pattern and a conversion of the obsolete muzzle loading Enfield weapon.
The cavalry were armed with sword, lance and carbine, Martini-Henry for the British troopers, Snider for the Indian sowars.
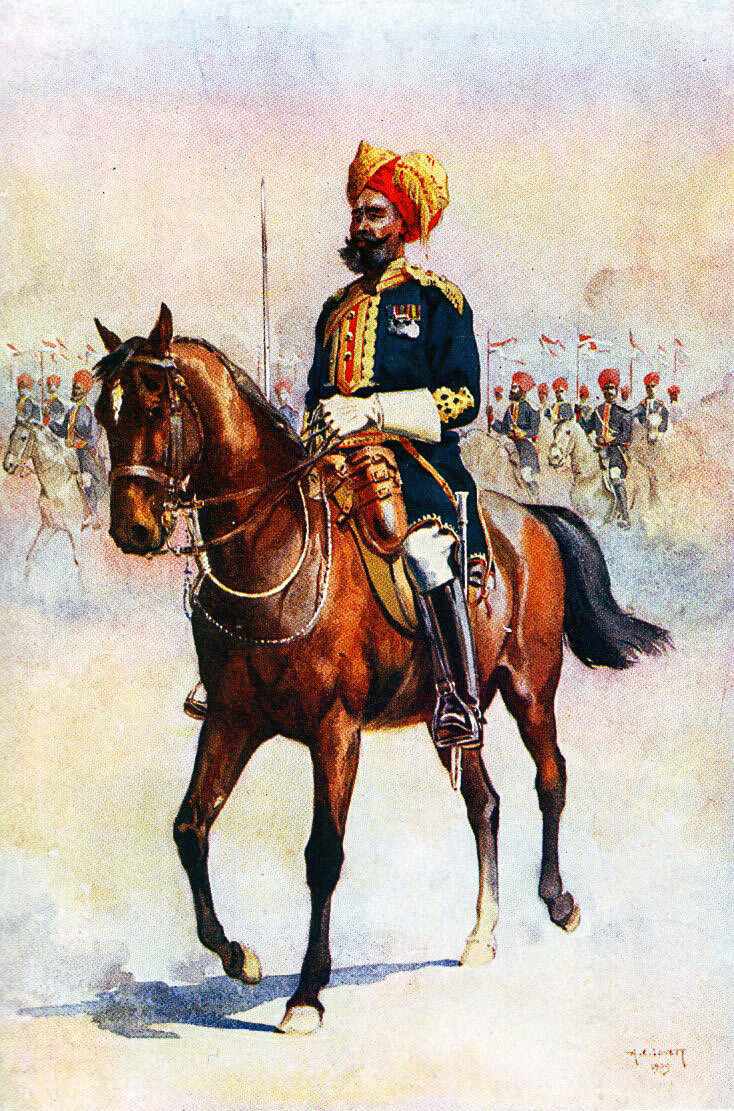
Rissaldar Major 14th Bengal Cavalry, Murray’s Jats: Battle of Charasiab on 9th October 1879 in the Second Afghan War: picture by A.C. Lovett
The British artillery, using a variety of guns, many smooth bored muzzle loaders, was not as effective as it could have been, if the authorities had equipped it with the breech loading steel guns being produced for European armies. Artillery support was frequently ineffective and on occasions the Afghan artillery proved to be better equipped than the British.
The army in India possessed no higher formations above the regiment in times of peace, other than the staffs of static garrisons. There was no operational training for staff officers. On the outbreak of war, brigade and divisional staffs had to be formed and learn by experience.
The British Army had, in 1870, replaced long service with short service for its soldiers. The system was not yet universally applied, so that some regiments in Afghanistan were short service and others still manned by long service soldiers. The Indian regiments were all manned by long service soldiers. The universal view seems to have been that the short service regiments were weaker both in fighting effectiveness and disease resistance than the long service.
Winner of the Battle of Charasiab: The British and Indians.
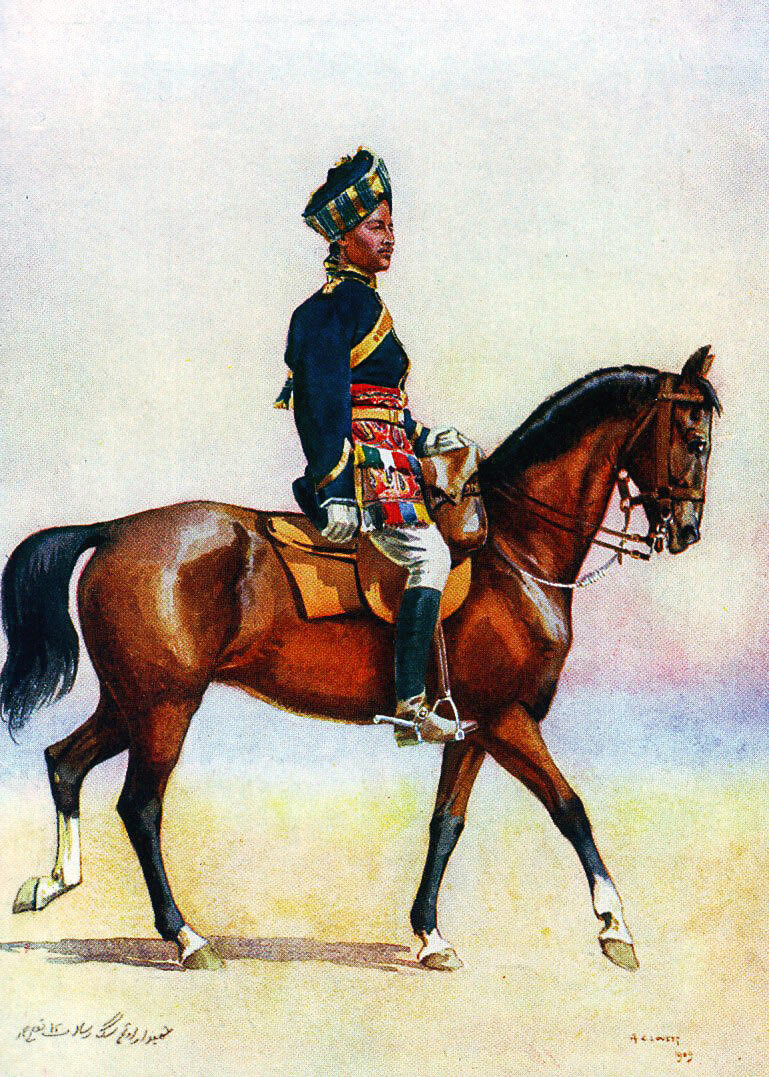
Bengal 12th Cavalry: Battle of Charasiab on 9th October 1879 in the Second Afghan War: picture by A.C. Lovett
British and Indian Regiments at the Battle of Charasiab:
British Regiments:
9th Lancers, now 9th/12th the Royal Lancers *
2 batteries Royal Horse Artillery
2 mountain batteries
67th Foot, later the Hampshire Regiment and now the Princess of Wales’s Royal Regiment. *
72nd Highlanders, later the Seaforth Highlanders and now the Royal Regiment of Scotland. *
92nd Highlanders, later the Gordon Highlanders and now the Royal Regiment of Scotland. *
Indian Regiments:
12th Bengal Cavalry *
14th Bengal Cavalry (Murray’s Jat Lancers) *
5th Punjab Cavalry (25th Cavalry (FF) *
23rd Bengal Native Infantry (Pioneers) *
28th Bengal Native Infantry (Punjabis) *
5th Gurkhas *
5th Punjab Infantry, Punjab Frontier Force (Vaughan’s Rifles) *
*these regiments have Charasiah as a battle honour.
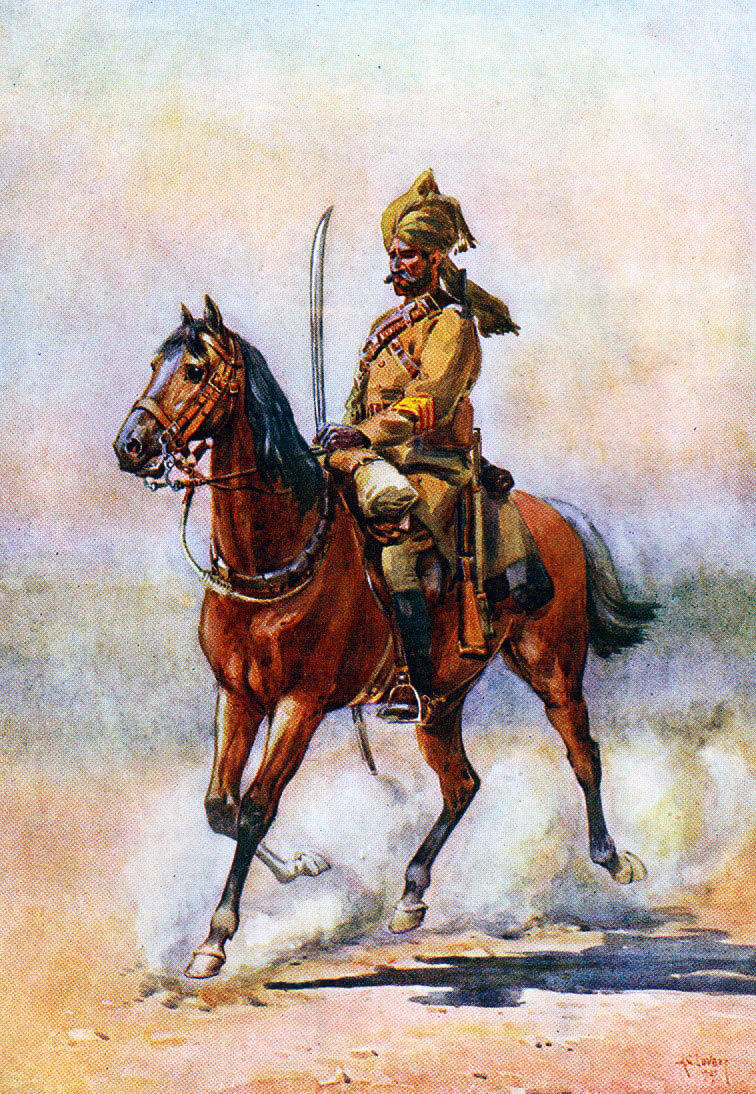
Punjab 5th Cavalry: Battle of Charasiab on 9th October 1879 in the Second Afghan War: picture by A.C. Lovett
Order of battle of the Kabul Field Force:
Cavalry Brigade: commanded by Brigadier-General Massey.
9th Lancers
12th Bengal Cavalry
14th Bengal Cavalry
5th Punjab Cavalry
Royal Artillery: commanded by Brigadier-General Gordon.
2 batteries Royal Horse Artillery
2 mountain batteries
First Infantry Brigade: commanded by Brigadier-General Macpherson VC.
67th Foot
92nd Highlanders
28th Bengal Native Infantry (Punjabis)
Second Infantry Brigade: commanded by Brigadier-General Baker.
72nd Highlanders
3rd Sikh Infantry
23rd Bengal Native Infantry (Pioneers)
29th Bengal Native Infantry (wing).
5th Gurkhas
5th Punjab Infantry, Punjab Frontier Force.
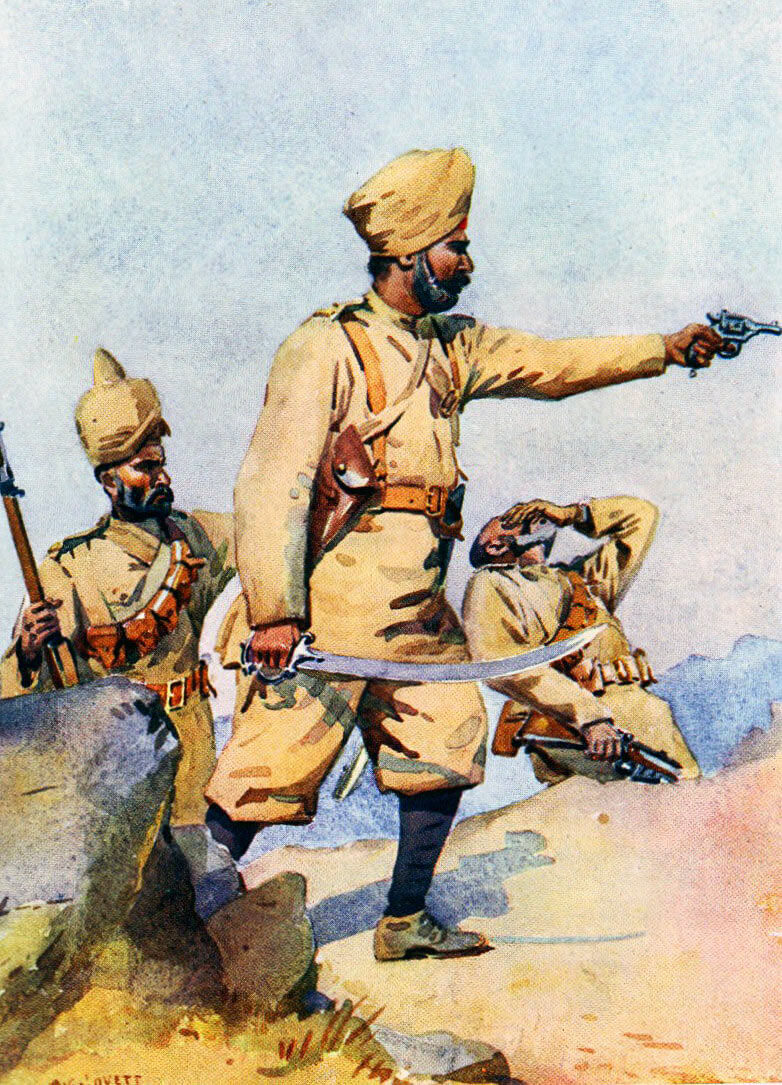
Punjabi infantry: Battle of Charasiab on 9th October 1879 in the Second Afghan War: picture by A.C. Lovett
Third Infantry Brigade: commanded by Brigadier-General Tytler VC.
85th Foot
11th Bengal Native Infantry (Rajputs)
13th Bengal Native Infantry (Rajputs)
20th Bengal Native Infantry (Punjabis)
Fourth Infantry Brigade: commanded by Brigadier-General Gordon.
2nd/8th Foot, King’s Own Regiment
7th Bengal Native Infantry (Rajputs)
21st Bengal Native Infantry (Punjabis)
29th Bengal Native Infantry (Punjabis) (wing)
The Third and Fourth Brigades garrisoned the lines of communication. This was no easy task due to the frequent raids by the mountain tribes, with many of the troops so employed seeing as much action, if not more than the troops with the main force.
Account of the Battle of Charasiab:
On 3rd September 1879, Afghan troops from the Herati regiments rioted in Kabul, demanding their arrears of pay. The rioters went to the Bala Hissar fortress, where they stormed the residency occupied by the British Military Mission under Sir Louis Cavagnari and a small escort of Guides Cavalry.
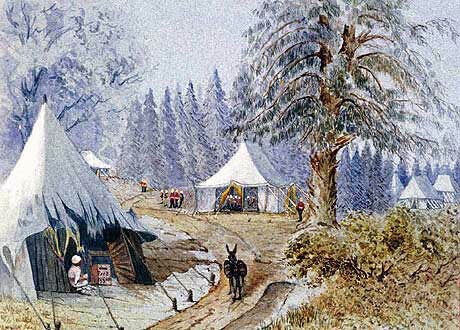
British encampment: Battle of Charasiab on 9th October 1879 in the Second Afghan War
After a bitter fight, the Herati troops killed Cavagnari and his British and Indian party, thereby rekindling the Second Afghan War.
The first phase of the war ended four months earlier with the signing of the Treaty of Gandamak in May 1879, the principle provision of which required the Afghan Ameer, Yakoub Khan, to accept Cavagnari’s mission in Kabul.
As the news of the deaths of Cavagnari’s party reached India, British and Indian regiments gathered in the border stations for the resumption of hostilities.
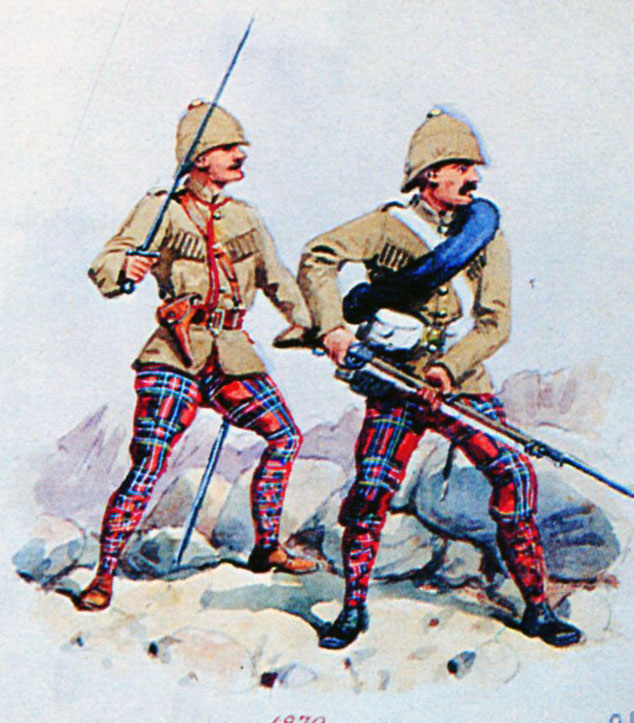
72nd Highlanders at the Battle of Charasiab on 9th October 1879 in the Second Afghan War: picture by Richard Simkin
While in the first phase, the British contented themselves with a limited incursion into Afghanistan to bring the Ameer to negotiations, the death of Cavagnari caused the government in Calcutta to initiate a full invasion of the country, the occupation of Kabul and punitive action against the killers of Cavagnari’s party.
This time, the advance was to be by the Kurrum Valley alone, the Khyber route being considered too difficult, with a strong invasion in the South of Afghanistan to take Kandahar, the Southern Afghan capital. Once Kabul was taken, the Khyber Pass route would be opened to establish supply lines with India.
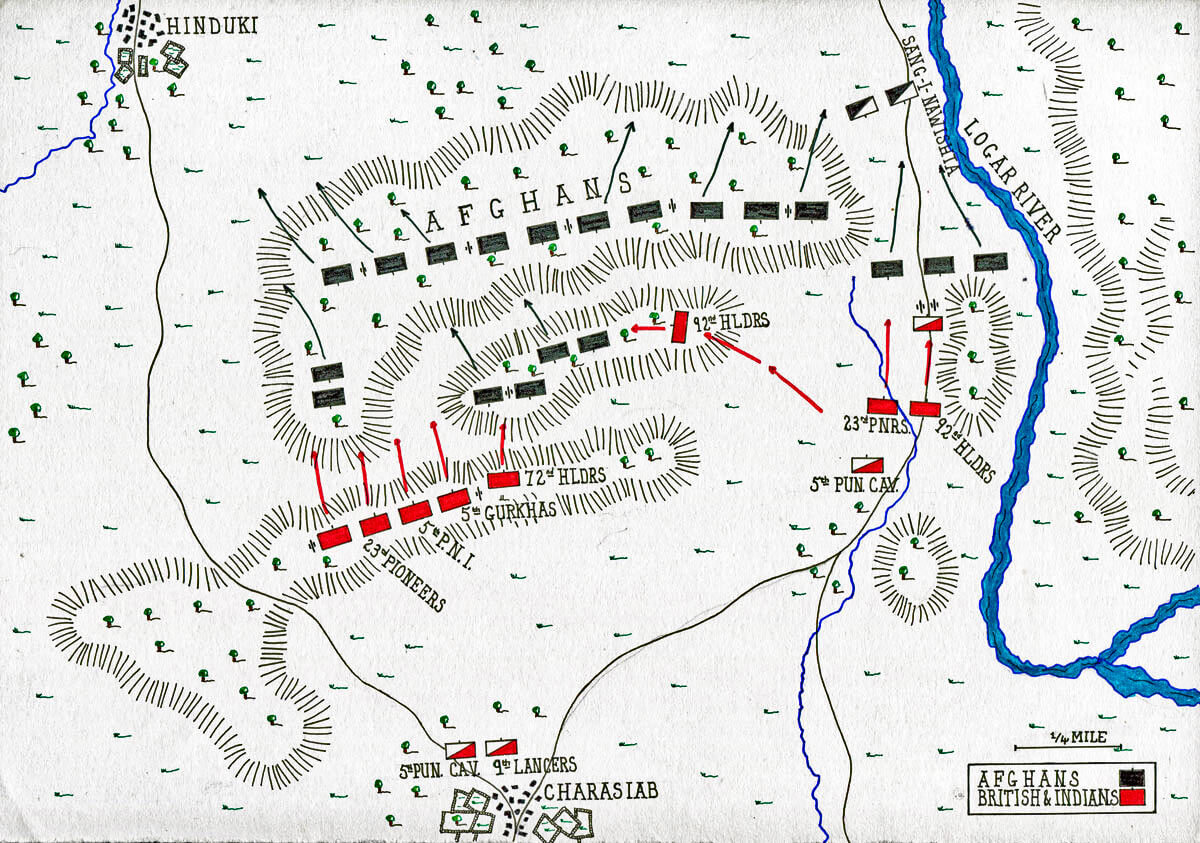
Map of the Battle of Charasiab on 9th October 1879 in the Second Afghan War: map by John Fawkes
Command of the northern attack on Kabul was given to Major General Sir Frederick Roberts, the commander of the Kurrum Valley Field Force in the first phase and the general considered to have performed best.
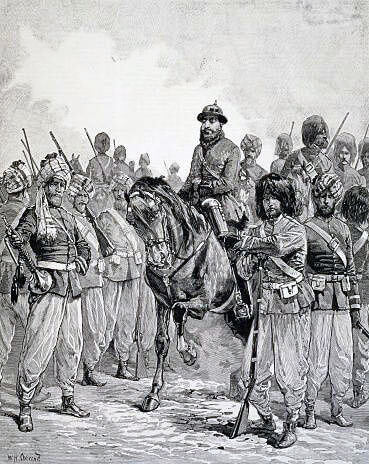
Afghan troops: Battle of Charasiab on 9th October 1879 in the Second Afghan War
Roberts reached Ali Khel near the head of the Kurrum Pass on 6th September 1879, to find the three brigades of the Kabul Field Force largely assembled and ready to cross the Shutagardan Pass into Central Afghanistan. Many of the mountain tribes were persuaded to desist from attacking the British supply columns, a move made easier by the Ramadan festival inhibiting tribal hostilities.
Yakoub Khan, finding that the murder of Cavagnari made his position as Ameer untenable, left Kabul and joined Roberts, enabling the British to claim that the invasion was to support the Ameer’s rule.
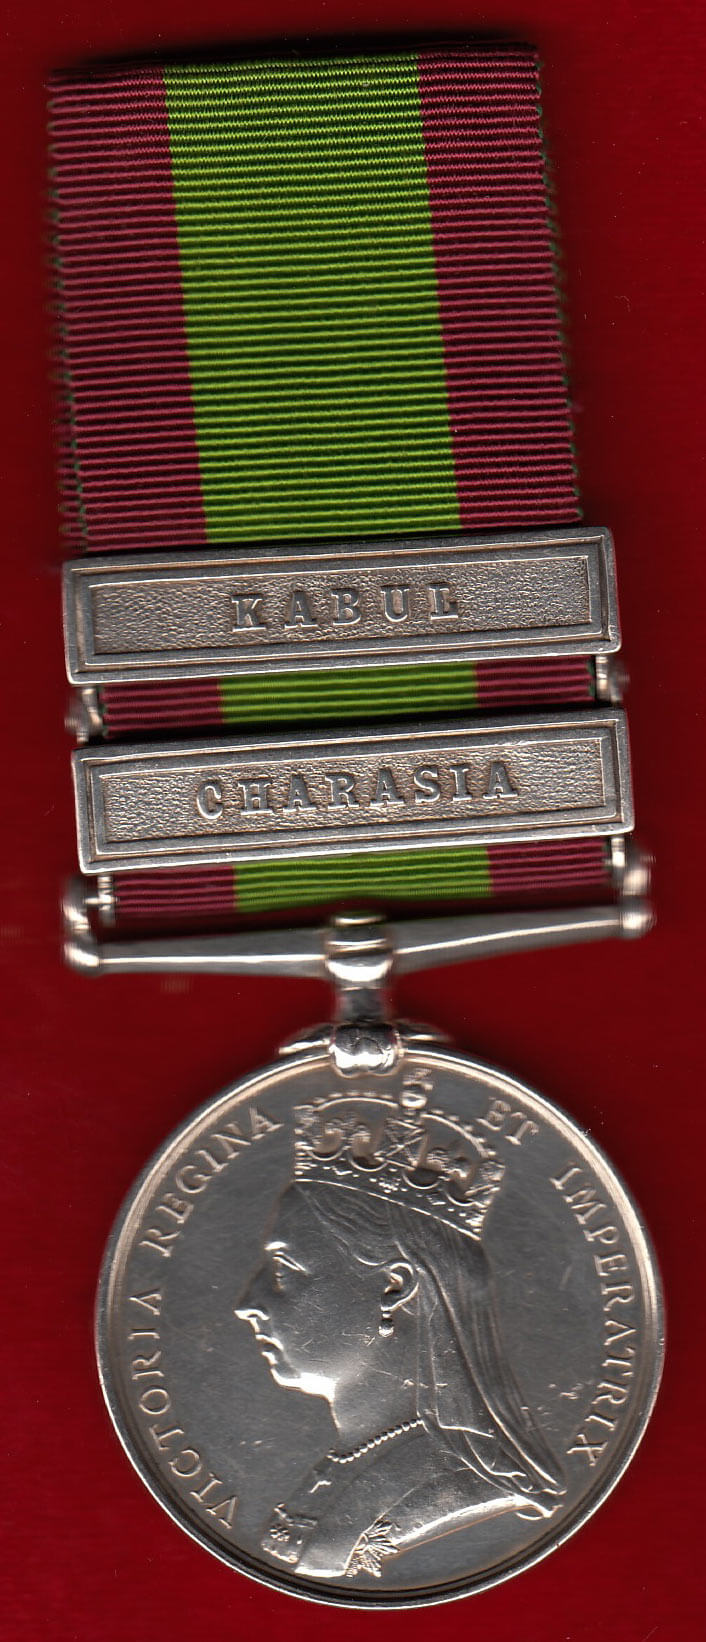
Second Afghan War Medal with clasps for Kabul and Charasia: Battle of Charasiab on 9th October 1879 in the Second Afghan War
On 3rd October 1879, the Kabul Field Force began the final thirty-six mile march to Kabul.
As in the first phase of the war, the British and Indian force was severely hampered by a shortage of transport animals, camels and oxen. Brigade Macpherson remained at the town of Safed Sang, with a reserve of ammunition and stores, while Roberts and the main body continued to Kabul.
On the evening of 5th October 1879, Roberts reached Charasiab village near the River Logar and encamped. To the north of the camp, by the river, the route to Kabul lay through the Sang i Nawishta defile. Brigadier MacGregor urged that a hill overlooking the defile be immediately occupied, but this was not done. It was Roberts’ intention to remain in Charasiab while the transport animals returned to Safed Sang and brought up the supplies left there with the remaining troops.
As evening drew in, Afghans could be seen gathering in the hills flanking the Sang i Nawishta.
On the morning of 6th October 1879, a force comprising 23rd Bengal Native Infantry and 92nd Highlanders with cavalry and 2 guns advanced to the Sang i Nawishta, with the task of making sure the route along the Logar River was passable. But the Afghan force was now moving forward and it could be seen that this was not a mass of tribesmen, but regular Afghan troops equipped with artillery, around 8,000 in number. The Afghans took position occupying three miles of the crescent of hills.
To further complicate Roberts’ position, Afghan tribesmen were gathering in his rear and cutting his links with Macpherson’s force. Roberts resolved on immediate attack on the Afghan army blocking his road to Kabul.
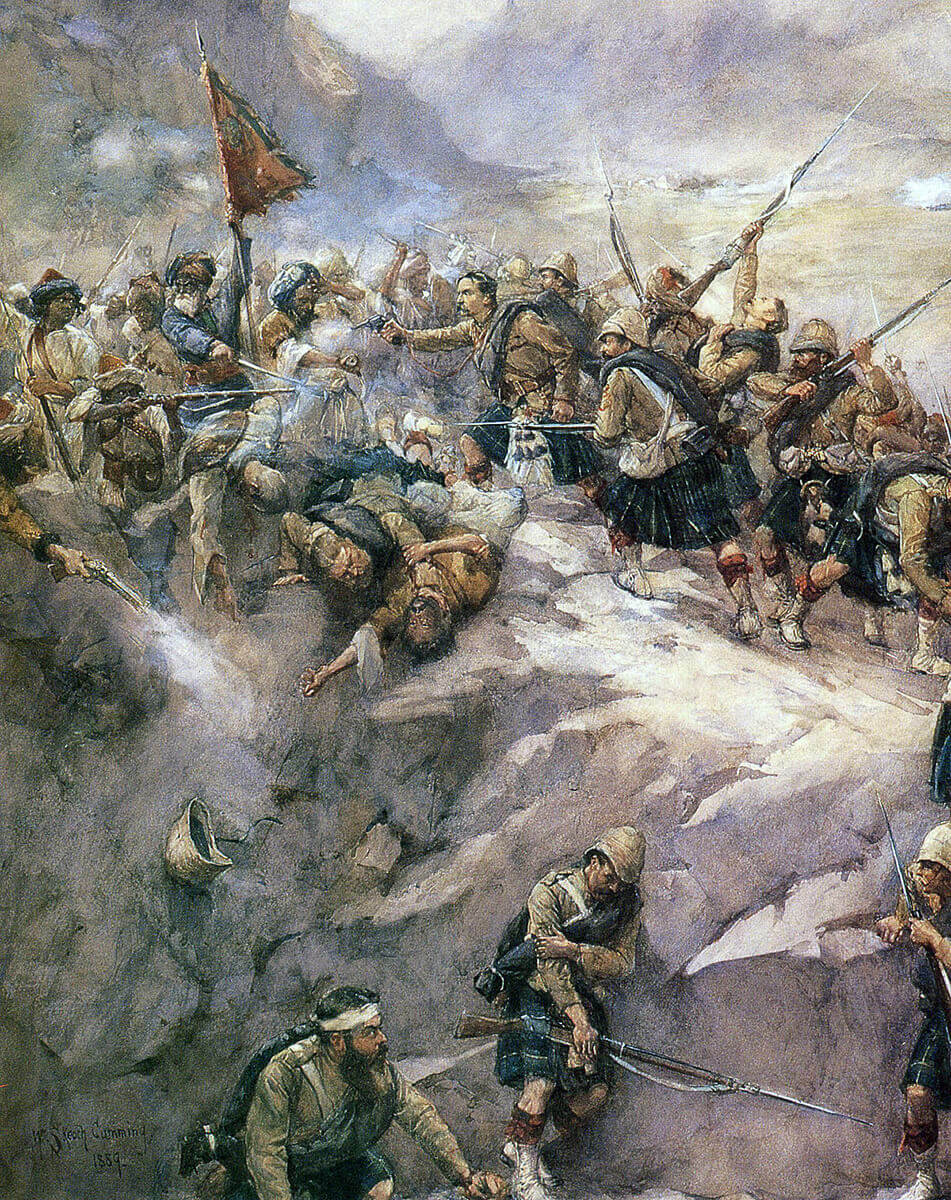
92nd Highlanders storming the heights at the Battle of Charasiab on 9th October 1879 in the Second Afghan War
Brigadier Baker advanced with the force already deployed; 72nd Highlanders, troops of 5th Gurkhas and 5th Punjab Infantry, cavalry and 5 guns.
Baker’s force divided in two; Major White leading a contingent from the 92nd and 23rd Pioneers into the defile, while Baker took the remaining companies to attack the Afghan right.
White stormed the hill overlooking the defile, only to find himself threatened by overwhelming numbers of Afghans. In spite of this, White detached two companies of highlanders to assist Baker’s attack.

Royal Artillery Elephant Battery: Battle of Charasiab on 9th October 1879 in the Second Afghan War
Baker’s troops stormed the hills forming the first line on the Afghan right, driving the Afghans back to the second line of hills. The 72nd, 5th Gurkhas and the remaining companies of the 23rd Pioneers assailed the second line. This attack was suddenly supported by the two companies of 92nd Highlanders, sent with great perspicacity by White to launch an assault in support of Baker on the left flank of the Afghans.
Looking out for Afghans: Battle of Charasiab on 9th October 1879 in the Second Afghan War
The Afghan centre and right, under attack by Baker and in flank by the 92nd, crumbled and fled, taking the troops facing White with them, pressed as they were by White’s advance up the defile. White’s cavalry captured 6 guns.
Casualties at the Battle of Charasiab: British and Indian casualties were 78. Afghan casualties were around 500.
Follow-up to the Battle of Charasiab:
The Battle of Charasiab opened the last section of road to Kabul for the British and Indian army. Moving forward, Roberts concentrated his army before taking over the city on 9th October 1879.
The battle at Charasiab was a critical one. As on several occasions in the Second Afghan War, the margin between success and disastrous failure was thin. The courage and resource of the troops and their officers won the battle against great odds. Roberts showed his remarkable tactical skill and ability to delegate, a confidence that was entirely justified in the case of vigorous and resourceful subordinate officers like White and Baker.
Anecdotes and traditions from the Battle of Charasiab:
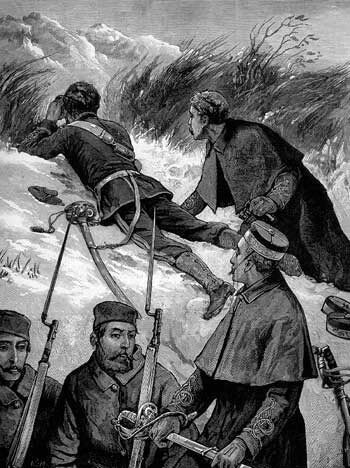
Lieutenant General Sir George White VC in 1890: Battle of Charasiab on 9th October 1879 in the Second Afghan War
- George White, a major in the 92nd Highlanders, showed his tactical skill in the battle, earning the Victoria Cross for his conduct at Charasiab and the next year at Kandahar. This was the same White who, after twenty further years’ service, in 1899 permitted his army so disastrously to be shut up in Ladysmith at the start of the Second Boer War.
- Charasiab is given as Charasiah in the battle honours list. This is clearly a misspelling.
References for the Battle of Charasiab:
The Afghan Wars by Archibald Forbes
The Road to Kabul; the Second Afghan War 1878 to 1881 by Brian Robson.
Recent British Battles by Grant.
The previous battle of the Second Afghan War is the Battle of Futtehabad
The next battle of the Second Afghan War is the Battle of Kabul
To the Second Afghan War index