
The disastrous British defeat at the hands of the Boers in Natal on 27th February 1881, leading to independence for the two Boer states

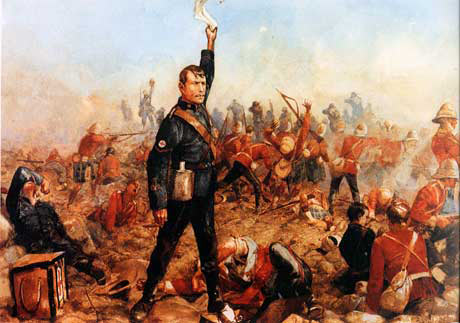
Battle of Majuba Hill on 27th February 1881 in the First Boer War: General Colley is shown on the left: picture by Richard Caton Woodville
The previous battle in the First Boer War is the Battle of Laing’s Nek
The next battle in the British Battles sequence is the Battle of Talana Hill
Battle: Majuba Hill
War: First Boer War
Date of the Battle of Majuba Hill: 27th February 1881
Place of the Battle of Majuba Hill: In the northern tip of Natal near to the Transvaal Border, in South Africa.
Combatants at the Battle of Majuba Hill: British against the Boers of the Transvaal
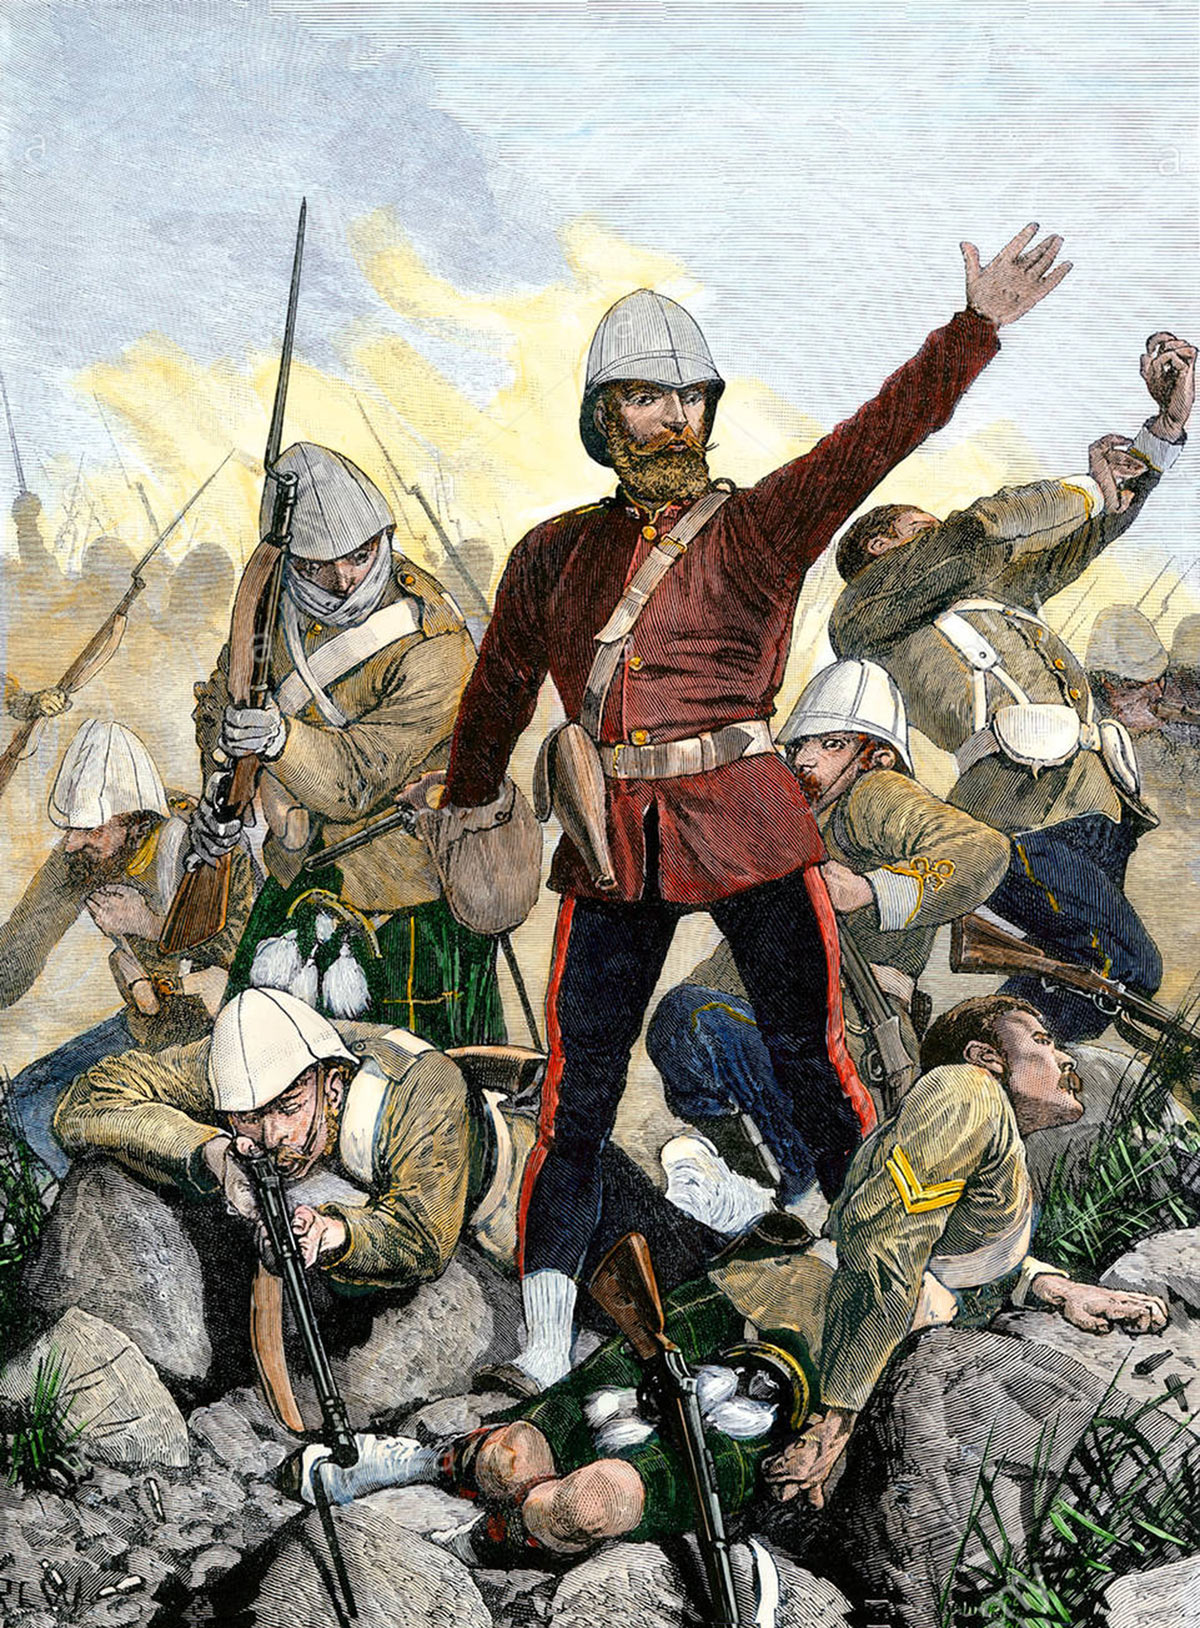
Major General Sir George Pomeroy Colley at the Battle of Majuba Hill on 27th February 1881 in the First Boer War: picture by Richard Caton Woodville
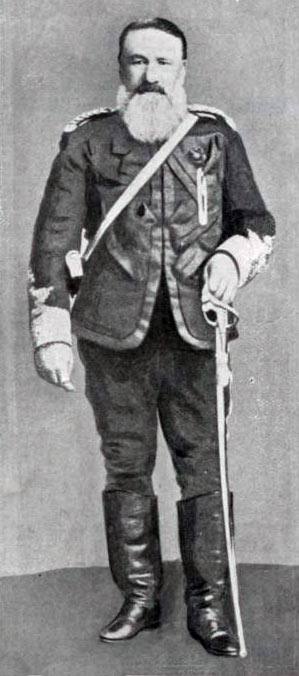
General Piet Joubert, Boer commander at the Battle of Majuba Hill on 27th February 1881 in the First Boer War
Commanders at the Battle of Majuba Hill: Major General Sir George Pomeroy Colley against Commandant General J.P. Joubert.
Size of the armies at the Battle of Majuba Hill: Colley’s British force comprised only 22 officers and 627 men.
Uniforms, arms and equipment at the Battle of Majuba Hill: The British infantry in South Africa at that date wore red jackets, blue trousers with red piping to the side, white pith helmets and pipe clayed equipment. The highlanders wore the kilt. The standard infantry weapon was the Martini Henry single shot breech loading rifle with a long sword bayonet. Gunners of the Royal Artillery wore blue jackets.
The Boers, being essentially a citizen militia, wore what they wished, jacket, trousers and slouch hat with a bandolier, and carried hunting rifles. The Boers were mainly mounted infantry, riding the ponies they used to tend their stock, many with a life time’s experience of marksmanship. They carried no bayonet leaving them at a substantial disadvantage in close combat, which they avoided so far as possible.
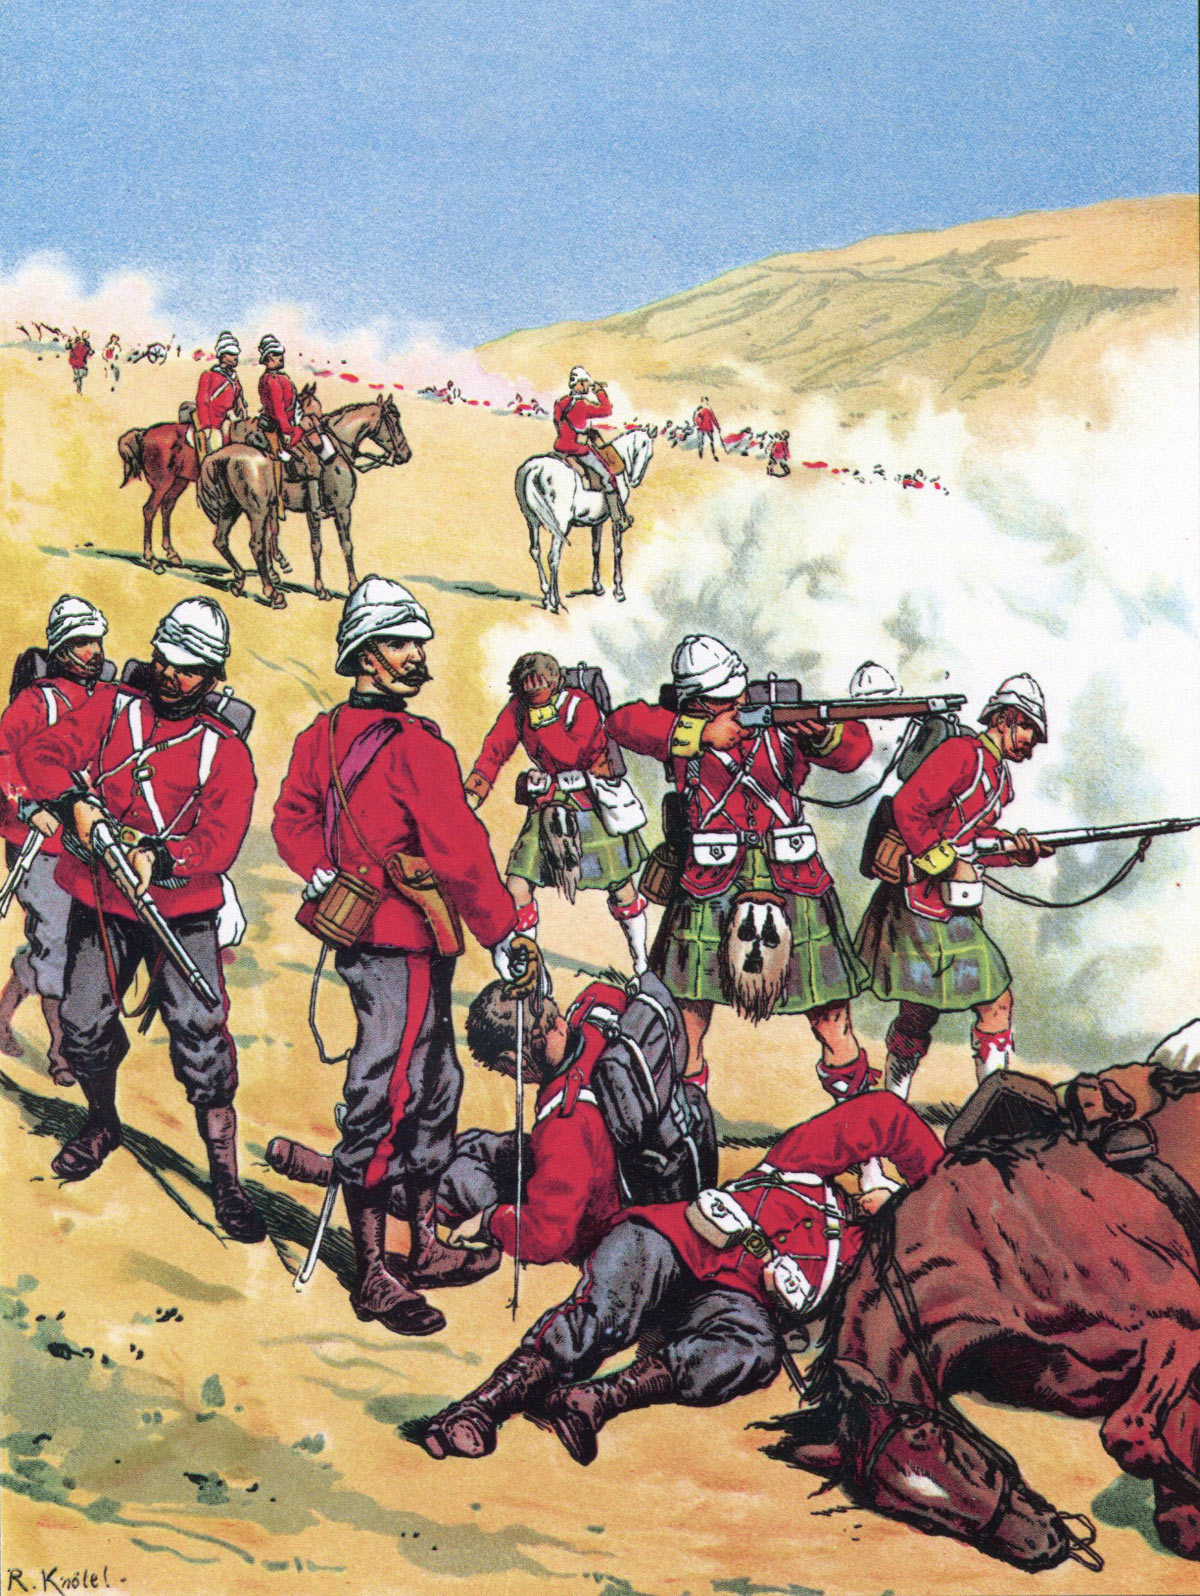
British troops at the Battle of Majuba Hill on 27th February 1881 in the First Boer War: picture by Richard Knötel
British Regiments at the Battle of Majuba Hill:
Royal Navy:
15th Hussars.
Royal Artillery
58th Regiment: later 2nd Battalion, the Northamptonshire Regiment and now the Royal Anglian Regiment.
2nd Battalion, 60th Rifles: later the King’s Royal Rifle Corps and now the Rifles.
92nd Highlanders: later 2nd Battalion Gordon Highlanders and now the Royal Regiment of Scotland.
Majuba Hill is not a British Battle Honour.
Winner of the Battle of Majuba Hill: The Boers resoundingly.
Account of the Battle of Majuba Hill: In early February 1881 Major General Sir George Colley, the British High Commissioner for South East Africa, lay at Newcastle in Natal ready to move up the road towards the Transvaal, where the Boers were in revolt against British rule. The Boer demands were for self-rule under the overall suzerainty of Britain.
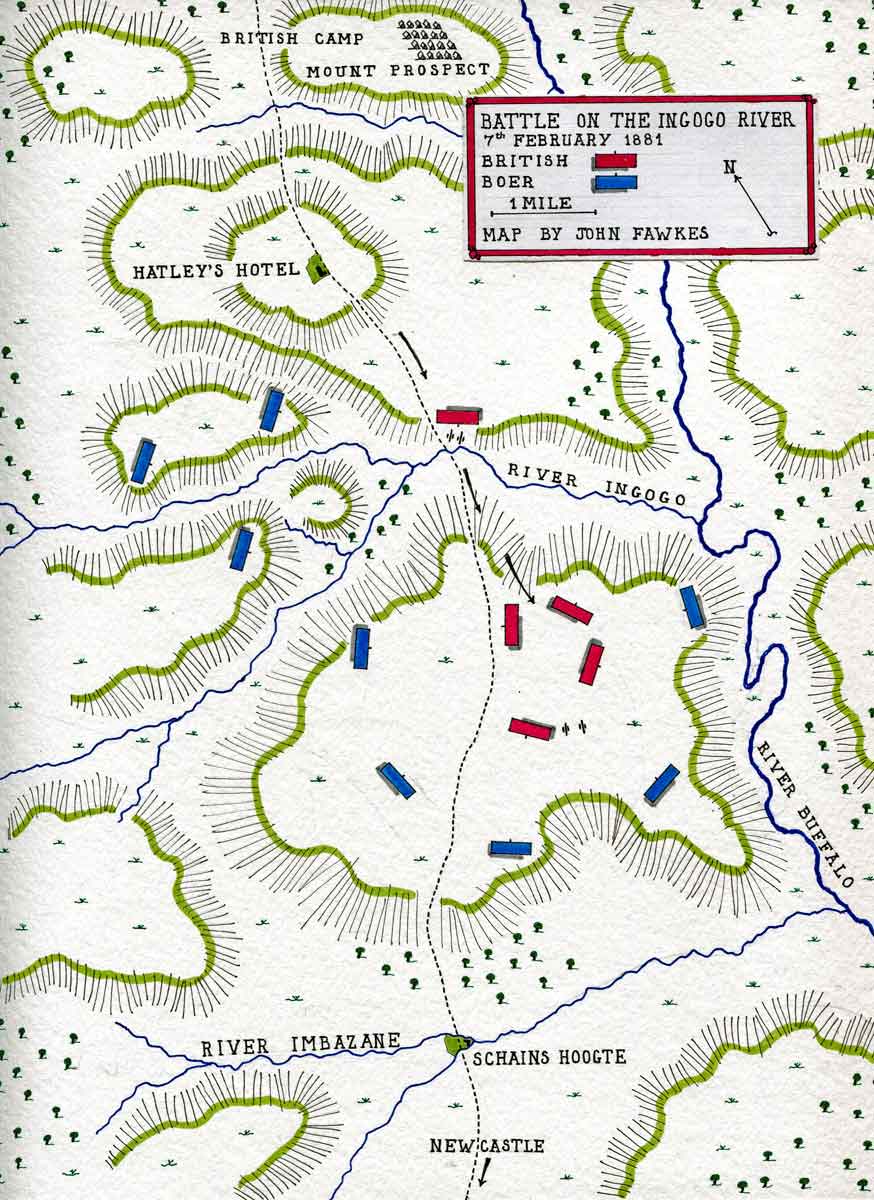
Map of the Ingogo River engagement on 7th February 1881: map by John Fawkes
Substantial reinforcements were on the way to South Africa, but carried the disadvantage for Colley of bringing a senior general, Sir Frederick Roberts, to supercede him. Colley moved with the forces he had and suffered his first defeat at Laing’s Nek.
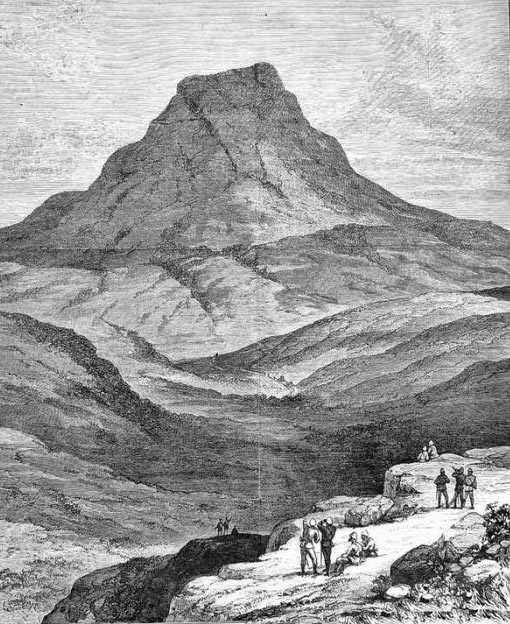
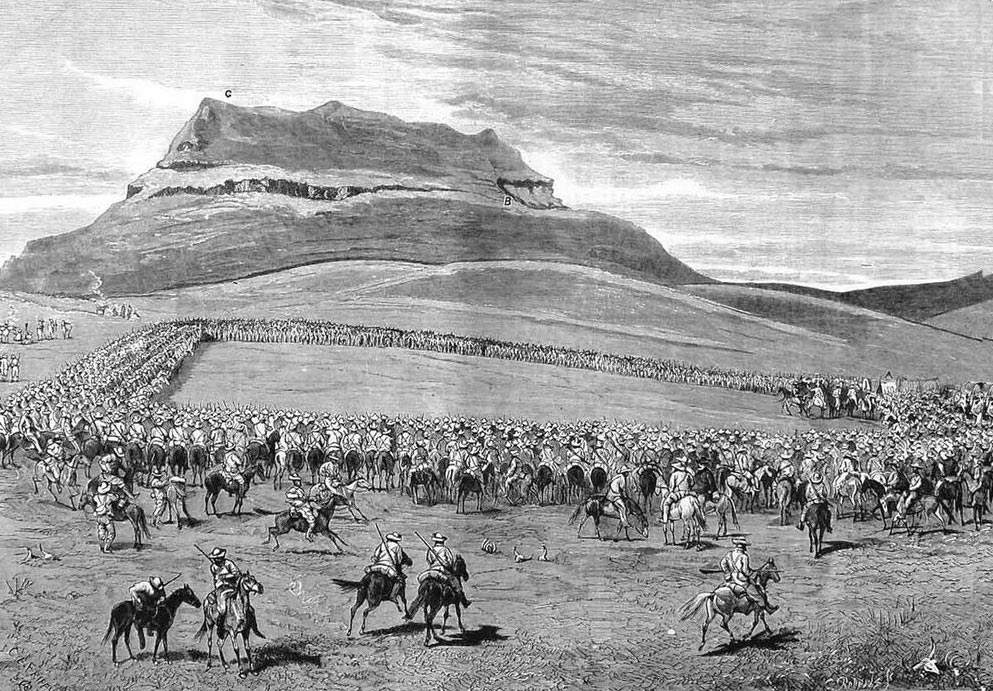
British officers observing Majuba Hill before the Battle of Majuba Hill on 27th February 1881 in the First Boer War
On 7th February 1881, Colley tried again, moving forward to the Ingogo River, where he suffered another sharp reverse at the hands of the Boer riflemen. On 12th February 1881, Brigadier General Sir Evelyn Wood VC, a veteran of Britain’s colonial wars, arrived at Durban with regiments hurried over from India; the 15th Hussars, 2nd/60th Rifles and the 92nd Highlanders. Coming up with Colley, Wood persuaded him to stay put until the substantial reinforcements from Britain arrived at the front. Wood moved back to the Tugela River to organise the newly arriving troops.

92nd Highlanders on the hilltop at the Battle of Majuba Hill on 27th February 1881 in the First Boer War
Colley did not intend to comply with the compact he had made with Wood and on the night of 26th February 1881, he marched out, towards the Boer positions, with a small force of infantry; 22 officers and 627 men from the 58th Regiment, 60th Rifles, 92nd Highlanders and the Royal Navy contingent. This small force moved towards the Boer camp, which lay on the far side of Mount Majuba.
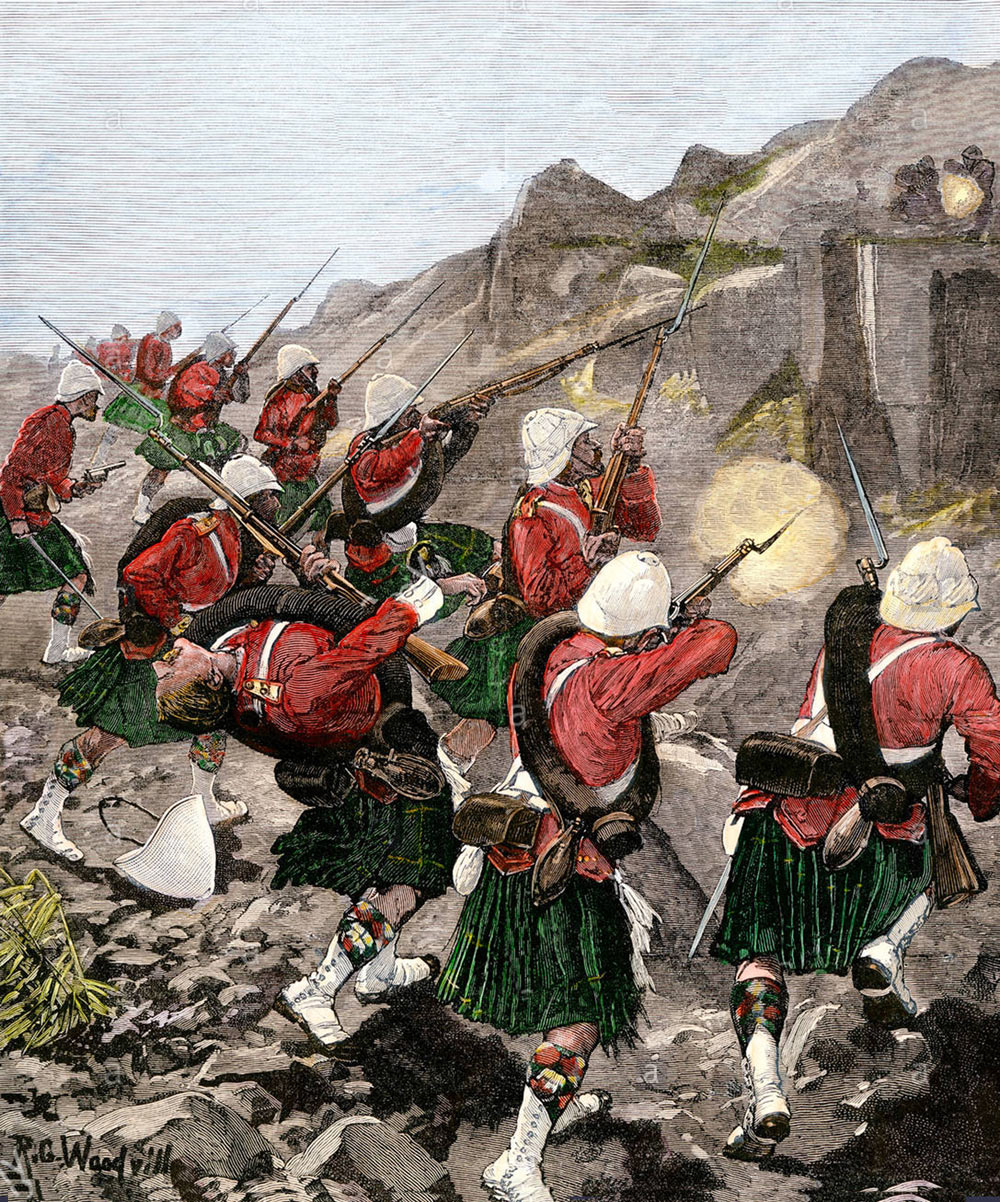
92nd Highlanders scale the hillside at the Battle of Majuba Hill on 27th February 1881 in the First Boer War: picture by Richard Caton Woodville
Two companies of the 2nd/60th were left as a picket at the base of Mount Imguela on the way to Majuba with a dismounted troop of the 15th Hussars and two more companies of infantry were positioned a little further along the road.

Map of the Battle of Majuba Hill on 27th February 1881 in the First Boer War: map by John Fawkes
The British force reached the top of Majuba Hill in the early morning and, exhausted, lay down on the plateau that stretched the length of the oblong summit. Little was done to prepare a position.
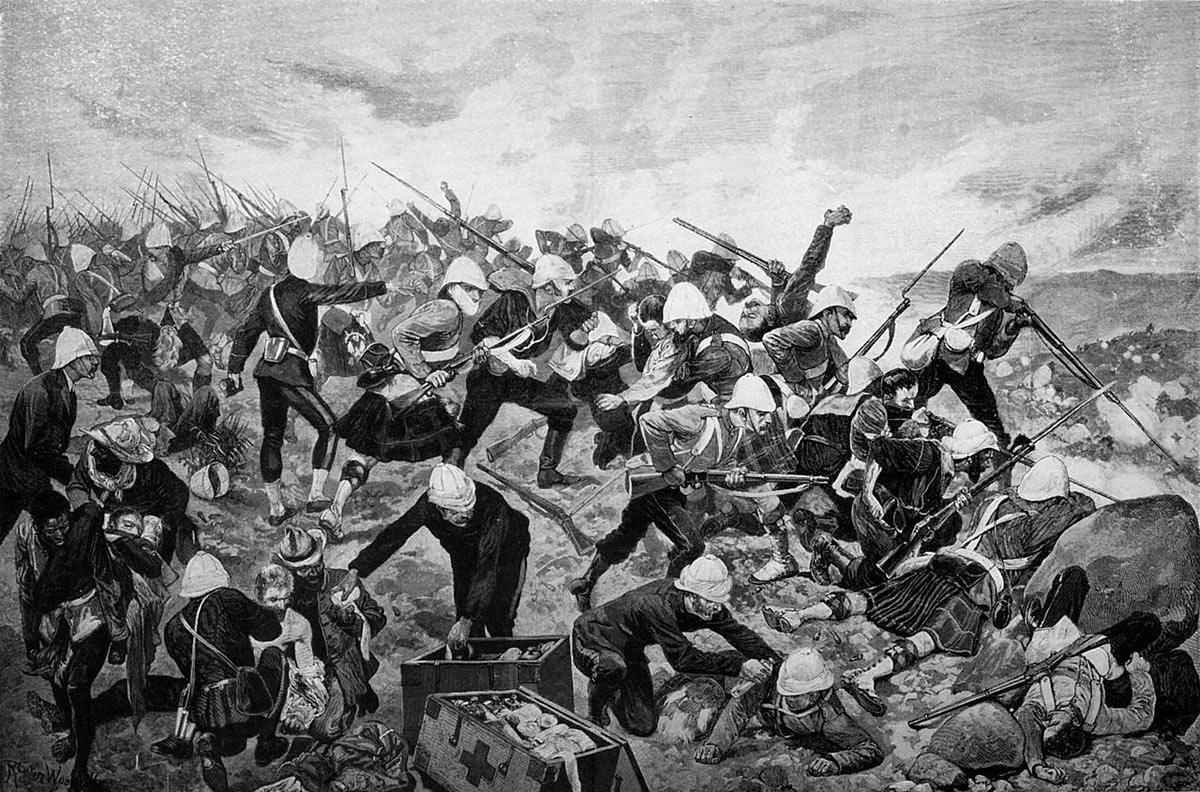
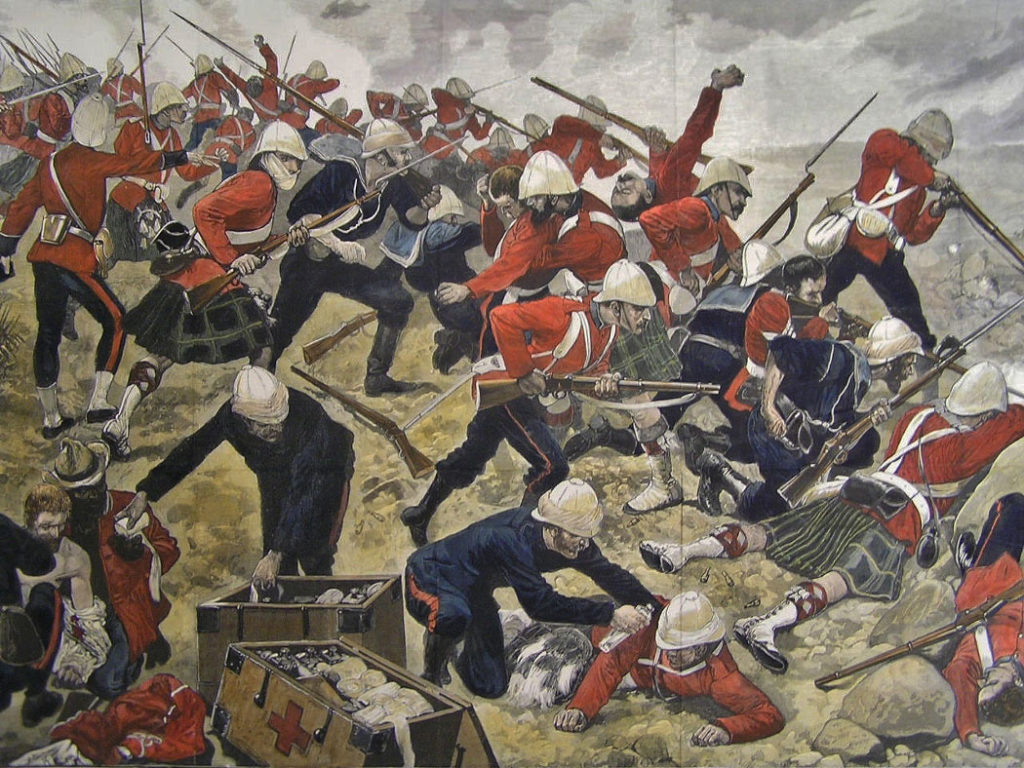
Battle of Majuba Hill on 27th February 1881 in the First Boer War: the full picture by Richard Caton Woodville
As dawn broke, the Boers, encamped to the north-east on lower ground, were in consternation at seeing the British above them. In trepidation, they awaited an attack on their camp, but Colley did nothing.
Regaining their confidence, the Boers began to work their way up the several sides of Majuba, while older marksmen covered them, picking off any soldier who appeared on the skyline and pinning down the British force. As the Boers moved up the sides of Majuba, the small size of Colley’s force became apparent.
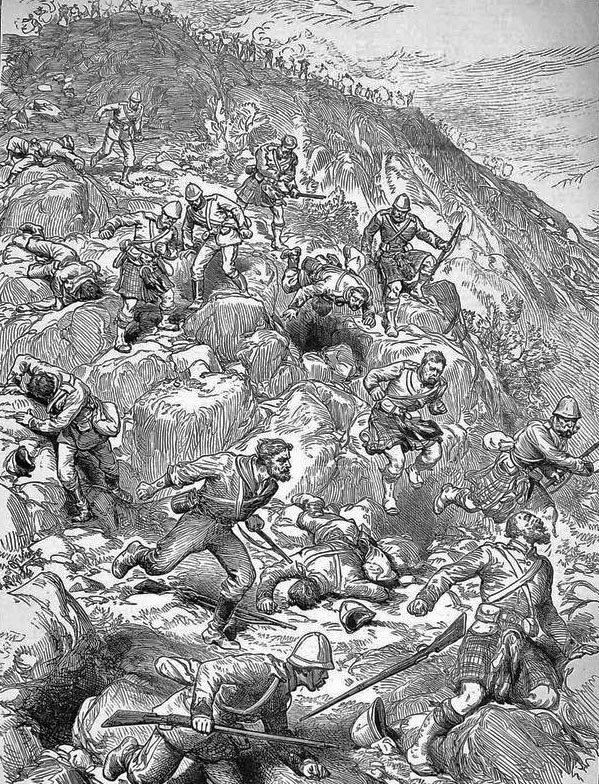
British troops fleeing down the hillside at the Battle of Majuba Hill on 27th February 1881 in the First Boer War
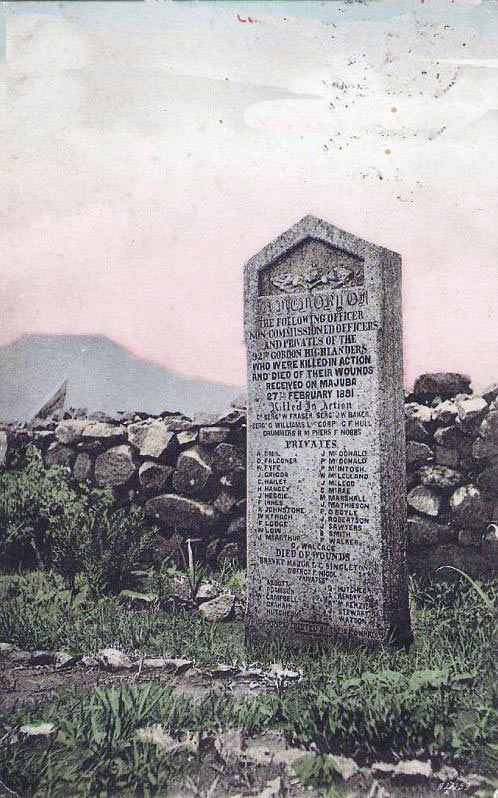
Memorial to the 92nd Highlanders killed at the Battle of Majuba Hill on 27th February 1881 in the First Boer War
The British had not occupied the whole summit and the Boers were able to infiltrate to the top, bringing fire on the British troops from higher sections of the plateau. British casualties mounted. There was little coordinated command. Lieutenant (later General) Ian Hamilton urged Colley to charge the Boer line, but the general procrastinated, saying ‘Wait, wait.’
Finally, the British infantry, after suffering considerable loss, broke and fled from the top of the mountain, leaving a small group of 92nd Highlanders to be surrounded and captured. At the time of the break, Sir George Colley was shot dead. The troops rushed to the bottom of the hill, falling back on the picket companies, which were themselves enveloped by the Boers, now mounted and in pursuit. Only a heavy bombardment from the Royal Artillery guns in the main camp stemmed the Boer advance. The battle was over.
Casualties at the Battle of Majuba Hill: Of the small British force, 283 became casualties. Boer casualties are not known but are likely to have been trifling.
Follow-up to the Battle of Majuba Hill: Assuming overall command, Sir Evelyn Wood, on instructions from London, negotiated terms with the Boers which gave them what they had sought from the start, self-government under the overall suzerainty of the British Crown.
Negotiations between the British and the Boers after the Battle of Majuba Hill on 27th February 1881 in the First Boer War
‘Fighting Mac’ Macdonald at the Battle of Majuba Hill on 27th February 1881 in the First Boer War
Anecdotes and traditions from the Battle of Majuba Hill:
- Although a small battle, Majuba was a major disaster for Britain and the British Army. It highlighted many of the inadequacies of an army steeped in the methods of early 19th Century warfare, failing to grasp the implications and potential of modern long-range breech loading firearms. In the two South African Wars the British Army learnt a great deal from the Boer Commandoes on the importance of field craft and individual rifle handling; lessons put to good use in 1914 against the German Army.
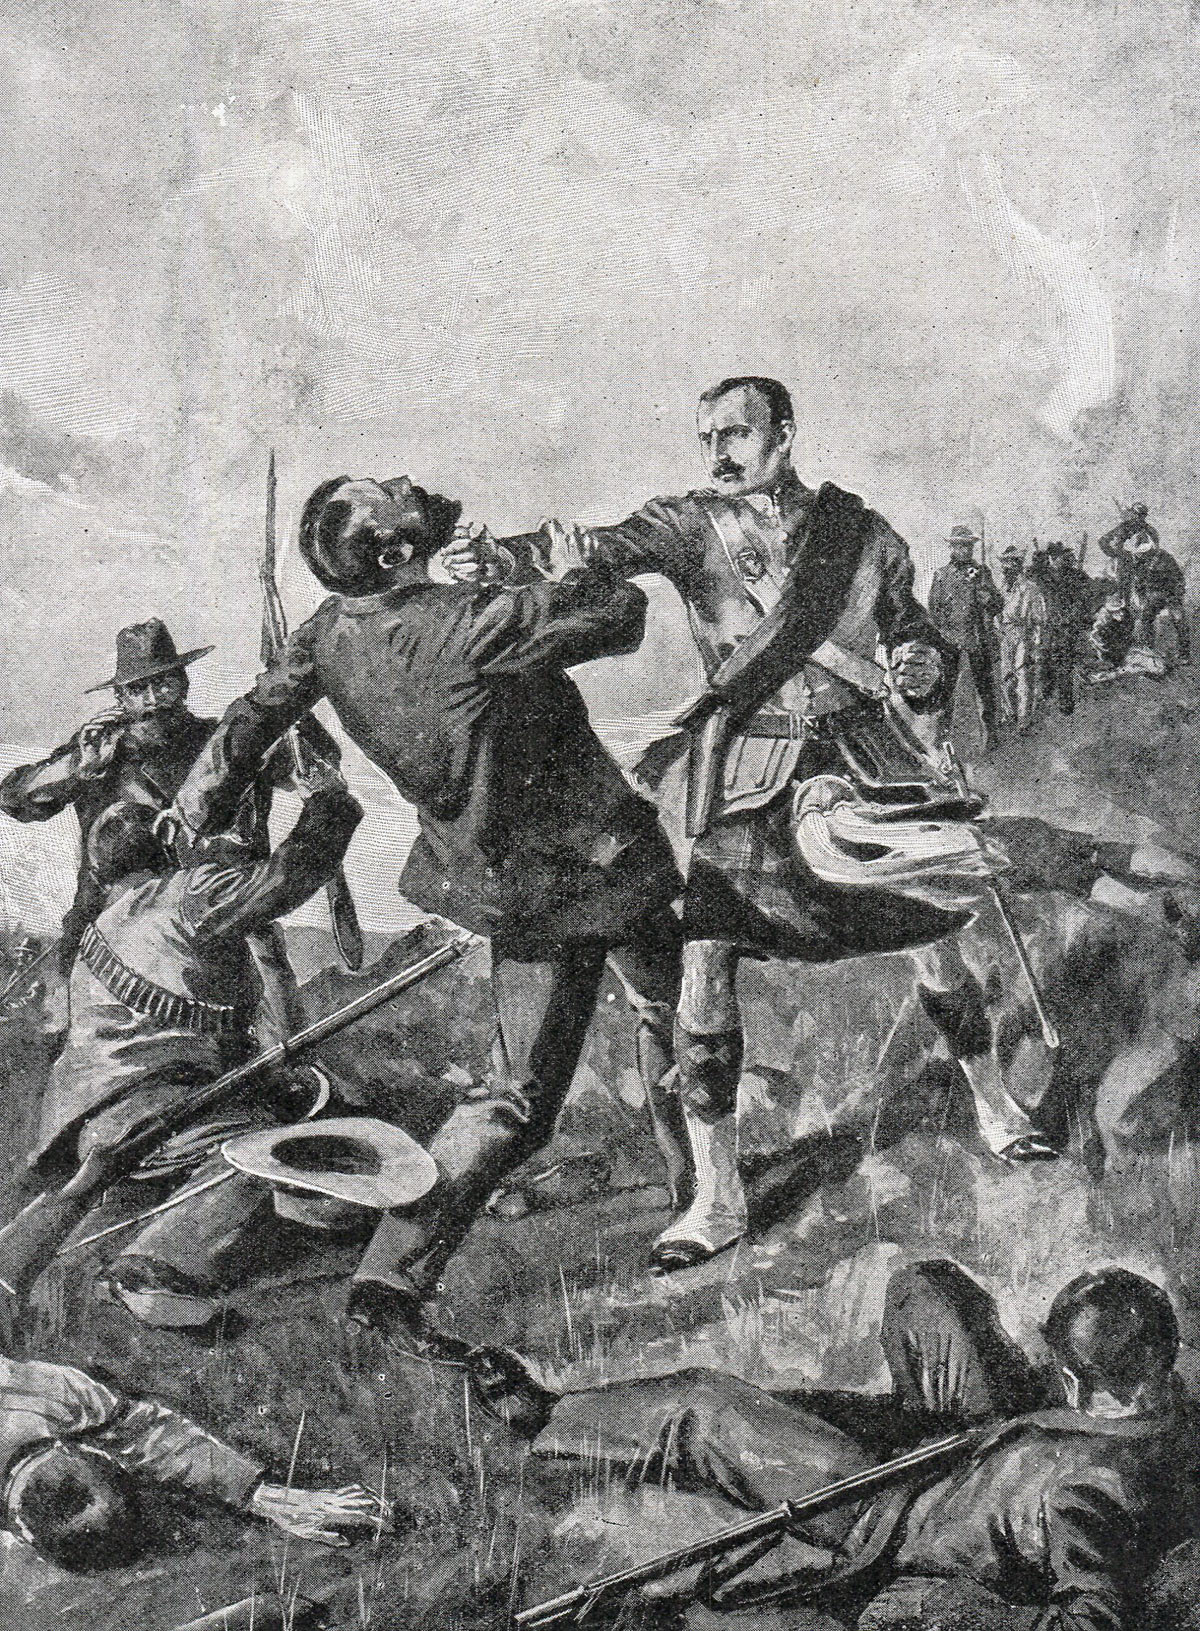
- The party of 92nd Highlanders that rallied and remained on the mountain top was led by Lieutenant Hector Macdonald. After the capture of this party, the Boer commander, General Joubert, impressed by Macdonald’s courage and determination, returned Macdonald’s sword to him. Hector Macdonald had been promoted from the ranks for his conduct with the 92nd during the Second Afghan War. In his later service, Kitchener attributed victory at the Battle of Omdurman to Macdonald’s handling of his brigade of Sudanese troops in the closing stages of the battle. Serving with distinction in the Second Boer War, Macdonald rose to the rank of Major-General before committing suicide.
Lance Corporal Joseph John Farmer at the Battle of Majuba Hill on 27th February 1881 in the First Boer War
- Lance Corporal Joseph John Farmer was awarded the Victoria Cross for his conduct at the first aid station on the top of Majuba Hill during the battle. Farmer raised a white cloth over the wounded to indicate their presence to the Boers. His arm was shot through. He raised another cloth with his other arm which was also hit. Farmer was a veteran of the Zulu War.
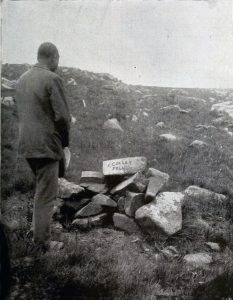
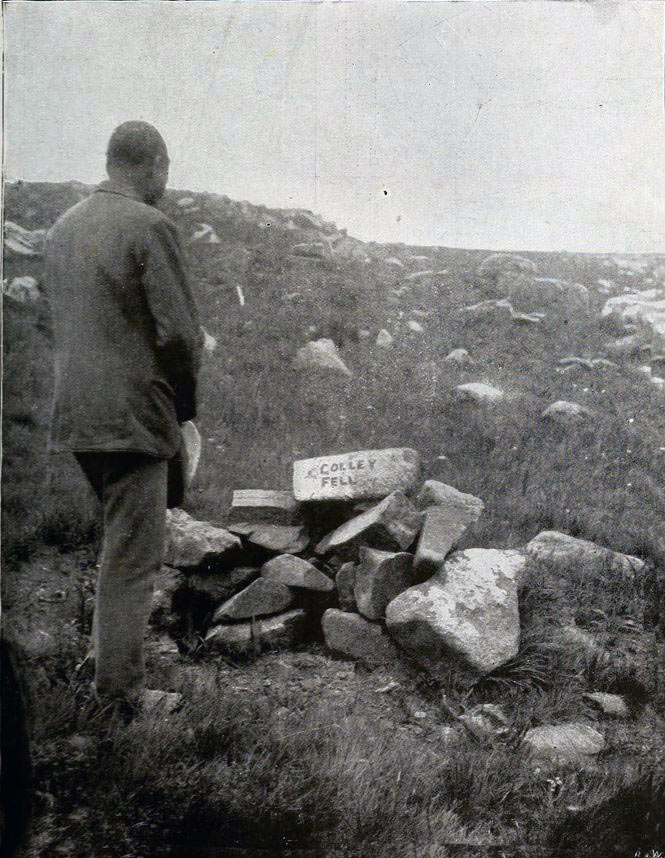
The spot where General Colley fell at the Battle of Majuba Hill on 27th February 1881 in the First Boer War
- Colley was a disastrous commander, rash in assuming battle, but timid in the conduct of the battle itself. He should have awaited the reinforcements being sent to Natal. Instead he attempted to win the war against the Boers with the inadequate resources available to him, before he might be superceded by the arrival of General Roberts. One officer described Colley as incapable of commanding a corporal’s guard.
- Victorian Britain had a tendency to make martyrs of generals killed in action furthering British colonial interests, particularly if they had a reputation for being religious. Colley was given just such a status. Illustrations of the stone marking the spot where ‘Colley fell’ were widely published in the British press.
References for the Battle of Majuba Hill:
British Battles on Land and Sea, Volume II edited by Field Marshal Sir Evelyn Wood
South Africa and the Transvaal War Volume I by Louis Creswicke
The previous battle in the First Boer War is the Battle of Laing’s Nek
The next battle in the British Battles sequence is the Battle of Talana Hill