The iconic British defeat on 24th January 1900, during Buller’s second and disastrous attempt to cross the Tugela River and relieve Ladysmith
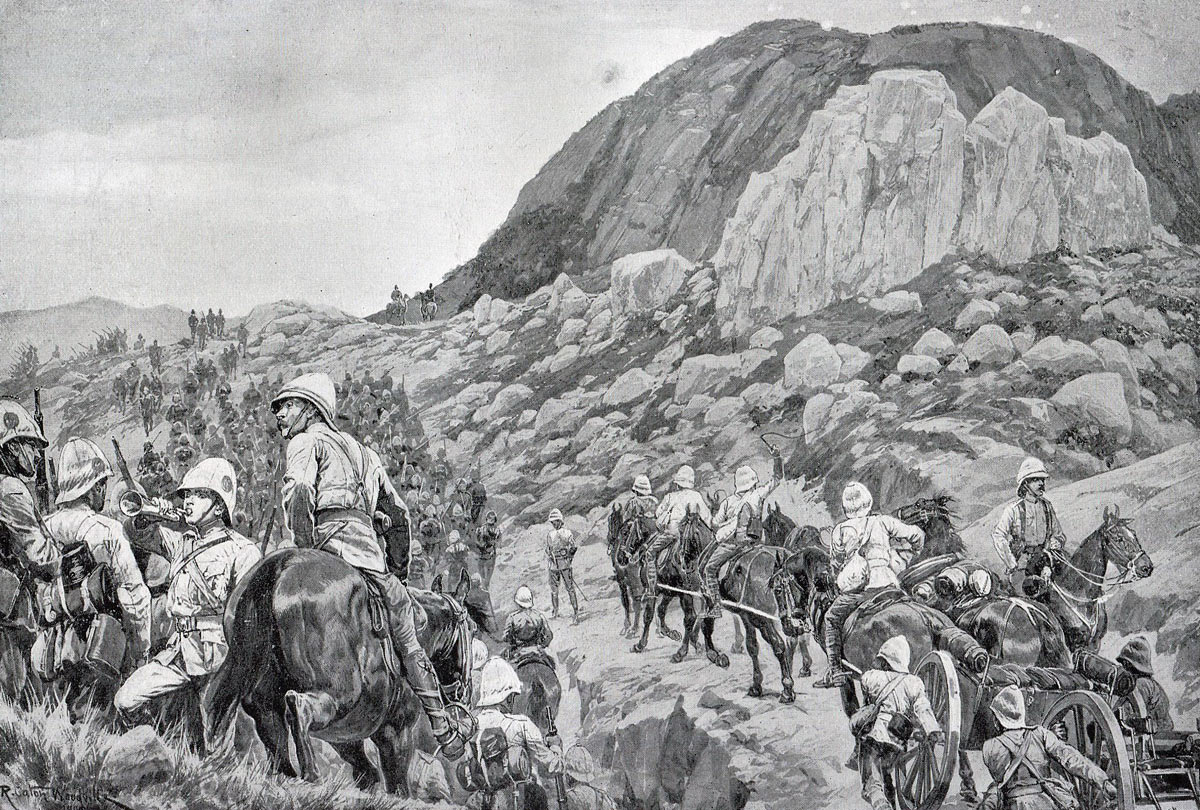
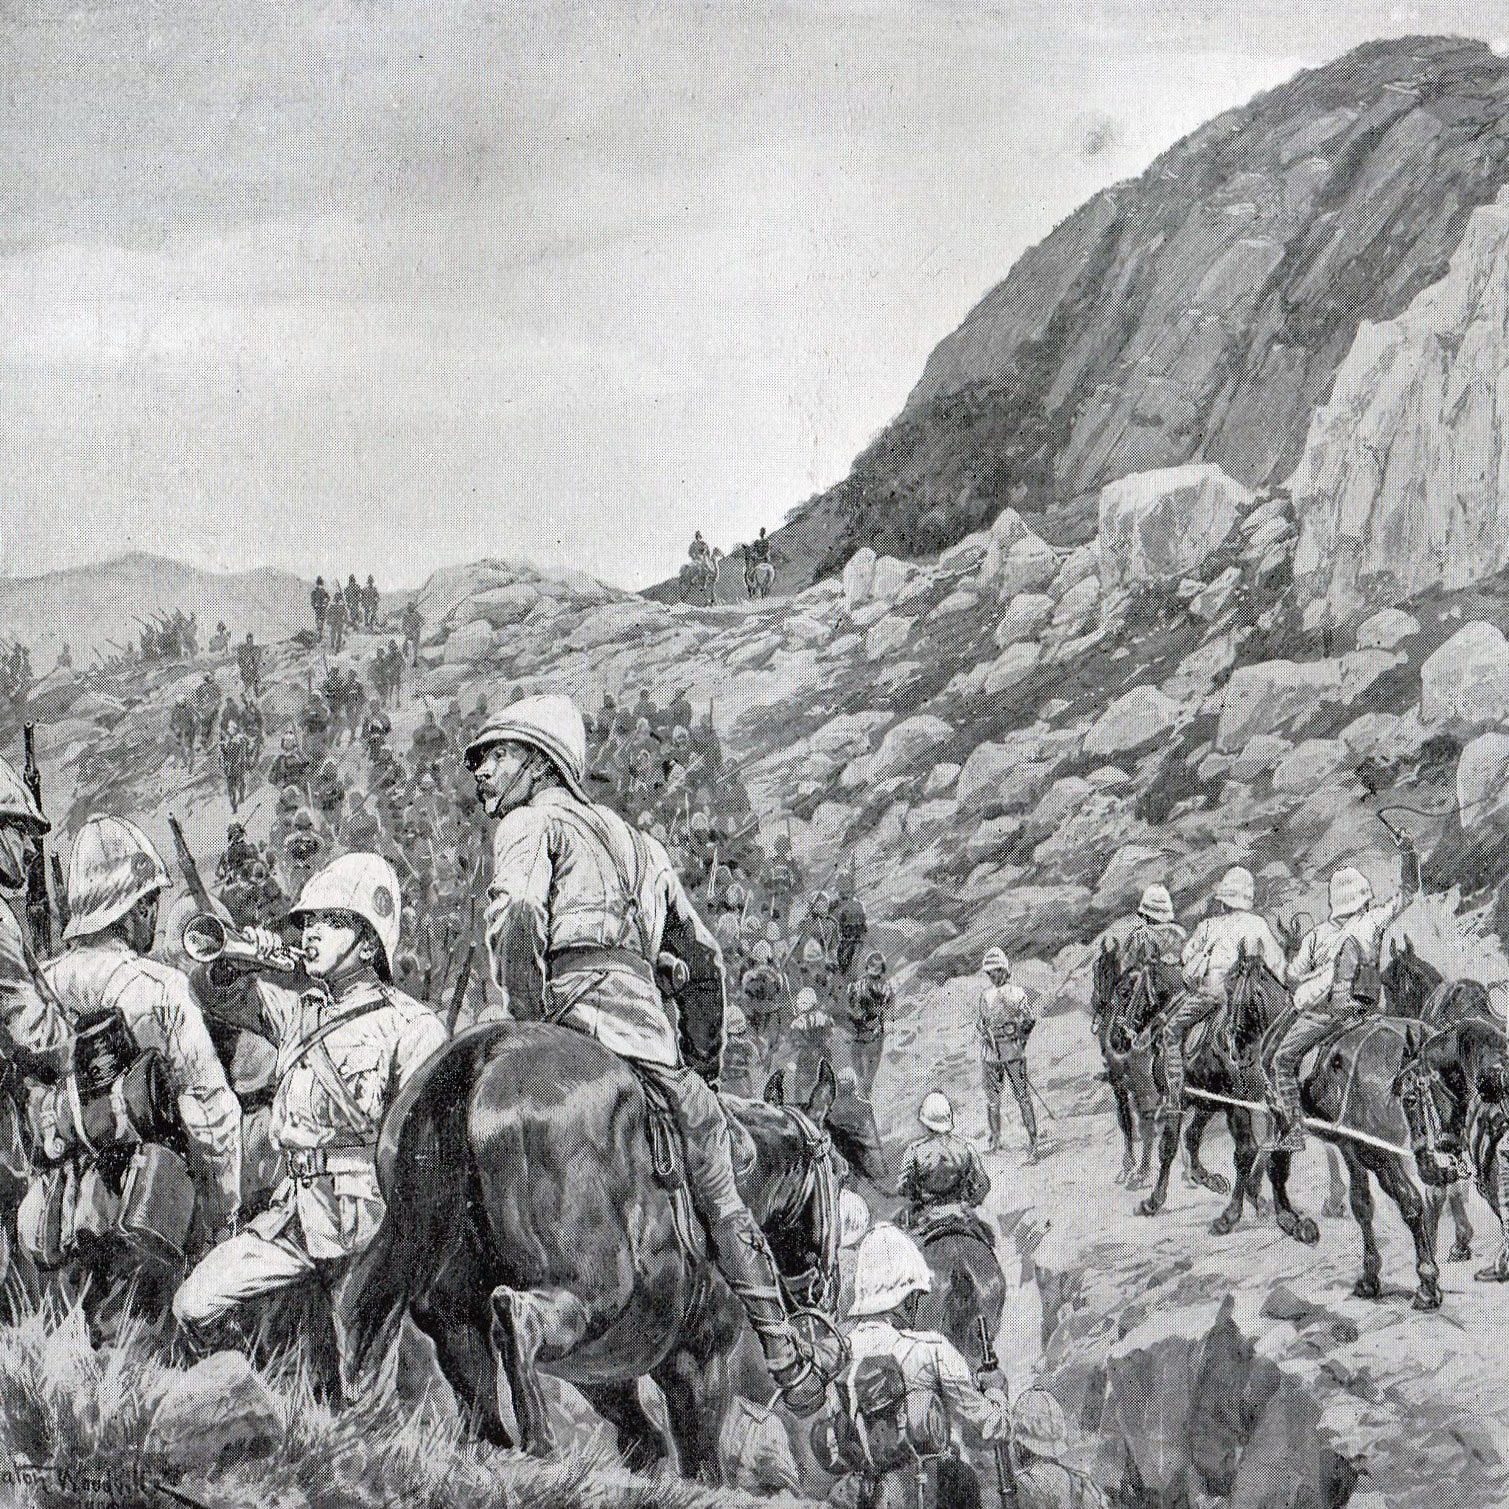
British advance up Spion Kop: Battle of Spion Kop on 24th January 1900 in the Great Boer War: picture by Richard Caton Woodville
The previous battle in the Great Boer War is the Battle of Colenso
The next battle in the Great Boer War is the Battle of Val Krantz
Battle: Spion Kop.
War: The Great Boer War.
Date: 24th January 1900
Place: On the Tugela River in Northern Natal in South Africa.
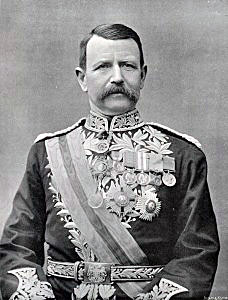
Lieutenant General Sir Charles Warren, commander of the British assault on Spion Kop: Battle of Spion Kop on 24th January 1900 in the Great Boer War
Combatants: The British against the Boers.
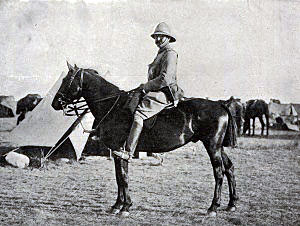
Colonel Thorneycroft who commanded the troops on Spion Kop: Battle of Spion Kop on 24th January 1900 in the Great Boer War
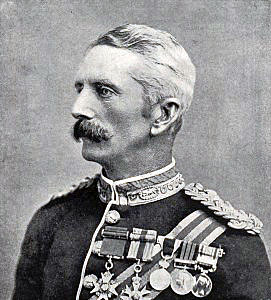
Generals: General Sir Redvers Buller against General Botha. Lieutenant General Sir Charles Warren was nominally in command of the assault on Spion Kop. Colonel Thorneycroft ended up in command of the British Troops on top of Spion Kop on the death of Major General Woodgate.
Size of the armies: 20,000 British troops against 8,000 Boers.
Arms and equipment at the Battle of Spion Kop: The Boer War was a serious jolt for the British Army. At the outbreak of the war British tactics were appropriate for the use of single shot firearms, fired in volleys controlled by company and battalion officers; the troops fighting in close order. The need for tight formations had been emphasised time and again in colonial fighting. In the Zulu and Sudan Wars overwhelming enemy numbers armed principally with stabbing weapons were kept at a distance by such tactics, but, as at Isandlwana, would overrun a loosely formed force. These tactics had to be entirely rethought in battle against the Boers armed with modern weapons.
In the months before hostilities the Boer commandant general, General Joubert, bought 30,000 Mauser magazine rifles, firing smokeless ammunition, and a number of modern field guns and automatic weapons from the German armaments manufacturer Krupp, the French firm Creusot and the British company Maxim. Unfortunately for the Boers they chose to buy high explosive ammunition for their new field guns. The war was to show that high explosive was largely ineffective in the field, unless rounds landed on rocky terrain and splintered the rock. The British artillery relied upon air-bursting shrapnel which was highly effective against infantry in open country.
There were many reports of Boer ammunition failing to explode. It seems likely that this will have been due to a lack of training for the Boer gunners in the use of shells which needed to be fused before firing.
Once the war was under way the arms markets of Europe were closed to the Boers, due to the British naval blockade, and the error in ammunition selection could not be remedied.
Soldiers of 2nd Lancashire Fusiliers on board ship to South Africa: Battle of Spion Kop on 24th January 1900 in the Great Boer War
The Boer commandoes, without formal discipline, welded into a fighting force through a strong sense of community and dislike for the British. Field Cornets led burghers by personal influence not through any military code. The Boers did not adopt military formation in battle, instinctively fighting from whatever cover there might be. Most Boers were countrymen, running their farms from the back of a pony with a rifle in one hand. These rural Boers brought a life time of marksmanship to the war, an important advantage further exploited by Joubert’s consignment of smokeless magazine rifles. Viljoen is said to have coined the aphorism “Through God and the Mauser”. With strong field craft skills and high mobility the Boers were natural mounted infantry. The urban burghers and foreign volunteers readily adopted the fighting methods of the rest of the army.
Commandant General Louis Botha organised the Boer counter attack onto Spion Kop: Battle of Spion Kop on 24th January 1900 in the Great Boer War
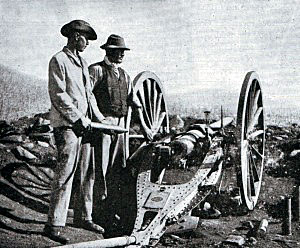
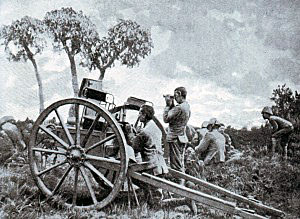
Boer quick firing field gun and crew: Battle of Spion Kop on 24th January 1900 in the Great Boer War
Other than the regular uniformed Staats Artillery and police units, the Boers wore their every day civilian clothes on campaign.
After the first month the Boers lost their numerical superiority, spending the rest of the formal war on the strategic defensive against British forces that outnumbered them, although operating with aggression when led by the younger generation of leaders like De Wet.
British tactics, developed on the North-West Frontier of India, Zululand, the Sudan and in other colonial wars against badly armed tribesmen, when used at Modder River, Magersfontein, Colenso and Spion Kop were inappropriate against entrenched troops armed with modern magazine rifles. Every British commander made the same mistake; Buller, Methuen, Roberts and Kitchener (Elandslaagte was a notable exception where Hamilton specifically directed his infantry to keep an open formation). When General Kelly-Kenny attempted to winkle Cronje’s commandoes out of their riverside entrenchments at Paardeburg using his artillery, Kitchener intervened and insisted on a battle of infantry assaults, with the same expensive consequences as earlier in the war.
The British Army was not the only European army to fail to appreciate the effect of long range magazine fed rifle fire. The Germans and the French in the opening months of the First World War made massed infantry attacks in the face of such fire, suffering enormous casualties, as did the Russians and Austro-Hungarians (see the Battle of Mons in 1914).
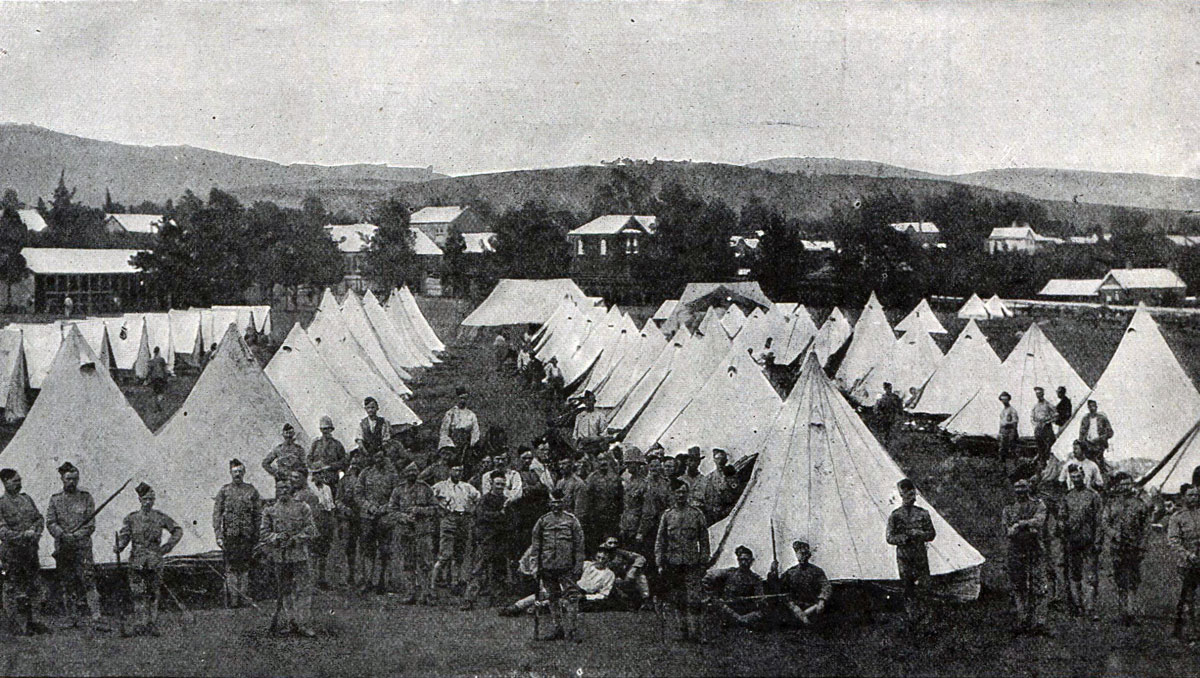
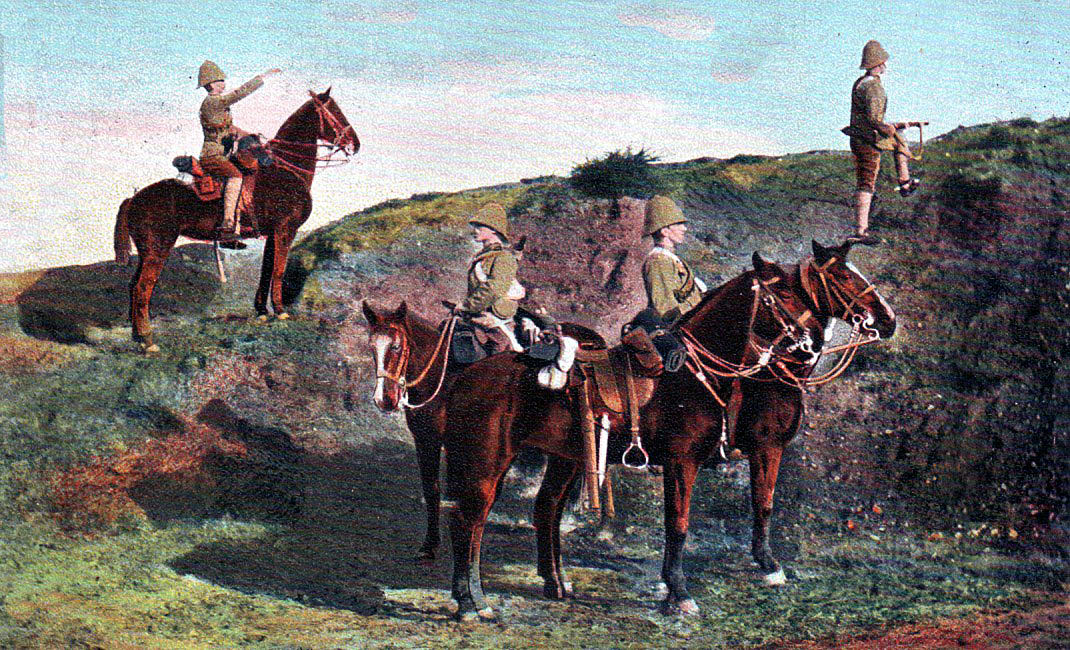
Thorneycroft’s Mounted Infantry in camp: Battle of Spion Kop on 24th January 1900 in the Great Boer War
Some of the most successful British and Empire troops in the South African War were the non-regular regiments; the Imperial Light Horse, City Imperial Volunteers, the South Africans, Canadians, Australians and New Zealanders, who more easily broke from the habit of earlier British colonial warfare, using their horses for rapid movement rather than the charge, advancing by fire and manoeuvre in loose formations and making use of cover, rather than the formal advance into a storm of Mauser bullets.
Officers of the German Corps fighting with the Boers at the Battle of Spion Kop on 24th January 1900 in the Great Boer War
The Boer armies suffered from a wide variation in competence and commitment. The general belief was that the Transvaalers were more resilient and determined fighters than the Free Staters. The younger commanders tended to be more resourceful and aggressive and felt handicapped by the older more senior generals.
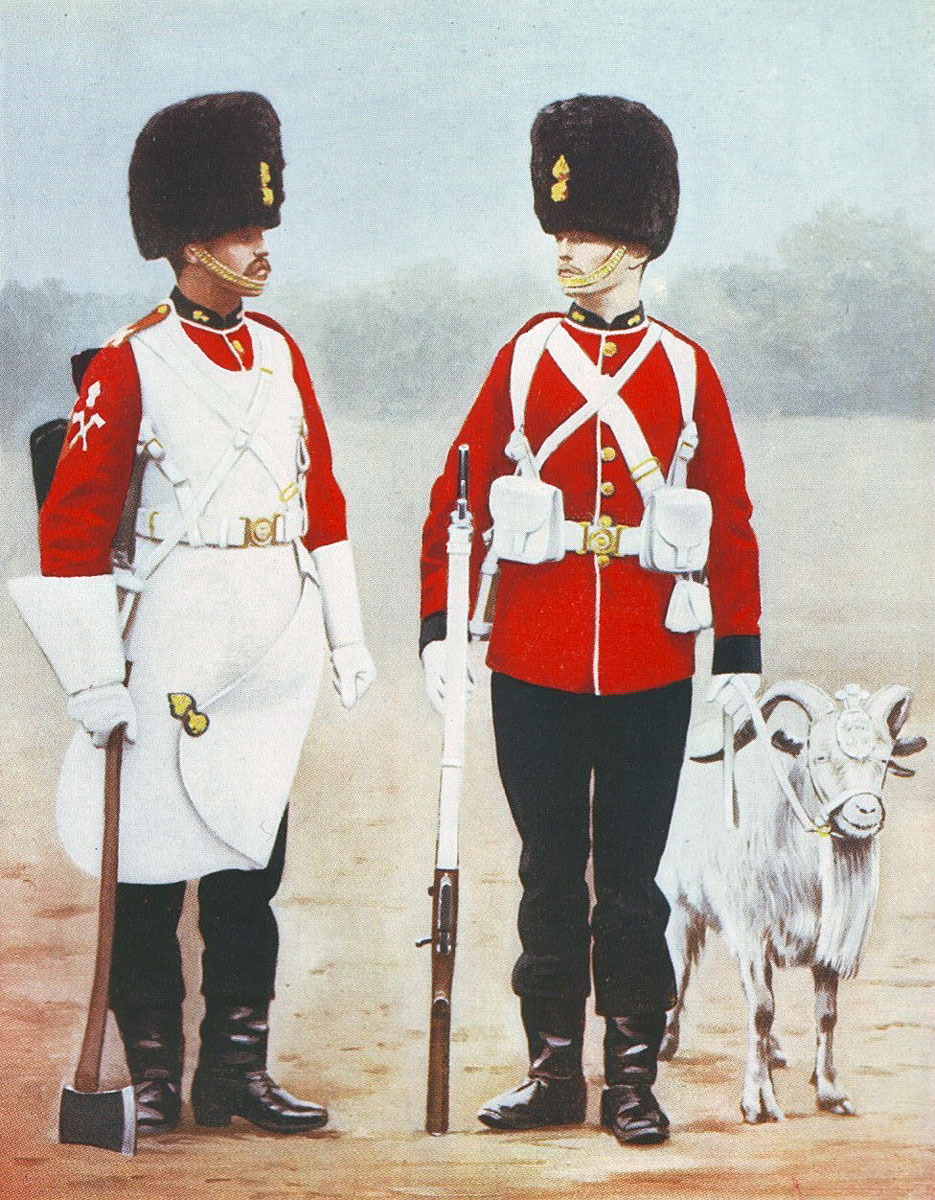
The British regiments made an uncertain change into khaki uniforms in the years preceding the Great Boer War, with the topee helmet as tropical headgear. Highland regiments in Natal devised aprons to conceal coloured kilts and sporrans. By the end of the war the uniform of choice was a slouch hat, drab tunic and trousers. The danger of shiny buttons and too ostentatious emblems of rank was emphasised in several engagements with disproportionately high officer casualties. Officers quickly took to carrying rifles like their men and abandoned swords and other obvious emblems of rank.
The British infantry was armed with the Lee Metford magazine rifle firing 10 rounds, but no training regime had been established to take advantage of the range, accuracy and speed of fire of the weapon. Personal skills such as scouting and field craft were little taught. The idea of fire and movement on the battlefield was largely unknown, many regiments still going into action in close order. Notoriously General Hart insisted that his Irish Brigade fight shoulder to shoulder as if on parade in Aldershot. Short of regular troops, Britain engaged volunteer forces from Britain, Canada, Australia and New Zealand who brought new ideas and more imaginative formations to the battlefield.
Boer riflemen on Spion Kop at the Battle of Spion Kop on 24th January 1900 in the Great Boer War
The war was littered with incidents in which British contingents became lost or were ambushed, often unnecessarily, and forced to surrender. The war was followed by a complete re-organisation of the British Army, with emphasis placed on personal weapon skills and fire and movement using cover.
The British artillery was a powerful force in the field, under or misused by commanders with little training in the use of modern guns in battle. Pakenham cites Pieters as being the battle at which a British commander, surprisingly Buller, developed a modern form of battlefield tactics: heavy artillery bombardments coordinated to permit the infantry to advance under their protection. It was the only occasion that Buller showed any real generalship and the short inspiration quickly died.
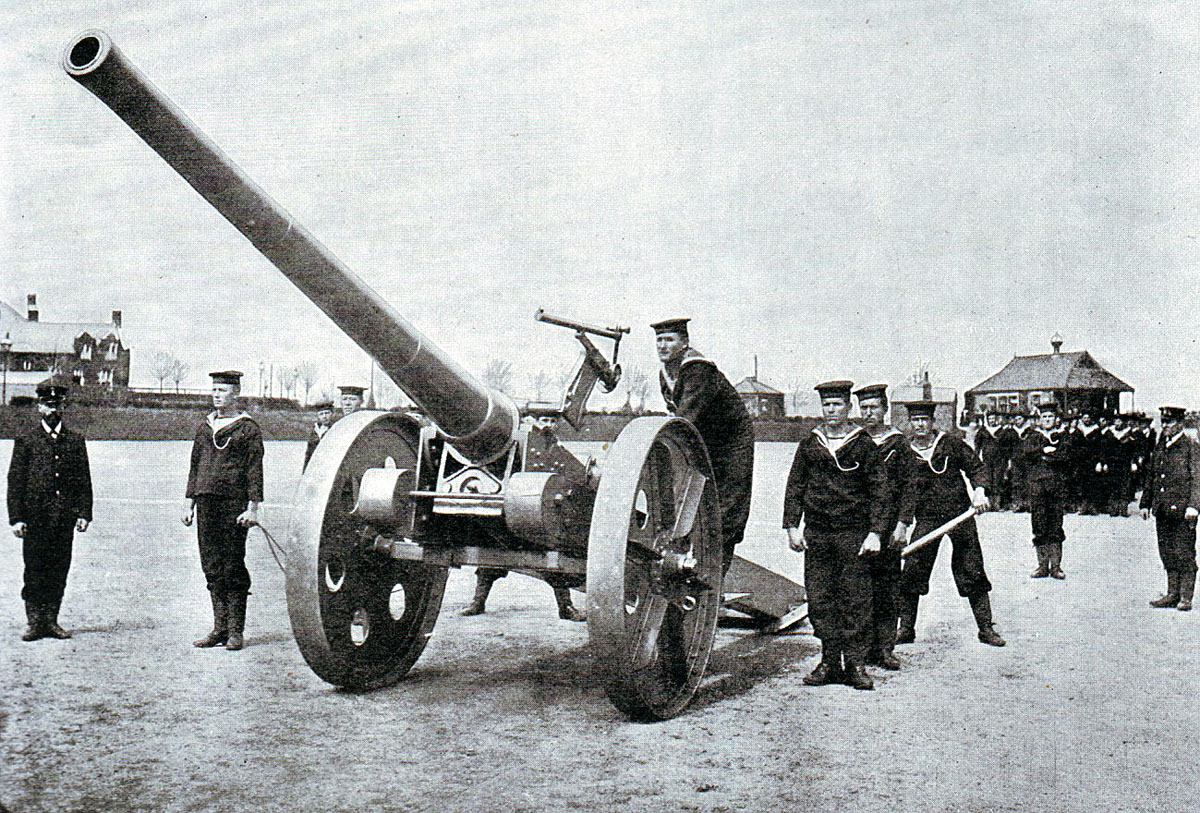
The Royal Field Artillery fought with 15 pounder rifled breach loading guns, the Royal Horse Artillery with 12 pounders and the Royal Garrison Artillery batteries with 5 inch howitzers. The Royal Navy provided heavy field artillery with a number of 4.7 inch naval guns mounted on field carriages devised by Captain Percy Scott of HMS Terrible and the iconic long 12 pounders, seen in the Royal Navy gun competitions at the Royal Tournament.
Maxim automatic weapons were used by the British, often mounted on special carriages, accompanying the mounted infantry, cavalry and infantry battalions, one on issue to each unit.
War Aims of the Boers in the South African War:
Having started the hostilities the Boers found themselves without an achievable war aim. The only strategy that might have succeeded would have been to invade and occupy the whole of Cape Colony, Natal and the other neighbouring British colonies. The two Boer republics did not have the resources to carry out such an extensive operation. In any case they could not have prevented a British sea landing to retake these areas.
Royal Dublin Fusiliers Maxim Gun Team: Battle of Spion Kop on 24th January 1900 in the Great Boer War
Once war was declared the Boers invaded and occupied Natal as far as the Tugela River, but with Ladysmith holding out in their rear. The Orange Free State government was reluctant to allow its forces to advance further south in Natal. In Cape Colony some of the citizens of Boer origins joined their brothers from the two Republics but most did not.
Officers of Thorneycroft’s Mounted Infantry in South Africa: Battle of Spion Kop on 24th January 1900 in the Great Boer War
The only other offensive operations the Boers carried out were to besiege Mafeking in the north and Kimberley further south on the Cape Colony to Rhodesia railway. Both sieges were unsuccessful. A limited incursion was carried out into the central part of Cape Colony up to the area around Stormberg, leading to Gatacre’s disastrous counter-attack.
Conan Doyle, who served as a doctor in South Africa during the war, comments that the Boers missed an opportunity at the beginning of the war to capture the substantial quantity of stores built up by the British at De Aar.
A major difficulty for the Boer armies was that although supremely competent in defence, digging field fortifications and using their magazine rifles to great effect to defend them, the Boers lacked an effective tactical offensive capability. The absence of formal military discipline made it difficult for the Boer commanders to devise strategies they could rely on their troops to carry through. As the British built up their army and began to advance defeat for the Boers became inevitable.
Winner: The Boers.
13th Hussars in South Africa: Battle of Spion Kop on 24th January 1900 in the Great Boer War
British Regiments:
The British Order of Battle:
Maxim Gun of the 13th Hussars: Battle of Spion Kop on 24th January 1900 in the Great Boer War
Cavalry Brigade (commanded by the Earl of Dundonald)
1st Royal Dragoons
13th Hussars
Bethune’s Mounted Infantry
Thorneycroft’s Mounted Infantry
Natal Carabineers
South African Light Horse
Imperial Light Horse
Imperial Light Infantry
Natal Police
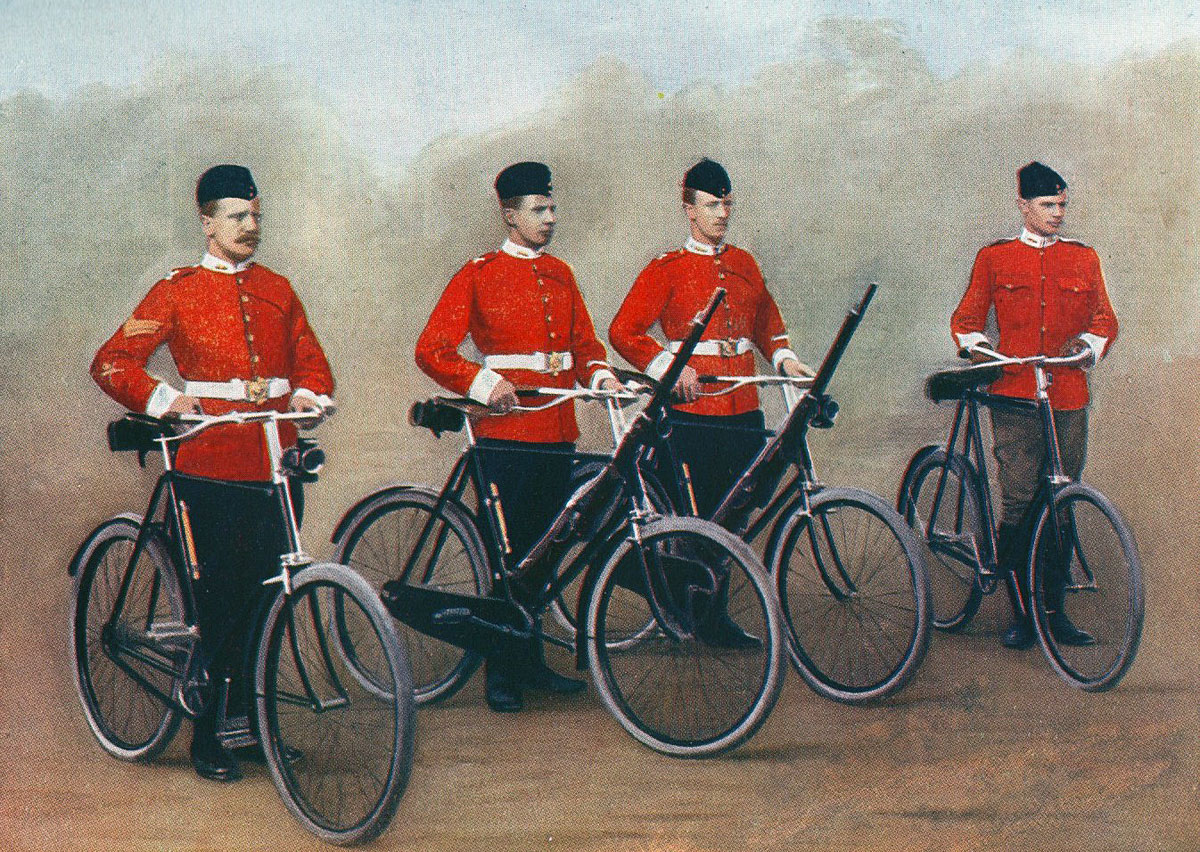
Cyclists of the Lancashire Fusiliers in Home Service uniform: : Battle of Spion Kop on 24th January 1900 in the Great Boer War
Second Division under Lieutenant General Sir C. F. Clery
2nd Brigade (commanded by Major General Hildyard)
2nd East Surreys
2nd West Yorks
2nd Devons
2nd Queen’s West Surreys
4th Brigade (commanded by Major General Lyttelton)
1st Rifle Brigade
1st Durham Light Infantry
3rd King’s Royal Rifles
2nd Scottish Rifles (the old 90th Light Infantry)
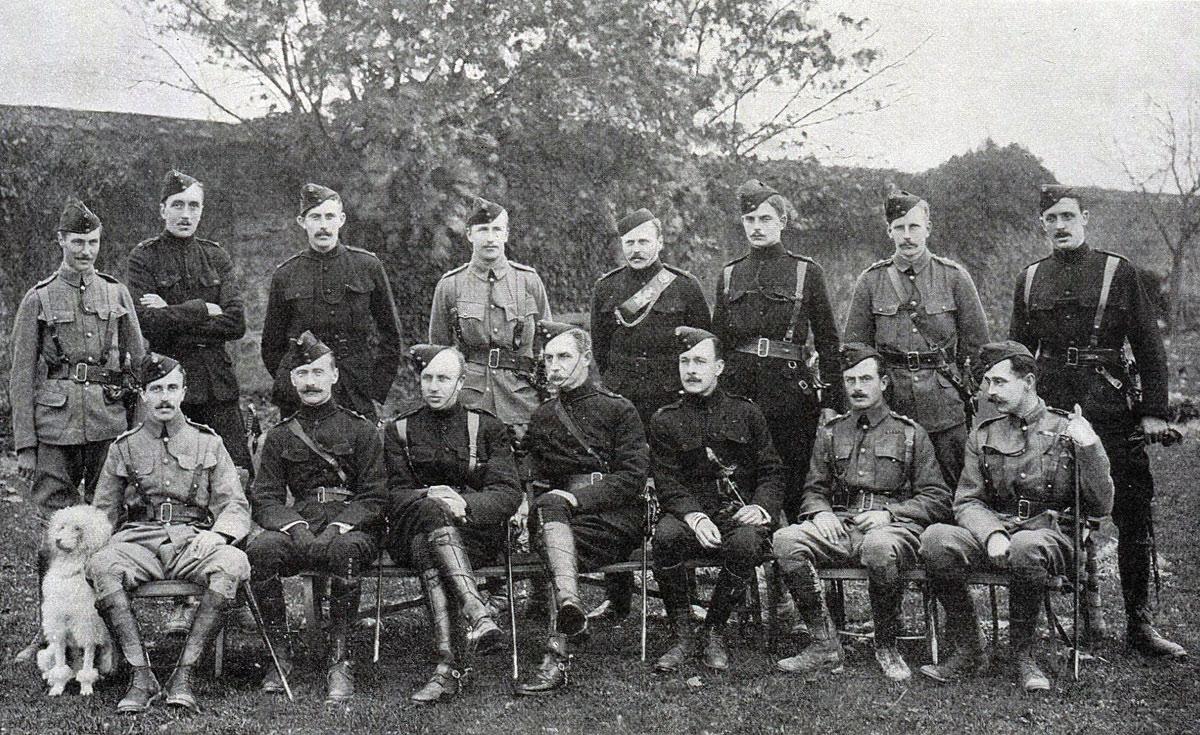
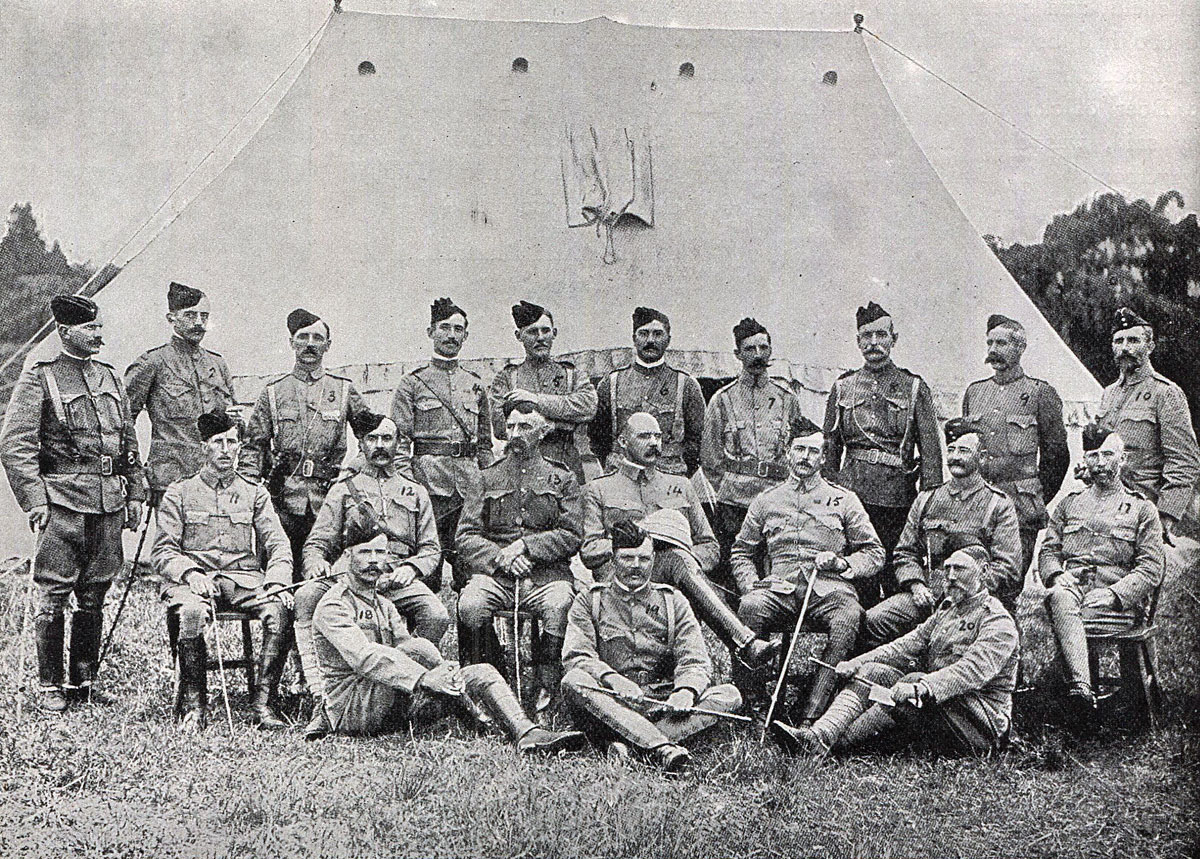
Officers of 3rd King’s Royal Rifle Corps: Battle of Spion Kop on 24th January 1900 in the Great Boer War
Third Division:
5th Irish Brigade (commanded by Major General Hart)
1st Inniskilling Fusiliers
1st Connaught Rangers
1st Royal Dublin Fusiliers
1st Border Regiment
Royal Welch Fusiliers in home service uniform: Battle of Spion Kop on 24th January 1900 in the Great Boer War
6th Fusilier Brigade (commanded by Major General Barton)
2nd Royal Fusiliers
2nd Royal Scots Fusiliers
1st Royal Welch Fusiliers
2nd Royal Irish Fusiliers
Squadron 14th Hussars
63rd, 64th and 73rd Batteries Royal Field Artillery.
Fifth Division (Lieutenant General Sir Charles Warren)
10th Brigade (commanded by Major General Coke)
2nd Dorset Regiment
2nd Middlesex Regiment
Eleventh Brigade (commanded by Major General Woodgate)
2nd King’s Royal Lancaster Regiment
2nd Lancashire Fusiliers
1st South Lancashire Regiment
1st York and Lancashire Regiment
19th, 20th and 28th Batteries Royal Field Artillery.
Royal Navy 4.7 inch gun in South Africa: Battle of Spion Kop on 24th January 1900 in the Great Boer War
Corps troops:
2nd Royal Dublin Fusiliers
2nd Somerset Light Infantry
61st Battery (Howitzers)
Natal Battery with 9 pounders
Battery of six Royal Navy 12 pounders
4th Mountain Battery
4.7 Inch Royal Navy guns
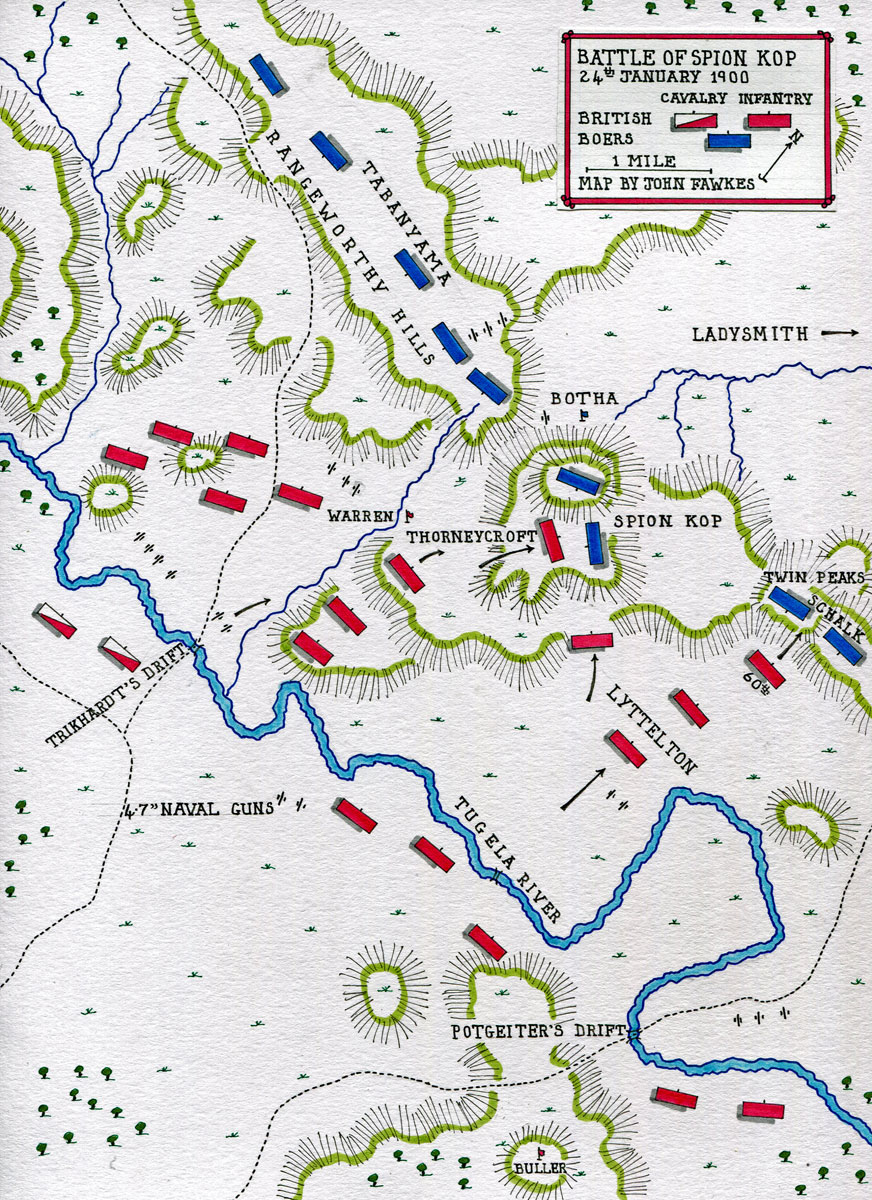
Map of the Battle of Spion Kop on 24th January 1900 in the Great Boer War: map by John Fawkes
Account of the Battle of Spion Kop:
Of all the Great Boer War battles Spion Kop retains an appalling notoriety for the incompetence of British leadership and the slaughter of the small number of men engaged on each side in the struggle for the top of the hill. The battle graphically showed the failure of the British Army to understand the requirements of modern warfare: tactics to cope with powerful long range artillery and magazine rifle fire, the need for proper communications and systems of reconnaissance, maintenance of chains of command in action and training and leadership at all levels.
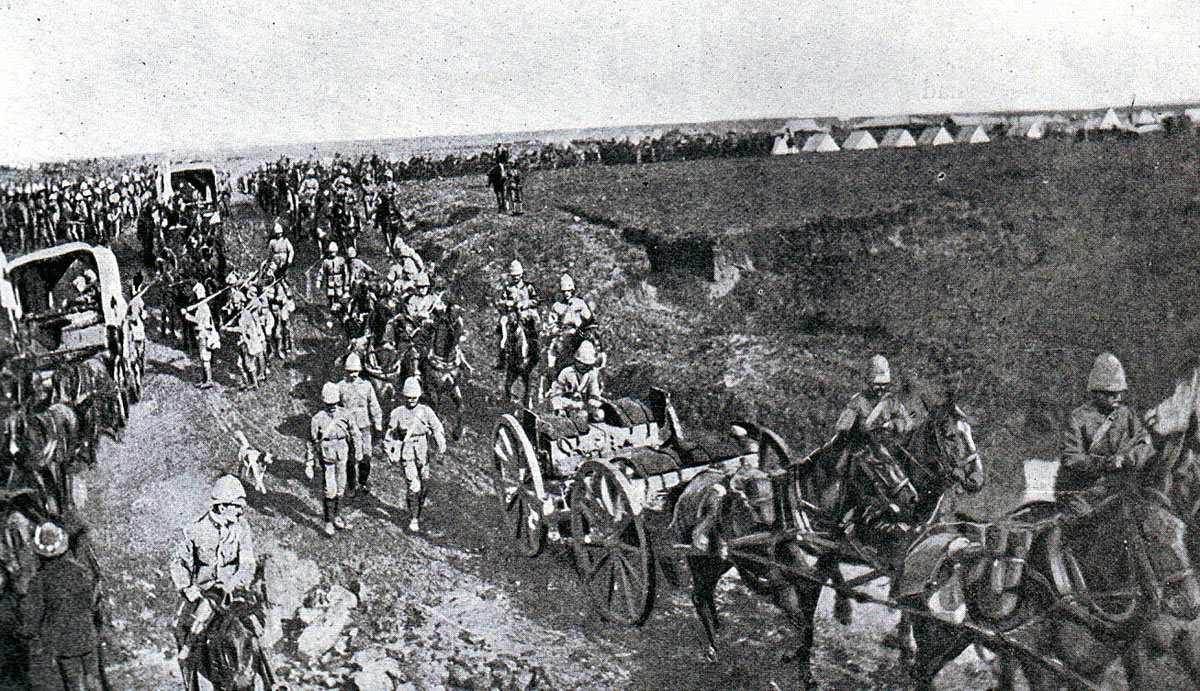
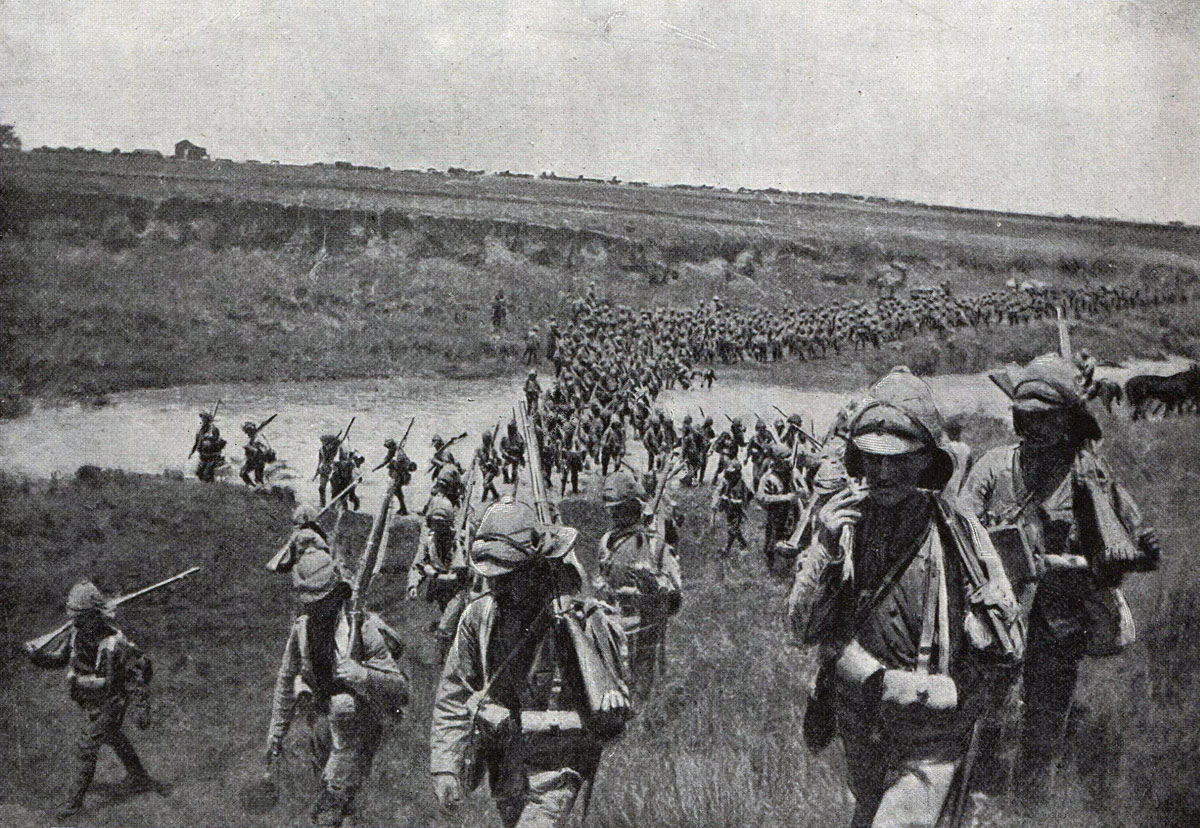
British troops on the march from Chieveley to the Battle of Spion Kop on 24th January 1900 in the Great Boer War
General Buller’s defeat at Colenso on 15th December 1899 left him with the same strategic conundrum; how to relieve Ladysmith. Before he assumed the position of commander-in-chief in South Africa, Buller urged that the small British force in Natal must remain on the defensive behind the Tugela River in the face of a Boer invasion of the colony. General Penn Symons ignored this advice and advanced to the northern tip of Natal, where he won the battle of Talana -dying in the process- a minor success that did little to stem the Boer invasion. General Sir George White, arriving in the colony with reinforcements, had not felt able to pull his troops back from Ladysmith behind the Tugela, although fundamentally he agreed with Buller, and found himself besieged in the town with most of the British troops in the colony.
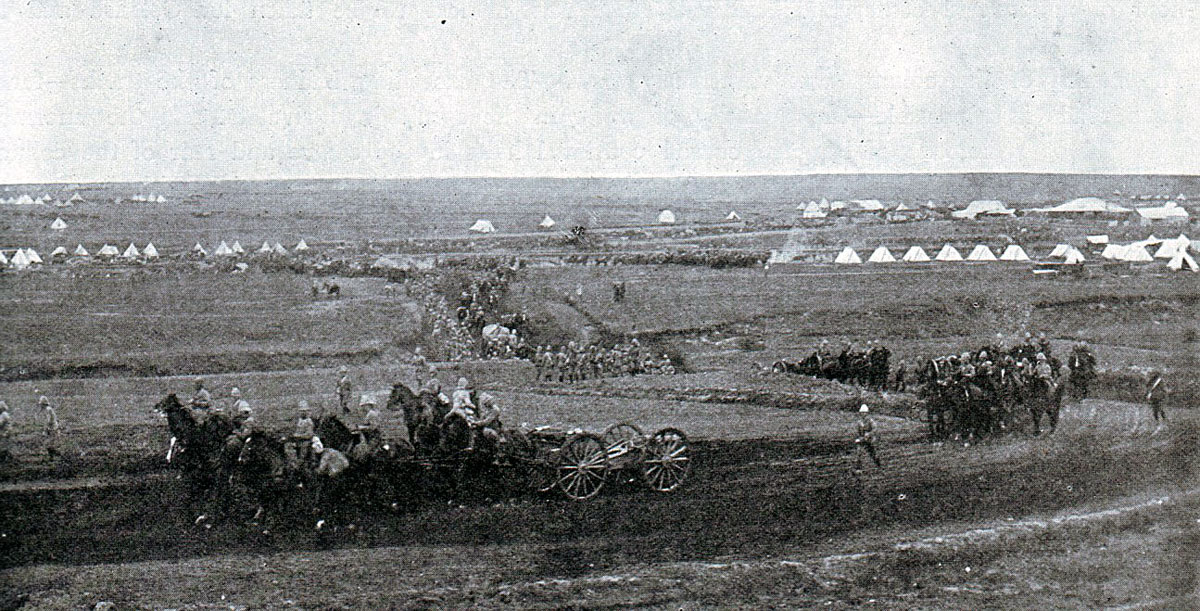
General Warren’s Division leaving Frere Camp before the Battle of Spion Kop on 24th January 1900 in the Great Boer War
Similar actions in Mafeking and Kimberley left British garrisons besieged by forces of Boers in the North West of South Africa. Instead of having a free hand to counter invade the two Boer republics, The Orange Free State and the Transvaal, Buller was forced to attempt the relief of these three towns. In particular it was inconceivable that White be left to surrender to the Boers with 10,000 British troops.
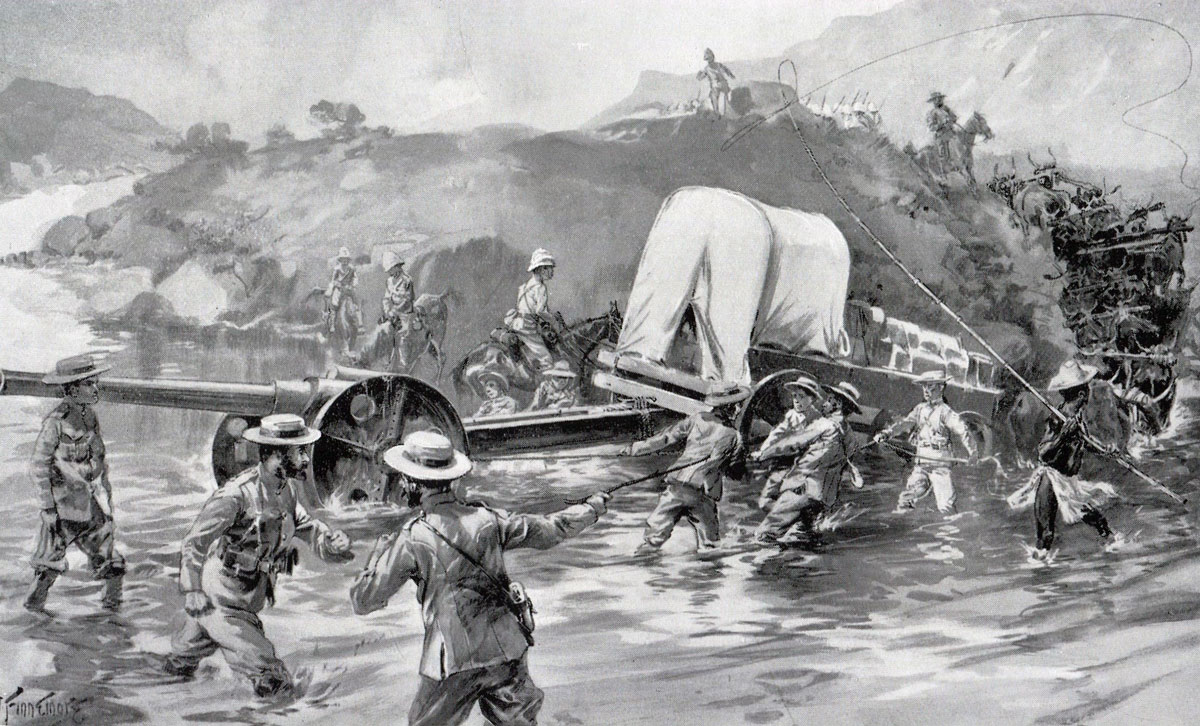
Naval 4.7 inch gun crossing a drift to begin the attack on Spion Kop: Battle of Spion Kop on 24th January 1900 in the Great Boer War: picture by Joseph Finnemore
General Botha with his Boer burgher army entrenched on the line of the Tugela River and awaited attack by Buller’s Natal Field Force.
At Colenso Buller attempted an assault straight up the railway line to Ladysmith, hoping that White would mount a simultaneous assault from Ladysmith against the Boer rear. Colenso was a severe reverse for Buller leaving unresolved the problem of crossing the Tugela River.
British Mountain Gun Battery in action: Battle of Spion Kop on 24th January 1900 in the Great Boer War
White’s losses in the Boer assaults on Wagon Hill and Caesar’s Camp on 6th January 1900 caused him to signal to Buller that he was unable to make any further foray to assist the relief operation. Relieved of the obligation to attempt a joint operation with White Buller planned his next attack further west on the Tugela to outflank the main Boer entrenched positions around the north-south railway line at Colenso.
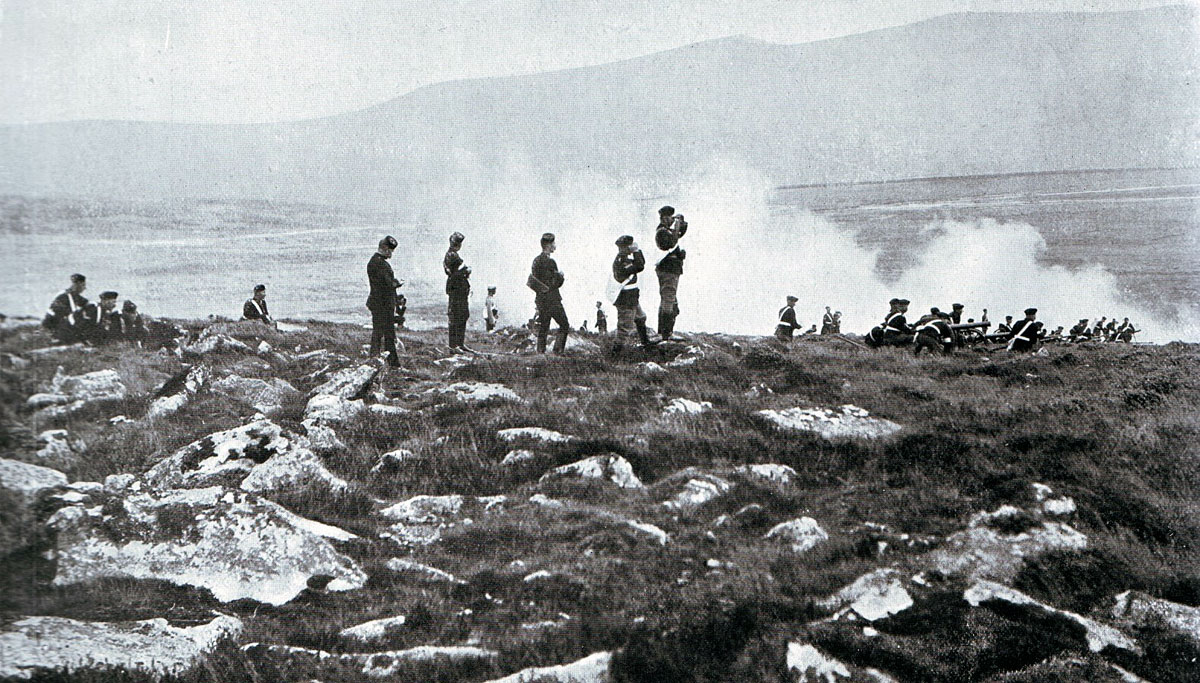
Naval Guns firing across the Tugela River at the Battle of Spion Kop on 24th January 1900 in the Great Boer War: picture by Frank Dadd
Substantial reinforcements arrived from Britain in Warren’s Fourth Division. Once they reached the main army Buller moved to the west and began his assault across the Tugela.
The point chosen for the attack lay opposite the Rangeworthy Hills, of which Spion Kop was one.
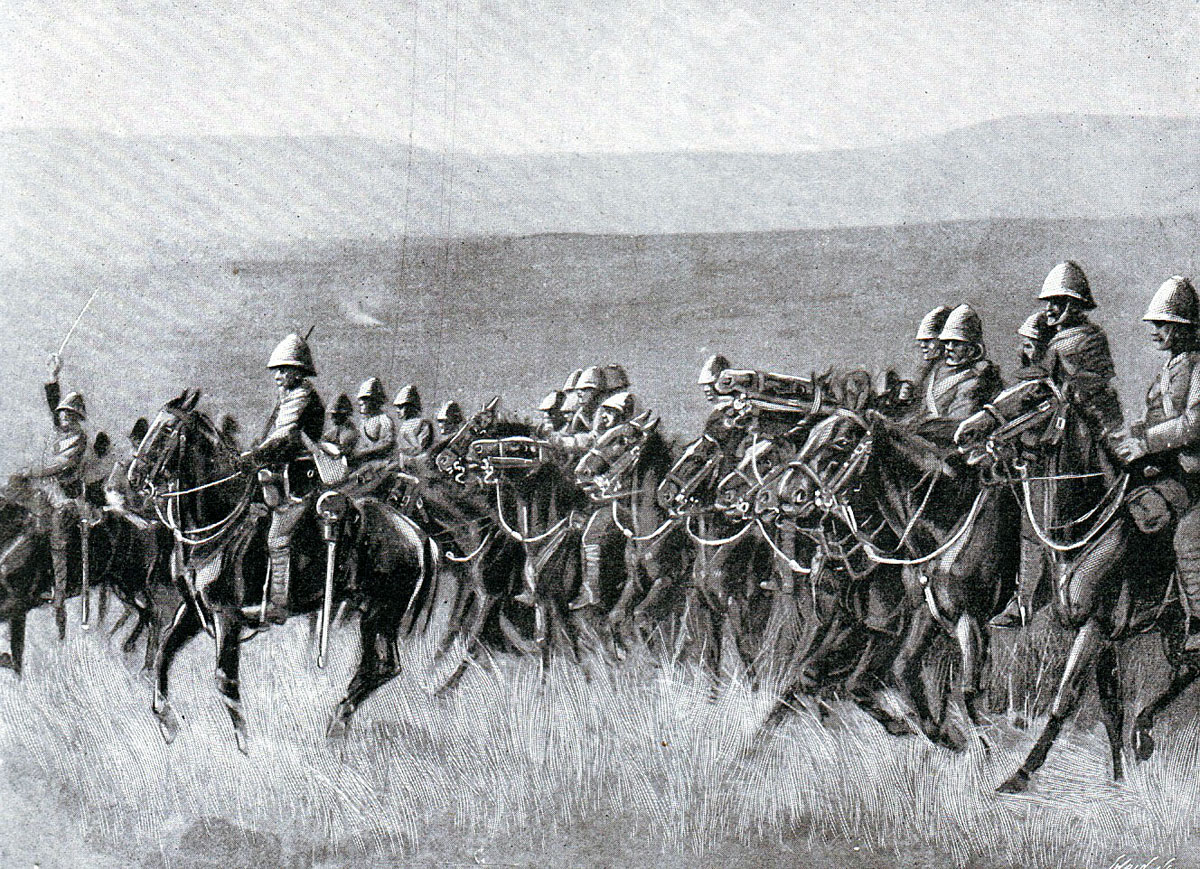
Dundonald’s Cavalry on the way to Potgieter’s Drift before the Battle of Spion Kop on 24th January 1900 in the Great Boer War
Major General Lyttelton’s brigade of Rifle Regiments initially crossed the river at Potgeiter’s Drift to the East of the main attack, at a point where the river bending in a loop to the south protected the crossing from enfilade fire.
Lieutenant General Warren with 13,000 men and 36 guns had the task of crossing the river further west at Trikhardt’s Drift and pushing up onto the Rangeworthy Hills, thereby diverting Boer attention so that Lyttelton could punch through to Ladysmith. Buller planned to follow Lyttelton’s attack with a further force of 8,000 men and 22 guns.
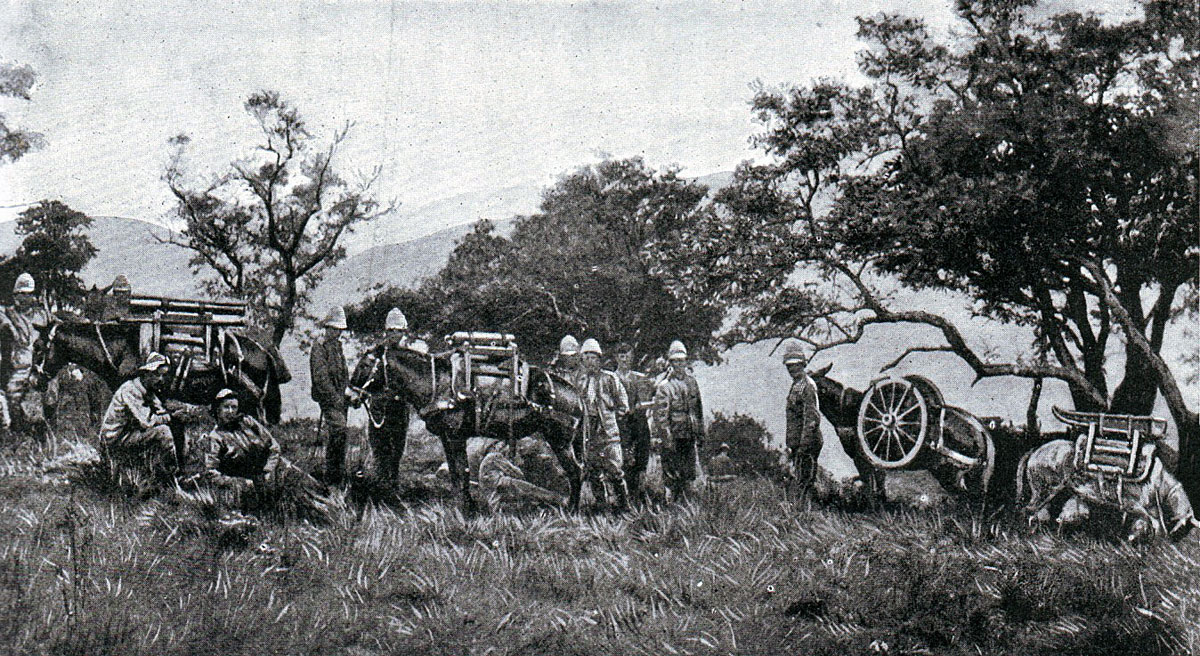
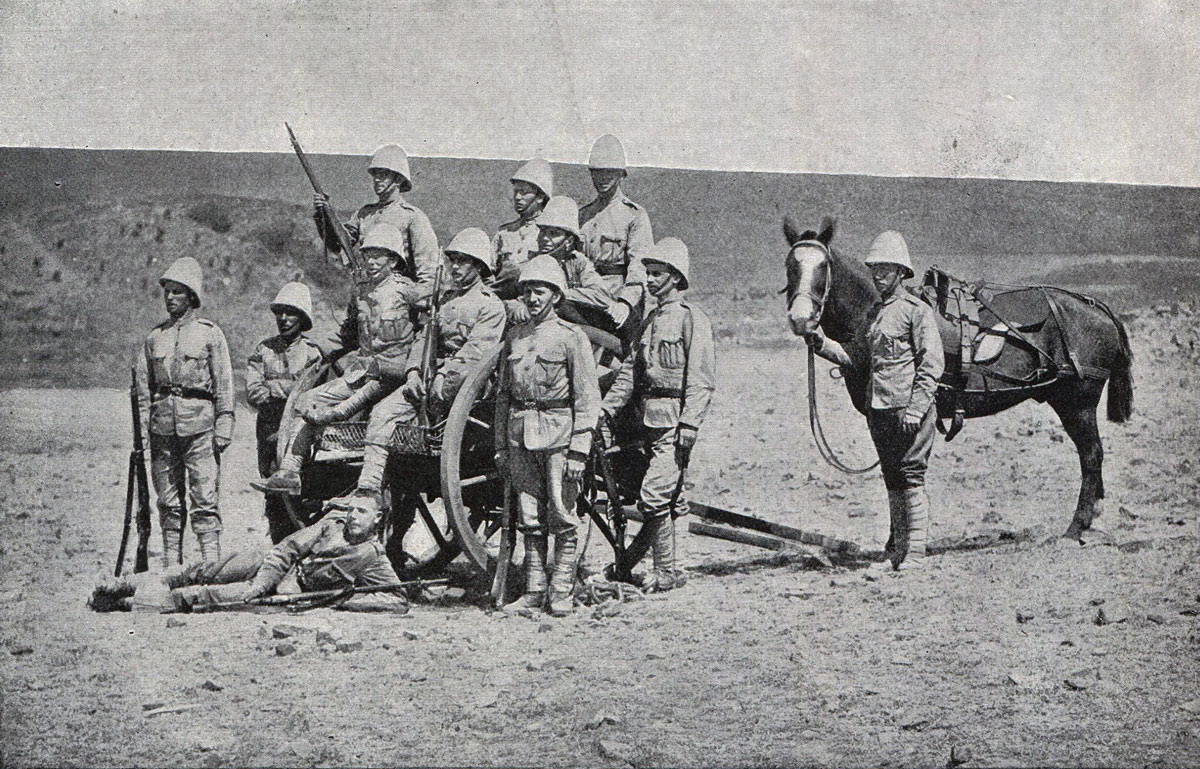
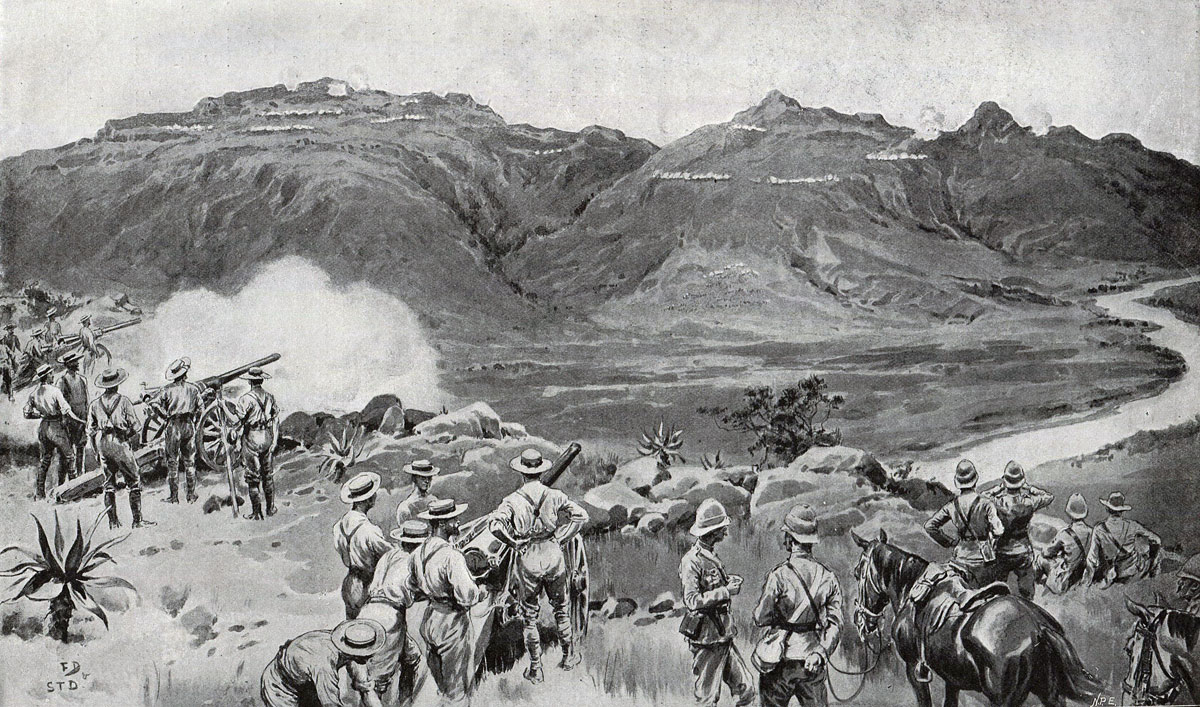
British Mountain Battery: Battle of Spion Kop on 24th January 1900 in the Great Boer War
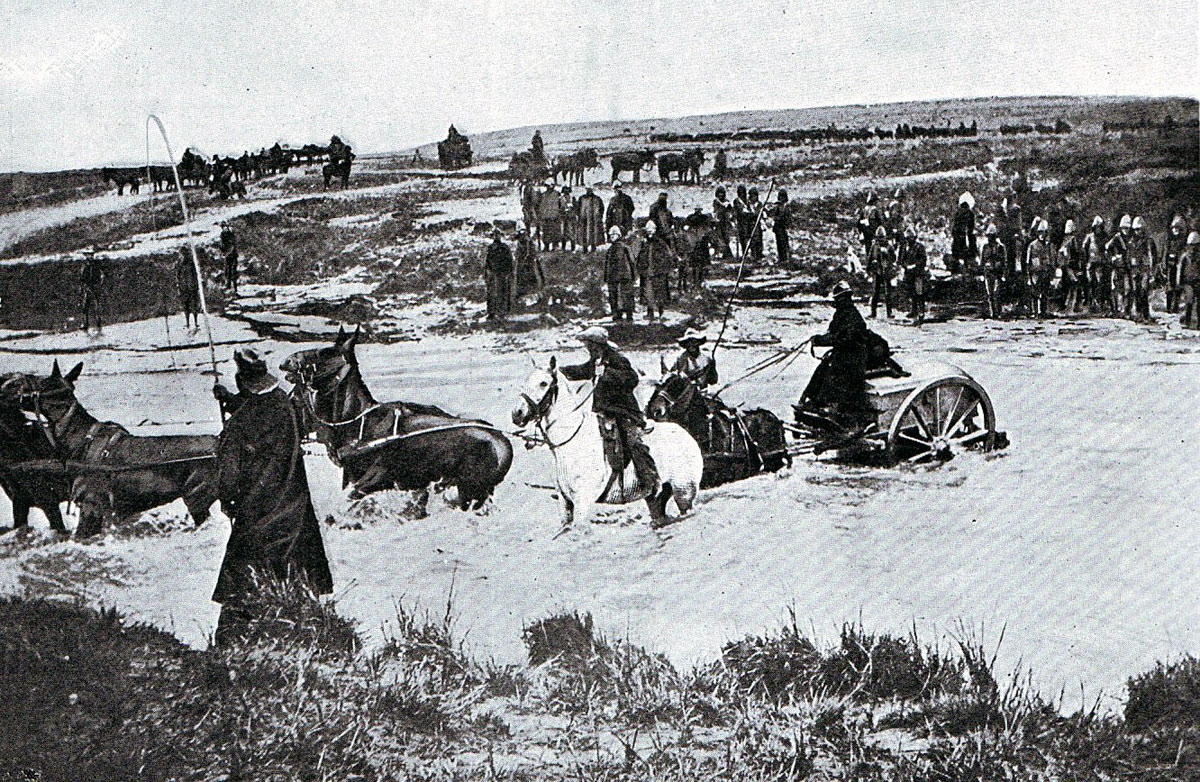
British mule drawn ammunition cart crossing a drift: Battle of Spion Kop on 24th January 1900 in the Great Boer War
Warren’s force set off for the Tugela on 15th January 1900, beginning the crossing of the river on 17th January. On 19th January Warren was still bringing his column across the river and had not begun his attack although his artillery opened an extensive bombardment along the Tabanyama Ridge immediately opposite Trikhardt’s Drift. In the meantime Botha realising the threat to his extreme right flank brought Boer commandoes and guns to the area, settling them into the threatened hills and opening fire on Warren’s waiting troops.
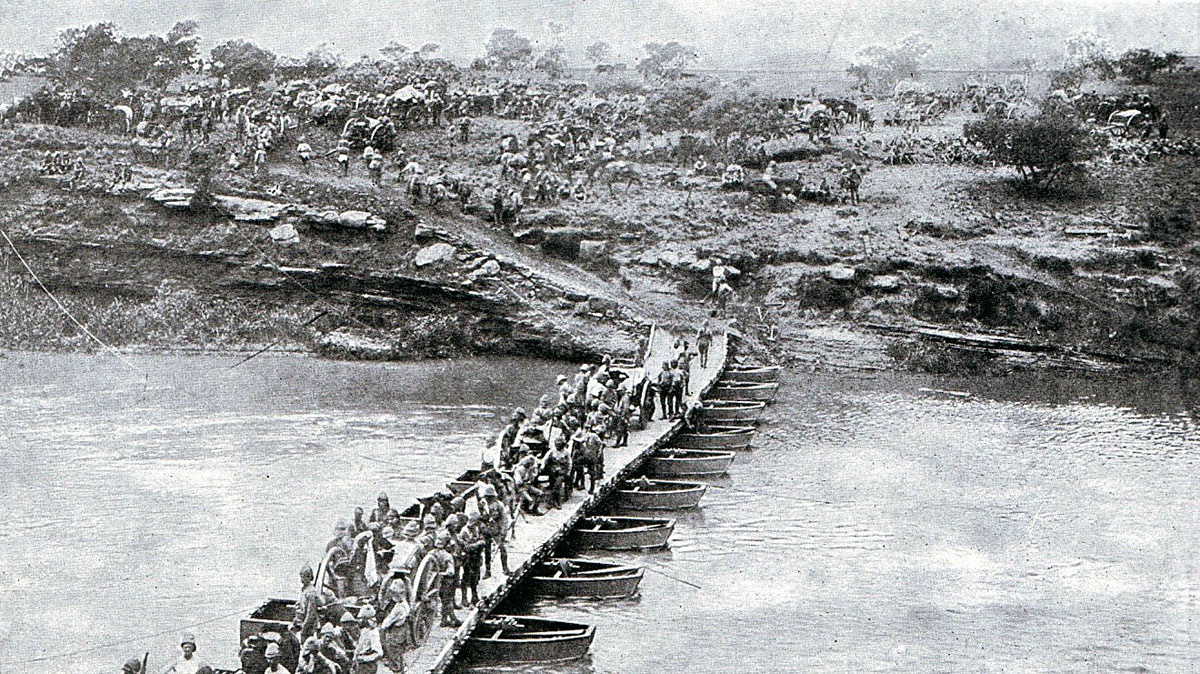
British Pontoon Bridge over the Tugela River: Battle of Spion Kop on 24th January 1900 in the Great Boer War
Losing patience with Warren’s lack of urgency, on 23rd January 1900 Buller rode forward and ordered Warren to begin the attack on the Rangeworthy Hills.
Cameronians maxim gun on Zwart Kop during the Battle of Spion Kop on 24th January 1900 in the Great Boer War
Warren’s plan was to climb and capture the hill of Spion Kop which he considered to be the key to the Rangeworthy position. With his troops established on Spion Kop he would overlook the open ground leading to Ladysmith.
The column assigned to take Spion Kop comprised a party of Thorneycroft’s Mounted Infantry, battalions from Woodgate’s Lancastrian brigade and sappers of the Royal Engineers to dig the necessary entrenchments.
The column made a night approach finally setting off up the steep side of the hill and arriving at the top in the early morning of 24th January 1900. The hill was shrouded in mist. A small Boer picket fled, leaving Warren’s men in possession of the summit, which the sappers began to entrench. It seemed to the British that the relief of Ladysmith was at hand.
Royal Lancasters crossing a drift at the Battle of Spion Kop on 24th January 1900 in the Great Boer War
The Boer picket rushed to warn Botha who directed the Boer guns in the area to fire on the summit of Spion Kop. A few hundred Boer burghers were persuaded to climb the hill and attempt to recapture it from the British.
On Spion Kop the mist prevented the British force from realising that the area they occupied did not include the summit and that their position was overlooked by higher features. The infantry soldiers fell asleep after the strenuous climb while the team of sappers dug trenches. The entrenched area extended to just an acre.
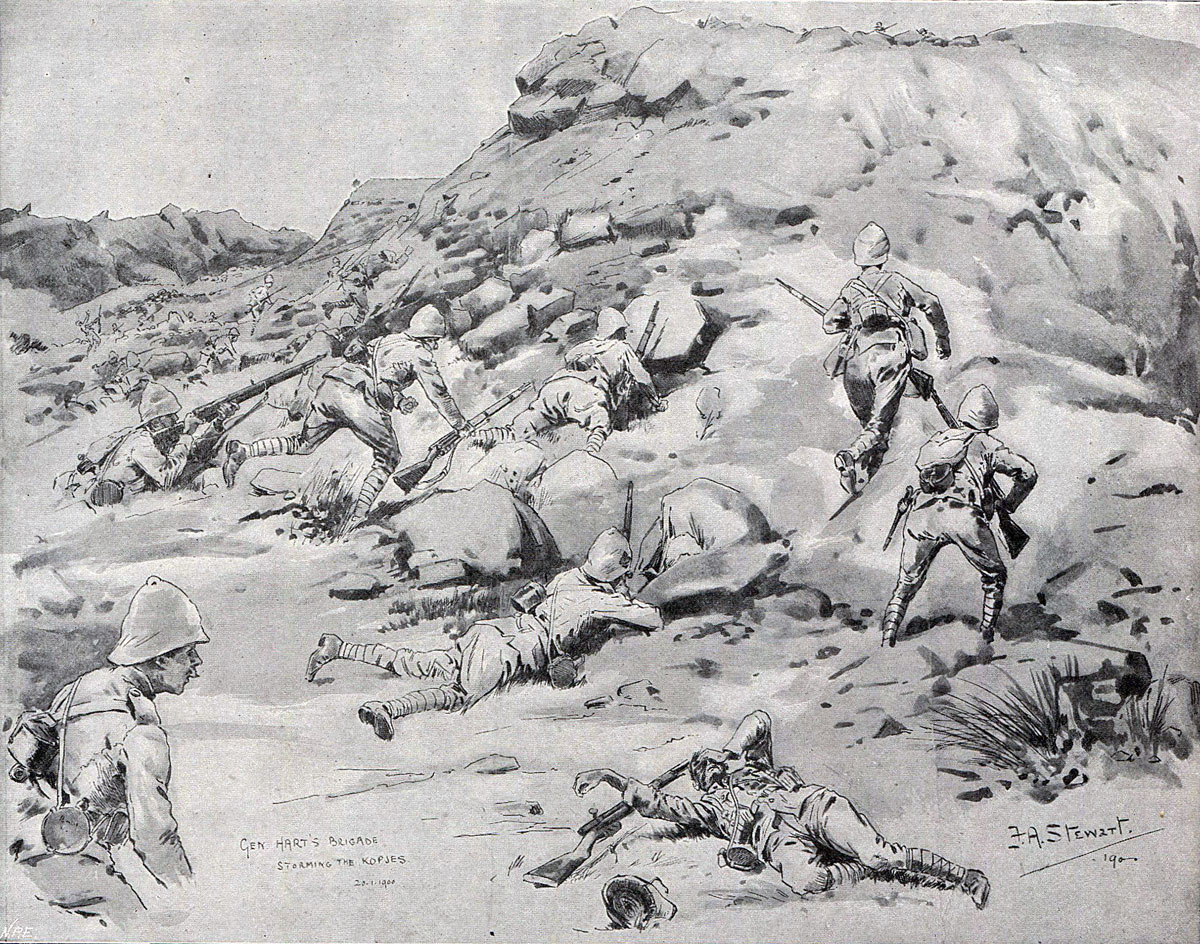
The Irish Brigade storming the Kops at the Battle of Spion Kop on 24th January 1900 in the Great Boer War: picture by F.A. Stewart
The Boer bombardment began and the Boers on the lip of the summit of the hill fired into the entrenched area, which the British troops were to find was too small and too shallow.
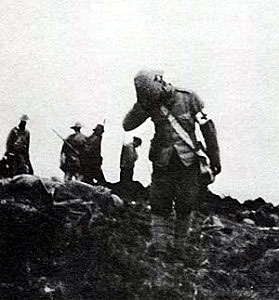
Major General Woodgate killed at the Battle of Spion Kop on 24th January 1900 in the Great Boer War
Under the storm of artillery and rifle fire the British troops in the trenches on the hill top suffered heavily. General Woodgate was an early casualty, as were the commanding officers of the Royal Lancasters and the Royal Engineers, leaving the British troops without senior officers.
Warren in the meanwhile ordered General Coke to take reinforcements to the hill-top: Imperial Light Infantry, 2nd Dorsets and 2nd Middlesex. Hart and other senior officers urged Warren to attack Tabanyama. Instead, Warren signalled Lyttleton that a diversion was needed.
On the Boer side the fighting was just as desperate. Only volunteers could be persuaded to climb to the top of Spion Kop and the surrounding heights. The hillside was littered with Boer casualties and many were killed on the summit. The sense of desperation was as great on the Boer side as on the British.
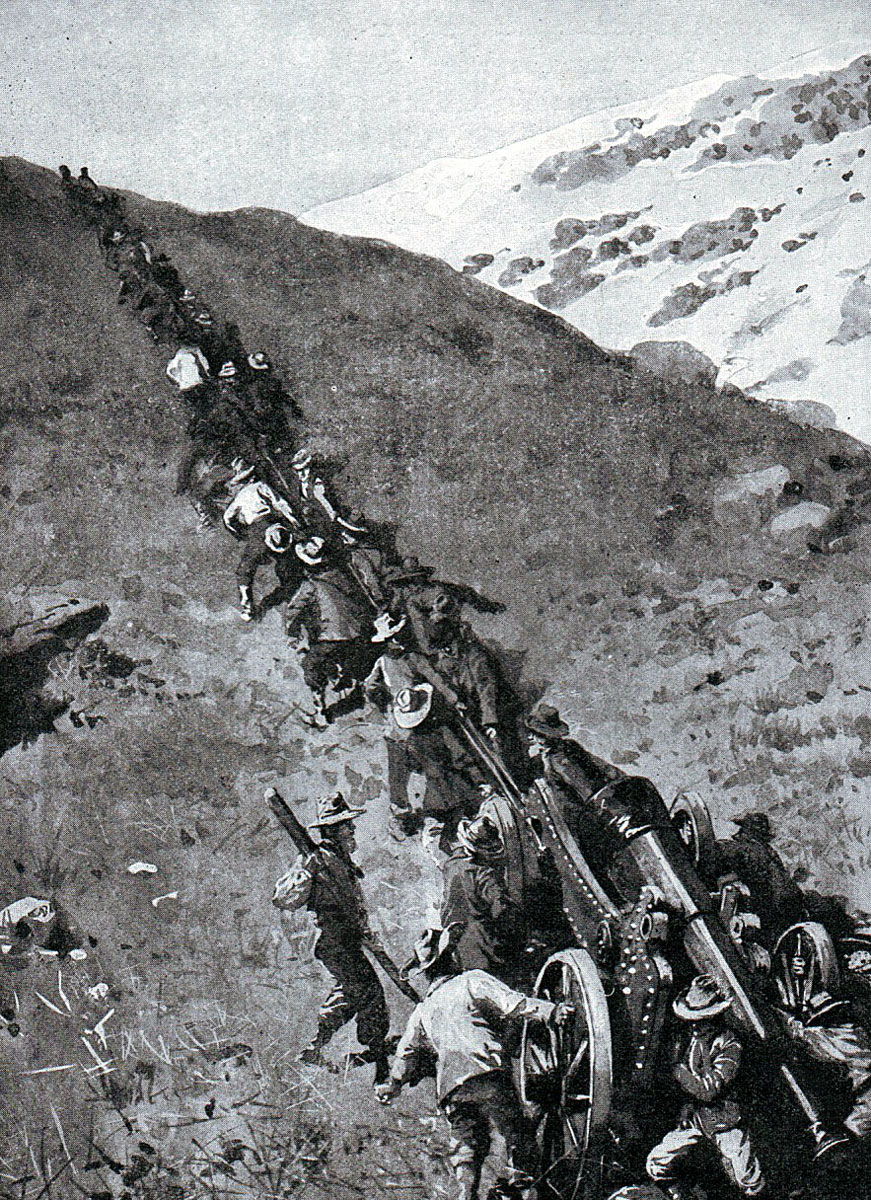
Boers hauling a heavy gun up a mountain at the Battle of Spion Kop on 24th January 1900 in the Great Boer War
On Buller’s urgings Warren put Thorneycroft in command on the crest of Spion Kop. Some of the despairing and exhausted British troops attempted to surrender to the Boers. Thorneycroft on taking command ordered the Boers back and shouted that there was to be no surrender. At the critical moment Coke’s reinforcements burst onto the hilltop, although Coke himself stayed beneath the crest and settled down for a nap, so it is reported. The most critical battle for the British Empire in many decades was left to a colonel to fight.
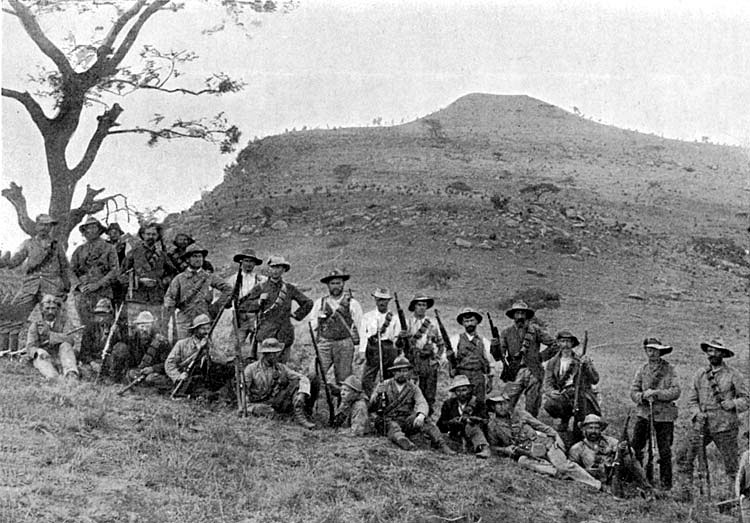
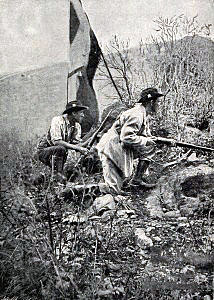
Boer riflemen at Spion Kop: Battle of Spion Kop on 24th January 1900 in the Great Boer War
At this point in the battle Lyttelton launched his diversionary attack. The 2nd Scottish Rifles climbed Spion Kop to join Thorneycroft’s troops while 1st Rifle Brigade attacked straight up the Twin Peaks to the East of Spion Kop.
Schalk Burger, commanding the Boers on the Twin Peaks, panicked at the assault on his position and many of his burghers made for the rear, leaving the 60th to take the summit of the ridge.
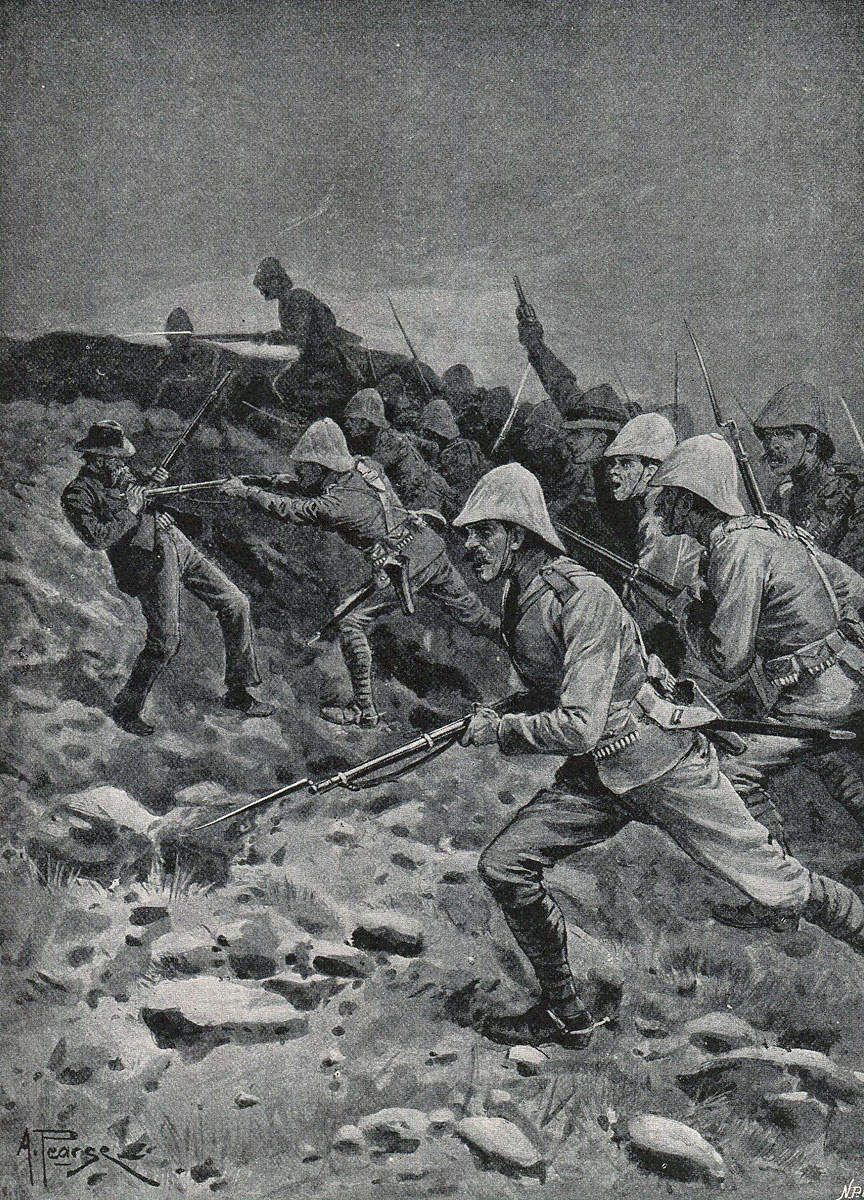
British troops rushing the top of Spion Kop during the Battle of Spion Kop on 24th January 1900 in the Great Boer War: picture by A. Pearse
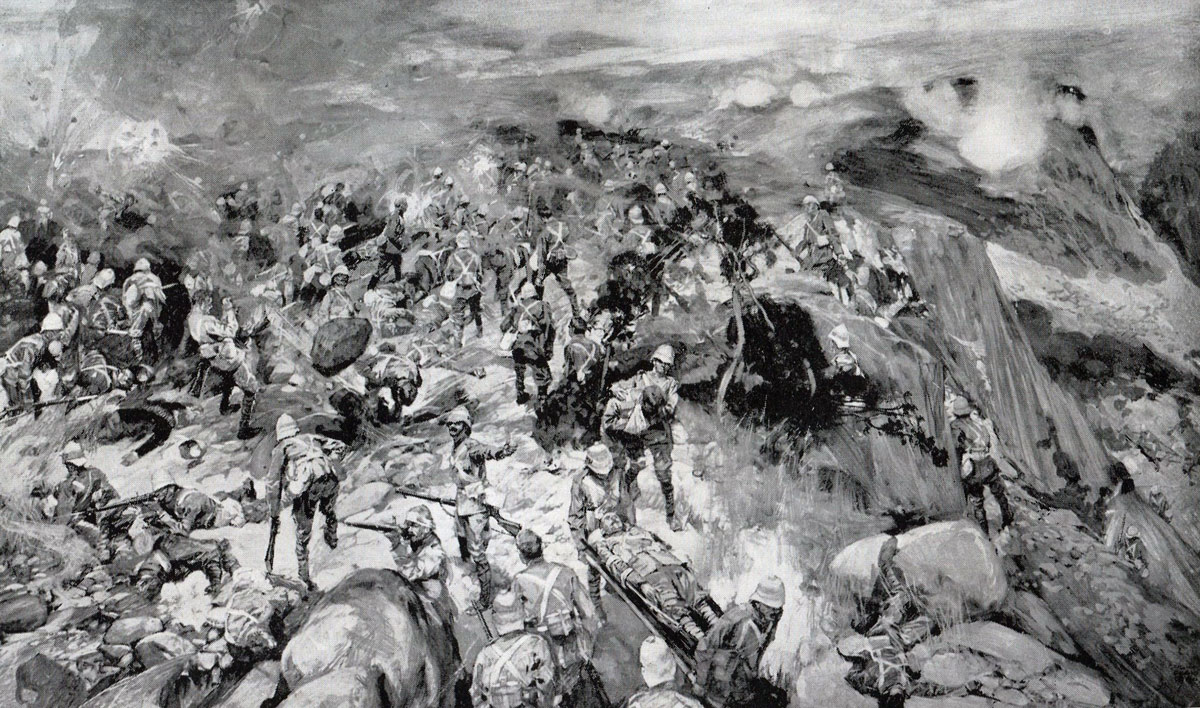
British troops under fire on Spion Kop in the Battle of Spion Kop on 24th January 1900 in the Great Boer War: picture by F.J. Waugh
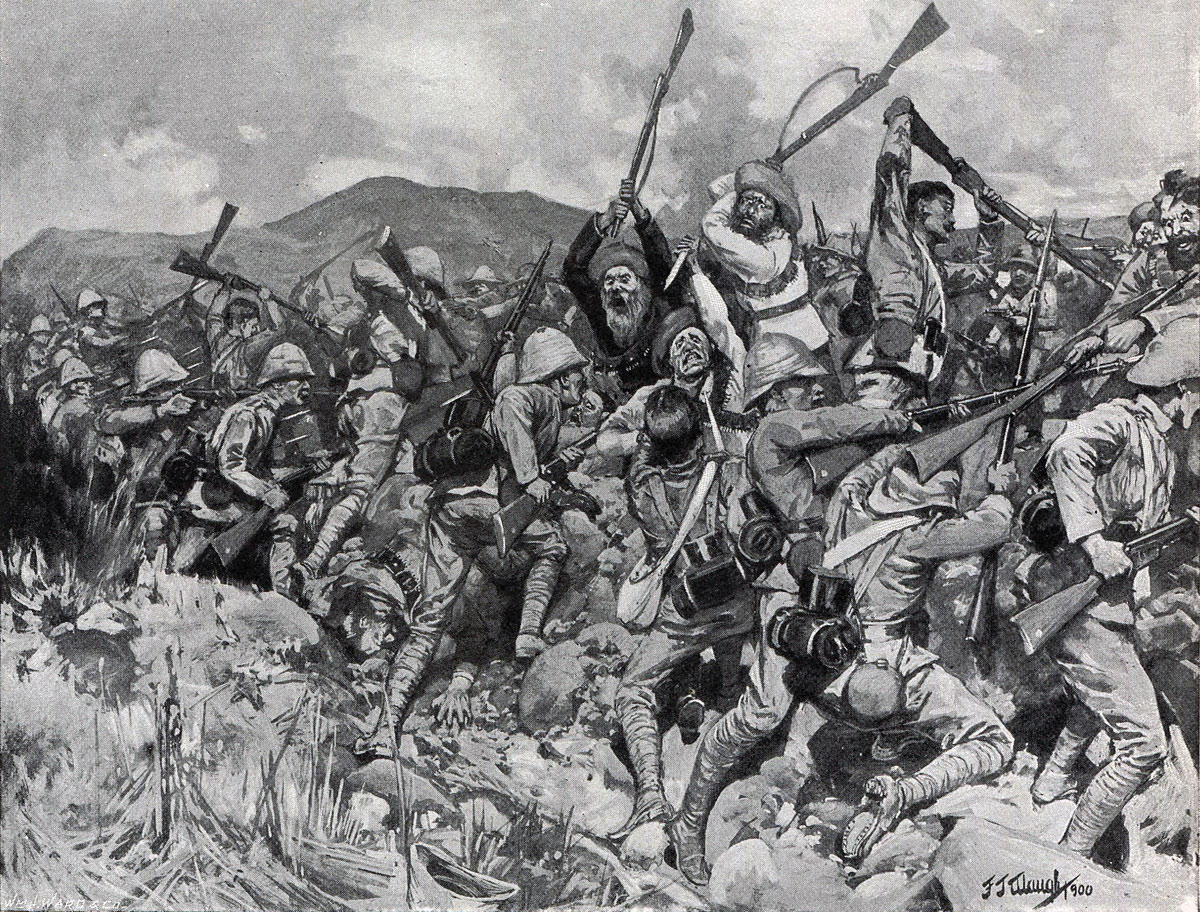
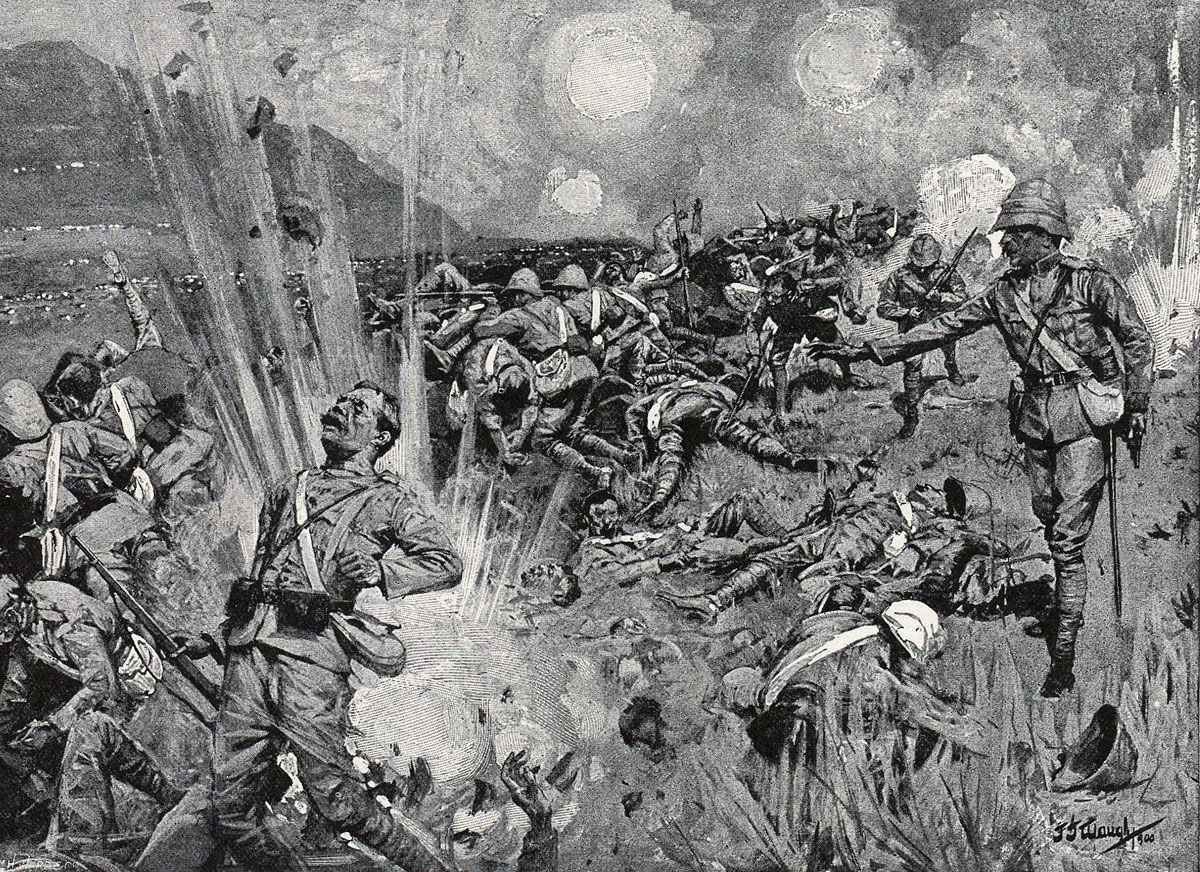
British troops repelling a Boer Assault at the top of Spion Kop in the Battle of Spion Kop on 24th January 1900 in the Great Boer War: picture by F.J. Waugh
The roasting hot day came to a close and Warren began to organise reliefs and supplies for the hard pressed infantry on the summit of Spion Kop. Still under artillery fire Thorneycroft and his men were at the end of their tether. Warren had sent Thorneycroft no orders of any sort during the day, other than his appointment in command, and he now sent no message to inform Thorneycroft that substantial reinforcements were on their way. Not until 9pm did the reliefs begin to climb the hill.
General Warren at the bottom of Spion Kop during the Battle of Spion Kop on 24th January 1900 in the Great Boer War
On the Boer side the effect of the battle had been just as devastating and the diversionary attack by the 60th Rifles had been the last straw. The Boers had left the summit of Spion Kop. Thorneycroft did not realise it, but he had won the battle. Instead of moving forward after the retreating enemy Thorneycroft resolved to withdraw off the hill with the confused and demoralised remnants of the Lancashire battalions, Middlesex, Scottish Rifles and his own Imperial Light Infantry. The reinforcements began to arrive and a vigorous dispute developed, a newly arrived commanding officer insisting that the hill must be held. Thorneycroft was adamant. He was in command and he was taking his troops down from this hellish hill top which they could no longer hold.
Thorneycroft’s troops on Spion Kop in the Battle of Spion Kop on 24th January 1900 in the Great Boer War: picture by Frank Craig from a sketch by an officer
At dawn the next day the Boer leaders saw that their men had re-occupied Spion Kop. The battle had been won.
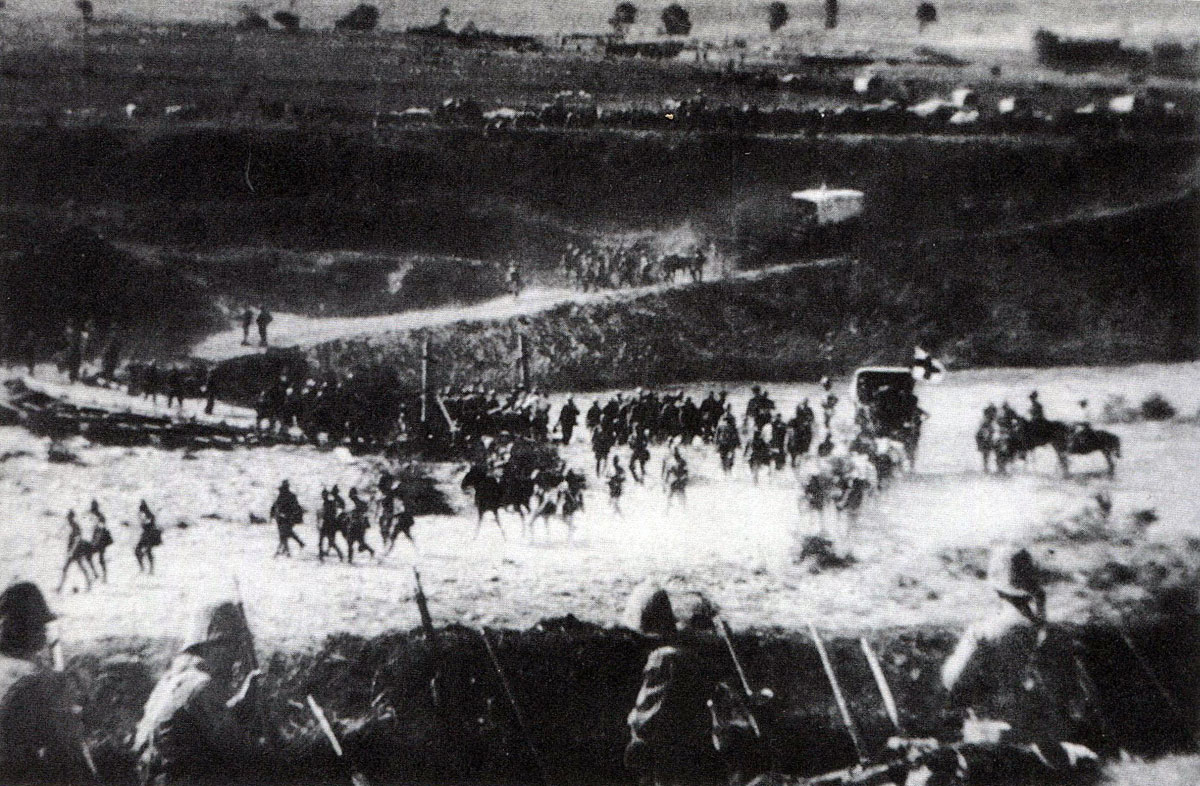
British troops retreating across the Tugela River after the Battle of Spion Kop on 24th January 1900 in the Great Boer War
Warren’s force trailed back across the Tugela. The second attempt to force through to Ladysmith had failed disastrously.
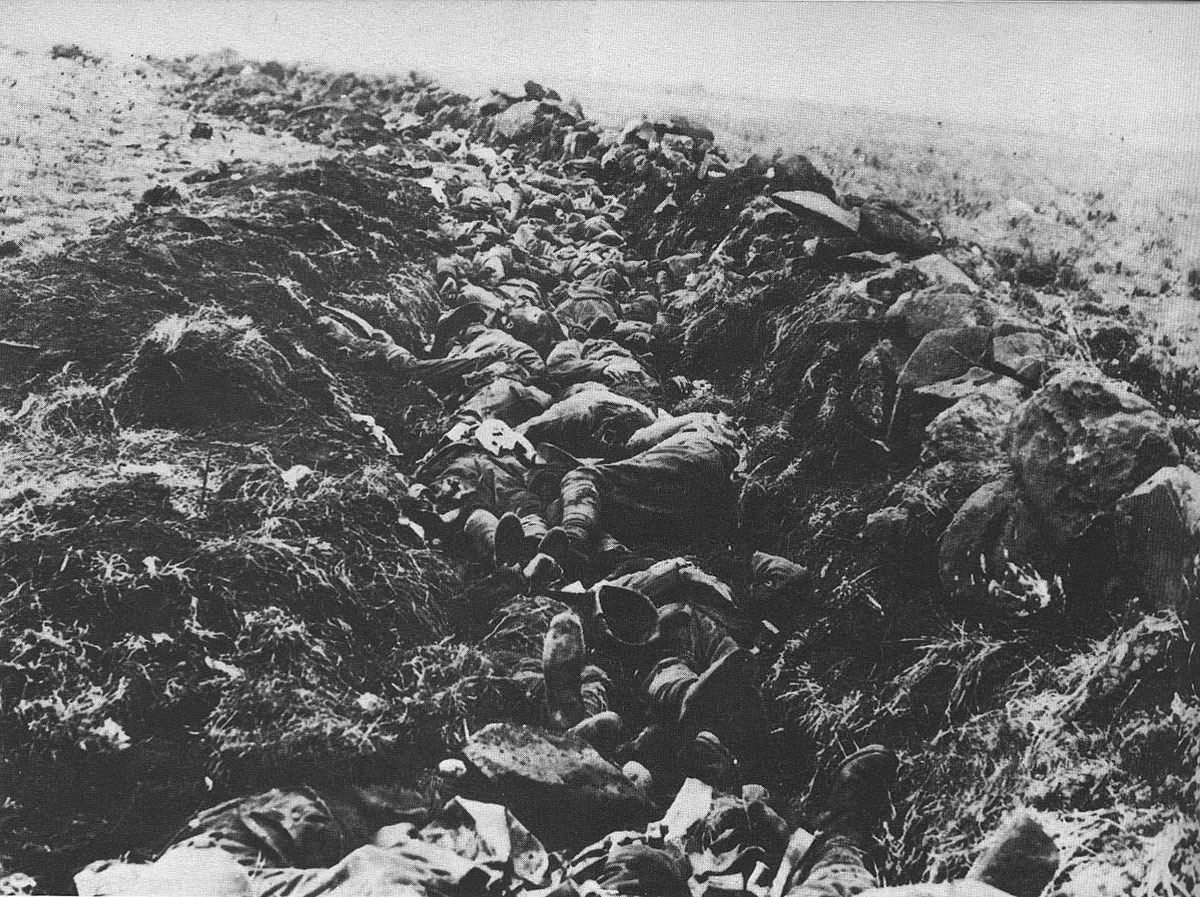
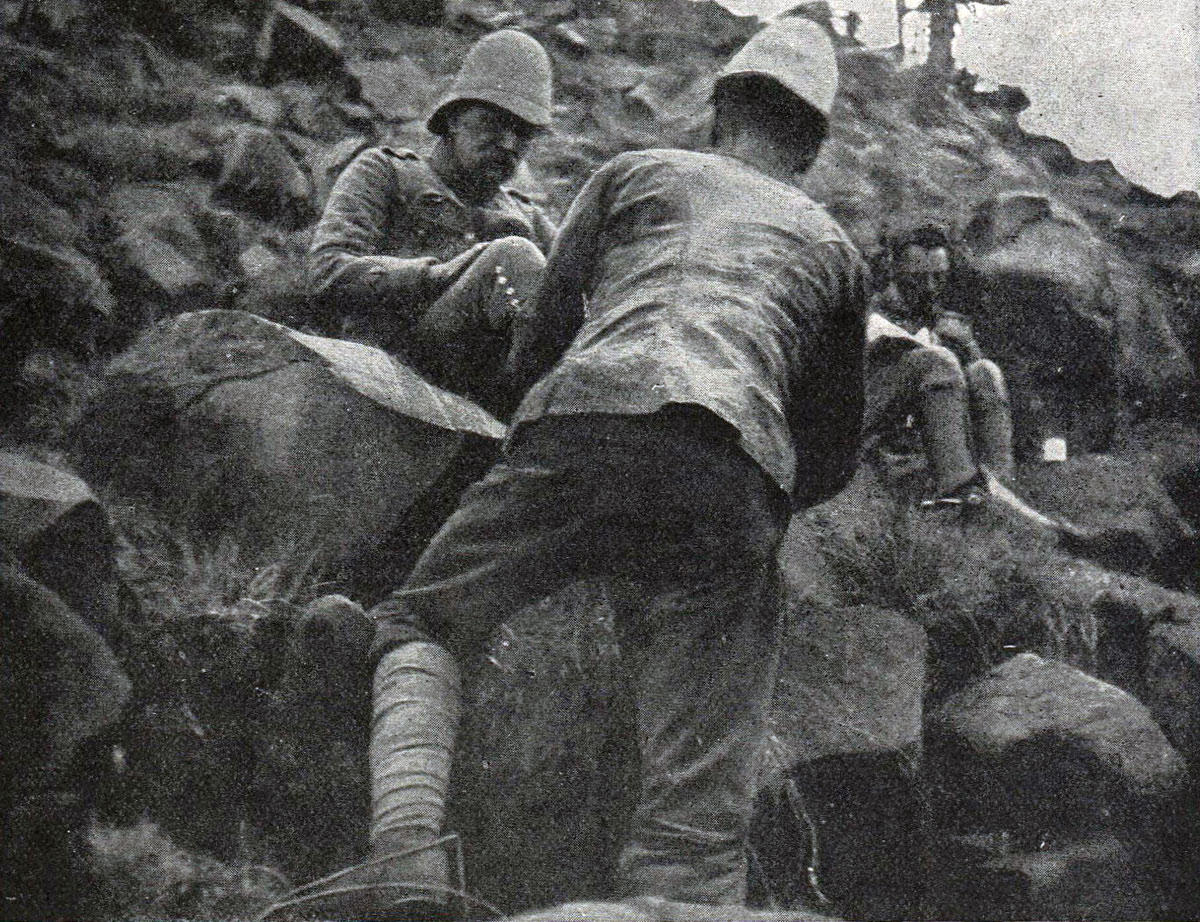
Area at the top of Spion Kop called ‘Murderous Acre’ after the Battle of Spion Kop on 24th January 1900 in the Great Boer War
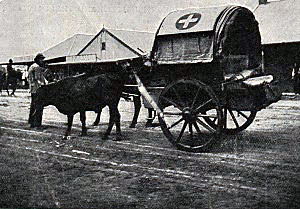
Ambulance of the Indian Stretcher Bearer Corps: Battle of Spion Kop on 24th January 1900 in the Great Boer War
Casualties at the Battle of Spion Kop:
The British suffered 1,500 casualties, 243 of them dead in the trench on the peak of Spion Kop. The Boers suffered 335 casualties.
Follow-up to the Battle of Spion Kop:
News of Spion Kop caused consternation in Britain and nearly brought down the government. The cabinet was at a loss to work out what could have gone wrong. The decision was made to send out Lord Roberts and Lord Kitchener to take over as commander in chief and chief of staff in South Africa.
Searching for casualties after the Battle of Spion Kop on 24th January 1900 in the Great Boer War
Spion Kop drove the final nail into the coffin of Buller’s reputation. With the end of the war Buller was dismissed from the army, a terrible end to a worthy life of service to the British Crown in spite of his failings.
Buller’s incompetence as a general was fully demonstrated at Spion Kop. In spite of his overwhelming strength he allowed the battle to be decided by a few hundred men fighting in what came to be called the murderous acre, on the top of a hill beyond any proper command control. In spite of his reservations as to Warren’s conduct of the battle Buller failed to intervene.
Curiously Spion Kop was something of a disaster for the Boers. Many of the Boers assumed that, as after Majuba in the First Boer War, the British would sue for peace and leave them their independence. Numbers of burghers, including Botha, considering the war as good as won went home, leaving insufficient men to resist Buller’s next and decisive attacks at Val Krantz and Pieter’s Hill.
Indian Stretcher Bearers of the unit led by Mahatma Gandhi: Battle of Spion Kop on 24th January 1900 in the Great Boer War
Denys Reitz, author of Commando, was one of the Boer volunteers who climbed onto Spion Kop and fought through the day, finally despairing of success and pulling back. It is an irony that in 1918 Reitz commanded 1st Royal Scots Fusiliers in France.
Battle Honours:
Spion Kop is not a British battle honour. All the regiments that fought in South Africa received the battle honour ‘South Africa’ with the dates of presence in the country.
Regimental anecdotes and traditions relating to the Battle of Spion Kop:
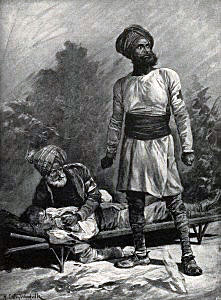
- Mahatma Gandhi was present at Spion Kop with his team of Indian stretcher bearers.
- ‘Spion Kop’ or ‘The Kop’ is the name given to Liverpool Football Club’s ground at Anfield. The name was given to a number of football stands during the 20th Century of which the Liverpool stand is the best known. Most of the others have been demolished. It is said the steep seating resembled the hill in Natal famous for the battle. It was particularly appropriate for the Liverpool ground to be named after the battle at which the principal British formation was Woodgate’s Lancastrian Brigade.
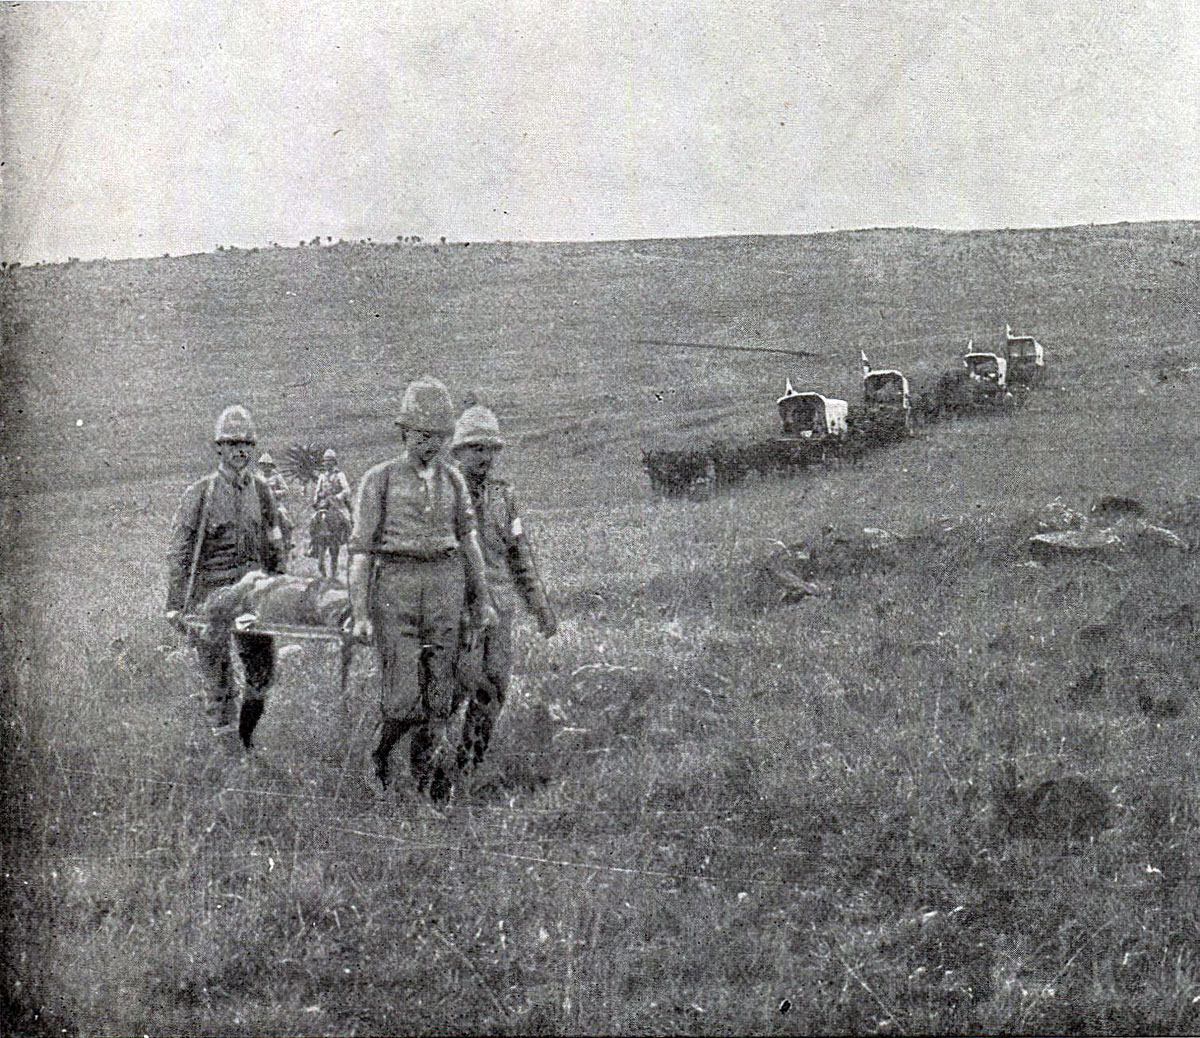
Bringing in British casualties after the Battle of Spion Kop on 24th January 1900 in the Great Boer War
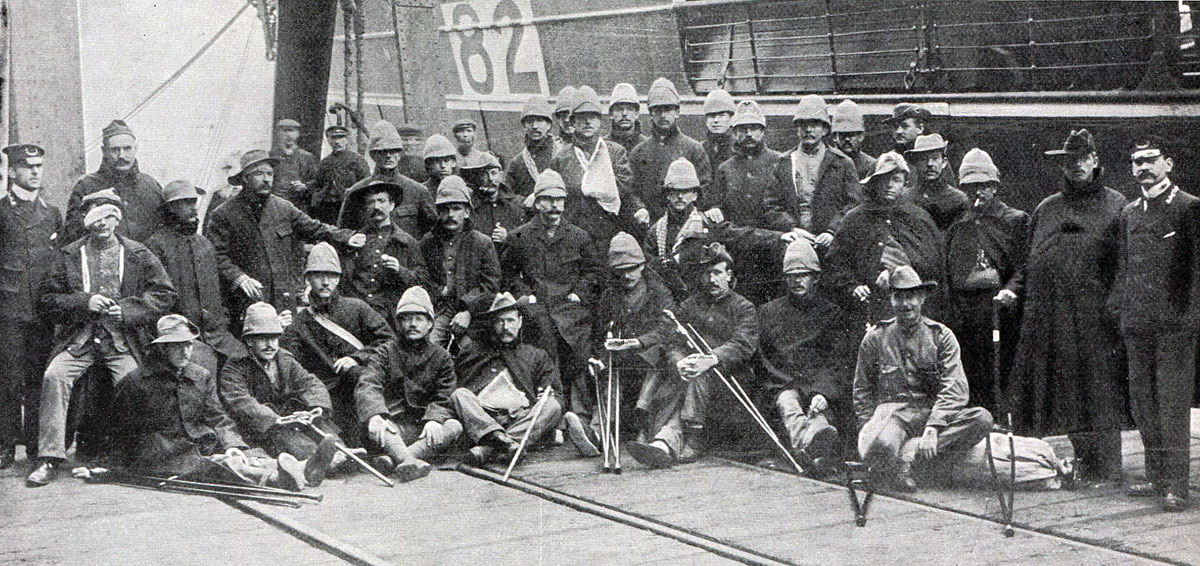
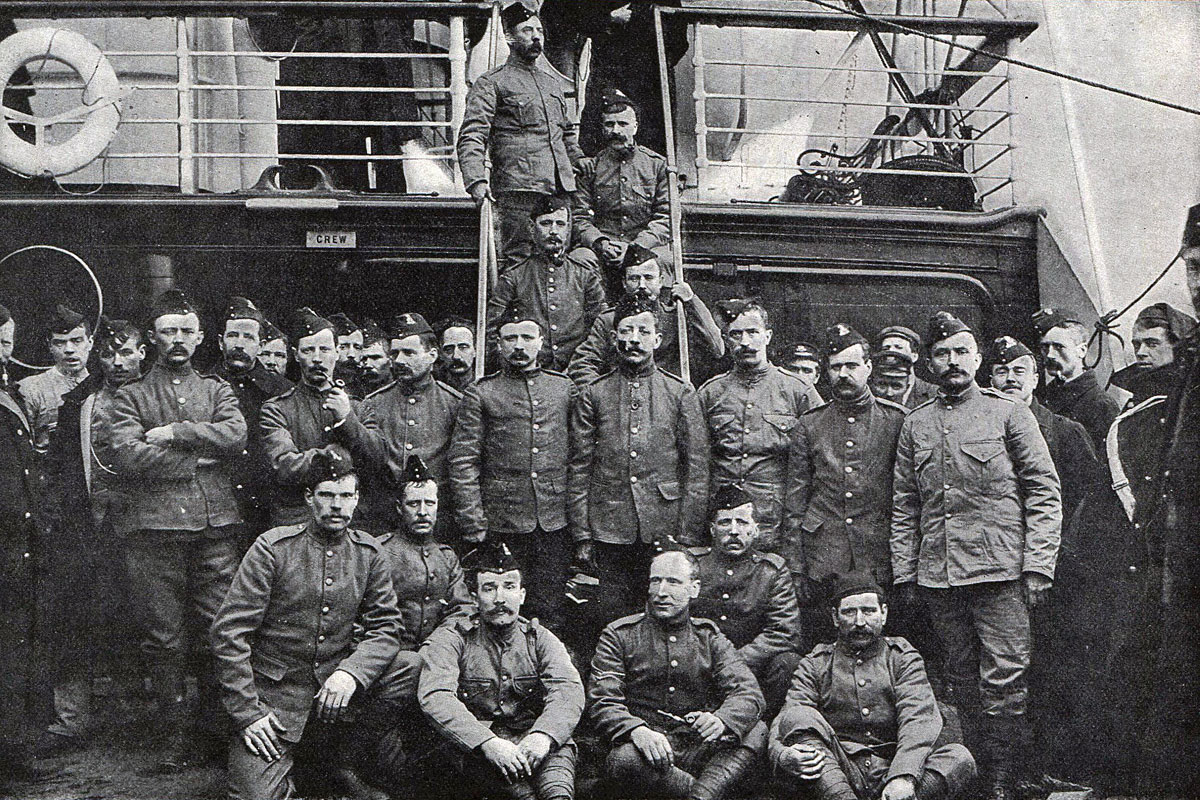
British wounded from Spion Kop and Colenso on board ship for ‘Blighty’: Battle of Spion Kop on 24th January 1900 in the Great Boer War
References for the Battle of Spion Kop:
The Great Boer War is widely covered. A cross section of interesting volumes would be:
The Times History of the War in South Africa
The Great Boer War by Sir Arthur Conan Doyle
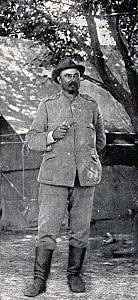
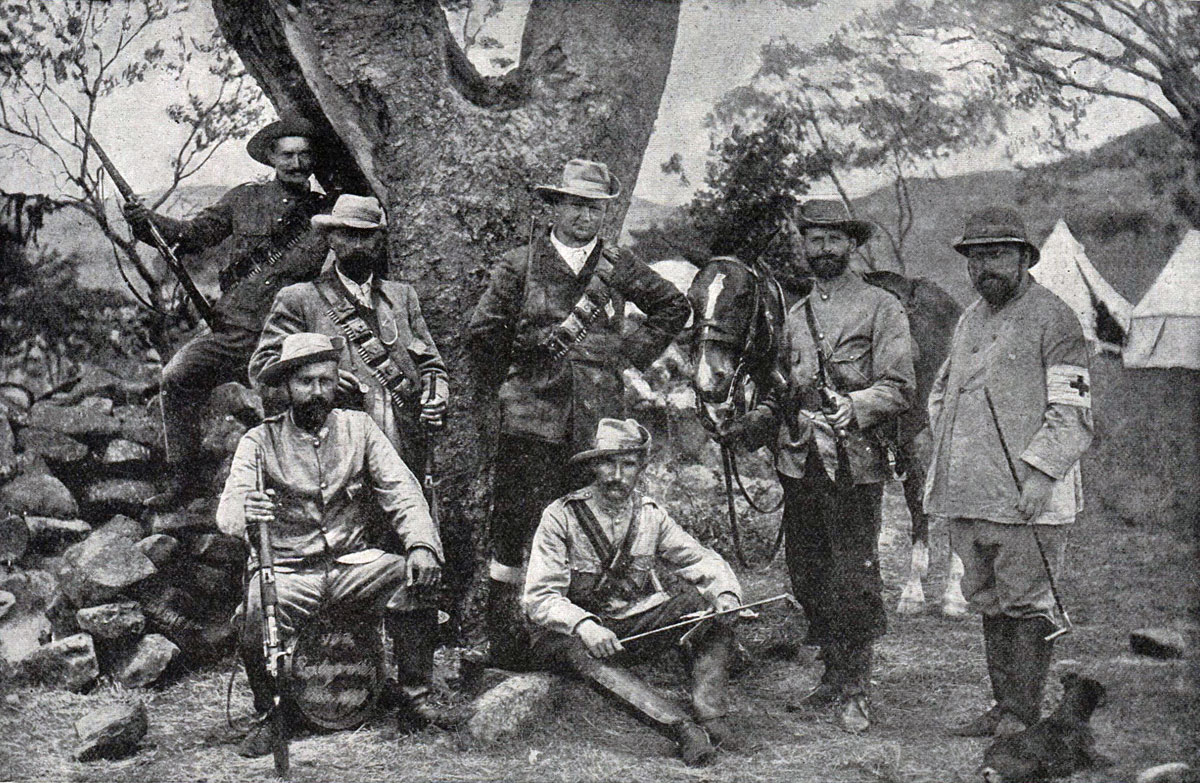
Boer medical staff at the Battle of Spion Kop on 24th January 1900 in the Great Boer War
Goodbye Dolly Gray by Rayne Kruger
With the Flag to Pretoria by HW Wilson
The Boer War by Thomas Pakenham
South Africa and the Transvaal War by Louis Creswicke (6 highly partisan volumes)
Books solely on the fighting in Natal:
Buller’s Campaign by Julian Symons
Ladysmith by Ruari Chisholm
For a view of the fighting in Natal from the Boer perspective:
Commando by Denys Reitz.
The previous battle in the Great Boer War is the Battle of Colenso
The next battle in the Great Boer War is the Battle of Val Krantz
© britishbattles.com.