British Battles

You are here: Home / Great Boer War / Battle of Val Krantz

Battle of Val Krantz

The third unsuccessful attempt by Buller to push across the Tugela River and relieve Ladysmith, fought on 5th February 1900
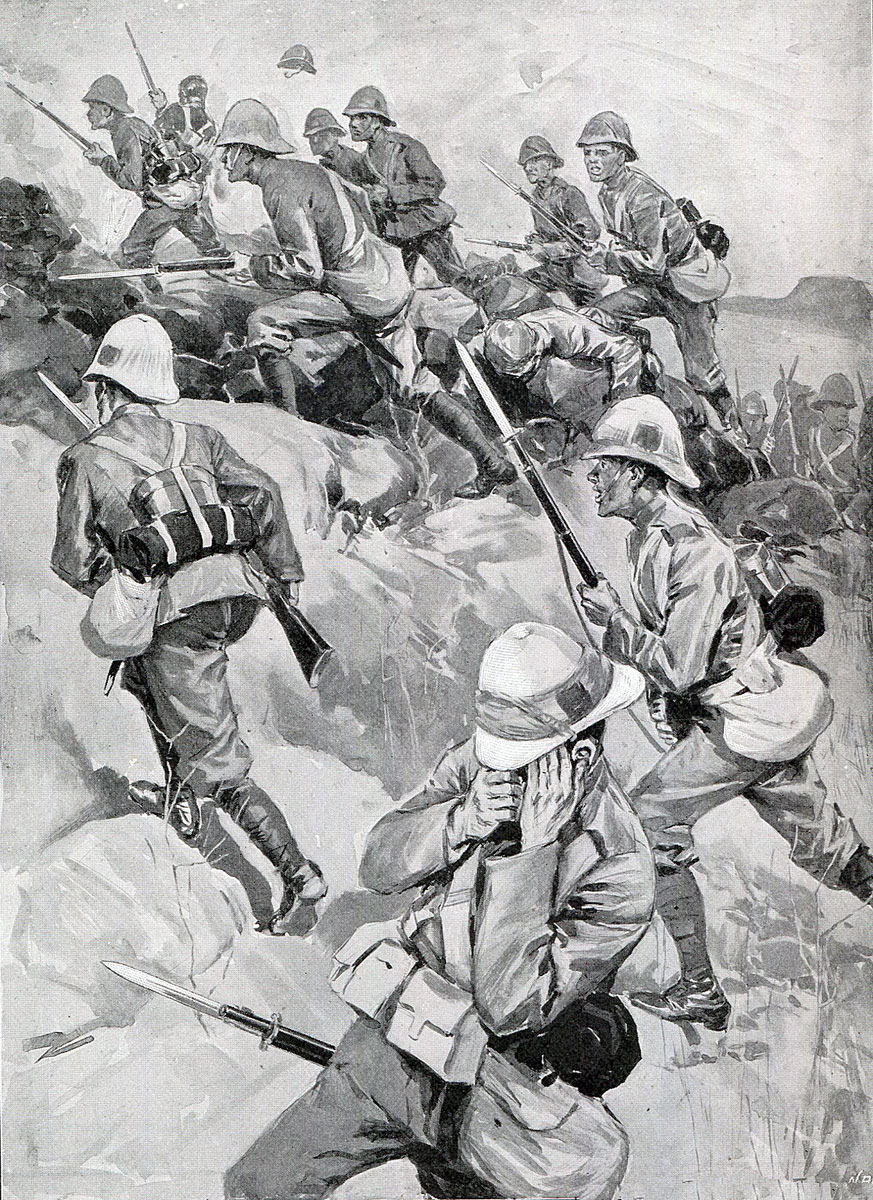
1st Durham Light Infantry attacking up Val Krantz: at the Battle of Val Krantz on 5th February 1900 in the Boer War: picture by Oscar Eckhardt
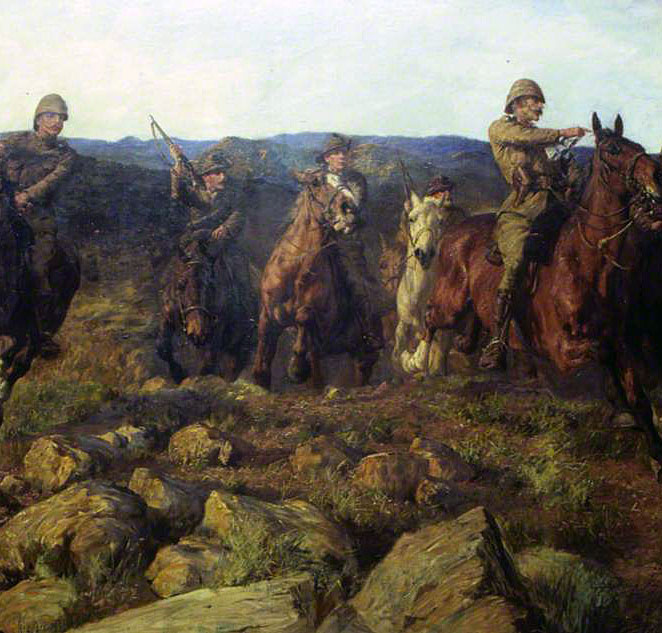
1st Durham Light Infantry attacking up Val Krantz: at the Battle of Val Krantz on 5th February 1900 in the Boer War: picture by Oscar Eckhardt

67. Podcast on the Battles of Val Krantz and Pieters fought between 5th and 28th February 1900 in the Boer War: The third unsuccessful attempt by Buller to push across the Tugela River followed by the fourth, final and successful crossing of the Tugela, leading to the relief of Ladysmith: John Mackenzie’s britishbattles.com podcasts

The previous battle of the Great Boer War is the Battle of Spion Kop

The next battle of the Great Boer War is the Battle of Pieters

To the Great Boer War index


War: The Great Boer War

Date of the Battle of Val Krantz: 5thFebruary 1900

Place of the Battle of Val Krantz: On the Tugela River, Northern Natal, in South Africa.

Combatants at the Battle of Val Krantz: British against the Boers.
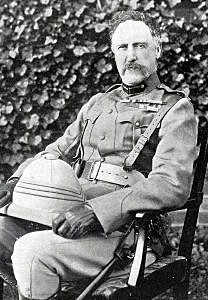
Major General Lyttelton, commander of British Fourth Brigade: Battle of Val Krantz on 5th February 1900 in the Great Boer War

Major General Lyttelton, commander of British Fourth Brigade: Battle of Val Krantz on 5th February 1900 in the Great Boer War

Commanders at the Battle of Val Krantz: Lieutenant General Sir Redvers Buller against General Botha. Major General Lyttelton commanded the British brigade attacking Val Krantz. The defending Boer general was Viljoen

Size of the armies at the Battle of Val Krantz: 20,000 British and colonial troops against between 4,000 to 8,000 Boers, as they returned to their commandos.

Uniforms, arms and equipment at the Battle of Val Krantz: The Boer War was a serious jolt for the British Army. At the outbreak of the war, British tactics were appropriate for the use of single shot firearms, fired in volleys controlled by company and battalion officers, the troops fighting in close order. The need for tight formations had been emphasised time and again in colonial fighting. In the Zulu and Sudan Wars, overwhelming enemy numbers, armed principally with stabbing weapons, were easily kept at a distance by such tactics; but, as at Isandlwana, would overrun a loosely formed force. These tactics had to be entirely rethought in battle against the Boers armed with modern weapons.
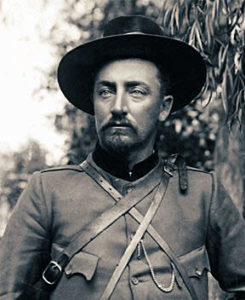
General Ben Viljoen, Boer commander on Val Krantz at the Battle of Val Krantz on 5th February 1900 in the Great Boer War

General Ben Viljoen, Boer commander on Val Krantz at the Battle of Val Krantz on 5th February 1900 in the Great Boer War

In the months before hostilities, the Boer commandant general, General Joubert, bought 30,000 Mauser magazine rifles and a number of modern field guns and automatic weapons from the German armaments manufacturer Krupp and the French firm Creusot. The Boer commandoes, without formal discipline, welded into a fighting force through a strong sense of community and dislike for the British. Field cornets led Boer burghers by personal influence, not through any military code. The Boers did not adopt military formation in battle, instinctively fighting from whatever cover there might be. Many Boers were countrymen, running their farms from the back of a pony with a rifle in one hand. These rural Boers brought a life time of marksmanship to the war, an important edge, further exploited by Joubert’s consignment of German magazine rifles. Viljoen is said to have coined the aphorism ‘Through God and the Mauser’ to describe the national inspiration. With strong fieldcraft skills and high mobility, the Boers were natural mounted infantry. The urban burghers and foreign volunteers readily adopted the fighting methods of their rural comrades.

Other than in the regular uniformed Staats Artillery and police units, the Boers wore their everyday civilian clothing on campaign.

After the first month of the war, the Boers lost their numerical superiority, spending the rest of the formal war on the defensive against British forces, that regularly outnumbered them.

British tactics, used at Modder River, Magersfontein, Colenso and Spion Kop, were incapable of winning battles against entrenched troops armed with modern magazine rifles. Every British commander made the same mistake; Buller; Methuen, Roberts and Kitchener. When General Kelly-Kenny attempted to winkle Cronje’s commandoes out of their riverside entrenchments at Paardeberg using his artillery, Kitchener intervened and insisted on a battle of infantry assaults; with the same disastrous consequences as in earlier battles.

Some of the most successful British troops were the non-regular regiments; the City Imperial Volunteers, the South Africans, Canadians, Australians and New Zealanders, who more easily broke from the habit of traditional European warfare, using their horses for transport rather than the charge, advancing by fire and manoeuvre in loose formations and making use of cover, rather than the formal attack in line into a storm of Mauser bullets.
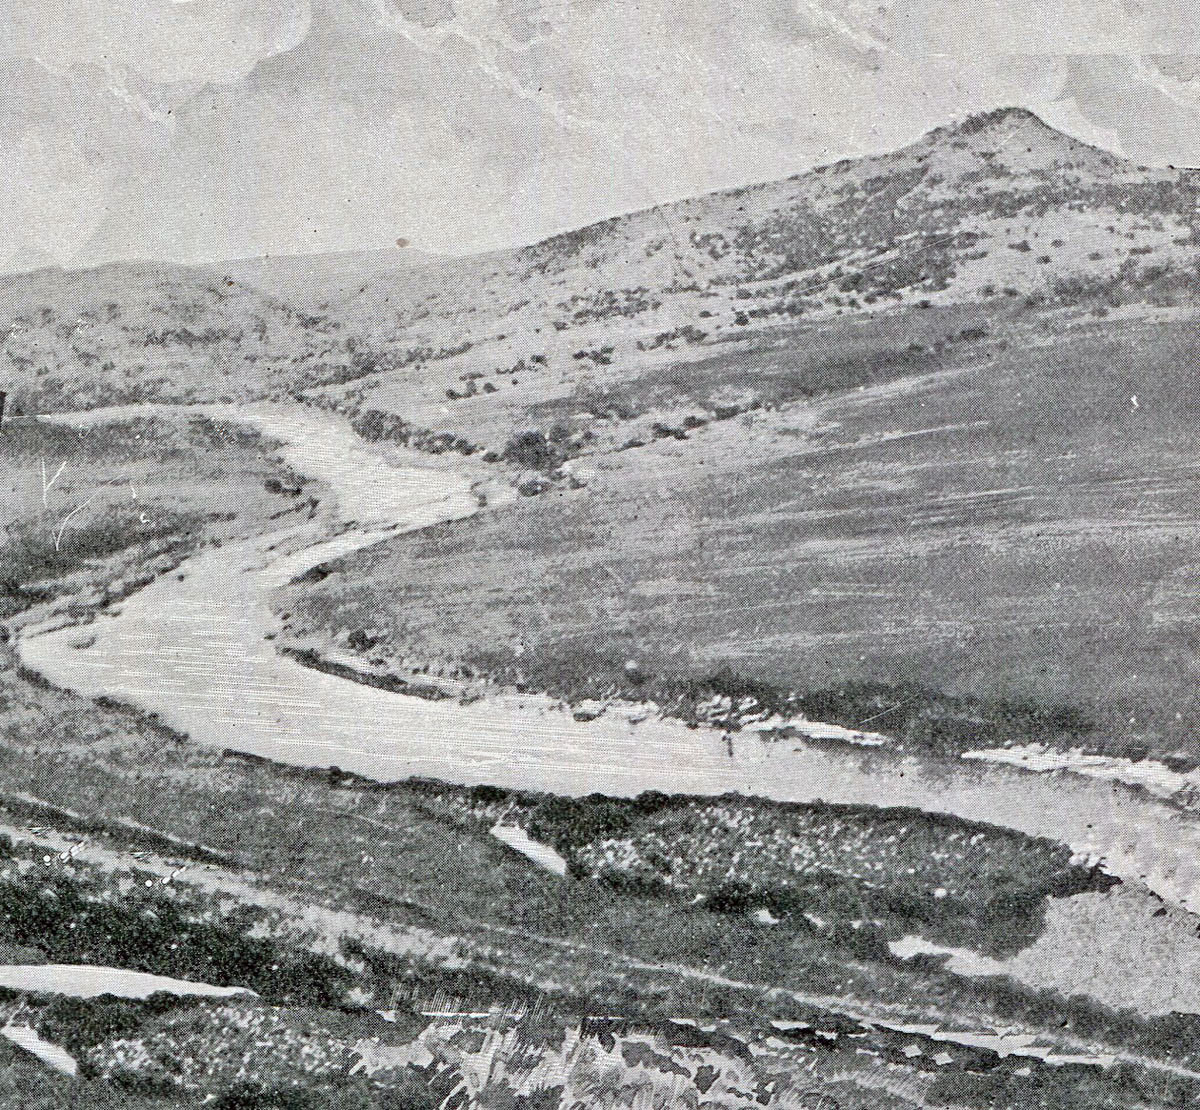
Val Krantz viewed across the Tugela River: Battle of Val Krantz on 5th February 1900 in the Great Boer War

Val Krantz viewed across the Tugela River: Battle of Val Krantz on 5th February 1900 in the Great Boer War

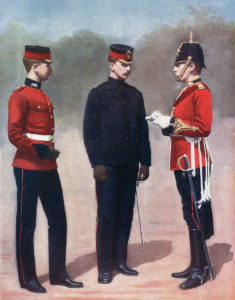
Uniforms, equipment and training: The British regiments made an uncertain change into khaki uniforms in the years preceding the Great Boer War, with the topee helmet as tropical headgear. Highland regiments in Natal devised aprons to conceal coloured kilts and sporrans. By the end of the war, the uniform of choice was slouch hat, drab tunic and trousers. The danger of shiny buttons and too ostentatious emblems of rank was emphasised in several engagements with disproportionately high officer casualties.  From early in the war many British officers stopped wearing their swords and carried rifles, to make themselves less conspicuous to Boer marksmen.

The British infantry were armed with the Lee-Metford magazine rifle, firing 10 rounds. But no training regime had been established to take advantage of the accuracy and speed of fire of the weapon. Personal skills such as scouting and field craft were little taught. The idea of fire and movement was unknown, many regiments still going into action in close order.

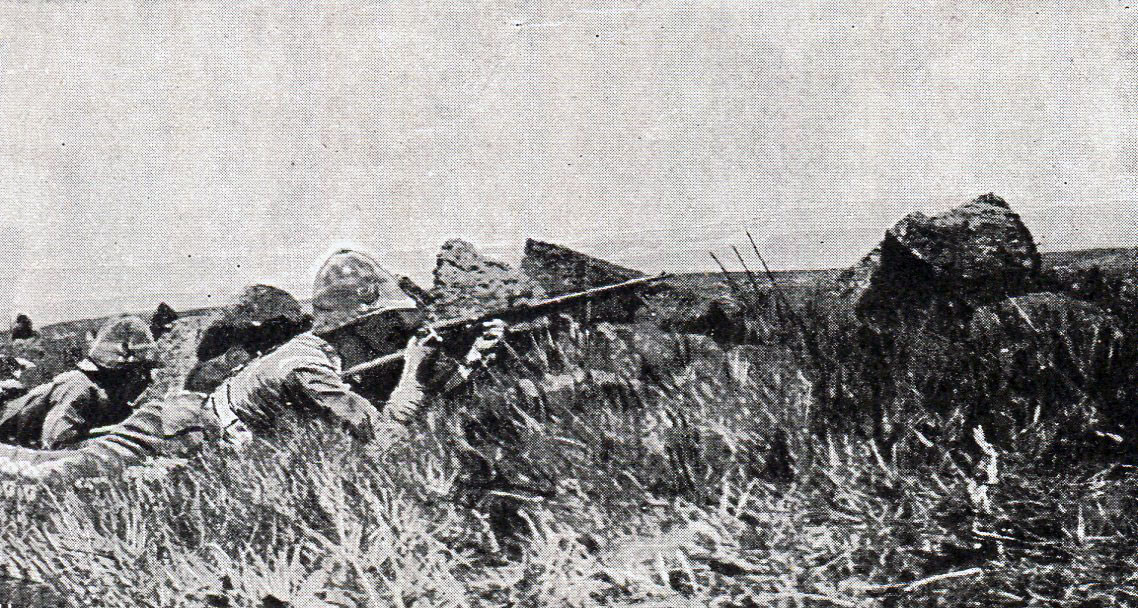
West Yorkshires on Val Krantz: Battle of Val Krantz 5th February 1900 in the Boer War

West Yorkshires on Val Krantz: Battle of Val Krantz 5th February 1900 in the Boer War

Notoriously, General Hart insisted that his Irish Brigade fight shoulder to shoulder, as if on parade in Aldershot. Short of regular troops, Britain engaged volunteer forces from Britain, Canada, Australia and New Zealand, who brought new ideas and more practical formations to the battlefield.

The British regular troops lacked imagination and resource. Routine procedures such as effective scouting and camp protection were often neglected. The war was littered with incidents in which British contingents became lost or were ambushed, often unnecessarily, and forced to surrender. The war was followed by a complete re-organisation of the British Army.

The British artillery was a powerful force in the field, underused by commanders with little training in the use of modern guns in battle. Pakenham cites Pieters as being the battle at which a British commander, surprisingly Buller, developed a modern form of battlefield tactics: heavy artillery bombardments, co-ordinated to permit the infantry to advance under their protection. It was the only occasion that Buller showed any real general ship and the short inspiration quickly died.

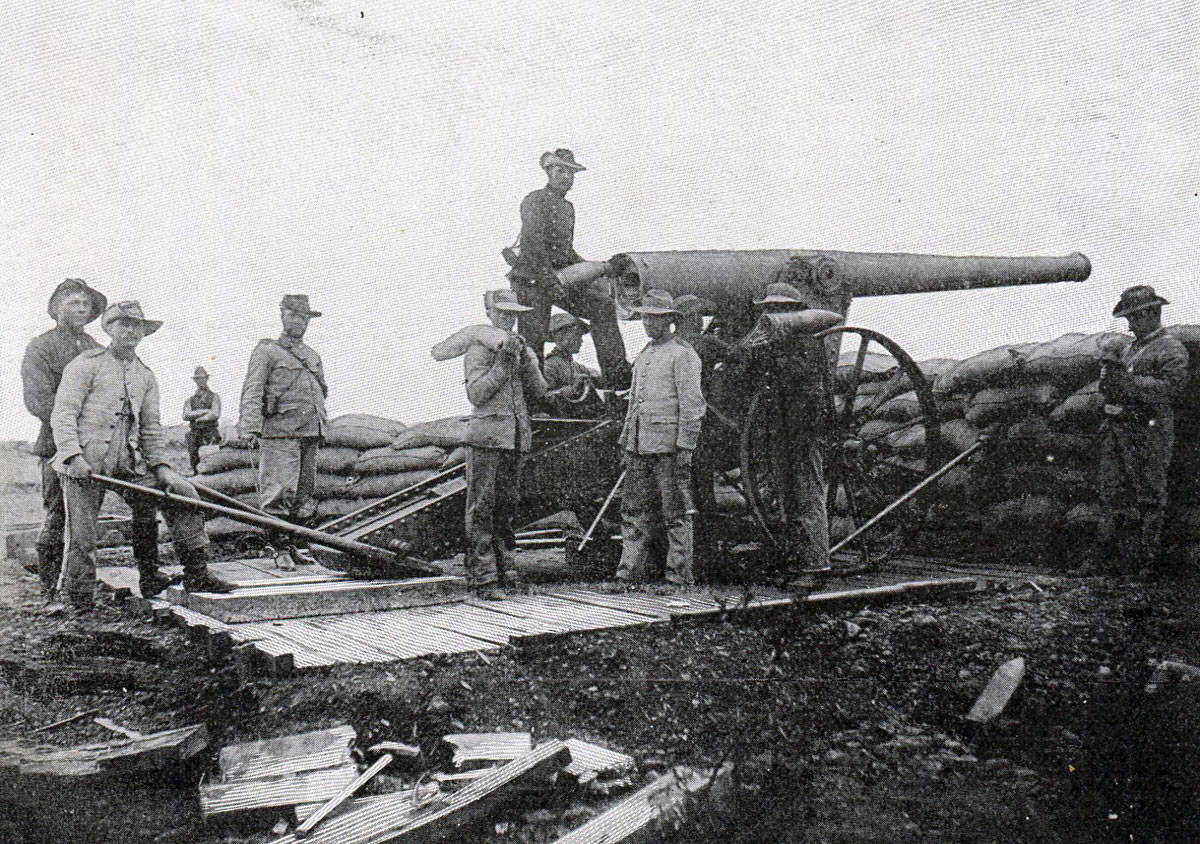
Boer 'Long Tom' gun: Battle of Val Krantz 5th February 1900 in the Great Boer War

Boer ‘Long Tom’ gun: Battle of Val Krantz 5th February 1900 in the Great Boer War

The Royal Field Artillery fought with 15 pounder guns; the Royal Horse Artillery with 12 pounders and the Royal Garrison Artillery batteries with 5-inch howitzers. The Royal Navy provided heavy field artillery with a number of 4.7-inch naval guns, mounted on field carriages devised by Captain Percy Scott of HMS Terrible.

Automatic weapons were used by the British, usually mounted on special carriages accompanying the cavalry.

Winner of the Battle of Val Krantz: Finally, the British.

British Order of Battle at the Battle of Val Krantz:

Cavalry (Earl of Dundonald)
1st Royal Dragoons
13th Hussars
Bethune’s Mounted Infantry
Thorneycroft’s Mounted Infantry
Natal Carabineers
South African Light Horse
Imperial Light Horse
Imperial Light Infantry
Natal Police

Second Division under Lieutenant General Sir C. F. Clery
Second Brigade (commanded by Major General Hildyard)
2nd East Surreys
2nd West Yorks
2nd Devons
2nd Queen’s West Surreys

King's Royal Lancaster Regiment: Battle of Val Krantz 5th February 1900 in the Great Boer War

King’s Royal Lancaster Regiment: Battle of Val Krantz 5th February 1900 in the Great Boer War

Fourth Brigade (commanded by Major General Lyttelton)
1st Rifle Brigade
1st Durham Light Infantry
3rd King’s Royal Rifle Corps
2nd Scottish Rifles (the old 90th Light Infantry)

Squadron of the 14th Hussars
7th, 14th and 66th Batteries, Royal Field Artillery (less the ten guns lost at the Battle of Colenso)

Third Division:
Fifth Irish Brigade (commanded by Major General Hart)
1st Inniskilling Fusiliers
1st Connaught Rangers
1st Royal Dublin Fusiliers
1st Border Regiment

Sixth Fusilier Brigade (commanded by Major General Barton)
2nd Royal Fusiliers
2nd Royal Scots Fusiliers
1st Royal Welch Fusiliers
2nd Royal Irish Fusiliers

Squadron 14th Hussars
63rd, 64th and 73rd Batteries Royal Field Artillery.

Fifth Division (Lieutenant General Sir Charles Warren)
Tenth Brigade (commanded by Major General Coke)
2nd Dorset Regiment
2nd Middlesex Regiment

Eleventh Brigade (commanded by Colonel Walter Kitchener)
2nd King’s Royal Lancaster Regiment
2nd Lancashire Fusiliers
1st South Lancashire Regiment
1st York and Lancaster Regiment

19th, 20th and 28th Batteries Royal Field Artillery.

Corps troops:
2nd Royal Dublin Fusiliers
2nd Somerset Light Infantry
61st Battery (Howitzers)
Natal Battery with 9 pounders
Battery of six Royal Navy 12 pounders
4th Mountain Battery
4.7 Inch Royal Navy guns


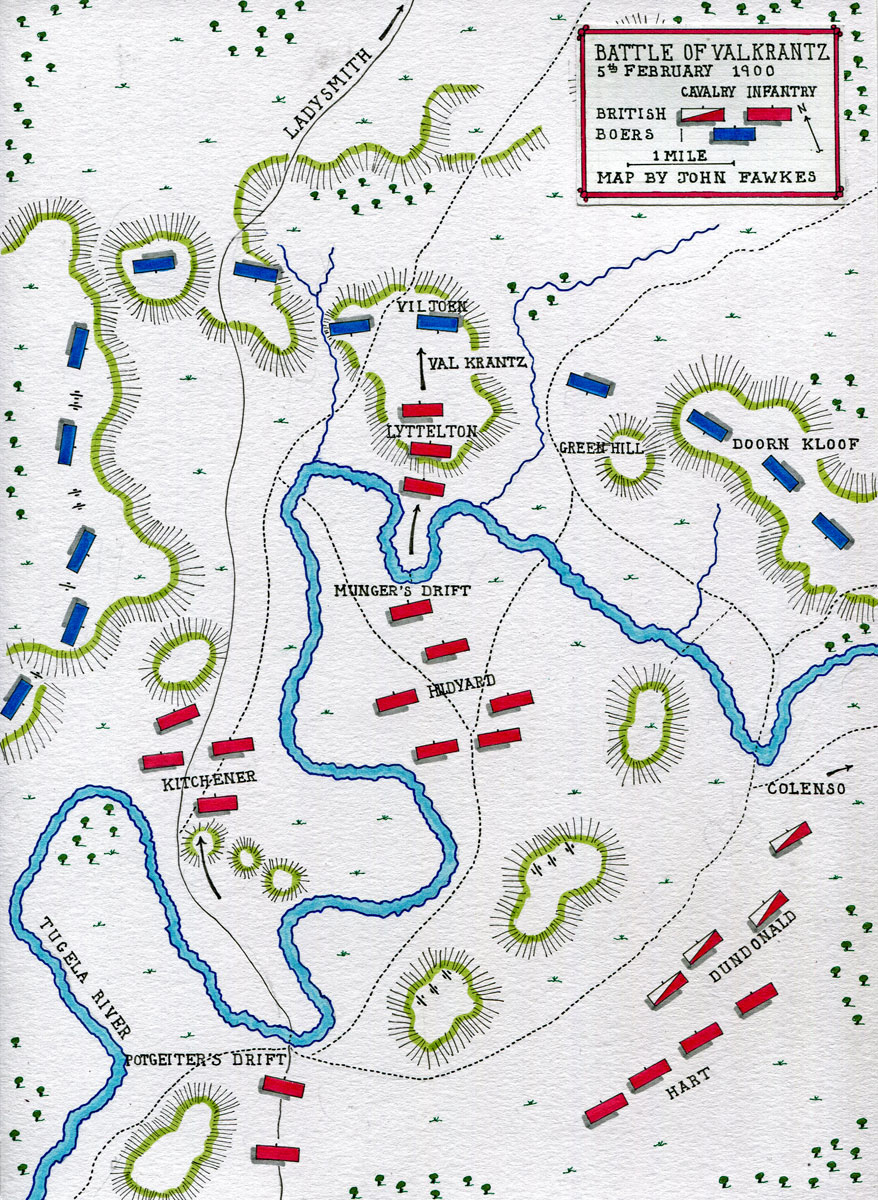
Map of the Battle of Val Krantz on 5th February 1900 in the Great Boer War: map by John Fawkes

Map of the Battle of Val Krantz on 5th February 1900 in the Great Boer War: map by John Fawkes

Account of the Battle of Val Krantz: 
In October 1899, Lieutenant General Sir Redvers Buller arrived in South Africa as the new British commander-in-chief against the Boers.

Buller was an old South Africa hand and urged that, until reinforcements arrived for the outnumbered garrison, the British troops should remain well back, out of reach of the invading Boer armies. The stop gap commanders-in-chief, pending Buller’s arrival in Natal, Major General Sir Pen Symons and Lieutenant General Sir George White, ignored this advice. Symons took the outnumbered British force across the Tugela into the northern tip of Natal. White, on taking over with the death of Symons, failed to pull the force back swiftly enough in the face of the Boer invasion of Natal.
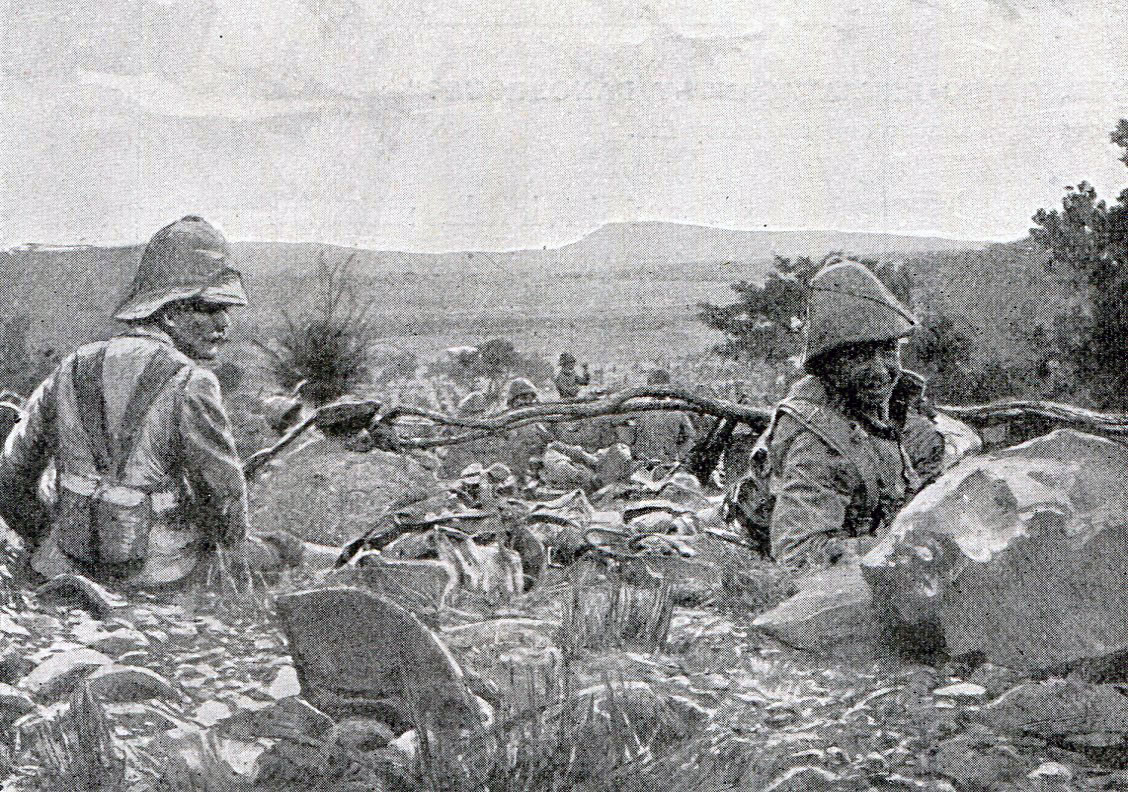
British troops waiting to attack at the Battle of Val Krantz on 5th February 1900 in the Great Boer War

British troops waiting to attack at the Battle of Val Krantz on 5th February 1900 in the Great Boer War

The Boers engulfed White’s troops in the town of Ladysmith and the siege of Ladysmith began.

All freedom of movement was lost to Buller, who incurred the overwhelming obligation of relieving the British troops in Ladysmith; it being inconceivable that they surrender.

Buller’s task was to storm the Boer positions on the banks of the Tugela and fight on into Ladysmith; no easy undertaking in the face of thousands of determined Transvaal and Orange Free State nationalists, well entrenched on the river banks and hills, armed with modern artillery and magazine rifles, that they used with great expertise.

Buller’s first attempt to force the Tugela River positions came to grief at Colenso on 15thDecember 1899.  His second attempt was notoriously defeated at Spion Kop on 24th January 1900.

Buller’s third attempt was at Val Krantz, on the left flank of the Boer positions around Spion Kop, beginning in the early hours of 5th February 1900.
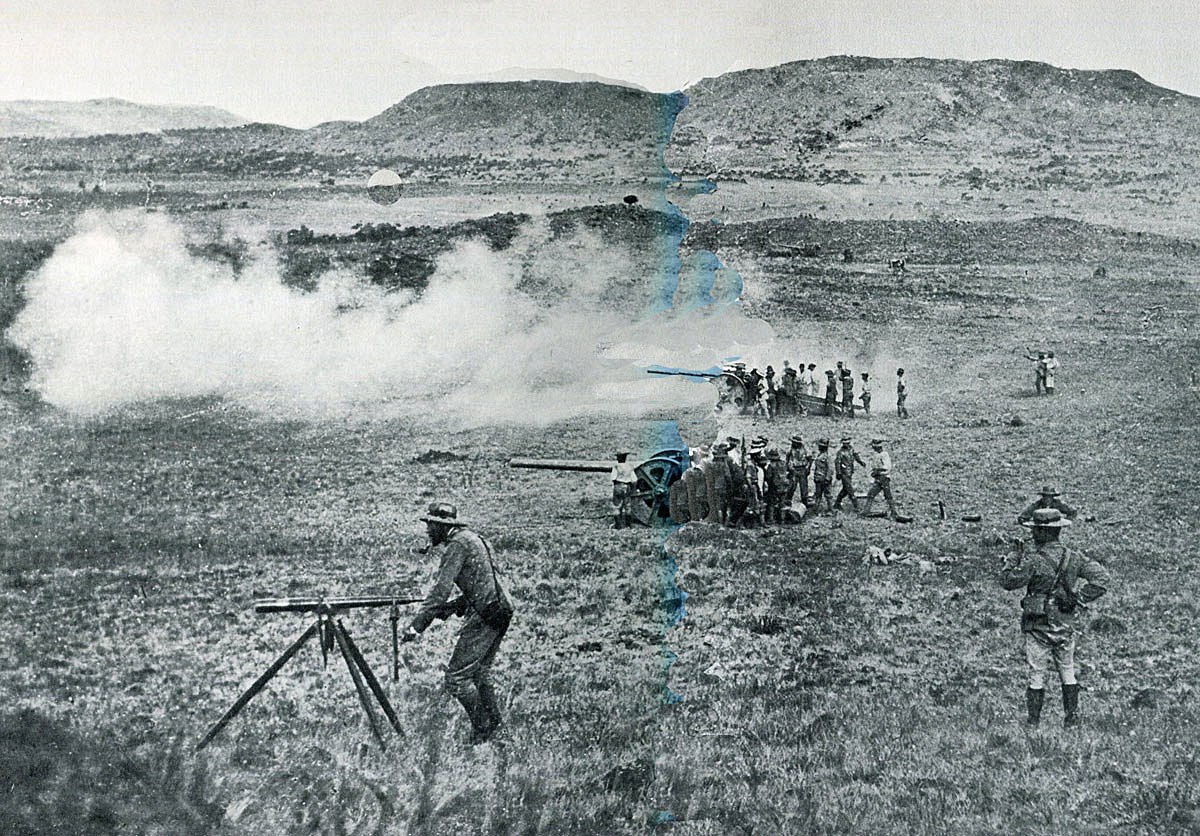
Royal Navy 4.7 inch guns firing at the Boer positions in the Battle of Val Krantz on 5th February 1900 in the Great Boer War

Royal Navy 4.7 inch guns firing at the Boer positions in the Battle of Val Krantz on 5th February 1900 in the Great Boer War

The British long-range naval guns shelled the line of kops on the far bank of the Tugela River while the Lancashire Brigade demonstrated across the river at Potgeiter’s Drift.

The real attack force, Lyttelton’s Fourth Brigade, crossed by a pontoon bridge at Munger’s Drift, a mile to the east of Potgeiter’s and headed for Val Krantz, a hill at the bend in the river.

The deliberate slowness with which Buller permitted Lyttelton’s force to begin the attack and the sight of the single pontoon bridge being assembled at Munger’s Drift gave the Boers ample warning that the true line of assault was up onto Val Krantz.

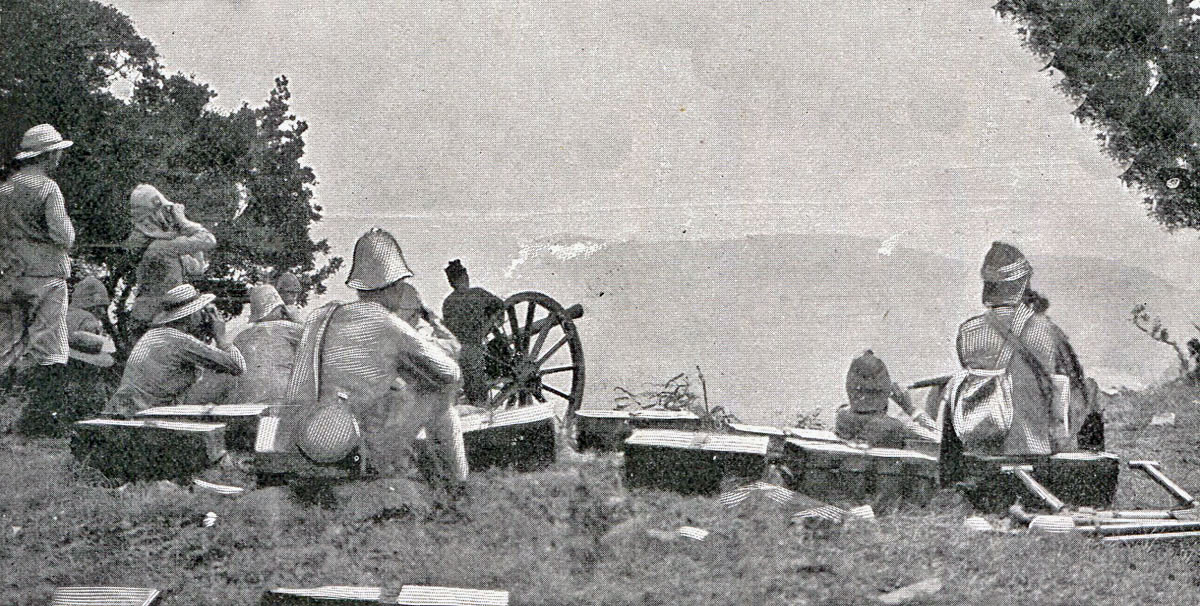
British guns firing on Val Krantz: Battle of Val Krantz 5th February 1900 in the Great Boer War

British guns firing on Val Krantz: Battle of Val Krantz 5th February 1900 in the Great Boer War

The battalions of the Fourth Brigade, comprising 1st Durham Light Infantry, 3rd King’s Royal Rifle Corps, 1st Rifle Brigade and 2nd Scottish Rifles (the old 90th Light Infantry), with the 2ndDevons from Hildyard’s brigade, scaled Val Krantz, driving the Boers from the lower slopes of the hill and coming under heavy fire from the surrounding higher positions.

The initial plan was for Hildyard’s Brigade of 2nd East Surreys, 2nd Queen’s West Surreys, 2ndDevons, and 2nd West Yorkshires to cross the Tugela River immediately after Lyttelton and storm Green Hill. The cavalry brigade would then cross and make for Ladysmith followed by Hart’s brigade. But the ever-hesitant Buller lost all confidence in the attack as Lyttelton crossed and cancelled the order to Hildyard to cross the river, leaving Lyttelton to make the assault alone.
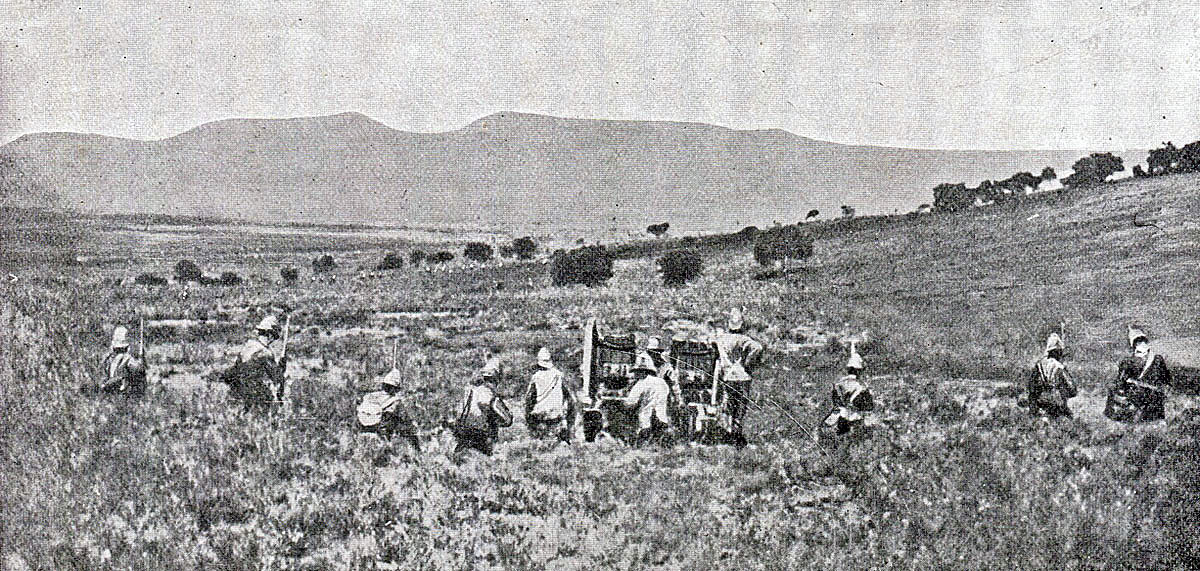
1st Durham Light Infantry moving through the gun line to attack Val Krantz: Battle of Val Krantz on 5th February 1900 in the Great Boer War

1st Durham Light Infantry moving through the gun line to attack Val Krantz: Battle of Val Krantz on 5th February 1900 in the Great Boer War

The Boers, only some 1,200 in number, were led by Viljoen in a spirited defence of Val Krantz, while the Boer rifle and artillery fire built up from the surrounding hills. The Boers were in considerable difficulty. The spectacular success of the Battle of Spion Kop, reminiscent of the Boer victory on the hilltop in the First Boer War, Majuba Hill, persuaded the Boers, including General Botha, that the British would now sue for peace, as they had in 1881 and many Boers had gone home. Hurrying back in the face of the threat of a further attack by Buller, they arrived during the days of Val Krantz and afterwards.
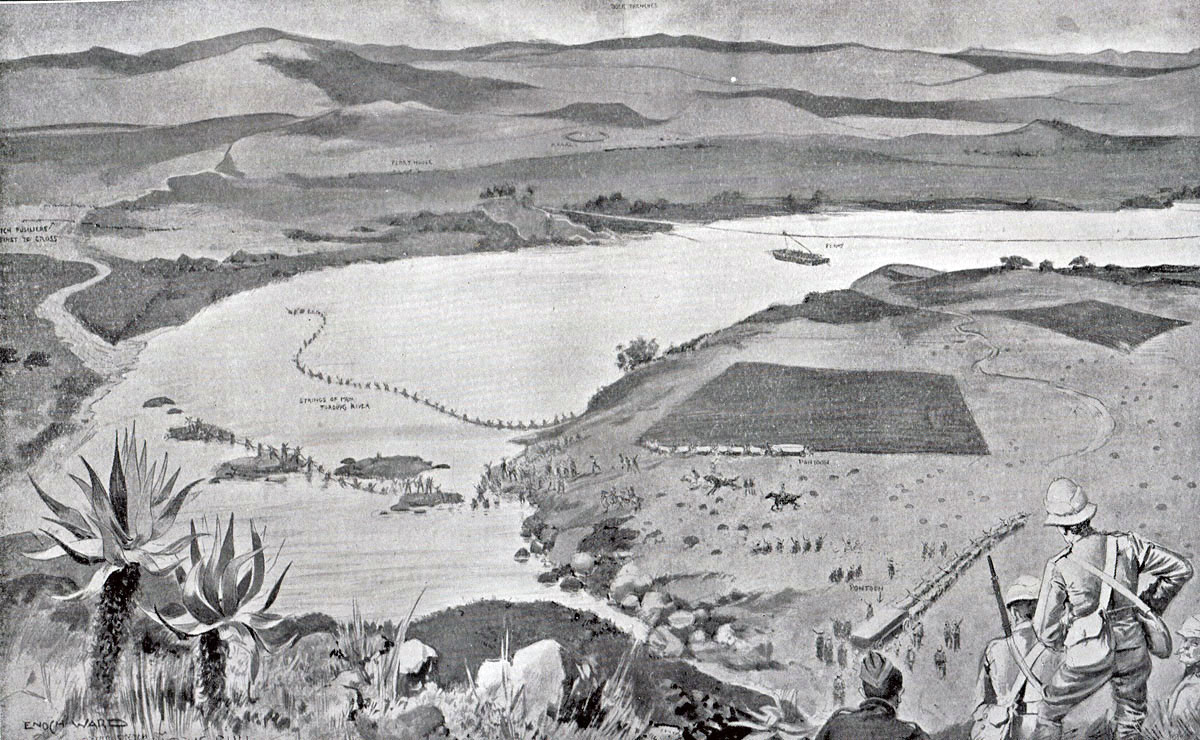
British troops crossing the Tugela River at Potgeiter's Drift: Battle of Val Krantz 5th February 1900 in the Great Boer War: picture by Enoch Ward

British troops crossing the Tugela River at Potgeiter’s Drift: Battle of Val Krantz 5th February 1900 in the Great Boer War: picture by Enoch Ward

Buller’s reaction to the stiffening resistance was to order Lyttelton to abandon the attack and retreat. Lyttelton ignored the order and called for reinforcements.

Lyttelton urged Buller, in particular, to bring more troops across the river and attack Doorn Kloof, the hill position on his right flank. But Buller convinced himself the Boer positions were too strong to be forced. The most Buller would risk was to reinforce Lyttelton with Hildyard’s brigade.

At dawn on 6th February 1900, the Boer artillery began a heavy bombardment with guns that had been brought up during the night.
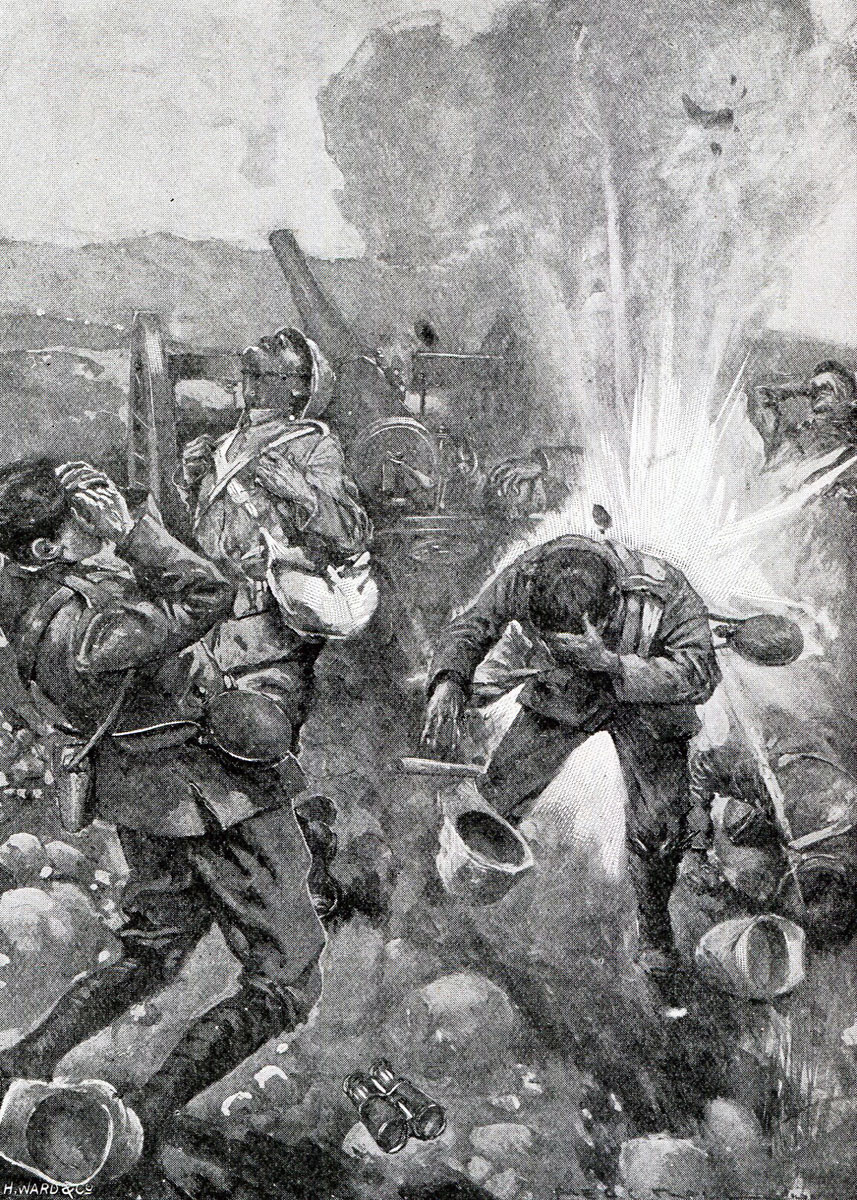
British guns under fire at the Battle of Val Krantz on 5th February 1900 in the Great Boer War: picture by H. Ward

British guns under fire at the Battle of Val Krantz on 5th February 1900 in the Great Boer War: picture by H. Ward

Lyttelton and other generals urged Buller he had to commit more troops and expand the position by attacking Doorn Kloof. A council of war was held, but Buller could not be persuaded to take the risk.

On the Thursday night. the operation was abandoned and the British troops withdrew across the Tugela River, ending the battle known as Val Krantz.

The British suffered 400 casualties and Buller attracted the nicknames of ‘the Tugela Ferryman’ and ‘Sir Reverse Buller.’

Casualties at the Battle of Val Krantz: This extended period of fighting in February 1900 at the Battles of Val Krantz and Pieters cost the British around 3,000 casualties. The Boers probably suffered around 1,500 casualties.
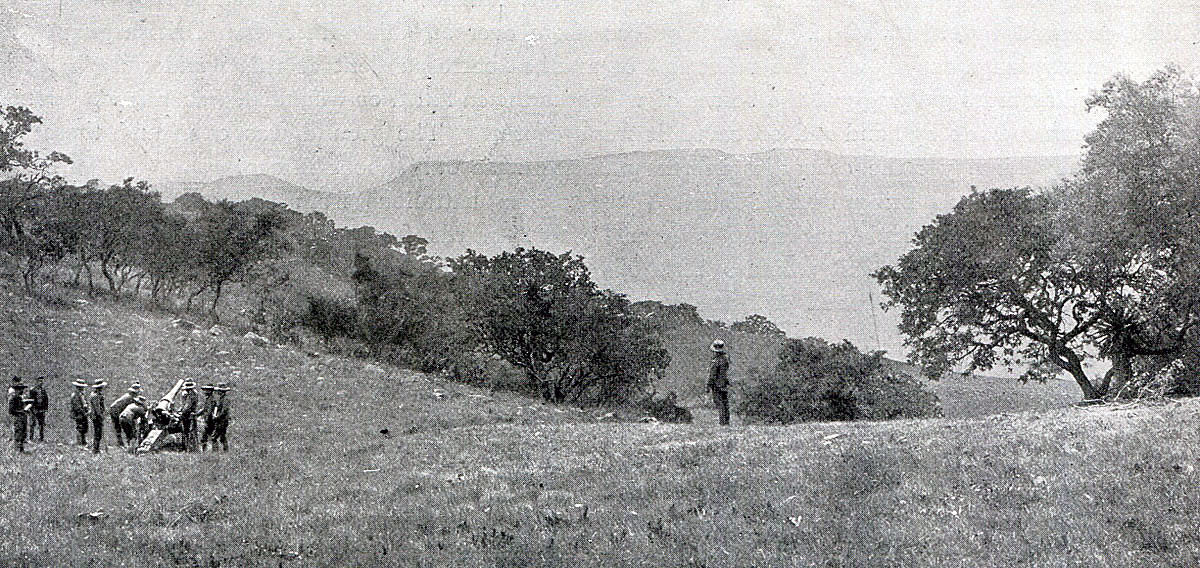
4.7 inchNaval gun firing at Boer positions during the Battle of Val Krantz on 5th February 1900 in the Great Boer War Naval gun firing at Val Krantz: Battles of Val Krantz and Pieters 5th to 28th February 1900 in the Boer War

Naval gun firing at Boer positions during the Battle of Val Krantz on 5th February 1900 in the Great Boer War

Follow-up to the Battle of Val Krantz: 
The unsuccessful Battle of Val Krantz was followed, on 14th February 1900, by the British attack around Colenso, known as the Battle of Pieters, the fourth and finally successful British attempt to force the Boer positions along the Tugela River and relieve the British garrison besieged in Ladysmith.

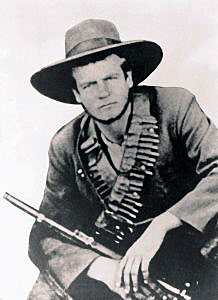
Deneys Reitz, Boer soldier: Battle of Val Krantz on 5th February 1900 in the Great Boer War

Deneys Reitz, Boer soldier: Battle of Val Krantz on 5th February 1900 in the Great Boer War

Anecdotes from the Battle of Val Krantz: 

  • It an irony that in the First World War, between 1917 and 1919, Deneys Reitz, who fought as a Boer soldier in the Boer War, commanded a battalion of the Royal Scots Fusiliers, one of the regiments he fought against in Natal.

References for the Battle of Val Krantz:

The Boer War is widely covered. A cross section of interesting volumes would be:

The Great Boer War by Sir Arthur Conan Doyle

Goodbye Dolly Gray by Rayne Kruger

The Boer War by Thomas Pakenham

South Africa and the Transvaal War by Louis Creswicke (6 highly partisan volumes)

Books solely on the fighting in Natal:

Buller’s Campaign by Julian Symons

Ladysmith by Ruari Chisholm

For a view of the fighting in Natal from the Boer perspective:

Commando by Deneys Reitz.

67. Podcast on the Battles of Val Krantz and Pieters fought between 5th and 28th February 1900 in the Boer War: The third unsuccessful attempt by Buller to push across the Tugela River followed by the fourth, final and successful crossing of the Tugela, leading to the relief of Ladysmith: John Mackenzie’s britishbattles.com podcasts

The previous battle of the Great Boer War is the Battle of Spion Kop

The next battle of the Great Boer War is the Battle of Pieters
To the Great Boer War index


Search BritishBattles.com

Follow / Like Us

Follow us on Facebook Follow us on Pinterest  Follow us on RSS Follow us on Twitter

Other Pages

  • Home
  • Contact Us
  • Privacy
  • News Blog
  • Museums

The BritishBattles Podcast

If you are too busy to read the site, why not download a podcast of an individual battle and listen on the move! Visit our dedicated Podcast page or visit Podbean below.

Britishbattles on Podbean

Follow @Britishbattles


Wars Prior to 1700

  • Wars of Roman Britain
  • Battle of Medway
  • Danish Wars
  • Battle of Ashdown
  • Norman Conquest
  • Battle of Stamford Bridge
  • Battle of Hastings
  • Barons’ War
  • Battle of the Standard
  • Battle of Lewes
  • Battle of Evesham
  • Scottish Wars of Independence
  • Battle of Stirling Bridge
  • Battle of Falkirk
  • Battle of Bannockburn
  • Battle of Dupplin Moor
  • Battle of Halidon Hill
  • 100 Years War
  • Battle of Sluys
  • Battle of Morlaix
  • Battle of Auberoche
  • Battle of Caen
  • Battle of Creçy
  • Siege of Calais
  • Battle of Neville’s Cross
  • Battle of La Roche-Derrien
  • Battle of Winchelsea
  • Battle of Mauron
  • Battle of Poitiers
  • Battle of Cocherel
  • Battle of Auray
  • Battle of Najera
  • Battle of La Rochelle
  • Battle of Otterburn
  • Battle of Homildon Hill
  • Battle of Shrewsbury
  • Siege of Harfleur
  • Battle of Agincourt
  • Battle of Baugé
  • Battle of Cravant
  • Battle of Verneuil
  • Siege of Orléans
  • Battle of the Herrings
  • Battle of Patay
  • Battle of Formigny
  • Battle of Castillon
  • Wars of the Roses
  • First Battle of St Albans
  • Battle of Blore Heath
  • Battle of Northampton
  • Battle of Wakefield 1460
  • Battle of Mortimer’s Cross
  • Second Battle of St Albans
  • Battle of Towton
  • Battle of Barnet
  • Battle of Tewkesbury
  • Battle of Bosworth Field
  • Anglo Scottish War
  • Battle of Flodden
  • Battle of Pinkie
  • The Spanish War
  • The Spanish Armada
  • English Civil War
  • Battle of Edgehill
  • Battle of Seacroft Moor
  • Battle of Stratton
  • Battle of Wakefield 1643
  • Battle of Chalgrove
  • Battle of Adwalton Moor
  • Battle of Lansdown Hill
  • Battle of Roundway Down
  • Storming of Bristol
  • First Battle of Newbury
  • Battle of Cheriton
  • Battle of Cropredy Bridge
  • Battle of Marston Moor
  • Battle of Lostwithiel
  • Second Battle of Newbury
  • Battle of Naseby
  • Siege of Basing House
  • Battle of Dunbar
  • Battle of Worcester

Wars of 1700

  • War of the Spanish Succession
  • Battle of Blenheim
  • Battle of Ramillies
  • Battle of Oudenarde
  • Battle of Malplaquet
  • King George’s War (Austrian Succession)
  • Battle of Dettingen
  • Battle of Fontenoy
  • Battle of Rocoux
  • Battle of Lauffeldt
  • Jacobite Rebellion
  • Battle of Prestonpans
  • Battle of Falkirk
  • Battle of Culloden
  • Frederick the Great Wars
  • First Silesian War
  • Battle of Mollwitz
  • Battle of Chotusitz
  • Second Silesian War
  • Battle of Hohenfriedberg
  • Battle of Soor
  • Battle of Kesselsdorf
  • Seven Years War
  • Battle of Lobositz
  • Battle of Prague
  • Battle of Kolin
  • Battle of Rossbach
  • Battle of Leuthen
  • Battle of Zorndorf
  • Battle of Hochkirch
  • Battle of Kunersdorf
  • Battle of Liegnitz
  • Battle of Torgau
  • Battle of Burkersdorf
  • Battle of Minden
  • Battle of Emsdorf
  • Battle of Warburg
  • Battle of Kloster Kamp
  • Battle of Vellinghausen
  • Battle of Wilhelmstahl
  • Capture of Manila
  • Capture of Havana
  • Anglo-French Wars in India
  • Siege of Arcot
  • Battle of Arni
  • Battle of Kaveripauk
  • Battle of Plassey
  • French and Indian War
  • Battle of Monongahela 1755 – Braddock’s Defeat
  • Braddock’s Defeat: Part 1
  • Braddock’s Defeat: Part 2
  • Braddock’s Defeat: Part 3
  • Braddock’s Defeat: Part 4
  • Braddock’s Defeat: Part 5
  • Braddock’s Defeat: Part 6
  • Braddock’s Defeat: Part 7
  • Braddock’s Defeat: Part 8
  • Braddock’s Defeat: Part 9
  • Braddock’s Defeat: Part 10
  • Braddock’s Defeat: Part 11
  • Battle of Ticonderoga 1758
  • Capture of Louisburg 1758
  • Battle of Quebec 1759
  • American Revolutionary War
  • Battle of Lexington and Concord
  • Battle of Bunker Hill
  • Battle of Quebec 1775
  • Battle of Sullivan’s Island
  • Battle of Long Island
  • Battle of Harlem Heights
  • Battle of White Plains
  • Battle of Fort Washington
  • Battle of Trenton
  • Battle of Princeton
  • Battle of Ticonderoga 1777
  • Battle of Hubbardton
  • Battle of Bennington
  • Battle of Brandywine Creek
  • Battle of Freeman’s Farm
  • Battle of Paoli
  • Battle of Germantown
  • Battle of Saratoga
  • Battle of Monmouth
  • Siege of Savannah
  • Siege of Charleston
  • Battle of Camden
  • Battle of King’s Mountain
  • Battle of Cowpens
  • Battle of Guilford Courthouse
  • Battle of Yorktown
  • Siege of Gibraltar
  • Battle of Cape St Vincent 1780
  • Anglo-Mysore Wars
  • Storming of Seringapatam

Wars of 1800

  • Second Mahratta War
  • Battle of Assaye
  • Battle of Laswaree
  • Peninsular War
  • Battle of Roliça
  • Battle of Vimeiro
  • Battle of Sahagun
  • Battle of Benavente
  • Battle of Cacabelos
  • Battle of Corunna
  • Battle of the Douro
  • Battle of Talavera
  • Battle of the River Coa
  • Battle of Busaco
  • Battle of Barrosa
  • Battle of Campo Maior
  • Battle of Redinha or Pombal
  • Battle of Sabugal
  • Battle of Fuentes de Oñoro
  • Battle of Albuera
  • Battle of Usagre
  • Battle of El Bodon
  • Battle of Arroyo Molinos
  • Storming of Ciudad Rodrigo
  • Storming of Badajoz
  • Battle of Villagarcia
  • Battle of Almaraz
  • Battle of Salamanca
  • Battle of Garcia Hernandez
  • Battle of Majadahonda
  • Attack on Burgos
  • Retreat from Burgos
  • Battle of Morales de Toro
  • Battle of San Millan and Osma
  • Battle of Vitoria
  • Storming of San Sebastian
  • Battle of the Pyrenees
  • Battle of San Marcial
  • Battle of the Bidassoa
  • Battle of the Nivelle
  • Battle of the Nive
  • Battle of St Pierre
  • Battle of Orthez
  • Battle of Tarbes
  • Battle of Toulouse
  • Sortie from Bayonne
  • Napoleonic Wars
  • Battle of Cape St Vincent 1797
  • Battle of the Nile
  • Battle of Alexandria
  • Battle of Copenhagen
  • Battle of Trafalgar
  • Battle of Maida
  • Battle of Quatre Bras
  • Battle of Waterloo
  • First Afghan War
  • Battle of Ghuznee
  • Battle of Kabul and the retreat to Gandamak
  • Siege of Jellalabad
  • Battle of Kabul 1842
  • First Sikh War
  • Battle of Moodkee
  • Battle of Ferozeshah
  • Battle of Aliwal
  • Battle of Sobraon
  • Second Sikh War
  • Battle of Ramnagar
  • Battle of Chillianwallah
  • Battle of Goojerat
  • Crimean War
  • Battle of The Alma
  • Battle of Balaclava
  • Battle of Inkerman
  • Siege of Sevastopol
  • Indian Mutiny
  • Siege of Delhi
  • American Civil War
  • First Battle of Bull Run
  • Battle of Shiloh
  • Battle of Antietam
  • Battle of Fredericksburg
  • Battle of Chancellorsville
  • Abyssinian War
  • Battle of Magdala
  • Second Afghan War
  • Battle of Ali Masjid
  • Battle of Peiwar Kotal
  • Battle of Futtehabad
  • Battle of Charasiab
  • Battle of Kabul 1879
  • Battle of Ahmed Khel
  • Battle of Maiwand
  • Battle of Kandahar
  • Zulu War
  • Battle of Isandlwana
  • Battle of Rorke’s Drift
  • Battle of Khambula
  • Battle of Gingindlovu
  • Battle of Ulundi
  • War in Egypt and Sudan
  • Battle of Tel-el-Kebir
  • Battle of El Teb
  • Battle of Tamai
  • Battle of Abu Klea
  • Battle of Atbara
  • Battle of Omdurman
  • First Boer War
  • Battle of Laing’s Nek
  • Battle of Majuba Hill
  • Great Boer War
  • Battle of Talana Hill
  • Battle of Elandslaagte
  • Battle of Ladysmith
  • Battle of Belmont
  • Battle of Graspan
  • Battle of Modder River
  • Battle of Stormberg
  • Battle of Magersfontein
  • Battle of Colenso
  • Battle of Spion Kop
  • Battle of Val Krantz
  • Battle of Pieters
  • Battle of Paardeberg
  • Siege of Mafeking
  • Siege of Kimberley
  • Siege of Ladysmith
  • North-West Frontier of India
  • Black Mountain Expedition 1888
  • Black Mountain Expedition 1891
  • Waziristan 1894
  • Siege and Relief of Chitral
  • Malakand Rising 1897
  • Malakand Field Force 1897
  • Mohmand Field Force 1897
  • Tirah 1897

Wars of 1900

  • First World War
  • British Expeditionary Force (BEF)
  • Battle of Mons
  • Battle of Mons (2nd Day): Elouges
  • Battle of Landrecies
  • Battle of Le Cateau
  • Battle of Le Grand Fayt
  • Battle of Étreux
  • Battle of Heligoland Bight
  • Battle of Néry
  • Battle of Villers Cottérêts
  • Battle of the Marne
  • Battle of the Aisne
  • Texel Action
  • Battle of Coronel
  • Battle of the Falkland Islands
  • Battle of the Dogger Bank
  • Gallipoli Part I : Naval Attack on the Dardanelles
  • Gallipoli Part II: Land attack on Gallipoli Peninsular
  • Gallipoli Part III: ANZAC landing on 25th April 1915
  • Gallipoli Part IV: First landings at Cape Helles and Y Beach on 25th April 1915
  • Battle of Jutland Part I: Opposing fleets
  • Battle of Jutland Part II: Opening Battle Cruiser action on 31st May 1916
  • Battle of Jutland Part III: Clash between British and German Battle Fleets during the evening 31st May 1916
  • Battle of Jutland Part IV: Night Action 31st May to 1st June 1916
  • Battle of Jutland Part V: Casualties and Aftermath
  • Home


Copyright © 2025 · Chalfont Web Design

MENU
  • Wars Prior to 1700
    • Wars of Roman Britain
      • Battle of Medway
    • Danish Wars
      • Battle of Ashdown
    • Norman Conquest
      • Battle of Stamford Bridge
      • Battle of Hastings
    • Barons’ War
      • Battle of the Standard
      • Battle of Lewes
      • Battle of Evesham
    • Scottish Wars of Independence
      • Battle of Stirling Bridge
      • Battle of Falkirk
      • Battle of Bannockburn
      • Battle of Dupplin Moor
      • Battle of Halidon Hill
    • 100 Years War
      • Battle of Sluys
      • Battle of Morlaix
      • Battle of Auberoche
      • Battle of Caen
      • Battle of Creçy
      • Siege of Calais
      • Battle of Neville’s Cross
      • Battle of La Roche-Derrien
      • Battle of Winchelsea
      • Battle of Mauron
      • Battle of Poitiers
      • Battle of Cocherel
      • Battle of Auray
      • Battle of Najera
      • Battle of La Rochelle
      • Battle of Otterburn
      • Battle of Homildon Hill
      • Battle of Shrewsbury
      • Siege of Harfleur
      • Battle of Agincourt
      • Battle of Baugé
      • Battle of Cravant
      • Battle of Verneuil
      • Siege of Orléans
      • Battle of the Herrings
      • Battle of Patay
      • Battle of Formigny
      • Battle of Castillon
    • Wars of the Roses
      • First Battle of St Albans
      • Battle of Blore Heath
      • Battle of Northampton
      • Battle of Wakefield 1460
      • Battle of Mortimer’s Cross
      • Second Battle of St Albans
      • Battle of Towton
      • Battle of Barnet
      • Battle of Tewkesbury
      • Battle of Bosworth Field
    • Anglo Scottish War
      • Battle of Flodden
      • Battle of Pinkie
    • The Spanish War
      • The Spanish Armada
    • English Civil War
      • Battle of Edgehill
      • Battle of Seacroft Moor
      • Battle of Stratton
      • Battle of Wakefield 1643
      • Battle of Chalgrove
      • Battle of Adwalton Moor
      • Battle of Lansdown Hill
      • Battle of Roundway Down
      • Storming of Bristol
      • First Battle of Newbury
      • Battle of Cheriton
      • Battle of Cropredy Bridge
      • Battle of Marston Moor
      • Battle of Lostwithiel
      • Second Battle of Newbury
      • Battle of Naseby
      • Siege of Basing House
      • Battle of Dunbar
      • Battle of Worcester
  • Wars of 1700
    • War of the Spanish Succession
      • Battle of Blenheim
      • Battle of Ramillies
      • Battle of Oudenarde
      • Battle of Malplaquet
    • King George’s War (Austrian Succession)
      • Battle of Dettingen
      • Battle of Fontenoy
      • Battle of Rocoux
      • Battle of Lauffeldt
    • Jacobite Rebellion
      • Battle of Prestonpans
      • Battle of Falkirk
      • Battle of Culloden
    • Frederick the Great Wars
    • First Silesian War
      • Battle of Mollwitz
      • Battle of Chotusitz
    • Second Silesian War
      • Battle of Hohenfriedberg
      • Battle of Soor
      • Battle of Kesselsdorf
    • Seven Years War
      • Battle of Lobositz
      • Battle of Prague
      • Battle of Kolin
      • Battle of Rossbach
      • Battle of Leuthen
      • Battle of Zorndorf
      • Battle of Hochkirch
      • Battle of Kunersdorf
      • Battle of Liegnitz
      • Battle of Torgau
      • Battle of Burkersdorf
      • Battle of Minden
      • Battle of Emsdorf
      • Battle of Warburg
      • Battle of Kloster Kamp
      • Battle of Vellinghausen
      • Battle of Wilhelmstahl
      • Capture of Manila
      • Capture of Havana
    • Anglo-French Wars in India
      • Siege of Arcot
      • Battle of Arni
      • Battle of Kaveripauk
      • Battle of Plassey
    • French and Indian War
      • Battle of Monongahela 1755 – Braddock’s Defeat
      • General Braddock’s Defeat on the Monongahela in 1755 I
      • Braddock’s Defeat: Part 2
      • Braddock’s Defeat: Part 3
      • Braddock’s Defeat: Part 4
      • Braddock’s Defeat: Part 5
      • Braddock’s Defeat: Part 6
      • Braddock’s Defeat: Part 7
      • Braddock’s Defeat: Part 8
      • Braddock’s Defeat: Part 9
      • Braddock’s Defeat: Part 10
      • Battle of Ticonderoga 1758
      • Capture of Louisburg 1758
      • Battle of Quebec 1759
    • American Revolutionary War
      • Battle of Lexington and Concord
      • Battle of Bunker Hill
      • Battle of Quebec 1775
      • Battle of Sullivan’s Island
      • Battle of Long Island
      • Battle of Harlem Heights
      • Battle of White Plains
      • Battle of Fort Washington
      • Battle of Trenton
      • Battle of Princeton
      • Battle of Ticonderoga 1777
      • Battle of Hubbardton
      • Battle of Bennington
      • Battle of Brandywine Creek
      • Battle of Freeman’s Farm
      • Battle of Paoli
      • Battle of Germantown
      • Battle of Saratoga
      • Battle of Monmouth
      • Siege of Savannah
      • Siege of Charleston
      • Battle of Camden
      • Battle of King’s Mountain
      • Battle of Cowpens
      • Battle of Guilford Courthouse
      • Battle of Yorktown
      • Siege of Gibraltar
      • Battle of Cape St Vincent 1780
    • Anglo-Mysore Wars
      • Storming of Seringapatam
  • Wars of 1800
    • Second Mahratta War
      • Battle of Assaye
      • Battle of Laswaree
    • Peninsular War
      • Battle of Roliça
      • Battle of Vimeiro
      • Battle of Sahagun
      • Battle of Benavente
      • Battle of Cacabelos
      • Battle of Corunna
      • Battle of the Douro
      • Battle of Talavera
      • Battle of the River Coa
      • Battle of Busaco
      • Battle of Barrosa
      • Battle of Campo Maior
      • Battle of Redinha or Pombal
      • Battle of Sabugal
      • Battle of Fuentes de Oñoro
      • Battle of Albuera
      • Battle of Usagre
      • Battle of El Bodon
      • Battle of Arroyo Molinos
      • Storming of Ciudad Rodrigo
      • Storming of Badajoz
      • Battle of Villagarcia
      • Battle of Almaraz
      • Battle of Salamanca
      • Battle of Garcia Hernandez
      • Battle of Majadahonda
      • Attack on Burgos
      • Retreat from Burgos
      • Battle of Morales de Toro
      • Battle of San Millan and Osma
      • Battle of Vitoria
      • Storming of San Sebastian
      • Battle of the Pyrenees
      • Battle of San Marcial
      • Battle of the Bidassoa
      • Battle of the Nivelle
      • Battle of the Nive
      • Battle of St Pierre
      • Battle of Orthez
      • Battle of Tarbes
      • Battle of Toulouse
      • Sortie from Bayonne
    • Napoleonic Wars
      • Battle of Cape St Vincent 1797
      • Battle of the Nile
      • Battle of Alexandria
      • Battle of Copenhagen
      • Battle of Trafalgar
      • Battle of Maida
      • Battle of Quatre Bras
      • Battle of Waterloo
    • First Afghan War
      • Battle of Ghuznee
      • Battle of Kabul and the retreat to Gandamak
      • Siege of Jellalabad
      • Battle of Kabul 1842
    • First Sikh War
      • Battle of Moodkee
      • Battle of Ferozeshah
      • Battle of Aliwal
      • Battle of Sobraon
    • Second Sikh War
      • Battle of Ramnagar
      • Battle of Chillianwallah
      • Battle of Goojerat
    • Crimean War
      • Battle of The Alma
      • Battle of Balaclava
      • Battle of Inkerman
      • Siege of Sevastopol
      • Indian Mutiny
      • Siege of Delhi
    • American Civil War
      • First Battle of Bull Run
      • Battle of Shiloh
      • Battle of Antietam
      • Battle of Fredericksburg
      • Battle of Chancellorsville
    • Abyssinian War
      • Battle of Magdala
    • Second Afghan War
      • Battle of Ali Masjid
      • Battle of Peiwar Kotal
      • Battle of Futtehabad
      • Battle of Charasiab
      • Battle of Kabul 1879
      • Battle of Ahmed Khel
      • Battle of Maiwand
      • Battle of Kandahar
    • Zulu War
      • Battle of Isandlwana
      • Battle of Rorke’s Drift
      • Battle of Khambula
      • Battle of Gingindlovu
      • Battle of Ulundi
    • War in Egypt and Sudan
      • Battle of Tel-el-Kebir
      • Battle of El Teb
      • Battle of Tamai
      • Battle of Abu Klea
      • Battle of Atbara
      • Battle of Omdurman
    • First Boer War
      • Battle of Laing’s Nek
      • Battle of Majuba Hill
    • Great Boer War
      • Battle of Talana Hill
      • Battle of Elandslaagte
      • Battle of Ladysmith
      • Battle of Belmont
      • Battle of Graspan
      • Battle of Modder River
      • Battle of Stormberg
      • Battle of Magersfontein
      • Battle of Colenso
      • Battle of Spion Kop
      • Battle of Val Krantz
      • Battle of Pieters
      • Battle of Paardeberg
      • Siege of Mafeking
      • Siege of Kimberley
      • Siege of Ladysmith
    • North-West Frontier of India
      • Black Mountain Expedition 1888
      • Black Mountain Expedition 1891
      • Waziristan 1894
      • Siege and Relief of Chitral
      • Malakand Rising 1897
      • Malakand Field Force 1897
      • Mohmand Field Force 1897
      • Tirah 1897
  • Wars of 1900
    • First World War
      • British Expeditionary Force (BEF)
      • Battle of Mons
      • Battle of Mons (2nd Day): Elouges
      • Battle of Landrecies
      • Battle of Le Cateau
      • Battle of Le Grand Fayt
      • Battle of Étreux
      • Battle of Heligoland Bight
      • Battle of Néry
      • Battle of Villers Cottérêts
      • Battle of the Marne
      • Battle of the Aisne
      • Texel Action
      • Battle of Coronel
      • Battle of the Falkland Islands
      • Battle of the Dogger Bank
      • Gallipoli Part I: Naval Attack on the Dardanelles
      • Gallipoli Part II: Genesis of the land attack on the Gallipoli Peninsula
      • Gallipoli Part III: ANZAC landing on 25th April 1915
      • Gallipoli Part IV: First landings at Cape Helles and Y Beach on 25th April 1915
      • Battle of Jutland Part I: Opposing fleets
      • Battle of Jutland Part II: Opening Battle Cruiser action on 31st May 1916
      • Battle of Jutland Part III: Clash between British and German Battle Fleets during the evening 31st May 1916
      • Battle of Jutland Part IV: Night Action 31st May to 1st June 1916
      • Battle of Jutland Part V: Casualties and Aftermath
  • British Battles