The battle (also known as the Battle of Enslin) fought on 25th November 1899 in the Great Boer War by Lord Methuen, leading to the British advance to the disastrous battles of Modder River and Magersfontein
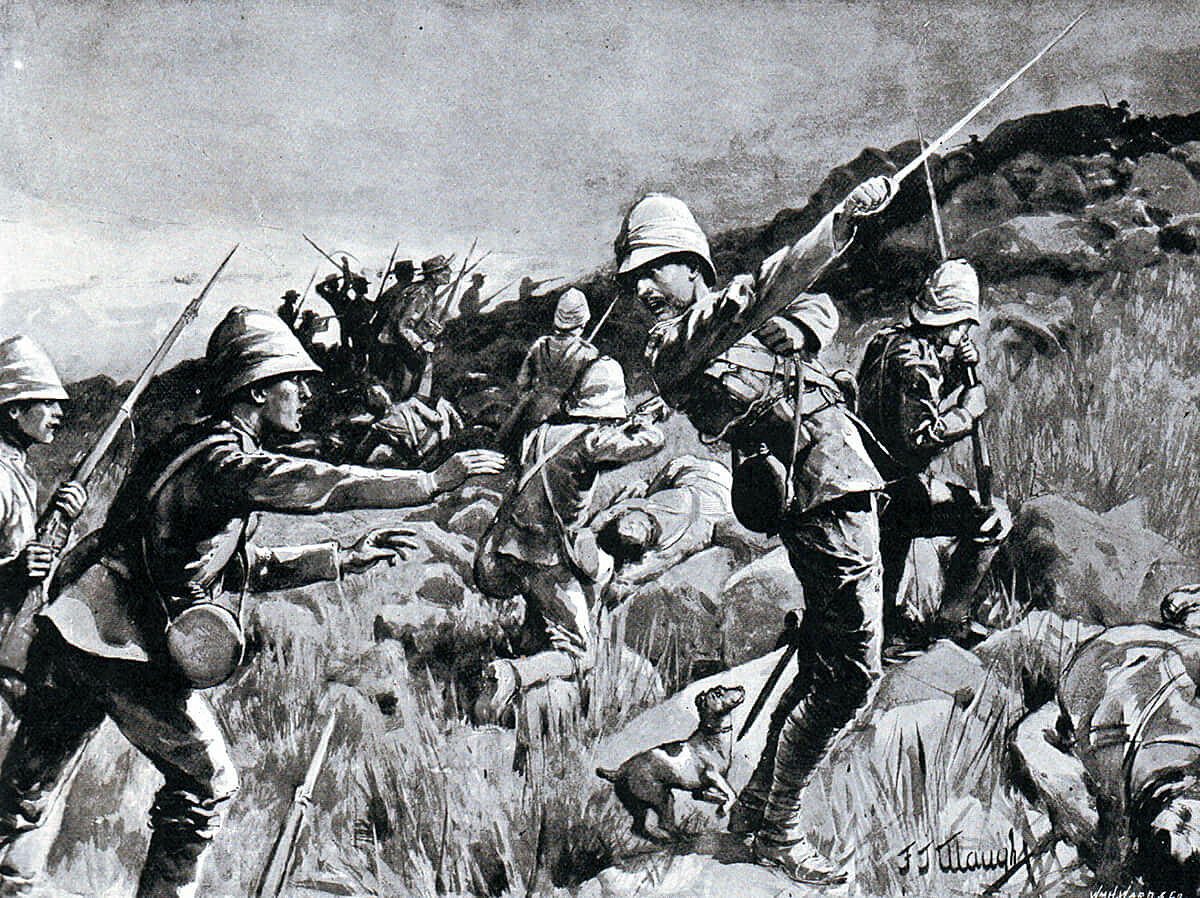
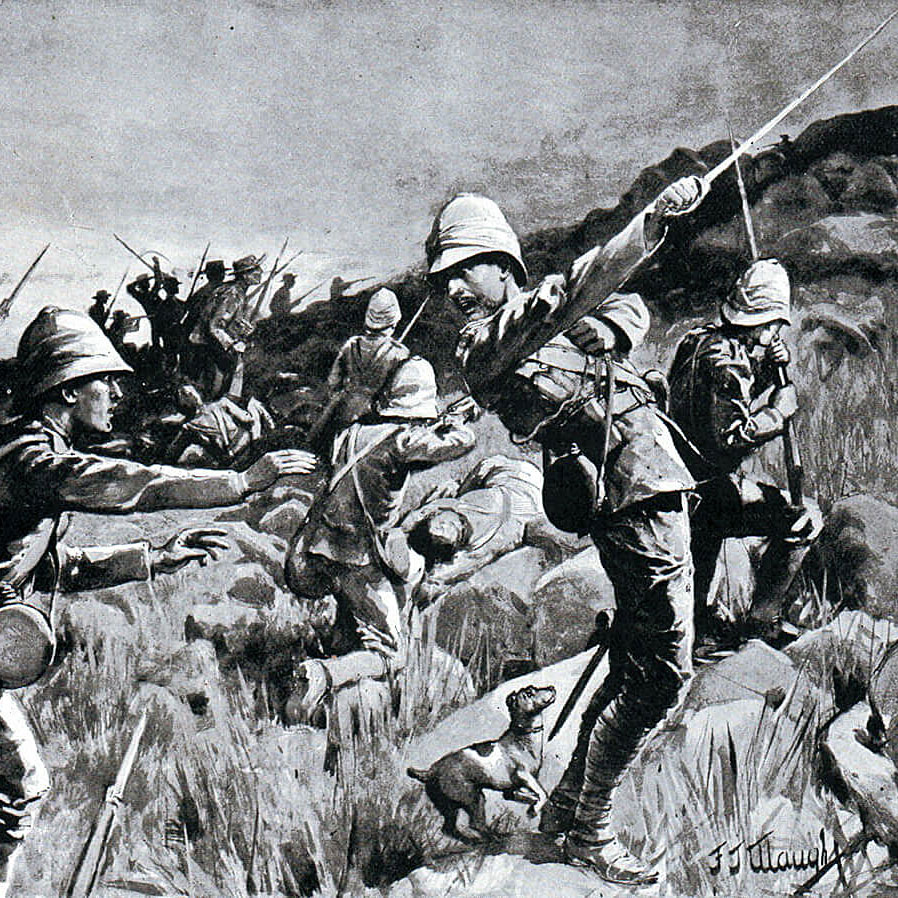
Death of Major Plumbe of the Royal Marines Light Infantry at the Battle of Graspan (also known as ‘Enslin’) on 25th November 1899 in the Great Boer War. His fox terrier ‘Dickie’ is behind him: picture by F.J. Waugh
The previous battle in the Boer War is the Battle of Belmont
The next battle in the Boer War is the Battle of Modder River
Battle: Graspan (also known as Enslin)
War: The Great Boer War
Date: 25th November 1899.
Commandant Koos de la Rey, Boer commander at the Battle of Belmont (also known as ‘Enslin’), fought on 23rd November 1899 in the Great Boer War
Place of the Battle of Graspan (also known as ‘Enslin’): On the western border of the Orange Free State north west of Cape Colony in South Africa.
Combatants at the Battle of Graspan (also known as ‘Enslin’): British against the Boers.
Generals at the Battle of Graspan (also known as ‘Enslin’): Lieutenant General Lord Methuen against Commandant Koos de la Rey.
Size of the armies at the Battle of Graspan (also known as ‘Enslin’): 9,000 British against 3,000 Boers.
Uniforms, arms and equipment at the Battle of Graspan (also known as ‘Enslin’): The Boer War was a serious jolt for the British Army. At the outbreak of the war British tactics were appropriate for the use of single shot firearms, fired in volleys controlled by company and battalion officers; the troops fighting in close order. The need for tight formations had been emphasised time and again in colonial fighting. In the Zulu and Sudan Wars overwhelming enemy numbers armed principally with stabbing weapons were kept at a distance by such tactics, but, as at Isandlwana, would overrun a loosely formed force. These tactics had to be entirely rethought in battle against the Boers armed with modern weapons.
In the months before hostilities the Boer commandant general, General Joubert, bought 30,000 Mauser magazine rifles, firing smokeless ammunition, and a number of modern field guns and automatic weapons from the German armaments manufacturer Krupp, the French firm Creusot and the British company Maxim. Unfortunately for the Boers they elected to buy high explosive ammunition for their new field guns. The war was to show that high explosive was largely ineffective in the field, unless rounds landed on rocky terrain and splintered the rock. The British artillery relied upon air-bursting shrapnel which was highly effective against infantry in open country.
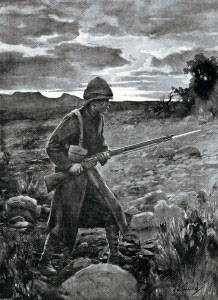
British soldier acting as a sentry in the Veldt: Battle of Graspan (also known as ‘Enslin’) 25th November 1899 in the Great Boer War
Once the war was under way the arms markets of Europe were no longer open to the Boers due to the British naval blockade and the error in ammunition selection could not be remedied.
The Boer Commandoes, without formal discipline, welded into a fighting force through a strong sense of community and dislike for the British. Field Cornets led burghers by personal influence not through any military code. The Boers did not adopt military formation in battle, instinctively fighting from whatever cover there might be. Most Boers were countrymen, running their farms from the back of a pony with a rifle in one hand. These rural Boers brought a life time of marksmanship to the war, an important advantage further exploited by Joubert’s consignment of smokeless magazine rifles. Viljoen is said to have coined the aphorism “Through God and the Mauser”. With strong field craft skills and high mobility, the Boers were natural mounted infantry. The urban burghers and foreign volunteers readily adopted the fighting methods of the rest of the army.
Other than in the regular uniformed Staats Artillery and police units, the Boers wore their everyday civilian clothes on campaign.
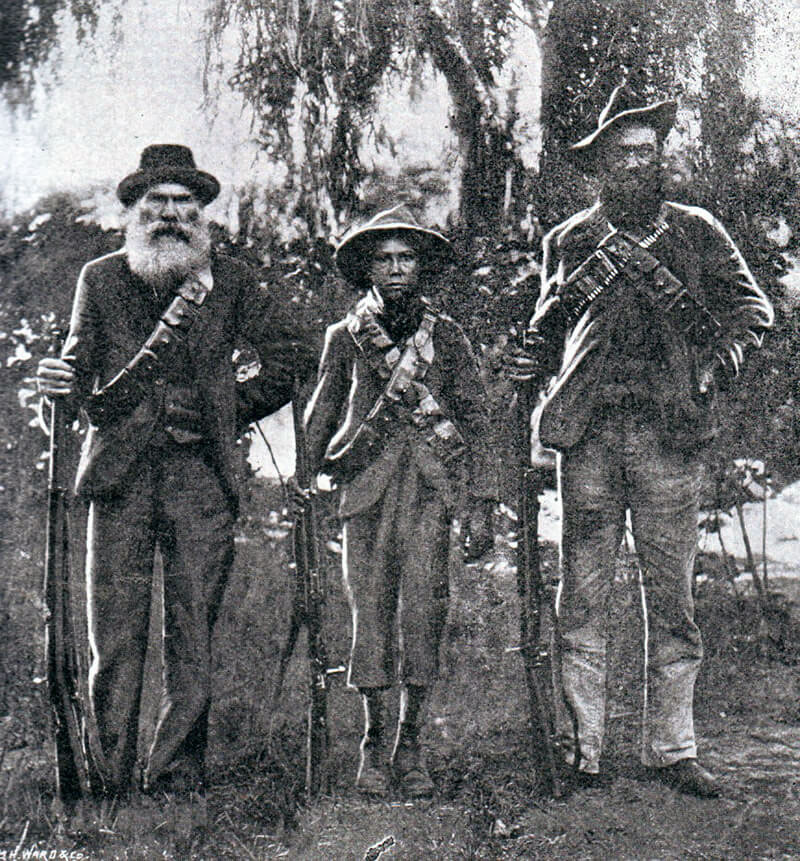
Three generations of a Boer family in arms against the British: Battle of Graspan (also known as ‘Enslin’) on 25th November 1899 in the Great Boer War
After the first month the Boers lost their numerical superiority, spending the rest of the formal war on the defensive against British forces that regularly outnumbered them.
British tactics, developed on the North-West Frontier of India, Zululand, the Sudan and in other colonial wars against badly armed tribesmen, when used at Modder River, Magersfontein, Colenso and Spion Kop were incapable of winning battles against entrenched troops armed with modern magazine rifles. Every British commander made the same mistake; Buller; Methuen, Roberts and Kitchener (Elandslaagte was a notable exception where Hamilton specifically directed his infantry to keep an open formation). When General Kelly-Kenny attempted to winkle Cronje’s commandoes out of their riverside entrenchments at Paardeberg using his artillery, Kitchener intervened and insisted on a battle of infantry assaults, with the same high casualties as earlier in the war.
Some of the most successful British troops were the non-regular regiments; the Imperial Light Horse, City Imperial Volunteers, the South Africans, Canadians, Australians and New Zealanders, who more easily broke from the habit of earlier British colonial warfare, using their horses for transport rather than the charge, advancing by fire and manoeuvre in loose formations and making use of cover, rather than the formal advance into a storm of Mauser bullets.
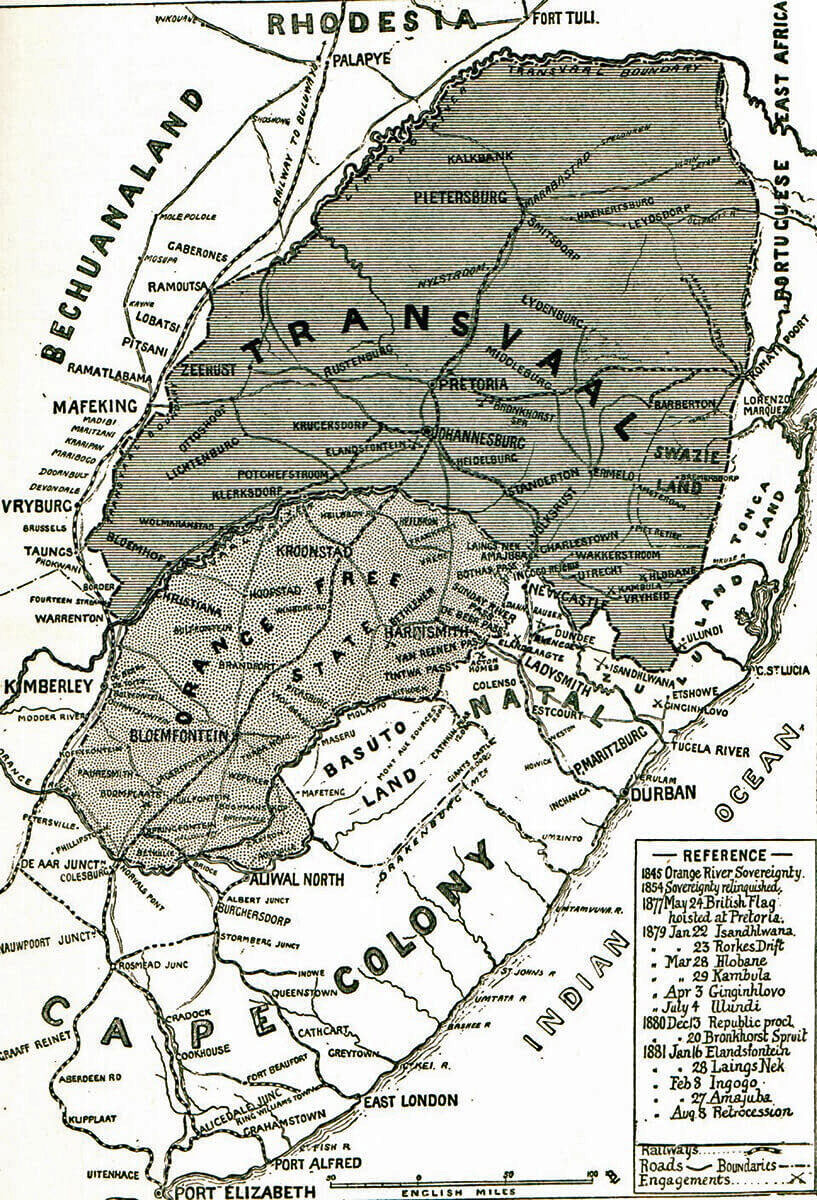
Map of South Africa: Methuen’s march took place up the left side of the map: Battles of Belmont and Graspan (also known as ‘Enslin’) in November 1899 in the Boer War
War Aims of the Boer republics:
Having started the hostilities, the Boers found themselves without an achievable war aim. The only strategy that might have had a chance of success would have been to invade and occupy the whole of Cape Colony, Natal and the other neighbouring British colonies.
The two Boer republics did not have the resources to carry out such an extensive operation. In any case they could not have prevented a British sea landing to retake the colonies.
Once war was declared, the Boers invaded and occupied Natal as far as the Tugela River, but with Ladysmith holding out in their rear. The Orange Free State government was not prepared to allow its forces to advance further south in Natal. In Cape Colony, some of the citizens of Boer origins joined their brothers from the two Republics, but most did not.
Boer police at the front in the Boer War: Battle of Graspan (also known as ‘Enslin’) on 25th November 1899 in the Great Boer War
The only other offensive operations the Boers carried out were to besiege Mafeking in the north and Kimberley near the Cape Colony border. Both sieges were unsuccessful and took up substantial Boer resources. Limited incursion was carried out into the central area of Cape Colony, up to the area around Stormberg.
A major difficulty for the Boer armies was that, although competent in defence, digging field fortifications and using their magazine rifles to great effect to defend them, the Boers lacked an effective offensive capability. The absence of formal military discipline made it difficult for the Boer commanders to devise strategies they could rely on their troops to carry out. As the British built up their armies and began to advance, defeat for the Boers became inevitable.
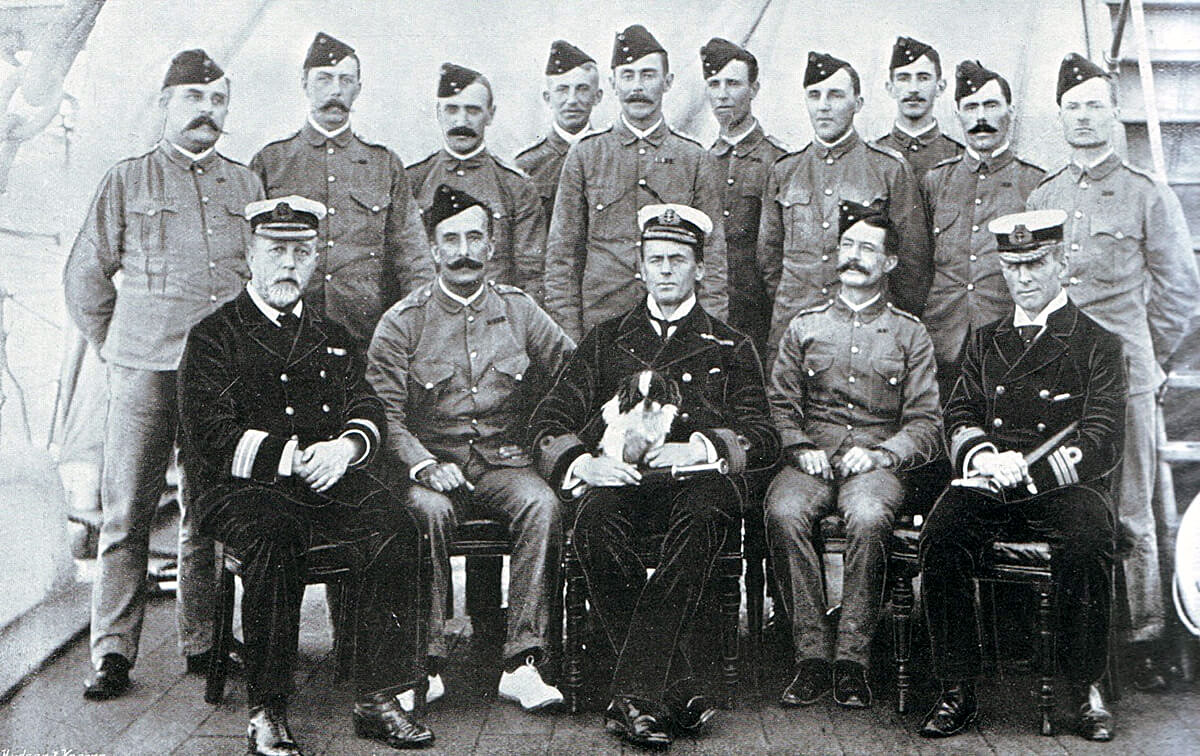
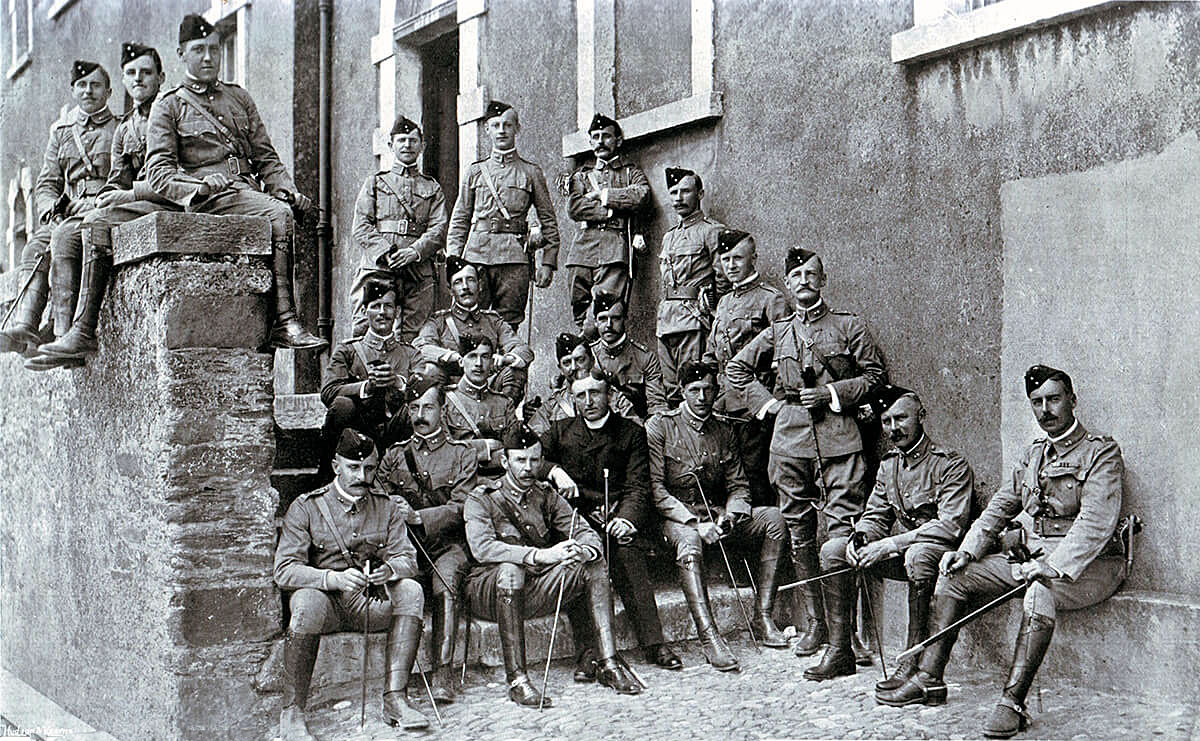
Officers of 2nd King Own Yorkshire Light Infantry on HMS Powerful en route from Mauritius to South Africa in 1899 in the Great Boer War. Captain C.A.L. Yate (see under ‘Anecdotes’) is fourth from the left in the back row standing
Uniforms at the Battle of Graspan (also known as ‘Enslin’): British regiments made an uncertain change into khaki uniforms in the years preceding the Boer War, with the topee helmet as tropical headgear. Highland regiments in Natal devised aprons to conceal coloured kilts and sporrans. By the end of the war, the uniform of choice was slouch hat, drab tunic and trousers; the danger of shiny buttons and too ostentatious emblems of rank, emphasised in several engagements with disproportionately high officer casualties.
The British infantry were armed with the Lee Metford magazine rifle, firing 10 rounds. But no adequate training regime had been established to take advantage of the accuracy and speed of fire of the weapon. Personal skills such as scouting and field craft were little taught. The idea of fire and movement was largely unknown, many regiments still going into action in close order. Notoriously, General Hart insisted that his Irish Brigade fight shoulder to shoulder as if on parade in Aldershot. Short of regular troops, Britain engaged volunteer forces from Britain, Canada, Australia and New Zealand, who brought new ideas and more imaginative formations to the battlefield.
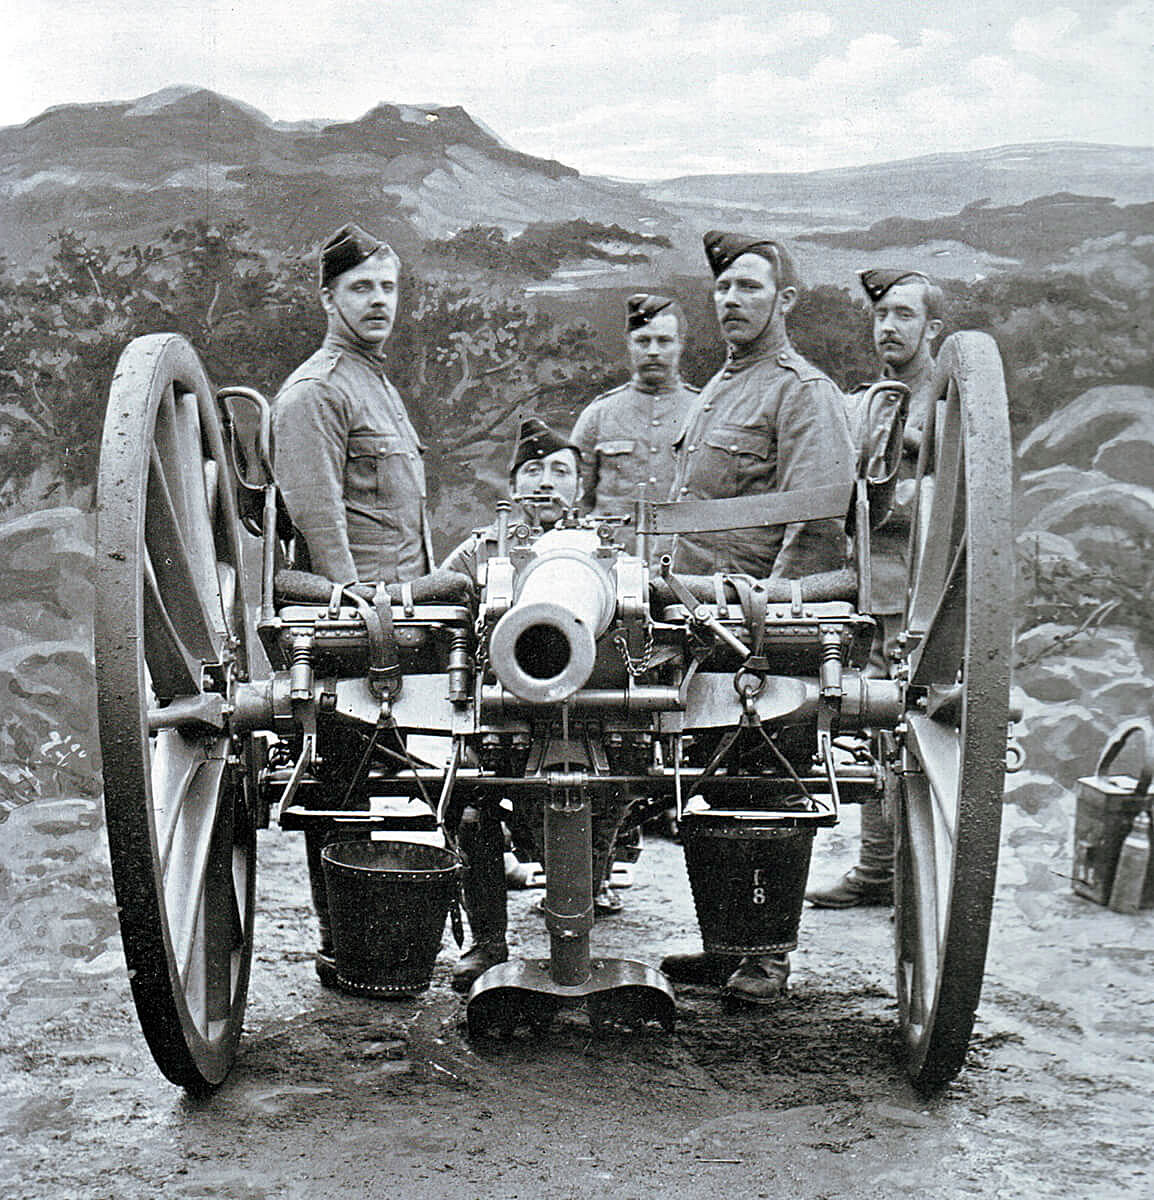
British 15 pounder field gun, the gun used by the two Royal Field Artillery batteries in the Battles of Graspan (also known as ‘Enslin’) on 25th November 1899 in the Great Boer War
The British regular troops lacked imagination and resource. Routine procedures such as effective scouting and camp protection were often neglected. The war was littered with incidents in which British contingents became lost or were ambushed, often unnecessarily and forced to surrender. The war was followed by a complete re-organisation of the British Army, with emphasis placed on personal weapon skills and fire and movement, using cover.
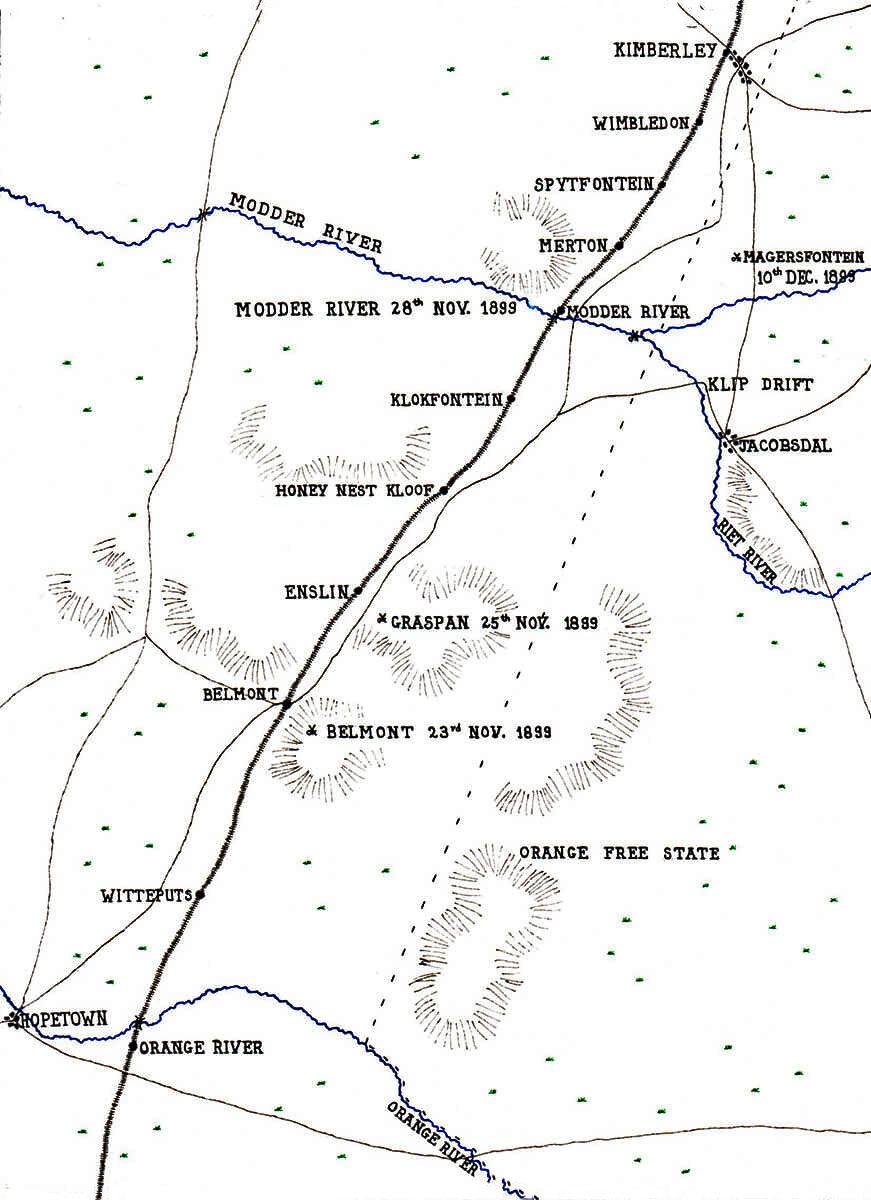
Map showing the area of Lord Methuen’s operations from the Orange River to the Battle of Magersfontein on 10th December 1899 in the Boer War: map by John Fawkes
The British artillery was a powerful force in the field, underused by commanders with little training in the use of modern guns in battle. Pakenham cites the Battle of Pieters as being the battle at which a British commander, surprisingly Buller, developed a modern form of battlefield tactics: heavy artillery bombardment, co-ordinated to permit the infantry to advance under its protection. It was the only occasion that Buller showed any real generalship and the short inspiration quickly died.
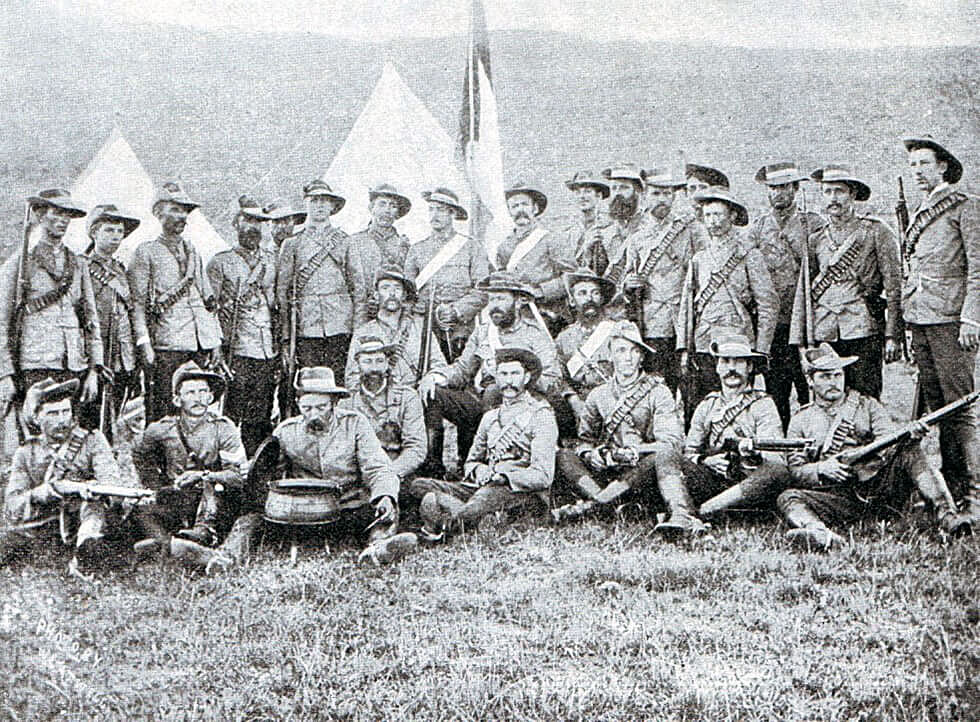
Sailors of the Naval Brigade from HMS Doris who fought at the Battle of Graspan on 25th November 1899 in the Great Boer War
The Royal Field Artillery fought with 15 pounder guns; the Royal Horse Artillery with 12 pounders and the Royal Garrison Artillery batteries with 5-inch howitzers. The Royal Navy provided heavy field artillery with a number of 4.7-inch naval guns mounted on field carriages devised by Captain Percy Scott of HMS Terrible. The Royal Navy also fielded the 12 pounder guns seen in the Field Gun competition at the Royal Tournament.
Automatic weapons were used by the British, usually mounted on special carriages accompanying the mounted infantry or cavalry.
Winner of the Battle of Graspan (also known as ‘Enslin’): The British.
British Regiments at the Battle of Graspan (also known as ‘Enslin’):
9th Lancers, now 9th/12th Royal Lancers.
Royal Field Artillery: 18th and 75th Batteries.
Royal Engineers: 7th Field Company
Royal Army Medical Corps: 19th Field Hospital.
Army Service Corps
The Naval Brigade comprising Royal Navy, Royal Marines Light Infantry and four long 12 pounder guns (although called a brigade this unit comprised around 365 naval and marine personnel, a weak half-battalion)
Guards Brigade (Major General Colville)
3rd Battalion, Grenadier Guards.
1st and 2nd Battalions, Coldstream Guards.
1st Battalion, Scots Guards.
9th Brigade (Major General Featherstonehaugh and then Major General Pole-Carew)
1st Northumberland Fusiliers: now the Royal Regiment of Fusiliers.
2nd Manchester Regiment: later the King’s Regiment and now part of the Duke of Lancaster’s Regiment.
2nd King’s Own Yorkshire Light Infantry: later the Light Infantry and now part of the Rifles.
2nd North Lancashire Regiment: later the Queen’s Lancashire Regiment and now part of the Duke of Lancaster’s Regiment.
2nd Northamptonshire Regiment: now the Royal Anglian Regiment.
1st Royal Munster Fusiliers, disbanded in 1922.
Rimington’s Guides.
New South Wales Lancers
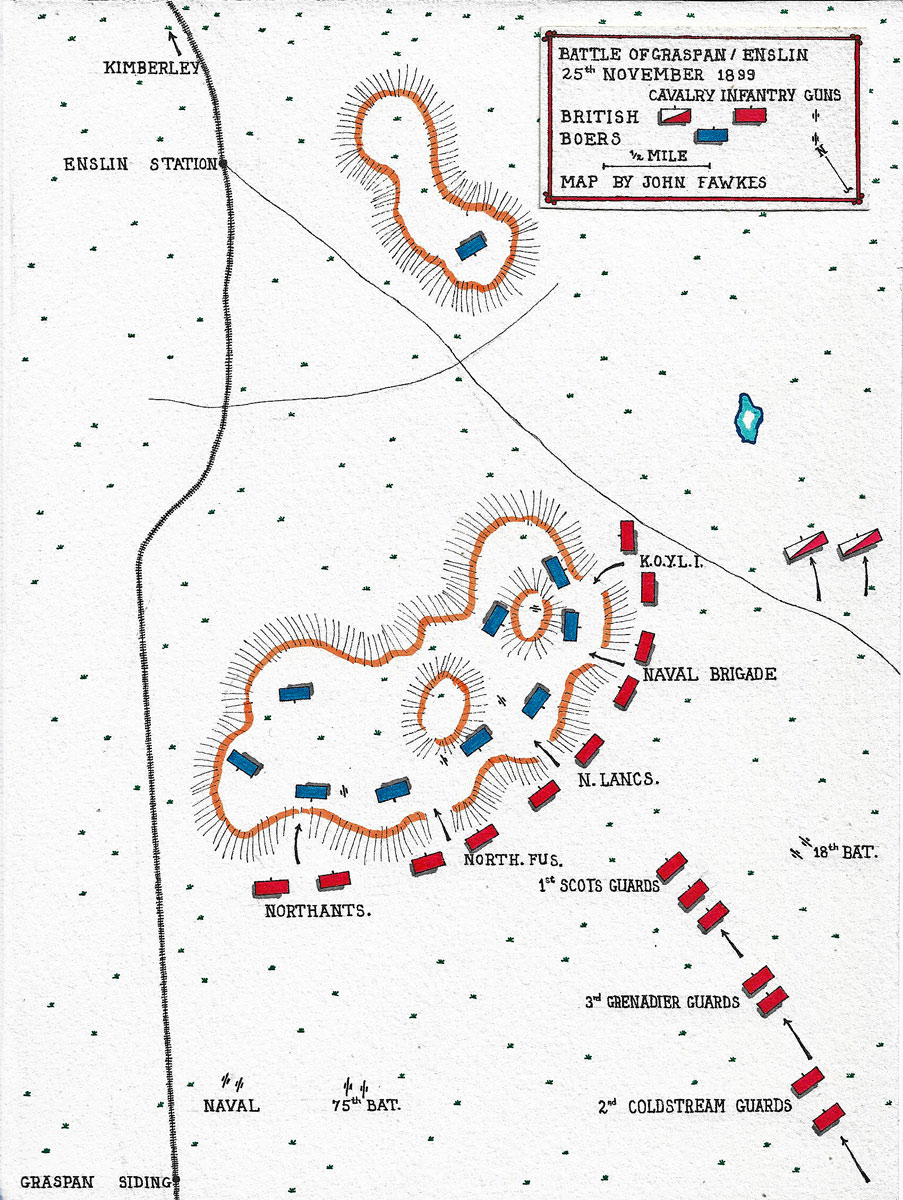
Map of the Battle of Graspan (also known as Enslin), fought on 25th November 1899 in the Great Boer War: battle map by John Fawkes
Account of the Battle of Graspan (also known as Enslin):
After the Battle of Belmont, the British troops spent the night in camp near Thomas’s Farm while the Royal Engineers repaired the railway line supported by the Armoured Train.
In the afternoon of 24th November 1899, Methuen’s force continued north towards the besieged town of Kimberley, marching parallel to the railway line. 1st Scots Guards with some Royal Munster Fusiliers, newly arrived from De Aar, remained at Belmont, as there was believed to be a Boer commando of some 500 men still in the area.
Methuen stopped at Swinks Pan, a station further north on the railway line, and camped. Boer scouts watching the column confirmed the presence of a Boer force, although it was not seen.
At dawn on the morning of 25th November 1899, the 9th Brigade marched out, heading north, the Guards being permitted to follow with the baggage, in view of their major role in the battle the previous day. The Armoured Train provided support from the railway line.
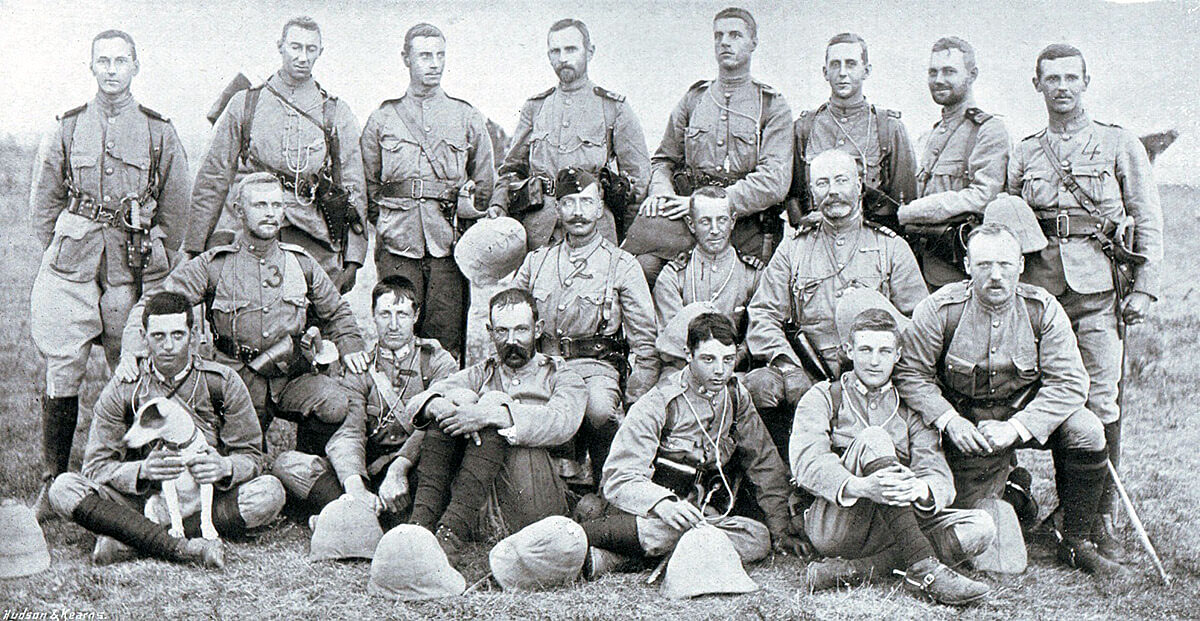
Officers of the Naval Brigade at the Battle of Graspan (also known as ‘Enslin’) on 25th November 1899 in the Great Boer War. Some of the officers are numbered: 1 Commander Ethelston 2 Major Plumbe 3 Lieutenant Jones 4 Captain Senior 5 Midshipman Huddart. Major Plumbe’s fox terrier Dickie is shown
The 9th Brigade approached Graspan (the name refers to the circle of hills that surrounds the area) or Enslin Station, to find a substantial Boer force in position on the hills to the east of the railway line, covering the approach to Enslin Station.
The Boers were positioned on a long ridge of low hills rising gradually from the Veldt, beyond which was a further hill, the top being a precipitous ridge.
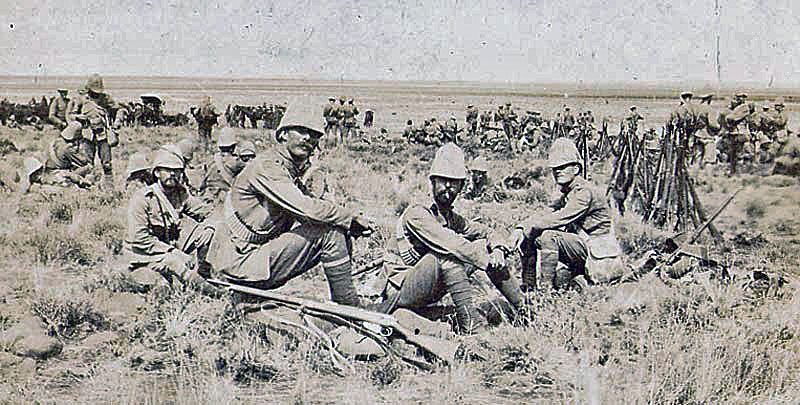
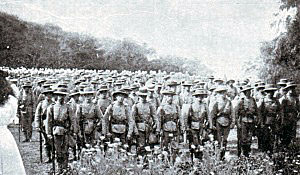
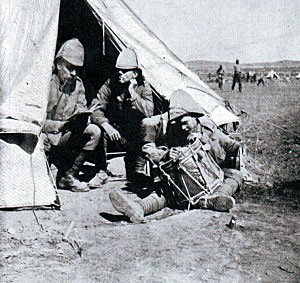
British troops in camp after a day’s march: Battle of Graspan (also known as ‘Enslin’) on 25th November 1899 in the Great Boer War
The Boer force numbered around 3,000 men, equipped with a heavy gun, five field guns, a Maxim 1 pounder ‘pom-pom’ and a Maxim machine gun, commanded by General de la Rey. It was not the force Methuen faced at Belmont.
On the most northern of these hills was positioned a commando of 300 Transvaalers newly arrived from Kimberley.
Methuen resolved not to repeat what was seen as his error at Belmont in allowing an inadequate artillery bombardment to precede the infantry assault.
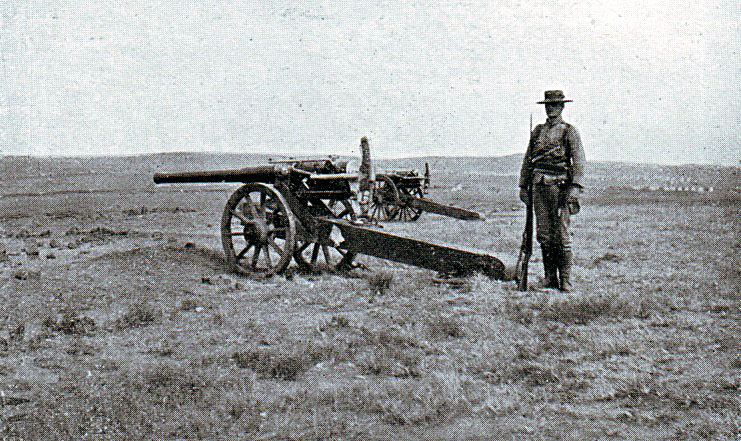
Royal Navy long 12 pounder field gun, two of which took part in the Battle of Graspan (also known as ‘Enslin’) on 25th November 1899 in the Great Boer War
The British artillery, comprising the 13th and 75th field batteries and two naval guns, began a bombardment of the Boer positions. The Boer guns replied but being positioned individually were unable to respond as effectively as the British batteries.
The Boers had registered the ranges before the battle began, but the British guns moved, throwing the Boers off target. As on many occasions, the Boer use of high explosive rendered their fire less effective than the British use of air burst shrapnel, even when the Boer fire was accurate.
The Boer gun that made most impression on the British was the one pounder Maxim ‘pom-pom’, even though it was not effective in inflicting casualties.
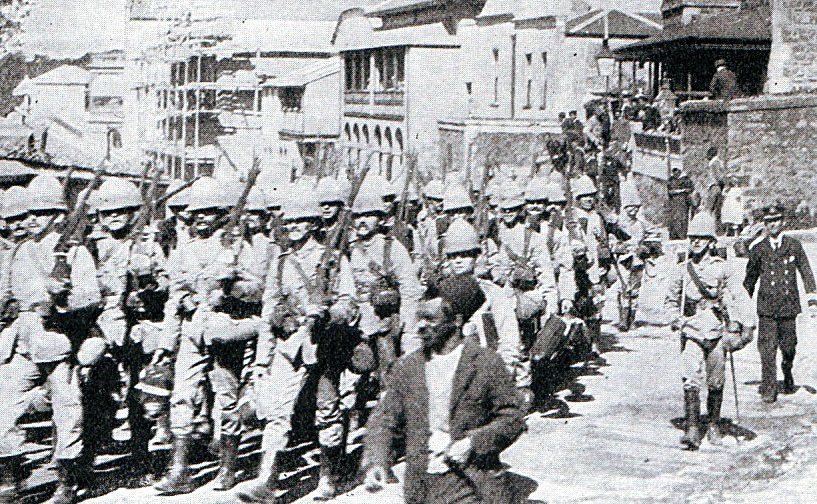
Royal Marines from HMS Doris in Cape Town. Captain Senior is marching on the right. Senior was killed in the storming of the Boer position by the Naval Brigade at the Battle of Graspan (also known as ‘Enslin’) on 25th November 1899 in the Great Boer War
The pom-pom fired on the 18th Field Battery by way of indirect fire, with a Boer on the hill top directing the pom-pom which was on the reverse slope. The pom-pom fired some 200 rounds and achieved the deaths of two British horses and injury to five men.
By the end of the artillery exchange, all the Boer guns were silenced, although not destroyed. The main effect on the Boer riflemen of the British gun fire was to cause them to take cover in the rocks at the top of the reverse slopes, inhibiting the Boer rifle fire.
Realising that the Boer force was much stronger than he had been led to believe, Methuen heliographed for the Guards battalions on the march from Belmont to hurry forward.

Contemporary photograph of the British attack at the Battle of Graspan (also known as ‘Enslin’) on 25th November 1899 in the Great Boer War
At about 7am, while the British artillery was still firing on the line of hill tops, the British infantry began to advance. The Northamptonshires and Northumberland Fusiliers approached the left-hand kopjes. The Naval Brigade formed a storming party for the Boer position on the extreme right, with 2nd King’s Own Yorkshire Light Infantry moving around the hill on their right flank and the North Lancashires on their left.
The British infantry attack advanced in rushes, in open order, up the hill to the Boer positions.
The British Army had learnt one of the major lessons of warfare against concealed marksmen, that officers must be as unobtrusive as possible. The Royal Navy had not. When his men went to ground, Captain Prothero RN of HMS Doris remained standing, an enormous man with a beard carrying a sword. He was soon shot and wounded. Commander Ethelston of HMS Powerful was also hit, but fatally. Major Plumbe was shot and killed, as was Captain Senior, both of the Royal Marines.
The Royal Naval Brigade faltered in the face of the storm of rifle fire and its loss of officers, but was supported by the attacks on its right by the Yorkshire Light Infantry and its left by the North Lancashires. A further officer, Midshipman Cymbeline Huddart, was wounded for the third time, fatally.
Captain Prothero is said to have called out ‘Men of the Naval Brigade, advance at the double; take that kopje or be hanged for it’.
Officers of 1st Royal Munster Fusiliers before leaving for South Africa: Battle of Graspan (also known as ‘Enslin’) on 25th November 1899 in the Great Boer War
The Naval brigade stormed into the Boer positions at the top of the hill led by Lieutenant Taylor, Royal Navy and Lieutenant Jones, Royal Marine Light Infantry.
In the face of the British bayonet charge, the Boers left their positions, some hurrying along the top of the ridge to the east and others descending the far side to their ponies and making off to the north.
The 9th Lancers and Rimington’s Guides, on the extreme British right, attempted to pursue the retreating Boers, but came under a heavy fire from the kopje in the rear of the stormed positions. The British mounted men were forced to draw rein while the Boers with their field guns made off to the north and east.
British troops drinking from a water wheel at Enslin Station after the Battle of Graspan (also known as ‘Enslin’) on 25th November 1899 in the Great Boer War
Casualties at Graspan or Enslin:
British losses were 20 officers and men killed and 165 wounded. The Royal Naval Brigade suffered 101 casualties from 365 men.
Boer losses were estimated at around 220 dead and wounded. 30 wounded Boers were taken in a captured field hospital. The Jacobsdal Commando suffered 46 casualties from a strength of 180. Commandant Rissik and Mr Jeppe, a Transvaal financier, were captured. No Boer guns were taken.
Follow-up:
The British force marched from the battlefield to Enslin station. The day was extremely hot and the troops suffered from lack of water. Immense sums were offered to the engine driver for water from the tenders, but it is said the driver was adamant in refusing. Food rations were also short.
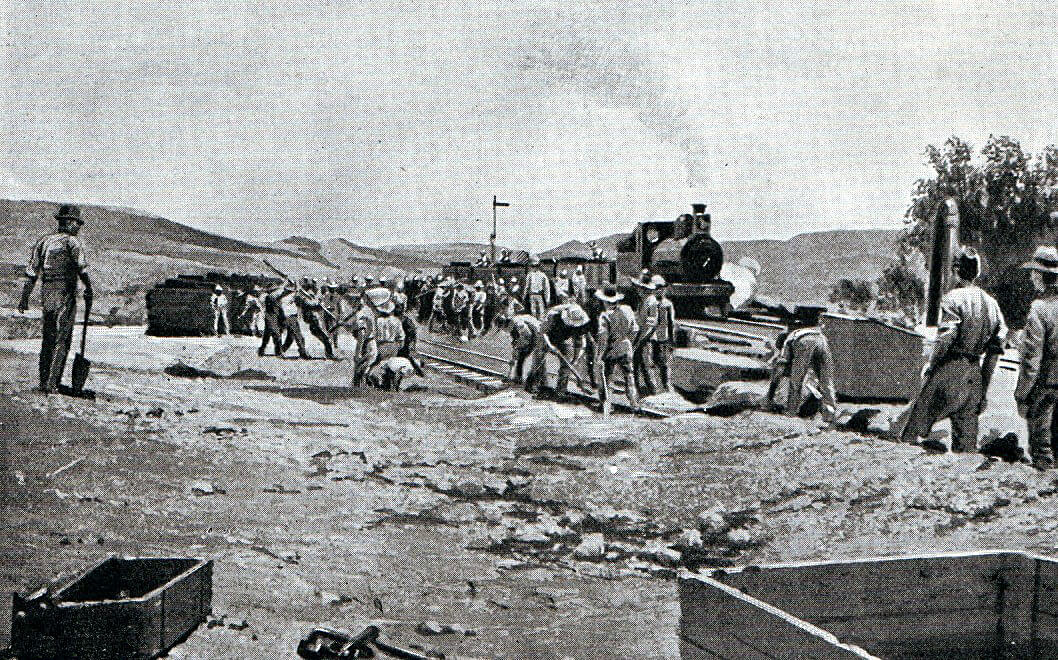
Royal Engineers re-instating the railway line north of Enslin Station after the Battle of Graspan on 25th November 1899 in the Great Boer War
The railway line beyond Enslin had been torn up by the Boers and had to be re-laid and the telegraph line replaced.
Once this work was complete, Methuen was able to resume his march north to Kimberley. The next battle would be at the crossing of the Modder River.
Queen’s South Africa Medal and Battle Honour:
Graspan was awarded as a clasp on the Queen’s South Africa Medal but is not a regimental battle honour. All regiments that fought in the South African War were awarded the Battle Honour ‘South Africa’ with the dates of involvement.
British drummer boy writing home: Battle of Graspan (also known as ‘Enslin’) on 25th November 1899 in the Great Boer War
Anecdotes and traditions from the Battle of Graspan (also known as ‘Enslin’):
- Following the loss of officers in the initial action north of the Orange River, officers were required to reduce their profile by dulling their buttons and accoutrements and where possible to carry rifles, in line with their soldiers.
- During the Great Boer War, the Boer pom-poms acquired a fearsome reputation with British troops, largely due to the noise and the large number of projectiles fired. In fact, the pom-poms inflicted few casualties.
- An army officer is said to have commented to a naval officer after Graspan ‘It is utterly useless for you to go on as you do, for you will only all get killed in this sort of warfare. I saw your officers walking about in front of their men, even when the latter were taking cover, just as if they were carrying on on board ship.’
- Queen Victoria sent a telegram to the Royal Naval Brigade after Graspan saying: ‘The Queen desires that you will convey to the Naval Brigade who were present at the action at Graspan, Her Majesty’s congratulations on their gallant conduct, and at the same time express the Queen’s regret at the losses sustained by the Brigade.’
- The conduct of the small Naval Brigade in storming the Boer hill top position at Graspan attracted considerable attention in the British Press. The public imagination was particularly taken by Dickie, the fox terrier of Major Plumbe from the Royal Marines, found guarding the body of his dead master after the battle.
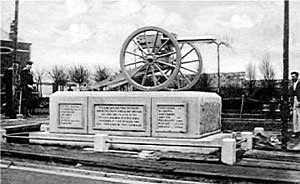
Memorial in Devonport to the Royal Marine and Royal Navy casualties from HMS Doris during the Boer War
- A memorial was raised at Devonport to the Royal Naval Brigade personnel lost at Graspan.
- One of the officers wounded at Graspan was Captain C.A.L. Yate of 2nd King’s Own Yorkshire Light Infantry. Yate was at the beginning of an extraordinary career. He served on the North West Frontier of India and was attached to the Japanese Army in the Russo-Japanese War of 1905, for which he received Japanese decorations. He was qualified at Interpreter level in German, French and several Indian languages. It is thought that he may have carried out intelligence duties in Germany before the First World War. Major ‘Cal’ Yate commanded the forward trenches of his battalion at the Battle of Le Cateau on 26th August 1914 when they were overwhelmed by the German attack and taken prisoner. Yate was awarded the VC. Yate died during an escape attempt from Torgau prisoner of war camp.
References:
The Boer War is widely covered. A cross section of interesting volumes would be:
The Times History of the War in South Africa
The Great Boer War by Sir Arthur Conan Doyle
Goodbye Dolly Gray by Rayne Kruger
With the Flag to Pretoria by HW Wilson
The Boer War by Thomas Pakenham
South Africa and the Transvaal War by Louis Creswicke (6 highly partisan volumes)
The previous battle in the Boer War is the Battle of Belmont
The next battle in the Boer War is the Battle of Modder River