
The British and Egyptian victory over the Khalifa’s Dervishes, fought on 2nd September 1898, that conquered the Sudan and made Kitchener a British national hero
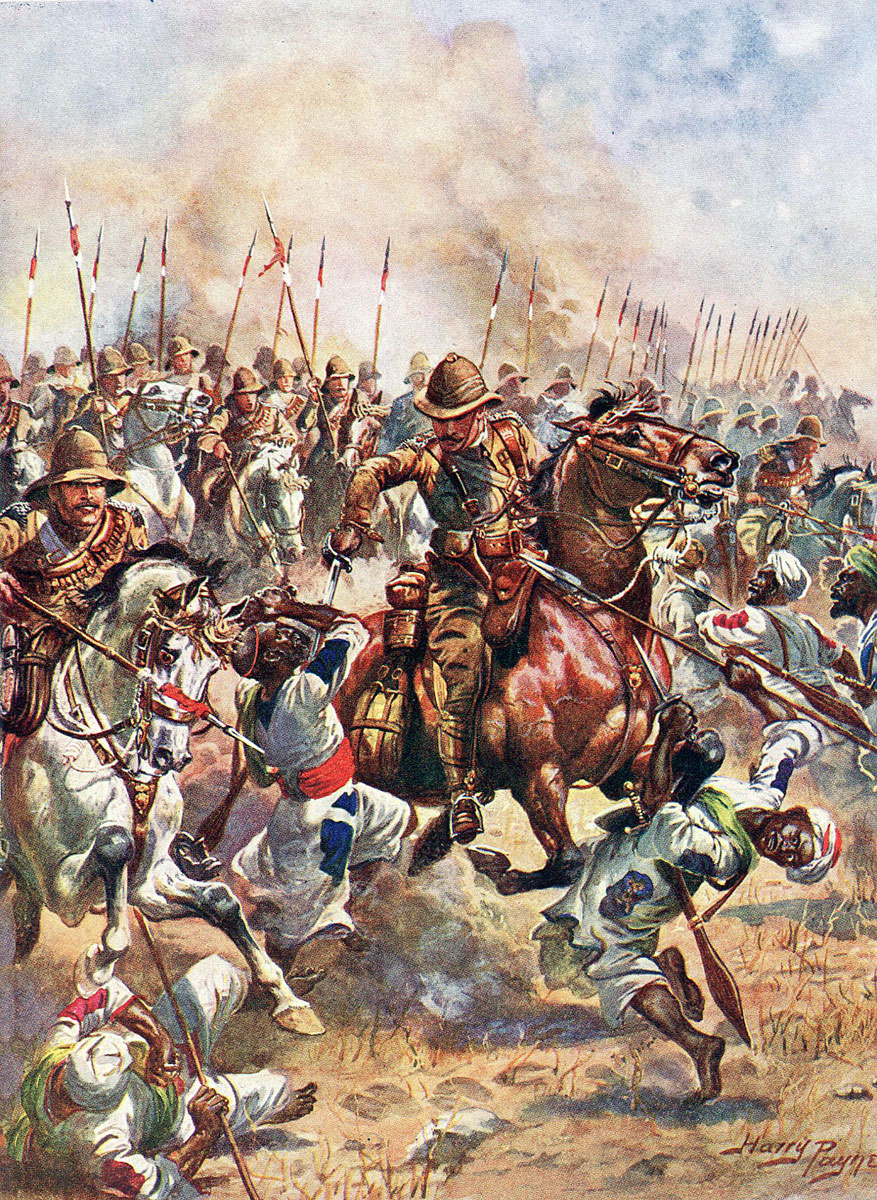
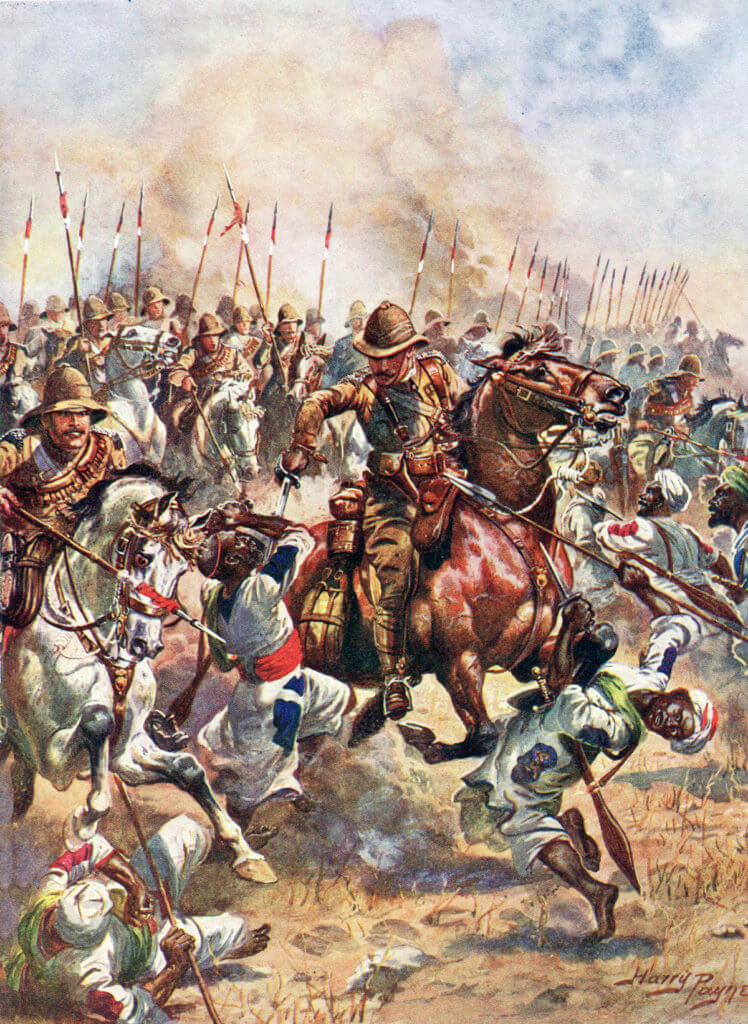
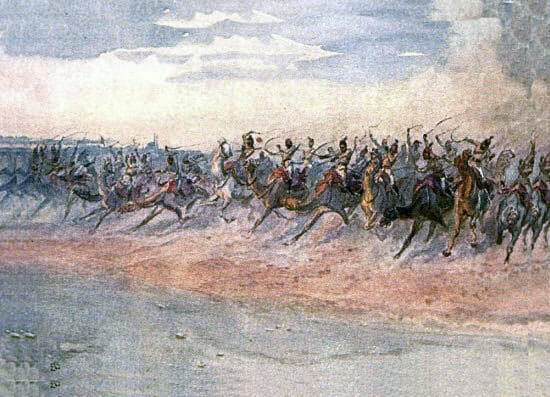
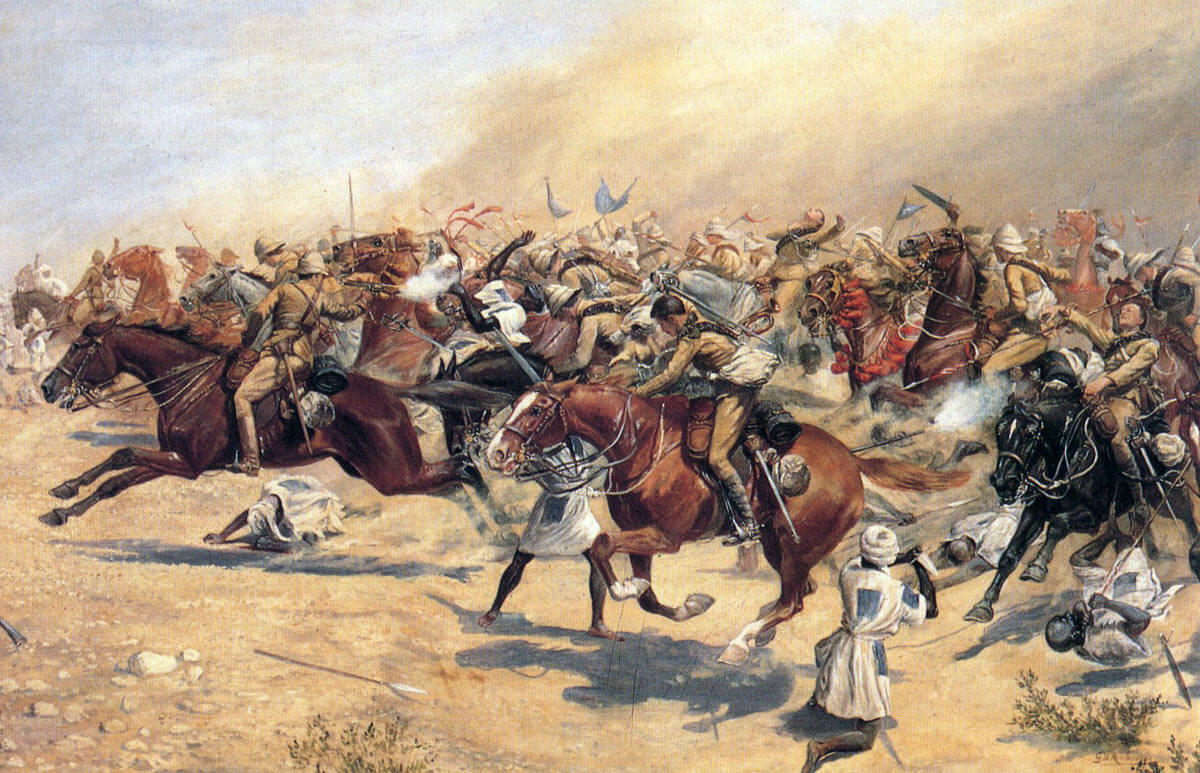
Charge of the 21st Lancers at the Battle of Omdurman on 2nd September 1898: picture by Harry Payne
The previous battle of the War in Egypt and the Sudan is the Battle of Atbara
The next battle in the British Battles sequence is the Battle of Laing’s Nek
To the War in Egypt and the Sudan index
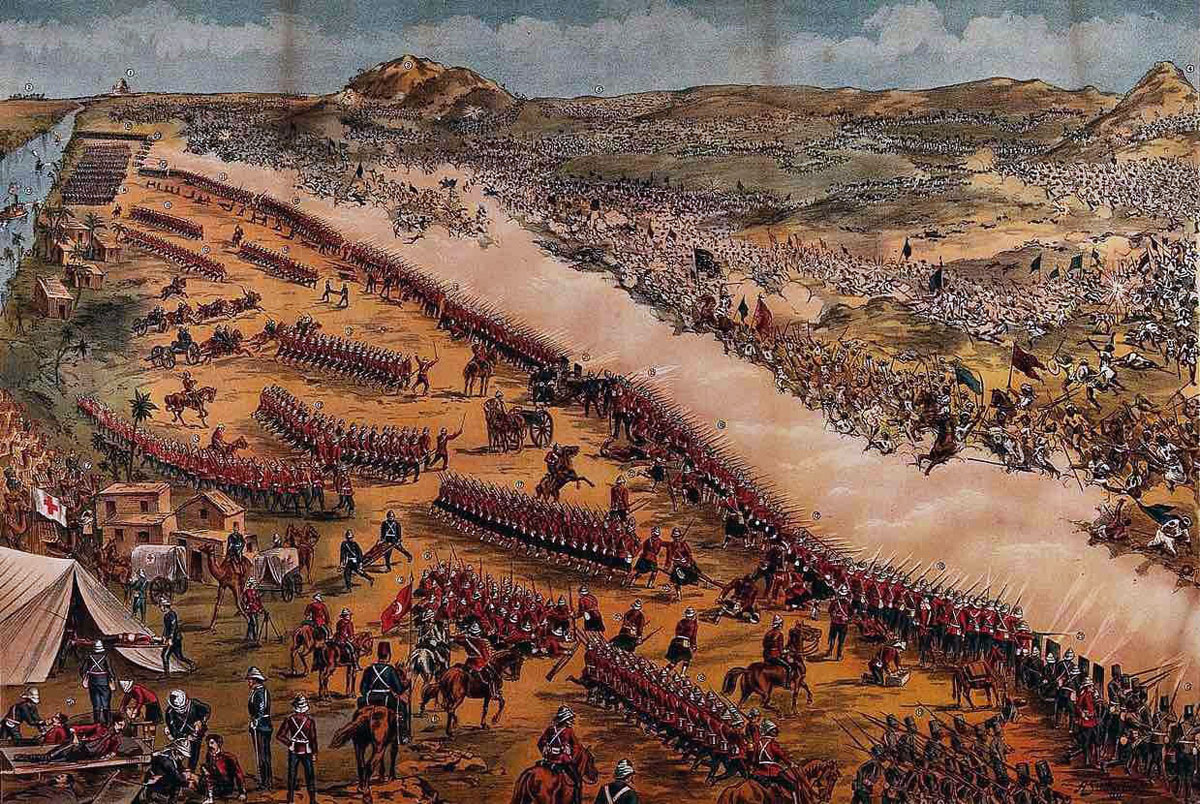
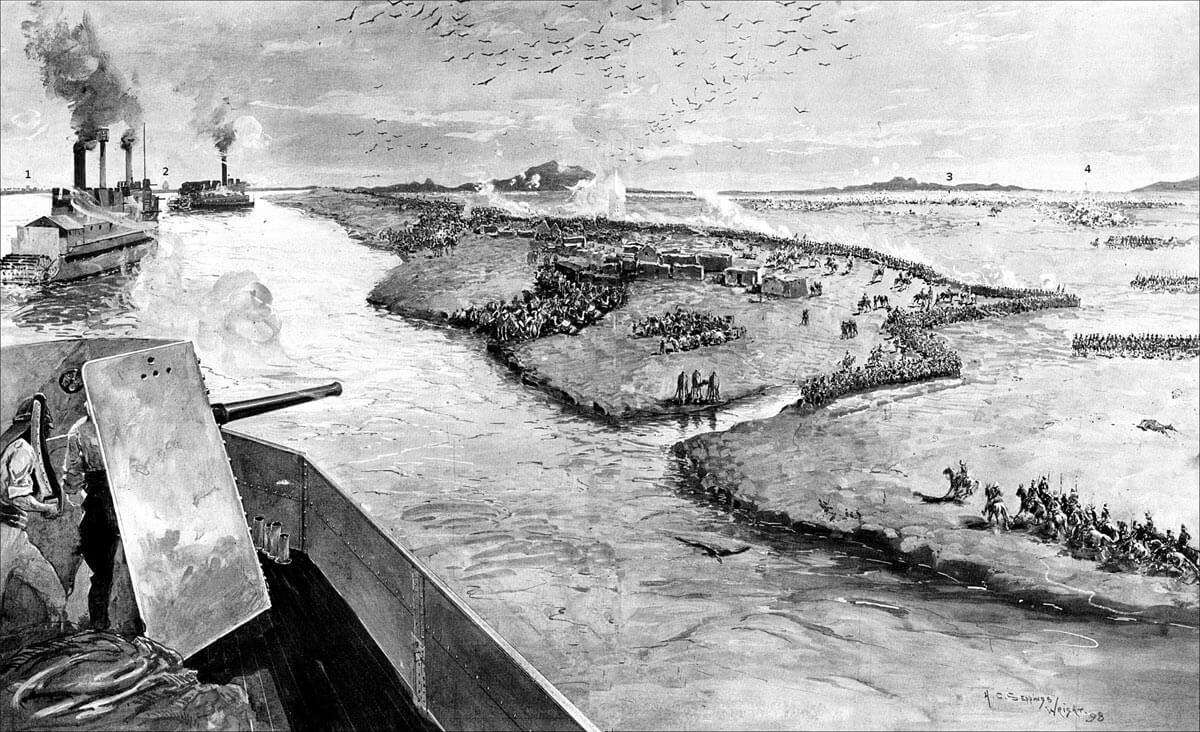
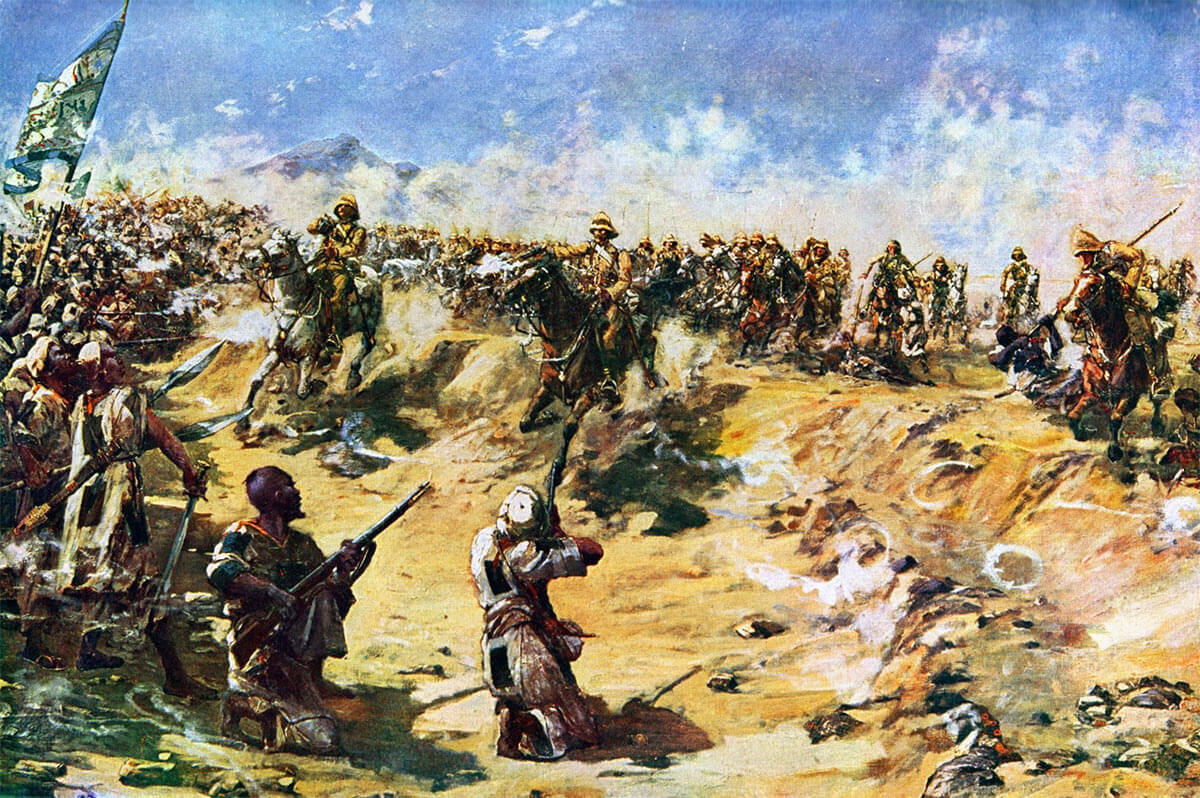
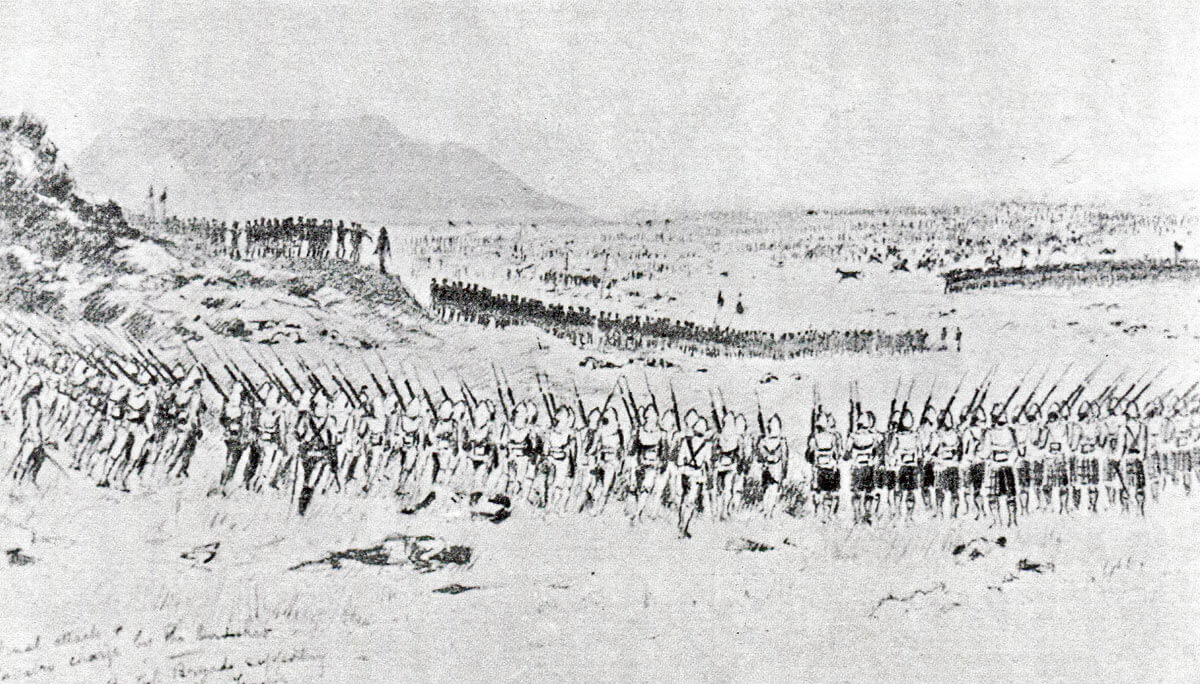
Battle of Omdurman on 2nd September 1898: a contemporary Victorian propaganda print showing the Main Dervish attack on the trench line along the River Nile backed by the Nile steamers: print by Sutherland
Battle: Omdurman
War: Conquest of the Sudan
Date of the Battle of Omdurman: 2nd September 1898
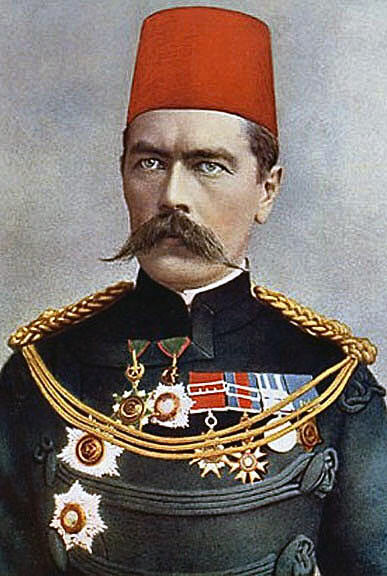
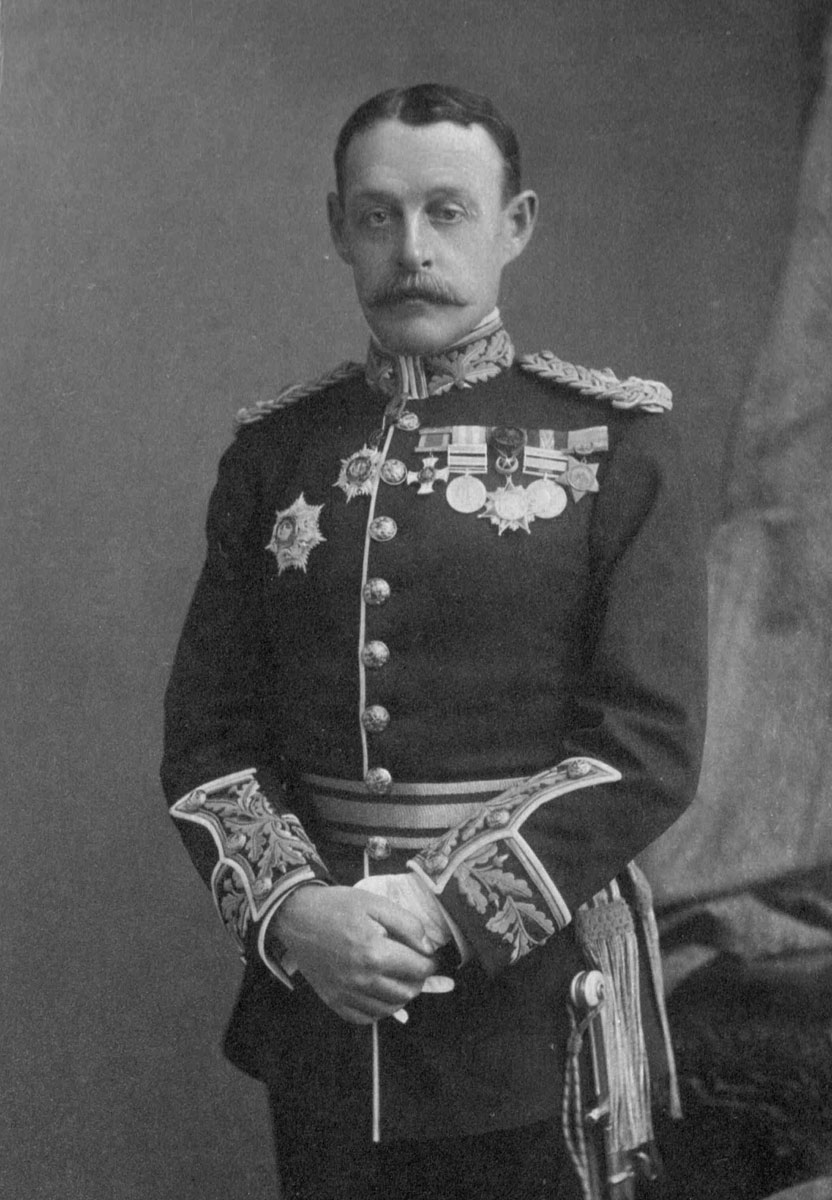
The Sirdar, Major General Herbert Kitchener: Battle of Omdurman on 2nd September 1898 in the Sudanese War
Place of the Battle of Omdurman: To the north of Omdurman along the west bank of the River Nile in the Sudan.
Combatants at the Battle of Omdurman: British and Egyptians against the Sudanese Dervish Empire of the Khalifa
Commanders at the Battle of Omdurman: The Egyptian Sirdar, Major General Herbert Kitchener, commanded the British and Egyptian troops. Commodore Keppel, Royal Navy, commanded the steamers on the River Nile. The Khalifa, Abdullah Al-Taishi, commanded the Mahdist Dervish forces.
Size of the armies at the Battle of Omdurman:
The Sirdar’s army comprised 8,200 British and 17,600 Egyptian (including Sudanese) troops, 44 guns and 20 Maxims, supported by 10 steamers, mounting 36 guns and 24 Maxims.
The Khalifa’s army probably comprised around 50,000 men, with an unknown number of guns.
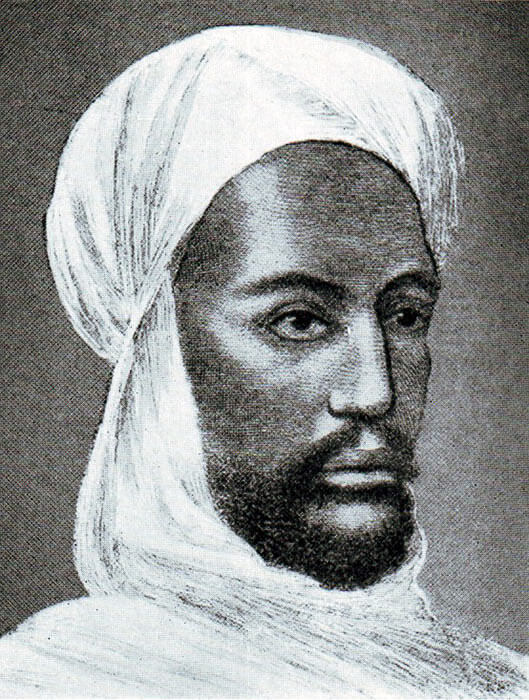
The Khalifa, Abdullah-al-Taishi, Mahdist leader at the Battle of Omdurman on 2nd September 1898 in the Sudanese War
Winner of the Battle of Omdurman: The British and Egyptian troops decisively defeated the troops of the Khalifa.
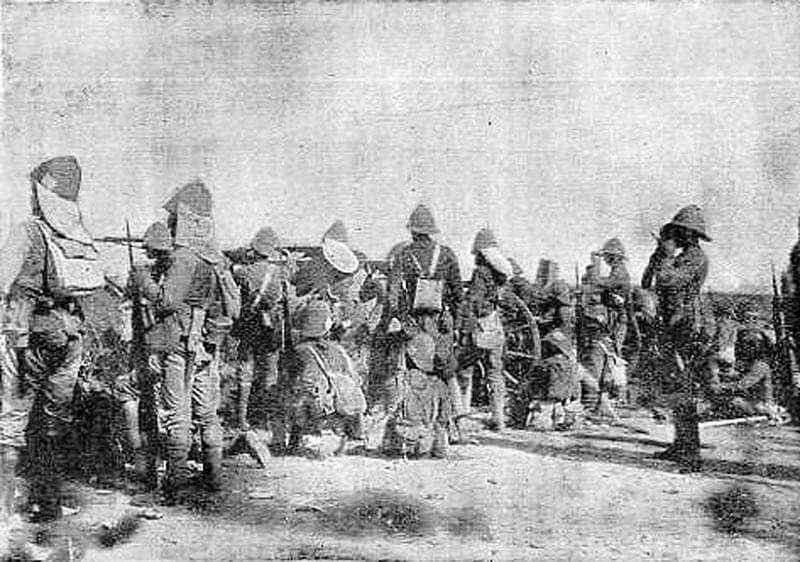
Uniforms, arms and equipment at the Battle of Omdurman:
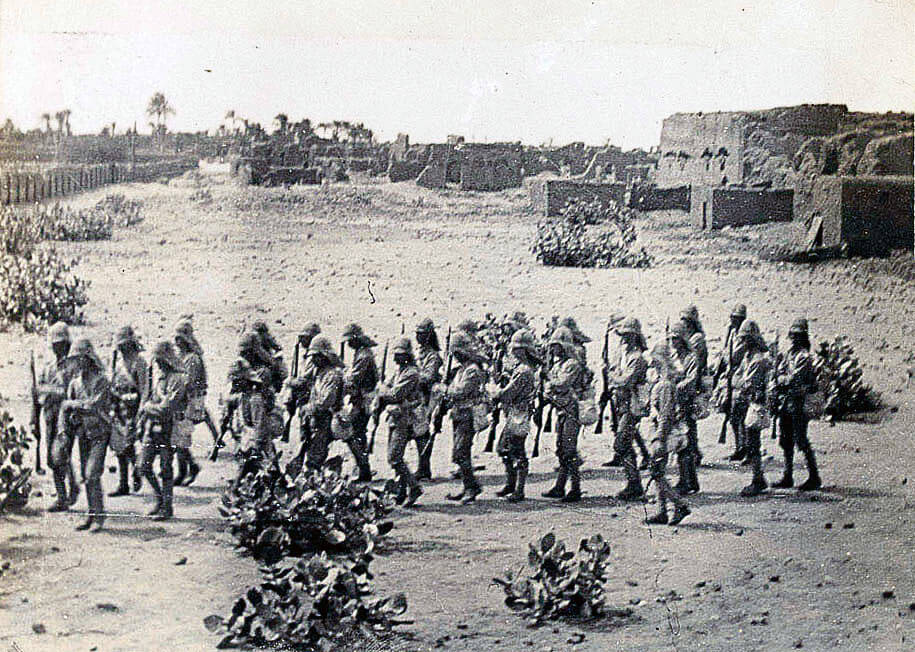
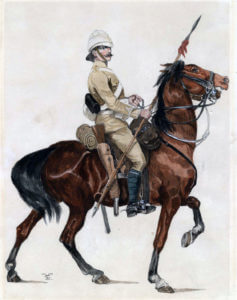
The British troops wore the new khaki field uniforms with the characteristic pith helmet. The two Highland regiments wore the kilt. The British infantry regiments were armed with the Lee Metford bolt action magazine rifle. Each battalion had a Maxim gun detachment.
The Lee Metford bolt action magazine rifle was first used in action by British troops of the Chitral Relief Force on the North-West Frontier of India in 1895. General Gatacre, commander of the British contingent in the Sudan War, served as a brigade commander in the Chitral Relief Force.
It was the experience of the British infantry of the Chitral Relief Force that the new Lee Metford’s ammunition had insufficient stopping power against attacking tribesmen, the wound it inflicted being too light.
As a consequence, the Indian Government Armoury at Dum Dum, near Calcutta, introduced a range of expanding or exploding rounds that inflicted greater wounds. This ammunition was issued to British regiments in India.
On taking command of his British brigade in the Sudan in 1895, Gatacre took steps to modify the old-style ammunition issued to his regiments by filing down the pointed noses and turning them into ‘Dum Dum’ bullets. This undoubtedly increased the impact of the British volleys on the Khalifa’s troops, inflicting disabling wounds.
The Egyptian army comprised two forms of infantry: battalions of Egyptian soldiers and battalions of Sudanese, many of them deserters or prisoners from the Dervish army. The weapon carried was the old Martini-Henry, single shot, lever action rifle, recently discarded by the British army.
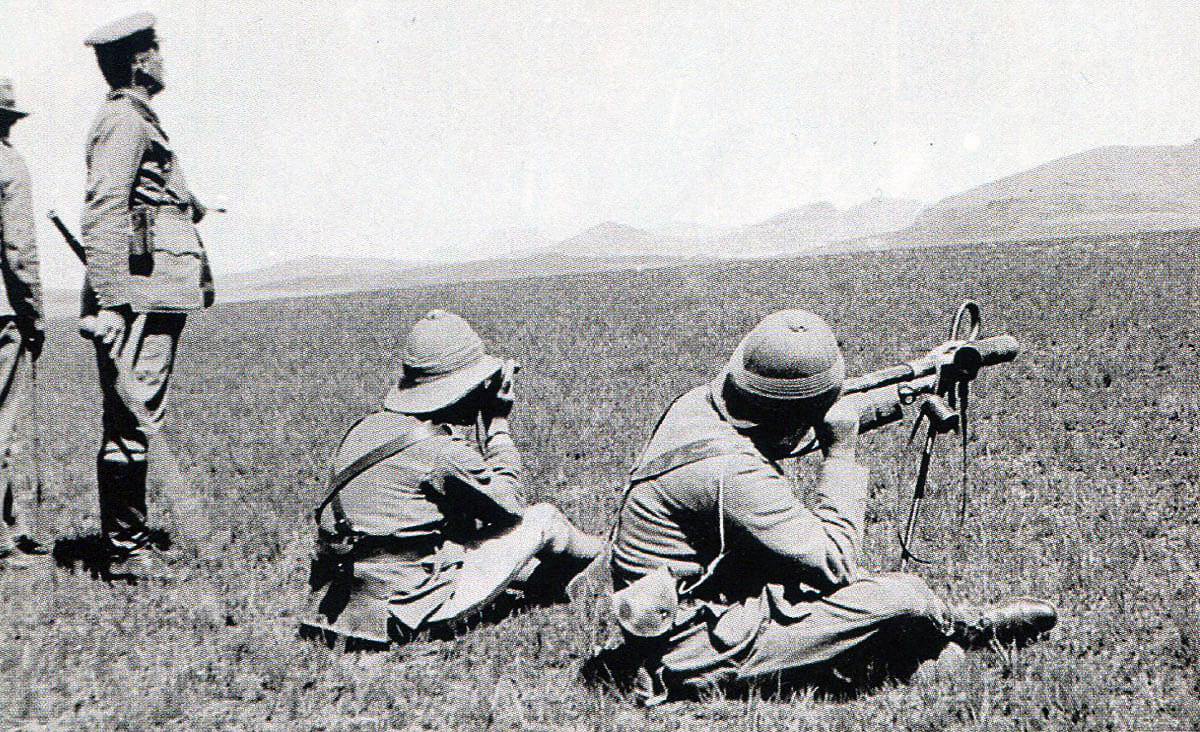
Several batteries of artillery and Maxim machine guns accompanied the Sirdar’s army in the Sudan, both British and Egyptian.
The sole British cavalry regiment, the 21st Lancers, was armed with lance, sword and carbine. The officers also carried pistols. Winston Churchill bought a Mauser pistol before leaving Britain for the Sudan. In the charge Churchill chose to use his pistol rather than his sword.
The Egyptian cavalry carried the same weapons as the 21st Lancers, except for the lance, which was not carried.
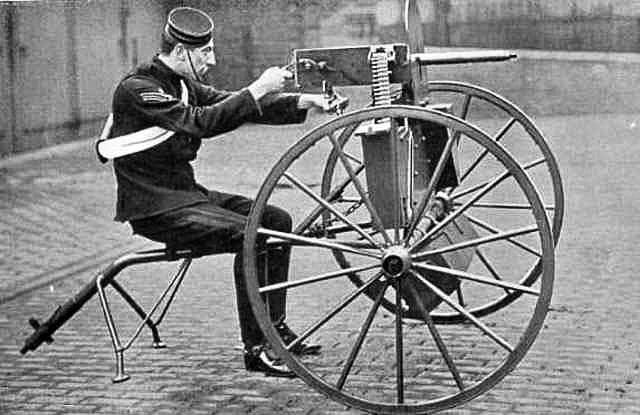
British cavalry Maxim machine gun: Battle of Omdurman on 2nd September 1898 in the Sudanese War
The Dervish army comprised tribesmen armed with long swords and spears, most on foot, with a few horsemen. At the beginning of the 1890s, with the Dervishes under the Mahdi in revolt against Egyptian/Turkish rule of the Sudan, the Dervish Sudanese defeated the Egyptian armies and eliminated the Egyptian garrisons across the Sudan. In this process, the Dervishes acquired the rifles of the Egyptian soldiers, with a small number of artillery pieces and Maxims, so that in any Dervish force there was a percentage of men with firearms, although not particularly skilled in their use.
The Dervish army possessed a number of cavalrymen, in particular the mounted Baggara tribesmen.
The Dervish warriors wore white tunics, with black patches sewn on the front and back. Each contingent was led by a flag of a distinctive colour; red, green or black. Many more flags were carried by the army, a common motif being a white flag, with quotations from the Koran embroidered across it.
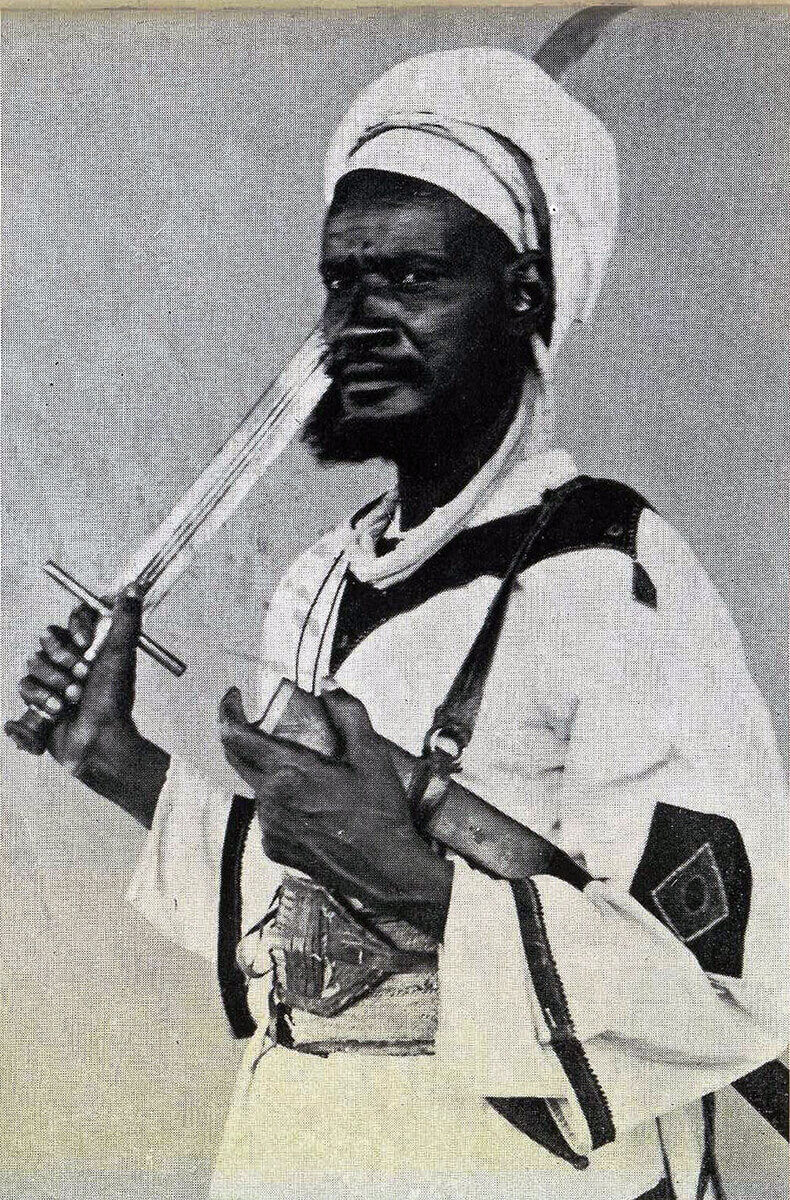
Dervish Emir: Battle of Omdurman on 2nd September 1898 in the Sudanese War
Background to the Battle of Omdurman:
See this section in the Battle of Atbara, the battle immediately preceding Omdurman
Following the successful Battle of Atbara on 8th April 1898, the Sirdar’s Anglo-Egyptian army went into summer quarters around Berber, to await the arrival of the substantial reinforcements that were necessary for the final advance on the Khalifa’s capital of Omdurman and Khartoum.
The Sirdar, Major General Sir Herbert Kitchener, marked his victory at Atbara with a parade through the town of Berber, riding a white horse and leading the defeated Emir Moustafa, captured at Atbara.
In Omdurman, the Khalifa assembled his army for the coming decisive fight for his capital.
During the months before the final advance, many of the British officers went on leave to Cairo and in some cases to England, leaving their troops encamped in the desert, while the new units came down the River Nile to Berber.
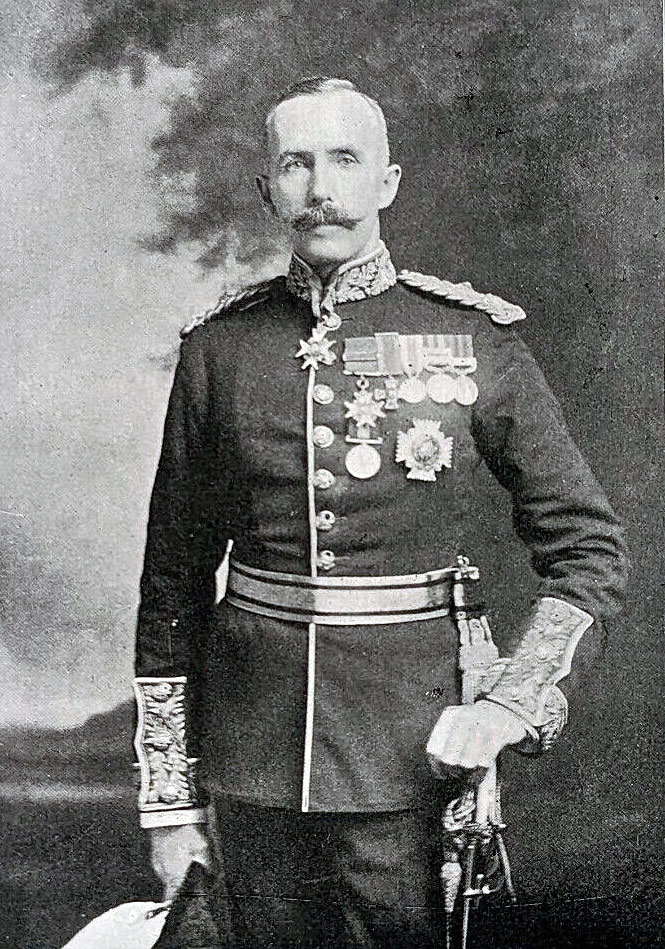
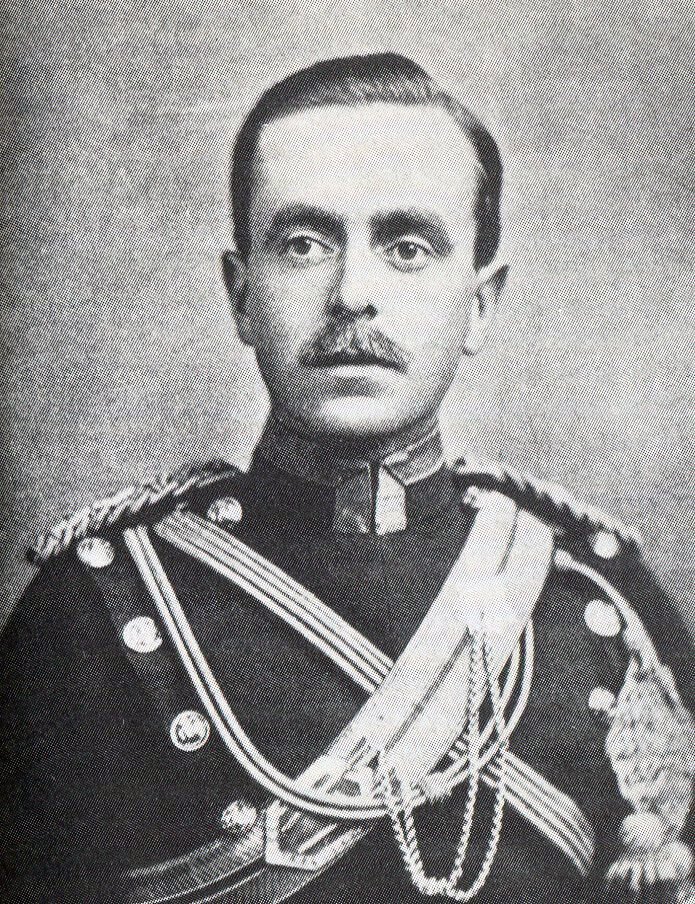
Major-General William Gatacre commanding British Division: Battle of Omdurman 2nd September 1898 in the Sudanese War
Major-General Archibald Hunter, commanding the Egyptian Division: Battle of Omdurman 2nd September 1898 in the Sudanese War
The success at Atbara caused a considerable stir in late Victorian Britain, with a surge in fashionable military circles of applications for employment in the Sirdar’s army. Kitchener was inundated with requests to serve on his staff. In one instance, the Sirdar’s staff conveniently lost a letter from the Prince of Wales pressing the interest of a particular officer. From the Royal Family, Queen Victoria’s grandson, Prince Christian Victor and Prince Francis of Teck, the brother of the Duchess of York, later Queen Mary, joined Kitchener’s staff.
Three new gunboats, named Sheikh, Melik and Sudan and manufactured in Britain, were brought up the River Nile in pieces on the Desert Railway and assembled at Atbara for the final voyage upstream. These gunboats were of the most modern design, with screws instead of side paddles, giving Commodore Keppel a total of ten vessels.
Further artillery arrived: an Egyptian battery, two Royal Artillery batteries and more Maxims, including a Maxim section from the Royal Irish Regiment.
A further Egyptian infantry brigade joined the force, with a new British brigade, comprising 1st Northumberland Fusiliers and 1st Lancashire Fusiliers from Cairo, 1st Grenadier Guards from Gibraltar and 2nd Rifle Brigade from Malta.
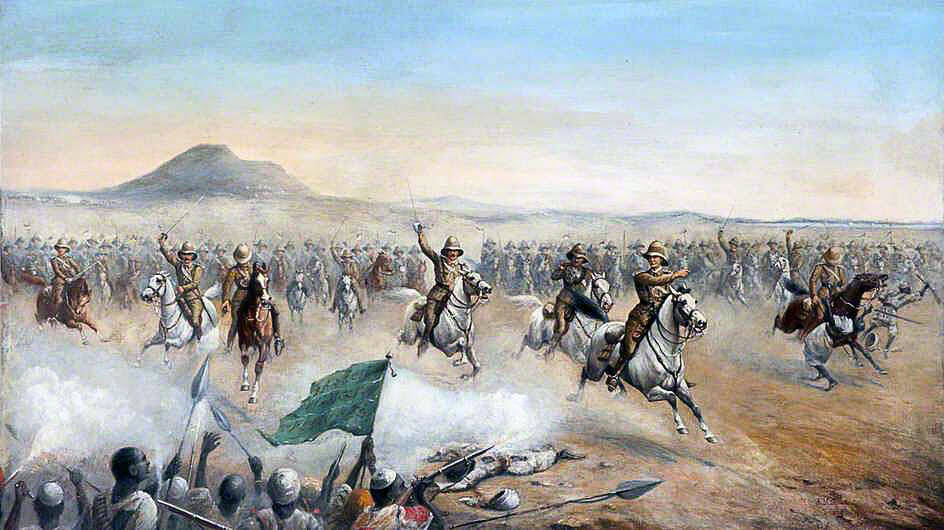
Charge of the 21st Lancers at the Battle of Omdurman on 2nd September 1898 in the Sudanese War: picture by Major John Edward Chapman Mathews
The 21st Lancers at the Battle of Omdurman:
A British cavalry regiment joined the force from Cairo, the 21st Lancers. The 21st Lancers originated from an East India Company cavalry regiment, taken into Crown service after the Indian Mutiny in 1857. The regiment was the junior cavalry regiment and had seen no action since its incorporation into the British army. As a result, it was the subject of considerable mockery in the army, with the comment circulating that the regimental motto was ‘Thou shalt not kill’.
The 21st was a regiment of hussars for some years, being converted to lancers in the previous 18 months. It was short of officers and the orders for the Sudan caused a rush of cavalry officers, from across the army, to obtain attachments to the 21st for the campaign.
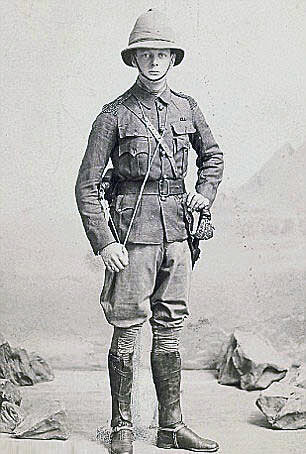
Winston Churchill: Battle of Omdurman on 2nd September 1898 in the Sudanese War
One of these officers was Winston Churchill, a lieutenant in the 4th Hussars. Unfortunately for Churchill, the Sirdar held a strong antipathy towards newspaper correspondents and against Churchill in particular, in the light of Churchill’s reporting of the Malakand Campaign in India and his subsequent book ‘The Malakand Field Force’. Kitchener refused to appoint Churchill to his staff. Despite this decision, Churchill managed to obtain an attachment to the 21st Lancers, through his mother’s influence, intending to combine his military duties with appointment as war correspondent for the Morning Post, thereby further alienating the Sirdar.
Six junior officers from other regiments served attachments with the 21st Lancers in the Omdurman campaign.
On arrival in Egypt, the 21st Lancers were mounted on local Syrian light horses. A further change was that the Sirdar wanted a four-squadron regiment. Determined that his regiment take part in the campaign, the Commanding Officer, Lieutenant Colonel Martin, reorganised his three-squadron regiment into four squadrons.
It was a substantial handicap, for a regiment about to go on active service, to change its mounts, its main weapon, add several new officers and re-organise its sub-units.
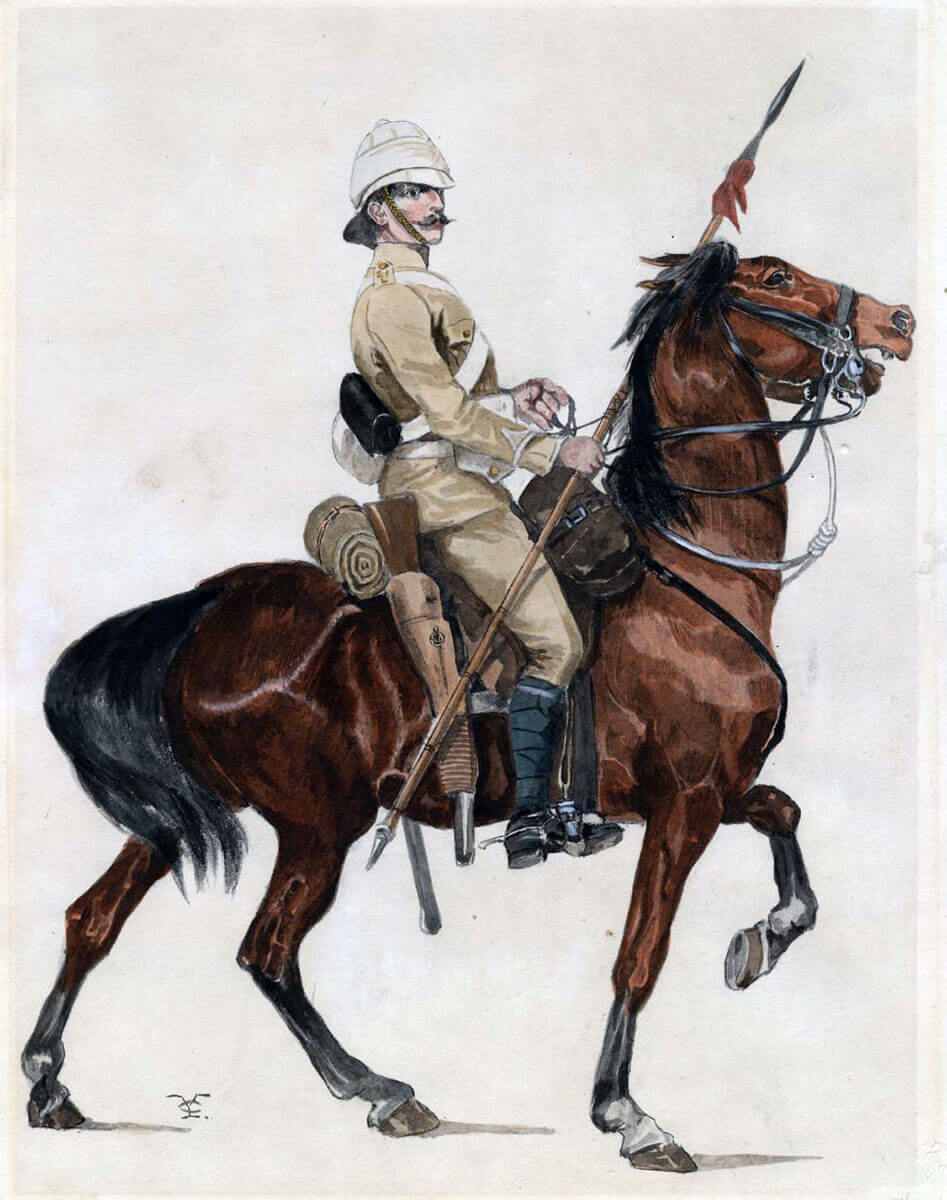
21st Lancers in the Sudan: Battle of Omdurman on 2nd September 1898 in the Sudanese War
Colonel Martin and his officers, and possibly his men, were thirsting to distinguish themselves in the coming campaign and the whole army knew that if there was an opportunity for a charge, the 21st Lancers would take it.
Churchill described the extraordinary appearance of the 21st, when arrayed for the campaign, each trooper hung about with all the items of kit considered necessary in the desert. The soldiers described this appearance as ‘Christmas Tree Order’. The regiment made a curious sound, with pots and pans and other items banging together, as the troopers trotted along.
The troops of the Sirdar’s army at the Battle of Omdurman:
By the time the build-up of troops was complete, the Sirdar’s army comprised the following regiments:
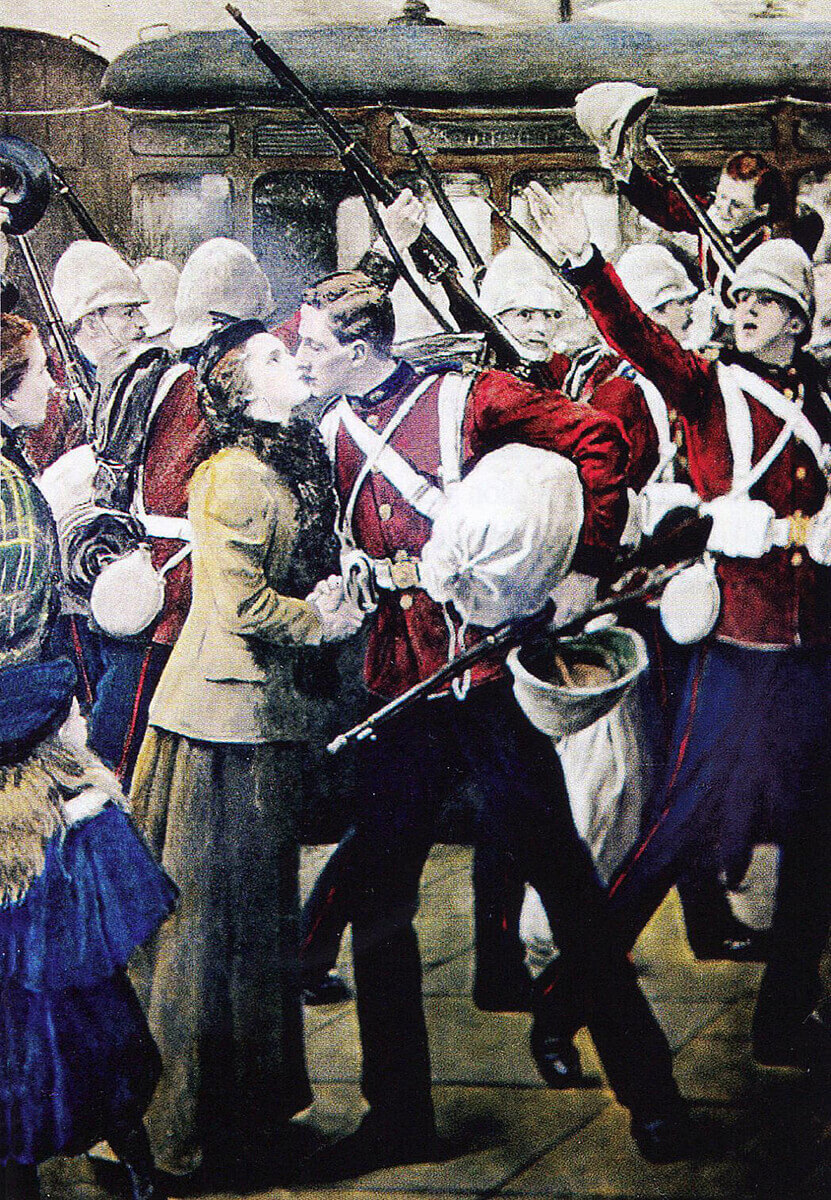
Grenadier Guards leaving London for the Sudan: Battle of Omdurman on 2nd September 1898 in the Sudanese War
British troops at the Battle of Omdurman:
21st Lancers
32nd Field Battery, Royal Artillery
37th Howitzer Battery, Royal Artillery
Two 40-pdrs., Royal Artillery
Infantry Division: commanded by Major General Gatacre
1st Brigade; commanded by Brigadier General Wauchope
1st Battalion Royal Warwickshire Regiment
1st Battalion Lincolnshire Regiment
1st Battalion Seaforth Highlanders
1st Battalion Queen’s Own Cameron Highlanders
6 Maxims
Detachment, Royal Engineers
2nd Brigade; commanded by Brigadier General Lyttelton
1st Battalion Grenadier Guards
1st Battalion Northumberland Fusiliers
2nd Battalion Lancashire Fusiliers
2nd Battalion Rifle Brigade
4 Maxims
Detachment, Royal Engineers
Seaforth Highlanders on exercise in Britain: Battle of Omdurman on 2nd September 1898 in the Sudanese War
Egyptian troops at the Battle of Omdurman:
9 Squadrons, Cavalry
1 Battery, Horse Artillery
4 Field batteries
10 Maxims
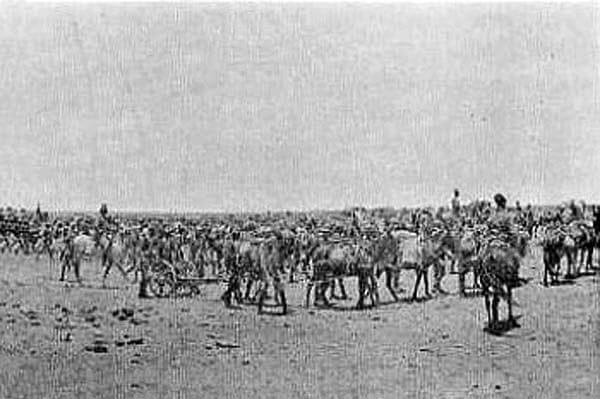
8 Companies, Camel Corps
Egyptian Camel Corps: Battle of Omdurman on 2nd September 1898 in the Sudanese War: picture by Lady Butler
Second Division; commanded by Major General Hunter
1st Brigade; commanded by Colonel Macdonald
2nd Egyptian Battalion
9th, 10th, and 11th Sudanese Battalions (IX, X and XI)
2nd Brigade: commanded by Colonel Maxwell
8th Egyptian Battalion
12th, 13th, and 14th Sudanese Battalions (XII, XIII and XIV)
3rd Brigade; commanded by Colonel Lewis
3rd, 4th, 7th, and 15th Egyptian Battalions
4th Brigade: commanded by Colonel Collinson
1st, 5th, 17th, and 18th Egyptian Battalions.
Camel Transport
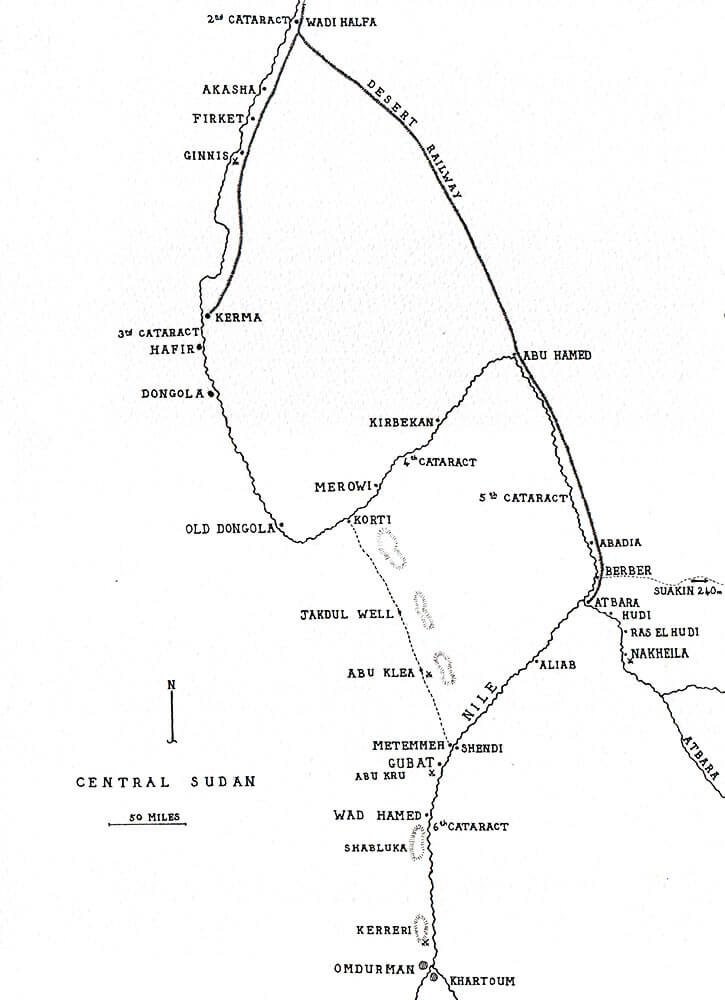
Map of the Sudan: Battle of Omdurman on 2nd September 1898 in the Sudanese War: map by John Fawkes
Account of the Battle of Omdurman:
Even before the Sirdar’s full force assembled in August 1898, the infantry was moving south, up the River Nile to Wad Hamed, the new forward base for the final advance on Omdurman, fifty-eight miles from the city.
The British infantry, some of the cavalry, the staff, guns and stores were moved to Wad Hamed in the steamers, while the rest of the cavalry, the Egyptian division and the war correspondents were required to march up the left or western bank of the River Nile.
Grenadier Guards landing before the Battle of Omdurman on 2nd September 1898 in the Sudanese War
At Wad Hamed, the Sirdar’s army built a camp, straggling along the left bank of the River Nile, with the British infantry at the southern end and the cavalry at the northern.
The Sirdar’s army set off from the Wad Hamed camp on 28th August 1895, initially marching into the desert to circumvent the Shabluka Hills, before returning to the River Nile bank, and marching on to the Kerreri Hills.
The march continued over the next few days, while the cavalry caught up the infantry, having stayed an extra day in the Wad Hamed camp.
On 29th August 1898, the gunboat Zafir developed a leak and sank in the middle of the River Nile, with no loss of life.
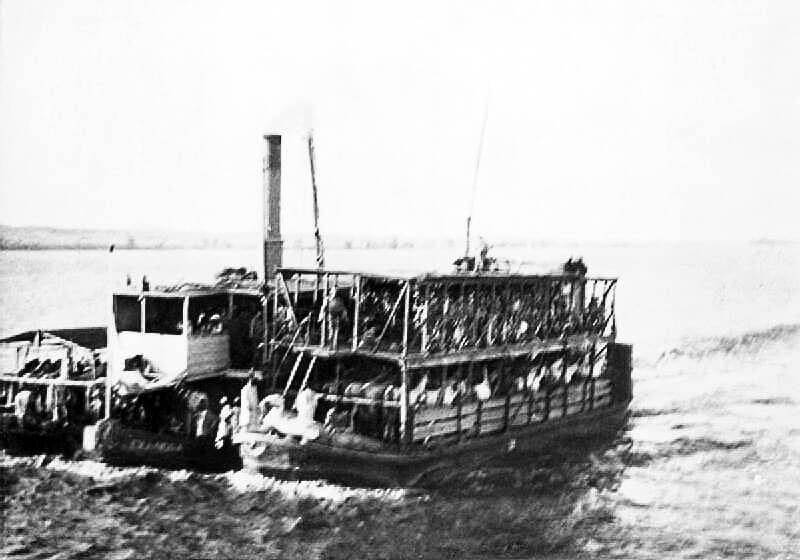
River Nile steamboat: Battle of Omdurman on 2nd September 1898 in the Sudanese War
At around the same time disaster struck the Khalifa’s flotilla. The Khalifa formed the idea of laying mines in the River Nile. An Egyptian engineer was brought from prison in Omdurman and required to prepare a mine, comprising a large boiler, made watertight and filled with gunpowder. The charge was to be detonated by a pistol built into the boiler, fired remotely with a string. In the process of planting the mine, the string was accidentally pulled, showing the efficiency of the system, by blowing up the riverboat that was carrying the mine, with its crew and the Egyptian engineer.
The Khalifa ordered a second mine prepared. This one was laid without mishap, because the Emir put in charge took the precaution of flooding the mine before working with it. The Emir was showered with honours by the grateful Khalifa.
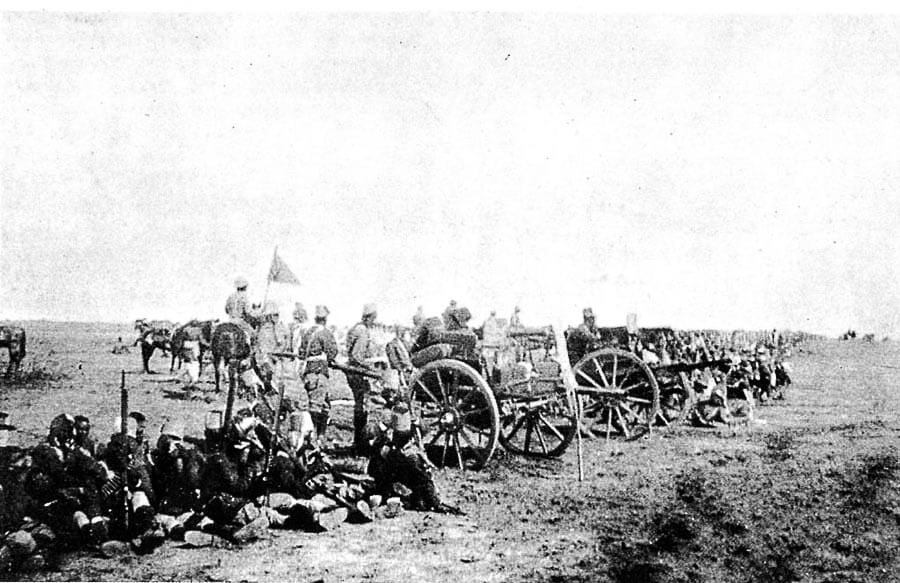
Artillery on the march in the Sudan: Battle of Omdurman on 2nd September 1898 in the Sudanese War
31st August 1898:
On 31st August, the Sirdar’s army encamped on the west bank of the River Nile, to the north of the Kerreri Hills. Everyone in the army was aware that battle was imminent, in view of the proximity of Omdurman, ten miles to the south.
1st September 1898:
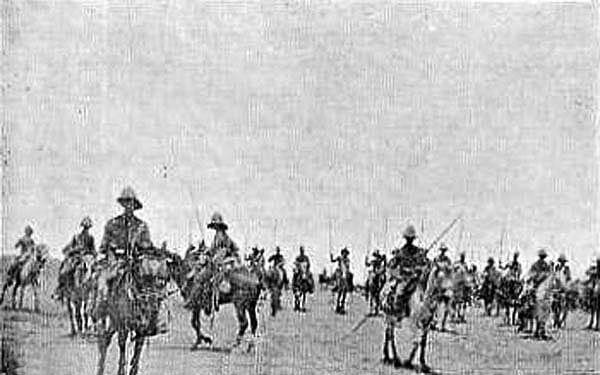
On 1st September, the cavalry moved out to conduct a reconnaissance. The 21st Lancers advanced up the river bank, while the Egyptian cavalry, under Lieutenant Colonel Broadwood, followed a wide curving route into the desert, around the western end of the Kerreri Hills. In the centre rode a column of the Camel Corps and the Horse Artillery. The Sirdar’s gunboats moved up the River Nile in conformity with the advance of the cavalry. The cavalry cleared the Kerreri Hills by 7am.
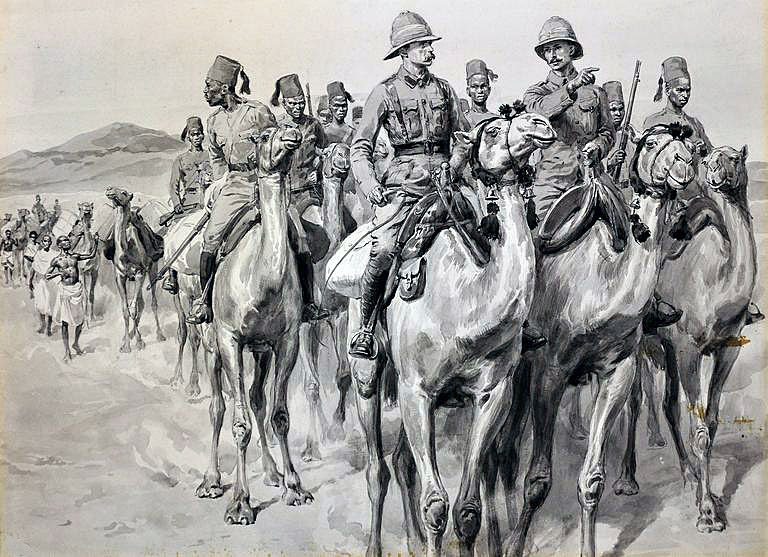
Camel Corps: Battle of Omdurman on 2nd September 1898 in the Sudanese War: picture by Frank Dadds
Once past the Kerreri Hills, the 21st Lancers could see Omdurman in the distance, on the west bank of the River Nile and the ruins of the city of Khartoum in the angle of the confluence of the two great rivers, the Blue Nile and the White Nile.
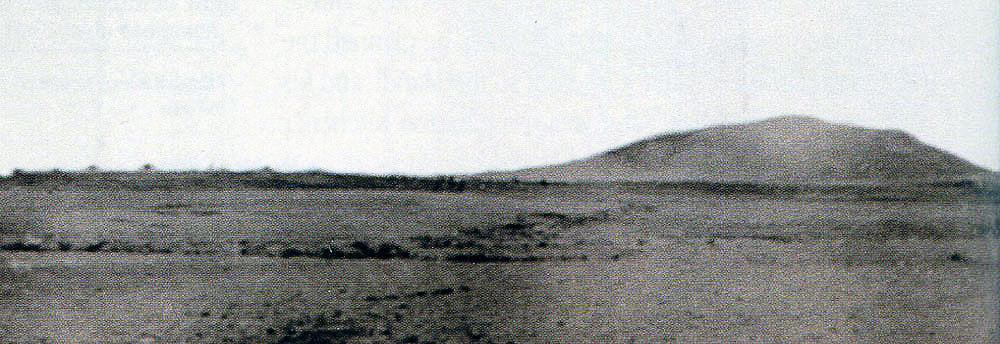
Nearer, about three miles away, on the west bank of the River Nile, rose the Jebel Surgham, a black hill above a ridge.
Immediately in front of the advancing horsemen lay a wide rolling sandy plain, bounded on three sides by a line of rocky hills and ridges, and on the fourth side by the River Nile. The plain was covered with patches of scrubby grass and an occasional bush. This plain would be the scene for the two main Dervish attacks during the Battle of Omdurman. Along the river bank was a straggling mud village, El Egeiga. The whole area was empty of people and animals.
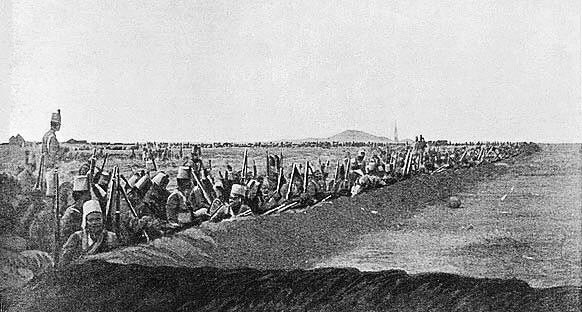
11th Sudanese in the trench at the Battle of Omdurman on 2nd September 1898 in the Sudanese War
The cavalry moved across the plain and climbed the ridge of the Jebel Surgham, from where they looked south towards Omdurman.
About four miles away to the half right, was what appeared to be a long zeriba, or thorn fence, with men behind it.
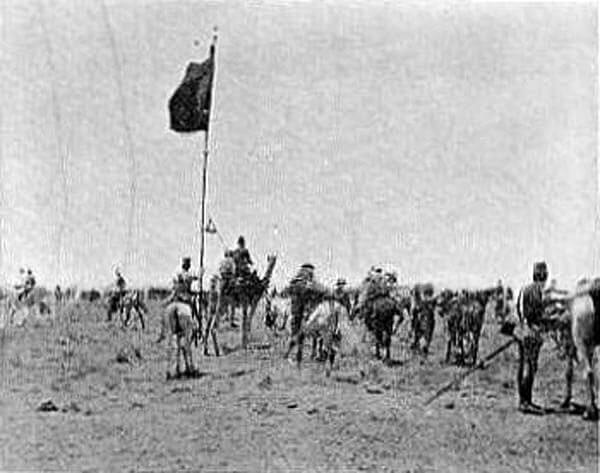
Advancing Dervish line at the beginning of the Battle of Omdurman on 2nd September 1898 in the Sudanese War
At about 11am, as the Sirdar’s cavalry watched the zeriba, it began to move towards them and the cavalrymen realised that, what they had taken as a fence, was in fact a four-mile-long wall of armed warriors, now hurrying towards them.
This advancing army was topped by a sea of flags. Horsemen rode along the line. A deep murmur of thousands of voices was to be heard, with horns and drums playing. There appeared to be around 55,000 men, moving in five great divisions.
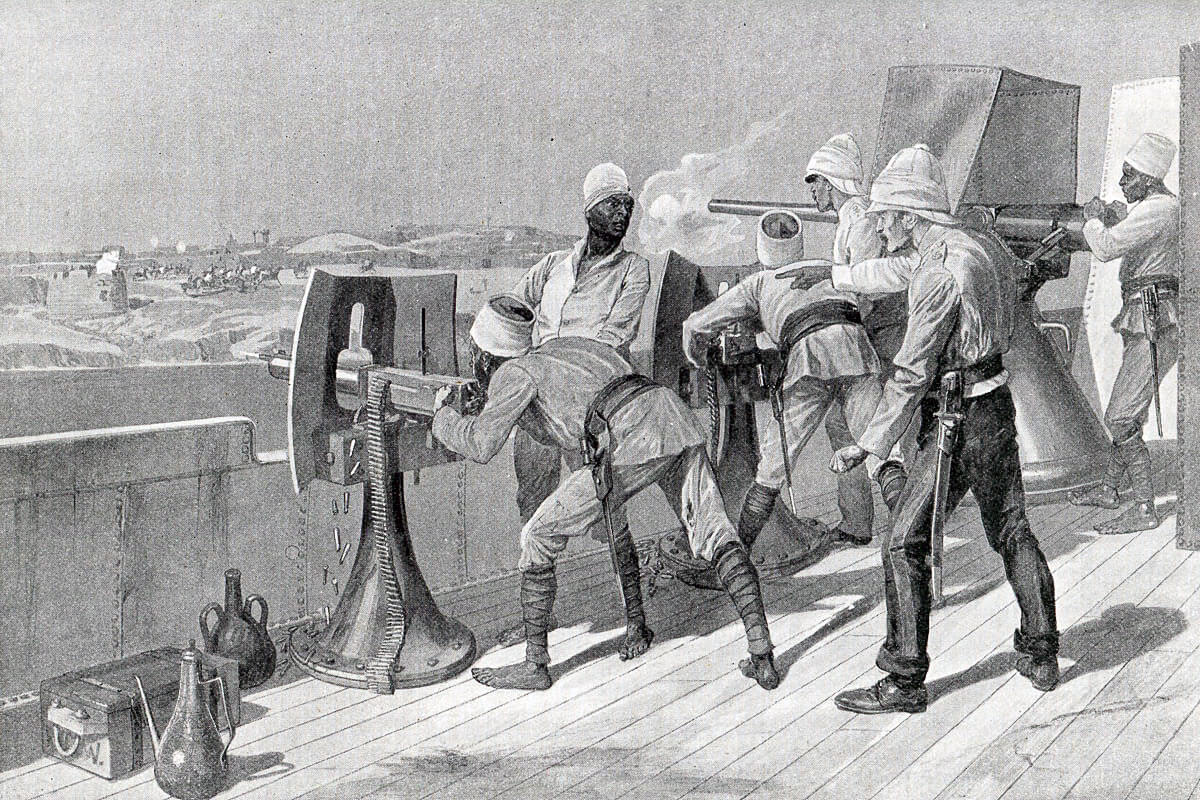
River Nile gunboat in action: Battle of Omdurman on 2nd September 1898 in the Sudanese War
At about the same time, the Sirdar’s gunboats moved upstream towards Omdurman and engaged the Dervish batteries, positioned in forts on each bank of the River Nile. There were some 40 guns in these forts, but they were no match for the weapons and crews of the gunboats and were destroyed in turn, the Dervish gunners taking refuge in the city of Omdurman. Finally, the gunboats turned their fire on the walls of the city, making several breaches.
12th Sudanese in the trench at the Battle of Omdurman on 2nd September 1898 in the Sudanese War
While this river operation was being conducted, a force of Arab irregulars loyal to Turkish rule and commanded by a British officer, Major Stuart Wortley, moved up the east bank of the River Nile, storming the forts and villages held by the Dervishes. The final attack took place opposite Omdurman and enabled the gunboats to land the battery of howitzers. These guns opened fire on Omdurman, destroying buildings and damaging the dome on the ornate tomb of the Mahdi.
While the riverboats were in action, in the face of the Dervish advance, the Sirdar’s cavalry began to fall back towards the main army. They were pursued by parties of Dervish horsemen, kept at a distance by dismounted rifle fire.
The main body of the Sirdar’s army, comprising the infantry, artillery and supplies, was halted along the River Nile, centred on the village of El Egeiga and building a long zeriba, a thorn fence, and a system of shallow trenches, parallel to the river.
Inside the zeriba: Battle of Omdurman on 2nd September 1898 in the Sudanese War
Reports came in from the cavalry, describing the Dervish force that was advancing, with the apparent intention of launching an immediate attack on the Sirdar’s force behind its zeriba. The troops were ordered to stand to and man their positions at 2pm.
However, at 1.45pm, the Dervish army suddenly stopped. They fired their rifles in the air and gave a great shout. They then settled down in the desert and prepared to sleep.
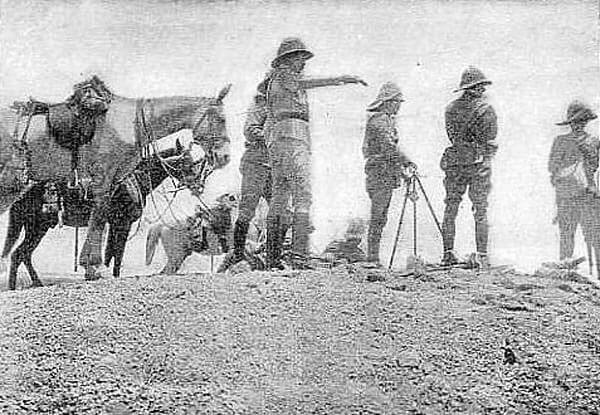
Watching the advancing Dervish line at the beginning of the Battle of Omdurman on 2nd September 1898 in the Sudanese War
The Sirdar’s cavalry watched the Dervish line until dusk and then returned to the encampment. It was assumed that the Dervishes would attack during the night and dispositions were made on that basis. The gunboats returned from their bombardment of Omdurman and were moored at each end of the long encampment, to provide fire support for the vulnerable flanks.
During the night, the gunboats played their powerful searchlights over the desert, producing an eerie effect. Churchill relates that the beams of light caused the Khalifa to take down his tent, as he feared the lights were specifically looking for him.
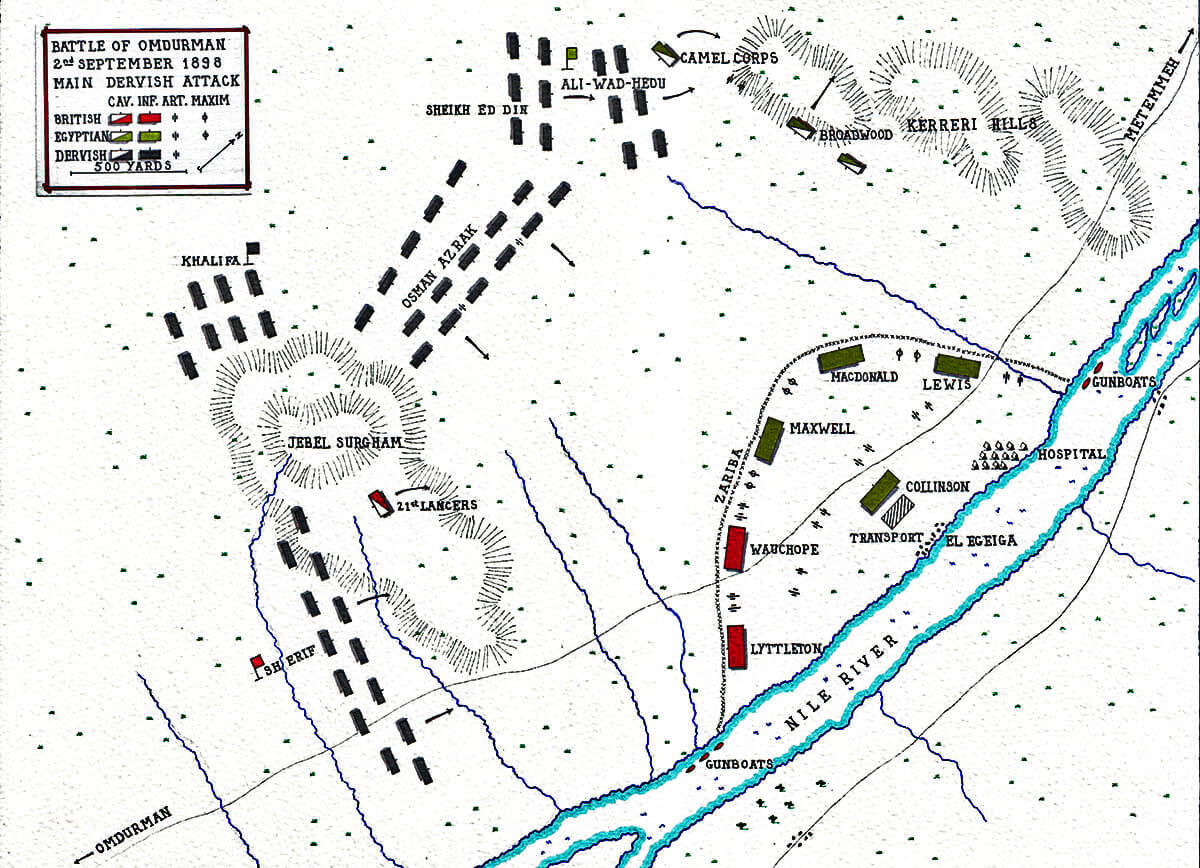
Map showing the Dervish attack at the Battle of Omdurman on 2nd September 1898: map by John Fawkes
2nd September 1898:
Reveille for the Sirdar’s army was at 4.30am. However, the cavalry were on the move before that. An Egyptian squadron, commanded by Captain Baring of the 10th Hussars, left the camp before dawn to watch the Dervish line.
The 21st Lancers rode out of the southern end of the zeriba at dawn, preceded by several officers’ patrols, heading for the Surgham ridge, which they reached at 5.45am.
The expectation was that, having made no attack during the night, the Dervish army would have withdrawn. However, there it was, where the 21st had seen it settle down for the night on the previous afternoon.
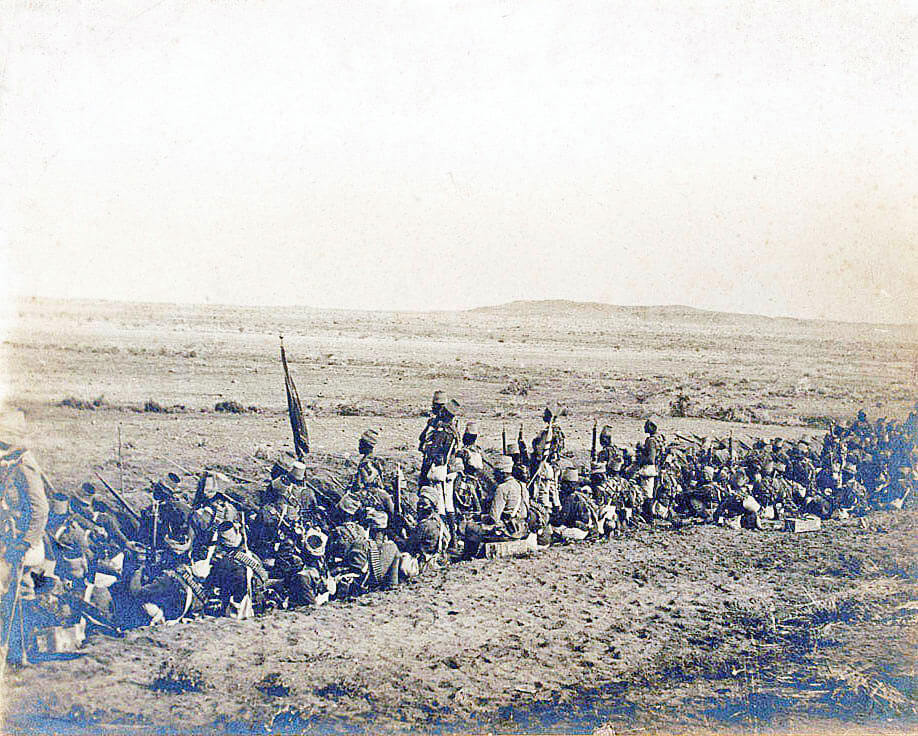
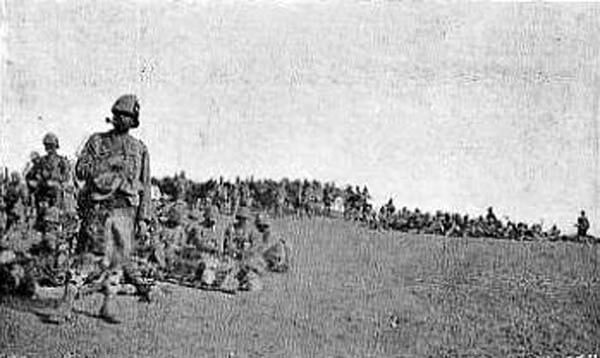
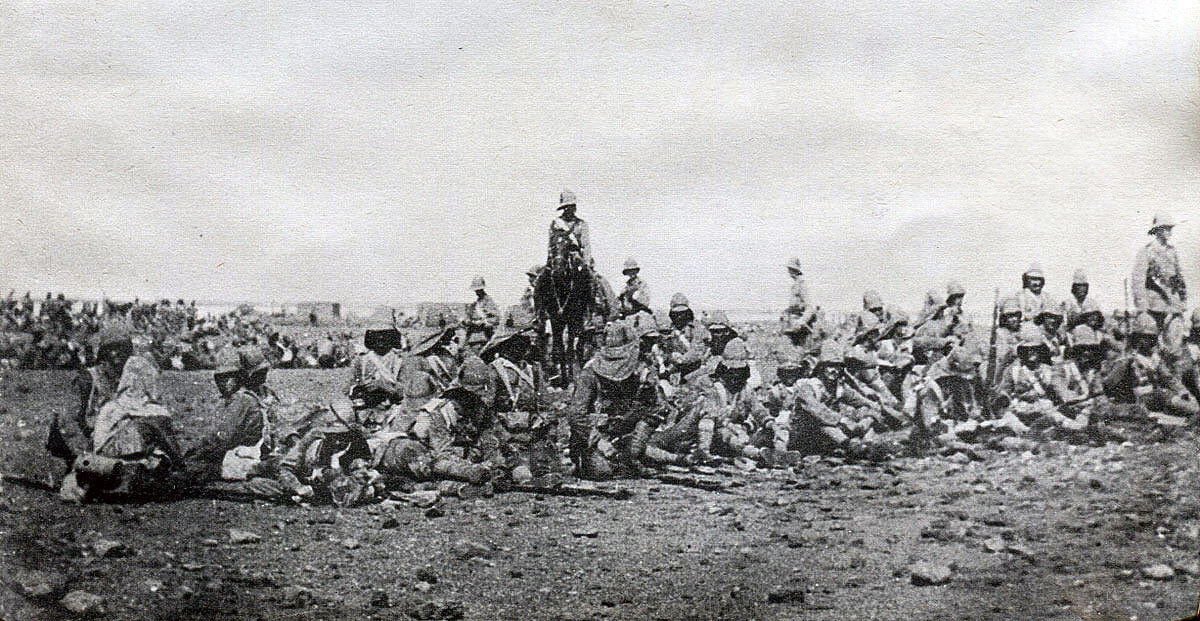
Sudanese troops at the Battle of Omdurman on 2nd September 1898 in the Sudanese War
Five minutes later, at 5.50am, the Dervish army gave a great cheer and its four-mile-long line began to move in the direction of the Sirdar’s camp.
The cavalry on the Jebel Surgham and its surrounding ridges could see the full Dervish line, but it was not yet in sight of the infantry in the zeriba.
The Sirdar’s infantry and artillery took up battle positions in a long crescent-shaped line, each end on the river, with the centre bulging out into the plain. The steamboats remained moored at either end of the line, as they had been overnight, to provide supporting fire to the flank battalions. The Egyptian cavalry, the Camel Corps and the Horse Artillery moved out into the Kerreri Hills, to the north of the line. The 21st Lancers continued in their position, on and around the Jebel Surgham to the south.
Maxim guns positioned between Maxwell’s Egyptian and Sudanese brigade and a British battalion at the Battle of Omdurman on 2nd September 1898 in the Sudanese War
The Dervish army came on at a fast walk; the left, led by the bright green flag of Ali-Wad-Hedu, heading for the Jebel Kerreri; the centre, marching into the wide plain and the right, swarming up the ridge around the eastern end of the Jebel Surgham, led by the red flag of Sherif and carrying hundreds of apparently blank white flags, each of which was in fact embroidered with texts from the Koran.
A few guns accompanied the Dervish centre and were the first weapons to open fire on the Sirdar’s force, throwing up clouds of sand short of the line of troops. The retaliation was immediate; a barrage from four of the Sirdar’s batteries at a range of 3,000 yards (less than 2 miles).
On the Dervish right, the division led by the red flag of Sherif, with the swarm of white flags, advanced over the Jebel Surgham ridge, to be met by fire from the 32nd Field Battery and the guns of the boats moored at the southern end of the line. The Dervishes fired their rifles in reply and hurried on down the reverse face of the ridge, towards the British battalions on the left of the Sirdar’s line.
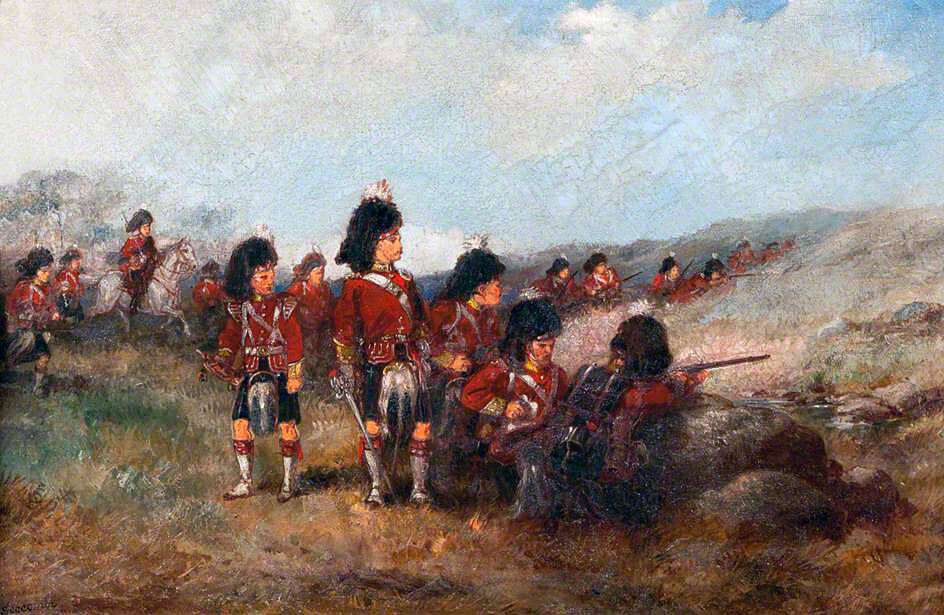
Highland troops: Battle of Omdurman on 2nd September 1898 in the Sudanese War
The 21st Lancers gathered in its patrols from the ridge and returned to the zeriba, ‘clearing the front’, to enable the infantry and maxims to open fire without fear of hitting their own cavalry.
The Khalifa’s strategy for the battle now became clear. The main attacking force of Osman Azrak, numbering around 15,000 men, was delivering the frontal assault on the Sirdar’s zeriba and trench line, hurrying across the plain between the Jebel Surgham and the Kerreri Hills.
While this attack was in progress, the Khalifa and his trusted deputy, Yakub, watched, with their 15,000 troops, from behind the Jebel Surgham, intending, if the frontal assault by Osman Azrak was successful, to emerge from their cover and join it. If unsuccessful, the Khalifa could withdraw to Omdurman, with his most reliable and important force intact, to fight again or carry out some other stratagem.
Osman Sheikh ed Din led the left of the attacking force, against the northern end of the zeriba, where the weakest Egyptian battalions were stationed.
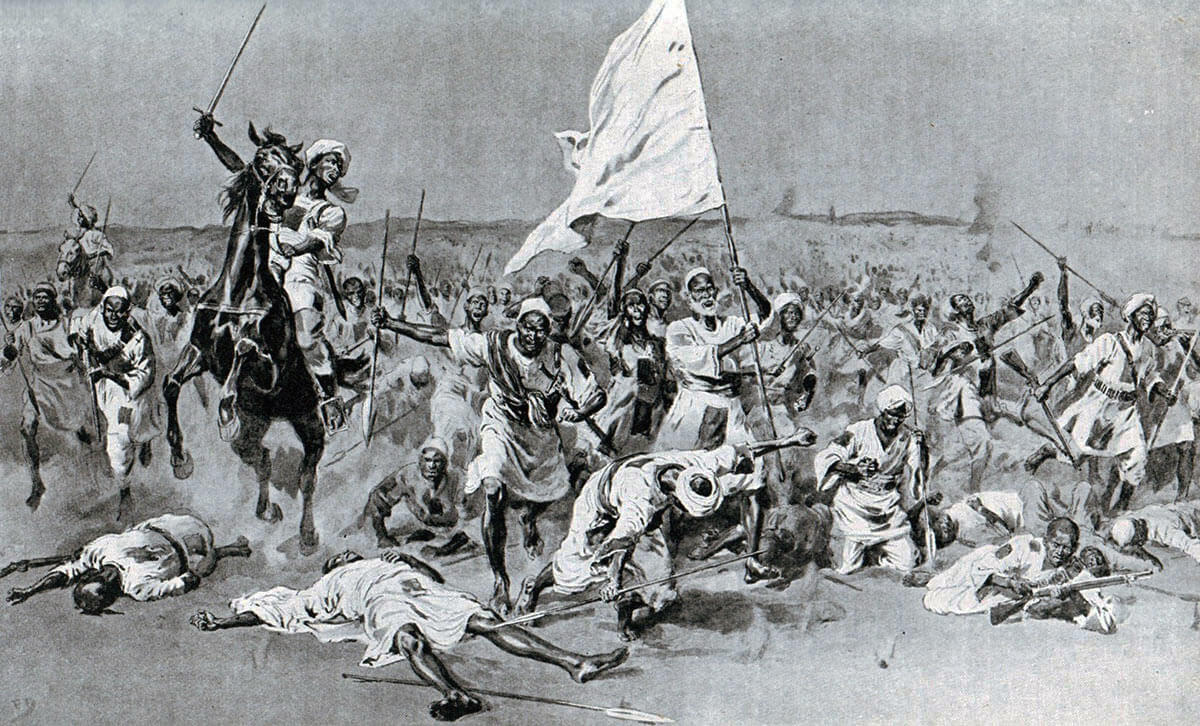
First Dervish attack at the Battle of Omdurman on 2nd September 1898 in the Sudanese War: picture by Frank Dadd
Ali-Wad-Helu’s men, with their bright green flag, headed for the Kerreri Hills, with instructions to await the outcome of the fight in the plain and, if the Sirdar’s army advanced towards Omdurman, to emerge from the Kerreri Hills and attack the Sirdar’s army in the rear.
The direct hand to hand combat began in the Kerreri Hills, where Broadwood was positioned, with the Egyptian cavalry on the western end of the hills, the Camel Corps next in the line and the Horse Artillery at the eastern end.
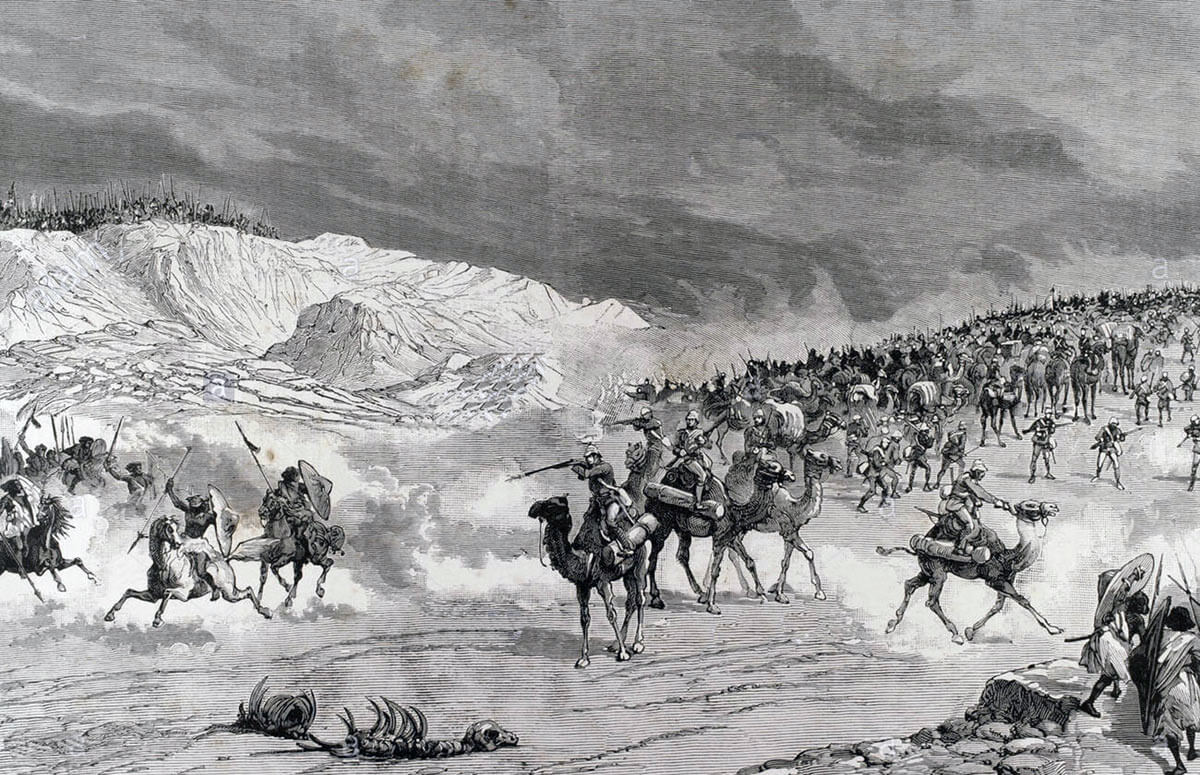
Camel Corps on the Kerreri Hills at the Battle of Omdurman on 2nd September 1898 in the Sudanese War
The number of Dervishes attacking the Kerreri Hills and the speed of their advance, made it necessary for the mounted Egyptian troops to retreat with some urgency. The Camel Corps suffered particular difficulty, as camels are unable to move swiftly across rocky hills, with their soft padded feet. The Camel Corps reached the northern end of the zeriba and were saved from the pursuing Dervishes by a barrage of gunfire from the gunboats moored at that end of the camp.
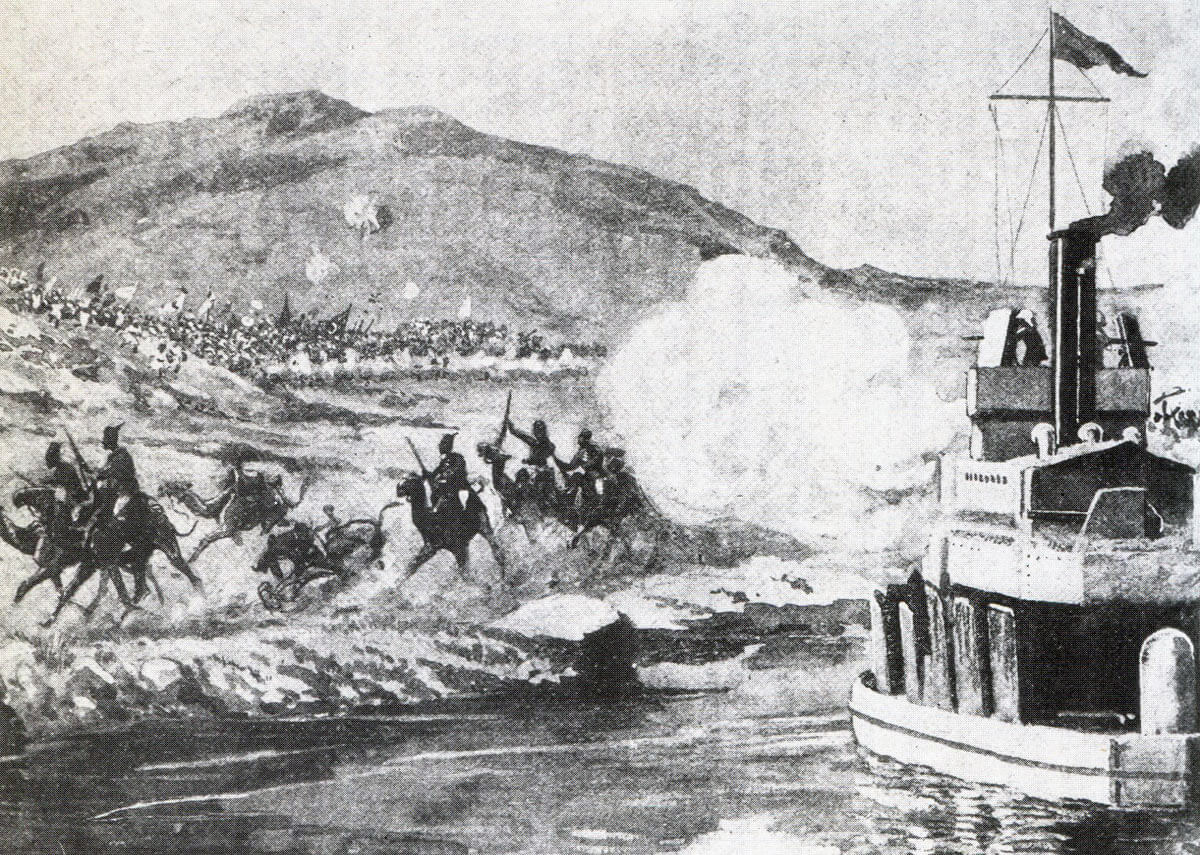
River Nile gunboat firing in support of the Camel Corps at the Battle of Omdurman on 2nd September 1898 in the Sudanese War
The Dervishes came up so fast on the Horse Artillery that two guns had to be left behind, when horses were shot and gun teams became intertwined. The lost guns were recovered later in the battle. While the Camel Corps moved east to the river, Broadwood’s cavalry and the horse artillery continued north.
The Sirdar sent Broadwood an order for the cavalry to move into the zeriba, but Broadwood chose to continue the withdrawal of the cavalry and horse artillery to the north of the Kerreri Hills, thereby drawing Ali-Wad-Helu’s menacing force away from the vulnerable northern end of the zeriba. As his cavalry withdrew north, squadrons, in turn, halted and gave dismounted fire at the pursuing Dervishes.
Steamers firing in support of the Sirdar’s army at 6.30am on 2nd September 1897: picture by HCS Eppings-Wright
In this way Broadwood lured Ali-Wad-Helu’s force three miles away to the north, while the main Dervish attack went in, thereby performing a valuable service to the Sirdar.
The two gunboats, after covering the Camel Corps’ escape into the zeriba, sailed north up the River Nile and fired in support of Broadwood, until the Dervishes withdrew west into the desert, out of range; whereupon Broadwood returned to the main camp, with the gunboats resuming their original positions.
The Main Dervish Attack at the Battle of Omdurman:
In the central plain, the division led by the white flags came down from the Jebel Surgham ridge and joined the main body advancing on the zeriba, making an attacking Dervish force of around 20,000 warriors.
Highland troops in the Battle of Omdurman on 2nd September 1898 in the Sudanese War
As the range shortened, infantry small arms fire all along the British and Egyptian line joined the artillery and Maxim barrage, inflicting heavy casualties on the advancing Dervishes.
Dervish losses were particularly heavy in the attack against the two British brigades, armed with magazine Lee-Metford rifles and supported by field artillery, Maxims and the gunboats. The Dervish attack here came to a halt 800 yards from the zeriba, with the Dervishes lying down in the sand and, where armed with rifles, returning the fire.
The Dervish attack against the Sudanese and Egyptian battalions managed to get within 300 yards of the line, before being halted. One tribesman, carrying a flag, rushed on to within 150 yards of the line, before being shot down. The leader, Osman Azrak, rode on until he was shot.
The attack, all along the line, was at a halt by 8am, and the Dervish soldiers melting away back across the plain.
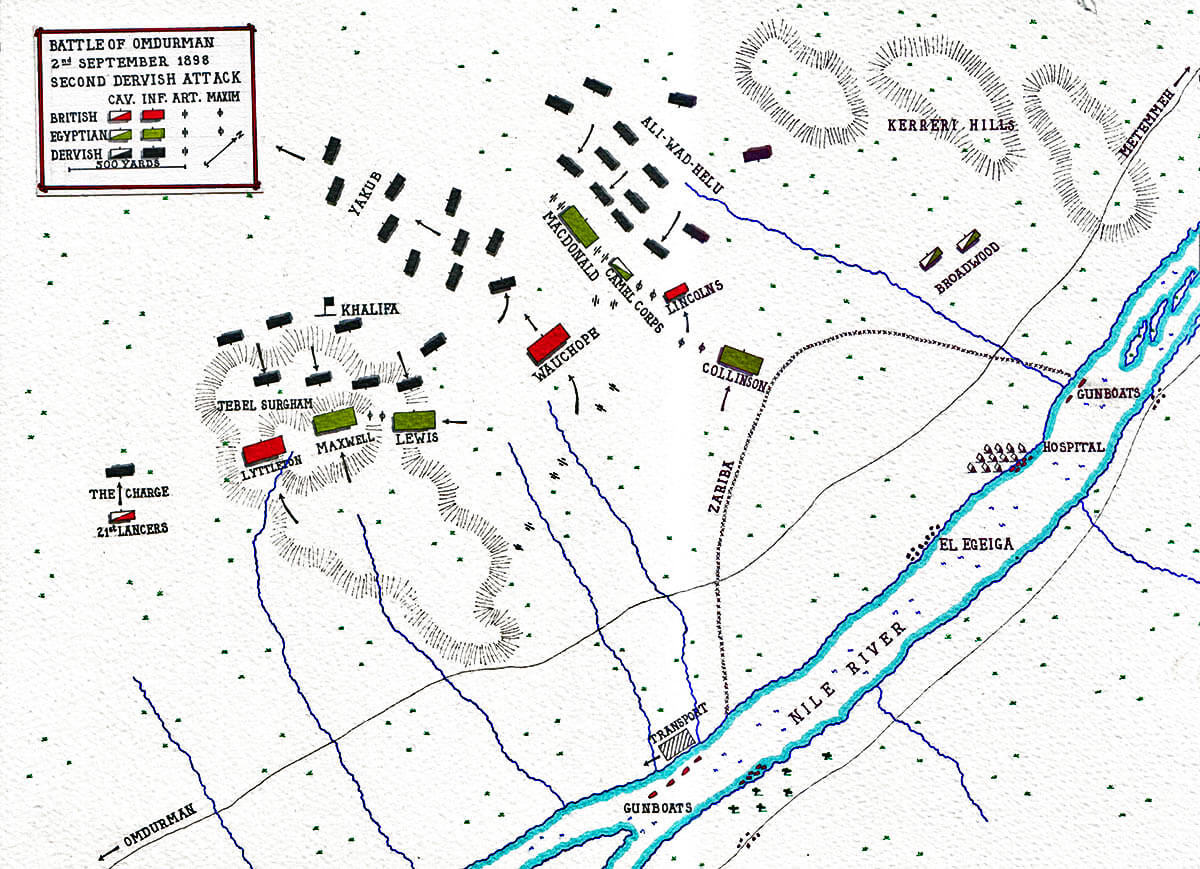
Map showing the second Dervish attack at the Battle of Omdurman on 2nd September 1898: map by John Fawkes
The Second Phase of the Battle at the Battle of Omdurman:
The Sirdar, anxious to prevent the Dervish army from escaping back into Omdurman and continuing their resistance in the streets of the city, resolved to march his infantry and guns around the eastern side of the Jebel Surgham, thereby cutting off the surviving sections of the Dervish army from the city, and compelling them to escape west into the desert.
First, there had to be a reconnaissance to see what was happening behind the Jebel Surgham, where the Khalifa’s choicest warriors, under the ‘Black Flag’, were awaiting the outcome of the main frontal attack. The 21st Lancers were given this task.
The 21st moved out from the southern end of the zeriba, preceded by several patrols and advanced to the crest of the ridge.
The Sirdar gesturing during the Battle of Omdurman on 2nd September 1898 in the Sudanese War
From there, the signals officer, from an accompanying party of Royal Engineers, heliographed to the Sirdar that the ridge was unoccupied and that a column of several thousand Dervishes could be seen making their way along the road towards Omdurman. The Dervishes with the Black Flag behind the Jebel Surgham could not be seen.
The Sirdar replied to the 21st, ‘Advance and clear the left flank and use every effort to prevent the enemy re-entering Omdurman’. It is clear that Lieutenant Colonel Martin, the commanding officer of the 21st Lancers, took this as a mandate to deliver an attack at any worthwhile target.
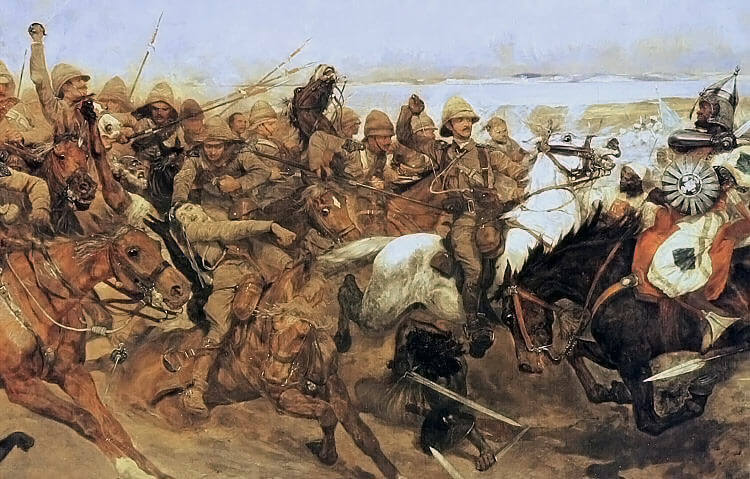
Charge of the 21st Lancers at the Battle of Omdurman on 2nd September 1898 in the Sudanese War: picture by E. Matthew Hale
The 21st Lancers prepared to move, in compliance with this order, but before doing so two patrols were sent out; one directly towards Omdurman and the second, under Lieutenant Robert Grenfell of the 12th Lancers, to see what was happening on the far side of the Jebel Surgham.
Colonel Broadwood: Battle of Omdurman on 2nd September 1898 in the Sudanese War
Grenfell, on his return, reported that there was a force of around 1,000 Dervishes drawn up in a shallow khor or hollow, about quarter of a mile away, towards the Omdurman road to the south of the Jebel Surgham. Martin decided to attack this force. By the time the 21st reached the khor, the number of Dervishes was around 2,500.
There are two explanations as to how the 21st came to charge such a large force. One explanation is that Grenfell’s patrol saw a group of Dervishes standing on the lip of the khor and missed the mass hiding in ambush in the khor itself. The second is the description given by Churchill. It is clear from the amount of detail Churchill gives in the ‘River War’, that he acquired a substantial amount of information, presumably from prisoners after the battle, of the actions and intentions of the Khalifa and his senior commanders during the battle. Also, Churchill took part in the charge as a troop commander and had his own eye witness account to draw on.
Churchill states that the departure of the 21st from the Sirdar’s zeriba, at the end of the first Dervish attack and its progress towards the Jebel Surgham ridge, were reported to the Khalifa. The Khalifa had posted a force of 700 Hadendoa tribesmen between the Jebel Surgham and the Omdurman road, to cover any retreat to the city.
With the report of the advance of the 21st Lancers, the Khalifa ordered four groups, each of 500 tribesmen from the Black Flag force, commanded by the Emir Ibrahim, to re-enforce the Hadendoa contingent.
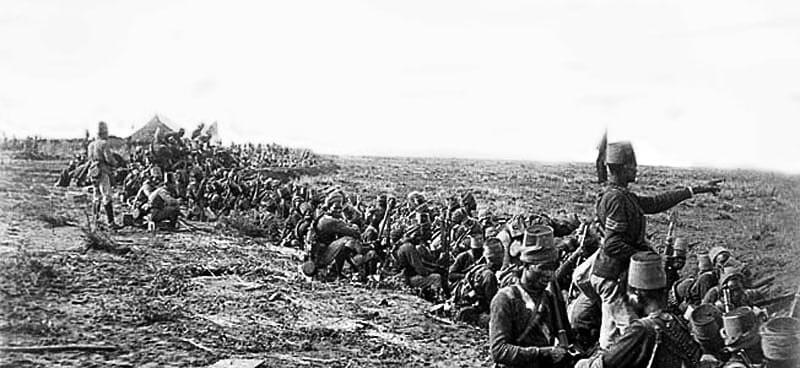
Grenadier Guards between the two attacks in the Battle of Omdurman on 2nd September 1898 in the Sudanese War
The re-enforcement of the group in the khor took place after Grenfell made his observation and before the main body of the 21st Lancers under Martin came up to make its attack; so that, in the interval between Grenfell’s observation and the charge, the number of Dervishes in the khor rose from around 700 to around 2,700.
A difficulty in resolving what occurred is that Grenfell was killed in the charge and unable to provide any explanation after the battle.
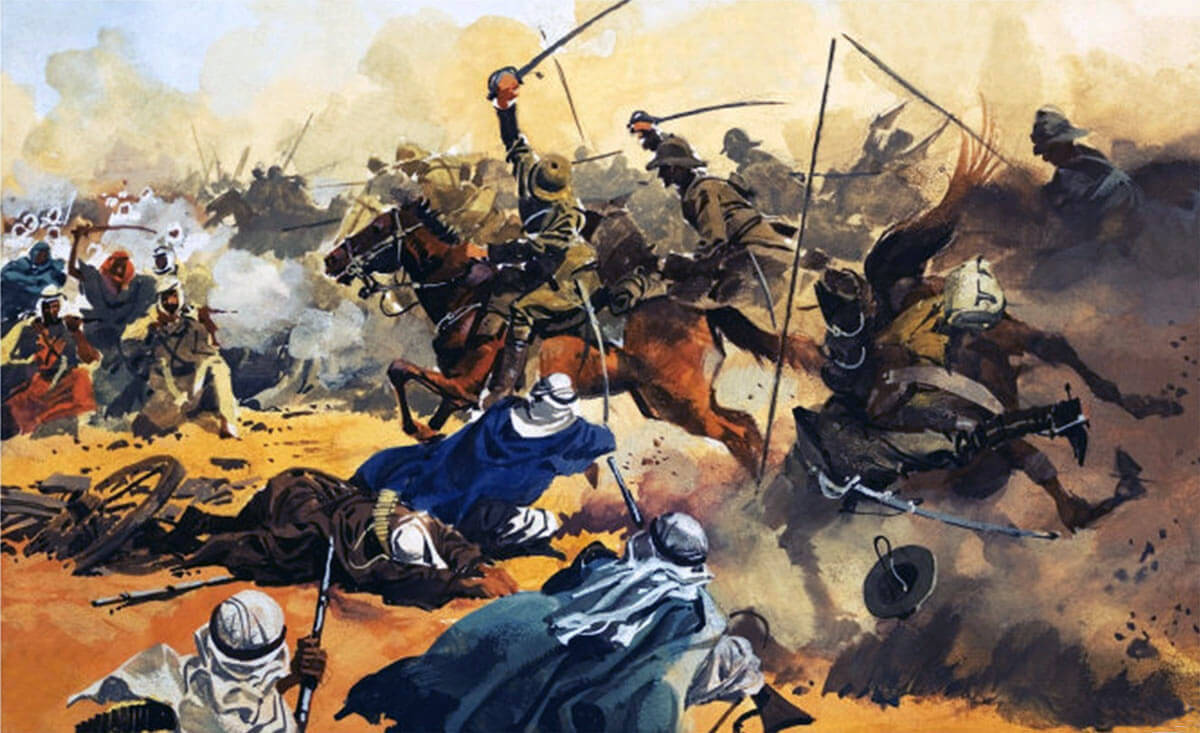
Charge of the 21st Lancers at the Battle of Omdurman on 2nd September 1898 in the Sudanese War: picture by George Delville Rowlandson
The comment is made that a cavalry officer with greater experience of fighting the Dervishes, such as Broadwood, would have anticipated some sort of ambush, have proceeded with greater caution and would have been more inclined to rely upon dismounted small arms fire than a mounted charge.
The 21st Lancers and their commanding officer were smarting under the taunts of the army at the regiment’s inexperience and lack of military honours and were looking for the opportunity to deliver a classic cavalry charge. Circumstances enabled them to do exactly that and to produce the iconic act of military glamour for the late Victorian era, comparable to the Light Brigade charge at the Battle of Balaclava in 1854. The presence of Winston Churchill in the 21st Lancers would cause the charge to become part of the iconography of his life and to be graphically recorded in his books. There was no prospect of simple military prudence causing Martin to reject such an opportunity.
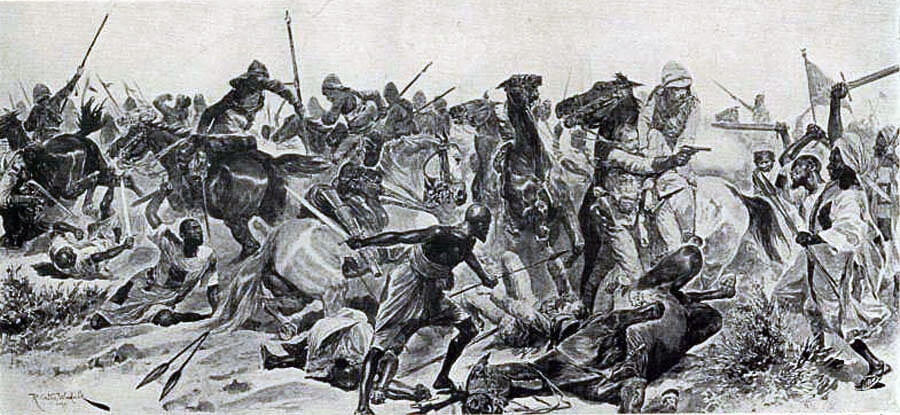
Charge of the 21st Lancers at the Battle of Omdurman on 2nd September 1898 in the Sudanese War: picture by Richard Caton Woodville
The Charge of the 21st Lancers at the Battle of Omdurman:
After sending the four Dervish regiments to the khor, Churchill says that the Khalifa followed with a small escort and was within 500 yards, watching the charge when it took place.
The 21st Lancers advanced at the walk, in a mass, towards the spot indicated by Grenfell. In their path was a party of around 100 Dervishes. The 21st wheeled to pass them on the left. The Dervishes dropped to their knees and opened rifle fire on the 21st, inflicting several casualties. Churchill says that Martin could see what was behind this skirmishing line. Martin ordered a wheel into line to the right and the regiment immediately broke into a charge at the gallop.
The Dervish skirmishing line was 250 yards away, but as the 21st covered half the distance, a wide khor opened in front of them and out of it leaped a dense mass of sword and spear wielding Dervishes, with horsemen and flags among them.

Charge of the 21st Lancers at the Battle of Omdurman on 2nd September 1898 in the Sudanese War: picture by William Barnes Wollen
Churchill’s description places the khor beyond the line of skirmishers, who he says were swept by the charge into the khor. The line of Dervishes in the khor was shorter than the line of charging British cavalry and about twelve deep. They appeared to be in no way intimidated by the charging cavalrymen.
The two forces met in a collision that Churchill describes as ‘prodigious’. The officers and troopers of the 21st galloped down into the khor, spearing the Dervishes, who cut at the horses and riders, attempting to bring them down. Those cavalrymen who fell from their horses were cut to pieces, with slashes from the heavy razor-sharp Dervish swords, or speared.
The cavalrymen, other than those brought down, rode up the far side of the khor and galloped on, rallying on the rest of the regiment, 200 yards beyond the khor.
Charge of the 21st Lancers at the Battle of Omdurman on 2nd September 1898 in the Sudanese War: picture by Ferdinando Tacconi
In several incidents, lone horsemen fought their way through the Dervishes, with officers and soldiers returning to assist comrades in difficulties. Private Byrne attacked several Dervishes surrounding the dismounted Lieutenant Molyneux of the Royal Horse Guards.
Lieutenant de Montmorency returned to find his missing troop sergeant and was unhorsed while trying to retrieve the body. Captain Kenna and Corporal Swarbrick then rescued de Montmorency.
Charge of the 21st Lancers at the Battle of Omdurman on 2nd September 1898 in the Sudanese War: picture by Richard Caton Woodville
Churchill times the charge as taking two minutes. Having rallied, the 21st was ready to charge back through the Dervishes, but Martin settled for dismounted rifle fire, which caused the Dervishes to melt away towards the Jebel Surgham, bringing the action to a close.
The Second Attack at the Battle of Omdurman:
While the 21st Lancers were delivering their charge, the Sirdar’s infantry and artillery, with Broadwood’s cavalry and the Camel Corps, were replenishing their ammunition stocks and falling in for the march to Omdurman.
At 9.15am, the Sirdar’s force set off in two columns, heading for the Jebel Surgham Ridge; the two British brigades of Gatacre’s division in the left-hand column, heading straight for the ridge, Littleton’s brigade leading and Wauchope’s following; Hunter’s Egyptian division in the right-hand column, in the order Maxwell’s, Lewis’s and Macdonald’s, heading for the Jebel Surgham end of the ridge.
Collinson’s Egyptian brigade followed, escorting the baggage and guns.
Broadwood, with the Egyptian cavalry, the horse artillery and the Camel Corps, occupied the gap between the rear Egyptian brigade and the River Nile.
Two of the gunboats guarded the rear of the column, while the other three escorted the head. The Military Hospital, positioned near the River Nile at the northern end of the camp, was still packing up and moving its patients and equipment to the boats.
It would seem that the Sirdar was concerned to occupy Omdurman before the Khalifa could retreat into the city with his remaining troops.
In Churchill’s view, the Sirdar’s move towards Omdurman was premature. He lists the Khalifa’s forces still on the field and undefeated, even, in some cases, unengaged; the Khalifa’s own ‘Black Flag’ force behind Jebel Surgham, Ali-Wad-Helu and his Red Flag behind the Kerreri Hills and Osman reforming his men after the First Attack: in all some 35,000 Dervishes, still ready to do battle.
The Sirdar’s rout across the ridge would leave the Khalifa’s army on his right flank and in his rear.
Hunter, commanding the Egyptian Division, was particularly concerned at the presence of Ali-Wad-Helu’s men behind the Kerreri Hills, in the rear of the army as it marched towards Omdurman.
It would seem that it was Hunter who ordered Macdonald to pull his brigade out of the column, to allow Lewis to march on and take his brigade’s place in the column, thereby ensuring that in the event that Ali-Wad-Helu’s Red Flag division attacked the rear of the Sirdar’s army, the attack would fall on the Egyptian brigade commanded by the most experienced and competent of the brigade commanders in the Egyptian division.
Hunter ensured that Macdonald’s brigade, the first target for any attack by Ali-Wad-Helu, was accompanied by three batteries of field artillery and eight Maxim guns.
In complying with the direction that his brigade take the rear, Macdonald moved his four regiments to the west, to enable Lewis’s brigade to pass him. Macdonald then moved his brigade back into the line of march. The time taken by this manoeuvre opened a significant gap between Macdonald’s leading troops and Lewis’s brigade to his front.
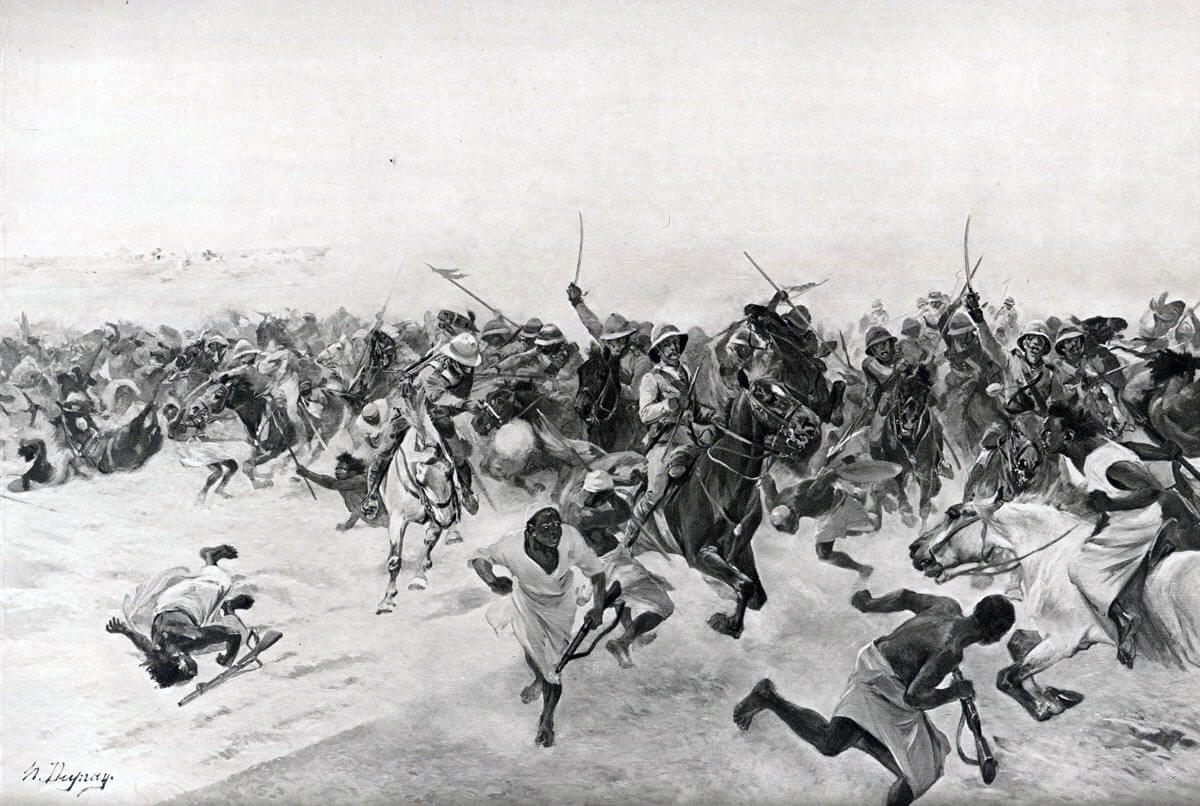
Charge of the 21st Lancers at the Battle of Omdurman on 2nd September 1898 in the Sudanese War: picture by Henri Dupray
As the Sirdar’s column moved off, Dervish horsemen began to emerge from the Kerreri Hills and mounted Baggara warriors rode down to the River Nile to water their horses. It was clear that the hospital was menaced. There were no combatant troops between the hospital and the advancing Dervishes and the operation to embark the wounded onto the river barges was taking longer than expected, in part because the hospital barges had been moved to the far side of the river and ammunition barges had to be used in their place. Colonel Sloggett, the senior medical officer, rode off to seek help from Macdonald.
Leading the Sirdar’s column was the British Division, with the battalions marching in parallel columns; Wauchope’s brigade on the left and Lyttelton’s Brigade on the right. Maxwell’s brigade marched behind the British battalions, while moving more to the right, towards the Jebel Surgham.
As the front of the column reached the crest of the ridge, the casualties from the 21st’s charge rode past, giving details of the action. Several of these wounded men had terrible injuries, with faces and limbs sliced through by sword strokes.
One of the Sirdar’s batteries came into action, shelling the Dervishes on the top of Jebel Surgham and the battle came to life again, with firing across the plain and high ground.
The Sirdar, accompanying Maxwell, looked back from his position on the lower slopes of the Jebel Surgham and saw that, instead of following on in column behind Lewis’s brigade, Macdonald was deploying his brigade into line, and bringing his batteries into action. It was apparent that Macdonald was about to be attacked by the Dervish force until now hidden to the west of the Jebel Surgham, out of sight of the rest of the Sirdar’s brigades.
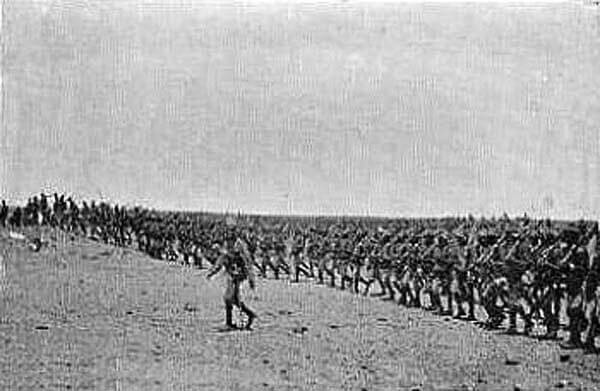
Colonel Macdonald’s Sudanese brigade advancing during the Battle of Omdurman on 2nd September 1898 in the Sudanese War
Macdonald formed his four battalions with three in line facing to the south west and the fourth, still in column of companies, on the right flank, so that his brigade formed an inverted L.
Churchill’s account of the battle states that Gatacre halted the British division on seeing that Macdonald was facing an attack from the west.
The Sirdar ordered Maxwell’s leading brigade of Sudanese troops to turn to the west and storm the Jebel Surgham. Lewis was ordered to bring his brigade into line on Maxwell’s right. Lyttelton was to bring his British brigade into line on the Jebel Surgham on Maxwell’s left.
Wauchope, with the First British Brigade, was ordered to turn back from the column, return to the plain and support Macdonald. Collinson and the Camel Corps were directed to fill the gap between Macdonald’s brigade and the river.
It is far from clear who gave Wauchope the order to take his brigade back to support Macdonald, Hunter, Gatacre or the Sirdar.
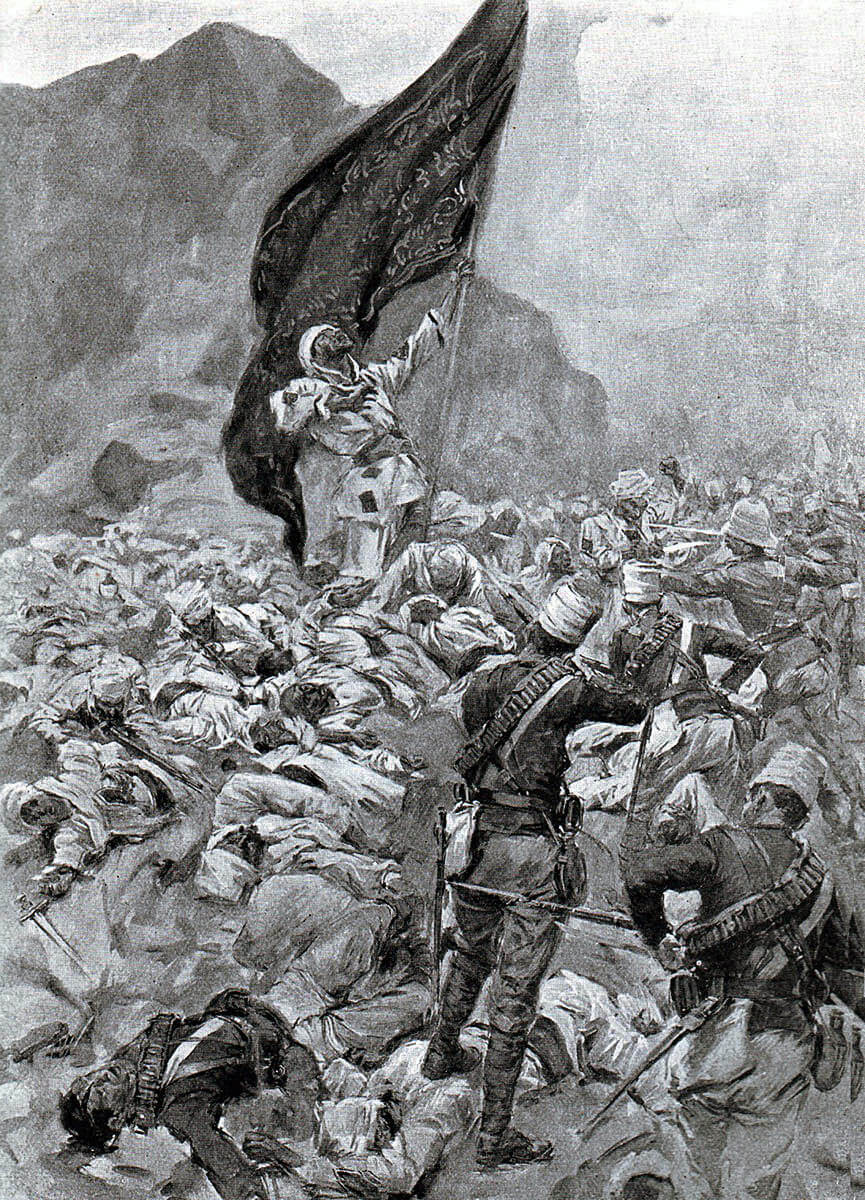
Last bearer of the Khalifa’s Black Flag at the Battle of Omdurman on 2nd September 1898 in the Sudanese War
Within minutes, out from behind the Jebel Surgham, surged the Black Flag force under Yakub, comprising the Khalifa’s bodyguard and ‘All the Glories of the Dervish Empire’, some 15,000 men, heading for Macdonald’s line.
The firing now became general across the battle area. The advance of the three brigades up to the crest of the Jebel Surgham forced the Khalifa to divert part of the Black Flag force from the assault on Macdonald in the plain, to defend his flank with an attack up the hillside. This Dervish advance caused some shakiness in Lewis’s right flank Egyptian battalion. But it was dealt with, when Hunter took control and brought up some reserve companies.
A young officer caused two Maxim guns to be manhandled to the summit of Jebel Surgham, from where they joined the infantry in firing onto the lower slopes and plain beneath.
Substantial casualties were inflicted on the Dervishes, several Emirs being killed and the Dervish formations attacking Macdonald’s brigade and the Jebel Surgham began to break up. Yakub and the guard of the Black Flag were mown down.
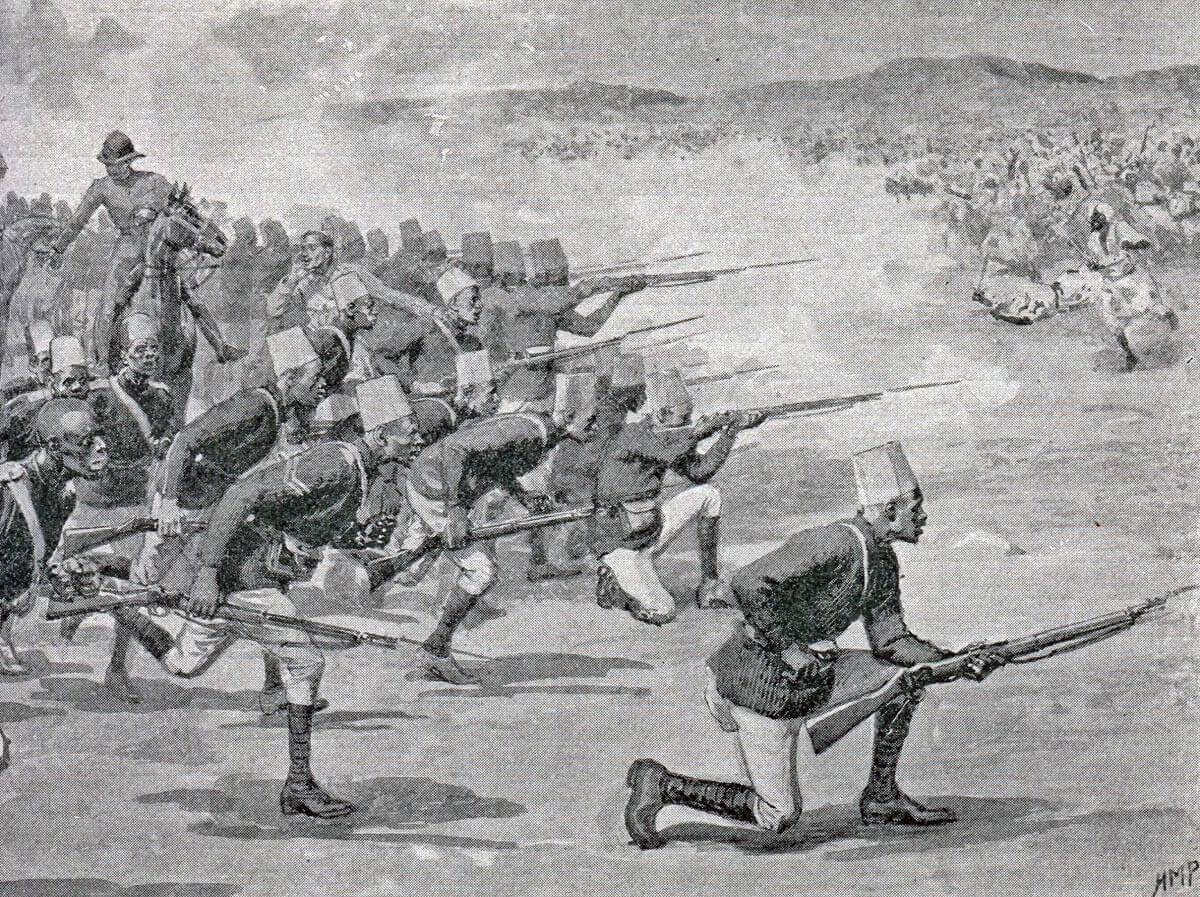
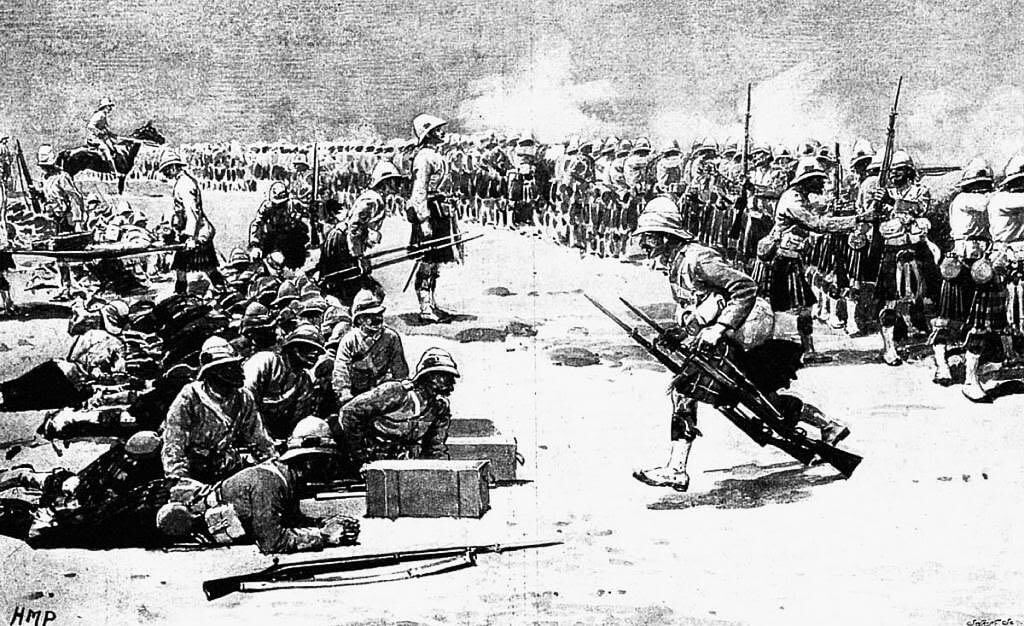
Sudanese troops of Maconald’s brigade at the Battle of Omdurman on 2nd September 1898 in the Sudanese War: picture by Henry Marriott Paget
It was at this point that the Dervish force of Ali-Wad-Helu emerged from the Kerreri Hills to attack Macdonald’s brigade in the rear. Although this attack was just too late to co-incide with the main Dervish attack from behind the Jebel Surgham, the wisdom of putting a commander of Macdonald’s calibre in the rear was confirmed.
Macdonald’s IX Sudanese was the regiment in column of companies behind his right flank, as the brigade faced south-west. The commander of the IX, on his own initiative, formed his battalion into line, facing to the north and opened fire on the advancing Dervish force. As the attack of Yakub from behind the Jebel Surgham melted away, Macdonald moved his other battalions, the X and then the XI, to positions in the new line, to the right of the IX, until his formation was in reverse, with another inverted ‘L’ formed, this time facing north; the 2nd Egyptians remaining in reserve on the left. Macdonald found time to reprimand the officers of the IX for moving on their initiative, instead of waiting for orders. Colonel Sloggett arrived from the hospital during this action and was killed tending Macdonald’s wounded.
Wauchope’s British brigade advancing to support Maconald’s brigade at the Battle of Omdurman on 2nd September 1898 in the Sudanese War: drawing by Corporal Farquharson of 1st Seaforth Highlanders
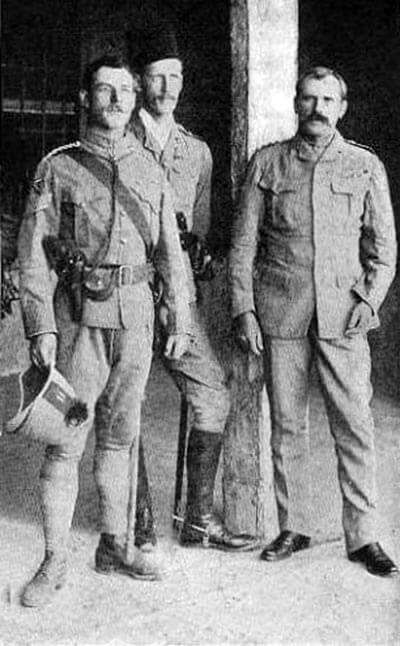
Colonel Macdonald (on right) with two staff officers: Battle of Omdurman on 2nd September 1898 in the Sudanese War
Churchill states that Macdonald’s soldiers began to fire wildly and that they were saved by the Lincolnshire Regiment coming up on their right, forming a line at right angles to Macdonald’s line and firing in enfilade on the advancing Dervishes. Other accounts state that the Lincolns arrived after Macdonald’s infantry and guns had destroyed the Dervish attack. Either way it was a close action, the Dervish charge coming within 300 yards of Macdonald’s line.
Churchill reports the Lincolns as firing 60 rounds a man.
It was Kitchener’s view that Macdonald was the hero of the battle. It irritated him that the charge by the 21st Lancers attracted more interest in Britain than the conduct of Macdonald and his Sudanese and Egyptian soldiers, with their British officers and non-commissioned officers and accompanying artillery and Maxim gunners.
The final episode in this part of the battle was a charge by a force of 400 Dervish horsemen, who rode at Macdonald’s line. All were shot down.
Once the Dervish attacks ceased, the Sirdar’s line advanced to the west, with fixed bayonets and drove the survivors out into the desert, away from the road to Omdurman.
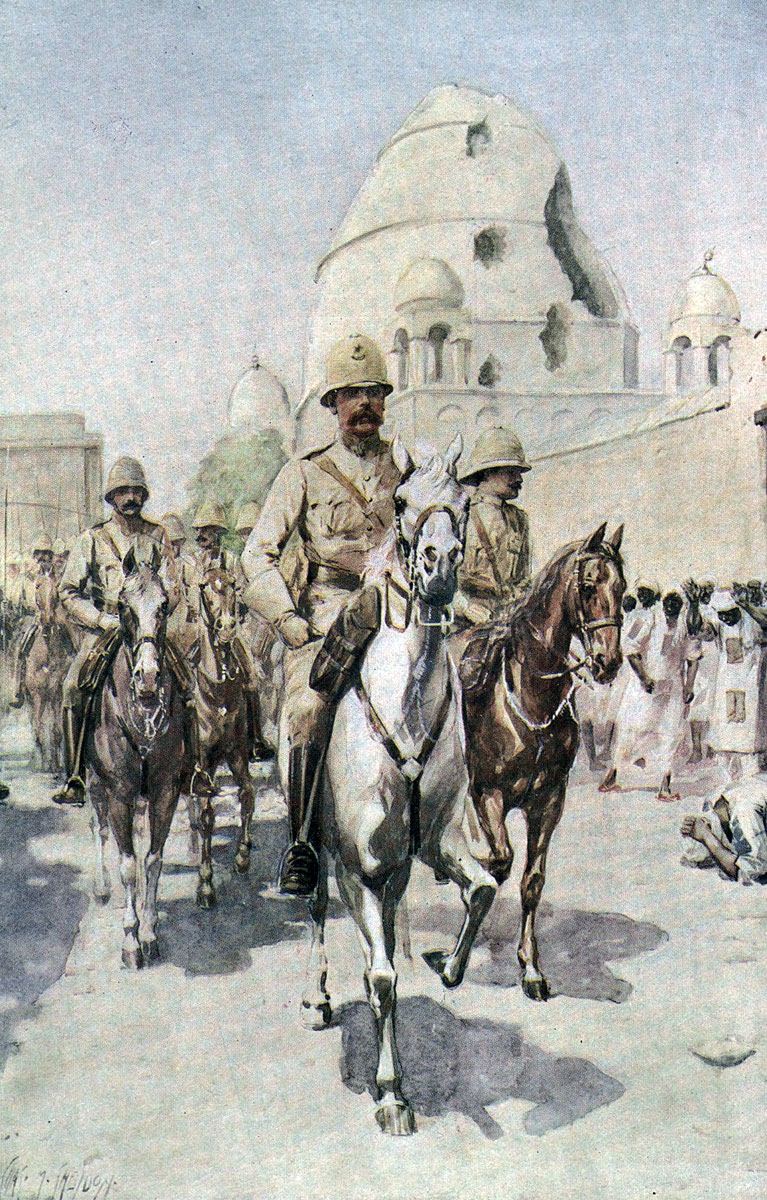
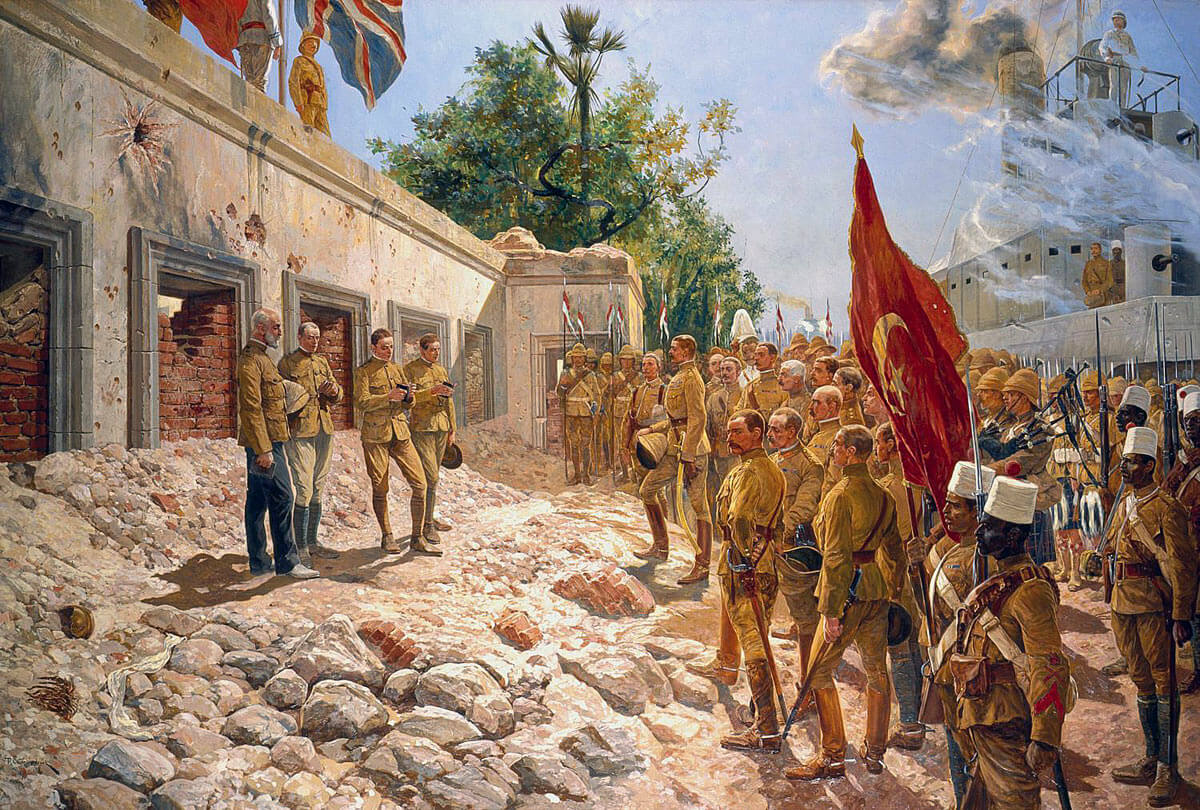
Kitchener enters Omdurman, passing the damaged Mahdi’s Tomb, after the Battle of Omdurman on 2nd September 1898 in the Sudanese War
The Sirdar’s force then turned its attention to the city of Omdurman. Entrance was gained by the gate on the eastern side and the several holes blown in the walls by the riverboat and howitzer bombardment.
The Khalifa ordered his beaten army to retreat into Omdurman, to hold the city against the Sirdar’s troops. This instruction was largely ignored, the Dervishes by-passing Omdurman and carrying on south towards their homes. Realising that he did not have a force to hold the city, the Khalifa left Omdurman on a donkey with a handful of attendants and headed south.
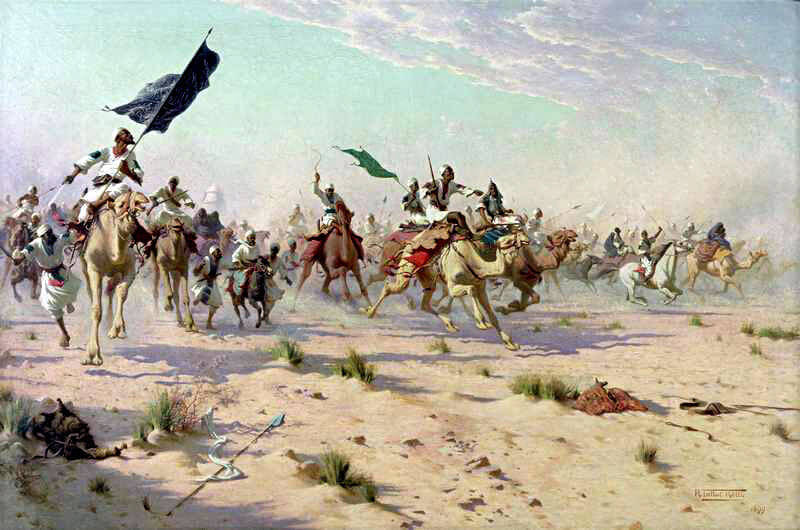
Flight of the Khalifa after the Battle of Omdurman on 2nd September 1898 in the Sudanese War: picture by Robert George Talbot Kelly
Some eight miles from the city, the Khalifa was able to mount his party on swift camels and ride on to join his army further south.
Casualties at the Battle of Omdurman:
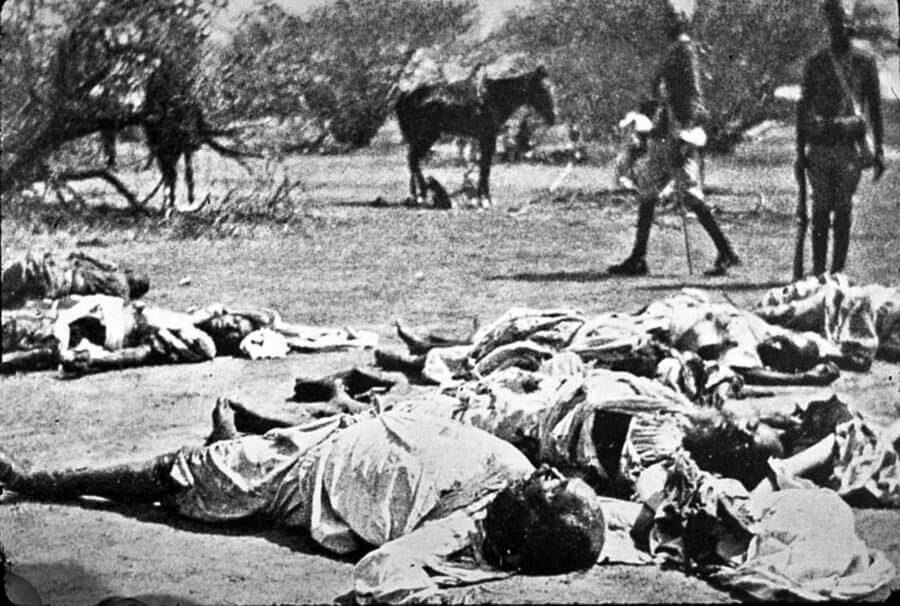
The casualties to the Sirdar’s army were 20 officers and 462 men killed and wounded. The Dervishes suffered losses of 9,700 dead, probably around 12,000 wounded and some 5,000 prisoners.

Bringing assistance to a wounded Dervish after the Battle of Omdurman on 2nd September 1898 in the Sudanese War
The 21st Lancers lost 1 officer killed, Lieutenant Robert Grenfell attached from the 12th Lancers and 4 wounded, 20 men killed and 46 wounded.
The Khalifa’s Black Flag captured in the Battle of Omdurman on 2nd September 1898 in the Sudanese War
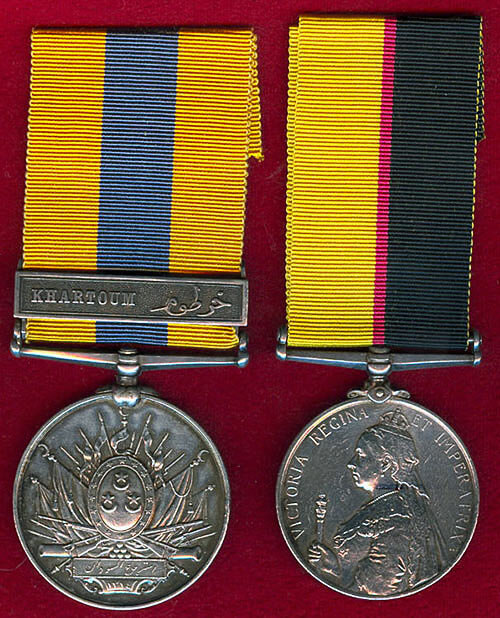
Queen’s Sudan Medal 1896-1898 and the Khedive’s Sudan Medal 1896-1908, with the clasp on the Khedive’s medal of ‘Khartoum’
Battle Honour and Campaign Medal for the Battle of Omdurman:
There was official dispute as to whether the battle was to be called ‘Omdurman’ or ‘Khartoum’. The battle is widely called ‘Omdurman’, but the battle honour ‘Khartoum’ was awarded to: 21st Lancers, Grenadier Guards, Northumberland Fusiliers, Royal Warwickshire Regiment, Lincolnshire Regiment, Lancashire Fusiliers, Seaforth Highlanders and Cameron Highlanders.
The campaign medals awarded were the Queen’s Sudan Medal 1896-1898 and the Khedive’s Sudan Medal 1896-1908, with the clasp on the Khedive’s medal of ‘Khartoum’.
Omdurman was an iconic late Victorian battle. Decorations were given for service in the campaign fairly freely. Among these, Victoria Crosses were awarded to three participants in the charge by the 21st Lancers: Captain Kenna and Lieutenant de Montmorency for the attempted retrieval of Montmorency’s dead troop sergeant and Private Byrne for his rescue of Lieutenant Molyneux of the Royal Horse Guards.
Captain Neville Smyth of the Queen’s Bays was awarded the Victoria Cross for rescuing two war correspondents from the attack of a Dervish after the battle was finished, being wounded in the process.
Follow-up to the Battle of Omdurman:
Following the capture of Omdurman, the Sirdar crossed the river to Khartoum and inspected the palace, where Gordon was said to have been killed in 1885. A memorial service was held outside the palace.
Victory for the Sirdar at Omdurman meant the end of the Mahdist revolt against the Khedive, which had begun in 1884 and led to the expulsion of the Egyptians and Turks from the Sudan. The Sudan was returned to nominal Egyptian and Turkish rule. In practice the country was, from 1898, ruled by British officials.
Memorial service for General Charles Gordon conducted at his palace in Khartoum after the Battle of Omdurman on 2nd September 1898 in the Sudanese War: picture by Richard Caton Woodville
After Omdurman, the British military contingent returned to its various bases, in Egypt, Gibraltar and Malta, leaving the Egyptian army to deal with the remnants of the Mahdi’s, now the Khalifa’s, revolt.
The officers who had come to the Sudan from Britain, to take up staff posts and attachments to the 21st Lancers and the other regiments, returned to Britain.
The Sirdar also returned to Britain for a time. Initially he was lionised. Once the news correspondents got back to Britain, allegations of prisoners being murdered after the battle arose. There was a parliamentary enquiry. The Sirdar left Britain and returned to his post in Egypt, where the authorities were less squeamish.
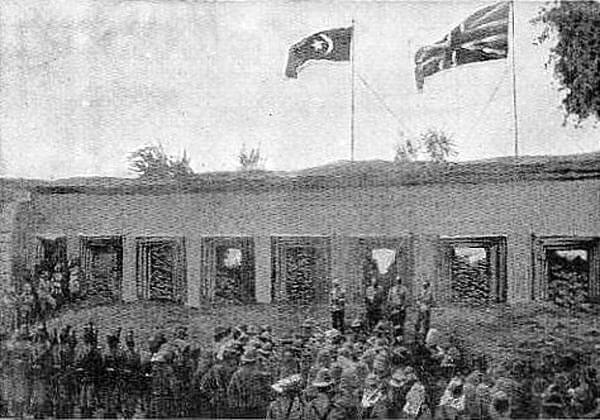
British and Khedive of Egypt’s flags flying from General Gordon’s palace in Khartoum after the Battle of Omdurman on 2nd September 1898 in the Sudanese War
The enquiry cleared Kitchener of the allegations, enabling him to continue his ascent to the highest appointments in the British army.
Kitchener commanded in South Africa in the later stages of the Boer War, under Field Marshal Roberts. After that war, Kitchener was appointed commander-in-chief in India, carrying out a fundamental re-organisation of the Indian Army. At the outbreak of the Great War, Kitchener was Chief of the Imperial General Staff. Kitchener was drowned, when HMS Hampshire struck a mine in 1917, taking him to Russia.
Body of the Khalifa: Battle of Omdurman on 2nd September 1898 in the Sudanese War
The Khalifa was killed in a battle fought on 22nd February 1899 in the south of the Sudan, at the head of his remaining emirs and some 5,000 Dervishes.
Anecdotes and traditions from the Battle of Omdurman:
-
Private James Byrne of the 21st Lancers, awarded the Victoria Cross for rescuing Lieutenant Molyneaux
Commanding Officers on the Nile Steamers: Flotilla Commander; Commander C. Keppel RN, TAMAI; Lt H.F. Talbot RN, SULTAN; Lt W.H. Cowan RN, HAFIR; Lt C.M. Staveley RN, MELIK; El Kaimakam W.S. Gordon RE, SHEIKH; Lt J.B. Sparks RN, ABU KLEA, El Bimbashi E.O. Newcombe RN, FATEH, Lt D. Beatty RN, METEMMA, El Bimbashi A.G. Stevenson RE, NASR, Lt the Hon A. Hood RN.
While the charge by the 21st Lancers at Omdurman produced no military benefit in the battle, it produced a sensation in late Victorian Britain, similar to that caused by the Charge of the Light Brigade in 1854. The 21st was awarded the title ‘Empress of India’s Own’ and many pictures and prints were produced recording the action.
- David Beatty, in World War One to command the Battle Cruiser Fleet at the Battles of Heligoland Bight, Dogger Bank and Jutland and finally the Grand Fleet, before becoming the First Sea Lord, was second-in-command of the River Nile steamers. Beatty was appointed to command the new steamer El Teb, which capsized and sank in the Fourth Cataract. Beatty took command of the steamer Fateh and was in the forefront of the fighting at the Battle of Omdurman. He was awarded the DSO and promoted commander for his services in the Sudan.
- The Nile steamer, Nasr, was commanded by Lieutenant Hood, Royal Navy. Hood commanded the Third Battle Cruiser Squadron at the Battle of Jutland on 31st May 1916 and died when his flagship HMS Invincible exploded.
- Lieutenant Colonel Horace Smith-Dorien, later Lieutenant General in the Great War commanding II Corps in 1914 at the Battles of Mons, day 2 Elouges and Le Cateau held a staff position in the Sirdar’s army at the Battle of Omdurman.
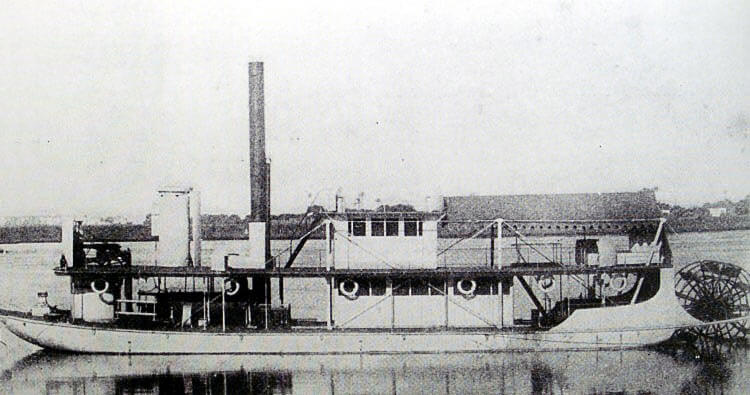
Steamer Firket: Battle of Omdurman on 2nd September 1898 in the Sudanese War
- Lieutenant Colonel Townshend of the Indian Staff Corps served in the Sirdar’s army. Townshend was the senior army officer of the garrison at the Siege of Chitral Fort in 1895. In the Great War, Townshend commanded at the ill-fated siege of Kut, in Iraq. He was awarded the Distinguished Service Order for his conduct in the Sudan.
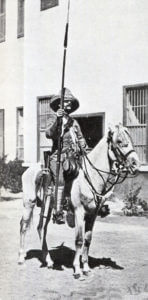
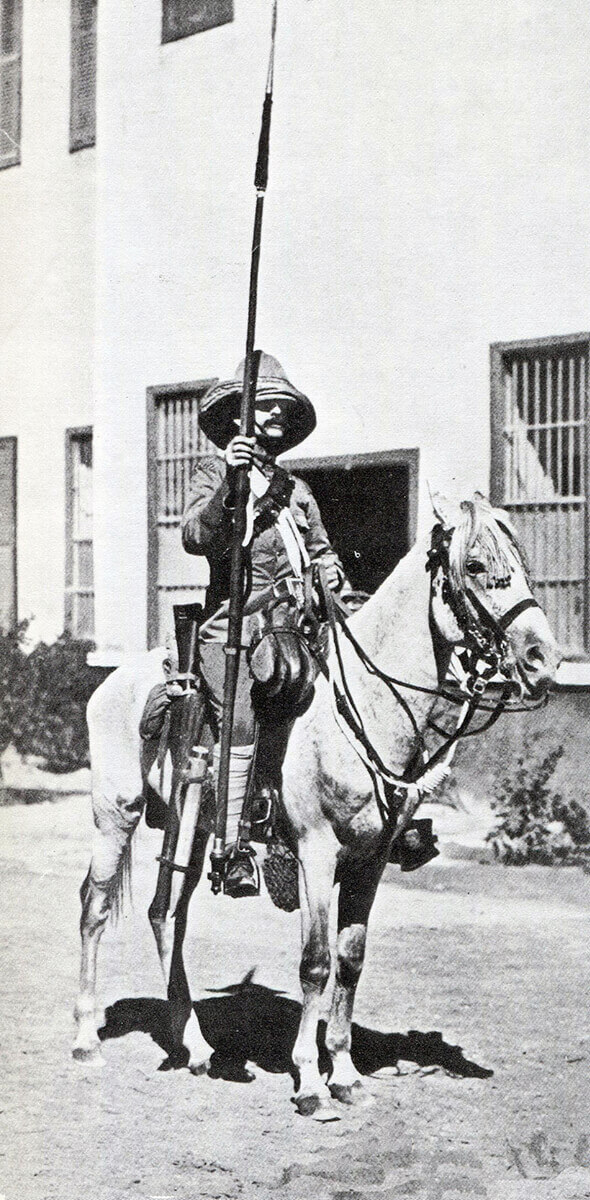
Trooper of the 21st Lancers: Battle of Omdurman on 2nd September 1898 in the Sudanese War
- Major Douglas Haig of the 7th Hussars commanded a squadron of the Egyptian Cavalry at Omdurman. In the Great War, Haig initially commanded I Corps and, from 1915, commanded the British Expeditionary Force, with the rank of Field Marshal.
- Sir Henry Rawlinson, in World War 1, General Lord Rawlinson and an army commander, of the Coldstream Guards, acted as an additional staff officer to the Sirdar at Omdurman, having come to Egypt for the health of his wife and being asked to act by Lord Cromer, to reduce the administrative burden on the Sirdar.
- Among other officers later to rise to prominence, who served at Omdurman, were Ian Hamilton, Lyttelton, Gatacre and Ivor Maxse. Lieutenant Colonel Broadwood, died of wounds commanding a division at Passchendaele in 1917.
- Lieutenant Molyneux, winner of the Victoria Cross in the 21st Lancer’s charge and an officer in the Royal Horse Guards, required a skin graft for the extensive sword wounds he suffered in the battle. The graft was provided by Winston Churchill. The surgeon, removing the graft from Churchill, told him ‘this is going to hurt like hell, like being flayed alive’.

The Memorial window in Medmenham Church to Lieutenant Colonel Pirie DSO, adjutant of the 21st Lancers at the Battle of Omdurman on 2nd September 1898 in the Sudanese War
- Lieutenant Robert Grenfell of the 12th Lancers, the sole officer death in the 21st Lancer’s charge, was the cousin of the Grenfell twins, one of whom, Captain Francis Grenfell of the 9th Lancers, won the Victoria Cross at Elouges in 1914
- Lieutenant Arthur Pirie served as the Adjutant of the 21st Lancers at Omdurman. He was wounded in the charge and received the Distinguished Service Order. Pirie was killed in Palestine in 1917 commanding the Berkshire Yeomanry. A memorial window in Medmenham Church in Buckinghamshire commemorates his life.

References for the Battle of Omdurman:
The River War by Winston Churchill
Khartoum Campaign 1898 or the Re-Conquest of the Soudan by Bennet Burleigh
Omdurman by Philip Ziegler
War on the River Nile by Michael Barthorp
British Battles on Land and Sea by Grant
Kitchener the Road to Omdurman by John Pollock
A History of the British Cavalry Volume 3 by the Marquess of Anglesey (contains a detailed account of the charge by the 21st Lancers, taken from several sources, including two letters written by Churchill)
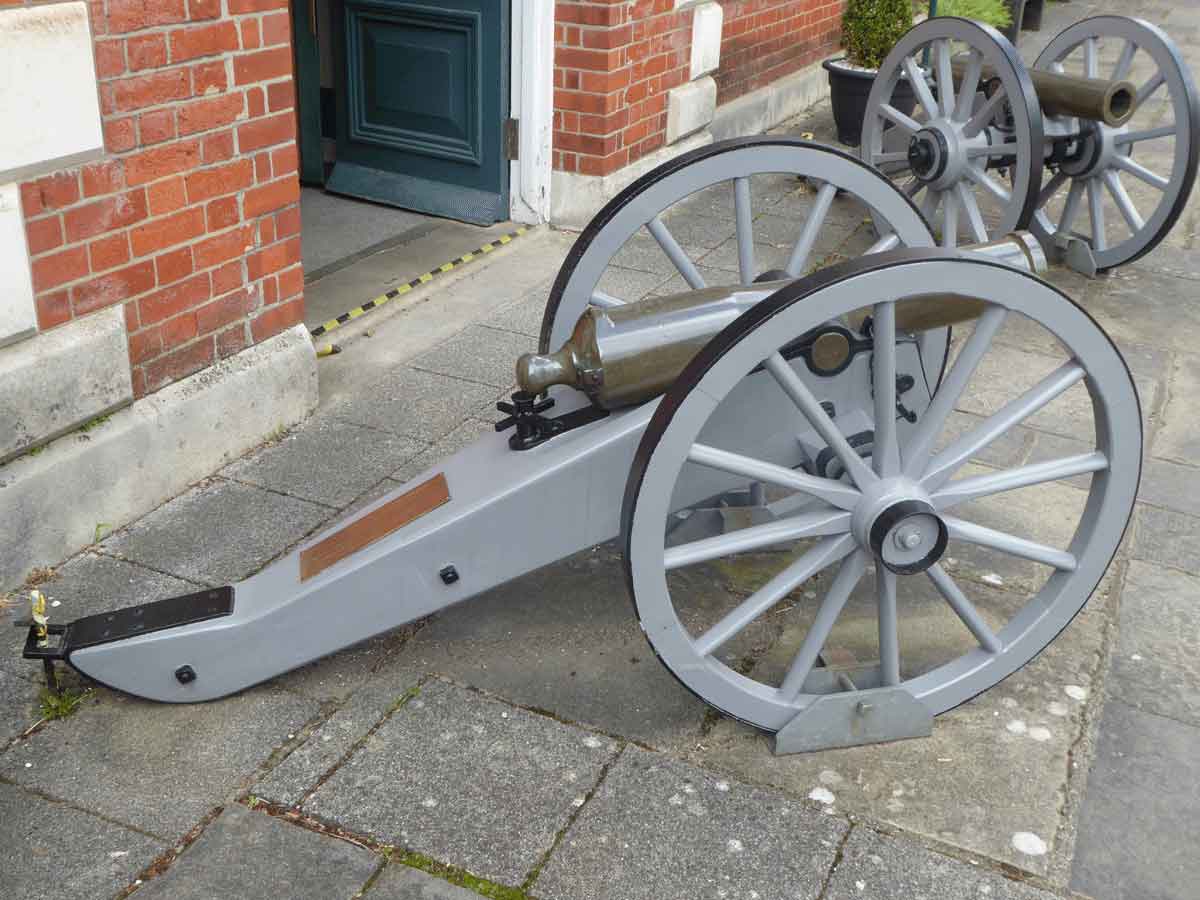
Two guns captured from the Dervishes at the Battle of Omdurman on 2nd September 1898 in the Sudanese War and now outside the Royal Green Jackets Museum, Peninsular Barracks, Winchester
The previous battle of the War in Egypt and the Sudan is the Battle of Atbara
The next battle in the British Battles sequence is the Battle of Laing’s Nek
To the War in Egypt and the Sudan index