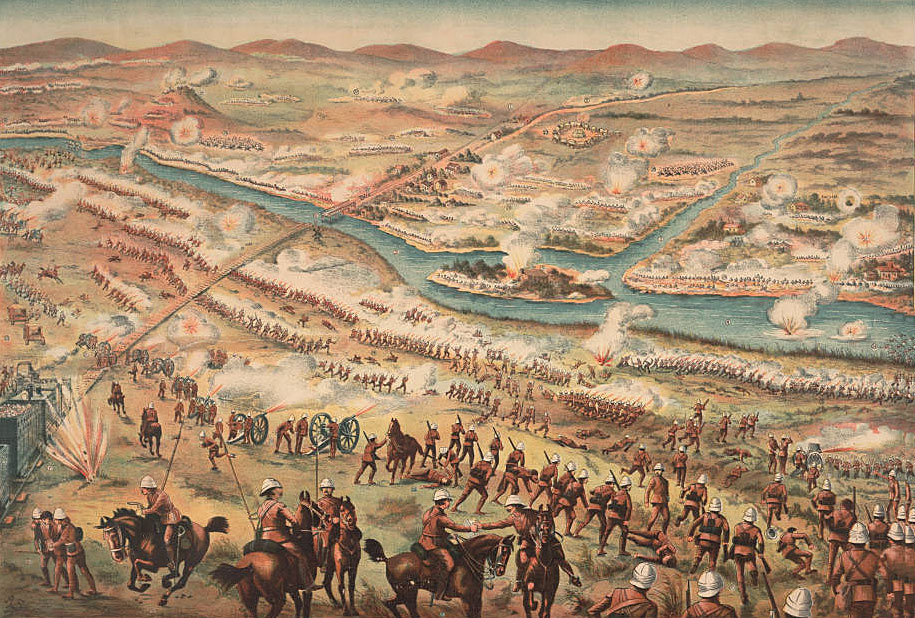
Lord Methuen’s encounter battle, fought on 28th November 1899 in the Boer War, as his British force advanced to relieve Kimberley

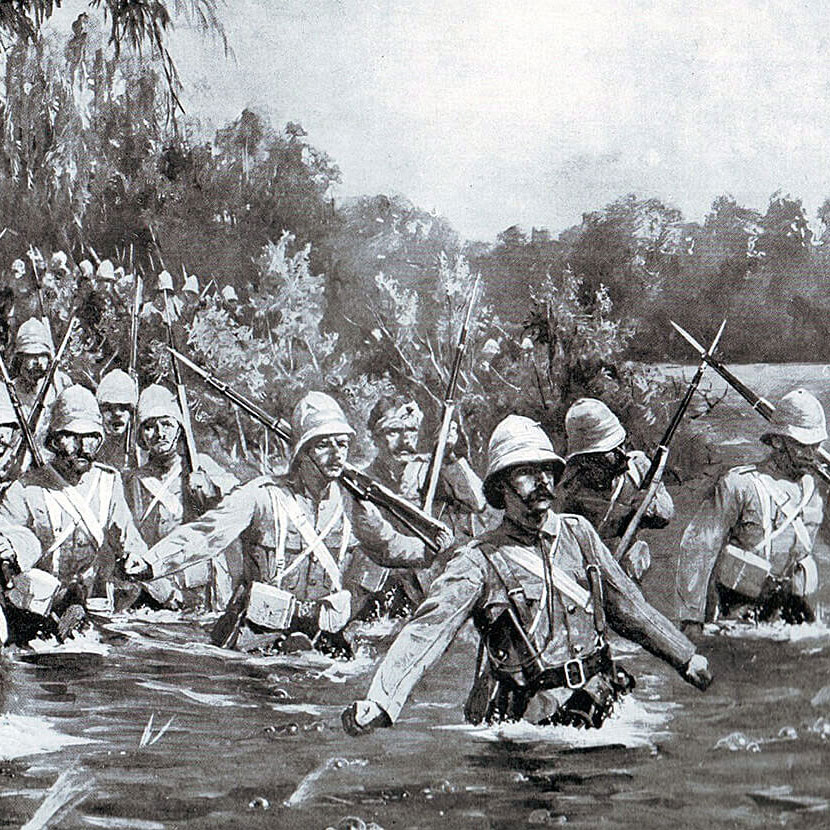
1st Argyll and Sutherland Highlanders, the old 91st, crossing the Modder River at Rosmead during the battle on 28th November 1899 in the Boer War: picture by Allen Stewart
 62. Podcast of the Battle of Modder River fought on 28thNovember 1899 in the Boer War as Lord Methuen’s British force advanced to relieve Kimberley: John Mackenzie’s britishbattles.com podcasts
The previous battle in the Boer War is the Battle of Graspan
The next battle in the Boer War is the Battle of Stormberg
Battle: Modder River.
War: The Boer War.
Date: 28th November 1899.
Place: In the North West of Cape Colony on the border with the Orange Free State in South Africa.
Combatants: The British against the Boers.
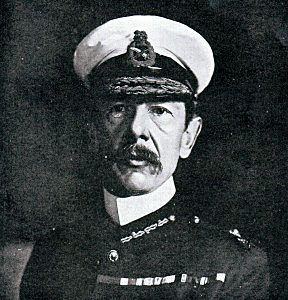
Generals: Lieutenant General Lord Methuen against General Cronje and General De la Rey of the Transvaal and General Prinsloo of the Orange Free State.
Size of the armies: 8,000 British against 8,000 Boers (Boer numbers are uncertain: some estimates put them as low as 3,000).
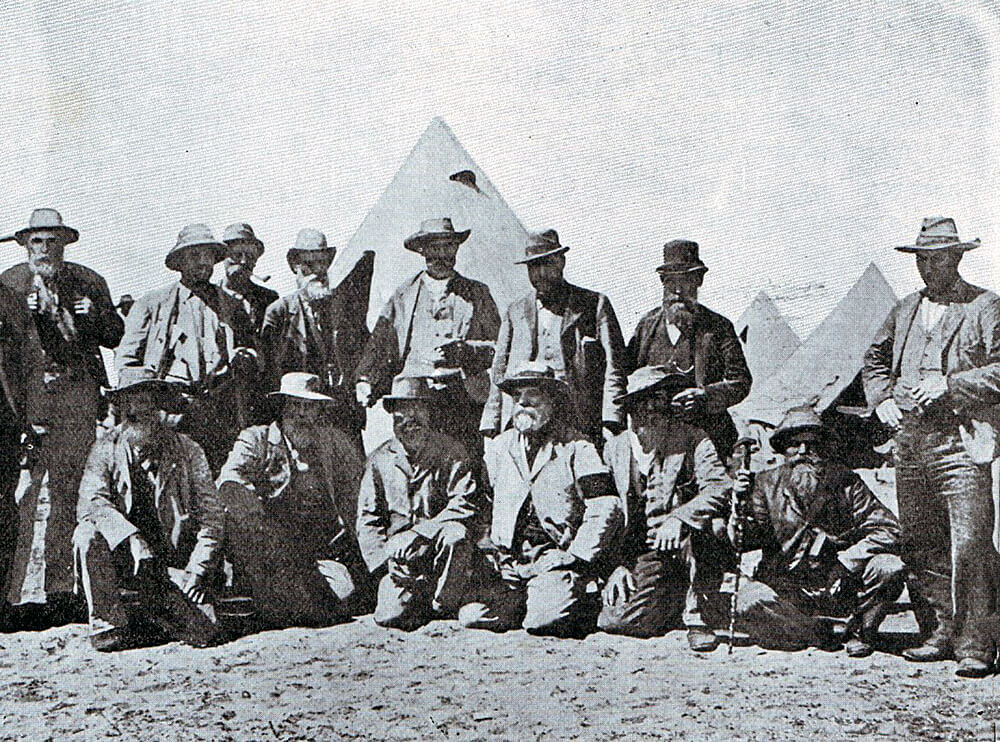
General Cronje’s commanders at the Battle of Modder River on 28th November 1899 in the Boer War
Uniforms, arms and equipment: The Boer War was a serious jolt for the British Army. At the outbreak of the war British tactics were appropriate for the use of single shot firearms, fired in volleys controlled by company and battalion officers; the troops fighting in close order. The need for tight formations had been emphasised time and again in colonial fighting. In the Zulu and Sudan Wars overwhelming enemy numbers armed principally with stabbing weapons were kept at a distance by such tactics, but, as at Isandlwana, would overrun a loosely formed force. These tactics had to be entirely rethought in battle against the Boers armed with modern weapons.
Boer ammunition train leaving Pretoria for the Front: Battle of Modder River on 28th November 1899 in the Boer War
In the months before hostilities the Boer commandant general, General Joubert, bought 30,000 Mauser magazine rifles, firing smokeless ammunition, and a number of modern field guns and automatic weapons from the German armaments manufacturer Krupp, the French firm Creusot and the British company Maxim. Unfortunately for the Boers they elected to buy high explosive ammunition for their new field guns. The war was to show that high explosive was largely ineffective in the field, unless rounds landed on rocky terrain and splintered the rock. The British artillery relied upon air-bursting shrapnel which was highly effective against infantry in open country.
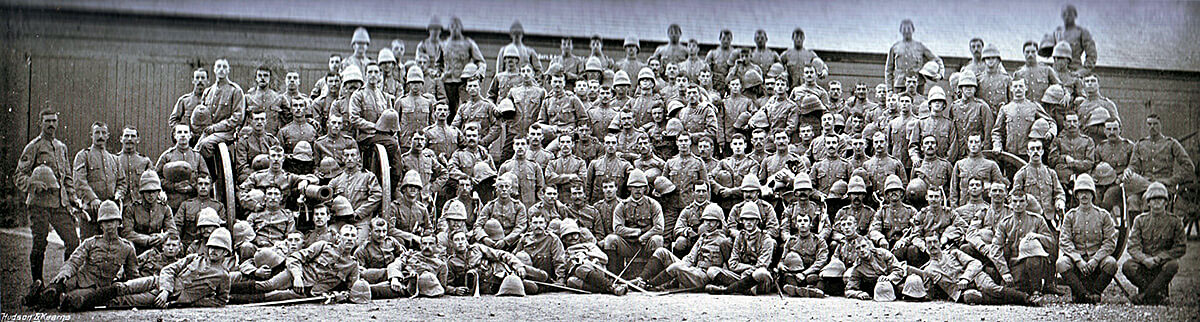
Orange Free State Artillery Corps commanded by the German ex-NCO Major Albrecht (sitting sixth from the left in light uniform). Albrecht commanded the Boer artillery at the Battle of Modder River on 28th November 1899 in the Boer War
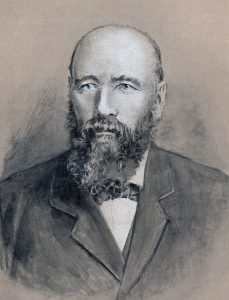
General Piet Cronje of the Transvaal, commander of the Boers at the Battle of Modder River on 28th November 1899 in the Boer War
Once the war was under way the arms markets of Europe were no longer open to the Boers due to the British naval blockade and the error in ammunition selection could not be remedied.
The commandoes, without formal discipline, welded into a fighting force through a strong sense of community and dislike for the British. Field Cornets led burghers by personal influence not through any military code. The Boers did not adopt military formation in battle, instinctively fighting from whatever cover there might be. Most Boers were countrymen, running their farms from the back of a pony with a rifle in one hand. These rural Boers brought a life time of marksmanship to the war, an important advantage further exploited by Joubert’s consignment of smokeless magazine rifles. Viljoen is said to have coined the aphorism “Through God and the Mauser”. With strong field craft skills and high mobility the Boers were natural mounted infantry. The urban burghers and foreign volunteers readily adopted the fighting methods of the rest of the army.
Other than in the regular uniformed Staats Artillery and police units, the Boers wore their every day civilian clothes on campaign.
After the first month the Boers lost their numerical superiority, spending the rest of the formal war on the defensive against British forces that regularly outnumbered them.
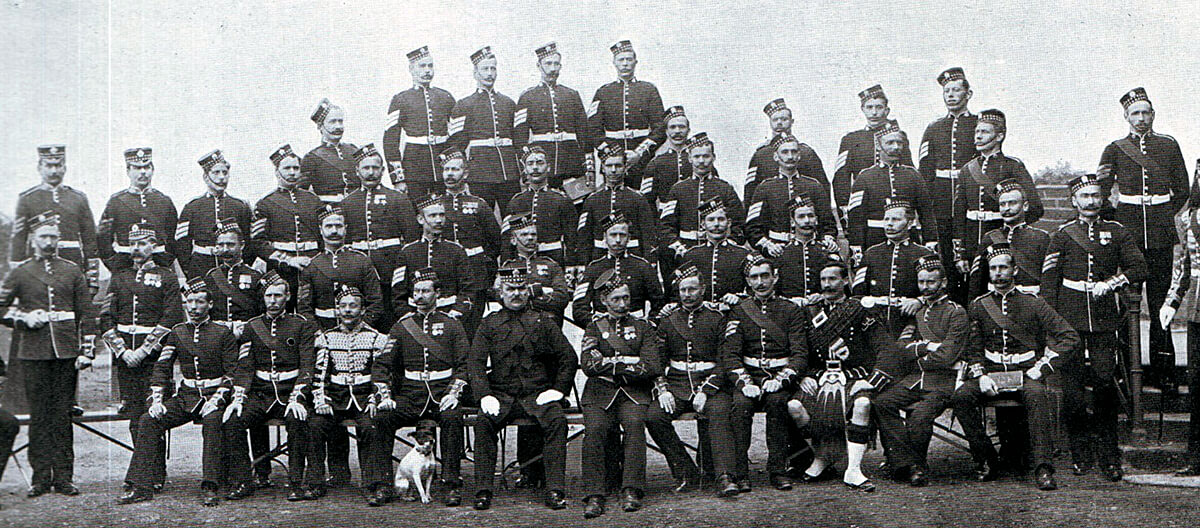
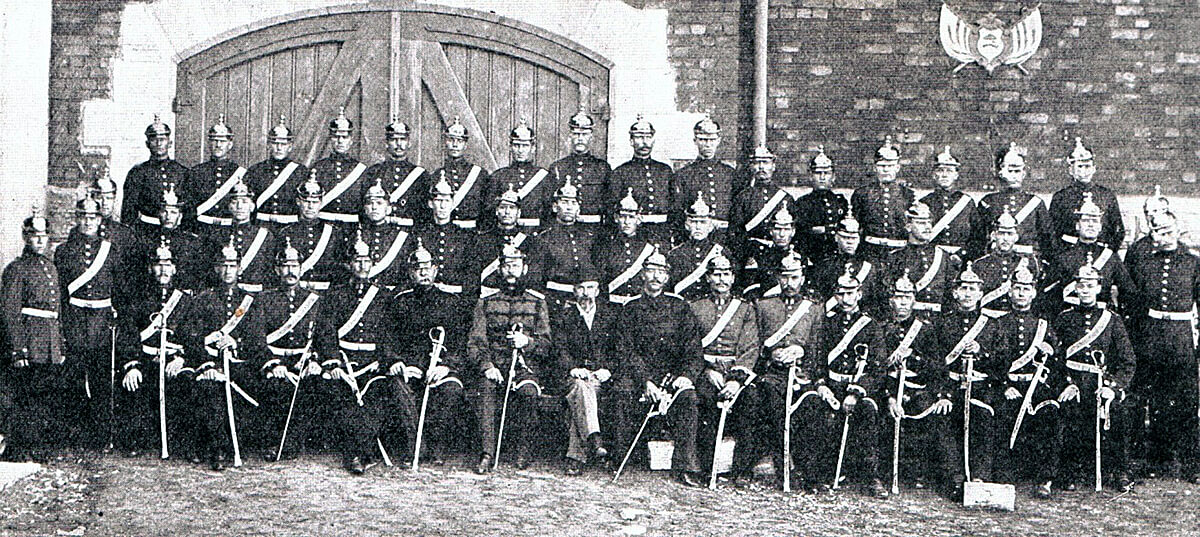
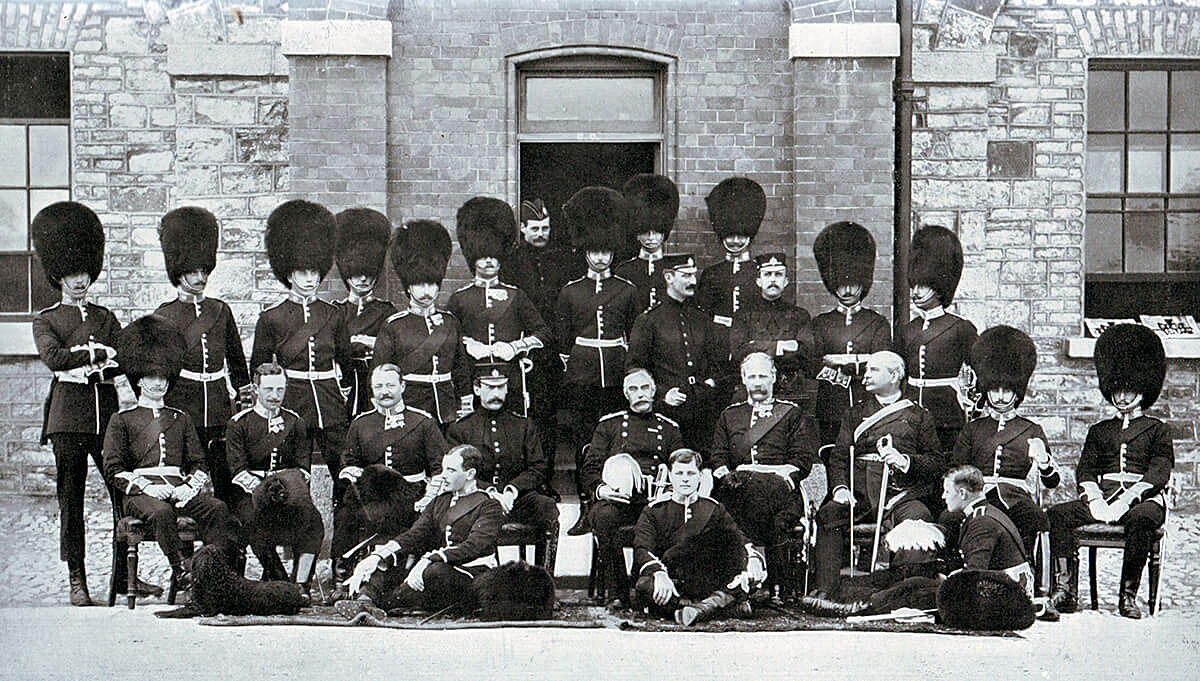
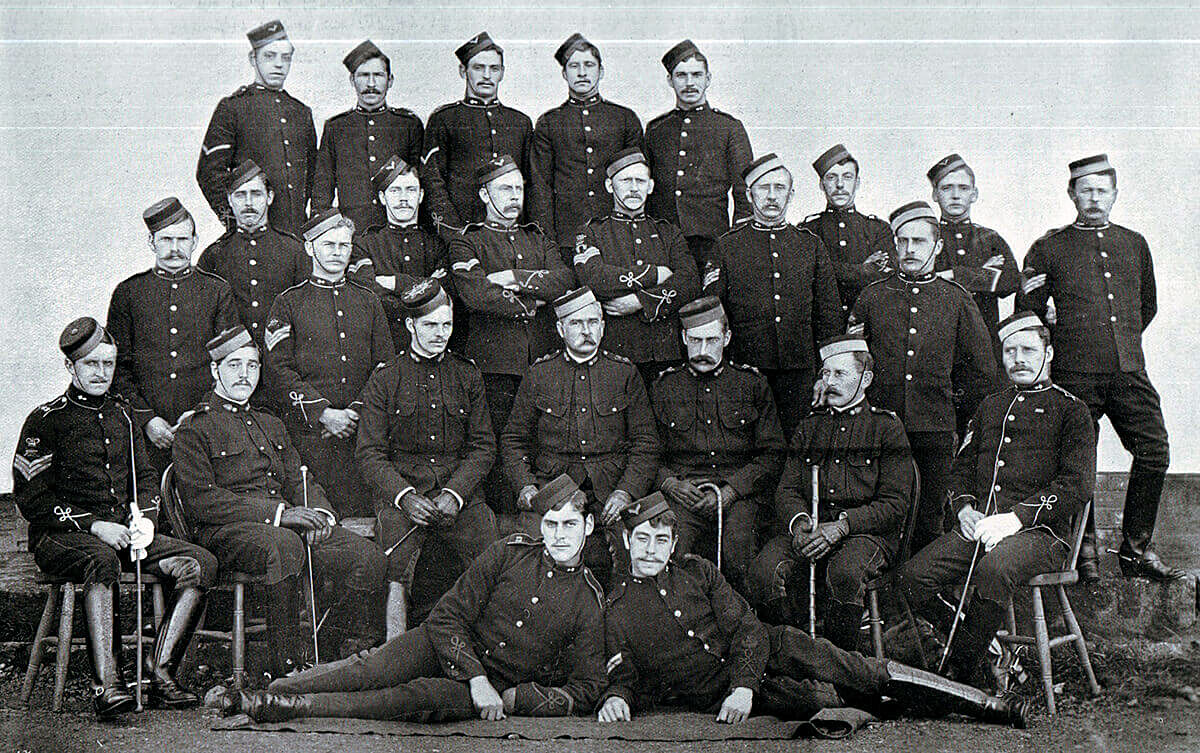
1st Scots Guards non-commissioned officers. The Battalion fought at Belmont, Graspan, Modder River and Magersfontein in 1899 in the Boer War
British tactics, developed on the North-West Frontier of India, Zululand, the Sudan and in other colonial wars against badly armed tribesmen, when used at Modder River, Magersfontein, Colenso and Spion Kop had difficulty winning battles against entrenched troops armed with modern magazine rifles. Every British commander made the same mistake; Buller; Methuen, Roberts and Kitchener (Elandslaagte was a notable exception where Hamilton specifically directed his infantry to keep an open formation). When General Kelly-Kenny attempted to winkle Cronje’s commandoes out of their riverside entrenchments at Paardeburg using his artillery, Kitchener intervened and insisted on a battle of infantry assaults, with the same disastrous consequences as earlier in the war.
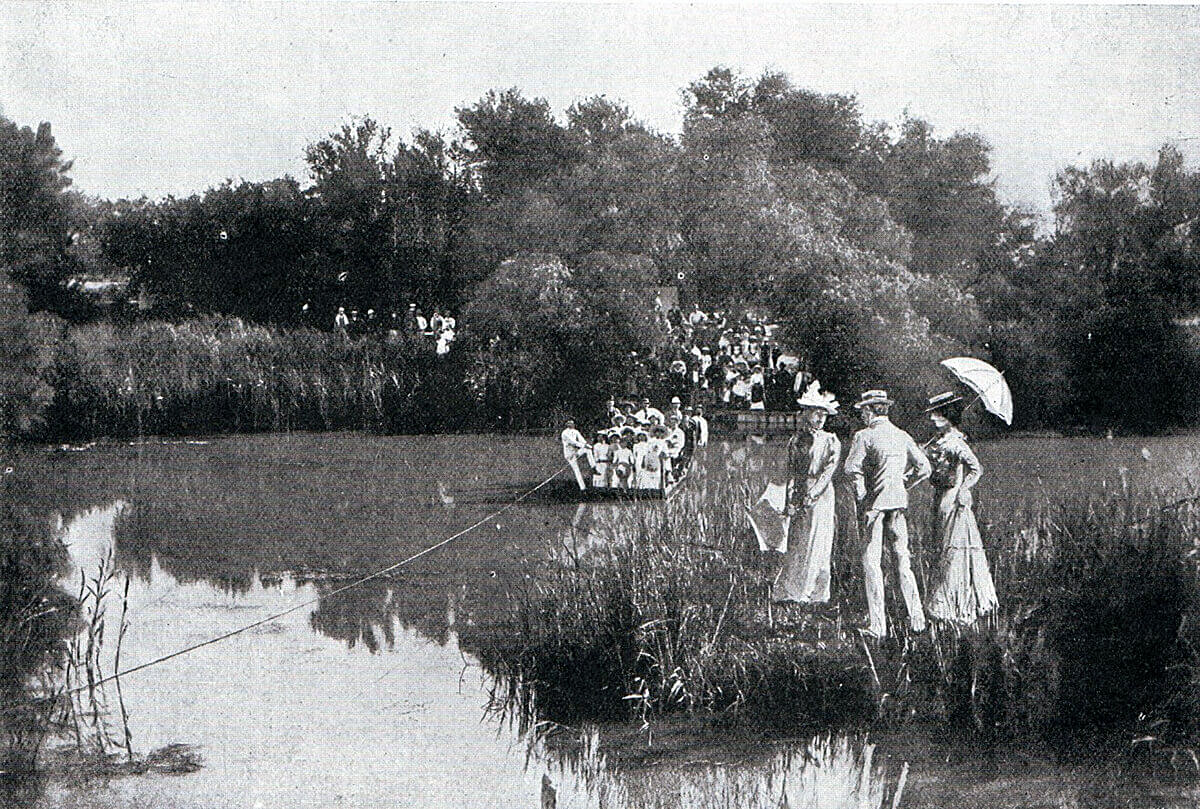
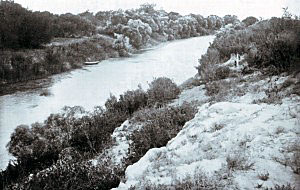
Modder River at Rosmead before the South African War, enjoyed as the ‘Henley’ of Kimberley: Battle of Modder River on 28th November 1899 in the Boer War
Some of the most successful British troops were the non-regular regiments; the Imperial Light Horse, City Imperial Volunteers, the South Africans, Canadians, Australians and New Zealanders, who more easily broke from the habit of earlier British colonial warfare, using their horses for transport rather than the charge, advancing by fire and manoeuvre in loose formations and making use of cover, rather than the formal advance into a storm of Mauser bullets.
War Aims:
Having started the hostilities, the Boers found themselves without an achievable war aim. The only strategy that might have had a chance of success would have been to invade and occupy the whole of Cape Colony, Natal and the other neighbouring British colonies. The two Boer republics did not have the resources to carry out such an extensive operation. In any case they could not have prevented a British sea landing to retake the colonies.
Once war was declared the Boers invaded and occupied Natal as far as the Tugela River, but with Ladysmith holding out in their rear. The Orange Free State government was not prepared to allow its forces to advance further south in Natal. In Cape Colony some of the citizens of Boer origins joined their brothers from the two Republics but most did not.
Royal Engineers Telegraph Section: Battle of Modder River on 28th November 1899 in the Boer War
The only other offensive operations the Boers carried out were to besiege Mafeking in the north and Kimberley further south on the Cape Colony border. Both sieges were unsuccessful. Some limited incursion was carried out into the central area of Cape Colony up to the area around Stormberg.
The major difficulty for the Boer armies was that although supremely competent in defence, digging field fortifications and using their magazine rifles to great effect to defend them, the Boers lacked an effective offensive capability. The absence of formal military discipline made it difficult for the Boer commanders to devise strategies they could rely on their troops to carry through. As the British built up their armies and began to advance, defeat for the Boers became inevitable.
The Boer armies suffered from a wide variation in competence and commitment. The general belief was that the Transvaalers were more resilient and determined fighters than the Free Staters. The younger commanders tended to be more resourceful and aggressive and felt handicapped by the older more senior commanders.
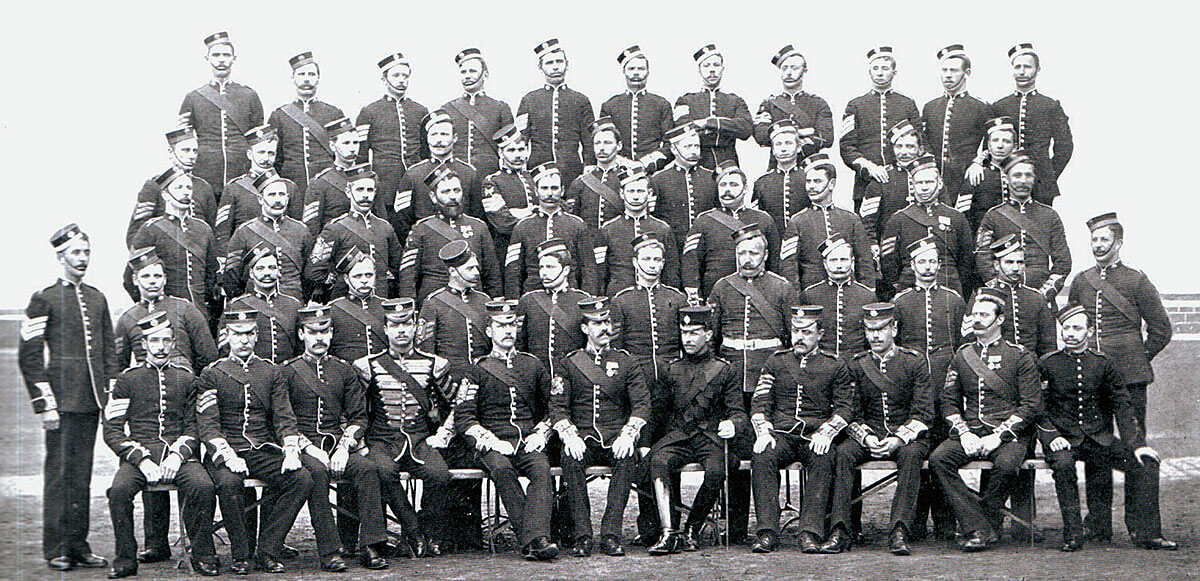
2nd Coldstream Guards non-commissioned officers. The Battalion fought at Belmont, Graspan, Modder River and Magersfontein in 1899: Battle of Modder River on 28th November 1899 in the Boer War
Uniform: The British regiments made an uncertain change into khaki uniforms in the years preceding the Boer War, with the topee helmet as tropical headgear. Highland regiments in Natal devised aprons to conceal coloured kilts and sporrans. By the end of the war the uniform of choice was a slouch hat, drab tunic and trousers; the danger of shiny buttons and too ostentatious emblems of rank was emphasised in several engagements with disproportionately high officer casualties.
Royal Marines from HMS Powerful, members of the Royal Naval Brigade at the Battle of Modder River on 28th November 1899 in the Boer War
The British infantry were armed with the Lee Metford magazine rifle firing 10 rounds, but no training regime had been established to take advantage of the accuracy and speed of fire of the weapon. Personal skills such as scouting and field craft were little taught. The idea of fire and movement was largely unknown, many regiments still going into action in close order. Notoriously, General Hart insisted that his Irish Brigade fight shoulder to shoulder as if on parade in Aldershot. Short of regular troops, Britain engaged volunteer forces from Britain, Canada, Australia and New Zealand, who brought new ideas and more imaginative formations to the battlefield.
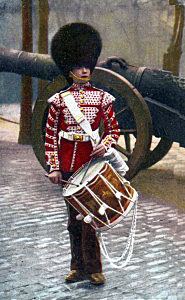
Scots Guards drummer: Battle of Modder River on 28th November 1899 in the Boer War
The British regular troops lacked imagination and resource. Routine procedures such as effective scouting and camp protection were often neglected. The war was littered with incidents in which British contingents became lost or were ambushed often unnecessarily and forced to surrender. The war was followed by a complete re-organisation of the British Army, with emphasis placed on personal weapon skills and fire and movement using cover.
The British artillery was a powerful force in the field, underused by commanders with little training in the use of modern guns in battle. Pakenham cites Pieters as being the battle at which a British commander, surprisingly Buller, developed a modern form of battlefield tactics: heavy artillery bombardments co-ordinated to permit the infantry to advance under their protection. It was the only occasion that Buller showed any real generalship and the short inspiration quickly died.
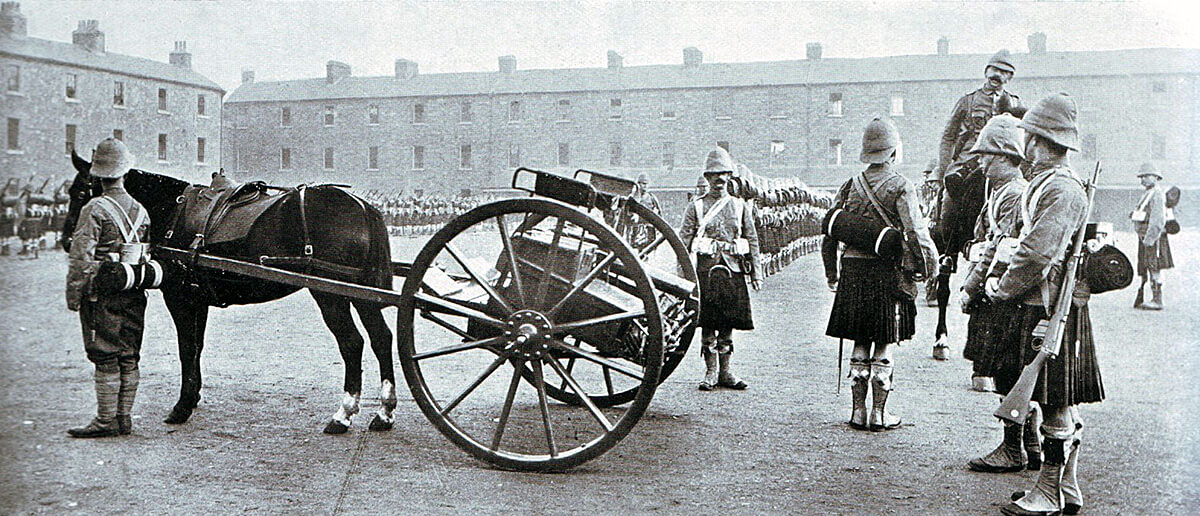
The Royal Field Artillery fought with 15 pounder guns; the Royal Horse Artillery with 12 pounders and the Royal Garrison Artillery batteries with 5 inch howitzers. The Royal Navy provided heavy field artillery with a number of 4.7 inch naval guns mounted on field carriages devised by Captain Percy Scott of HMS Terrible and the iconic long 12 pounders, seen in the Royal Navy gun competitions at the Royal Tournament.
Time and again the Gunners rescued British forces from disaster. This battle, Modder River, is a particular case in point, the 62nd Battery riding some fifty miles across the Veldt to take a critical role in the battle.
Automatic weapons were used by the British often mounted on special carriages accompanying the mounted infantry or cavalry, although several of the infantry battalions possessed a maxim machine gun.
Winner: The British suffered heavier casualties but the Boers withdrew from their positions on the Modder River.
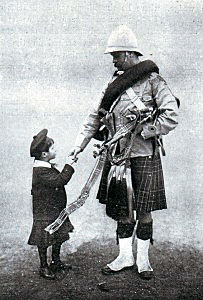
Pipe Major David Laing of 1st Scots Guards saying ‘Goodbye’ to his kilted son before leaving for South Africa: Battle of Modder River on 28th November 1899 in the Boer War
British Regiments:
Naval Brigade.
9th Lancers: now the 9/12th Royal Lancers.
Royal Field Artillery: 18th, 62nd and 65th Batteries.
Royal Engineers
Guards Brigade:
3rd Grenadier Guards.
1st and 2nd Coldstream Guards.
1st Scots Guards.
9th Brigade:
1st Northumberland Fusiliers: now the Royal Regiment of Fusiliers
2nd Northamptonshire Regiment: now the Royal Anglian Regiment
1st Loyal North Lancashire Regiment: later the Queens’ Lancashire Regiment and now the Duke of Lancaster’s Regiment
2nd King’s Own Yorkshire Light Infantry: later the Light Infantry and now the Rifles
Highland Brigade:
1st Argyll and Sutherland Highlanders: now 4th Battalion the Royal Regiment of Scotland
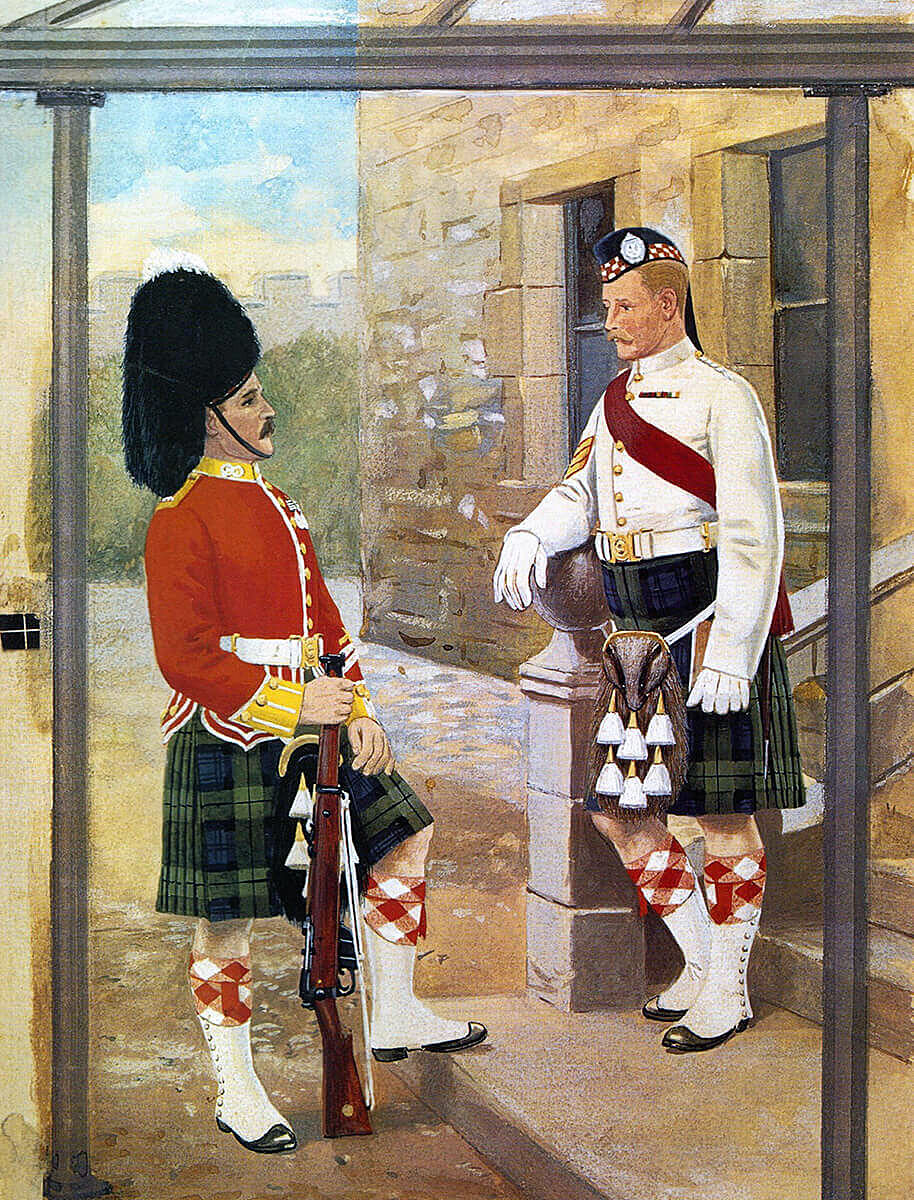
Argyll and Sutherland Highlanders in home service uniform after the war: Battle of Modder River on 28th November 1899 in the Boer War
Army Service Corps.
Army Medical Corps.
Rimington’s Guides.
New South Wales Lancers
Background:
The two Boer Republics, the Transvaal and the Orange Free State, began the war against Great Britain on 14th October 1899. Their principal operation was to invade Natal. They also began sieges of Mafeking and Kimberley, both important towns on the western borders of the two Boer republics.
The Government in Great Britain sent an Army Corps to South Africa under the command of Lieutenant General Sir Redvers Buller, to counter the Boer invasion of Natal and to drive the Boers back from Kimberley, Mafeking and Northern Cape Colony.

Royal Field Artillery 15 pounder gun team in Home Service uniform: Battle of Modder River on 28th November 1899 in the Boer War
Before Buller’s force could reach Southern Africa, the three battles in Natal, Talana Hill on 20th October, Elandslaagte on 21st October and Ladysmith on 30th October 1899 saw the existing British force in Northern Natal under Lieutenant General Sir George White penned up in Ladysmith and put under siege by the Boers.
Buller arrived in Cape Town and prepared his strategy for the war. Lieutenant General Lord Methuen would command the force, comprising the 1st Division, with the task of marching up the railway running north along the western border of the Boer Republics to relieve Kimberley. Lieutenant General Gatacre would command in the central front.
Sir George White, the British commander-in-chief in Natal, was under siege in Ladysmith so a general fell to be appointed to command the relief force in Natal. Buller took this role on himself, leaving the overall strategy of the war with no guiding hand.
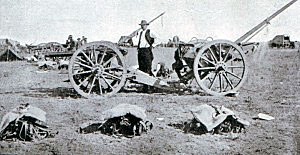
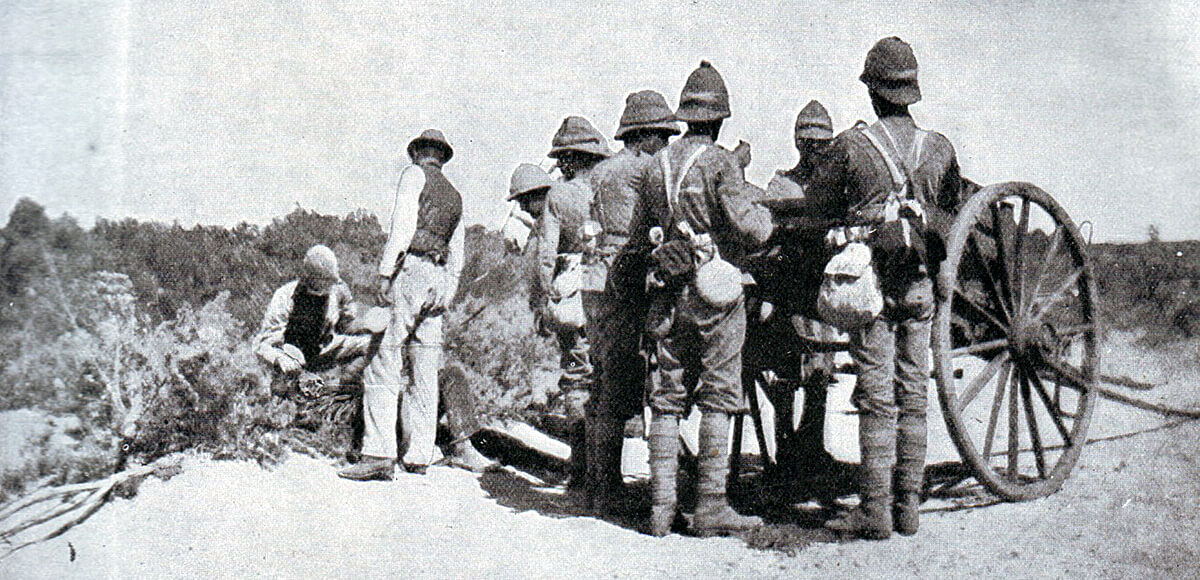
Boer gun at the Battle of Modder River on 28th November 1899 in the Boer War
Buller expected it would take him two weeks to relieve the Ladysmith garrison, after which he would return to Cape Colony. Buller was to spend the rest of the active war crossing the Tugela River and relieving Ladysmith.
In early 1900 the British government sent a strong command team of Lord Roberts and General Kitchener to take over the offensive in the Orange Free State from Cape Colony. In the meantime Lord Methuen was left to command the only advance on the Boer Republics.
18th Field Battery Royal Field Artillery. The Battery fought at the Battle of Modder River on 28th November 1899 in the Boer War
Account:
Lieutenant General Lord Methuen landed at Cape Town on 10th November 1899. His task with the 1st Division was to force his way north up the route of the Cape Town to Bulawayo Railway and raise the Boer siege of Cecil Rhodes’s diamond town, Kimberley. The British authorities feared that a Boer capture of the town would considerably increase the financial resources available to the Boer republics through access to Kimberley’s diamond mines.
The forward base for Methuen’s force was already established at De Aar in the north of Cape Colony, approximately 60 miles from the Orange River which formed the border with the Orange Free State. Substantial quantities of supplies were stock piled at De Aar for Methuen’s use.
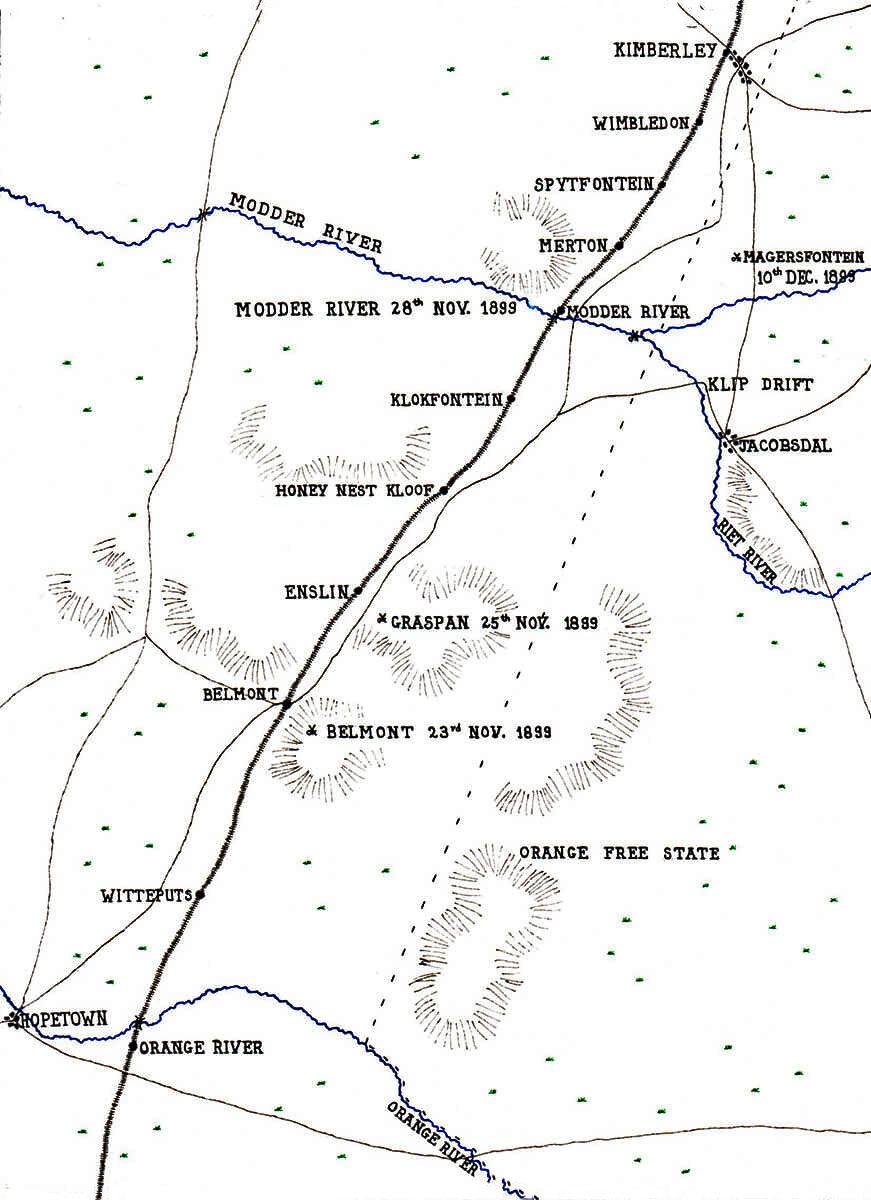
Map showing the area of Lord Methuen’s operations from the Orange River to the Battle of Magersfontein on 10th December 1899 in the Boer War: map by John Fawkes
Methuen’s division moved up to Orange River station on the single railway line that ran north to Rhodesia, joining the small force from the pre-war South African garrison. Methuen then pressed on up the line towards Kimberley, his troops fighting two successful but costly actions against the Boers at Belmont and Graspan.
These two battles followed the same pattern: the Boers driven from the hill tops they held by heavy artillery bombardment and an infantry attack at the point of the bayonet. On each occasion the Boers were fortunate there was no substantial British cavalry force to follow up the attacks or there would have been repeats of the slaughter inflicted on them at Elandslaagte.
Following the Battle of Graspan the Boers withdrew to the Modder River, where they prepared to resist again the advance of Methuen’s force.
Due to the partnership of the two Boer Republics, the Orange Free State and the Transvaal, command was divided. Prinsloo led the Free State burghers while Cronje and De la Rey commanded the Transvaalers.
De la Rey, a deeply religious but able commander, resolved not to repeat the mistakes that had cost the Boers a run of battles. His men would entrench in the plain, not on the hilltops where they were vulnerable to British artillery fire. De la Rey ordered his commandos to dig trenches along the bank of the Modder River, at the Riet River junction, astride the wrecked railway bridge south of Modder River station.
Modder River: Battle of Modder River on 28th November 1899 in the Boer War
Methuen’s force spent the night of 25th November 1899 after the Graspan Battle at Enslin Station while the Royal Engineers restored the railway and telegraph sabotaged by the retreating Boers. This work continued the next day while the troops marched on to Klokfontein Station, eight miles from the Modder River crossing and station.
The march was across the Veldt in temperatures around 110 degrees Fahrenheit. Water supplies at each of the railway stations were designed to supply a train service and were wholly inadequate for some 8,000 troops with accompanying horses and mules.
On 28th November 1899 Methuen’s army marched at dawn. The British command discounted any Boer resistance south of Spytfontein a station twelve miles north of the Modder River crossing.
G Company 1st Scots Guards at the Battle of Modder River 28th November 1899 in the Boer War
It is reported that the British high command neglected to carry out any adequate reconnaissance to see where the Boers were and where the British might expect to meet resistance. Nevertheless Lord Methuen himself on 27th November rode up to inspect the Modder River Railway Bridge which the Boers had destroyed. He saw nothing of the Boers.
At this stage of the war the reconnaissance capability of the British army and particularly the cavalry seems to have been inadequate. There seems to have been no intelligence structure even though the fighting was taking place on British colonial territory. Buller’s Army Corps had two majors from British infantry regiments in its staff structure with appointments giving their duties as ‘intelligence’. Presumably these officers went to Natal with Buller. In any case they will have had little opportunity to gain much information. There was no officer on the 1st Division staff with formal intelligence responsibilities.
Officers of the 1st Coldstream Guards. The Battalion fought at Belmont, Graspan, Modder River and Magersfontein in 1899 in the Boer War
Methuen’s advance is a striking example of an army moving ‘blind’. A reconnaissance up to the Modder River would have revealed the extensive Boer positions to the British and enabled Methuen to attack with a proper plan, perhaps with a river crossing above or below the Boer positions, instead of blundering into them as he did.
The soldiers were told they would breakfast by the Modder River. It is said that Methuen told his cook to defer preparing a meal until after the river was reached.
The Modder River was a pre-war recreation centre for the Kimberley population with several hotels and other buildings. About two miles west or downstream of Modder River Station a dam on the river created a pool for boating and swimming. On the north bank at this point stood a number of hotel and cottage buildings called Rosmead. To the east of the bridge where the Riet River and the main river forked was an area called Twee Rivier.
Major Albrecht the German commander of the Boer Artillery at the Battle of Modder River on 28th November 1899 in the Boer War
The Boers destroyed the railway bridge and built trenches along the north bank from the area of the Rosmead hotels and bungalows to the railway line and then further east onto Twee Rivier. Some 8,000 Boers occupied four miles of entrenched positions on both sides of the river. On the south bank the Boers built a line of trenches in the wooded strip along the river bank. Half of the Boers were Free Staters on the right under Prinsloo, the other half Transvaalers under Cronje and De la Rey. The Boer artillery, commanded by the German Major Albrecht, comprised seven field guns and a heavy gun positioned some two miles in the rear. The Boer field guns were scattered individually along the centre and eastern sections of the line. A gun and some Boers watched the ford well to the east.
De la Rey’s directions were that the British were to be permitted to approach within 400 yards of the Boer trench line before fire was opened on them, the idea being to spring an ambush.
1st Argyll and Sutherland Highlanders, the old 91st, in Britain before leaving for South Africa and taking part in the Battle of Modder River on 28th November 1899 in the Boer War
In the meantime the 1st Argyll and Sutherland Highlanders was marching up to Klokfontein, the first battalion of the Highland Brigade to join Methuen’s division.
Also on its way was 62nd Field Battery RFA, currently at Belmont Station.
Methuen’s force now numbered 8,000 infantry, 400 cavalry and 16 guns, which would rise to 22 guns once the 62nd Battery came up.
The force marched out of Klokfontein at dawn on 28th November for the Modder River crossing, not expecting any serious Boer resistance until Spytfontein. The soldiers were seriously short of water and looked forward to reaching the river.
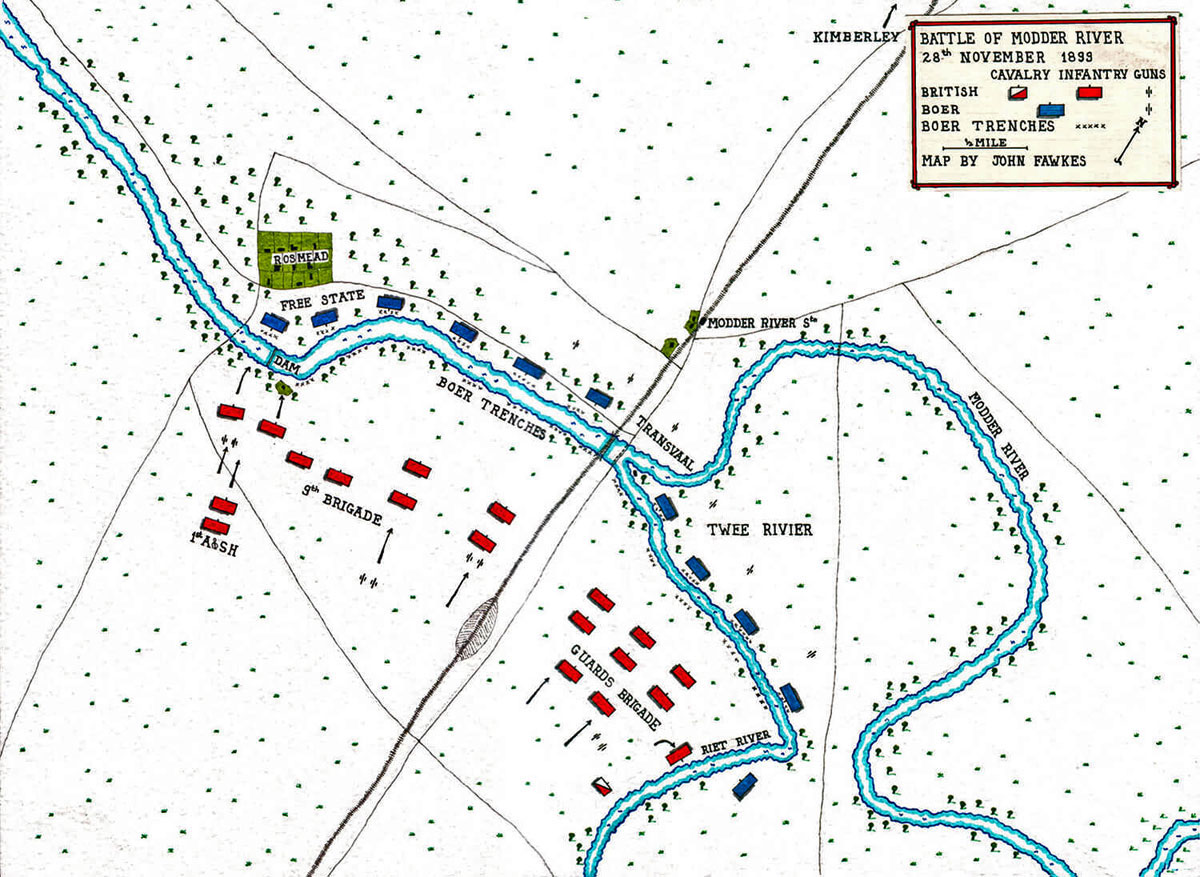
Map of the Battle of Modder River on 28th November 1899 in the Boer Warby John Fawkes
Information came in to Methuen as his men were under way that the Boers were in strength at the Modder River crossing. He considered that there was little he could do and his understanding was that the river was easily forded at a number of points. He intended to bludgeon his way through any resistance, much as he had at Belmont and Graspan.
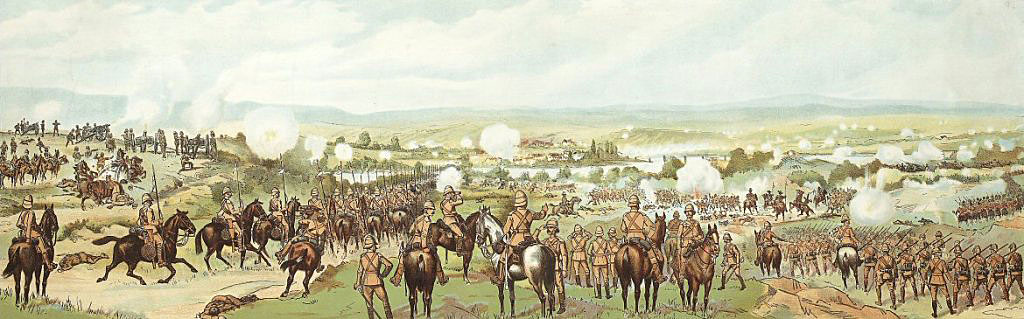
The British infantry deployed as they approached the river, the Guards Brigade on the right of the railway line and the 9th Brigade on the left. The Scots Guards took the right flank with the Grenadiers in the centre, 2nd Coldstream on the left next to the railway line and 1st Coldstream in support.
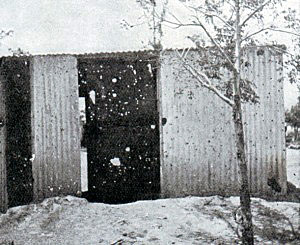
Shed hit by shrapnel fired by British guns at the Battle of Modder River on 28th November 1899 in the Boer War
The North Lancashires took the left flank of the 9th Brigade, with the KOYLI on their right and next the Northumberland Fusiliers, the 1st Argyll and Sutherland Highlanders in support.
The Royal Naval guns were on the left, the two RFA batteries on the right. The 9th Lancers and the Mounted Infantry supported the right flank. The Northamptons escorted the baggage in the rear.
The Boers had destroyed a number of culverts back down the line so that the armoured train was unable to approach Modder River Station.
The river was about 300 yards wide where it became the Riet, above the bridge, and about 500 yards wide below the bridge. There were three usable fords over the river, one well to the right of the British line, one by the bridge and the third below the dam. There is no indication that the British discovered the whereabouts of any of these fords until after the battle.
Unsuccessful attempts to get water to the British soldiers in the firing line at the Battle of Modder River on 28th November 1899 in the Boer War
The first British troops to approach the Boer positions were the cavalry and mounted infantry on the right. They saw a body of Boers moving away and a Boer field gun opened fire on them.
The British 18th and 75th Batteries unlimbered and opened fire on the Boer positions east of the bridge. As at Belmont and Graspan the single concealed Boer guns were difficult to target. The German artillery commander Major Albrecht had caused concealed gun pits to be built along the Boer line and his guns moved between these pits when they came under fire.
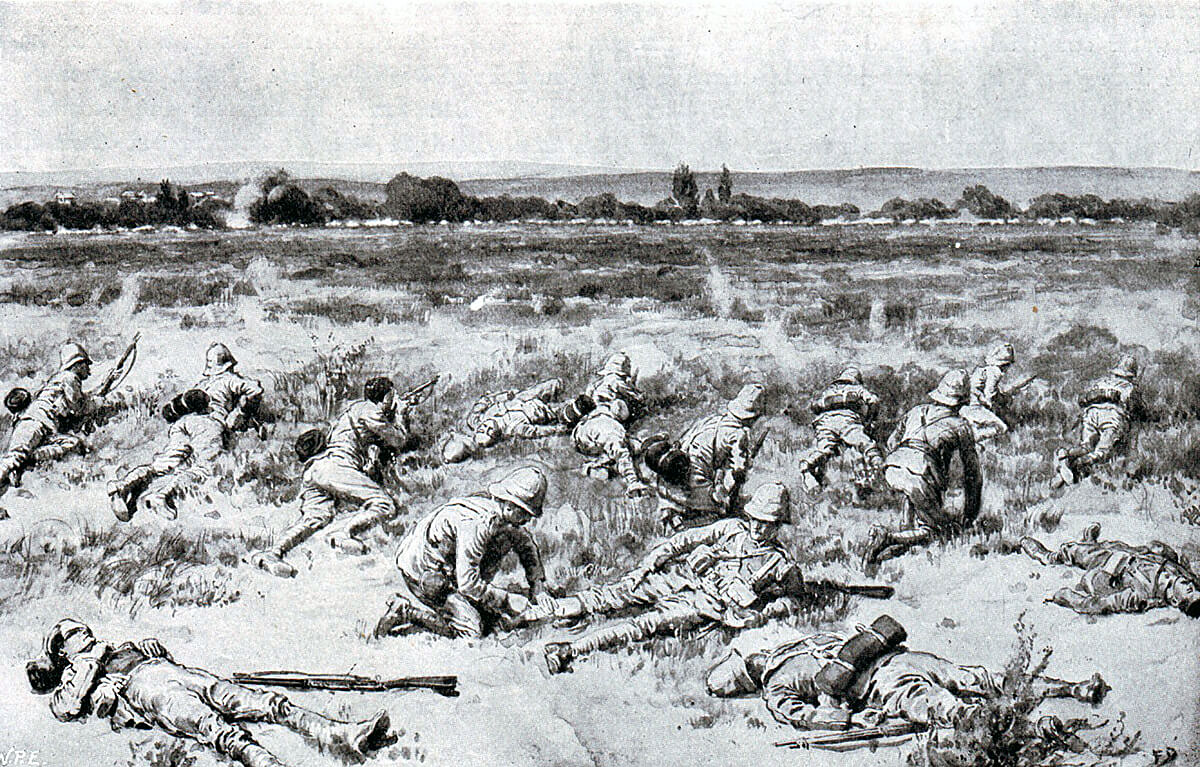
The British infantry line advanced on the Boer positions, unaware of their presence. Instead of following Cronje’s instructions to let the British advance to within 400 yards the Free Staters opened fire at around 800 yards. The fire extended along the Boer line so that there was four miles of rifle fire blazing at the advancing British troops. The British infantry went to ground and began to return the fire. Although the trap had been sprung too early the British infantry were in a difficult situation, unable to withdraw or to advance, mostly in the open without cover in the blazing heat of the South African sun.
The Boer pom-pom (automatic Maxim 1 pounder gun) achieved a direct hit on the Scots Guards Maxim machine gun, destroying the gun and killing or wounding the gun crew.
Major General Sir Henry Colville commanding the 1st Guards Brigade at the Battle of Modder River on 28th November 1899 in the Boer War
The 1st Coldstream Guards worked their way around the British right and down to the river’s edge where they attempted to find a ford. Colonel Codrington led a small party across the river, swimming as no ford could be found, but were forced to return as nothing could be achieved. The brigade commander, General Colville, called the Coldstream back from moving too far along the bank, preventing them from discovering the main ford which lay to the east of the railway bridge.
Methuen telegraphed to the 62nd Battery coming up from Belmont to press on with all dispatch. 2 companies of Royal Munster Fusiliers were ordered up from Belmont by train.
The British batteries on the field worked forward and began a prolonged bombardment of the Boer positions, while the riflemen on both sides exchanged fire. The temperature rose to 110 degrees and the British troops lay in the open, few with any water. The movement and shell explosions disturbed innumerable ants nests, the ants adding to the discomfort of the soldiers lying among them.
Foot Guards at the Battle of Modder River on 28th November 1899 in the Boer War: picture by Frank Dadd
Conan Doyle in his account of the war states: “The men gossiped, smoked and many of them slept. They lay on the barrels of their rifles to keep them cool enough for use. Now and again there came the dull thud of a bullet which had found its mark, and a man gasped, or drummed with his feet; but the casualties at this point were not numerous, for there was some little cover, and the piping bullets passed for the most part overhead.”
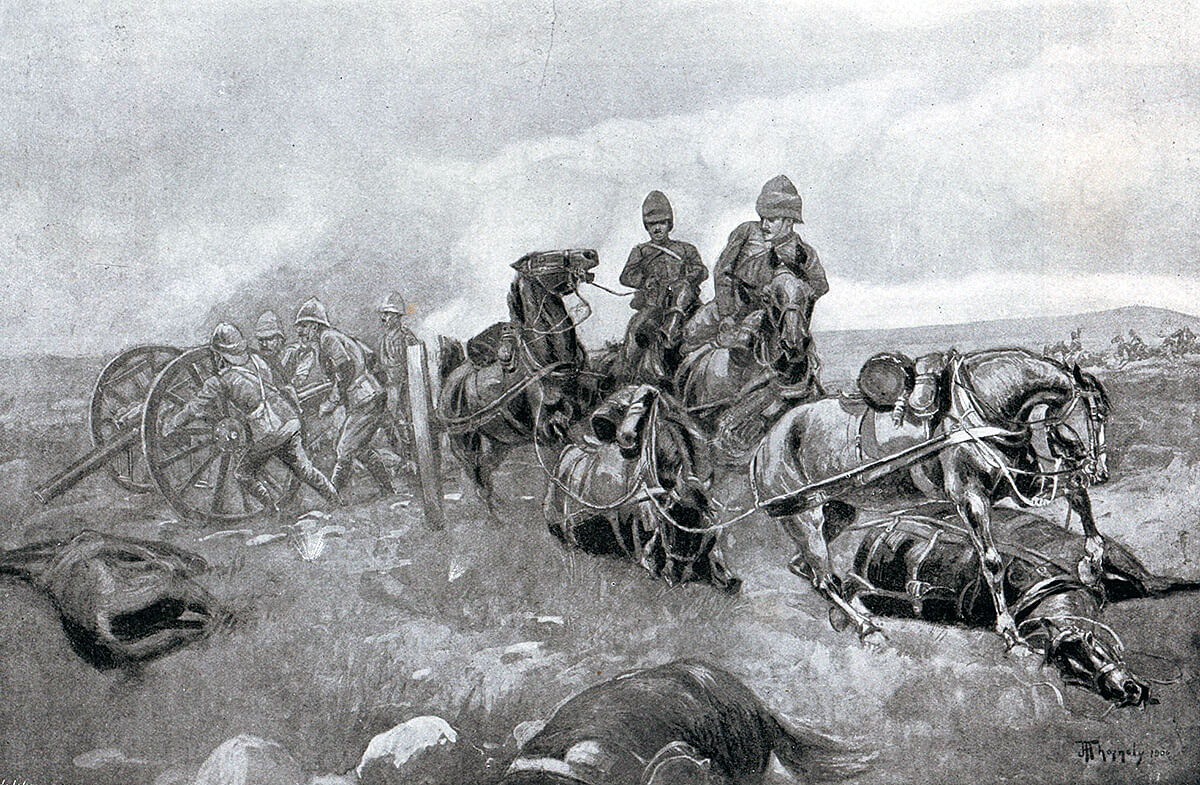
62nd Battery Royal Field Artillery arriving on the battlefield after a thirty mile march and unlimbering 900 yards from the Boer firing line at the Battle of Modder River on 28th November 1899 in the Boer War
At around noon the 62nd Battery arrived after a twenty-five mile march in which several horses died of exhaustion.
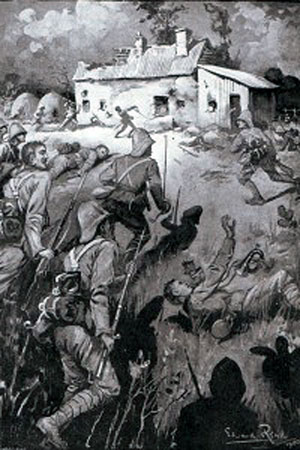
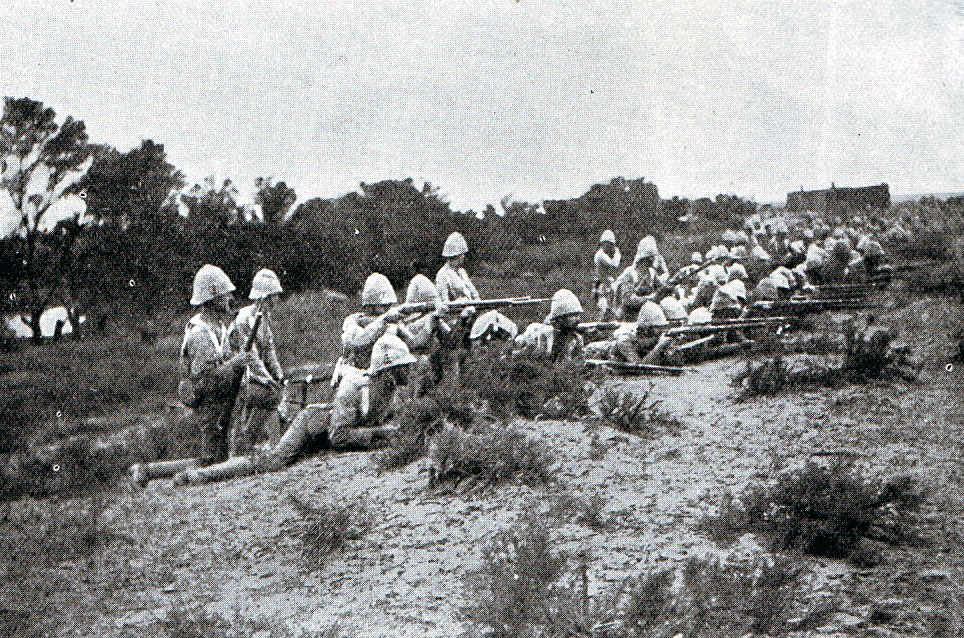
9th Brigade storming a farmhouse held by the Boers on the left flank during the Battle of Modder River on 28th November 1899 in the Boer War; picture by Edward Read
The battery came into action on the left flank at a range of 1,500 yards. At Methuen’s request the battery moved up to 900 yards and resumed firing, incurring casualties. Once the Boer guns were silenced the battery withdrew out of rifle range only to be redirected to the British right flank where they were required to repeat the operation, firing six rounds a minute until the Boer guns there were silenced.
As the afternoon wore on the battalions on the left, the KOYLI and the North Lancashires, began to work their way to the left and up to the river. They stormed a farmhouse held by the Boers and moved forward to the river bank. A number of KOYLIs crossed the river above the dam by the Rosmead Drift only to be driven back to the south bank. Lord Methuen, immediately supervising the operation, was wounded in the thigh. He was removed to the field hospital and General Codrington commanding the Guards Brigade took over command, although he was in no position to exercise supervision over the attack being conducted by the 9th Brigade.
A company of Argylls stormed across the river only to be driven back leaving several men dead in the Boer trenches on the far bank.
These attacks were supported by the fire of the 62nd Field Battery.
Battle of Modder River on 28th November 1899 in the Boer War
The next crossing was the one that finally achieved the necessary breakthrough. Colonel Barter led an infiltrating attack of KOYLIs at the dam itself, which involved scrambling in the water from iron strut to iron strut along the dam to the far side. Eventually some 400 men were on the north bank and began to force their way along the bank to the east.
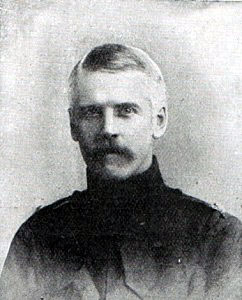
Lieutenant Colonel Northcott, Methuen’s staff officer, killed at the Battle of Modder River 28th November 1899 in the Boer War
Colonel Northcott, a senior officer on Methuen’s staff, brought up reinforcements and was fatally wounded by a shell burst in the process. These re-enforcements included a party from 1st Coldstream Guards taken from the right flank and led by Captain Newtown Butler and Colour Sergeant Plunkett.
During the course of the British attack De la Rey called for a counter-attack from the Boers in the centre commanded by Cronje, but none was forthcoming.
The batteries supporting the river crossing mistook the KOYLIs on the north bank for Boers and fired on them causing them to fall back, but the breakthrough had been achieved. The Free Staters holding this part of the Boer line were badly shaken by the artillery bombardment, the British rifle fire and finally the hand to hand fighting at the hands of the charging KOYLIs and Argylls. At around 2pm a large party of Free Staters left the trenches on the Boer right and rode off to the east. And then at around 4pm there was a general retreat from the Boer trenches around Rosmead which extended along the Boer positions.
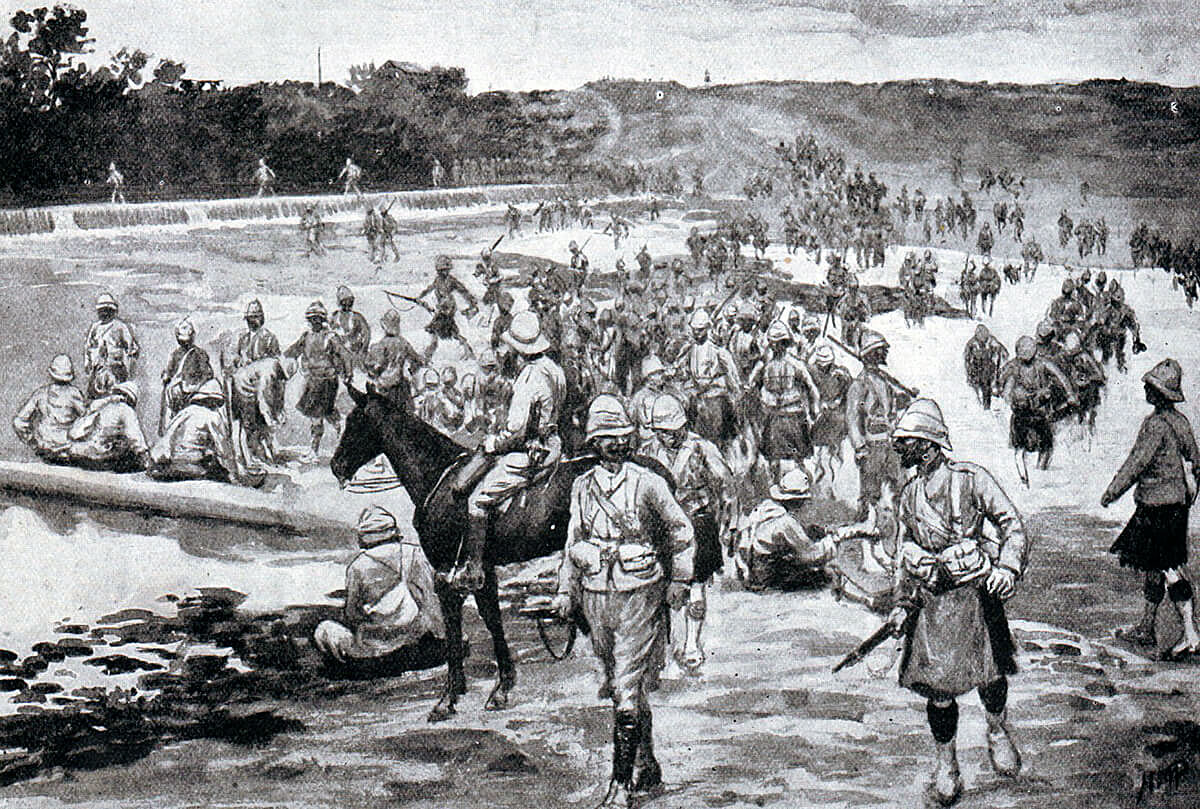
British troops of the 9th Brigade crossing the river by the Dam at the Battle of Modder River on 28th November 1899 in the Boer War
By this time the British infantry on the right were virtually out of ammunition with no re-supply possible in the conditions of the battle.
Due to their exhausted state after a full day in the scorching sun under rifle and field gun fire the dazed British soldiers did not realize that the Boers were leaving the field and anyway were in no condition to follow them up. Many fell asleep and spent the night in their battle positions. The night was cold and greatcoats had been left in camp.
Initially the Boers abandoned their field guns and wounded on the battlefield but they returned during the night and retrieved both.
On the morning of 29th November the Naval field guns fired a number of rounds to signal a new crossing of the Modder River. There was no response from the Boer lines. The British troops crossed unopposed. The Boers were gone.
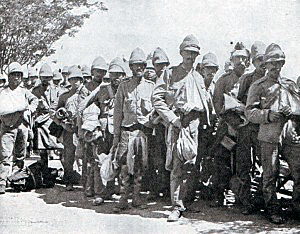
British walking wounded after the Battle of Modder River on 28th November 1899 in the Boer War
Casualties:
British casualties were 4 officers and 93 men killed and 20 officers and 362 wounded.
The principal losses sustained were by the Argyll and Sutherland Highlanders with 112 casualties and 2nd Coldstream Guards with 69 casualties.
Lord Methuen was wounded in the thigh. One of his principal staff officers Colonel Northcott was killed during the attack on Rosmead, while bringing up re-enforcements.
Boer losses are estimated at 60 killed and 300 wounded.
Battle Honours:
The regiments present at the battle received the battle honour ‘Modder River’. All the regiments that fought in South Africa received the battle honour ‘South Africa’ with the dates of presence in the country.
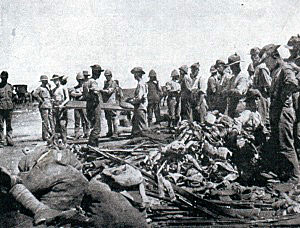
British troops clearing the battlefield of bodies and abandoned weapons after the Battle of Modder River on 28th November 1899 in the Boer War
Follow-up:
De la Rey and Cronje withdrew to the Magersfontein position 6 miles to the North of the Modder River to await the next attack by Methuen’s force, pressing on up the railway to relieve Kimberley.
Regimental anecdotes and traditions:
- If Lord Methuen had been a student of military history he might have found inspiration from General Howe’s conduct of the British attack at the Battle of Brandywine Creek in 1777 against the Americans. George Washington defended a river and a number of fords on either side.
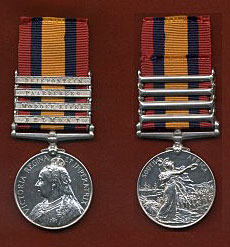
Queen’s South Africa medal with the clasp ‘Modder River’: Battle of Modder River on 28th November 1899 in the Boer War
Howe fixed the Americans with a feint attack while he marched upstream until he found an undefended ford, enabling him to cross and attack the Americans in the rear. Fords could be identified by the cattle hoof prints entering the river on each side.
- The Argyll’s involvement in the battle is commemorated by the pipe tune ‘the 91st at Modder River’. Somehow the tune’s title has become transposed so that it is more commonly known as ‘the 93rd at Modder River’. The 93rd was the second battalion of the Argyll and Sutherland Highlanders and was not at the Battle of Modder River on 28th November 1899.
- Major Coleridge of the North Lancashires leading his men into the Modder River at Rosmead is said to have called out ‘Now, boys, who’s for otter hunting?”
- In his official dispatch Lord Methuen said that he had been led to understand that the Modder River was fordable everywhere. Methuen also described the battle as ‘the hardest won victory in our annals of war’.
British troops collecting casualties from the battlefield after the Battle of Modder River on 28th November 1899 in the Boer War
- For Conan Doyle the honours of the day rested with 1st Argyll and Sutherland Highlanders, 2nd Coldstream Guards and the Artillery.
- It is reported that during the battle the four Naval long 12 pounders fired over 500 rounds, the six guns of 18th Battery fired more than 1,100 rounds, 75th Battery fired 900 rounds and the later arrivers, the 62nd, fired 500 rounds.
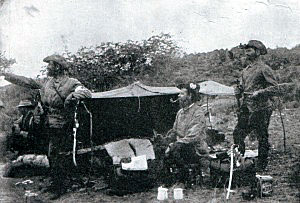
Major McGrigor of 1st Scots Guards having a bath after the Battle of Modder River on 28th November 1899 in the Boer War
- Once the battle was finished and it was clear the Boers had gone the troops were able to bathe in the Modder River and the officers to have a bath. A Guards officer, Major McGrigor of 1st Scots Guards, recorded: ‘We had a lovely wash this morning. I washed shirt and drawers, besides myself. I wanted it. My clothes have not been off since we left the Orange River on November 21…’
- The Argylls suffered particularly when lying under fire in the Veldt, the sun burning the backs of their legs below the kilt hem.
- After the battle De la Rey accused Cronje of leaving his men in the lurch by failing to launch a counter-attack from the centre to the area of Rosmead.
- General De La Ray’s older son Adriaan was mortally wounded at the Battle of Modder River. De La Ray took his son to Jacobsdal where he died. De La Ray missed a crucial command meeting as he was conducting his son’s funeral.
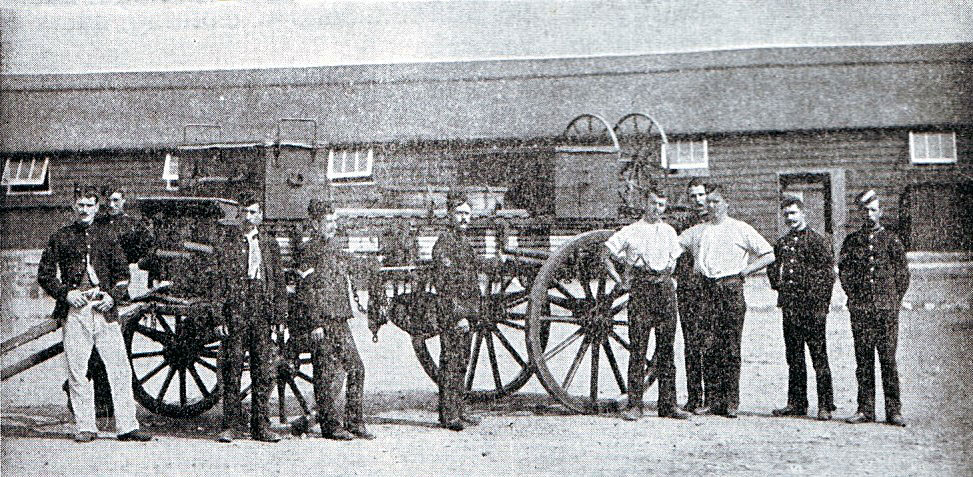
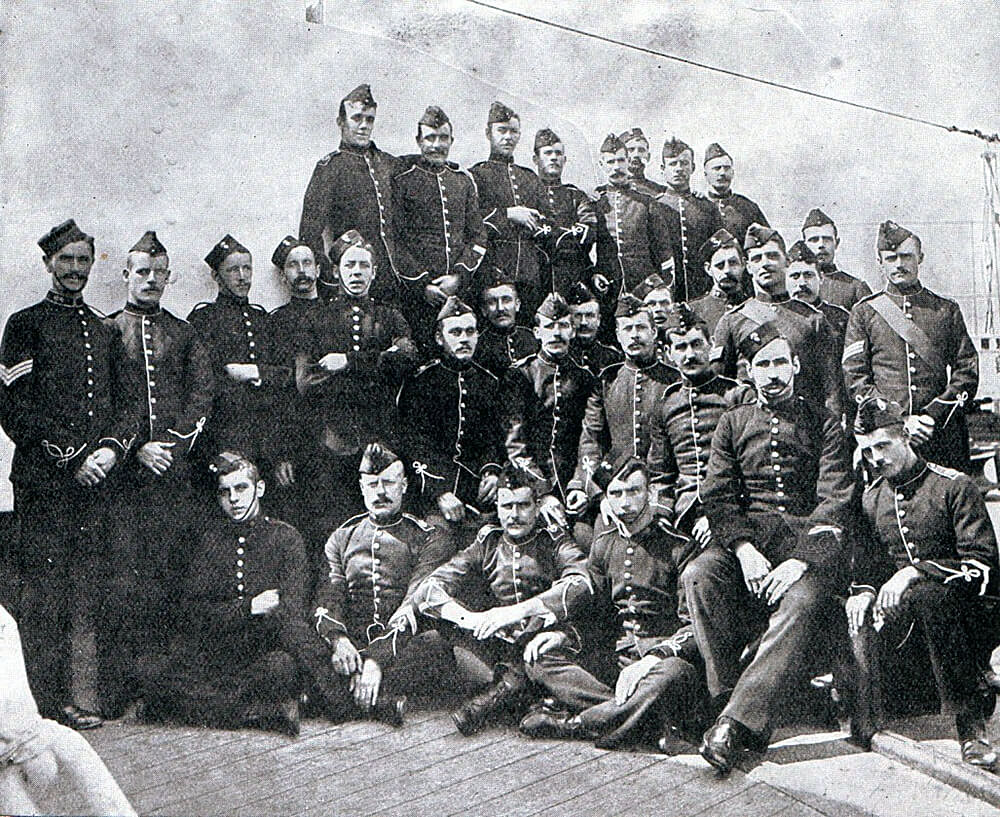
62nd Field Battery Royal Field Artillery prize winning gun teams. The Battery fought at the Battle of Modder River on 28th November 1899 in the Boer War
- Major Granet and his 62nd Battery Royal Field Artillery were hastening to the front up the railway line from Orange Bridge Station when they received the order to hurry on to Modder River. They had marched twenty miles the first day in temperatures of 100 degrees and more, the next day they marched twenty-five miles and were about to rest when they were ordered forward for another five miles and a full day’s battle, moving around the field under rifle and gun fire.
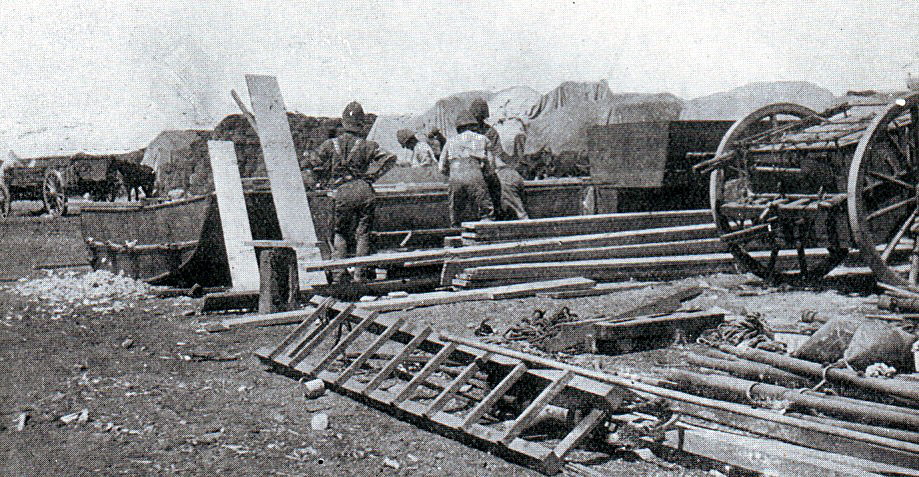
Royal Engineers preparing pontoon bridges to cross the Modder River after the Battle of Modder River on 28th November 1899 in the Boer War, the railway bridge having been destroyed by the Boers
- With 1st Scots Guards at Belmont and Modder River was Reserve Corporal William Oakley, a soldier of 6 foot 4 inches height. Oakley returned to the Reserve in April 1902 and resumed his position as a police constable with the City of London Police. Oakley had problems. In 1916 he was discharged from the police for drunkenness and mental disorder after threatening to cut his throat. He died in 1951. Perhaps Oakley suffered from post-traumatic stress disorder from his experiences at Belmont and Modder River.
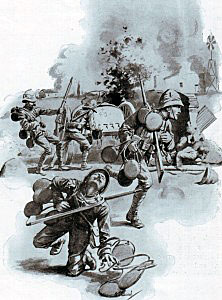
Battle of Modder River on 28th November 1899 in the Boer War
References:
The Boer War is widely covered. A cross section of interesting volumes would be:
- The Times History of the War in South Africa
- The Great Boer War by Sir Arthur Conan Doyle
- Goodbye Dolly Gray by Rayne Kruger
- With the Flag to Pretoria by HW Wilson
- The Boer War by Thomas Pakenham
- South Africa and the Transvaal War by Louis Creswicke (6 highly partisan volumes)
62. Podcast of the Battle of Modder River fought on 28thNovember 1899 in the Boer War as Lord Methuen’s British force advanced to relieve Kimberley: John Mackenzie’s britishbattles.com podcasts
The previous battle in the Boer War is the Battle of Graspan
The next battle in the Boer War is the Battle of Stormberg