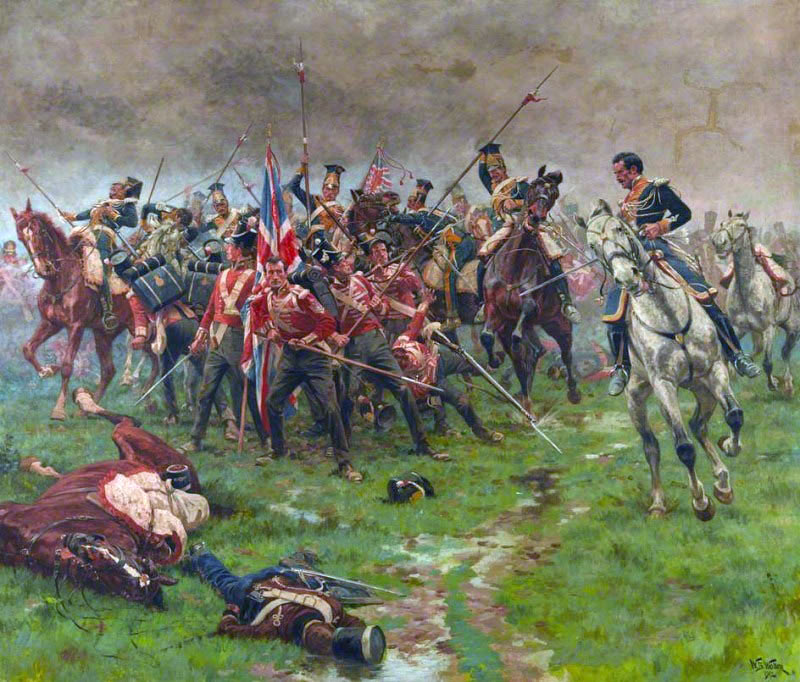
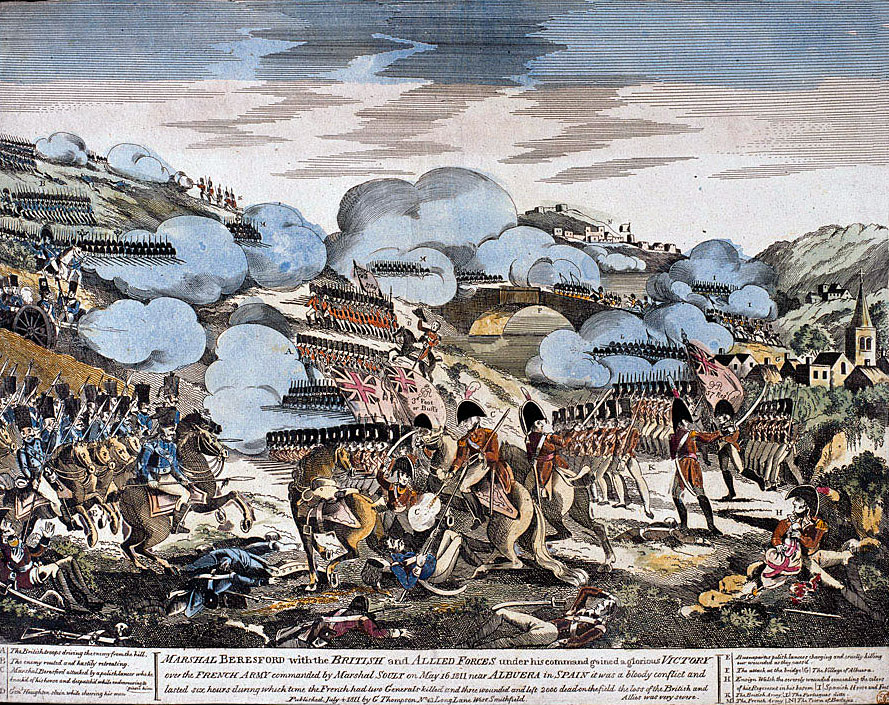
Marshal Beresford’s hard-fought battle against the French army of Marshal Soult on 16th May 1811 during the Peninsular War, with his army of British, Portuguese and Spanish troops
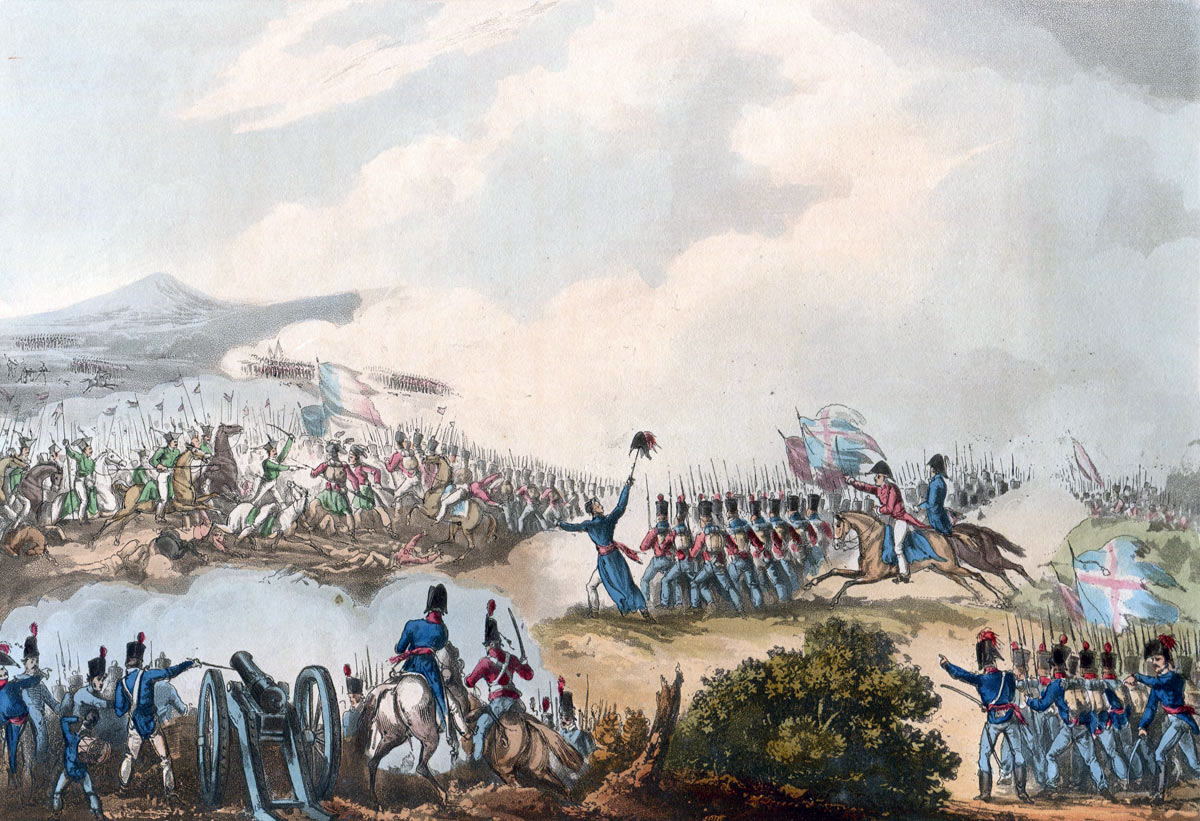
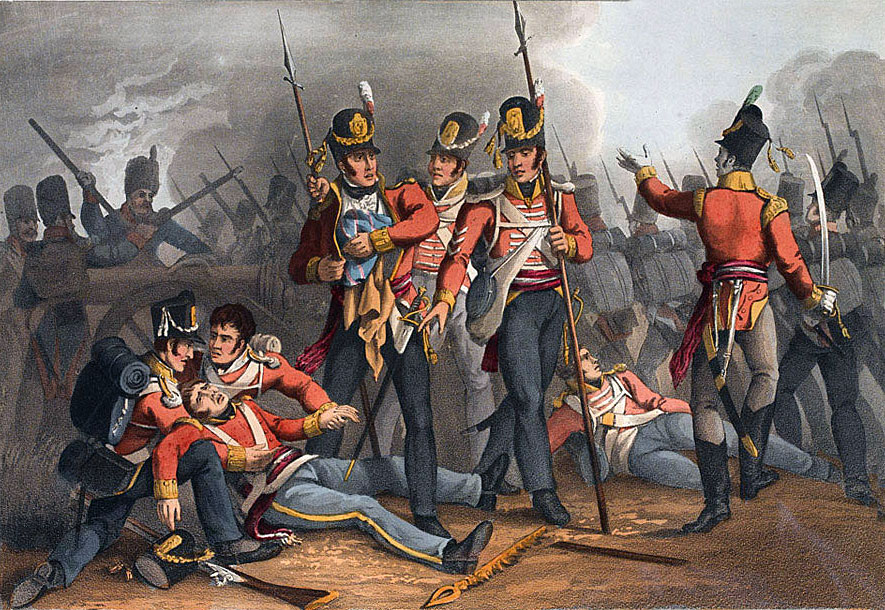
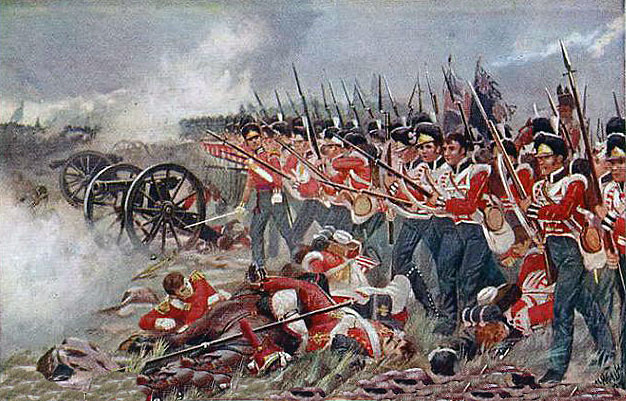
Battle of Albuera on 16th May 1811 in the Peninsular War: picture by J.J. Jenkins
![]()
22. Podcast of the Battle of Albuera: Marshal Beresford’s hard-fought battle against Marshal Soult on 16th May 1811 during the Peninsular War, with his army of British, Portuguese and Spanish troops: John Mackenzie’s britishbattles.com podcasts
The previous battle in the Peninsular War is the Battle of Fuentes de Oñoro
The next battle of the Peninsular War is the Battle of Usagre
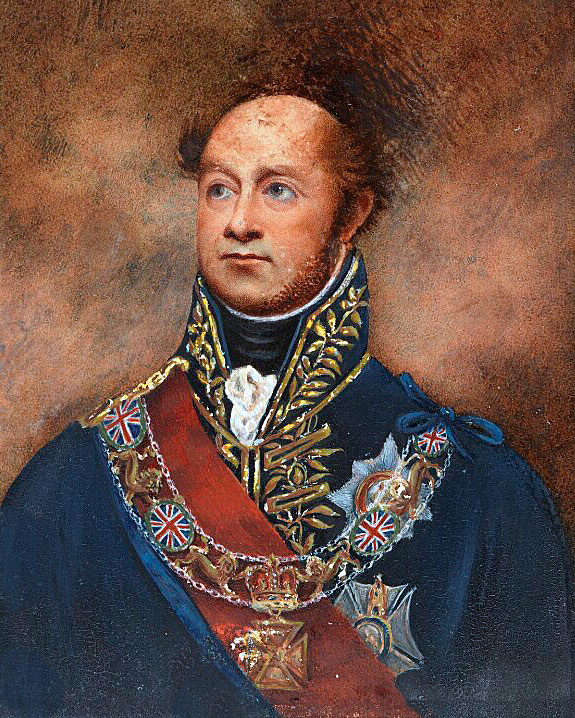
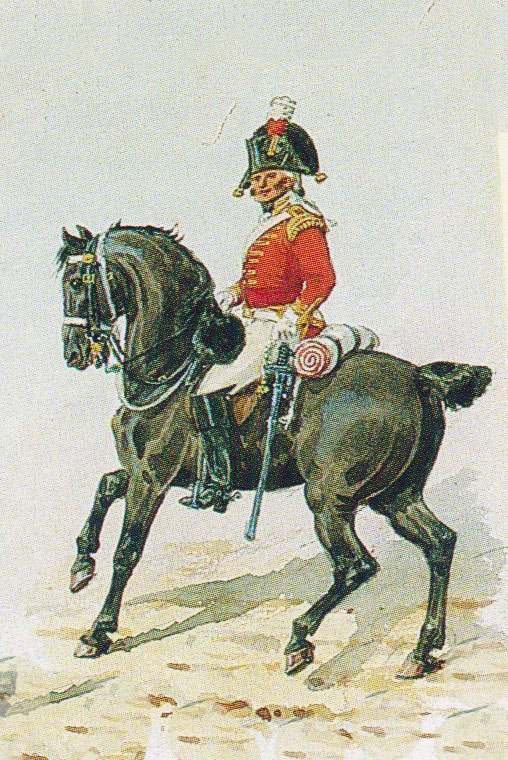
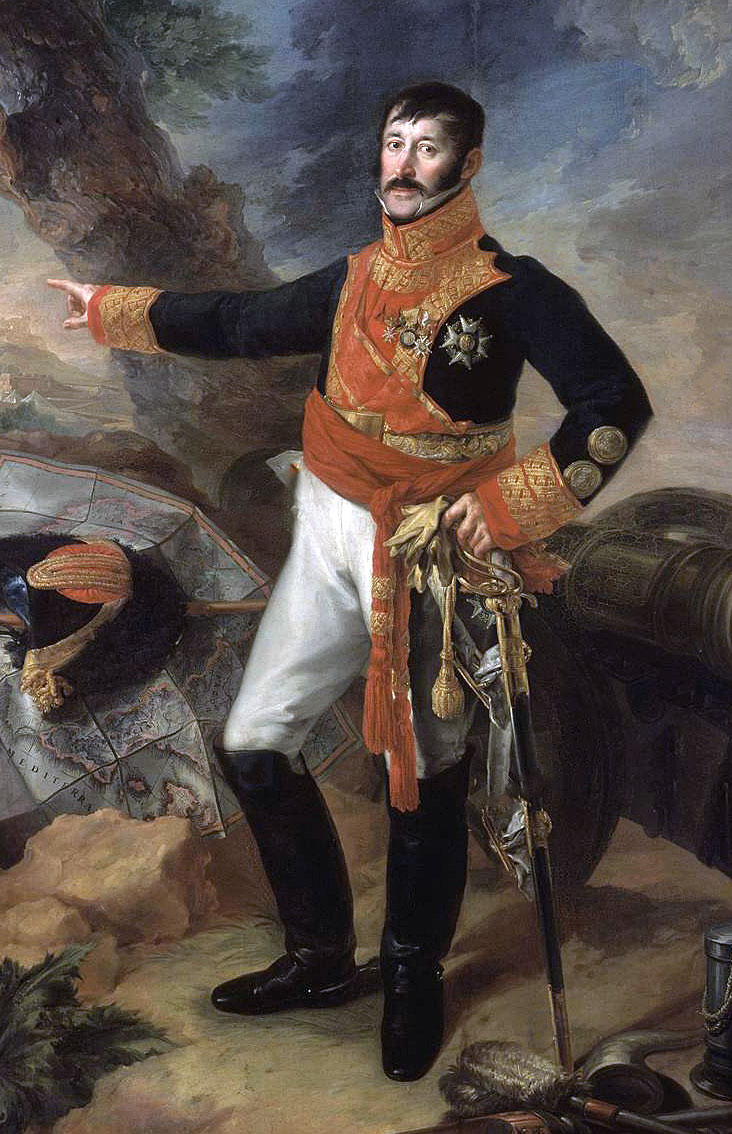
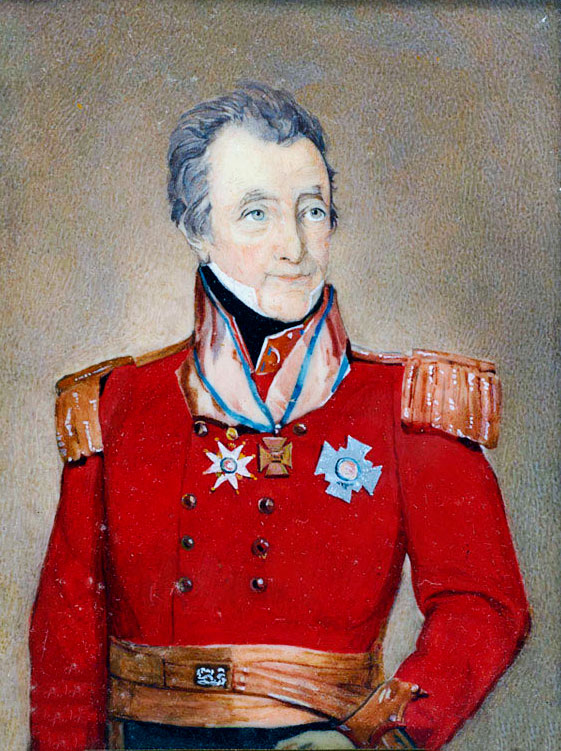
Marshal William Carr Beresford: Battle of Albuera on 16th May 1811 in the Peninsular War
Battle: Albuera
War: Peninsular War
Date of the Battle of Albuera: 16th May 1811
Place of the Battle of Albuera: south-westernSpain, near the Portuguese border, south-east of Badajoz.
Combatants at the Battle of Albuera: British, Portuguese and Spanish against the French.
Commanders at the Battle of Albuera: The British Marshal Beresford and the Spanish General Blake against the French Marshal Soult.
Size of the armies at the Battle of Albuera: 32,000 British, Portuguese and Spanish troops (including 2,000 cavalry) and 38 guns against 23,000 French troops (including 4,000 cavalry) and 40 guns.
6,000 of Beresford’s troops were British.
Uniforms, arms, equipment and training
at the Battle of Albuera:
The British infantry wore red waist-length jackets,
grey trousers, and stovepipe shakos. Fusilier regiments wore bearskin caps. The
two rifle regiments wore dark green jackets and trousers.
The Royal Artillery wore blue tunics.
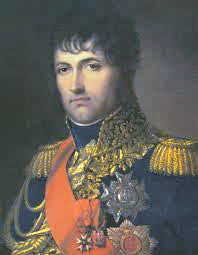
Marshal Soult, French Commander at the Battle of Albuera on 16th May 1811 in the Peninsular War
Highland regiments wore the kilt with red tunics and black ostrich feather caps.
British heavy cavalry (dragoon guards and dragoons) wore red jackets and ‘Roman’ style helmets with horse hair plumes.
The British light cavalry was increasingly adopting hussar uniforms, with some regiments changing their titles from ‘light dragoons’ to ‘hussars’.
The King’s German Legion (KGL) was the Hanoverian army in exile. The KGL owed its allegiance to King George III of Great Britain, as the Elector of Hanover, and fought with the British army. The KGL comprised both cavalry and infantry regiments. KGL uniforms mirrored the British.
The Portuguese army uniforms increasingly during the Peninsular War reflected British styles. The Portuguese line infantry wore blue uniforms, while the Caçadores light infantry regiments wore green.
The Spanish army essentially was without uniforms, existing as it did in a country dominated by the French. Where formal uniforms could be obtained, they were white.
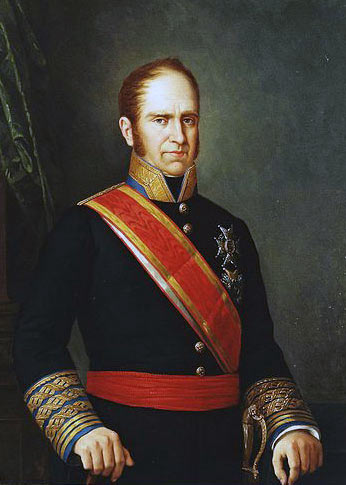
General Joaquin Blake, Spanish Commander at the Battle of Albuera on 16th May 1811 in the Peninsular War
The standard infantry weapon across all the armies was the muzzle-loading musket. The musket could be fired at three or four times a minute, throwing a heavy ball inaccurately for a hundred metres or so. Each infantryman carried a bayonet for hand-to-hand fighting, which fitted the muzzle end of his musket.
The British rifle battalions (60th and 95th Rifles) carried the Baker rifle, a more accurate weapon but slower to fire, and a sword bayonet.
Field guns fired a ball projectile, of limited use against troops in the field unless those troops were closely formed. Guns also fired case shot or canister which fragmented and was highly effective against troops in the field over a short range. Exploding shells fired by howitzers, yet in their infancy. were of particular use against buildings. The British were developing shrapnel (named after the British officer who invented it) which increased the effectiveness of exploding shells against troops in the field, by exploding in the air and showering them with metal fragments.
Throughout the Peninsular War and the Waterloo campaign, the British army was plagued by a shortage of artillery. The Army was sustained by volunteer recruitment and the Royal Artillery was not able to recruit sufficient gunners for its needs.
Napoleon exploited the advances in gunnery techniques of the last years of the French Ancien Régime to create his powerful and highly mobile artillery. Many of his battles were won using a combination of the manoeuvrability and fire power of the French guns with the speed of the French columns of infantry, supported by the mass of French cavalry.
While the French conscript infantry moved about the battle field in fast moving columns, the British trained to fight in line. The Duke of Wellington reduced the number of ranks to two, to extend the line of the British infantry and to exploit fully the firepower of his regiments.
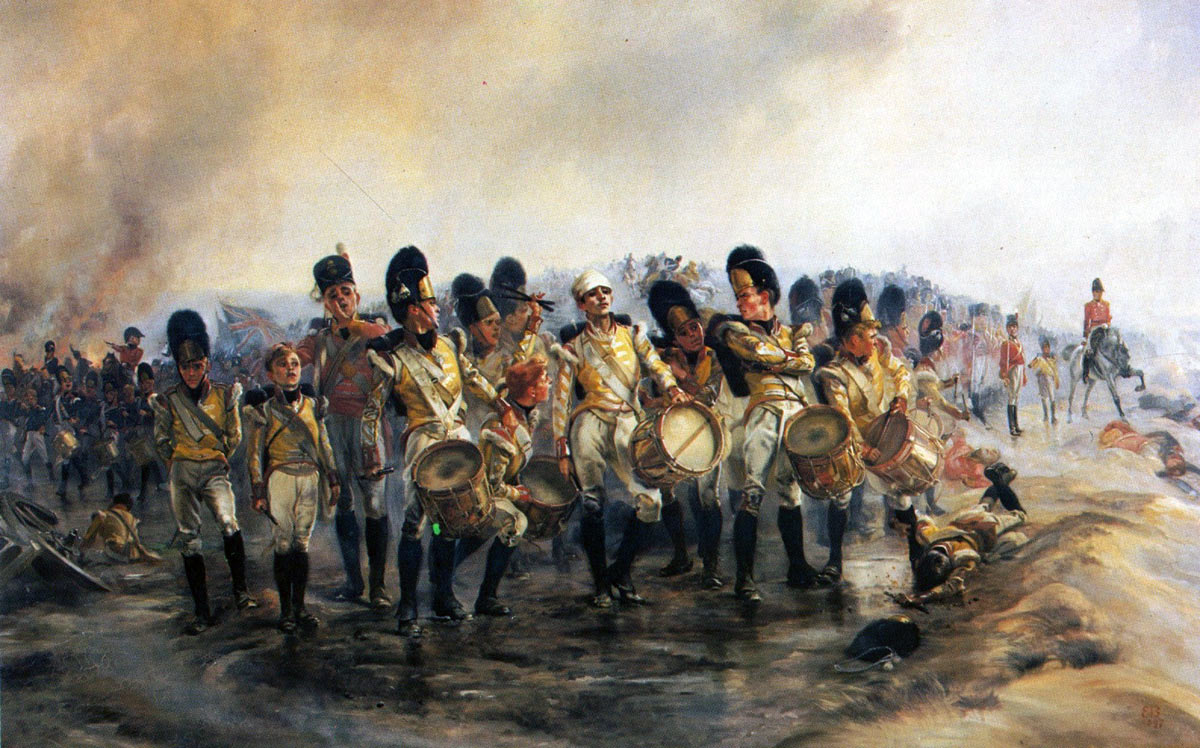
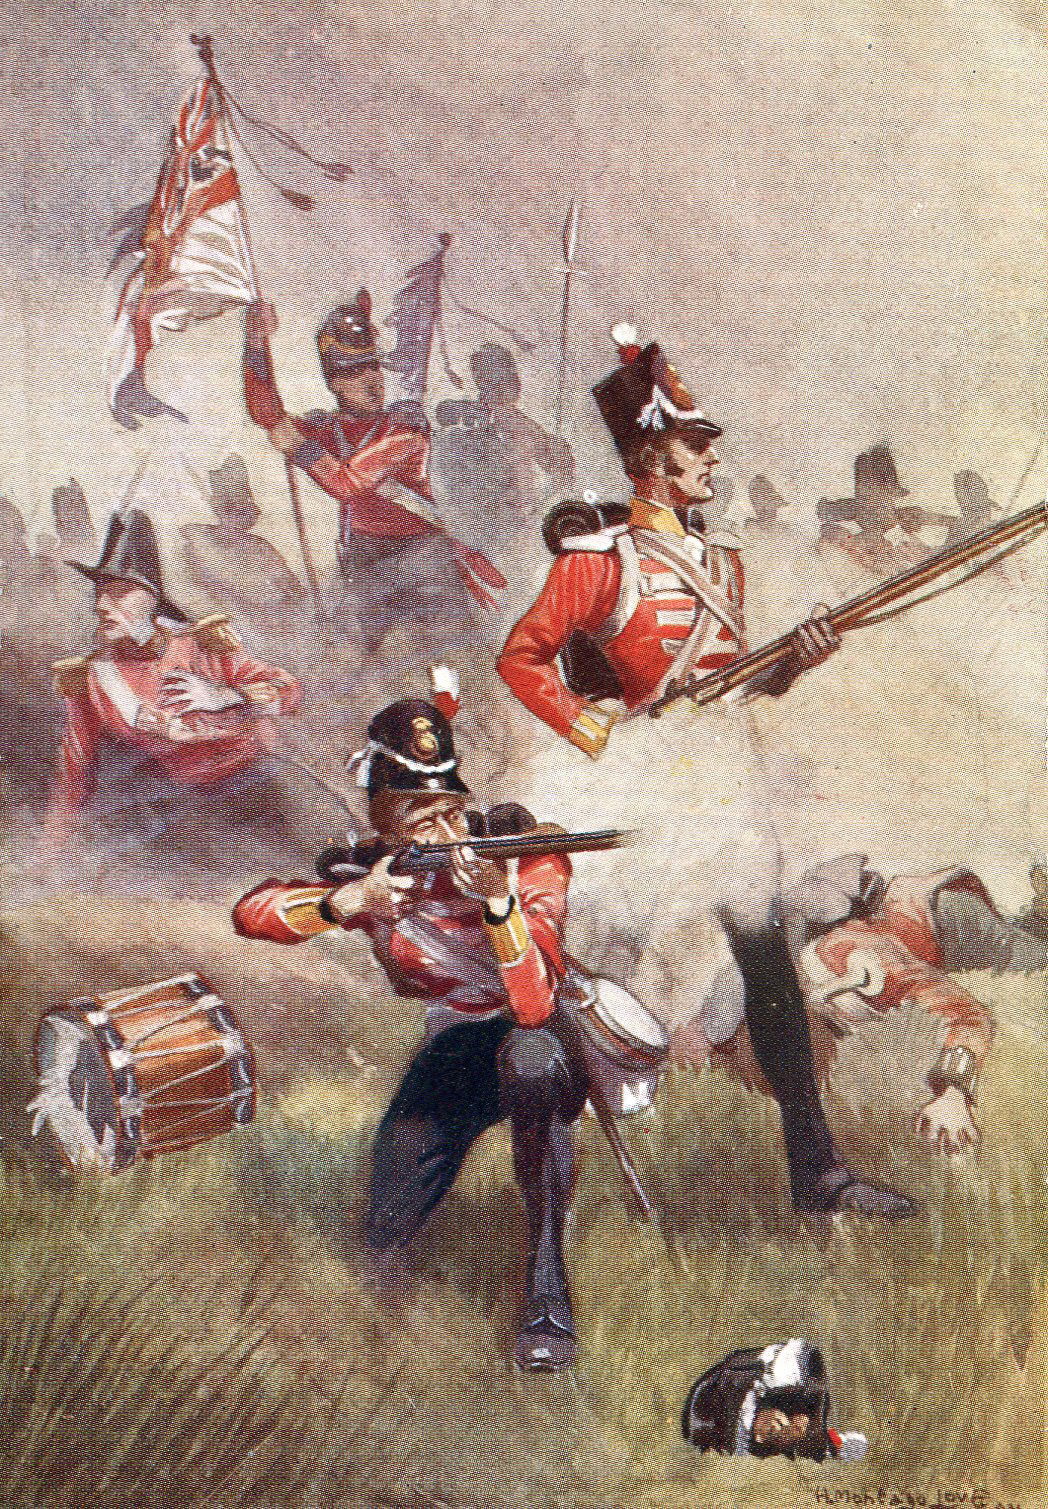
‘Steady the Drums and Fifes’; 57th Regiment at the Battle of Albuera on 16th May 1811 in the Peninsular War: picture by Lady Butler
The French army wore a variety of uniforms. The basic infantry uniform was dark blue.
There was a wide range of cavalry in the French army, Cuirassiers (there were no French cuirassiers in Spain), Dragoons, Hussars, Chasseurs à Cheval and Lancers. The Cuirassiers wore heavy breastplates. The Cuirassiers and Dragoons wore blue uniforms and brass helmets with a long horse hair crest. The Hussars and Chasseurs à Cheval wore the classic hussar uniform of short braided jacket, second slung jacket, fur busby and curved scimitar sword. The Lancers wore a Polish uniform of double-breasted jacket and displaced square topped shako. A wide range of colours were worn by the various light cavalry regiments.
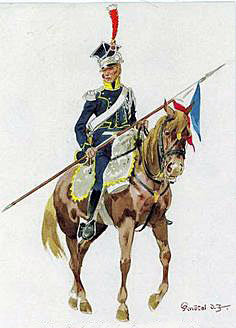
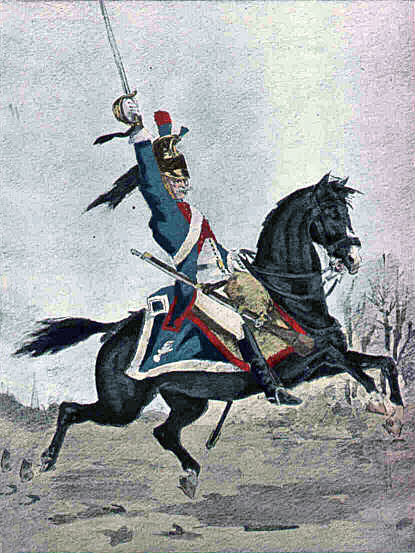
1st Vistula Polish Lancers: Battle of Albuera on 16th May 1811 in the Peninsular War
The French foot artillery wore uniforms similar to the infantry, the horse artillery wore hussar uniforms.
The standard infantry weapon for both armies was the musket, which could be fired two or three times a minute and threw a heavy ball inaccurately for a hundred metres. Each infantryman carried a bayonet that fitted on the muzzle.
The British rifle battalions were armed with the Baker rifle, a more accurate weapon but slower to fire, and a sword bayonet.
Field guns fired a ball projectile, by its nature of limited effect against troops in the field, unless closely formed. Guns also fired case shot or canister which fragmented, but was effective only at a short range. Exploding shells fired by howitzers, as yet in their infancy, were of particular use against buildings. The British had the development of ‘shrapnel’ or fragmenting shell which was effective against troops.
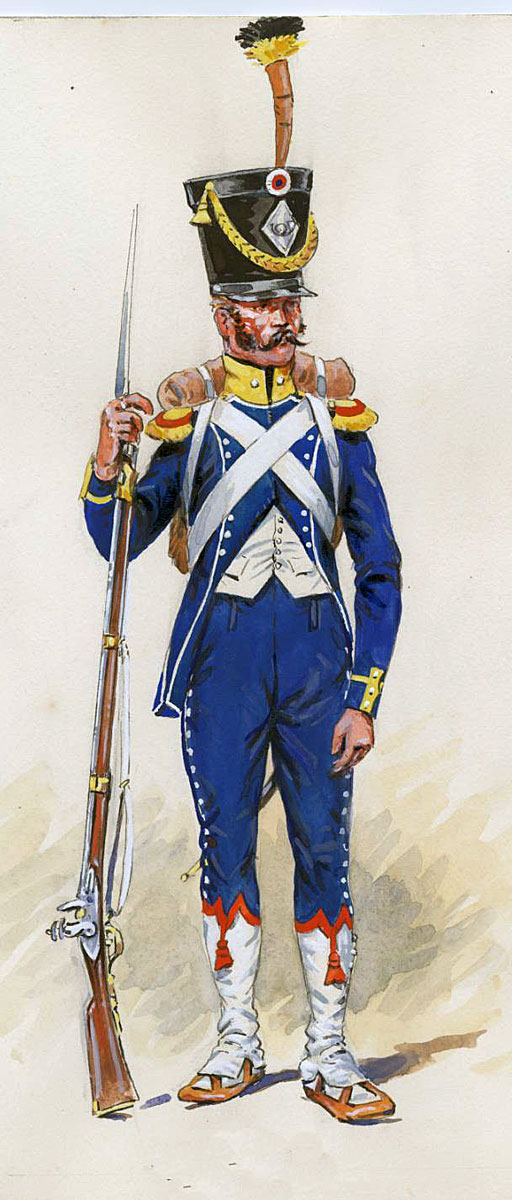
Portuguese Lusitanian Legion: Battle of Albuera on 16th May 1811 in the Peninsular War
Winner of the Battle of Albuera: The
British, Spanish and Portuguese.
British and Portuguese order of battle at the Battle of Albuera:
Commander-in-Chief: Marshal William Carr Beresford
Anglo-Portuguese Corps
Cavalry: commanded by Major General Lumley (command switched to Lumley during
the battle)
Heavy Brigade: commanded by Colonel de Grey: 3rd Dragoon Guards
and 4th Dragoons
13th Light Dragoons
Portuguese Brigade: commanded by Colonel Otway: 1st and 7th Portuguese Dragoons, 1 squadron of 5th and 8th Portuguese Dragoons.
Infantry:
Second Division: commanded by Major General Stewart
1st Brigade: commanded by Lieutenant Colonel Colborne: 1st/3rd Foot (the Buffs), 2nd/31st Foot, 2nd/48th Foot, 2nd/66th Foot.
2nd Brigade: commanded by Major General Hoghton: 29th Foot, 1st/48th Foot, 1st/57th Foot.
3rd Brigade: commanded by Lieutenant Colonel Abercromby: 2nd/28th Foot, 2nd/34th Foot, 2nd/39th Foot.
3 companies 5th/60th Foot.
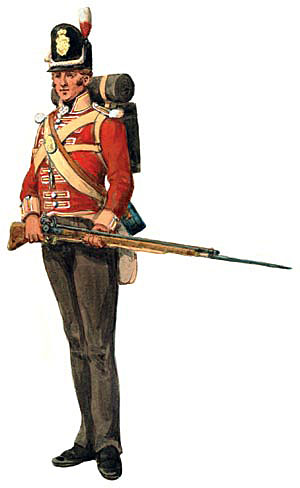
Private 3rd Buffs: Battle of Albuera on 16th May 1811 in the Peninsular War
Fourth Division: commanded by Major General
Lowry Cole
1st Brigade (the Fusilier Brigade): commanded by Lieutenant
Colonel Sir William Myers: 1st/7th Royal Fusiliers,
2nd/7th Royal Fusiliers, 1st/23rd Royal
Welch Fusiliers.
Portuguese Brigade: commanded by Brigadier General Harvey: 1st and
2nd/2nd and 2nd/14th Portuguese
Regiments of the Line, 1st Loyal Lusitanian Legion
Light Companies of 2nd/27th, 1st/40th and
97th Foot.
Portuguese Division: commanded by Major General
Hamilton
1st Brigade: commanded by Brigadier General Archibald Campbell:
1st and 2nd/4th, 1st and
2nd/14th Portuguese Regiments of the Line
2nd Brigade: commanded by Brigadier General Luiz Fonseca:
Independent Brigades:
German Brigade: commanded by Major General Charles, Baron von Alten: 1st and
2nd Light Battalions, King’s German Legion
Portuguese Brigade: commanded by Colonel Collins: 1st and 2nd/5th Portuguese
Regiment of the Line, 5th Caçadores
Artillery: commanded by Major Dickson: Lefebre’s Troop RHA, Hawker’s battery, Cleeve’s and Braun’s batteries KGA, Braun’s and Arriga’s batteries, Portuguese Artillery.
Spanish Regiments: Battle of Albuera on 16th May 1811 in the Peninsular War
Spanish order of battle at the
Battle of Albuera:
Commander-in-Chief: Captain General Joachim Blake
Cavalry:
Brigades of Loy and Penne Villemur
Infantry:
Vanguard Division: commanded by General Lardizabal
Third Division: commanded by General Ballasteros
Fourth Division: commanded by General Zayas
Estremaduran Brigade: commanded by General D’España
Artillery: commanded by Colonel de Miranda: 2 batteries.
French Dragoon: Battle of Albuera on 16th May 1811 in the Peninsular War
French order of battle at the
Battle of Albuera:
Commander-in-Chief: Marshal Soult, Duke of Dalmatia
Cavalry: commanded by General Comte de Latour Maubourg
1st Brigade: commanded by General Briche: Hussars and Chasseurs
2nd Brigade: commanded by General Bron: Dragoons
3rd Brigade: commanded by General Bouvier des Ecats: Dragoons
3 un-brigaded regiments: 1st Polish Lancers and Chasseurs à Cheval
Infantry:
Fifth Corps
First Division: commanded by General Girard
Second Division: commanded by General Gazan
Werlé’s Brigade
Godinot’s Brigade
Reserve of 11 Companies of Grenadiers
Artillery: commanded by General Ruty: 48 guns.
Background to the Battle of Albuera:
While Lieutenant General Viscount Wellington was engaged in combatting Marshal Massena on the Portuguese-Spanish border at Ciudad Rodrigo in the western centre of Spain, leading to the battle of Fuentes de Oñoro, Marshal Beresford was laying siege to the fortified border city of Badajoz in the south, in uneasy co-operation with the Spanish general, Joachim Blake, who nominally accepted Beresford as his overall commander.

British siege of Badajoz before the Battle of Albuera on 16th May 1811 in the Peninsular War
In early May 1811, Marshal Soult marched north from Seville with his Army of Andalusia, to relieve the French garrison in Badajoz.
Beresford and Blake agreed to confront Soult at Albuera, a defensive ridge position previously selected by Wellington, that screened the Badajoz siege works.
Soult pressed his march with all speed, intending to catch Beresford before he could concentrate his troops to oppose him.
On 13th May 1811, Beresford moved to Valverde with the British Second Division, Hamilton’s Portuguese Division and three batteries, to be in a central position, until it became clear which road Soult was taking in his advance on Badajoz.
Long’s British cavalry were falling back before Soult on the road through Santa Marta.
On 15th May 1811, Beresford issued his orders for the army to concentrate on the Albuera position.
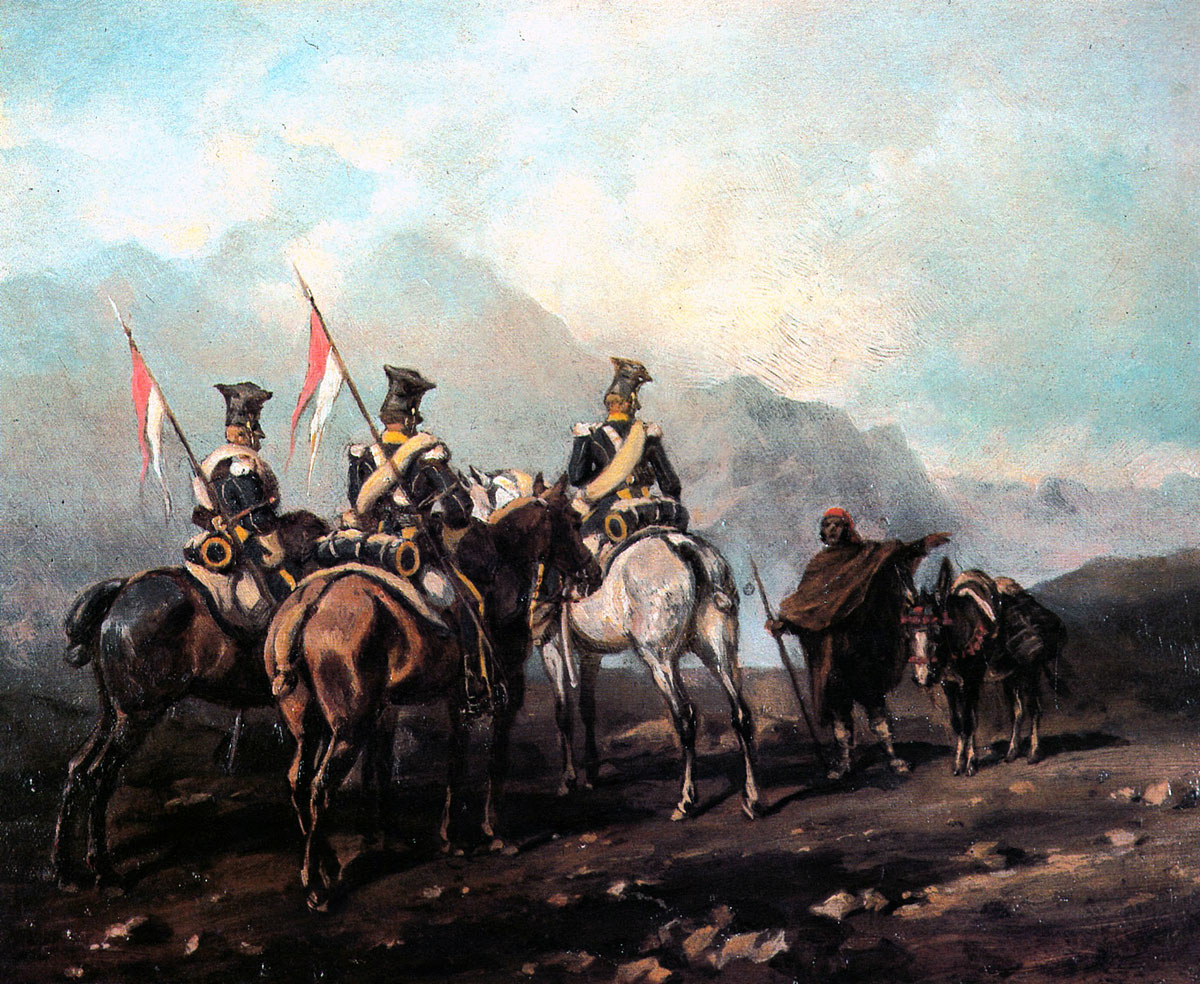
Patrol of Polish Lancers in Spain: Battle of Albuera on 16th May 1811 in the Peninsular War
Beresford, with his British and Portuguese troops and a small contingent of Spanish troops, was in position at Albuera later on 15th May 1811, awaiting the arrival of the British Fourth Division and Blake’s contingent.
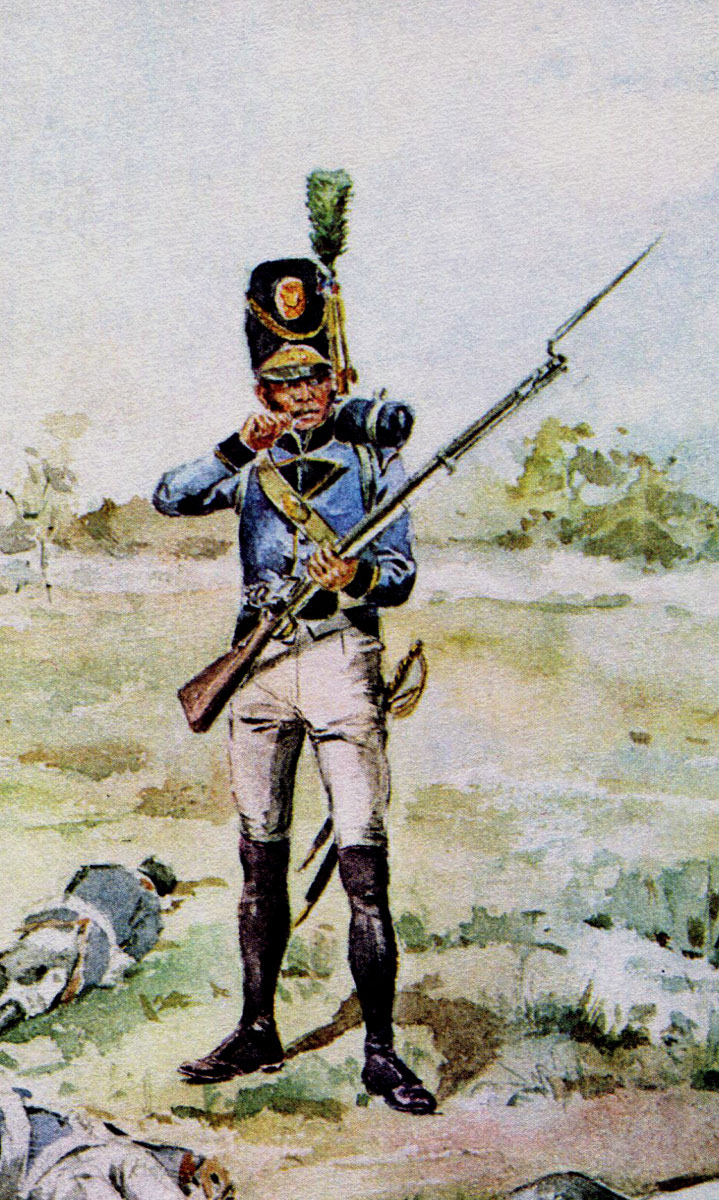
French Light Infantryman: Battle of Albuera on 16th May 1811 in the Peninsular War
Blake was slow to bring his troops up from Almendrad and arrived during the night.
The village of Albuera lies where the Seville to Badajoz road, running from the south-east to the north-west, crosses the Albuera River, before ascending a ridge behind the village.
Beresford placed his army on the ridge, expecting to receive a frontal assault across the river and through the village.
Beresford positioned Hamilton’s Portuguese Division and Collins’s Portuguese Brigade on his left, with Otway’s 600 Portuguese Cavalry to their front and the British Second Division on the ridge above Albuera athwart the main road to Badajoz.
The village of Albuera was held by Alten’s brigade of the King’s German Legion.
Cole’s Fourth Division was to march at 2am on 15th May 1811 from Badajoz to join Beresford’s army at Albuera.
Another formation intended to join Beresford’s army, Kemmis’s British Brigade, failed to arrive in time for the battle, being on the north bank of the River Guadiana and impeded in its march by the closure of the ford above Badajoz due to a rise in the water level.
Beresford planned that Blake’s Spanish contingent would take up position on his right.
Blake’s force started arriving from 11pm on 15th May 1811 and, in the dark, took up the wrong position, moving through Stewart’s Second Division to the low ground to its front, instead of extending the line from Stewart’s right.
Early on 16th May 1811 Blake’s force was re-positioned with Blake’s three divisions, Lardizabal’s, Ballesteros’ and Zayas formed on the right of Beresford’s line, now three miles in length.
South of Albuera, the Albuera River divides into two streams, the Arroyo Nogales to the east and the Arroyo Chicapierna to the west, with a ridge between the two.
3rd Buffs conceal the Colour at the Battle of Albuera on 16th May 1811 in the Peninsular War
Officer British 3rd Dragoon Guards: Battle of Albuera on 16th May 1811 in the Peninsular War: picture by Richard Simkin
Beresford did not occupy the ridge between the two streams and was heavily criticised by Wellington after the battle for failing to do so, on the basis that it would have made the French turning movement more difficult and given Beresford earlier notice of it.
Early in the afternoon of 15th May 1811, Beresford’s cavalry, commanded by Long, which had been retiring in front of Soult’s army, reached the River Albuera from Santa Marta.
There is dispute as to whether Long was ordered to pull the cavalry to the west bank of the River Albuera or remain on the east bank.
Either way, Long crossed the river by the Albuera bridge, leaving the east bank to the French.
Long was to be replaced by General Lumley in command of the cavalry during the battle, due to difficulties in seniority with the Spanish cavalry commanders.
The French army bivouacked at Santa Marta, 10 miles distant from Albuera on the night of 15th May 1811.
Soult came up to his cavalry advance guard and reconnoitred Beresford’s position at Albuera.
Soult could see Alten’s Brigade in the village, Otway’s Portuguese cavalry to the north and little else.
Soult resolved to attack Beresford before he could concentrate his forces and ordered his army to march for Albuera well before dawn, expecting that Beresford would be without the British Fourth Division, which was believed by the French to be still in the trenches before Badajoz, or Blake’s Spanish contingent.
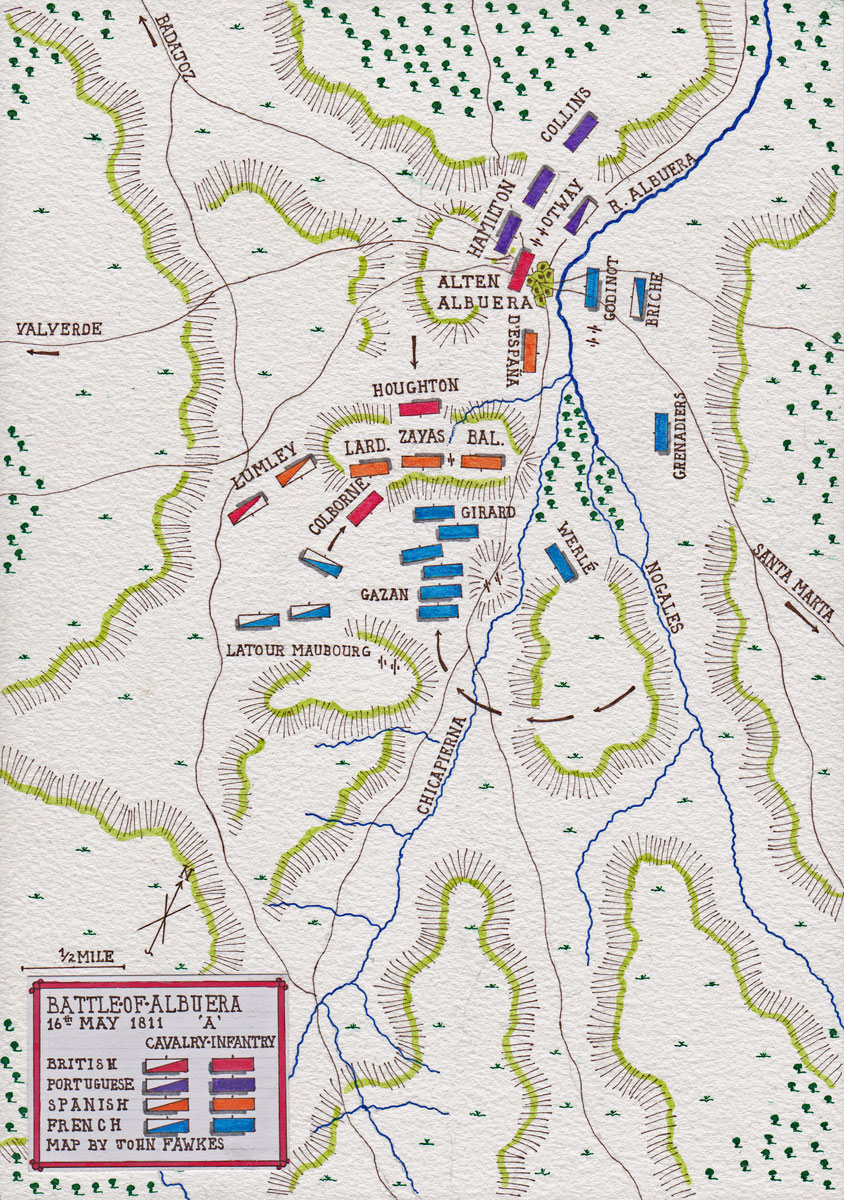
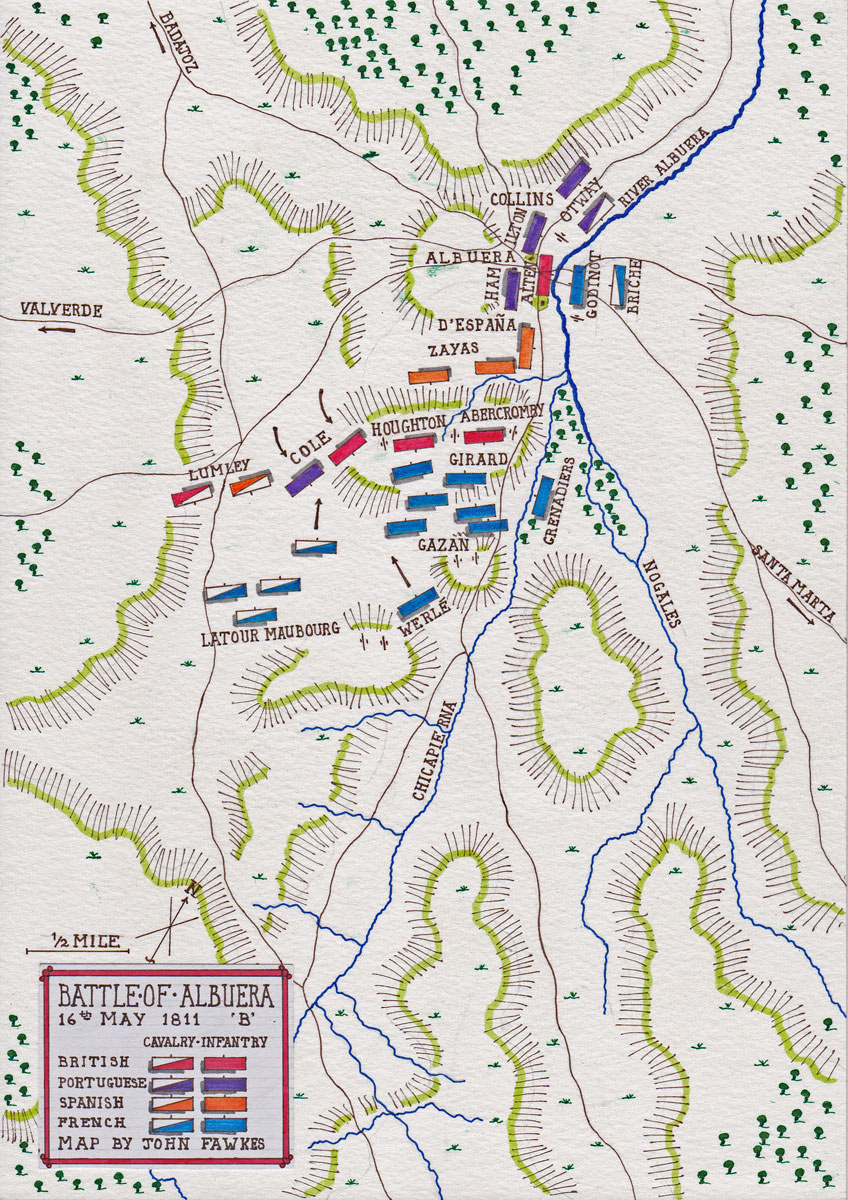
Map of the Battle of Albuera at the time of the French Attack on 16th May 1811 in the Peninsular War: map by John Fawkes
Account of the Battle of Albuera on 16th May 1811:
With dawn on 16th May 1811, Blake’s men were moved to their correct position on the right of Beresford’s line.
At the same time the French army was marching up the road from Santa Marta.
Beresford did not have Wellington’s facility for concealing his regiments and Soult could now see the whole of Beresford’s army arrayed along the high ground, even identifying the position of the different nationalities from the colour of their uniforms.
Soult, an able and versatile strategist, did not comply with Beresford’s expectations in making a frontal assault on the centre of Beresford’s army through Albuera.
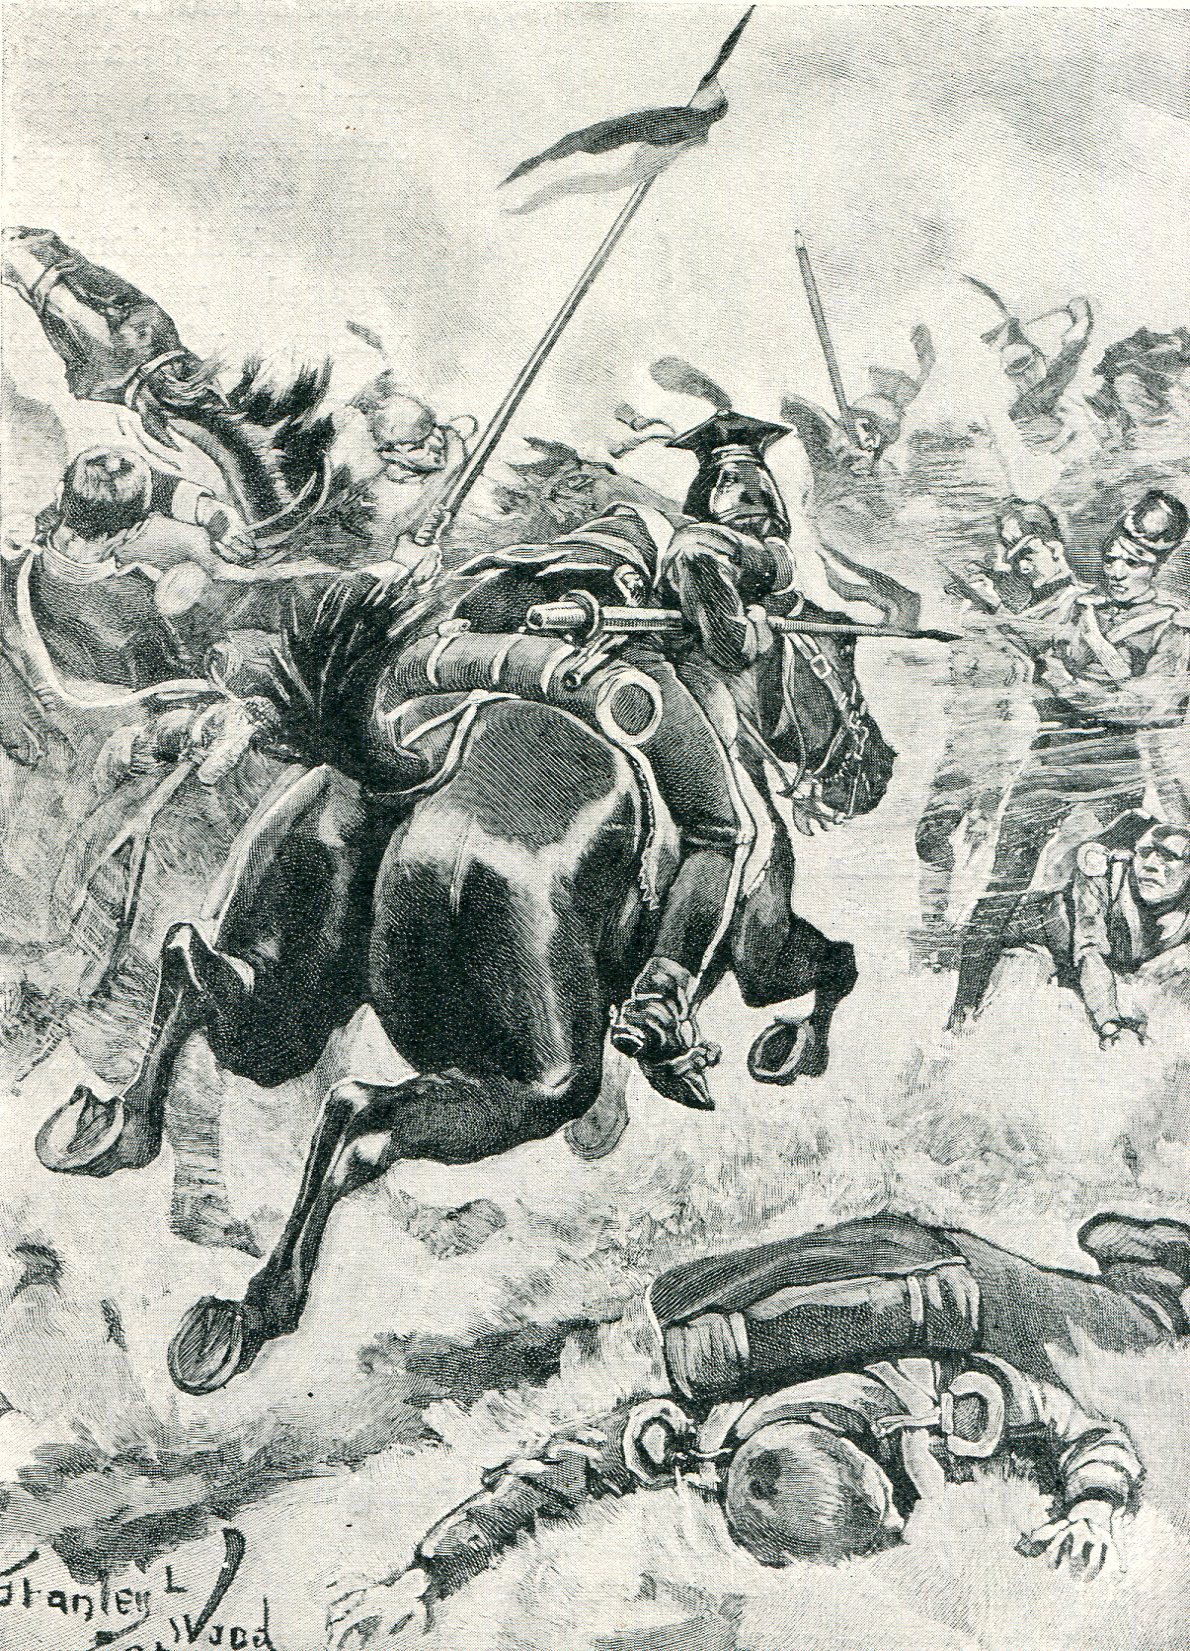
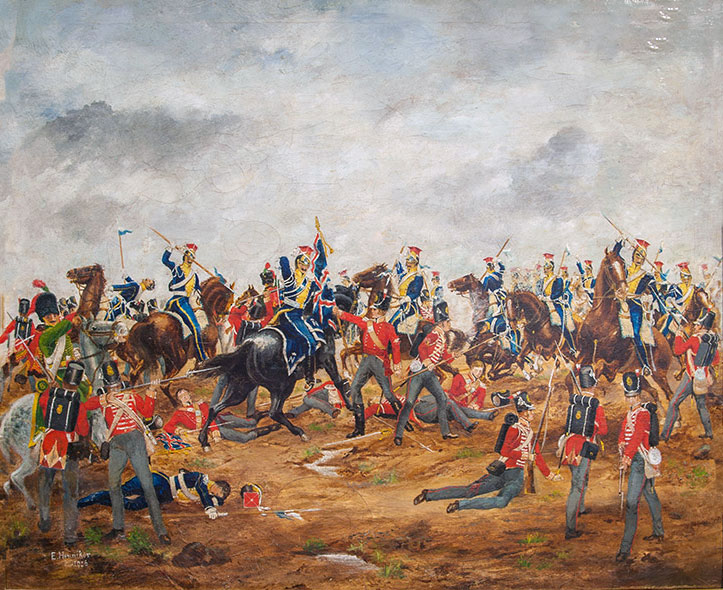
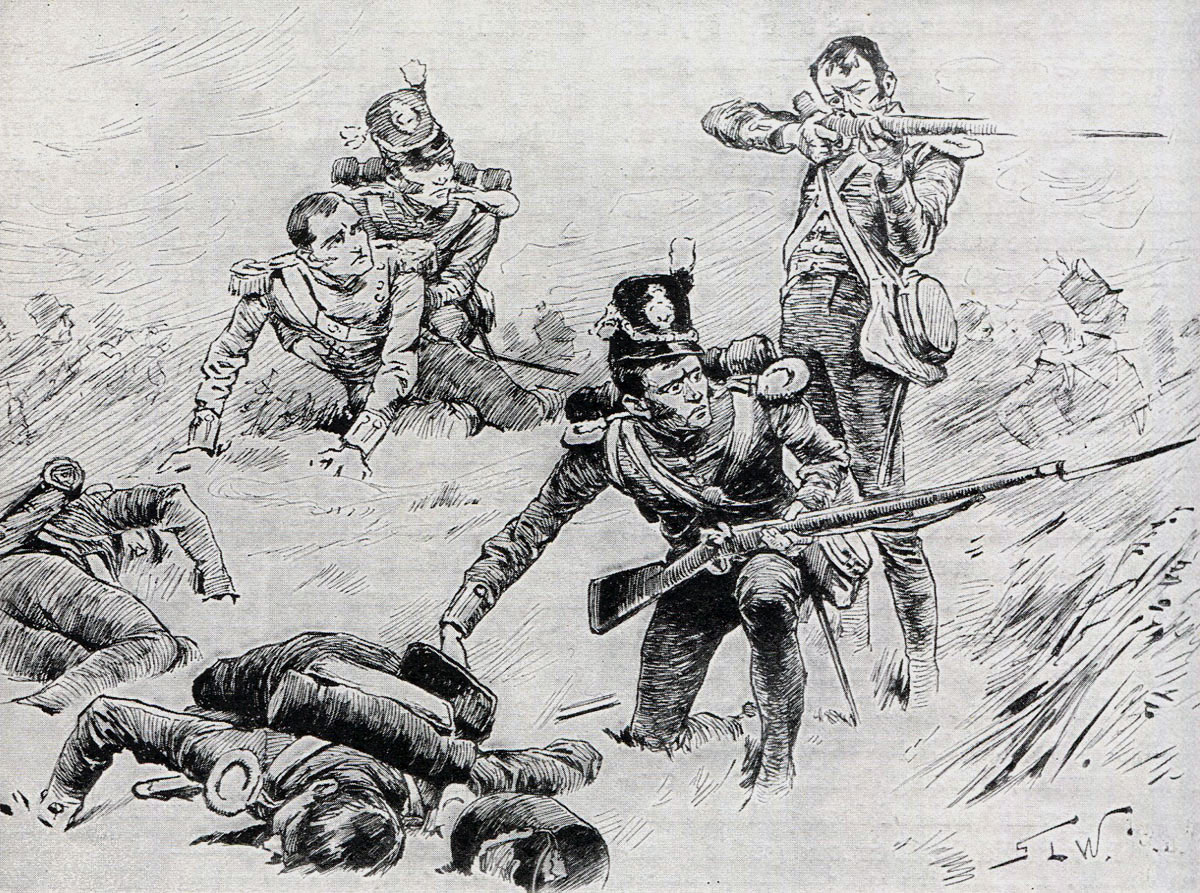
Charge of the 1st Vistula Polish Lancers at the Battle of Albuera on 16th May 1811 in the Peninsular War: picture by Stanley Wood
Soult planned a diversionary attack on Albuera to cause Beresford to commit his troops there, while the main French attack was delivered around Beresford’s right flank, held by Blake’s late arriving Spanish contingent.
At around 8am on 16th May 1811, a French force, comprising Godinot’s Brigade of infantry, Briche’s Brigade of cavalry and two batteries, with Werlé’s Brigade of infantry in support, began a diversionary attack on Alten’s Brigade in Albuera village.
The French guns opened fire and a detachment of Polish Lancers crossed the River Albuera.
The British Third Dragoon Guards charged the lancers and drove them back across the river, while a Portuguese battery fired into the columns of French infantry advancing on Albuera.
As the fighting around Albuera became heavier, Beresford ordered Cleeves’s German Battery and Colborne’s Brigade to support Alten.
Two Spanish battalions also moved to the river to counter the French move against Albuera.
General Jose de Zayas: Battle of Albuera on 16th May 1811 in the Peninsular War
Soult’s diversionary attack on Albuera was having the effect he intended of drawing Beresford’s troops away from the main French attack on Beresford’s right flank.
In the meantime, the divisions of Girard and Gazan of the French Fifth Corps were marching around the southern end of the ridge between the Nogales and Chicapierna streams, led by a brigade of cavalry, to attack Blake’s flank on Beresford’s extreme right.
A chance sighting of the advancing French columns by an ADC to General Zayas alerted Blake to the impending attack.
The Polish lancers that had made the crossing of the river Albuera and Werlé’s Brigade left the attack on Albuera and marched swiftly to join Gazan and Girard’s divisions.
It now became clear to Beresford that the main French attack would be on his far right flank.
Beresford ordered Blake to re-position his divisions to face to the right.
The British and Spanish cavalry withdrew to a position on the right rear of Blake’s proposed new line.
The British Second Division was ordered to march to the right and come up in support of Blake.
At this moment Cole arrived on the battlefield from Badajoz with Myer’s Brigade of his Fourth Division and Harvey’s Portuguese Brigade.
Soon after the sighting of the advancing French and without waiting for orders, General Zayas began re-positioning his division to face the impending French attack on the right, but Blake refused to comply with Beresford’s order, maintaining in a message to Beresford that the main French attack was the feint on Albuera.
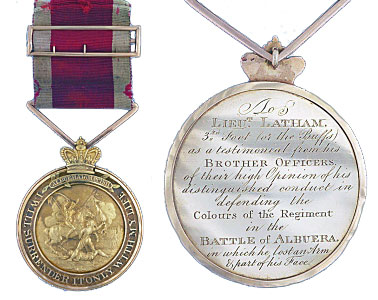
Medal awarded to Lieutenant Latham of the 3rd Buffs by his fellow officers for preserving the Regimental Colour at the Battle of Albuera on 16th May 1811 in the Peninsular War
Beresford received Blake’s message when at the left end of his line.
Beresford returned to the threatened right wing and re-positioned the Spanish divisions himself.
Nevertheless, although several Spanish battalions were recalled from Albuera, others were sent to the village or positioned along the river, thereby weakening the Spanish line as the French attack was about to begin.
The first impact of the French assault on Beresford’s right was by three brigades of cavalry, 3,000 strong and a battery of howitzers, which advanced around the west of Zayas’ flank, drove off the British and Spanish outposts and threatened to overwhelm the British cavalry, 1,400 strong, now commanded by General Lumley in place of Long.
Under the fire of three batteries of howitzers, positioned on the heights facing Zayas, Girard launched his division up the slope leading to the Spanish line, his regiments in a series of columns, followed by Gazan’s Division in four parallel columns.
It would seem that Girard expected an easy success and sacrificed a more effective formation for the speed of advancing in column.
The French infantry, some 8,000 men, halted and fired on the Spanish positioned at the top of the slope.
Because the French were firing uphill, it would seem that every man in the column was able to shoot.
Zayas’s four battalions, in good order, replied with repeated volleys.
The other Spanish battalions, moved around in the early part of the day and with little time to settle in their new positions, were less steady.
The Spanish line held, although suffering heavily and losing its cohesion, for around an hour and a half, keeping back the French attack with its fire.
The 3rd Buffs at the Battle of Albuera on 16th May 1811 in the Peninsular War
By this time, the leading battalions of Stewart’s Second Division were coming to their support, accompanied by Cleeve’s battery.
Colborne’s Brigade reached the Spanish line first and was directed by Stewart to the right of the Spanish.
Stewart pushed the first battalion, the 3rd Buffs, through the Spanish to a position overlapping the French columns, with which the Buffs exchanged volleys.
The following battalions of Colborne’s Brigade formed in line next to the Buffs, the 48th and 66th, all firing on the French column.
The French troops became unsteady and began to fall back.
The British, harassed by the artillery fire from the French guns on the opposing ridge, attempted a charge on the French infantry and were repulsed.
The British infantry was preparing for another more controlled charge, when a heavy storm of rain and hail burst over the battlefield.
Firing became difficult and visibility limited.
Colour Party of the Buffs attacked by the 1st Polish Lancers at the Battle of Albuera on 16th May 1811 in the Peninsular War: picture by William Barnes Wollen
Through this storm, the French cavalry commander, Latour Maubourg, launched a charge by the regiment of Polish lancers and a French hussar regiment, on the flank and rear of Colborne’s Brigade.
Due to the rain, British infantry appear to have identified the attacking cavalry as Spanish, until it was too late.
In Fortescue’s words: ‘In a few minutes the Buffs, Forty-eighth and Sixty-sixth had disappeared as a fighting force, half of them killed and wounded and the remainder prisoners.’
The 31st was still in column and out of reach of the charge and was the only battalion of Colborne’s Brigade to escape the annihilation.
The Polish Lancers turned on Cleeves’ Battery and, killing or capturing the gunners, took the guns.
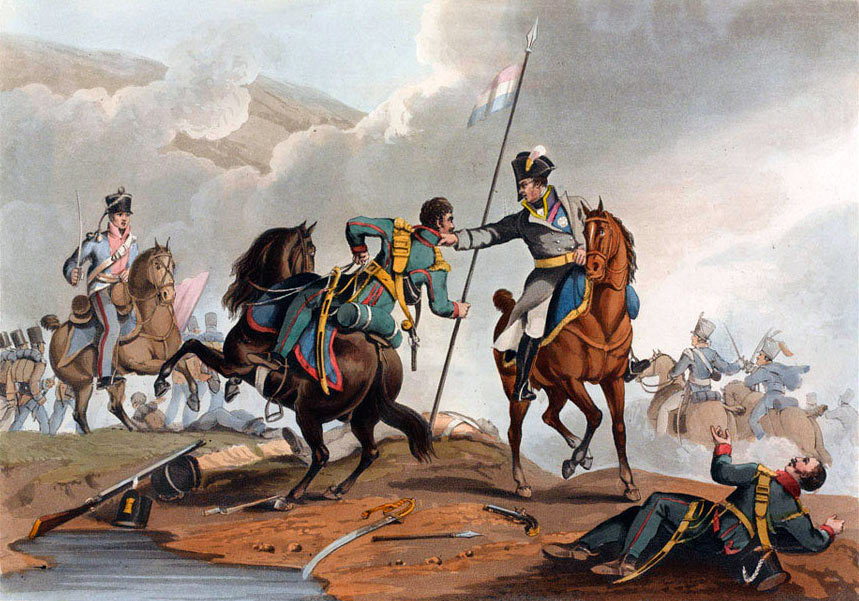
Beresford throwing the Polish Lancer to the ground at the Battle of Albuera on 16th May 1811 in the Peninsular War
All these guns, other than one howitzer, were later recovered.
Groups of these cavalrymen penetrated far into the Spanish line, one of the groups surprising Beresford and his staff, who fought them off.
The British 31st, sole surviving battalion from Colborne’s Brigade, deployed and continued the attack.
Hoghton’s British Brigade now came up at the foot of the slope behind Zayas’ Division; the 29th Regiment, followed by the 48th and 57th.
Soon the storm cleared and two squadrons of the 4th Dragoons attacked the disordered lancers and hussars, but were in turn driven back by a fresh body of French cavalry.
The second and third battalions were still forming when Spanish troops started rushing back down the hill from Zayas’ hard pressed regiments.
Hard on the heels of the Spanish came the Polish lancers, forcing the British infantry to fire indiscriminately on both.
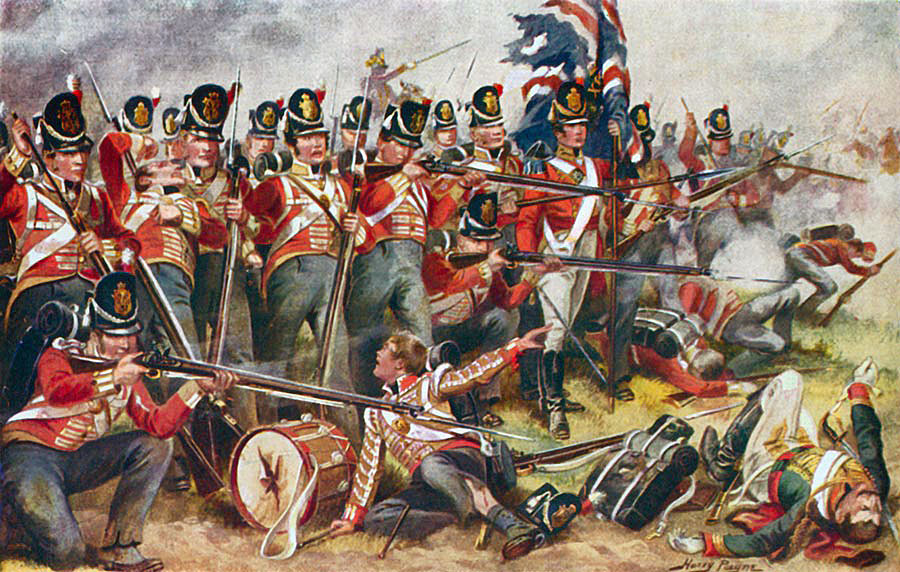
British 31st Regiment at the Battle of Albuera on 16th May 1811 in the Peninsular War: picture by Harry Payne
This fire was taken up by Abercromby’s Brigade, forming on Hoghton’s left.

Commemorative Medal for the Battle of Albuera on 16th May 1811 in the Peninsular War
A staff officer managed to stop the firing and Zayas’ four battalions passed through the British ranks and formed in their rear, having held their position against the French attack for an hour and a half.
Stewart now ordered his men to give three cheers before leading them to the top of the incline, taking over the positions left by Zayas’ Division.
At the bottom of the slope before them, on Soult’s direction, Gazan’s Division was taking over from the exhausted and demoralised troops of Girard’s Division, presenting an enormous mass of French troops and artillery at the bottom of the hill.
The British battalions were in this order from the right: 31st, 29th, 57th, 48th, 28th, 39th and 34th, formed in line on the ridge that led down to the river’s edge.
The British line advanced to within 60 yards of the mass of French infantry and opened fire, inflicting heavy casualties.
The French return fire was mainly grape-shot from their guns, firing into the British infantry at close range.
The British numbers dwindled and the battalions closed in on their colours, leaving gaps in the line, but kept firing.
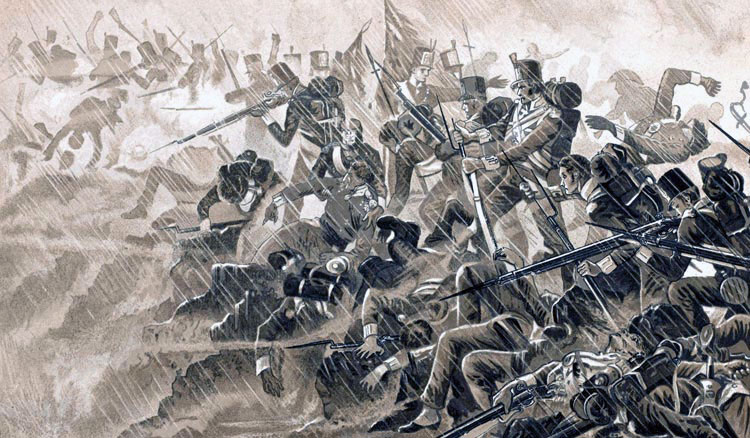
57th Regiment in the rainstorm at the Battle of Albuera on 16th May 1811 in the Peninsular War
William Inglis, Colonel of the 57th ‘DieHards’ at the Battle of Albuera on 16th May 1811 in the Peninsular War
General Stewart was twice wounded, but stayed on the field.
Brigadier Hoghton was hit several times and his horse killed. Still leading his brigade, he was finally shot dead.
Colonel Inglis of the 57th lost his horse and led his battalion into battle on foot, until he was severely wounded by a grape-shot.
Colonel Duckworth of the 48th was shot dead.
Colonel White and Major Way of the 29th were wounded.
Four fifths of Hoghton’s brigade became casualties, but the battalions fought on.
The French predicament was as bad, the infantry in their columns under the scourging fire of the British infantry and guns from the high ground to their front and flanks.
Girard attempted to deploy his battalions into a more open formation, but it could not be done in the heat of such a battle, the French columns surging about under the heavy fire.
The French lost officers at the same rate as the British; Generals Pepin, Maransin and Brayer mortally wounded. General Gazan was also wounded.

57th ‘Die Hards’ at the Battle of Albuera on 16th May 1811 in the Peninsular War: picture by Richard Caton Woodville
The colonel and all the senior officers of the leading French regiment became casualties.
Neither side would pull back. An impasse was reached.
Fortescue comments ‘It was plain that the first general who made a decisive movement would win the fight’.
Soult still had a large force uncommitted to the battle: Werlé’s Brigade of 5,000 men and the majority of Latour Maubourg’s Cavalry Division, positioned beyond the British right flank.

‘Recovery of the British Fusiliers’ at the Battle of Albuera on 16th May 1811 in the Peninsular War: picture by William Barnes Wollen
But Soult failed to act. He has been described as a general with a masterly strategic grasp but irresolute in battle.
Soult’s lack of resolve in the heat of battle showed itself on several occasions in the Peninsula and particularly at Albuera.
In the rear of the British infantry, Beresford was attempting to find formations to bring forward, to no avail.
Map of the Battle of Albuera at the time of the British Counter-Attack on 16th May 1811 in the Peninsular War: map by John Fawkes
D’España refused to commit his brigade to the terrible struggle taking place on the right flank.
Hamilton’s Portuguese Division had moved forward to the river and engaged Godinot’s Brigade.

7th Royal Fusiliers at the Battle of Albuera on 16th May 1811 in the Peninsular War: picture by Richard Simkin
The decisive step was taken by Colonel Hardinge of Beresford’s staff.
Hardinge sought out General Cole and urged him to advance on the French left flank. After consultation with Lumley, Cole resolved to take this action.
Cole formed his Fourth Division with the light companies and three additional companies in column on his right, the Portuguese Lusitanian Legion in column on his left and the rest of his division in line in the centre, Harvey’s Portuguese Brigade on the right and Myer’s Fusilier Brigade, comprising 1st and 2nd Battalions of 7th Royal Fusiliers and 1st/23rd Royal Welch Fusiliers, on the left.
Cole then attacked the left flank of the French infantry of Girard and Gazan.
Soult reacted by ordering Latour Maubourg to attack Cole’s line and Werlé’s Brigade to advance and intervene between Cole and the struggling columns of Girard and Gazan.
Four regiments of Latour Maubourg’s Dragoons charged the front of Harvey’s Portuguese Brigade and were repelled by heavy volleys.
Latour Maubourg fell back and took no further part in the battle.
23rd Royal Welch Fusiliers at the Battle of Albuera on 16th May 1811 in the Peninsular War
Myer’s Fusilier Brigade and the Lusitanian Legion, comprising 2,600 men, advanced on Werlé’s Brigade of 5,600 men.
Werlé had his three regiments, each of three battalions, in three columns, with the inevitable restriction on their ability to answer the volley fire of the British battalions advancing in line.
Each of Myers’ battalions bore down on one of Werlé’s columns and opened fire at forty paces.
The murderous British fire lasted half an hour while the French officers attempted to deploy their men into line.
Werlé’s Division at last broke and fled.
The panic infected the French Fifth Corps and the divisions of Gazan and Girard followed their comrades of Werlé’s Division.
Captain Fawcett of the 57th ‘Die Hards’ fatally wounded but still commanding his company at the Battle of Albuera on 16th May 1811 in the Peninsular War: picture by Stanley Wood
The British infantry pursued the French infantry down to the Chicapierna Stream.
The French artillery continued to fire in support of the infantry and were drawn off the battlefield under the protection of Latour Maubourg’s Cavalry Division.
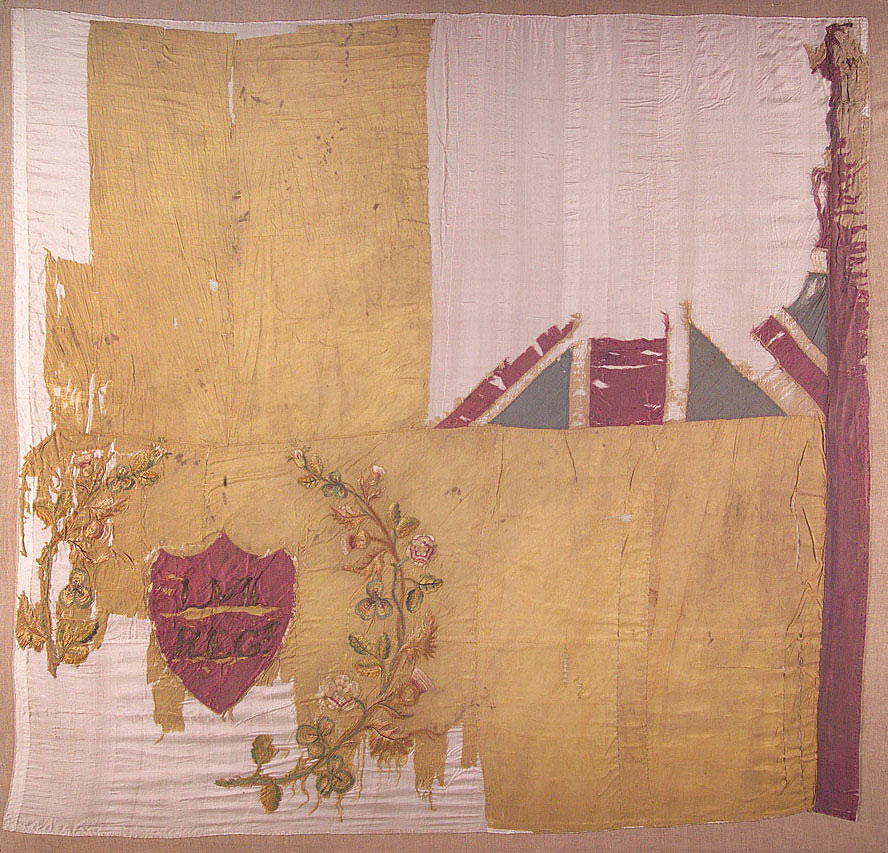
Regimental Colour carried by the 57th Regiment at the Battle of Albuera on 16th May 1811 in the Peninsular War
Soult’s final reserve, two battalions of Grenadiers, were drawn up by the stream and provided cover for the fleeing French infantry.
Three Portuguese brigades came up and forced the French Grenadiers back, but Soult’s well served artillery was now in position on the hill between the two streams and, covered by Latour Maubourg’s cavalry, was not vulnerable to attack.
No further advance was feasible for Beresford’s troops.
The few French skirmishers in Albuera were driven back across the river by Alten’s Brigade and the Battle of Albuera came to an end in the early afternoon of 16th May 1811.
Casualties at the Battle of Albuera:
The British suffered 4,200 casualties out of 6,000
men. The Spanish suffered 2,000 casualties and the Germans and Portuguese
suffered 600 casualties.
The French suffered around 8,000 casualties, but captured a howitzer and five colours from the 3rd Buffs, the 48th and 66th Regiments.
The King’s Colour of the 3rd Buffs was preserved by Lieutenant Latham, at the cost of losing an arm, the colour being concealed under his jacket for the rest of the battle.
Middlesex Regiment cap badge with distinction for the Battle of Albuera on 16th May 1811 in the Peninsular War
British regimental casualties:
3rd Dragoon Guards: 1 officer and 18 soldiers killed or wounded
and 1 soldier missing
4th Dragoons: 2 officers and 20 soldiers killed or wounded and
2 officers and 2 soldiers missing
13th Light Dragoons: 1 soldier wounded
Royal Artillery: 1 officer and 13 soldiers killed or wounded
3rd Foot: 18 officers and 446 soldiers killed or wounded and 2
officers and 177 soldiers missing
7th Royal Fusiliers (2 battalions): 30 officers and 675
soldiers killed or wounded
23rd Royal Welch Fusiliers: 13 officers and 319 soldiers killed
or wounded and 6 soldiers missing
27th Foot: 3 officers and 74 soldiers killed or wounded
28th Foot: 6 officers and 158 soldiers killed or wounded
29th Foot: 17 officers and 307 soldiers killed or wounded and
11 soldiers missing
31st Foot: 7 officers and 148 soldiers killed or wounded
34th Foot: 7 officers and 121 soldiers killed or wounded
39th Foot: 5 officers and 91 soldiers killed or wounded and 2
soldiers missing
40th Foot: 3 officers and 28 soldiers killed or wounded
48th Foot: 30 officers and 392 soldiers killed or wounded and 9
officers and 190 soldiers missing
57th Foot: 23 officers and 405 soldiers killed or wounded
60th Foot: 1 officer and 20 soldiers killed or wounded
66th Foot: 15 officers and 156 soldiers killed or wounded and
101 soldiers missing
97th Foot: 28 soldiers killed or wounded
Military General Service Medal with clasp for Battle of Albuera on 16th May 1811 in the Peninsular War awarded to Captain Crummer of the 28th Regiment
Follow-up to the Battle of Albuera:
Although considered a victory for the British,
Portuguese and Spanish, the casualties to the British infantry were disastrous.
Wellington is reported to have said ‘Another such battle will ruin us.’
Following the battle, Soult abandoned his attempt to relieve Badajoz and withdrew to Seville, taking his prisoners and captured British colours with him.
The British siege of Badajoz was abandoned on 10th June 1811 in the face of news that Soult and Marmont were moving to combine their armies to relieve Badajoz.
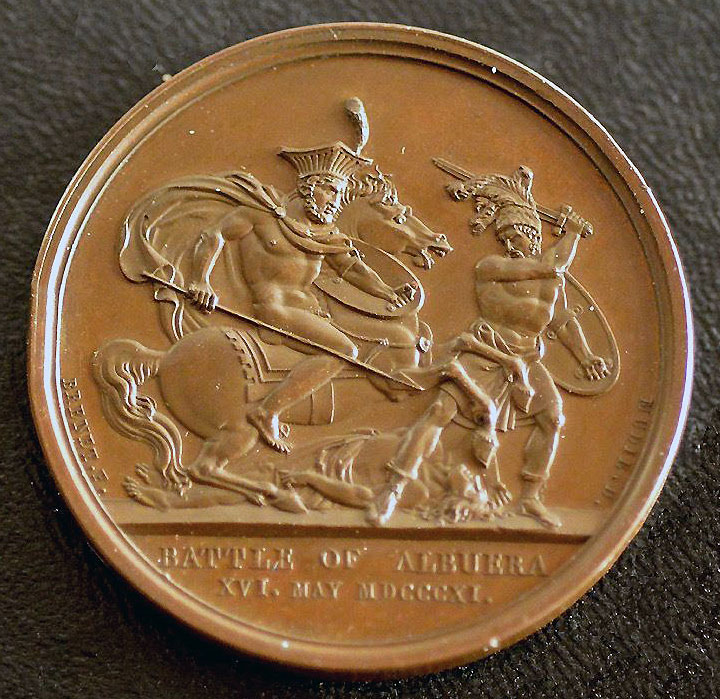
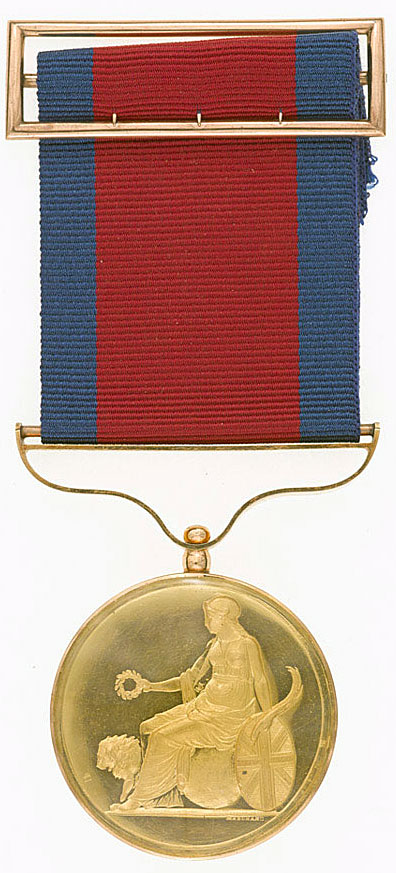
Commemorative Medal for the Battle of Albuera on 16th May 1811 in the Peninsular War
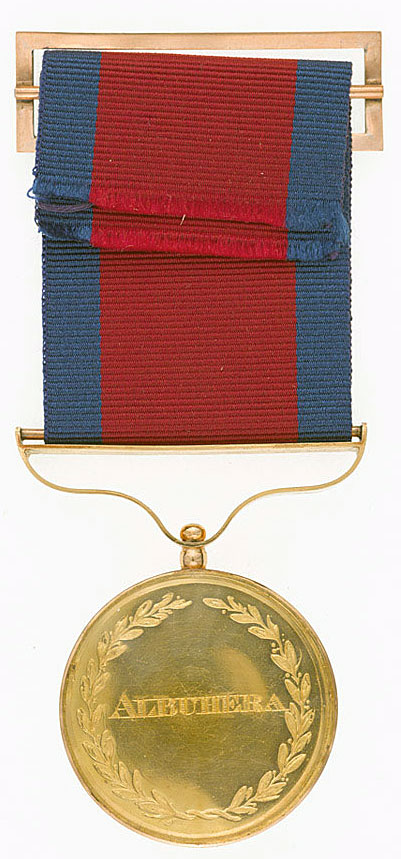
Medal and Battle Honour for the Battle of Albuera:
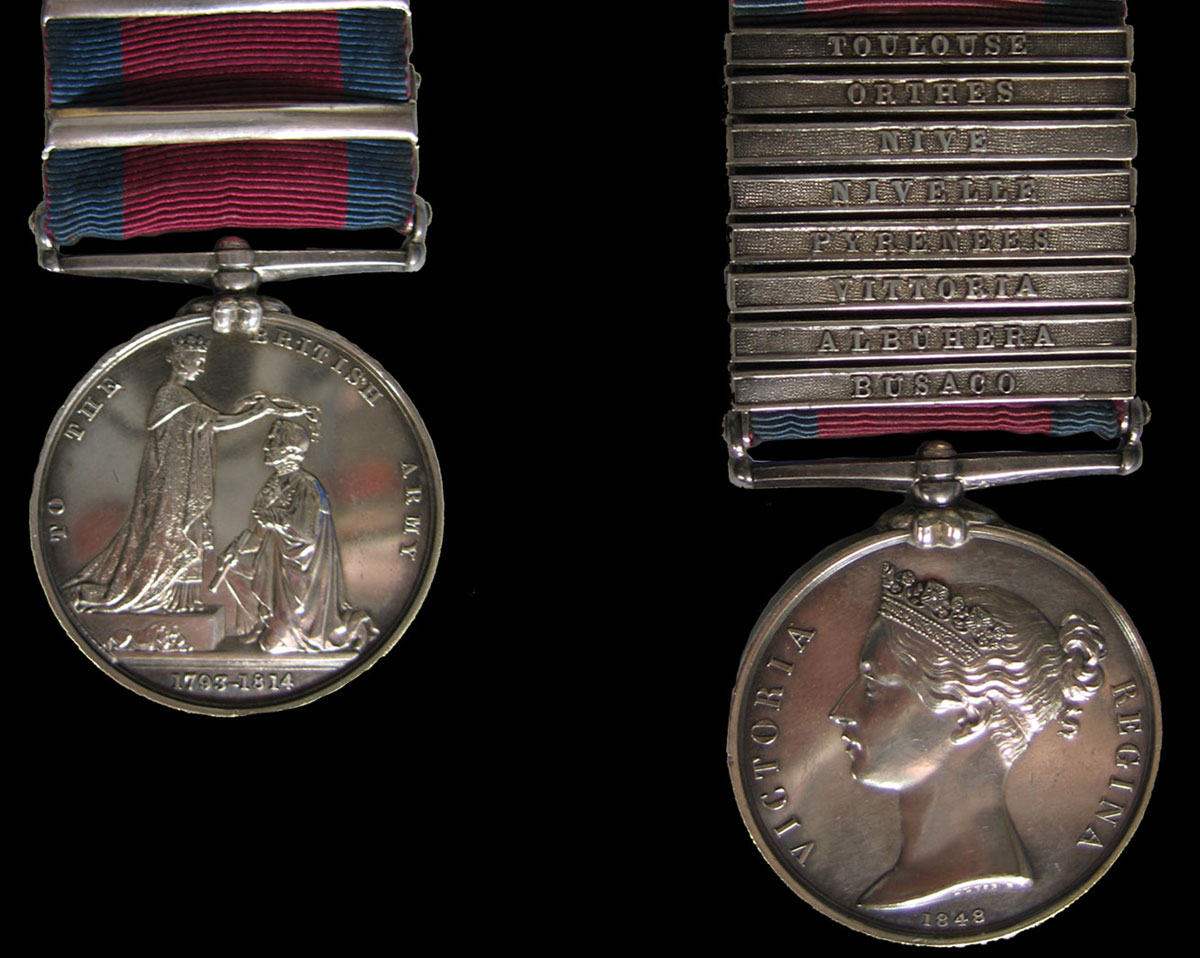
The Military General Service Medal 1848 was issued to all those serving in the British Army present at specified battles during the period 1793 to 1840, who were still alive in 1847 and applied for the medal. The medal was only issued to those entitled to one or more of the clasps. There were 21 clasps available for service in the Peninsular War.
The Battle of Albuera, spelt as ‘Albuhera’, was one of the clasps.
The battle honour Battle of Albuera, spelt as ‘Albuhera’ was awarded to the following regiments: 3rd Dragoon Guards, 4th Dragoons, 13th Light Dragoons, 3rd Buffs, 7th Royal Fusiliers, 23rd Royal Welch Fusiliers, 28th, 29th, 31st, 34th, 39th, 48th, 57th, 60th and 66th Regiments.
Anecdotes and traditions from the Battle of Albuera:
Army Gold Medal awarded to Sir William Inglis: Battle of Albuera on 16th May 1811 in the Peninsular War
Army Gold Medal awarded to Sir William Inglis: Battle of Albuera on 16th May 1811 in the Peninsular War
Beresford, a general in the British Army, was given the job in 1808 of reforming the Portuguese Army with the Portuguese rank of marshal. Beresford was a strict disciplinarian and a man of great physical strength. During the Battle of Albuera, Beresford was attacked by a Polish lancer. Beresford disarmed the lancer and threw him from his horse.
The Battle of Albuera is a rich mine of British regimental tradition. The conduct of the British infantry reinforced the view that they were near irresistible. The conduct of the Portuguese battalions, although largely inexperienced, was comparable to the British in the battle. However, it needs to be remembered that it was the Spanish battalions of General Zayas’ Division that initially held the French attack for an hour and a half and fought on through the battle, preventing the French from breaking through and receiving fire from both sides.
Fortescue in his ‘History of the Army’ Volume VIII at page 213 states: ‘Hence it was that the issue of the battle really turned partly upon the faulty tactics of the French generals, but mainly upon the valour of the British infantry…..Whence came the spirit which made that handful of English battalions – for not a single Scots or Irish battalion was present- content to die where they stood rather than give way one inch? Beyond all question it sprang from intense regimental pride and regimental feeling…’ Of course, the 1st Battalion of the Royal Welch Fusiliers was also present at the Battle of Albuera.
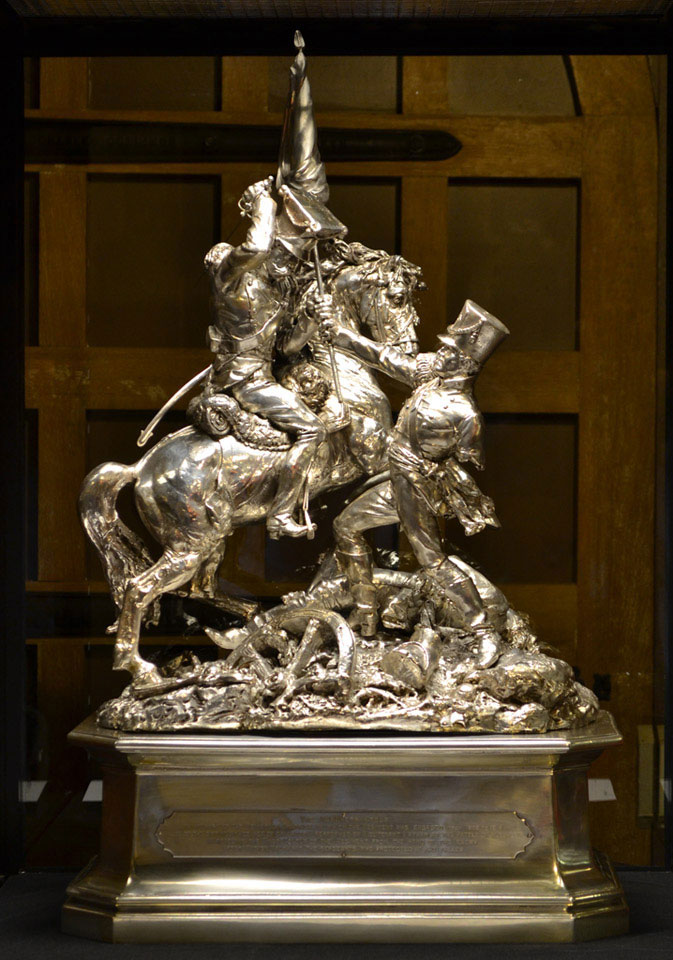
Buff’s Latham Centre Piece: Battle of Albuera on 16th May 1811 in the Peninsular War
Lieutenant Colonel Inglis of the 57th Foot was severely wounded during the resistance by Hoghton’s Brigade. Inglis lay on the ground, refusing to be moved to the rear, calling to his soldiers ‘Die Hard, 57th.’ The regiment acquired the nickname of ‘The Diehards’. The depot of the Middlesex Regiment, of which the 57th became the 1st Battalion, was named Inglis Barracks. ‘Albuhera’ was engraved on the cap badges of the Middlesex Regiment.
The Battle of Albuera is an important battle for the 3rd Old Buffs; from 1882 the East Kent Regiment. Lieutenant Latham was carrying the King’s Colour of 1st Buffs, when the regiment came under heavy attack by the Polish Lancers. Ensign Walsh and the sergeants forming the Escort to the Colour became casualties. A lancer attacked Latham who fought him off, losing an arm in the combat. This incident is commemorated in a large piece of regimental silver. The officers of the regiment presented Latham with a medal commemorating his courage.
After the Battle of Albuera only two officers of the 2nd/28th Regiment remained at their duty, the rest being casualties in the battle. The scene at the officer’s mess that evening, when the two officers toasted the King, is portrayed in Fortunio Matania’s picture.
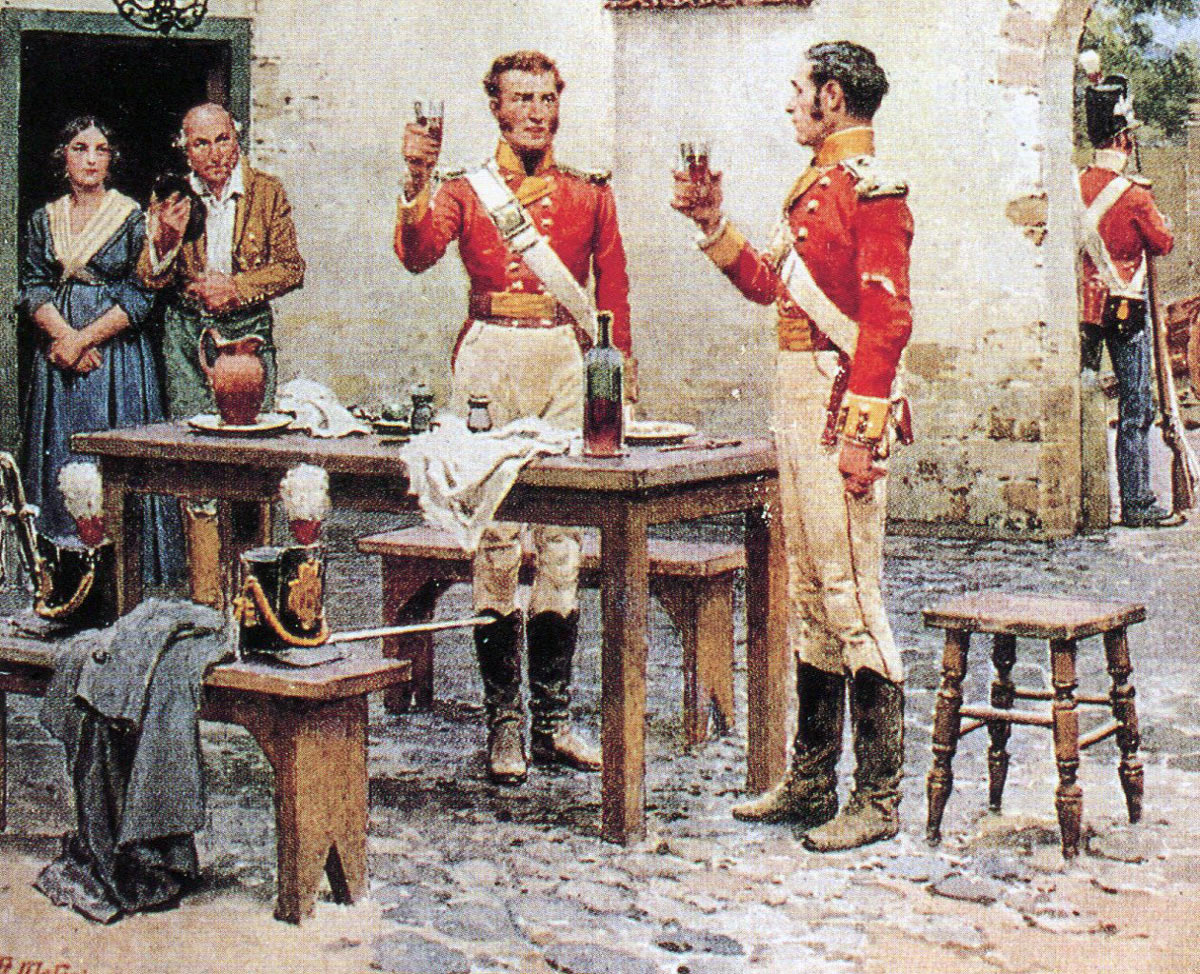
‘The King:’ the two unwounded officers of the 28th Regiment after the Battle of Albuera on 16th May 1811 in the Peninsular War: picture by Fortunio Matania
The French historian M. Thiers wrote of the Battle of Albuera: “a sort of fatality rendered the heroic bravery of our troops powerless against the cold courage of the English.”
References for the Battle of Albuera:
See the extensive list of references given at the end of the Peninsular War Index.
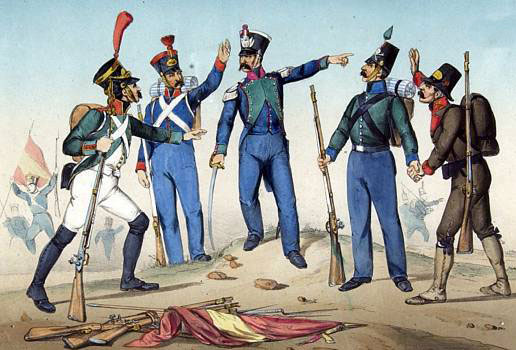
Contemporary Woodcut of the Battle of Albuera on 16th May 1811 in the Peninsular War
The previous battle in the Peninsular War is the Battle of Fuentes de Oñoro
The next battle of the Peninsular War is the Battle of Usagre

22. Podcast of the Battle of Albuera: Marshal Beresford’s hard-fought battle against Marshal Soult on 16th May 1811 during the Peninsular War, with his army of British, Portuguese and Spanish troops: John Mackenzie’s britishbattles.com podcasts