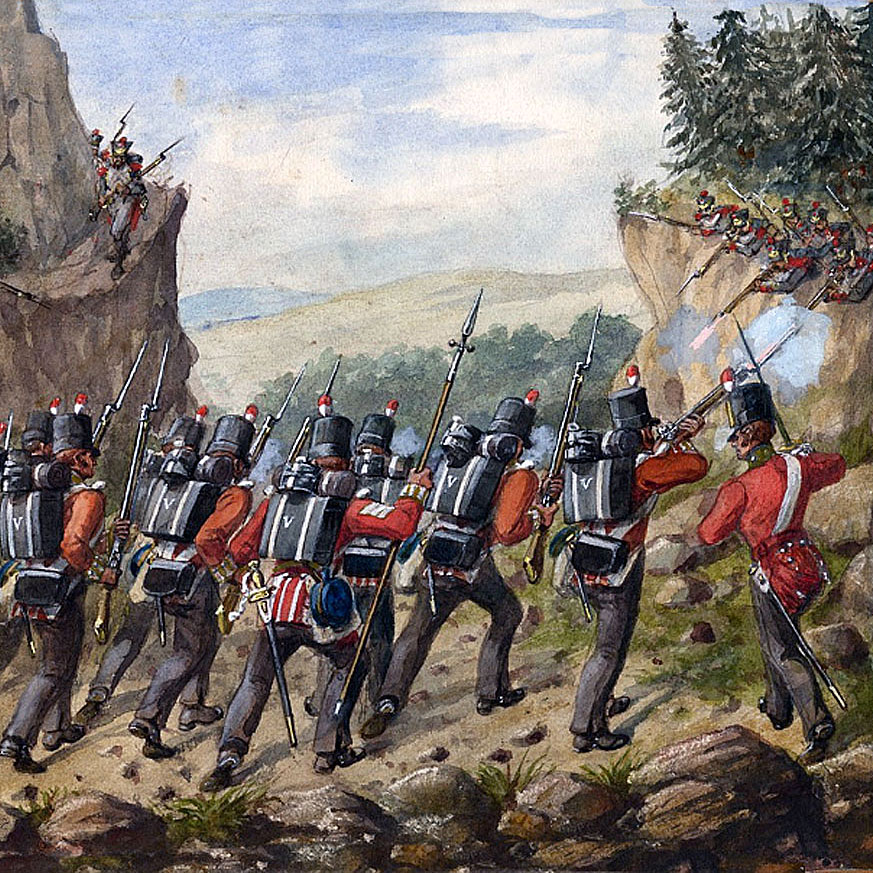
The clash in the mountains of Northern Spain on 18th June 1813, during the Peninsular War, between the van of Wellington’s advancing army and General Reille’s French ‘Army of Portugal’, withdrawing on Vitoria

British troops in action in the mountains: Battle of San Millan and Osma on 18th June 1813 in the Peninsular War: picture by Richard Simkin
 Podcast on the Battle of San Millan and Osma: the clash in the mountains of Northern Spain on 18th June 1813 between the van of Wellington’s advancing army and General Reille’s French ‘Army of Portugal’, as it withdrew to Vitoria: John Mackenzie’s britishbattles.com podcasts
The previous battle of the Peninsular War is the Battle of Morales de Toro
The next battle of the Peninsular War is the Battle of Vitoria
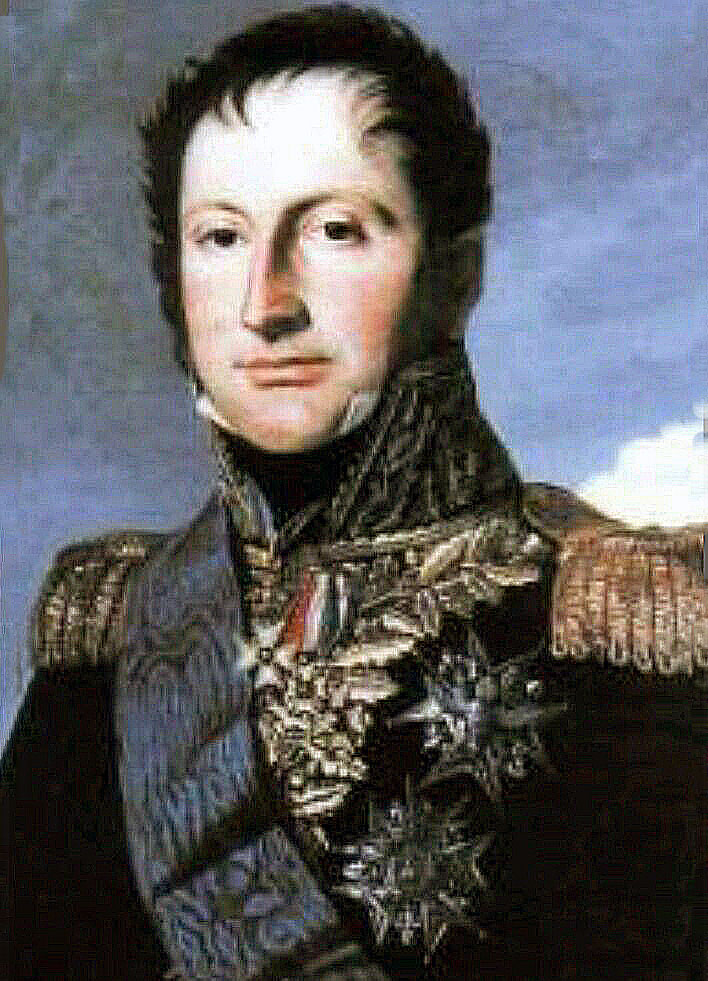
Général Reille, commander of the French ‘Army of Portugal’ at the Battle of San Millan and Osma on 18th June 1813 in the Peninsular War
War: Peninsular War
Date of the Battle of San Milan and Osma: 18th June 1813
Place of the Battle of San Milan and Osma: In the mountains to the west of Vitoria, in Northern Spain.
Combatants at the Battle of San Milan and Osma: British and Portuguese troops against the French.
Commanders at the Battle of San Milan and Osma: Lieutenant General Lord Wellington commanded the British troops in the battle. General Reille commanded the French Army of Portugal.
Size of the armies at the Battle of San Milan and Osma: Probably around 10,000 troops on each side were actively involved in the battle.
Uniforms, arms and equipment at the Battle of San Milan and Osma:
The British infantry wore red waist-length jackets, grey trousers, and stovepipe shakos. Fusilier regiments wore bearskin caps. The two rifle regiments wore dark green jackets and trousers.
The Royal Artillery wore blue tunics.
Highland regiments wore the kilt with red tunics and black ostrich feather caps.
British heavy cavalry (dragoon guards and dragoons) wore red jackets and black fore and aft cocked hats. The change in uniform brought in during 1812 saw the British heavy cavalry adopt ‘Roman’ style helmets with horse hair plumes.
The British light dragoons wore light blue uniform coats and a leather helmet with a fur crest running front to back.
From 1812, the British light cavalry increasingly adopted hussar uniforms, with some regiments changing their title from ‘light dragoons’ to ‘hussars’.
The King’s German Legion (KGL) was formed largely from the old disbanded Hanoverian army. The KGL owed its allegiance to King George III of Great Britain, as the Elector of Hanover, and fought with the British army. The KGL comprised both cavalry and infantry regiments. KGL uniforms followed the British.
The Portuguese army uniforms increasingly during the Peninsular War reflected British styles. The Portuguese line infantry wore blue uniforms, while the Caçadores light infantry regiments wore green.
The Spanish army essentially was without uniforms, existing as it did in a country dominated by the French. Where formal uniforms could be obtained, they were white.
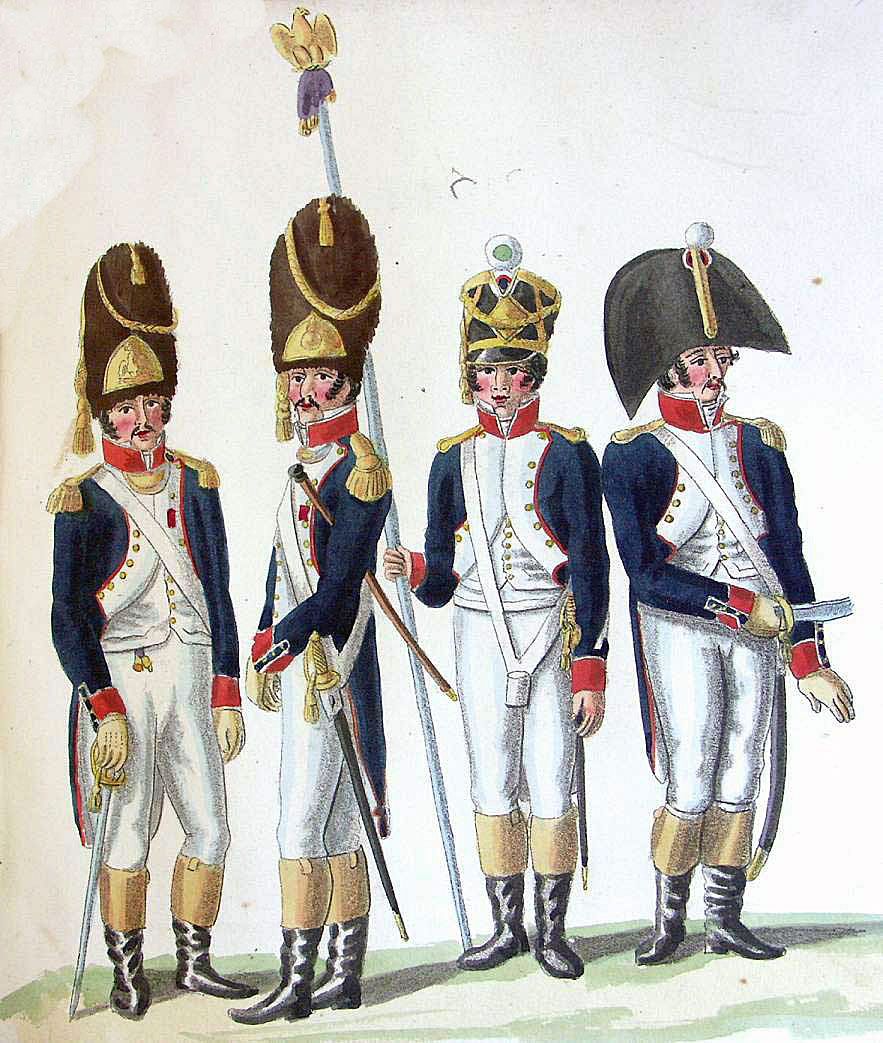
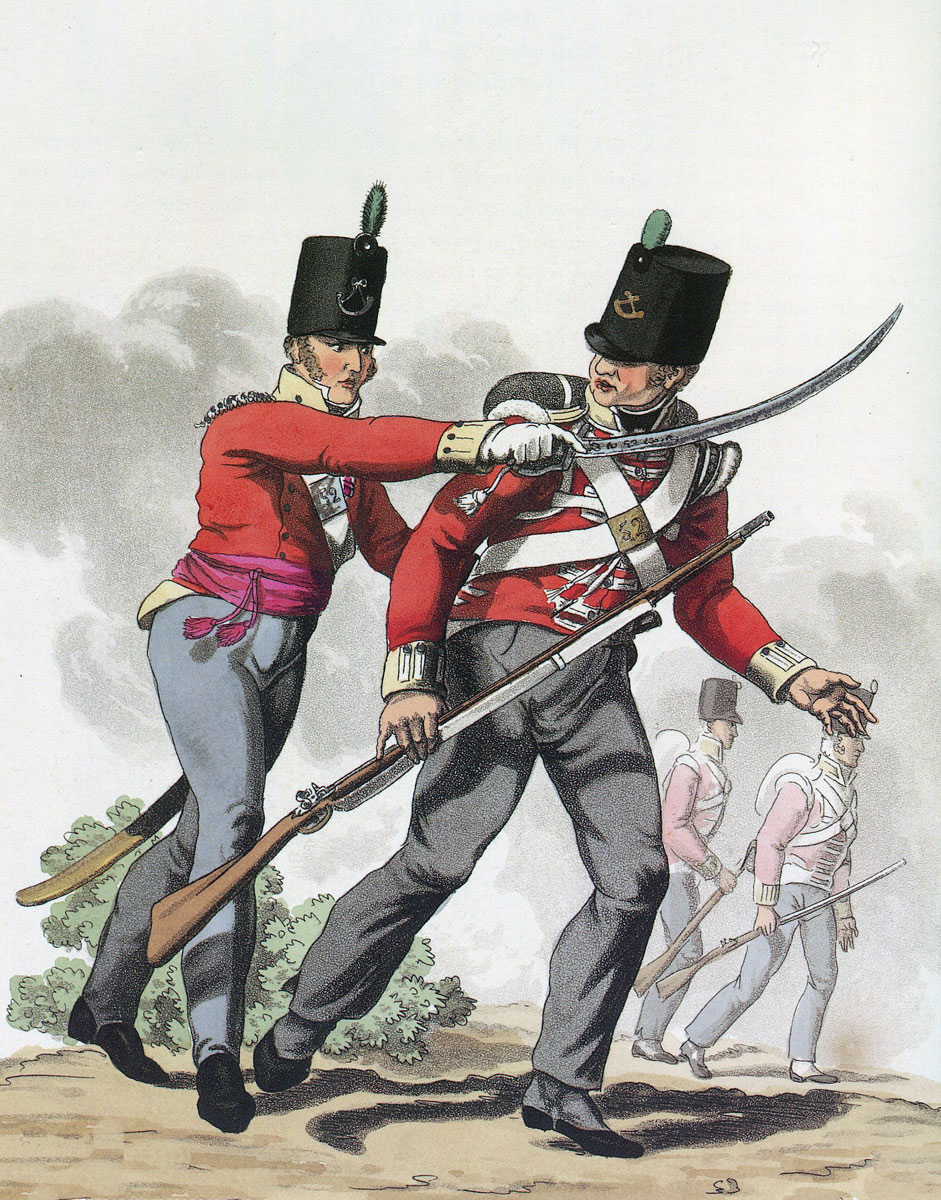
Officers of French infantry: Battle of San Millan and Osma on 18th June 1813 in the Peninsular War: picture by Suhl
The French army wore a variety of uniforms. The basic infantry uniform was dark blue.
The French cavalry comprised Cuirassiers, wearing heavy burnished metal breastplates and crested helmets, Dragoons, largely in green, Hussars, in the conventional uniform worn by this arm across Europe, and Chasseurs à Cheval, dressed as hussars.
The French foot artillery wore uniforms similar to the infantry, the horse artillery wore hussar uniforms.
The standard infantry weapon across all the armies was the muzzle-loading musket. The musket could be fired at three or four times a minute, throwing a heavy ball inaccurately for a hundred metres or so. Each infantryman carried a bayonet for hand-to-hand fighting, which fitted the muzzle end of his musket.
The British rifle battalions (60th and 95th Rifles) carried the Baker rifle, a more accurate weapon but slower to fire, and a sword bayonet.
Field guns fired a ball projectile, of limited use against troops in the field unless those troops were closely formed. Guns also fired case shot or canister which fragmented and was highly effective against troops in the field over a short range. Exploding shells fired by howitzers, yet in their infancy. were of particular use against buildings. The British were developing shrapnel (named after the British officer who invented it) which increased the effectiveness of exploding shells against troops in the field, by exploding in the air and showering them with metal fragments.
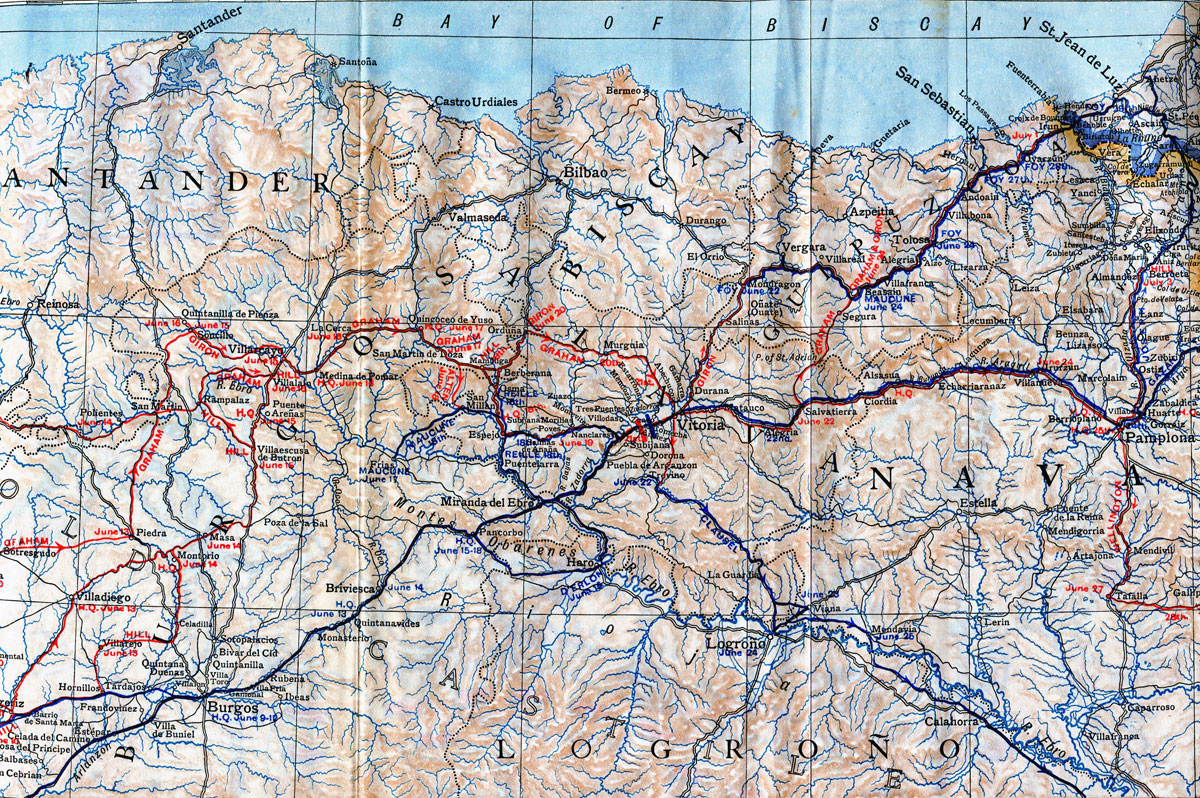
Map of North Eastern Spain
Throughout the Peninsular War and the Waterloo campaign, the British army was plagued by a shortage of artillery. The Army was sustained by volunteer recruitment and the Royal Artillery was not able to recruit sufficient gunners for its needs.
Napoleon exploited the advances in gunnery techniques of the last years of the French Ancien Régime to create his powerful and highly mobile artillery. Many of his battles were won using a combination of the manoeuvrability and fire power of the French guns with the speed of the French columns of infantry, supported by the mass of French cavalry.
While the French conscript infantry moved about the battle field in fast moving columns, the British trained to fight in line. The Duke of Wellington reduced the number of ranks to two, to extend the line of the British infantry and to exploit fully the firepower of his regiments.
Winner of the Battle of San Milan and Osma: The French were driven back by Wellington’s significantly stronger force, continuing the French retreat to Vitoria.
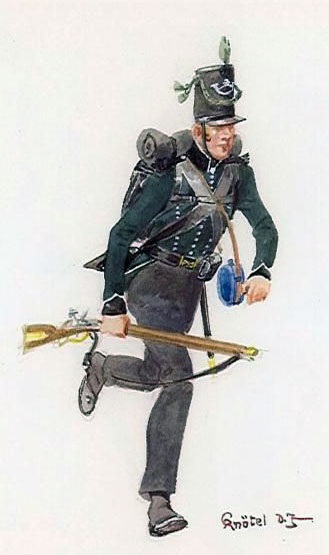
Soldier of the 95th Rifles: Battle of San Millan and Osma on 18th June 1813 in the Peninsular War: picture by Richard Knötel
Background to the Battle of San Milan and Osma:
(see britishbattles.com’s Battle of Vitoria for the full account of Wellington’s preparations in the winter of 1812/13 and his advance into Spain in April to June 1813)
Joseph Bonaparte, Napoleon’s brother, imposed on the Spanish by the Emperor as King of Spain, in 1812 struggled to hold his kingdom for France.
The French armies of the Centre, of Portugal, of the North and of the South, were operating against the Spanish insurrectionist forces across Spain.
Joseph and his chief of staff, Marshal Jourdan, worked to bring these French forces together to confront Wellington’s 1813 invasion of Spain from Portugal, with an army considerably re-inforced during the winter of 2012/3.
Jourdan’s view and that of the senior French commanders was that Wellington’s army could only advance north-east through Spain by way of the main route from Ciudad Rodrigo, through Salamanca, Valladolid and Burgos to Vitoria and on to the French border at Bayonne at the north-western end of the Pyrenees Mountains.
Wellington did not take this route. His troops crossed the border at the north-eastern corner of Portugal and advanced parallel to the main Burgos route through the mountains, along roads the French considered impassable for an army.
The going was difficult at times, but Wellington’s British, Portuguese and Spanish regiments and, in particular, his artillery made good progress along the mountain tracks.
In mid- June 1813, the main French army was stretched along the Ciudad Rodrigo to Vitoria road, north of Burgos, with Joseph anxiously seeking some sign that Wellington was behind him, so he could deliver a decisive check on Wellington’s advance.
But Wellington was not behind them. Already his army was marching around Joseph’s north-west flank.
For the march from the Portuguese border, Wellington divided his army into several columns, each taking a different route through the border mountains.
1st Light Battalion of the King’s German Legion: Battle of San Millan and Osma on 18th June 1813 in the Peninsular War
On 16th June 1813, Wellington’s army turned east, heading for Vitoria.
The new direction brought Wellington’s columns together, so that on the evening of 16th June 1813, almost the whole army was assembled.
In the meantime, the French high command still believed that Wellington must be marching up the road from Burgos behind the main French army, on the basis that the mountains to the west of this highway were impassable to an army equipped with artillery. Jourdan was less convinced that Wellington was not passing his right flank as his troops labored north on the Burgos road.
Particularly worrying for Jourdan was the French army’s inability to supply itself.
French armies lived off the countryside they passed through, a practice feasible in the richer areas of Europe. In Spain few areas could support large bodies of troops for even a few days, ensuring that the French armies in Spain were forced to keep on the move or starve.
It was only possible for Wellington to move his army through the inhospitable mountains of north-western Spain thanks to his large and well-organised commissariat. Even then, the speed of Wellington’s advance meant that the commissariat was unable to keep up with the troops, leading to shortages.
On 16th June 1813, Wellington entertained several of his generals to dinner at Medina de Pomar, 60 miles north of Burgos and 70 miles west of Vitoria.
On 17th June 1813, Wellington’s army marched out of Medina de Pomar for Vitoria, Graham’s column leading, followed by the columns of Wellington and then of Hill.
The British Sixth Division remained in Medina de Pomar to guard the stores.
Wellington spent that night at Quincoceo de Yuso.
The going during the day was such as to require horses to be led and guns to be manhandled with locked wheels.
Reports now came in to Jourdan reporting the presence of British soldiers to the south-west of Medina de Pomar. Far from being behind the French troops on the Burgos road, Wellington’s troops were north of Joseph and marching to cut French communications with France.
Joseph feared that Wellington’s intention was to take Bilbao on the Biscayan Coast.
Reille, commanding the Army of Portugal, was ordered to march to the relief of the French garrison in Bilbao.
Reille ordered Sarrut’s division to march north to Osma, following with Lamentière’s division and 3 regiments of light cavalry.
Reille ordered Maucune, at present some distance to his south-west, to bring his division up to Osma.
The countryside was mountainous, intersected by a few poor roads.

Map of the Battle of San Millan and Osma on 18th June 1813 in the Peninsular War: map by John Fawkes
The Battle of San Milan and Osma:
General Reille received information during the night of 17th/18th June 1813 that Wellington was marching, not on the road north-east towards Bilbao, but east-south-east on the road through San Martin de Losa towards Vitoria; that is straight towards him.
Reille arrived in the hamlet of Osma in time to see Graham’s columns marching out into the plain towards him.
Reille ordered Sarrut’s division forward and his men were immediately engaged by Halkett’s brigade of the 2 King’s German Legion light battalions, supported by artillery fire.
A prolonged cannonade ensued between the opposing armies.
Reille hung onto his position, in the expectation that he would be joined by Maucune’s division, but other than the sounds of a prolonged bombardment coming from the west, there was no sign of Maucune.
With the arrival of more British troops, as the First, Third and Fifth Divisions marched into the plain, supported by a substantial body of cavalry, Reille withdrew south down the road to Espejo.
Meanwhile to the west, Maucune was under attack, after marching along the north side of the River Ebro and joining the main west-east road at San Millan.
Reille’s suggestion to Maucune had been that it would be wise to take the road along the south bank of the River Ebro and cross the river where it was crossed by the north-south Bilbao road.
In the interests of speed, Maucune did not adopt this advice.
At San Millan, Maucune’s division joined the road along which Wellington’s columns were passing.
Maucune’s leading brigade halted at San Millan to await the rest of the division and, in the belief that the British were miles away, took no proper precautions by way of outposts.
The British Light Division came up, marching parallel to the road, as was their practice.
The French rear guard of a squadron of light cavalry was seen to be filing into San Millan.
A small body of the 1st KGL Hussars advanced at the trot and engaged the French light cavalry, dispersing them and taking several prisoners.
At the same time General Charles Alten pushed forward the 1st Battalion 95th Rifles and part of the 3rd Battalion to attack Maucune’s men in San Millan.
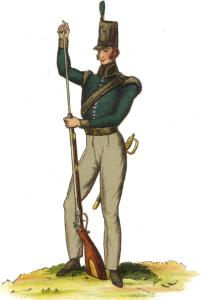
Officer and soldier of the 52nd Light Infantry: Battle of San Millan and Osma on 18th June 1813 in the Peninsular War: picture by Hamilton Smith
Wellington, arriving on the scene, committed the rest of Kempt’s Brigade and a battalion of Portuguese Caçadores to the attack.
These various units harried Maucune’s men along the road, while Wellington ordered the Fourth Division to march to Espejo to intercept the French retreat, but were too late to catch them.
Maucune’s Second Brigade, on emerging from the side road onto the main west-east road, was immediately attacked by the 52nd Light Infantry and a fierce contest took place over the occupation of a hill top.
The French troops finally escaped across country, south-east to Miranda del Ebro.
The French baggage train stampeded up a hill and was taken by the British troops, after a fierce resistance by its guards.
That night, Reille fell back along a side road to the east, rallying his three divisions in the village of Salinas de Anaña.
Wellington’s columns encamped along the Bilbao road from Mambliga to Espejo.
Casualties in the Battle of San Milan and Osma:
Reille’s force, other than Maucune’s division, suffered casualties of around 200 killed, wounded and missing. Maucune’s division, in their rough handling by the British Light Division, suffered around 400 killed, wounded and missing and lost the second brigade’s baggage in its entirety.
British casualties in the battle were around 150 killed, wounded and missing.
Follow-up to the Battle of San Milan and Osma:
Reille intended to continue his retreat to the east, towards the French border, but Joseph did not dare risk the loss of his substantial baggage train in Vitoria or endanger Clausel’s force, currently marching to join him in Vitoria.
Reille was ordered to bring his Army of Portugal to Vitoria, ensuring that it was part of the French order of battle for the Battle of Vitoria.
Anecdotes and traditions from the Battle of San Milan and Osma:
- The difficulty of the mountain roads in northern Spain were such that even Lord Wellington, a first class horseman, was compelled to lead his horse at times on the march to Vitoria from the Portuguese border.
- Due to the damage it received at San Millan, General Maucune’s division missed the Battle of Vitoria.
References for the Battle of San Milan and Osma:
See the extensive list of references given at the end of the Peninsular War Index.
The previous battle of the Peninsular War is the Battle of Morales de Toro
The next battle of the Peninsular War is the Battle of Vitoria
Podcast on the Battle of San Millan and Osma: the clash in the mountains of Northern Spain on 18th June 1813 between the van of Wellington’s advancing army and General Reille’s French ‘Army of Portugal’, as it withdrew to Vitoria: John Mackenzie’s britishbattles.com podcasts