The first battle of the Great Boer War, also known as the Battle of Dundee, fought in Northern Natal on 20th October 1899
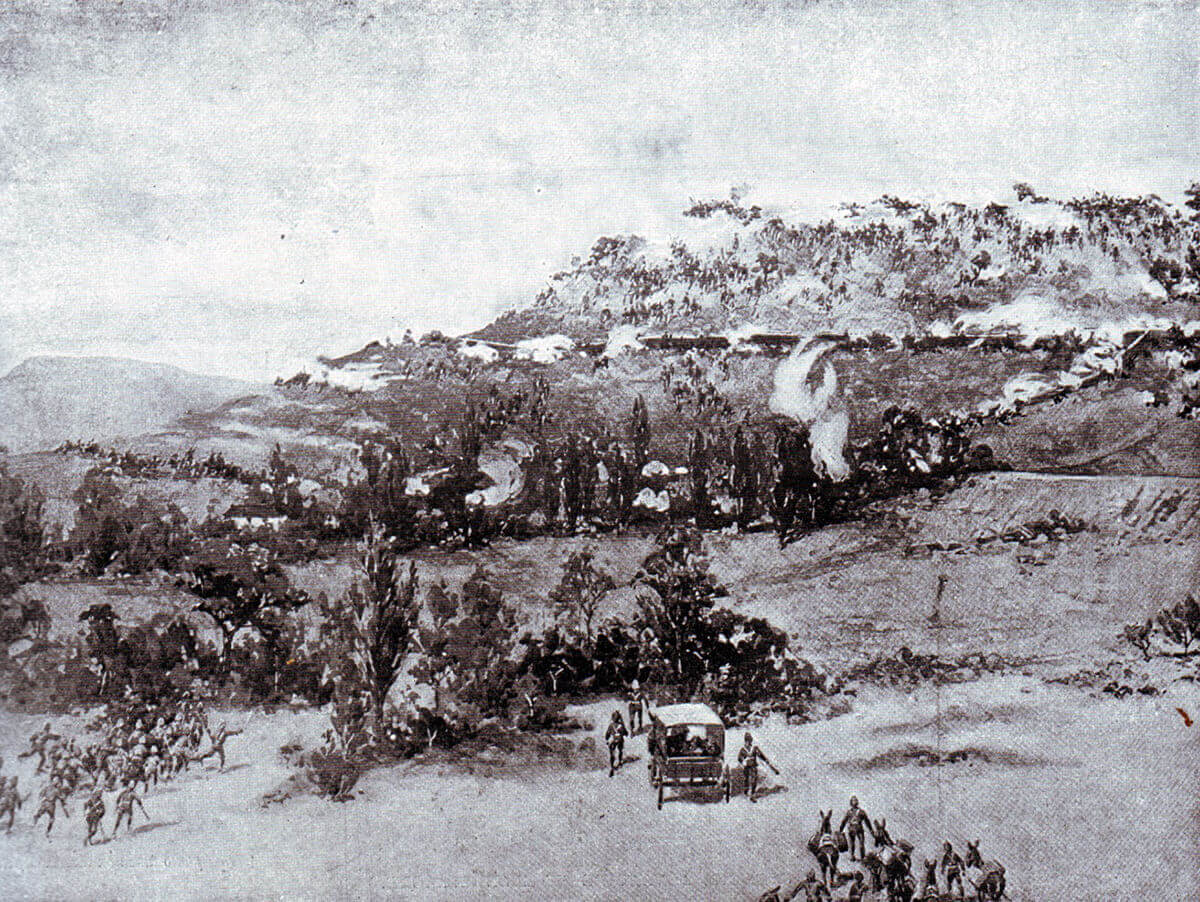
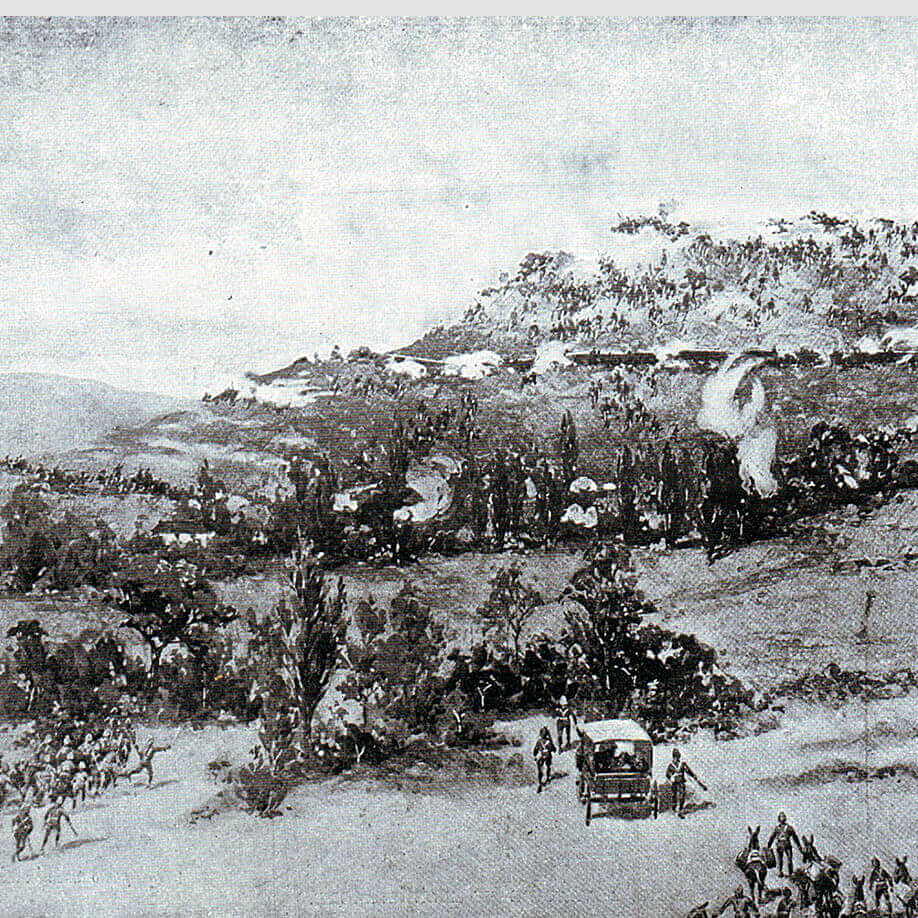
British troops storming Talana Hill during the Battle of Talana Hill on 20th October 1899 in the Boer War
![]() 57. Podcast on the Battle of Talana Hill: the first battle of the Great Boer War, also known as the Battle of Dundee, fought in Northern Natal on 20th October 1899: John Mackenzie’s britishbattles.com podcasts
57. Podcast on the Battle of Talana Hill: the first battle of the Great Boer War, also known as the Battle of Dundee, fought in Northern Natal on 20th October 1899: John Mackenzie’s britishbattles.com podcasts
The previous battle in the British Battles sequence is the Battle of Majuba Hill
The next battle in the Great Boer War is the Battle of Elandslaagte
Battle: Talana Hill
War: The South African or Boer War.
Date of the Battle of Talana Hill: 20th October 1899.
Place of the Battle of Talana Hill: Northern Natal in South Africa.
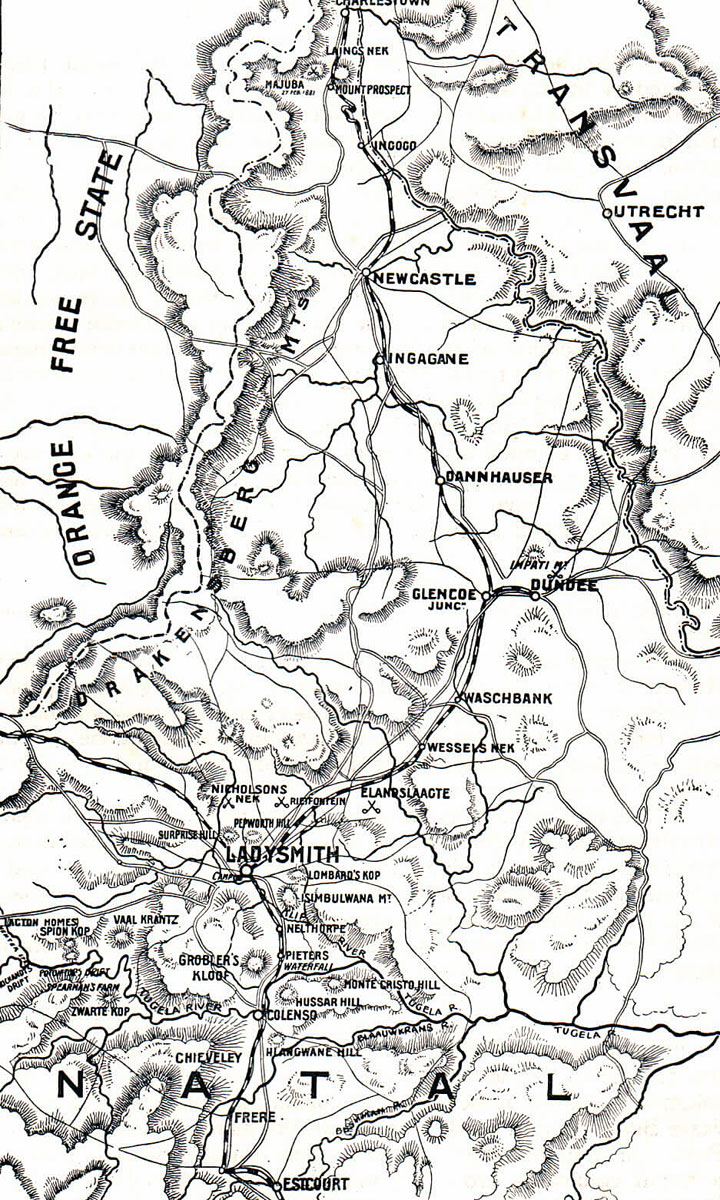
Map of Natal in 1899 on the outbreak of the South African or Boer War
Combatants in the Battle of Talana Hill: British against the Boers.
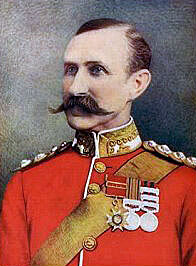
General Sir W Penn Symons, British commander at Talana Hill on 20th October 1899 during the Boer War, fatally wounded in the battle
Commanders at the Battle of Talana Hill: Colonel, local Major General, Sir William Penn Symons against Commandant Lucas Meyer. On his wounding during the battle command of the British force fell on Brigadier-General Yule.
Size of the armies at the Battle of Talana Hill: 4,000 British troops, including some 600 mounted men, 18th Hussars and Mounted Infantry, with 18 field guns and a machine gun, against 3,000 Boers, equipped with 3 field guns and 2 Maxim ‘pom-pom’ 1 pounder quick firers. The number of Boers is not authoritatively recorded.
Uniforms, arms and equipment at the Battle of Talana Hill: The Boer War was a serious jolt for the British Army. At the outbreak of the war British tactics were appropriate for the use of single shot firearms, fired in volleys controlled by company and battalion officers; the troops fighting in close order. The need for tight formations had been emphasised time and again in colonial fighting.
In the Zulu and Sudan Wars overwhelming enemy numbers, armed principally with stabbing weapons, were kept at a distance by such tactics, but, as at Isandlwana, would overrun a loosely formed force. These tactics had to be entirely rethought in battle against the Boers armed with modern weapons.
In the months before hostilities the Boer commandant general, General Joubert, bought 30,000 Mauser magazine rifles, firing smokeless ammunition, and a number of modern field guns and automatic weapons from the German armaments manufacturer Krupp, the French firm Creusot and the British company Maxim. The commandoes, without formal discipline, welded into a fighting force through a strong sense of community and dislike for the British. Field Cornets led burghers by personal influence not through any military code.
The Boers did not adopt military formation in battle, instinctively fighting from whatever cover there might be. Most Boers were countrymen, running their farms from the back of a pony with a rifle in one hand. These rural Boers brought a life time of marksmanship to the war, an important advantage further exploited by Joubert’s consignment of smokeless magazine rifles. Viljoen is said to have coined the aphorism “Through God and the Mauser”. With strong fieldcraft skills and high mobility the Boers were natural mounted infantry. The urban burghers and foreign volunteers readily adopted the fighting methods of the rest of the army.

Royal Dublin Fusiliers in 1905. The officer facing is wearing the two South African War medals. The second battalion of the regiment formed the first line of the attack at the Battle of Talana Hill on 20th October 1899 in the Boer War
Other than in the regular uniformed Staats Artillery and police units, the Boers wore their every day civilian clothes on campaign.
After the first month the Boers lost their numerical superiority, spending the rest of the formal war on the defensive against British forces that regularly outnumbered them.
British tactics, developed on the North-West Frontier of India, Zululand, the Sudan and in other colonial wars against badly armed tribesmen, when used at Modder River, Magersfontein, Colenso and Spion Kop were incapable of winning battles against entrenched troops armed with modern magazine rifles. Every British commander made the same mistake; Buller; Methuen, Roberts and Kitchener. When General Kelly-Kenny attempted to winkle Cronje’s commandoes out of their riverside entrenchments at Paardeberg using his artillery, Kitchener intervened and insisted on a battle of infantry assaults, with the same disastrous consequences as earlier in the war.
Some of the most successful British troops were the non-regular regiments; the City Imperial Volunteers, the South Africans, Canadians, Australians and New Zealanders, who more easily broke from the habit of earlier British colonial warfare, using their horses for transport rather than the charge, advancing by fire and manouevre in loose formations and making use of cover, rather than the formal advance into a storm of Mauser bullets.
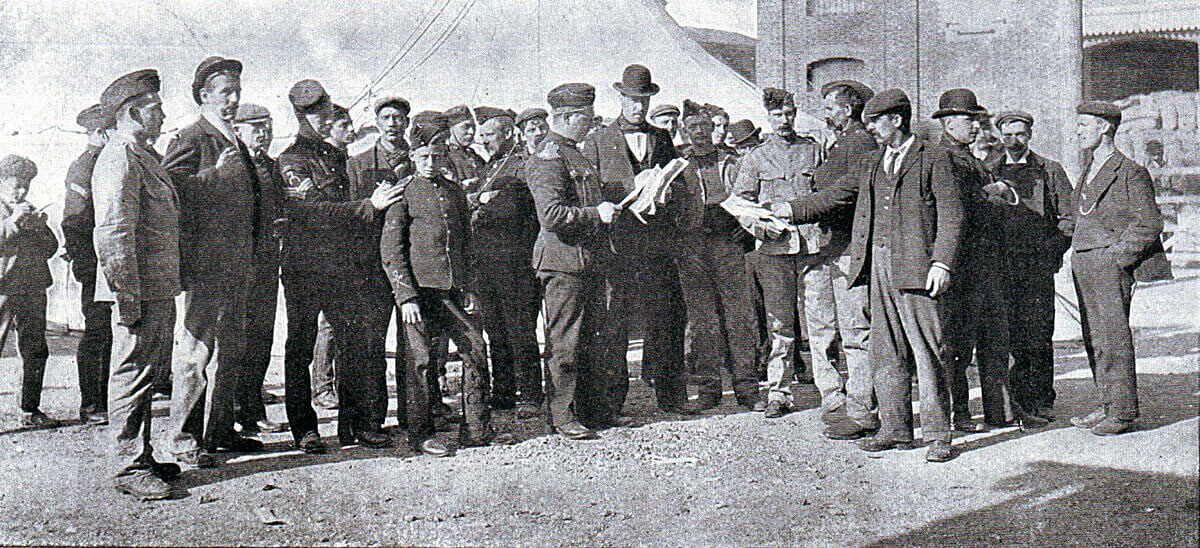
British reservists assembling in Southampton for the war in South Africa in 1899: Battle of Talana Hill on 20th October 1899 in the Boer War
Uniform in the Battle of Talana Hill: The British regiments made an uncertain change into khaki uniforms in the years preceding the Boer War, with the topee helmet as tropical headgear. Highland regiments in Natal devised aprons to conceal coloured kilts and sporrans. By the end of the war the uniform of choice was a slouch hat, drab tunic and trousers; the danger of shiny buttons and too ostentatious emblems of rank emphasised in several engagements with disproportionately high officer casualties.
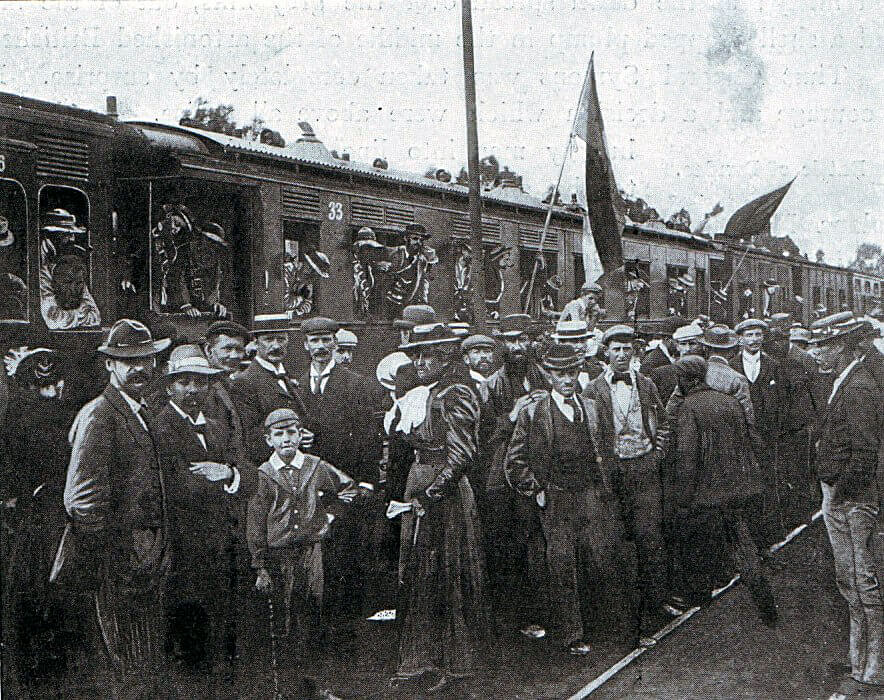
Boer citizens leaving Johannesburg for the front at the beginning of the Boer War in 1899: Battle of Talana Hill on 20th October 1899 in the Boer War
The British infantry were armed with the Lee Metford magazine rifle firing 10 rounds. But no training regime had been established to take advantage of the accuracy and speed of fire of the weapon. Personal skills such as scouting and field craft were little taught. The idea of fire and movement was largely unknown, many regiments still going into action in close order. Notoriously General Hart insisted that his Irish Brigade fight shoulder to shoulder as if on parade in Aldershot. Short of regular troops, Britain engaged volunteer forces from Britain, Canada, Australia and New Zealand who brought new ideas and more imaginative formations to the battlefield.
The British regular troops lacked imagination and resource. Routine procedures such as effective scouting and camp protection were often neglected. The war was littered with incidents in which British contingents became lost or were ambushed often unnecessarily and forced to surrender. The war was followed by a complete re-organisation of the British Army, with emphasis placed on personal weapon skills and fire and movement using cover.
The British artillery was a powerful force in the field, underused by commanders with little training in the use of modern guns in battle. Pakenham cites Pieters as being the battle at which a British commander, surprisingly Buller, developed a modern form of battlefield tactics: heavy artillery bombardments co-ordinated to permit the infantry to advance under their protection. It was the only occasion that Buller showed any real generalship and the short inspiration quickly died.
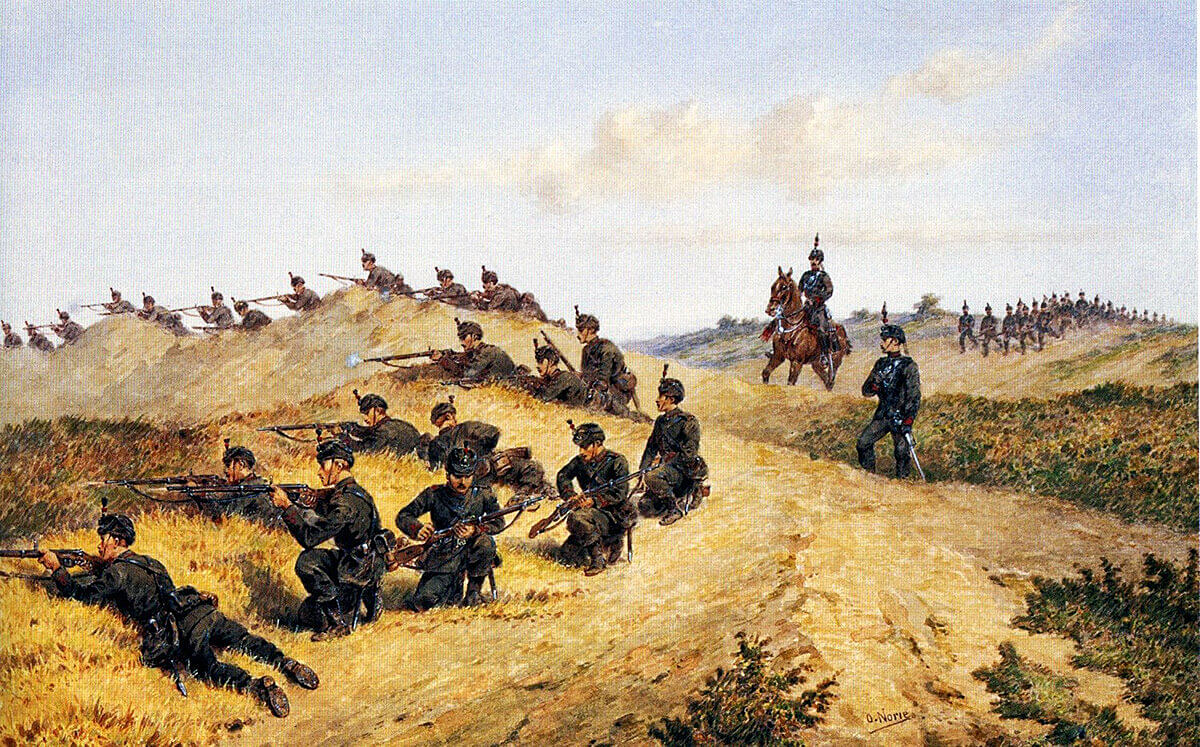
King’s Royal Rifle Corps training in Britain in 1890; picture by Orlando Norie: Battle of Talana Hill on 20th October 1899 in the Boer War
The Royal Field Artillery fought with 15 pounder guns; the Royal Horse Artillery with 12 pounders and the Royal Garrison Artillery batteries with 5 inch howitzers. The Royal Navy provided heavy field artillery with a number of 4.7 inch naval guns mounted on field carriages devised by Captain Percy Scott of HMS Terrible.
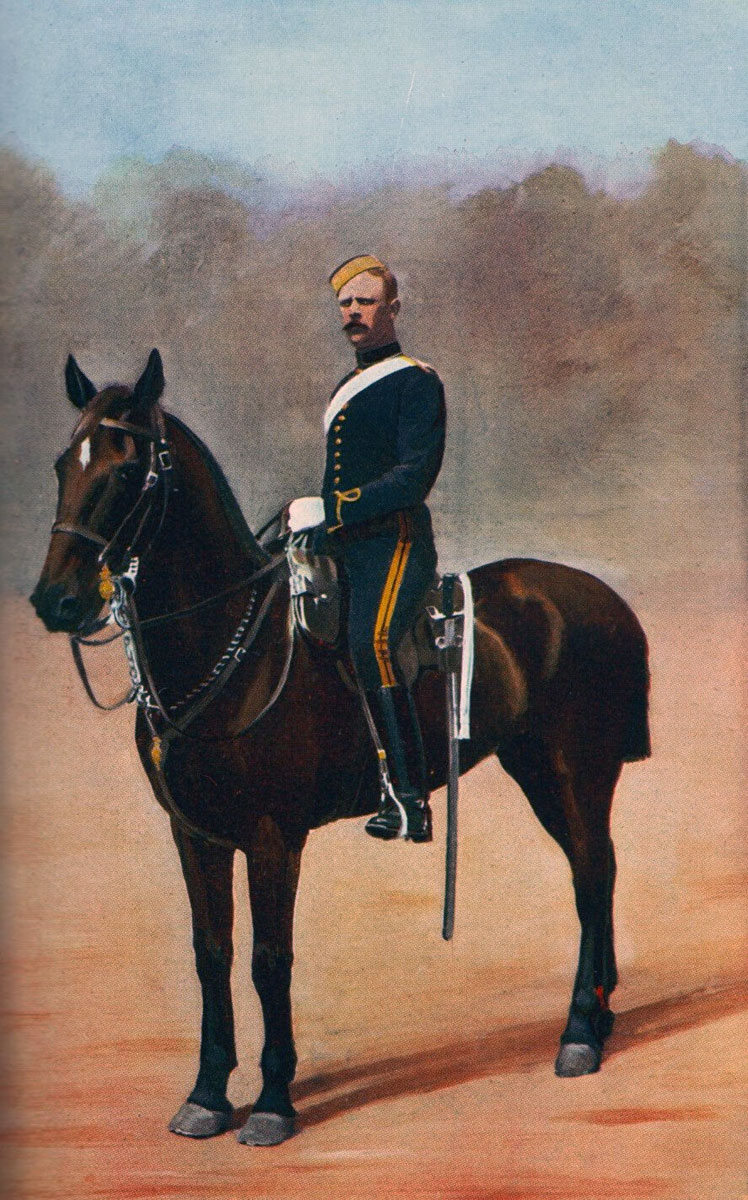
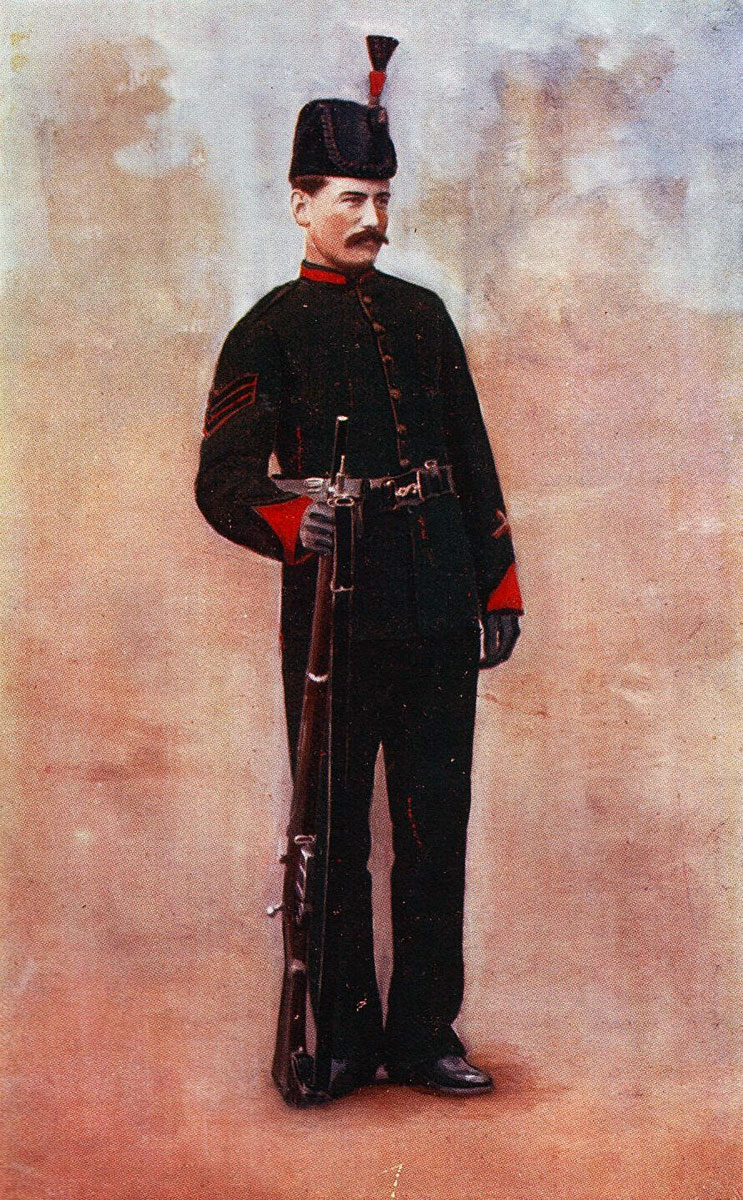
18th Hussar trooper in 1899: Battle of Talana Hill on 20th October 1899 in the Boer War
Automatic weapons were used by the British usually mounted on special carriages accompanying the mounted infantry or cavalry.
Winner of the Battle of Talana Hill: The British; but a Pyrrhic victory that achieved little in holding up the Boer invasion of Natal.
British Regiments at the Battle of Talana Hill:
18th Hussars: later the 13th/18th Royal Hussars and now the Light Dragoons.
Royal Field Artillery: 13th, 67th and 69th Batteries.
1st Battalion, the Leicestershire Regiment: now the Royal Anglian Regiment.
1st Battalion, the King’s Royal Rifle Corps (60th): later the Royal Green Jackets and now part of the Rifles.
1st Battalion, the Royal Irish Fusiliers: disbanded in 1922.
2nd Battalion, the Royal Dublin Fusiliers: disbanded in 1922.
Mounted Infantry: drawn from various infantry regiments.
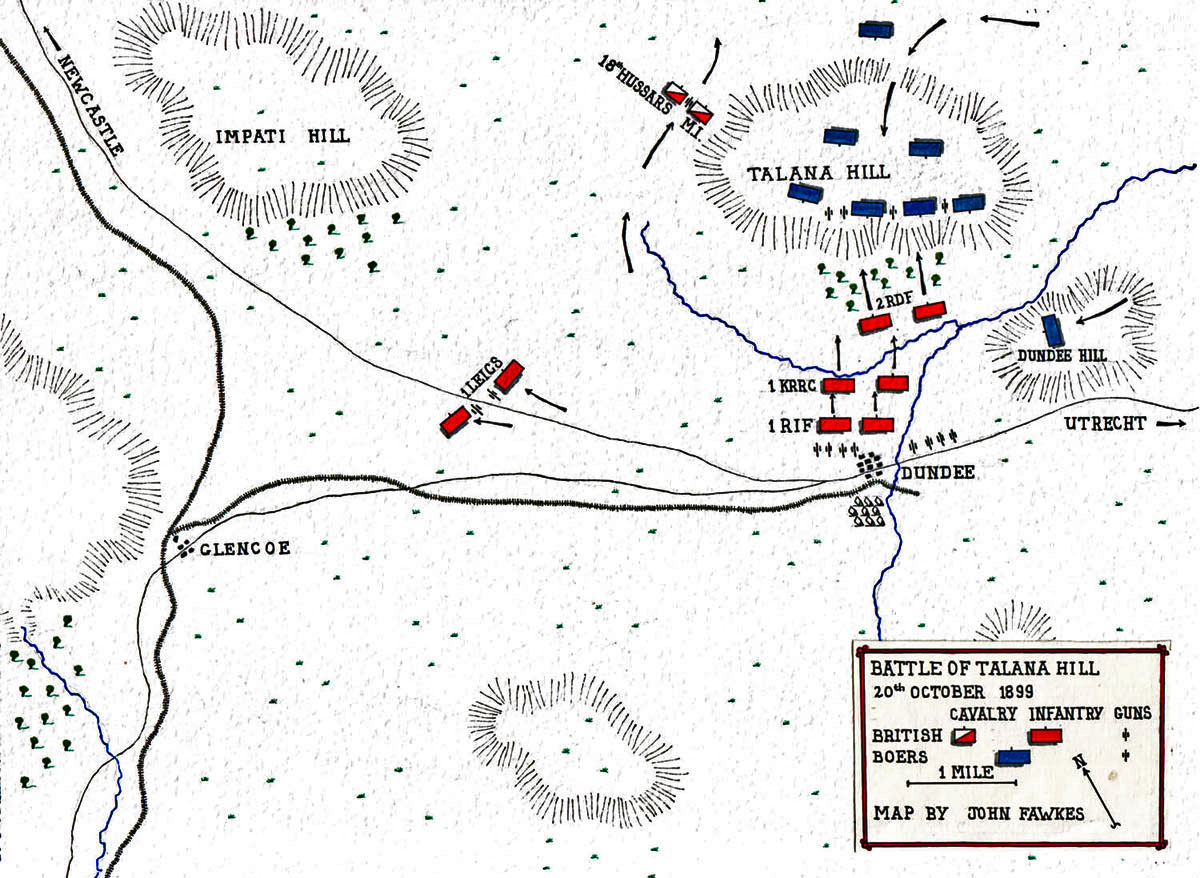
Map of the Battle of Talana Hill or Dundee on 20th October 1899 during the Boer War by John Fawkes
Account of the Battle of Talana Hill:
On the outbreak of the War in South Africa the British authorities feared the Boers from the Transvaal and the Orange Free State would invade the British coastal colony of Natal, a triangular shaped province situated on the Indian Ocean, sharing a long common border with the two Boer republics, its northern apex remote and exposed to attack.
In early autumn 1899 British reinforcements rushed to South Africa from India under the command of Major General Penn Symons.
Voices of South African experience at the British War Office in London urged Penn Symons to keep his outnumbered troops well back from the frontier behind the Tugela River. Penn Symons thought otherwise and advanced his lead brigade to Dundee, north of the Tugela, where it would be outflanked by a Boer invasion along the length of the frontier.
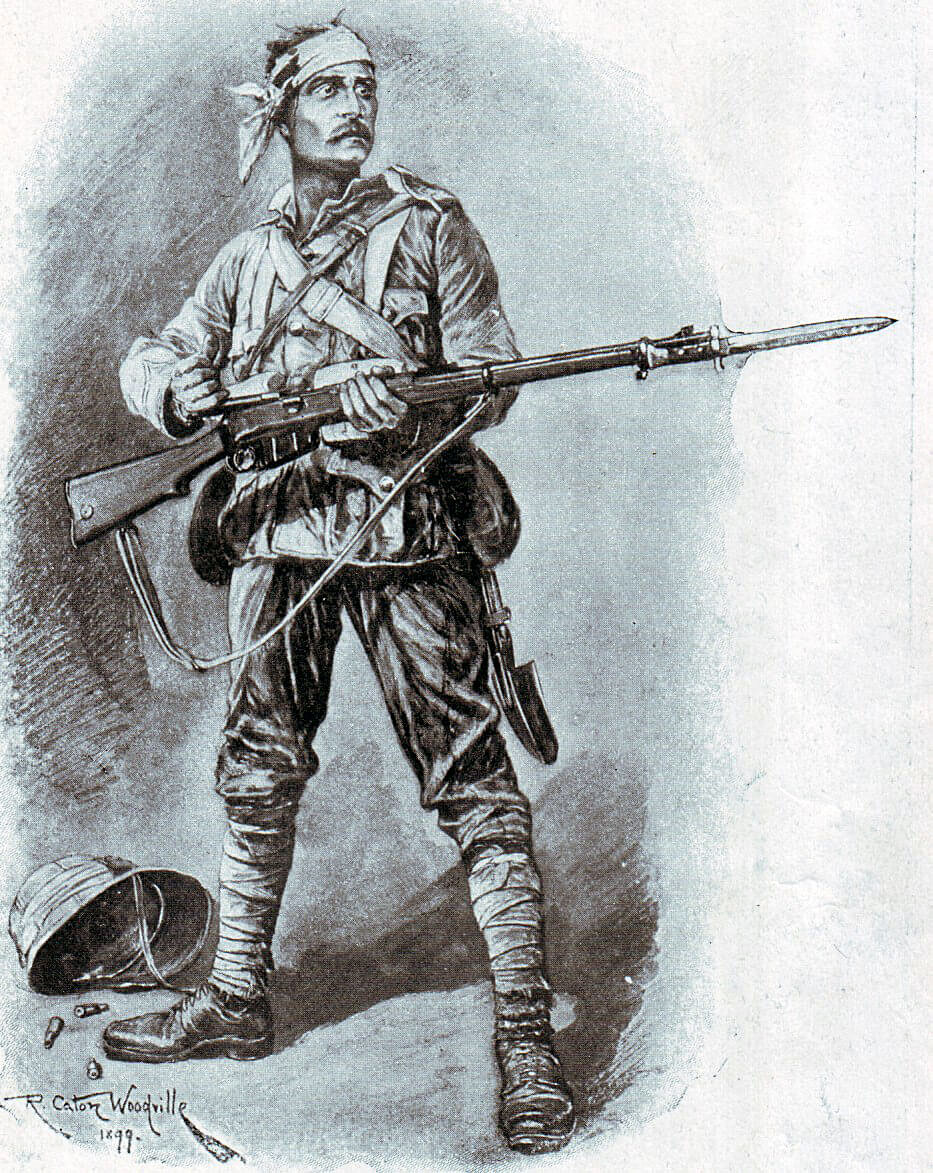
British infantryman in field uniform and equipment: Battle of Talana Hill on 20th October 1899 in the Boer War: picture by Richard Caton Woodville
The main Boer army to invade Natal was that of General Erasmus that came down the main north-south road through Newcastle. General Kock took a smaller force on a parallel route to the west of Erasmus, while Commandant Lucas Meyer entered Natal via its eastern border from Utrecht.
On 20th October 1899 at around 5am the Boer commando of General Meyer appeared on Talana Hill to the east of Dundee, following a night approach march.
The British spotted figures moving on Talana Hill. As it was expected that the first Boer incursion would arrive from the direction of Newcastle it was assumed that these figures were members of the Dundee town guard.
At 5.40am the Boer artillery opened fire from Talana Hill on Dundee and the British camp.
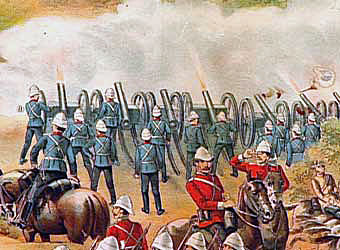
British gun line during the Battle of Talana Hill on 20th October 1899 in the Boer War
General Penn Symons was not impressed by the readiness of the British troops in Natal and worked them hard. His battalions were falling in for a day’s training when the first artillery rounds came in from three 75 millimetre guns, the first of Joubert’s new European acquisitions.
There was a delay before fire could be returned, the British artillery horses being at water. The batteries harnessed up and hurried through Dundee, coming into action in the open ground beyond the town, quickly silencing the outnumbered Boer guns.
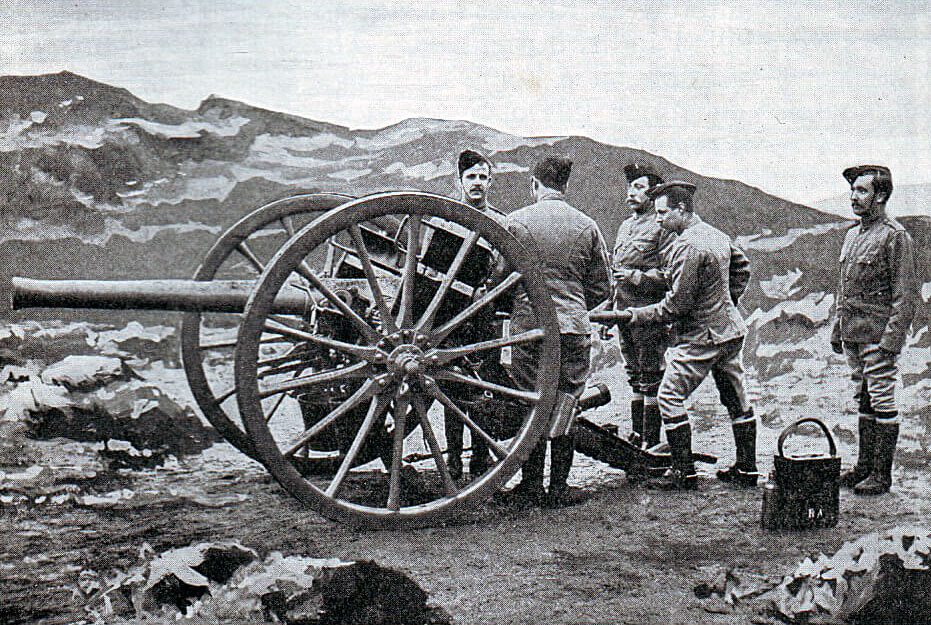
Royal Field Artillery gunners in 1899 with a 15 pounder field gun: Battle of Talana Hill on 20th October 1899 in the Boer War
As his artillery bombarded the Boers, Penn Symons prepared to attack their positions on Talana Hill with his infantry, forming with the Dublin Fusiliers massed in the front rank, the Rifles in support behind them and the Royal Irish Fusiliers in the third rank. Penn Symons insisted his regiments attack in conventional close order, an unrealistic tactic against an enemy armed with modern magazine rifles.
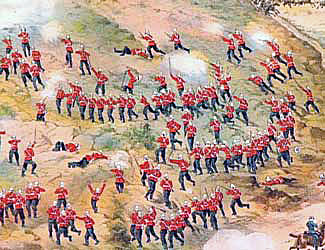
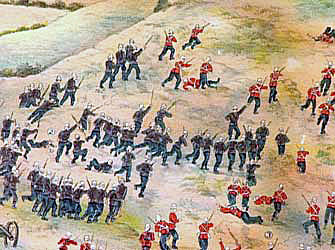
2nd Royal Dublin Fusiliers storming Talana Hill during the Battle of Talana Hill on 20th October 1899 in the Boer War
While his deployment of the infantry is considered to have been conventional (although it is hard to see what other choice he had), Penn Symons use of his mounted troops was imaginative and daring.
Penn Symons directed his cavalry force, the 18th Hussars and Mounted Infantry, to advance around the western end of Talana Hill. Lieutenant Colonel Möller, the commanding officer of the Hussars and in overall charge of the mounted units, was instructed to await directions there, unless he saw a good opportunity to cut off the Boers’ retreat from Talana Hill.
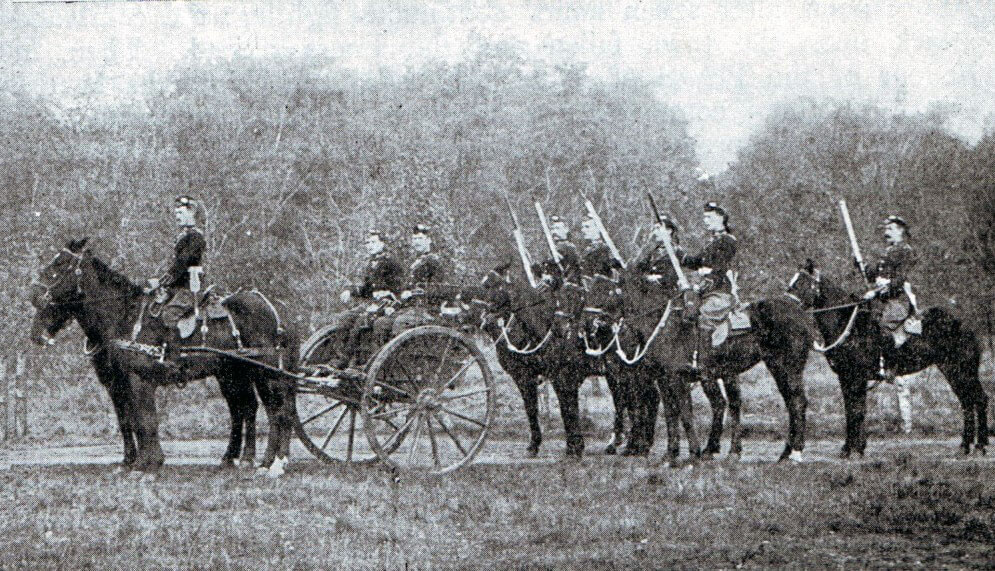
Mounted infantry machine gun detachment in 1899: Battle of Talana Hill on 20th October 1899 in the Boer War
The mounted units adopted what one of the experienced squadron leaders described as an ‘A1’ position overlooking the Boers’ led horses and ammunition supply, being passed up the hill. This officer, Major Marling, begged Möller to dismount his men and fire on the Boers with carbines and the Mounted Infantry machine gun. Möller refused, telling Marling to mind his own business.
1st King’s Royal Rifle Corps storming Talana Hill during the Battle of Talana Hill on 20th October 1899 in the Boer War
The infantry assault went in on Talana Hill, the first lines reaching a wood at the base of the hill where in the face of heavy fire the attack stalled. Penn Symons arrived at the wood, dismounted and led the advance himself, until he was mortally injured, receiving a bullet in the stomach.
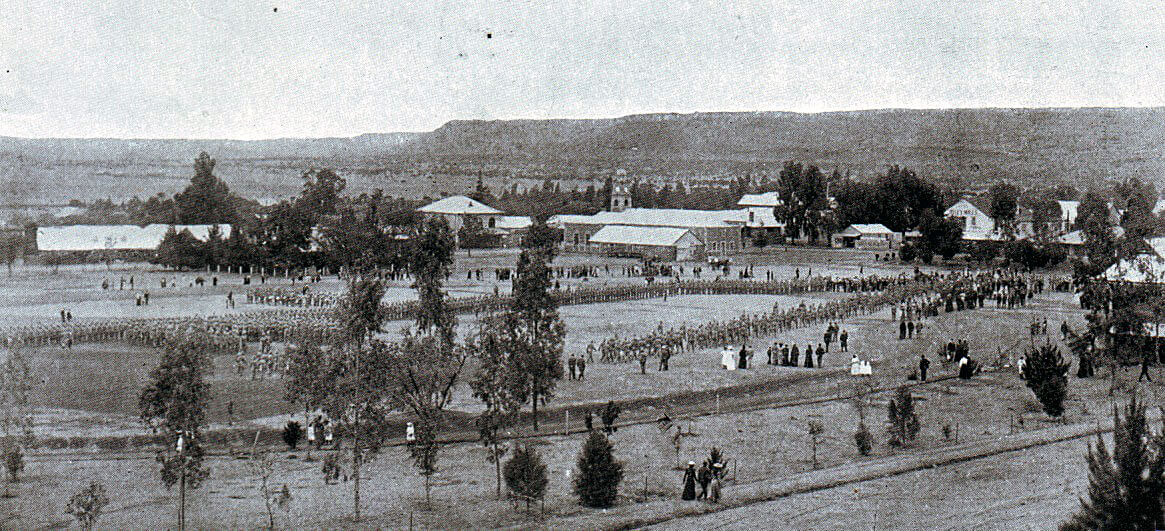
Royal Dublin Fusiliers leaving Ladysmith for Dundee before the Battle of Talana Hill on 20th October 1899 in the Boer War
The British infantry attack regained its momentum and continued up Talana Hill in the face of heavy fire, gathering below the peak for the final assault. As the troops stormed the top of the hill the Boers retreated.
One of the British batteries, firing from the open ground outside Dundee, failed to identify the troops on the top of Talana as British and continued to fire on the crest, inflicting unnecessary casualties and hindering the assault. Several senior British officers were killed or seriously wounded by British artillery fire.
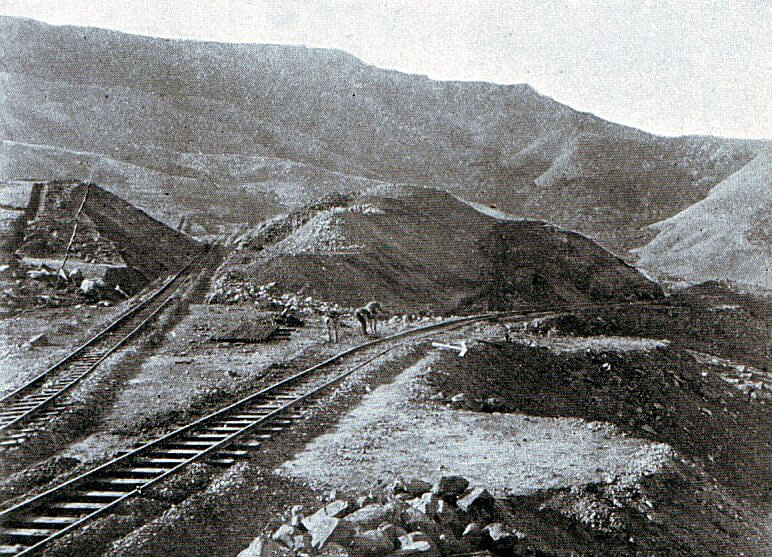
Glencoe in Natal: the railway branch to the left goes north to Newcastle, the line to the right to Dundee
The Boers could be seen mounting their ponies and streaming away across the valley on the far side of the hill. Penn Symons had sent the 18th Hussars and Mounted Infantry around Talana Hill to take advantage of just such a situation, but there was no sign of them.
Instead of staying in his ‘A1’ position Möller led his mounted units off to the north, in spite of the objections of his senior regimental officers. Finally Möller agreed that two squadrons of the 18th led by the regimental second in command Major Knox might return to the base of Talana Hill. When the opportunity came for the cavalry and mounted infantry to attack they were no longer in place and the opportunity to cut off the retreat of the Boers from Talana Hill was lost.
The loss of Penn Symons prevented the main British force from taking advantage of its success in storming Talana Hill. The British batteries came forward but due to a misunderstanding of their orders or a failure to identify the Boers, did not open fire on the retreating commando.
King’s Royal Rifle Corps in 1899; the first battalion formed the second line in the attack at Talana Hill in the Battle of Talana Hill on 20th October 1899 in the Boer War
Möller and his now much reduced mounted force ended up in a farm building some miles from Talana Hill in the middle of the Boer force advancing from Newcastle, where they surrendered. The two squadrons led by Major Knox managed to evade the Boers and returned to the British lines.
Casualties at the Battle of Talana Hill: British casualties were 51 killed and 203 wounded of the infantry battalions. Some 150 men were captured with Möller, around 80 of them 18th Hussars. Boer casualties were around 200. The 3 Krupp guns were left on Talana Hill, but recovered by the Boers following the British withdrawal from Dundee.
Follow-up to the Battle of Talana Hill: The British marked the battle as a victory, but it was only a temporary reprieve from the inexorable Boer invasion of Northern Natal and the British retreat into Ladysmith.
The more percipient among British officers considered the tactics of close order infantry advance against modern smokeless magazine rifles in the hands of skilled marksmen to be an anachronism. Penn Symons decided that he had no time to delay the attack on Talana Hill due to the imminent arrival of General Joubert’s advance guard commanded by Erasmus down the Newcastle road. The only tactic available was for the infantry to storm the hill after a brief artillery barrage. Penn Symons’ deployment of the mounted force behind Talana Hill was perceptive and could have brought about the capture of Meyer’s whole force, if he had not been let down by his subordinate cavalry commander.

Funeral held by 2nd Royal Dublin Fusiliers after the Battle of Talana Hill on 20th October 1899 in the Boer War
Penn Symons was an experienced and competent general. Commissioned into the 24th Foot, Penn Symons missed the massacre of his battalion at Isandlwhana in the Zulu War in 1879 by chance. He held a number of appointments in India and Burma before commanding brigades in the Waziristan and Tochi campaigns and a division in the Tirah, between 1897 and 1898.
Penn Symons was shot in the stomach as he went to lead the stalled infantry attack. He managed to mount his horse and ride back to the field hospital and survived for a few days. Penn Symons was promoted substantive major-general before his death.
If Penn Symons had survived the Battle of Talana Hill and continued to hold a senior command in Natal, British interests might have been better served than they were by his colleagues.
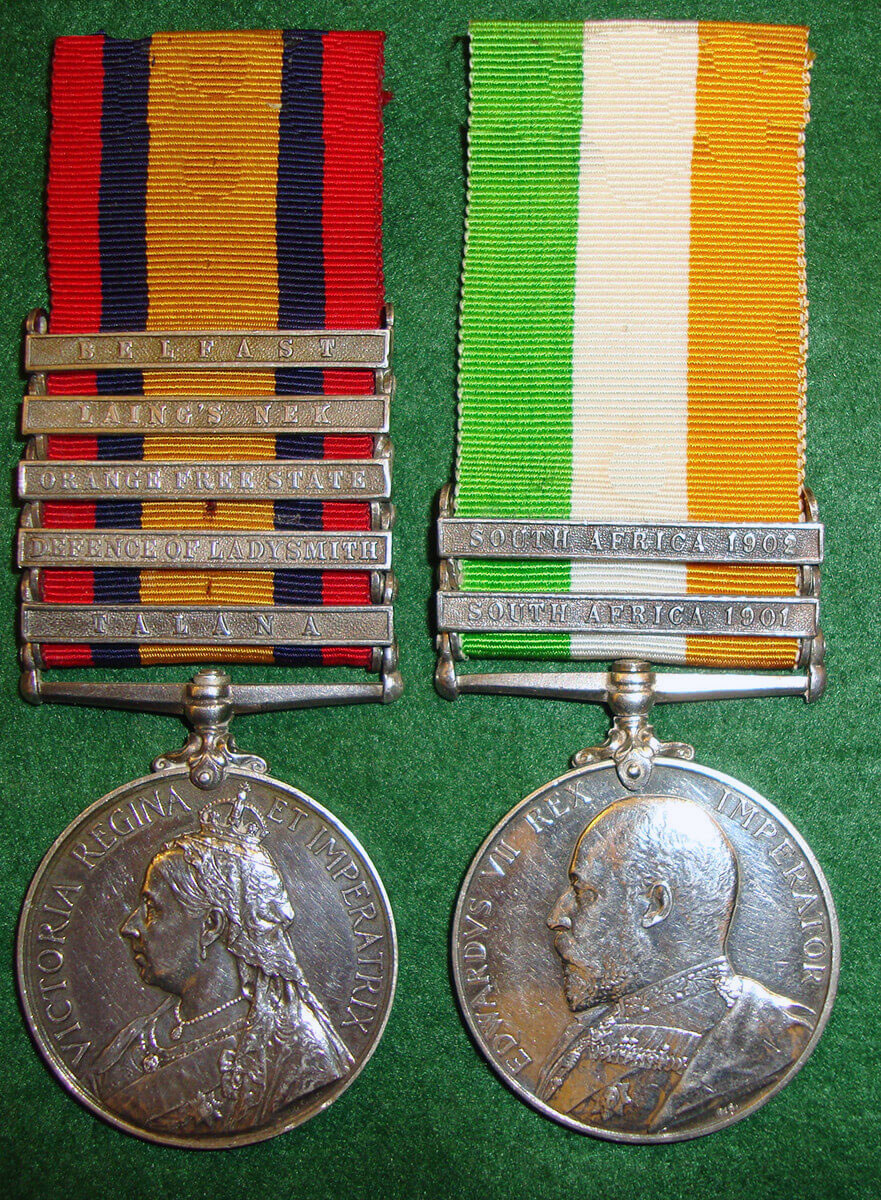
Queen’s South Africa War medal and King’s South Africa War medal awarded to Trooper Taylor of the 18th Hussars (Queen’s medal has the clasp ‘Talana’)
Battle Honours from the Battle of Talana Hill:
Talana Hill is not a battle honour. All the regiments that fought in South Africa received the battle honour ‘South Africa’ with the dates of presence in the country.
Anecdotes and traditions from the Battle of Talana Hill:
- Unlike Lieutenant Colonel Möller, the commanding officer of the 18th Hussars, who in his long army career had seen no action, two of his squadron commanders were experienced campaigners. Major Marling won the Victoria Cross in the Sudan in 1884. He also served in the First Boer War in 1881 and in Egypt in 1882. Major Knox served in the Camel Corps in the Nile Expedition of 1884-5. Möller was not prepared to take the advice of these experienced officers.
- The capture of the commanding officer and men from the 18th Hussars caused a sensation, particularly when the prisoners were paraded into the Boer capital, Pretoria. The incident was eventually the subject of a British Army Board of Inquiry. Although this investigation exonerated Möller, Lord Roberts directed that Möller was to be removed from command of the 18th Hussars and not again given a command.
Captain Weldon of 2nd Royal Dublin Fusiliers killed at the Battle of Talana Hill on 20th October 1899 during the Boer War
- Captain Weldon, killed leading E Company 2nd Royal Dublin Fusiliers, was accompanied into battle by his terrier Rose. When Captain Weldon’s body was recovered after the battle Rose was found by him. E Company took Rose under its wing.
- Among the officers killed was Lieutenant Colonel Gunning, the commanding officer of 1st KRRC. He stood up to call out to the artillery to stop firing when he was hit.
References for the Battle of Talana Hill:
The Great Boer War by Sir Arthur Conan Doyle
Goodbye Dolly Gray by Rayne Kruger
The Boer War by Thomas Pakenham
History of British Cavalry by the Marquis of Anglesey Volume 4 (particularly for the involvement of the 18th Hussars)
South Africa and the Transvaal War by Louis Creswicke (6 highly partisan British volumes)
Buller’s Campaign by Julian Symons
Ladysmith by Ruari Chisholm
Commando by Deneys Reitz
 57. Podcast on the Battle of Talana Hill: the first battle of the Great Boer War, also known as the Battle of Dundee, fought in Northern Natal on 20th October 1899: John Mackenzie’s britishbattles.com podcasts
The previous battle in the British Battles sequence is the Battle of Majuba Hill
The next battle in the Great Boer War is the Battle of Elandslaagte
© britishbattles.com.