The defeat by Colonel Evelyn Wood of a Zulu army on 29th March 1879, in the opening stages of the Zulu War

Battle of Khambula on 29th March 1879 in the Zulu War: print by Melton Pryor
![]() 54. Podcast on the Battle of Khambula on 29th March 1879 in the Zulu War: the defeat by Colonel Evelyn Wood VC of a Zulu army in the opening stages of the war: John Mackenzie’s britishbattles.com podcasts
54. Podcast on the Battle of Khambula on 29th March 1879 in the Zulu War: the defeat by Colonel Evelyn Wood VC of a Zulu army in the opening stages of the war: John Mackenzie’s britishbattles.com podcasts
The previous battle of the Zulu War is the Battle of Rorke’s Drift
The next battle of the Zulu War is the Battle of Gingindlovu
Battle: Khambula
War: Zulu War
Date of the Battle of Khambula: 29th March 1879
Place of the Battle of Khambula: Northern Zululand in South Africa.
Combatants at the Battle of Khambula: The British Number Four Column and the Zulu Army.
Commanders at the Battle of Khambula: Colonel Evelyn Wood VC and Ntshingwayo kaMahole.
Size of the armies at the Battle of Khambula: 2,000 British troops and native levies against 20,000 Zulus.
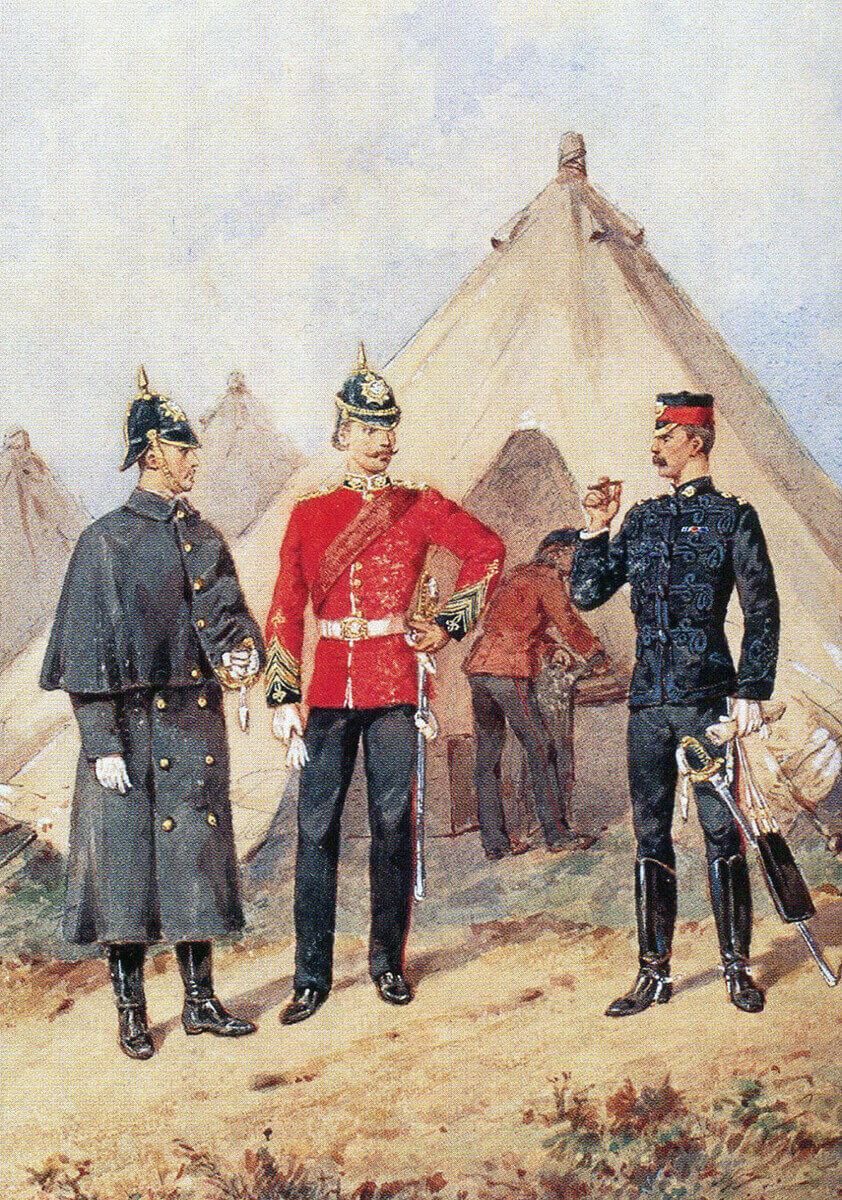
13th Somerset Light Infantry in England: Battle of Khambula on 29th March 1879 in the Zulu War: picture by Orlando Norie
Uniforms, arms and equipment at the Battle of Khambula: The Zulu warriors were formed in regiments by age, their standard equipment the shield and the stabbing spear. The formation for the attack, described as the ‘horns of the beast’, was said to have been devised by Shaka, the Zulu King who established Zulu hegemony in Southern Africa. The main body of the army delivered a frontal assault, called the ‘chest’, while the ‘horns’ spread out behind each of the enemy’s flanks and delivered the secondary and often fatal attack in the enemy’s rear. Cetshwayo, the Zulu King, fearing British aggression took pains to purchase firearms wherever they could be bought. By the outbreak of war, the Zulus had tens of thousands of muskets and rifles, but of a poor standard, and the Zulus were ill-trained in their use.
The regular British infantry were equipped with the breach loading single shot Martini-Henry rifle and bayonet. The British infantry wore red tunics, white solar topee helmets and dark blue trousers, with red piping down the side. The irregular mounted units wore blue tunics and slouch hats.
Winner of the Battle of Khambula: The British.
British Regiments at the Battle of Khambula:
Royal Artillery, 11th Battery, 7th Brigade.
1st Battalion of the 13th Light Infantry: later the Somerset Light Infantry and now the Rifles.
90th Perthshire Light Infantry: later 2nd Battalion the Scottish Rifles; disbanded in 1966.
Mounted Infantry
Frontier Light Horse under Lieutenant Colonel Buller
Boer Commando
Native Contingent of Swazis
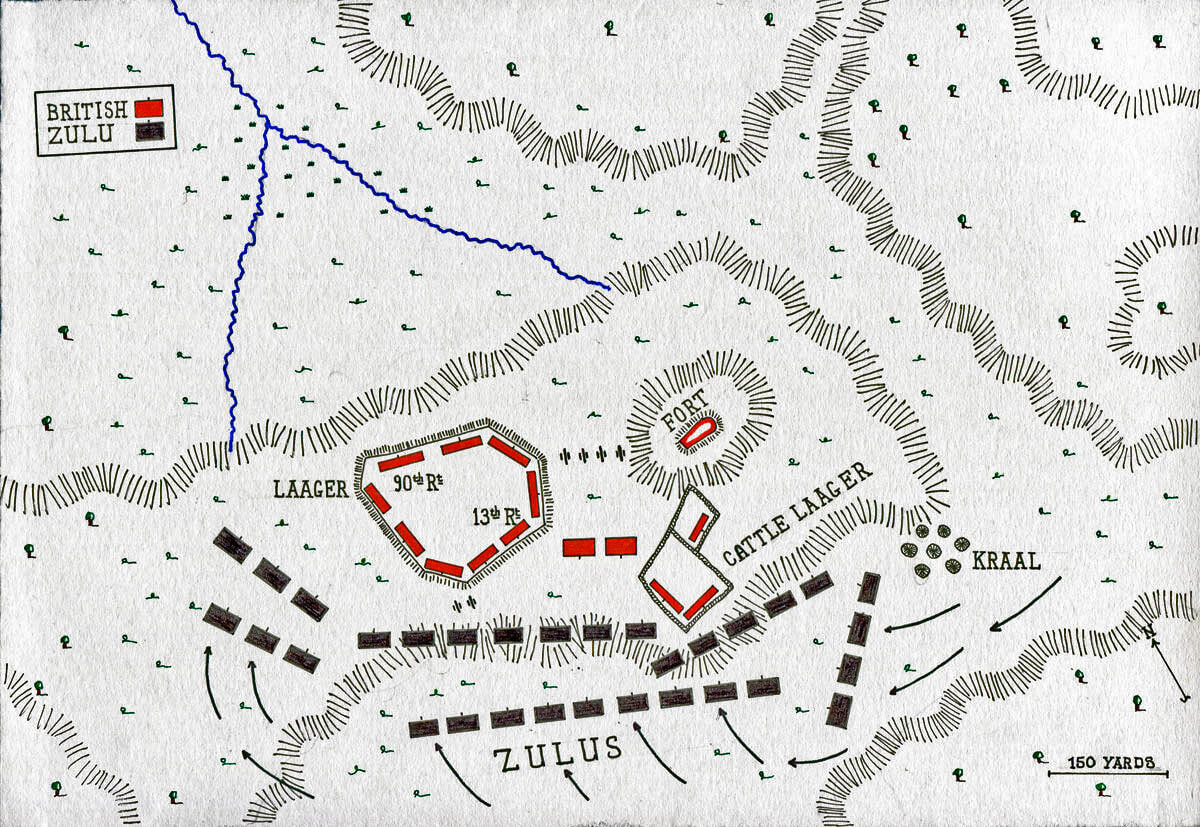
Map of the Battle of Khambula on 29th March 1879 in the Zulu War: map by John Fawkes
Account of the Battle of Khambula:
The shock of the defeat and loss at Isandlwana on 22nd January 1879 caused a catastrophic drop in morale among the British forces invading Zululand.
Colonel Evelyn Wood VC’s Number Four Column, the most northerly British force, invaded Zululand on 6th December 1878. The Zulus in the area were of the abaQulusi, a tribal group vigorously loyal to Cetshwayo the Zulu King. Led by the enterprising Prince Mbilini waMswati, the abaQulusi held a group of mountains of which Hlobane was the most prominent.
One of Wood’s senior officers was Lieutenant Colonel Redvers Buller, an energetic leader of irregular South African horse. (Buller became one of Britain’s generals in the Second Boer War: in this respect, the experience of Britain was similar to France; highly vigorous and successful colonial small war commanders were found wanting when required to command large formations in set piece wars).
On 20th January 1879, Wood dispatched Buller with a mounted force to reconnoitre the Zulu positions. After a running skirmish Buller was forced to retire.
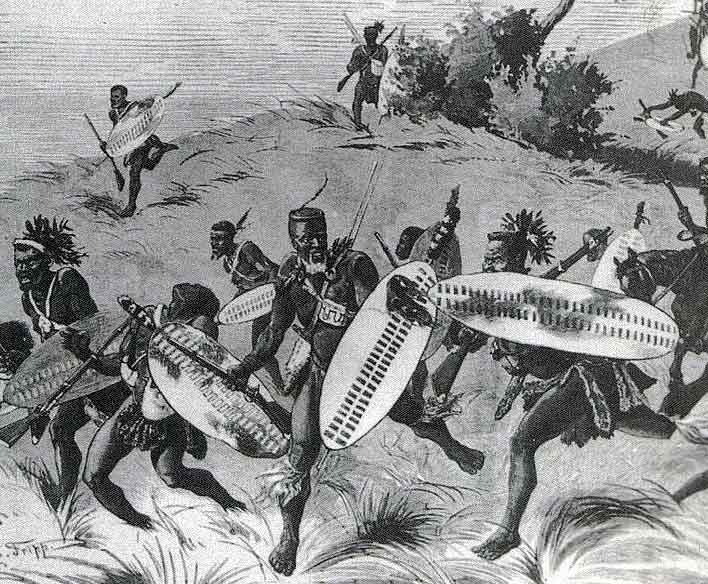
Zulus attacking at the Intombi River Disaster on 12th March 1879 in the Zulu War: Battle of Khambula on 29th March 1879 in the Zulu War
On 21st January 1879, Wood’s force marched out of camp and moved swiftly on the Zulu positions, forcing the Zulus to withdraw onto Hlobane Mountain. Wood’s troops camped and on 23rd January 1879, Wood began his attack on Hlobane. In the early hours of the morning, the column received the news of Isandlwana, the destruction of Chelmsford’s camp and the loss of nearly a full battalion of British troops.
It was immediately apparent to Wood that the whole Zulu army that had fought at Isandlwana might well attack his column. He abandoned the operation and moved north to a new camp site, away from the main Zulu army.
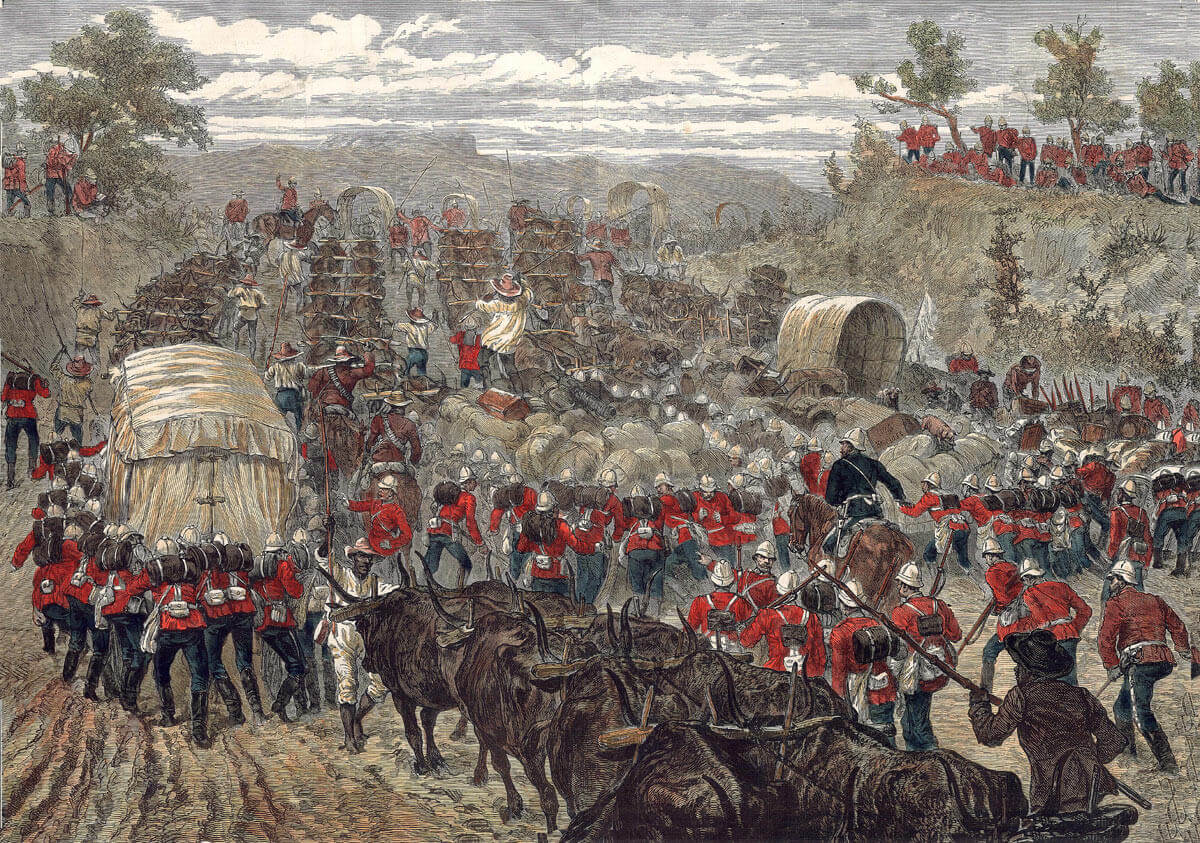
The British column encamped on a plateau at Khambula, where the ground sloped away on two sides. The troops fortified the camp with wagon walls and trenches, precautions that might have saved the British force at Isandlwana, and built an earthwork bastion on a small hill in the middle of the camp and a further laager to house the cattle and oxen.
No Zulu attack materialised over the next few days and the energetic Wood returned to harassing the local Zulus. On 1st February 1879, Buller carried out another raid on Hlobane.
Over the following weeks, the Zulus raided north into the areas occupied by Boer farms and villages, away from Wood’s camp, while the British raided the Zulu areas.
Intombi River Disaster on 12th March 1879 in the Zulu War: Battle of Khambula on 29th March 1879 in the Zulu War
On 12th March 1879, the Zulus inflicted another disaster on the British. A supply train of wagons and oxen was trapped, as it approached Luneburg in the North of Zululand, by the rising Intombi River. Captain Moriarty, commanding the escort of a company of the 80th Regiment, formed the wagons into a V shaped defensive position, the apex facing away from the river, while the column waited for the flooding river to subside sufficiently to be crossed.
On the morning of 12th March 1879, a force of some 800 Zulus, commanded by Mbilini, approached to within fifty yards of the camp, unseen due to the morning mist and rushed the defences, killing Moriarty and 60 of his men. A party of the 80th on the south bank fired on the Zulus until forced to retreat. The party of the 80th were pursued for some distance, until the Zulus turned back to despoil the train.
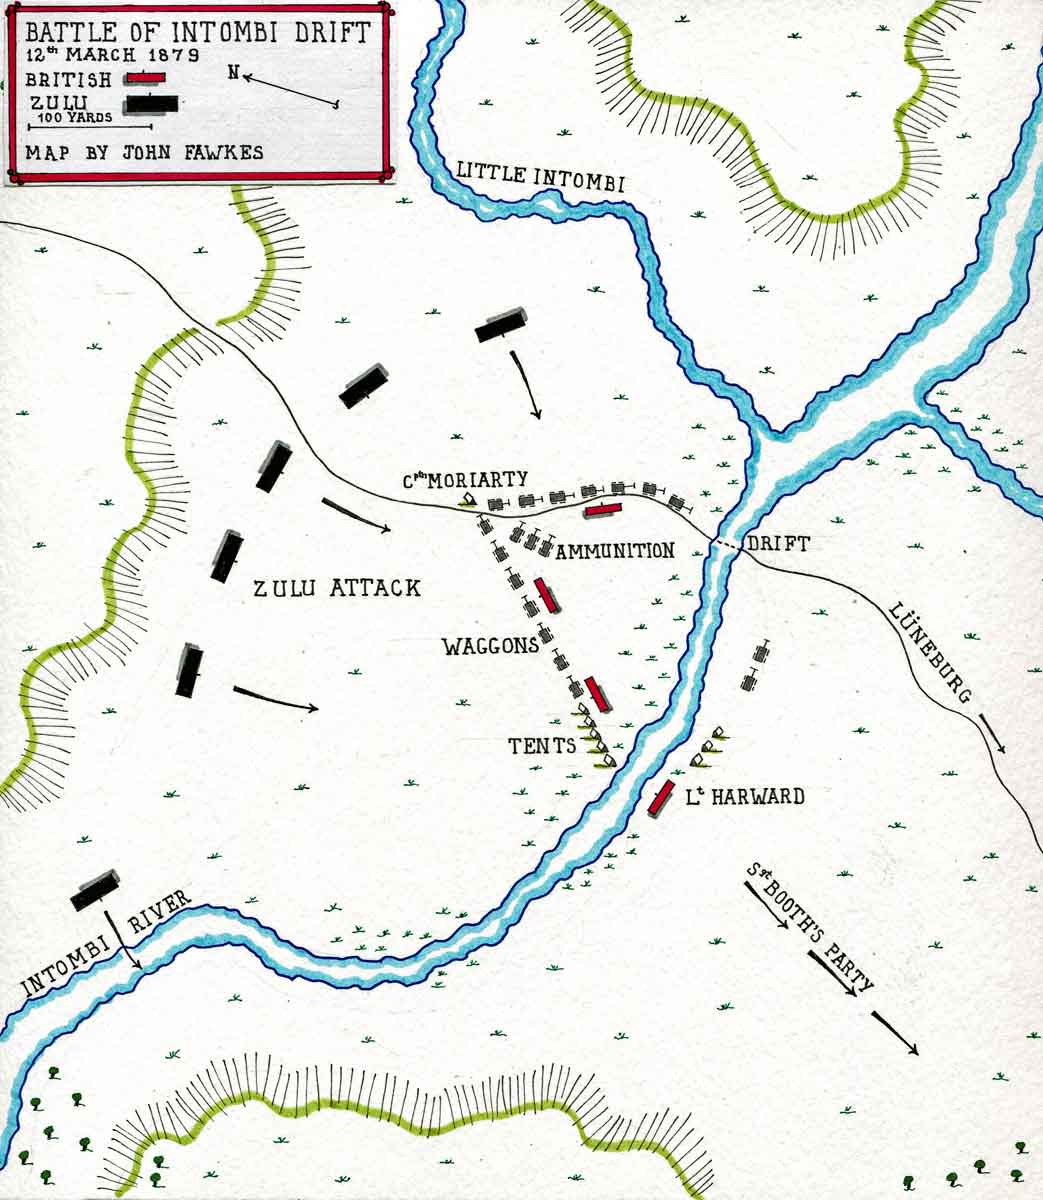
Map of the Intombi River Disaster on 12th March 1879 in the Zulu War: map by John Fawkes
Sergeant Anthony Booth, commanding the detachment, was awarded the Victoria Cross, while his officer, who had ridden off ostensibly to bring up reinforcements, was tried by court martial for abandoning his men.
The Intombi disaster prompted Evelyn Wood to launch a full attack on Hlobane Mountain, urged on by Lord Chelmsford, who needed Wood to provide a diversion in the North, as he prepared to march to the relief of Colonel Pearson’s column in its fortified camp at Eshowe near the coast in Southern Zululand.
Information came in that Cetshwayo, the Zulu King, was preparing to advance on Wood’s force. Nevertheless, on 27th March 1879, Colonels Buller and Russell left Khambula with 700 and 250 mounted troops each, to attack either end of Hlobane.
The climb to the long plateau of the hill was steep and laborious. Far from being surprised, the Zulus, who knew the area intimately, were ready and intended to trap Buller’s force.
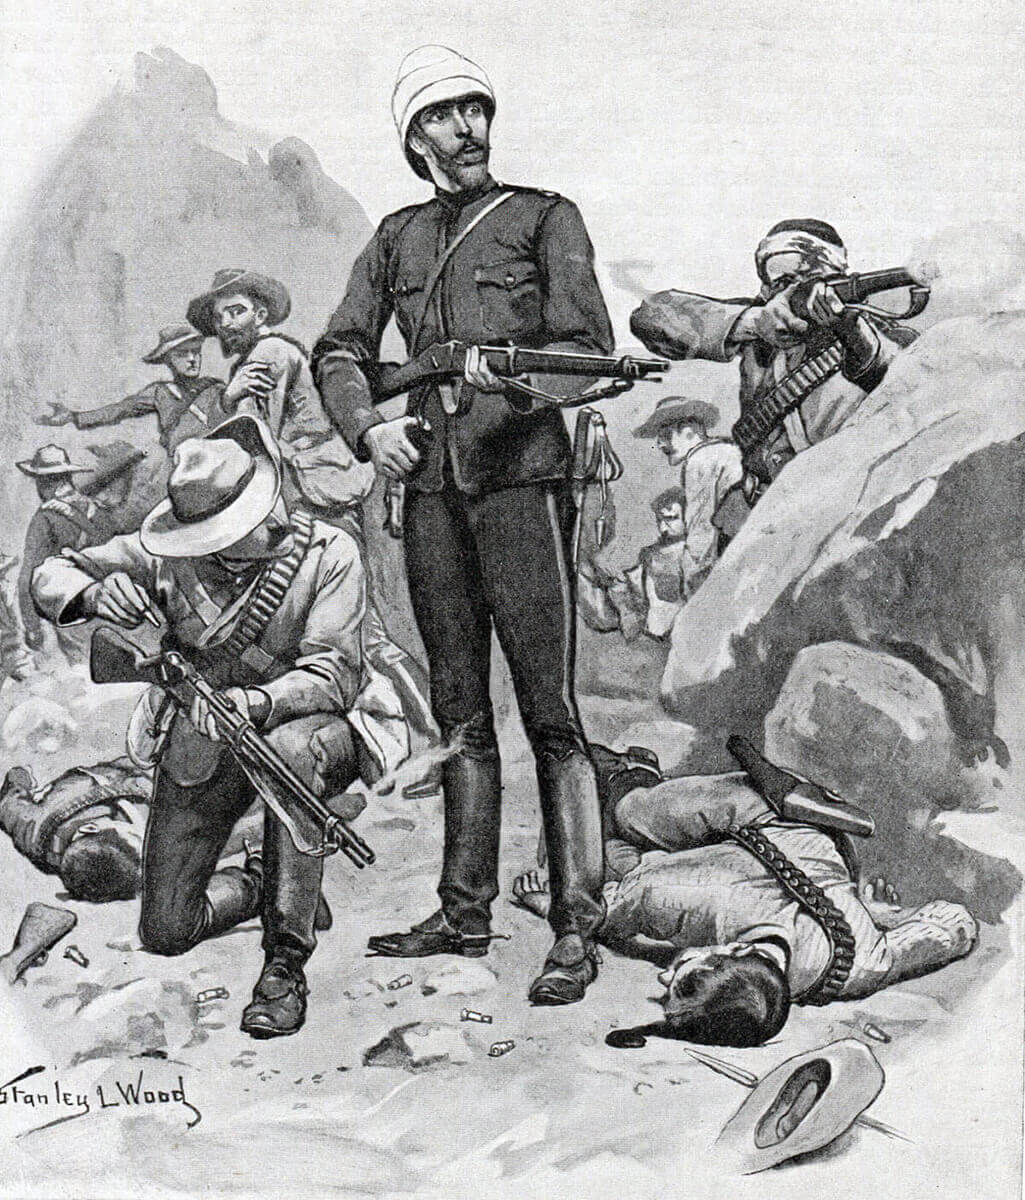
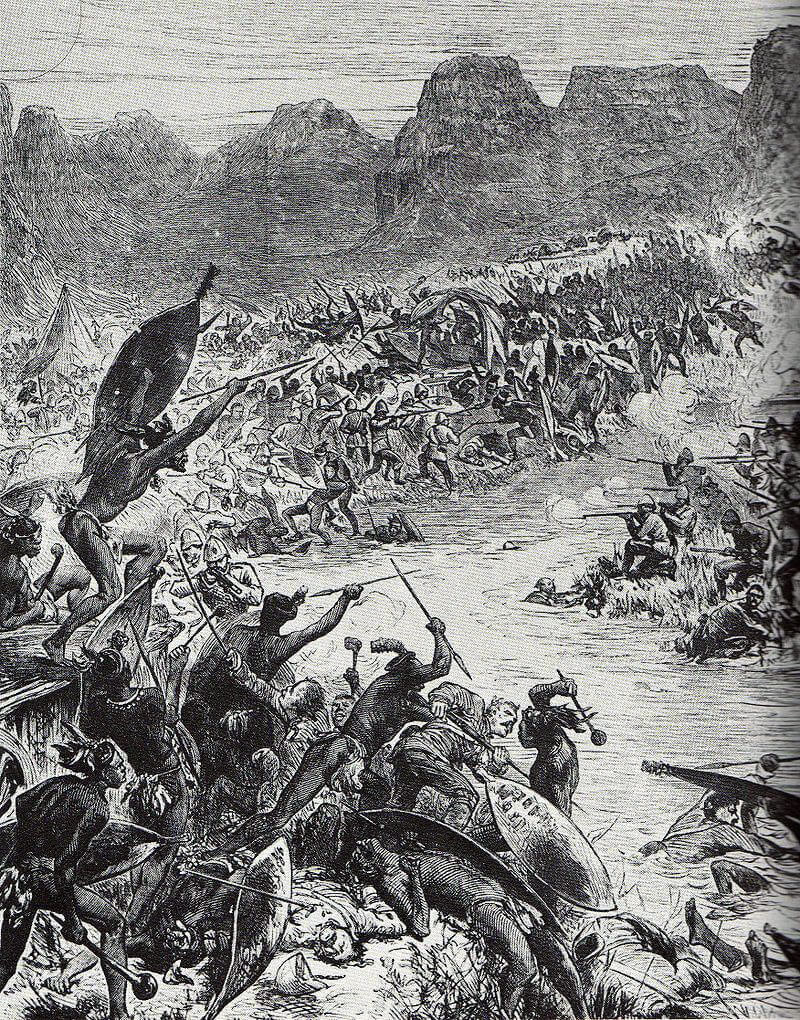
Colonel Buller and his men on Hlobane Mountain on 27th March 1879: Battle of Khambula on 29th March 1879 in the Zulu War: picture by Stanley Wood
Wood’s diversionary actions proved all too effective. The main Zulu Army, dispatched north by Cetshwayo, arrived at Hlobane during the course of Buller’s raid. The British force was chased along the plateau and escaped, suffering heavy casualties, just before the trap closed on it. Buller lost 12 officers and 80 men. An unrecorded number of native irregulars were killed.
The failure of the Hlobane attack severely affected the morale of the rest of Wood’s column, many of the remaining natives and Boer volunteers leaving for home.
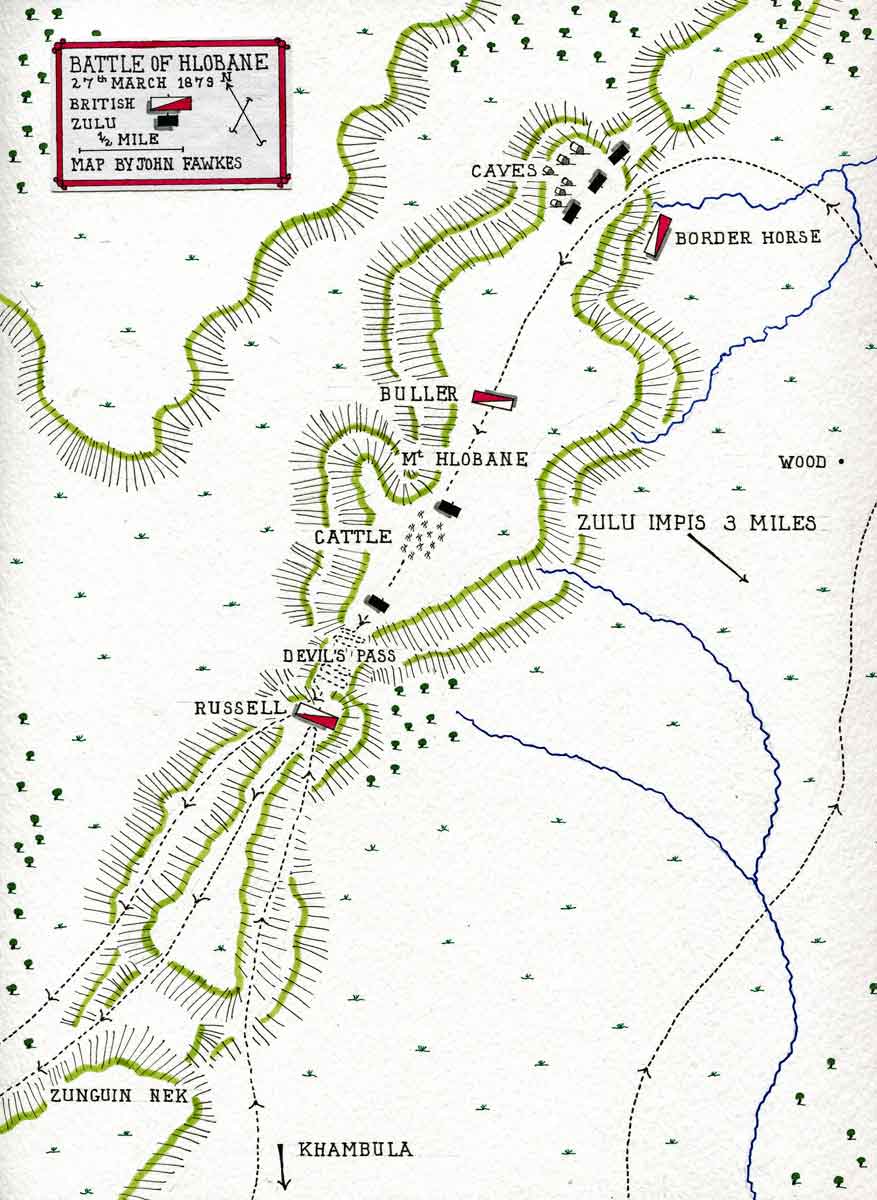
Map of Battle on Hlobane Mountain on 27th March 1879: Battle of Khambula on 29th March 1879 in the Zulu War: map by John Fawkes
The newly arrived Zulu Army, commanded by Chief Mnyamana Buthelezei, moved on towards Khambula in battle formation; the mass of warriors forming the ‘chest’ with other columns as the left and right ‘horns’, ready to envelope the British, encamped ready for battle the next day.
This time, the British, while in low morale after Isandlwana and the defeat of Buller’s attack on Hlobane, were prepared and in compact formation behind fortifications, unlike Pulleine’s 24th Foot at the Battle of Isandlwana.
A British patrol, out early in the morning, brought in a Zulu defector with information that the camp was to be attacked at midday. The patrol reported that the Zulu Army could be seen approaching.
The main fortification of the camp was the wagon lager, the wagons parked end to end in an octagonal shape, with additional fortification from heaps of turf, mealie bags and an entrenchment.
The cattle were held in a square of wagons on a raised area of the plateau. In the centre of the camp area stood the earthwork redoubt built on a knoll.
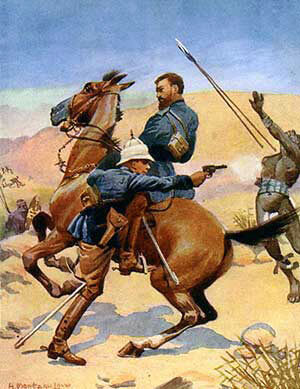
Colonel Buller winning the VC by rescuing one of his officers on Hlobane Mountain on 27th March 1879: Battle of Khambula on 29th March 1879 in the Zulu War
As soon as the Zulu approach was reported, the troops assembled at their positions, 1,200 men of the 1st/13th Light Infantry and the 90th Regiment, with 800 other irregular troops. Ammunition reserves were established along the rear of the lines.
Wood’s artillery comprised four 7 pounder guns, 2 mule borne guns and several rocket troughs. The mule guns took post in the redoubt, while the 7 pounders stood in the open ground between the two main fortifications.
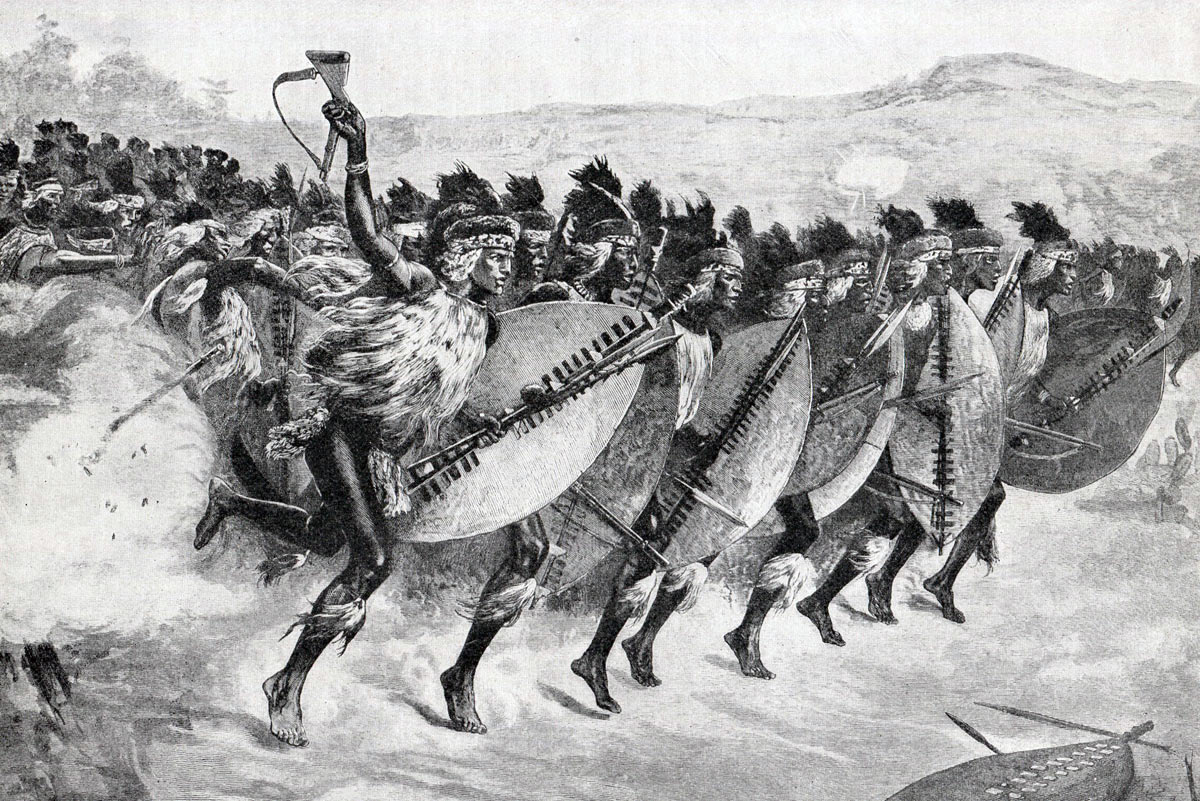
The Zulu formation paused for a time, while final arrangements for the attack were made. It may be that the Zulu generals wished to avoid a direct assault on the British camp; Cetshwayo’s instructions being not to repeat the mistake of Rorke’s Drift, but to threaten the Natal border and try to lure Wood’s force into the open. However, the Zulu warriors were in no mood for caution. The Zulu Army began to move towards the British with increasing speed, the horns spreading out to the left and right flanks, the chest heading straight for the camp. The battle began at around 1.30pm.
The left horn disappeared from view, as it moved into the valley to the South, where it was held up by marshy ground. The right horn circled round to the North and came in towards the camp. Wood dispatched Buller with his mounted men to provoke the right horn into making a premature attack, before the other sections of the Zulu Army were in place. Buller’s move had the effect intended, the mass of the right horn rushing towards the British fortifications.
Buller’s troops rode back into the camp, several men having considerable difficulty getting away from the fast-moving mass of Zulu warriors.
Once the mounted men were clear, the troops along the north face, the 90th Light Infantry, opened fire with the guns positioned in the open between the wagon laager and the redoubt. The storm of fire destroyed the right horn as a threat to the camp, the Zulu survivors rushing back to cover some six hundred yards back and remaining there. Wood was free to deploy a significant number of the troops and guns from the north side against the chest and left horn as they came up.
Zulu Attack at the Battle of Khambula on 29th March 1879 in the Zulu War
Hurried by the sound of firing, the Zulu left horn climbed the south face of the hill, out of sight of the British troops until they reached the crest, where they met a heavy fire from the 13th Regiment. The Zulus on the right of the advance were able to mount an attack on the cattle laager, forcing Wood to withdraw its garrison and leave the laager to the Zulus.
Wood ordered Major Hackett of the 90th to take two companies to the edge of the hill and fire down on the Zulus assembling in the valley below. This enterprise had to be abandoned, in the face of heavy Zulu fire, using Martini Henry rifles captured at Isandlwana, from the cattle laager and a hill to the West of the camp, although the Zulu left horn was temporarily halted. Hackett was blinded and one of his subalterns mortally injured.
90th Light Infantry in India before leaving for Natal: Battle of Khambula on 29th March 1879 in the Zulu War
The Zulu left horn and the chest attempted attacks on the camp at various points around the perimeter from the south to the north-east, all driven back by the heavy fire from the two infantry regiments and the guns of the Royal Artillery: the two mule guns in the redoubt and the four 7 pounders deployed in the open ground between the wagon laager and the redoubt.
At 5.30pm the Zulus began to fall back. Wood ordered companies of infantry forward to fire into the withdrawing Zulu regiments.
Wood then unleashed Buller’s mounted men in pursuit of the increasingly disordered Zulu retreat. Enraged by the defeat of the previous day on Hlobane and the slaughter at Isandlwana, the horsemen killed the fleeing Zulus mercilessly during the pursuit, that continued over many miles.
British foot patrols sought out Zulus lying wounded around the camp and killed many of them.
Under the pressure of the defeat and the subsequent pursuit, the Zulu Army collapsed, many of the warriors heading for their homes.
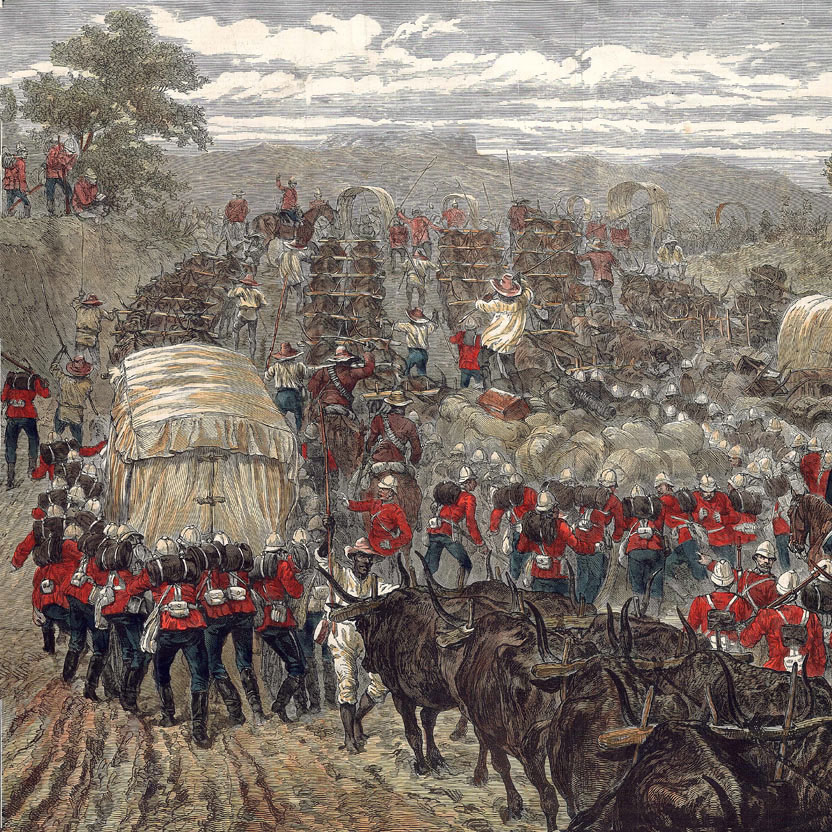
British troops on the move in Zululand: Battle of Khambula on 29th March 1879 in the Zulu War
Casualties at the Battle of Khambula:
Wood’s force suffered 83 casualties. It is believed that 3,000 Zulus were either killed in the battle or died of wounds.
Follow-up to the Battle of Khambula:
The battle at Khambula significantly reduced the ability of the Zulus to resist the British invasion of Cetshwayo’s Zululand kingdom. The diversion of such a large force of warriors to the North enabled Chelmsford to relieve Pearson at Eshowe in the South and then press forward to the final defeat of the Zulus at Ulundi.
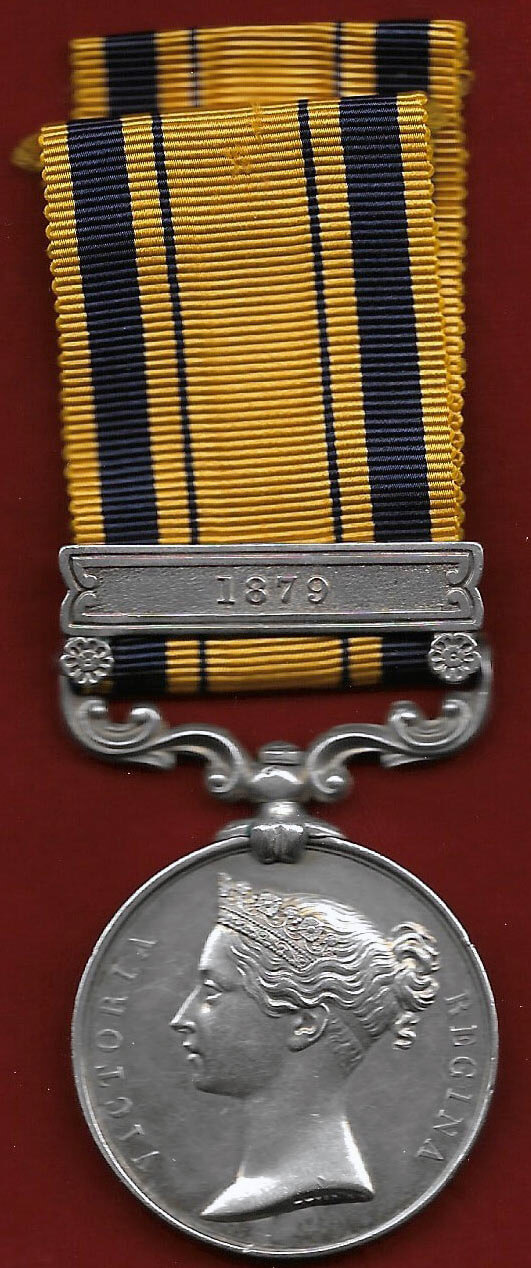
Zulu War Medal: Battle of Khambula on 29th March 1879 in the Zulu War
Anecdotes and traditions from the Battle of Khambula:
- The soldiers of the 13th and 90th Regiments expended an average of 31 rounds per man during the Battle of Khambula.
- Wood appears to have considered the role of the Royal Artillery guns as decisive in the battle, firing shrapnel over longer ranges and case shot at short distances into the massed Zulu ranks.
References for the Battle of Khambula:
Washing of the Spears by D. Morris
Zulu War by Ian Knight
Recent British Battles by Grant
 54. Podcast on the Battle of Khambula on 29th March 1879 in the Zulu War: the defeat by Colonel Evelyn Wood VC of a Zulu army in the opening stages of the war: John Mackenzie’s britishbattles.com podcasts
The previous battle of the Zulu War is the Battle of Rorke’s Drift
The next battle of the Zulu War is the Battle of Gingindlovu