The First Day of the Retreat from Mons and the Battle around Elouges and Audregnies, fought on 24th August 1914 in the First World War

The 9th Lancers charge German infantry and guns during the action at Elouges: First Day of the Retreat from Mons and the Battle around Elouges and Audregnies, fought on 24th August 1914 in the First World War: picture by Richard Caton Woodville
The previous battle in the First World War is the Battle of Mons
The next battle in the First World War is the Battle of Battle of Landrecies
Date of the Battle of Mons (2nd Day): Elouges: 24th August 1914.
Place of the Battle of Mons (2nd Day): Elouges: Northern France on the Belgian Border.
War: The First World War known as the ‘Great War’.
Contestants at the Battle of Mons (2nd Day): Elouges: The British Expeditionary Force (BEF) against the German First Army.
Commanders at the Battle of Mons (2nd Day): Elouges: Field-Marshal Sir John French commanding the British Expeditionary Force (BEF) with Lieutenant-General Sir Douglas Haig commanding I Corps and General Sir Horace Smith-Dorrien commanding II Corps against General von Kluck commanding the German First Army.
Size of the Armies at the Battle of Mons (2nd Day): Elouges:
The BEF comprised 2 corps of infantry, I and II Corps, and a cavalry division; 85,000 men and 290 guns.
General von Kluck’s First Army comprised 4 corps and 3 cavalry divisions; 160,000 men and 550 guns.
Winner of the Battle of Mons (2nd Day): Elouges:
The BEF continued to retreat, but inflicted significant casualties on the German First Army and evaded its attempts to envelope it.
Uniforms and equipment in the Battle of Mons (2nd Day): Elouges:
See this section in the ‘Battle of Mons’.
Background to the Battle of Mons (2nd Day): Elouges:
See this section in the ‘Battle of Mons’.
The BEF at this stage in the Great War comprised around 30% current regular soldiers and 70% reservists with previous service in the Regular British Army. The British Army was the only major European army with recent experience of active service; in South Africa in the Boer War from 1899 to 1901 and on the North-West Frontier of India. The German Army had not fought a war since the Franco-Prussian War in 1870-1.
In these early battles the British soldiers outfought the Germans, although forced to retreat by pressure of numbers and the withdrawal of the French armies on their flanks. The British units’ ability to move about the battlefield in cover and their facility to deliver high rates of accurate rifle fire repeatedly enabled them to repel attacks by massed German infantry. The British artillery units consistently provided support to the infantry with accurate gunfire, while manoeuvring about the battlefield with speed and resource.
This was the force the Kaiser described as a ‘Contemptible Little Army’. German officers were stunned by the way the British troops brought their attacks to a standstill time and again.
During the course of 1914 the old British army melted away as the casualties caused by artillery, machine gun and rifle fire mounted, until the ‘Contemptibles’ were largely gone, to be replaced by the new mass British Army of war-time volunteers and conscripts.
The courage and technical ability of the units in the BEF during 1914 is striking.
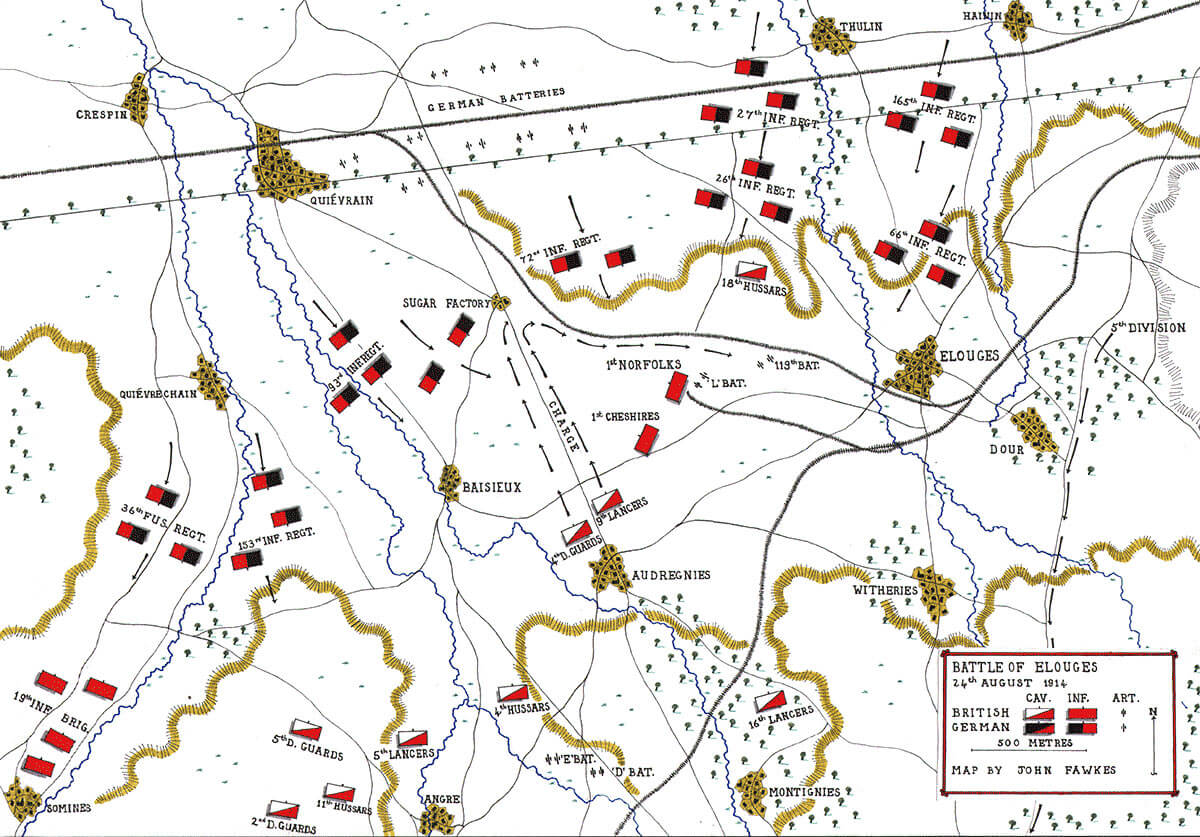
Map of the Battle of Elouges 24th August 1914: First Day of the Retreat from Mons and the Battle around Elouges and Audregnies, fought on 24th August 1914 in the First World War: map by John Fawkes
Account of the Battle of Mons (2nd Day): Elouges:
Following the withdrawal of the BEF II Corps during the night of 23rd/24th August 1914, following the German assault on the Mons Canal line, the BEF occupied a line about 17 miles long facing north east about 3 miles south of Mons.
The positions of the components of the BEF were:
I Corps:
1st Division around Grand Reng, Hoveroy and Givry.
2nd Division: 4th Brigade at Harveng, 5th Brigade at Paturages and 6th Brigade at Harvigny. 2nd Connaught Rangers were at Bougnies.
II Corps:
3rd Division: 7th Brigade at Cipley, 8th Brigade and 9th Brigades at Nouvelles.
5th Division: 1st Bedfords at Cipley, 13th Brigade at Wasmes, 1st Dorsets at Wasmes, 14th Brigade at Hornu, 15th Brigade at Champ des Sarts and Hornu.
19th Brigade at Thulin and the neighbouring towns.
Cavalry Division at Thulin, Elouges, Audregnies and Quivérain.
5th Cavalry Brigade around Givry.
Much of the BEF was exhausted, after a long day in action on 23rd August 1914 in the case of II Corps, and in marching considerable distances to come up in support in the case of I Corps.
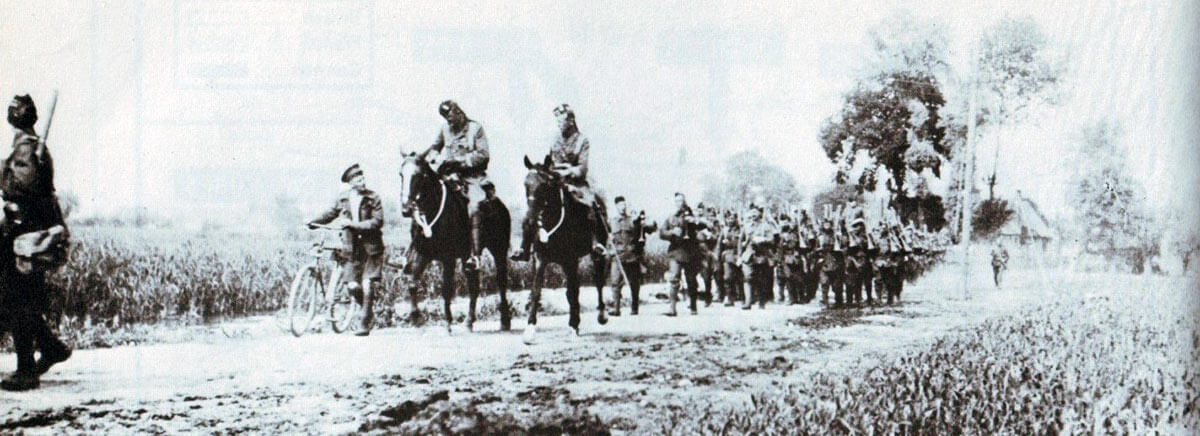
A cyclist delivers a message to the Commanding Officer of 1st Scottish Rifles (Cameronians) on the march in France: First Day of the Retreat from Mons and the Battle around Elouges and Audregnies, fought on 24th August 1914 in the First World War
At about 1am on the morning of 24th August 1914, the Commander-in-Chief, Field Marshal Sir John French, summoned the senior staff officers of I and II Corps and the Cavalry Division and informed them that the BEF was to withdraw to a line based on the town of Bavai, to comply with the French Fifth Army of General Lanrezac, retreating on the British right. Later in the morning the two corps commanders, Generals Haig and Smith-Dorrien, met to co-ordinate the withdrawal of their Corps.
In the meantime General Haig, commanding I Corps, formed a special rear guard, commanded by Brigadier-General Horne and comprising the 5th Cavalry Brigade, J Battery RHA, 2 brigades of field artillery and the 4th Guards Brigade. The task of this rear-guard was to concentrate at Bonnet and engage the Germans, while the 2 divisions of the I Corps withdrew to their new positions.
At 4am on 24th August the 1st Division marched off, heading for the new positions between Feignies and Bavai, while the 2nd Division moved out at around 4.15am. The Germans shelled both divisions but inflicted little loss.
Hornes’ rear-guard fell back behind I Corps, the 4th Guards Brigade withdrawing from Harveng and Bougnies to positions between Quévy le Petit and Genly, with the 5th Cavalry Brigade moving on its left flank. As it fell back the force was subjected to artillery fire which caused it little difficulty.
I Corps reached its new positions in the line, stretching from Feignies to La Longueville and then to Bavai, at around 10pm. The troops were exhausted, having in some cases marched nearly 60 miles in 64 hours, although few units of I Corps had been in action against the advancing Germans, other than by way of harassing artillery fire.
Matters were otherwise for II Corps on the left flank of the BEF, where the German First Army of General von Kluck was concentrating its efforts to envelope the western flank of the BEF.
At around 4am General Smith-Dorrien’s II Corps prepared to defend the area to which it had withdrawn during the evening of the 23rd August after the battle along the Canal Line. This area was essentially the line of rising slopes to the south of the railway and road between Mons and Valenciennes, from Cipley in the east to Hornu in the west. This defence would precede the withdrawal of the Corps which could only begin once the roads in its rear areas were cleared of the transport columns. In the meantime II Corps would hold the positions it had occupied on the previous evening, while on its right I Corps fell back to the new line.
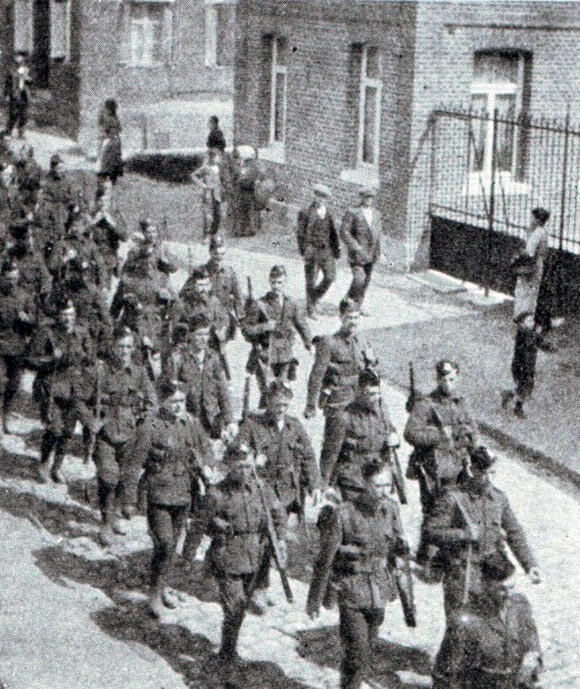
1st Scottish Rifles (Cameronians) marching through a French town: First Day of the Retreat from Mons and the Battle around Elouges and Audregnies, fought on 24th August 1914 in the First World War
The initial German move was to open an extensive barrage against the right of II Corps, followed by an infantry attack to spread along the Corps front from east to west by 5.15am.
The initial German infantry assaults fell on the 7th Brigade around Cipley and the 9th Brigade around Frameries.
109th Battery supported the 9th Brigade with a heavy fire and all the German attacks were repelled with heavy losses inflicted by infantry rifle and machine gun fire and the artillery barrage. This success enabled the 9th Brigade to fall back through Frameries in good order at around 9am and begin its march to Sars la Bruyere.
The 7th Brigade remained in place for longer, until it fell back towards Genly. This delay caused the brigade to suffer significantly heavier losses than the 9th, one of its battalions, the 2nd South Lancashires, suffering around 250 casualties through machine gun fire from German guns moved up to the slag heaps around Frameries.

The staff of the British 9th Brigade in Frameries on 24th August 1914: First Day of the Retreat from Mons and the Battle around Elouges and Audregnies, fought on 24th August 1914 in the First World War
At around 8am the 8th Brigade began its withdrawal from Nouvelles to Genly, doing so with little interference from the Germans other than largely ineffective artillery fire.
At around 6am a Royal Flying Corps reconnaissance plane reported that a German infantry division was advancing towards Condé, clearly intending to march wide around the BEF’s left flank, comprising II Corps’ 5th Division and the Cavalry Division.

BE2 Aeroplane: one of the models used by the Royal Flying Corps in the first months of the Great War: First Day of the Retreat from Mons and the Battle around Elouges and Audregnies, fought on 24th August 1914 in the First World War
Immediately to the west of Frameries, the Germans launched determined attacks on the right flank of the 5th Division. The area of Paturages was filled with miners’ cottages and held by 3 battalions of the 5th Brigade and 1st Bedfordshires. The German artillery bombarded the area from dawn onwards, but without hitting any of the British positions to any effect. A fierce but inconclusive battle was fought by one of the Bedford companies north of Paturages against advancing German infantry.
To the west of Paturages, in the area of Wasmes, a line of British units dug in along the railway, prepared to receive the German attack: 1st Dorsets, flanked on the left by 2 guns of 121st Battery, 2nd KOYLI with 37th Howitzer Battery, 2nd KOSB at Champ des Sarts and in the town of Wasmes, 2nd Duke’s and 1st RWK.
Acting as the 5th Division reserve at Dour were 1st Cheshires, 1st Norfolks and 119th Battery RFA. Other artillery units in the area of Dour were XXVII Brigade RFA, VII Howitzer Brigade and XXVIII Brigade RFA.
The Germans began their assault on the centre of the 5th Division at dawn with a heavy 2 hour artillery bombardment against the northern edge of St Ghislain, in the erroneous assumption that the British were still entrenched along the canal bank.
Following the bombardment, German infantry patrols crossed the canal by a number of foot bridges that remained intact, to find that the British had withdrawn during the previous night.
2 battalions of German infantry passed through St Ghislain and emerged into open country from the southern boundary of Hornu. Here the Germans came under heavy fire from the 13th Brigade battalions positioned north of Wasmes and the British guns and their advance was abruptly halted.
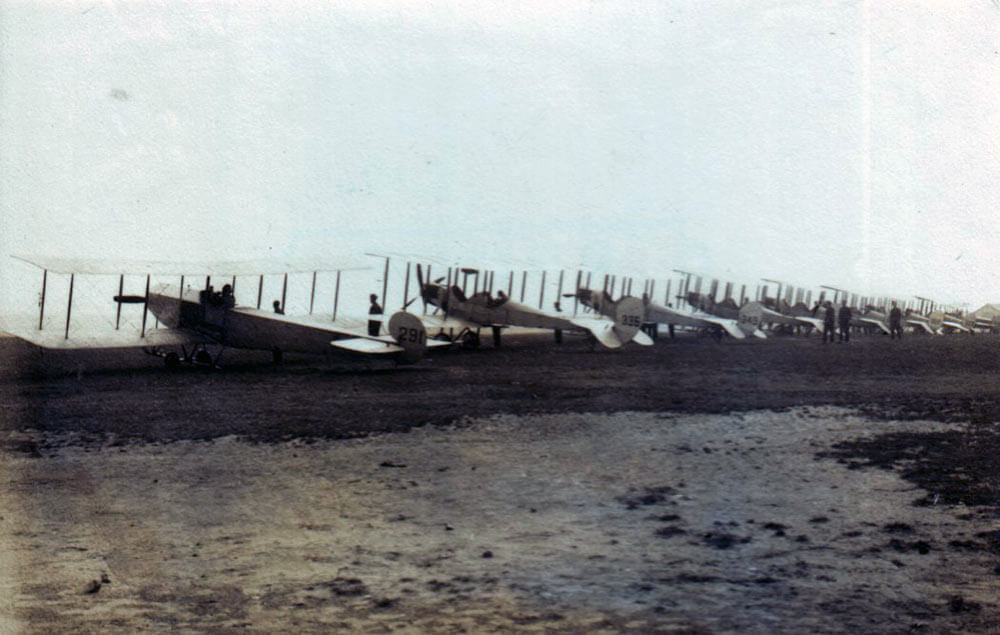
Royal Flying Corps aeroplanes: First Day of the Retreat from Mons and the Battle around Elouges and Audregnies, fought on 24th August 1914 in the First World War
At 9am the 5th Brigade, (2nd Division, I Corps) comprising 2nd Worcesters, 2nd Oxfordshire LI and 2nd HLI, began to withdraw from Paturages, heading southwards in compliance with the orders issued by I Corps, their destination being Sars la Bruyere. This left the Bedfords, at the eastern end of the II Corps position, exposed with an open flank. Some Dorsets moved to assist in covering the flank, but there was for the time no threat from the Germans at this point, other than by way of artillery fire, as their infantry assault was falling further to the west and was in any case designed to keep II Corps in position so that it could be outflanked from the area of Condé.
The German infantry attack from St Ghislain and Hornu continued with increasing numbers, attempting to force its way out of Hornu into open country. Each attack was beaten back by gunfire from 37th Battery RFA and rifle fire from the infantry battalions in the Wasmes area.
The Germans made no attack on the 14th Brigade, the next brigade in the II Corps line on the left of the 13th Brigade.
The German assault on the 5th Division:
On the extreme left of the BEF, the 19th Brigade, an independent formation receiving its orders directly from General Headquarters (GHQ), began to withdraw to Elouges at 2am.
Also at 2am the French 84th Division left Condé, moving south.
General Allenby began the retreat of the Cavalry Division at dawn, pulling back from positions in the rear of the 19th Brigade. Allenby intended to withdraw some distance as there was a strong build-up of German troops on his left, in the gap between the left flank of the BEF and the French troops in the area of Valenciennes.
Sir Charles Fergusson, GOC of the 5th Division, passed a message to Allenby informing him that the 5th Division was required to stay in position for the moment, while the other divisions withdrew, and requesting his assistance.
Allenby agreed to move the Cavalry Division to the area around Elouges to guard the 5th Division’s left flank from the Germans marching south from Condé. A squadron of the 9th Lancers moved forward to Thulin and engaged the Germans as they advanced into the village.
As the 19th Brigade reached Baisieux it came under General Allenby’s command and he halted the brigade in that town, to provide further support for the 5th Division.
The squadron of the 9th Lancers in Thulin, commanded by Captain Francis Grenfell, inflicted significant losses on the Germans attacking the village, while falling back on the main body of the regiment. Once in Thulin, German guns opened fire on the 9th Lancers.
Troops from the German 7th Division of IV Corps were seen marching west along the road to Valenciennes and then turning onto the road to Elouges. Here they were engaged with dismounted fire by the 9th Lancers and the 18th Hussars, causing the German force to deploy into the fields and mount a full attack on the British cavalry. The crisis was fast developing for the 5th Division, still in position around Wasmes, with the Germans advancing in strength to cut into the division’s left rear, despite the efforts of the cavalry regiments.
General Allenby attempted to discover whether the 5th Division was beginning its withdrawal, sending 3 successive staff officers to find out. In the meantime, the Cavalry Division and the 19th Infantry Brigade fell slowly back, deliberately leaving the road to the immediate south of Elouges clear for the 5th Division’s withdrawal when it took place.
The 19th Brigade fell back to Rombies, followed by the main part of the Cavalry Division. The 2nd Cavalry Brigade, in its role as rear-guard, took up positions in the area between the Mons-Valenciennes railway and Elouges, taking advantage of the sunken roads, slag heaps and mineral railways that cut the area up. The 2nd Cavalry Brigade was supported by L Battery RHA, which took up positions behind the mineral railway that ran between Elouges and Quiévrain.
By 11.30am the withdrawal of the rest of the Cavalry Division enabled the 2nd Cavalry Brigade to pull in all its detached parties and to fall back through Audregnies, albeit under a heavy German bombardment, with the 18th Hussars acting as the brigade rear guard.
On the right of the BEF, General Horne’s rear-guard held a line from the Mons-Mauberge road north of Bonnet to the area of Genly. The brigades of the 3rd Division passed through or by the rear-guard to form a defensive line. This end of the BEF was largely untroubled by the Germans, other than by artillery fire which caused little difficulty to the British troops.
At 11am General Horne declared that the responsibilities of his rear guard had been met and the rear-guard was dissolved, with the units returning to their established formations.
This was clearly premature as at 1pm HQ II Corps directed that the 3rd Division was to withdraw no further as the 5th Division was having considerable difficulty extracting itself from its positions around Wasmes, in view of the heavy German attacks.
The Dorsets and Bedfords were still in Paturages, covering the flank of the 13th Brigade, which was engaging the German infantry attempting to force their way out of Hornu to the south. At 10.30am the 2 battalions began to withdraw through Paturages, their destination being Blaugies to the west of Bavai. In La Bouverie the Dorset’s transport was ambushed by German infantry and was forced to fight its way out.
At 11am the 2 battalions began their move across the rear of the 13th Brigade in the course of their retreat. A detachment of Bedfords escorted the divisional artillery to St Waast to the west of Bavai while the remainder of the 2 battalions reached Blaugies at around 2pm.
At 11am Major General Sir Charles Ferguson, the GOC of the 5th Division, was given leave by II Corps to begin his retreat. The division’s withdrawal was none too soon as the German infantry was working its way around the division’s right flank, into the gap left by the retreat of the 3rd Division.
The 13th Brigade held the division’s right flank. The next in line, the 14th Brigade, fell back to Blaugies, its battalions moving in turn.
The 13th Brigade then began to withdraw, sections from each battery of XXVIII Brigade RFA remaining with the infantry to provide covering fire.
The Duke of Wellington’s Regiment at Wasmes:
The order to retreat failed to reach 2nd Duke’s and a battery of XXVII Brigade RFA. Difficulty in communication between brigade headquarters and battalions and batteries in close action with the fast advancing German infantry was to be a recurring theme during the retreat over the following weeks, leading to the loss of several units. Radio communication was in its infancy and sets were not available below divisional level, so that communication was still by telephone, when in static positions, or by hand of motorcycle or mounted despatch rider, runner or staff officer during the mobile phase of the war.
On the North-West Frontier of India and in South Africa the most efficient communication was by heliograph (flashing Morse code with mirrors), but this form of communication required stations to be positioned high up in mountains to achieve distance and a ready supply of sunshine, neither requisite available in Belgium and Northern France.
At 11.30am, when the Duke’s and the accompanying battery should have been withdrawing, they came under a heavy bombardment and infantry attack, which they managed to fend off.
At around 1pm the Germans launched a further heavy assault, by massed infantry from the direction of the Boussu-Quiévrain road. Again, these formations were shot down by rifle and machine-gun fire from the infantry and a fierce bombardment from the guns and the attack halted. Following this, the Dukes and the guns withdrew towards Dour.
The Duke’s casualties were around 400. The regiment and the battery had held off assaults by 6 German battalions (2 brigades).
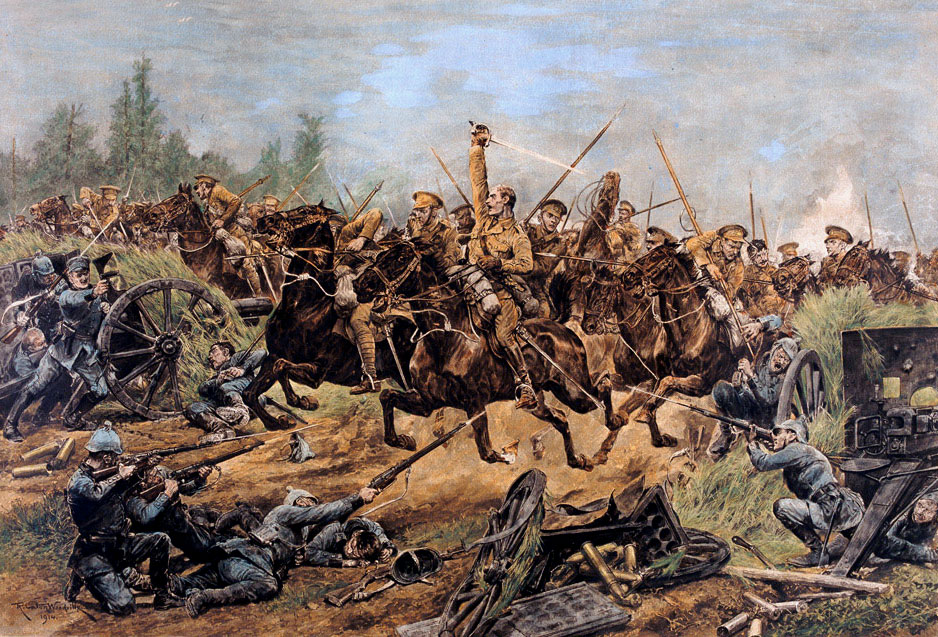
The 9th Lancers charge German infantry and guns during the action at Elouges: First Day of the Retreat from Mons and the Battle around Elouges and Audregnies, fought on 24th August 1914 in the First World War: picture by Richard Caton Woodville
The action at Elouges and Audregnies:
By 2pm the British 13th Brigade was in Warquinies on its way to St Waast and the 14th Brigade was at Blaugnies on its way to Eth, both destinations lying to the west of Bavai.
As the brigades moved south-west from these initial destinations, it became clear to the GOC of the 5th Division, Sir Charles Ferguson, that the British Cavalry Division and the 19th Brigade were too far to the south and that the 5th Division was threatened from the west by large bodies of German cavalry advancing against its open flank.
At 11.45am Ferguson sent a message to the Cavalry Division requesting assistance. At the same time Ferguson ordered the 1st Royal Norfolk Regiment and the 1st Cheshires with 119th Battery RFA, the force commanded by Lieutenant-Colonel CR Ballard of the Norfolks, to move forward from Dour, where these units were in the Divisional Reserve, and counter-attack the advancing Germans. As Ballard’s 2 battalions and the guns moved up, they were diverted further west to take position along the Elouges-Audregnies-Angre road.
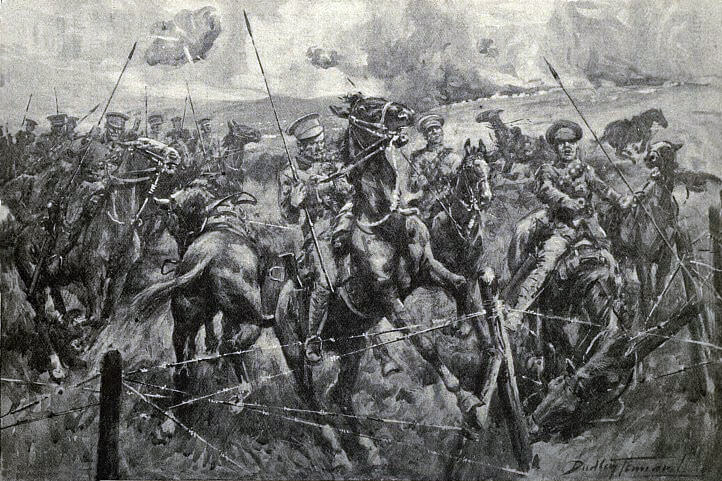
9th Lancers encounter a barbed wire fence in the course of their charge: First Day of the Retreat from Mons and the Battle around Elouges and Audregnies, fought on 24th August 1914 in the First World War
Receiving Ferguson’s request for support at around midday, Allenby ordered the 2nd and 3rd Cavalry Brigades to turn back to the area of Audregnies, where they were within 2 miles of Ballard’s force. The 18th Hussars returned to their positions in Elouges and the 9th Lancers took up position with L Battery RHA to the west of the village.
The 4th Dragoon Guards remained to the south of Elouges. The 3rd Cavalry Brigade occupied a position on the high ground to the west of Audregnies.
The area to the south of the Mons to Valenciennes highway sloped gently up to the Elouges-Audregnies road, where the British rear-guard was in position. Across this area ran the main railway from east to west with, to the south, a smaller railway for carrying newly dug coal. Across the middle of the area ran the old Roman road from Audregnies. Immediately to the east of the Roman road at Quiévrain stood a sugar factory and a cluster of slagheaps.
Colonel Ballard’s force of Norfolks, Cheshires and the 119th Battery formed a line from the Elouges-Quiévrain railway to the outskirts of Audregnies. At around 12.30 pm firing presaged a heavy German attack from Quiévrain and Baisieux towards Audregnies.
Brigadier-General de Lisle, GOC 2nd Cavalry Brigade, ordered Lieutenant-Colonel Campbell of the 9th Lancers to deliver a mounted charge into the right flank of the attacking Germans, if the opportunity arose. L Battery RHA took up position behind the railway line to the east of Audregnies. The 9th Lancers with 2 troops of 4th Dragoon Guards advanced at the gallop and crossed the Baisieux-Elouges road. The force of cavalry found themselves in an area crossed by hedges, fences and ditches. The charge was brought up short by a wire fence and the squadrons came under heavy artillery fire. The 9th Lancers split up, one group dismounted and took up positions around the sugar factory, another retired to the mineral railway line, where they joined the 18th Hussars and a third headed back to Audregnies.
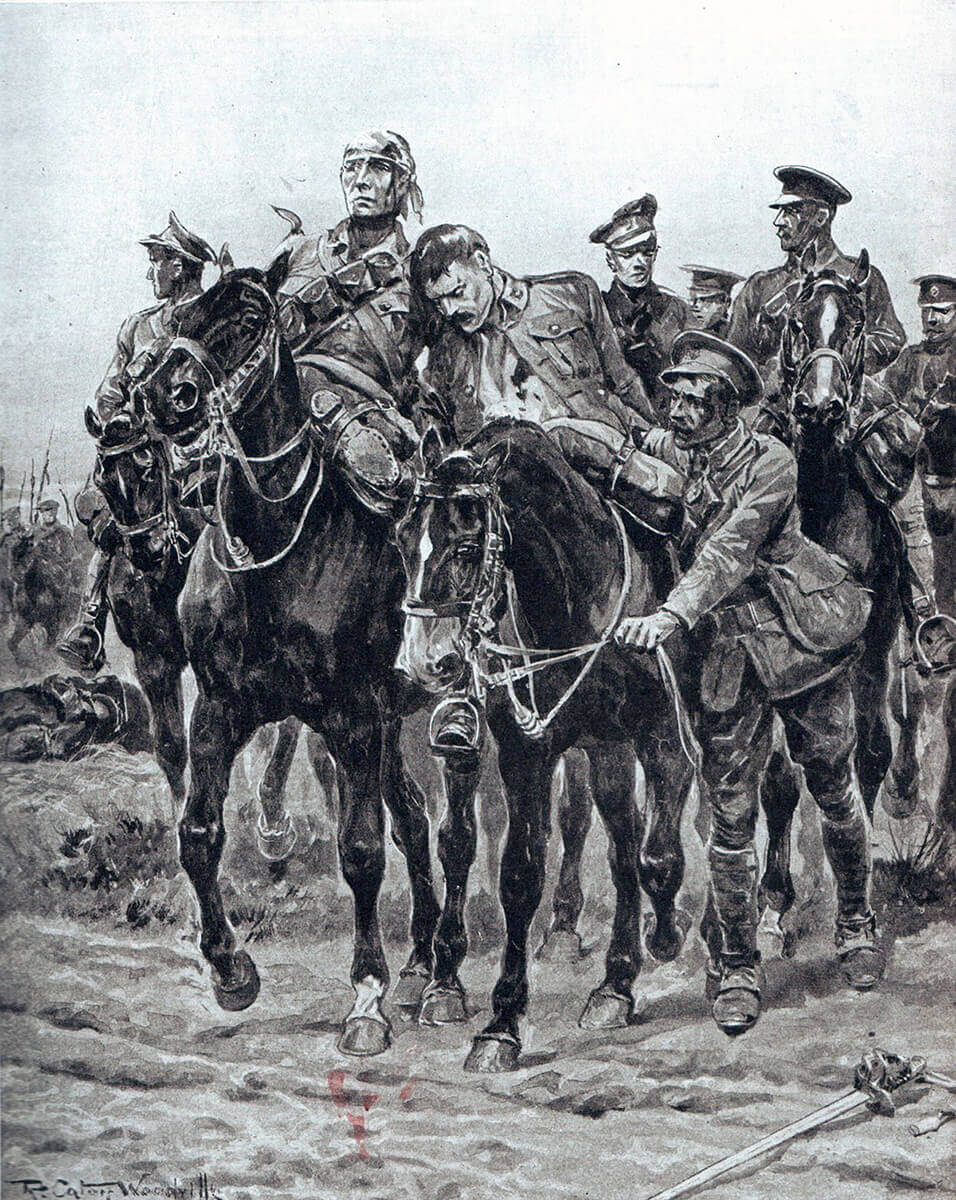
British Cavalry returning from a charge: First Day of the Retreat from Mons and the Battle around Elouges and Audregnies, fought on 24th August 1914 in the First World War: picture by Richard Caton Woodville
A squadron of the 4th Dragoon Guards galloped down a lane heading for Quiévrain and occupied a cottage, losing significant numbers to rifle and artillery fire.
During this episode the commanding officer of the 9th Lancers, Lieutenant-Colonel Campbell, rode across the open ground under heavy fire to obtain further orders, leaving his regiment under the command of Captain Lucas-Tooth. Lucas-Tooth organised his men around the sugar factory and subjected the advancing German infantry to a heavy fire.
Distracted by the activity of the 2nd Cavalry Brigade, the Germans faltered in their advance, enabling Ballard’s 2 battalions to consolidate their positions and the 3rd Cavalry Brigade to provide further support for the 2nd Cavalry Brigade with D and E Batteries RHA firing across the valley.
Further dense columns of German infantry advanced out of Quiévrain and from the area between Quiévrain and Baisieux towards the British line. L Battery RHA came into action from behind the railway line, firing shrapnel low over the German formations and inflicting significant casualties. L Battery’s fire brought the German attack to a standstill. 3 German batteries attempted to silence the RHA guns, but were unable to do so.
From their lines, Ballard’s force fired on the German infantry attempting to advance up the slope to their positions, while 119th Battery RFA, on the right to the south of Elouges, added its fire against the German infantry and guns.
At about 2.30pm it became clear to Ballard that the position of his 2 battalions and 119th Battery were becoming untenable, as large masses of German infantry could be seen moving south from the area of Quarouble, to the south west of his positions, threatening the rear of his force. The German troops were the 36th Regiment from the IV Corps. To Ballard’s east, the German 7th Division was pressing hard.
Ballard ordered his troops to retire in compliance with the general rearward movement by all 3 divisions in contact with the Germans; 3rd, 5th and the Cavalry Divisions.
The Rescue of 119th Battery, Royal Field Artillery:
119th Battery fired on the advancing German infantry until they were around 900 yards away. The German artillery fire was inflicting heavy losses on the gunners of 119th Battery. When the order to retire was received the German fire was so heavy that the horse teams could not be brought up to the guns. Major Alexander, the battery commander, directed his men to push the guns into cover, but found that there were insufficient unwounded gunners left to perform this task.
Major Francis Grenfell of the 9th Lancers, whose squadron was positioned nearby, offered to assist Alexander’s battery and led a team of volunteers from his regiment in pushing the guns out of the line of fire. Once moved, the guns were limbered up and driven away. Alexander and Grenfell received the Victoria Cross.
Again, there was considerable difficulty in communicating with the units in contact with the Germans. None of the 3 messages to retire sent by Ballard reached the Cheshires. L Battery also failed to receive the initial order to withdraw. The brigade major of the 2nd Cavalry Brigade rode forward and personally ordered the battery to retire. As with 119th Battery, the guns of L Battery had to be run back into cover, before the gun teams could be brought forward, one at a time, and the guns extracted.
The Cheshires, with a party of Norfolks, were left engaging the advancing German infantry, unaware that there was a general retirement in progress. The battalion, commanded by Lieutenant-Colonel Boger, until he was wounded, fell back to the Audregnies road, where a counter-attack drove back the advancing German infantry. After a lull the Germans resumed the assault and at around 7pm, with their ammunition largely exhausted and the battalion broken up into small groups, the Cheshires were overwhelmed and the survivors surrendered.
Part of the Cheshires reserve company in Audregnies was ordered to retire by a staff officer, who specifically forbade any attempt by these troops to re-join their battalion. Another party managed to fall back from Audregnies. These were the only Cheshires to survive the battle. Once these men reached Ath, they were found to number around 100, out of a battalion that had previously comprised 1,000 all ranks.
The final retreat of the flank guard of the 5th Division and the Cavalry Division reached the area of St Waast at around 9pm, covered by artillery fire from the 5th Division batteries along the line from Blaugies to Houdain.
The end of 24th August 1914 found the formations of the BEF in these positions:
I Corps:
1st Division in Feignies and La Longueville.
2nd Division in Bavai
II Corps:
5th Division in Bavai and St Waast.
3rd Division in St Waast, Amfriopret and Bermeries.
Cavalry Division with the 19th Infantry Brigade in St Waast and Wargnies (except the 5th Cavalry Brigade which was on the right flank at Feignies).
In II Corps the 3rd Division was now on the left flank, with the 5th Division on its right. This change was effected because the 5th Division was in action against the Germans all day, while the 3rd Division was free to march the greater distance to the left flank, leaving the 5th Division with the shorter distance to retire once disengaged.
Throughout the BEF, all ranks were exhausted from marching and lack of sleep. For the units in action, supply had been a major problem and many soldiers went for 24 hours in action without food or rest.
It was considered that the day’s fighting had been a success. Substantial casualties had been inflicted on the German divisions, that had been in action. The British regiments had shown themselves adept at disengaging, after a vigorous defence. Only in the case of the Cheshires had a full battalion been overwhelmed. No guns had been lost despite the considerable danger that batteries such as 119th RFA and L Battery RHA had been in.
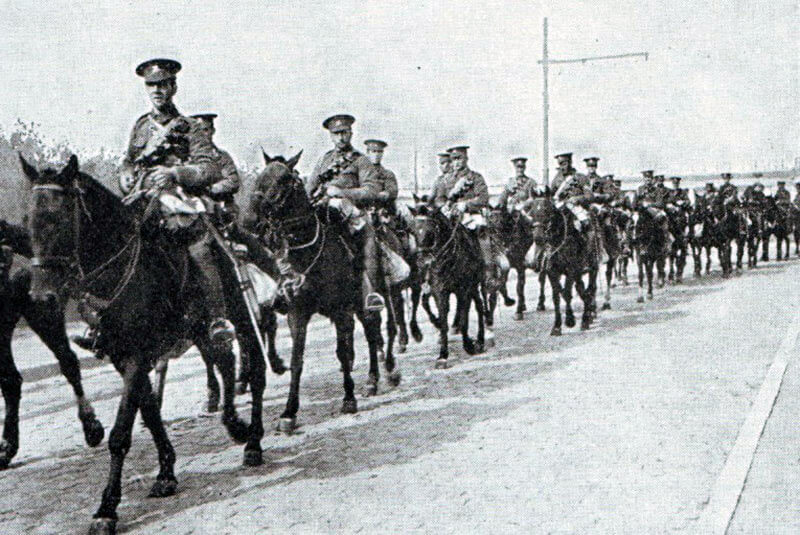
British Cavalry on the march: First Day of the Retreat from Mons and the Battle around Elouges and Audregnies, fought on 24th August 1914 in the First World War
Casualties at the Battle of Mons (2nd Day): Elouges:
Approximate unit casualties in killed, wounded and captured were:
Cavalry Division: 250 (mainly 9th Lancers, 4th Dragoon Guards and 18th Hussars of the 2nd Cavalry Brigade).
I Corps: 100.
II Corps: 1,650 (Cheshires approx. 750; Norfolks approx. 275; 119th Battery 30)
19th Infantry Brigade: 40.
German casualties are unknown but were probably in the region of 7,500.
Aftermath to the Battle of Mons (2nd Day): Elouges:
On 25th August 1914, the BEF continued its retreat to the south, in line with the French armies, skirting the Forest of Mormal and the Fortress of Mauberge. The retreat would end with the Battle of the Marne and the Advance to the Aisne River in September 1914, followed by the transfer of the BEF to the Belgian front around Ypres in the ‘Race for the Sea’.
Other formations arrived from Britain, in particular the 4th Division, relieved of garrison duties by Yeomanry and Territorial regiments, and in September the 6th Division.
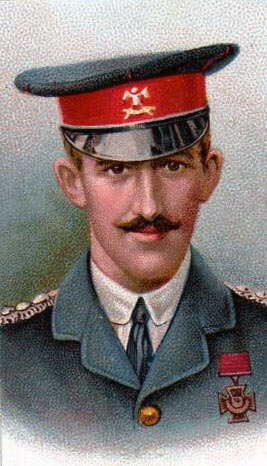
Captain Francis Grenfell VC, 9th Lancers: First Day of the Retreat from Mons and the Battle around Elouges and Audregnies, fought on 24th August 1914 in the First World War
Decorations and campaign medals for the Battle of Mons (2nd Day): Elouges:
The 1914 Star was issued to all ranks who served in France or Belgium between 5th August 1914, the date of Britain’s declaration of war against Germany and Austria-Hungary, and midnight on 22nd/23rd November 1914, the end of the First Battle of Ypres. The medal was known as the ‘Mons Star’. A bar was issued to all ranks who served under fire stating ‘5 Aug. to 23 Nov. 1914’.
An alternative medal the 1914/1915 Star was issued to those not eligible for the 1914 Star.
The 1914 Star with the British War Medal and the Victory Medal were known as ‘Pip, Squeak and Wilfred’. The British War Medal and the Victory Medal alone were known as ‘Mutt and Jeff’.
Captain Francis Grenfell of the 9th Lancers and Major Alexander of 119th Battery, Royal Field Artillery, received the Victoria Cross for their actions in retrieving the guns of 119th Battery.
Sergeants Turner and Davids of 119th Battery each received the Distinguished Conduct Medal for the same incident.
Lieutenant-Colonel Campbell and Captain Lucas-Tooth each received the Distinguished Service Order for their conduct in leading the 9th Lancers.
Anecdotes and traditions from the Battle of Mons (2nd Day): Elouges:
- Major Tom Bridges commanded one of the 4th Dragoon Guards squadrons that charged with the 9th Bridges was knocked from his horse and kicked on the head. He was extricated by an officer driving around the battlefield in a Rolls Royce motor car. Bridges later made a name for himself by rousing the sleeping British stragglers in St Quentin by beating a toy drum and blowing a toy whistle.
- While escaping from the advancing German infantry, Bridges passed 2 guns of L Battery RHA, which he described as ‘firing away as if they were on exercise in Okehampton’.
- Captain Lucas-Tooth of the 9th Lancers was later killed on the Aisne.
- Captain Francis Grenfell of the 9th Lancers was killed in the fighting around Ypres on 24th May 1915. His twin brother, Rivy, was killed in September 1914 serving with the 9th The Grenfell’s older brother was killed at the Battle of Omdurman, in the charge of the 21st Lancers in the Sudan in 1898, and their cousin Claud was killed at Spion Kop in the Boer War. 3 other brothers served through the Great War reaching the rank of lieutenant-colonel. The war poet Julian Grenfell and his brother Gerald Grenfell, both killed in the Great War, were cousins of Francis.
- L Battery RHA was, on 1st September 1914, the battery in action at Néry, in which all but one gun was put out of action and the battery won 3 Victoria Crosses.
References for the Battle of Mons (2nd Day): Elouges:
Mons, The Retreat to Victory by John Terraine.
The First Seven Divisions by Lord Ernest Hamilton.
The Official History of the Great War by Brigadier Edmonds August-October 1914.
The previous battle in the First World War is the Battle of Mons
The next battle in the First World War is the Battle of Battle of Landrecies