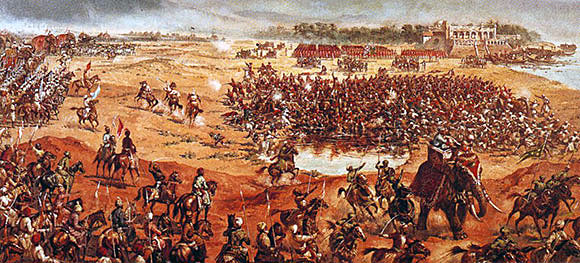
General Gough’s hard fought victory over the Sikh Army
on 10th February 1846 on the banks of the Sutlej River, that ended the First Sikh War
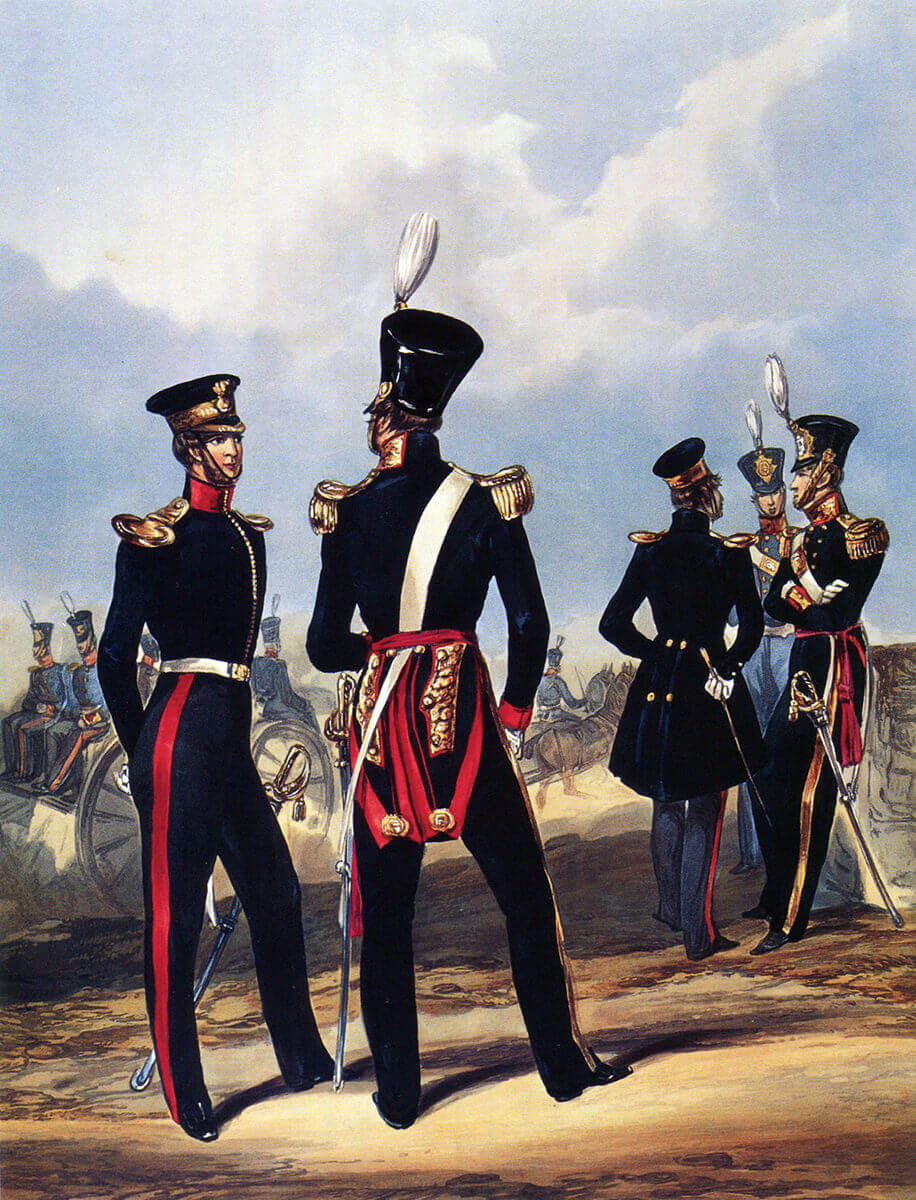
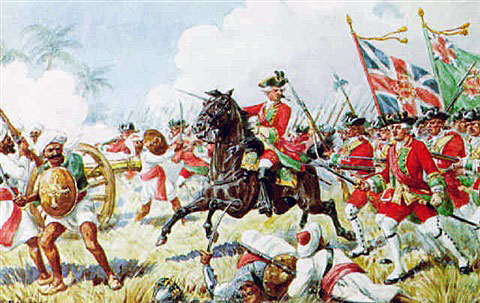
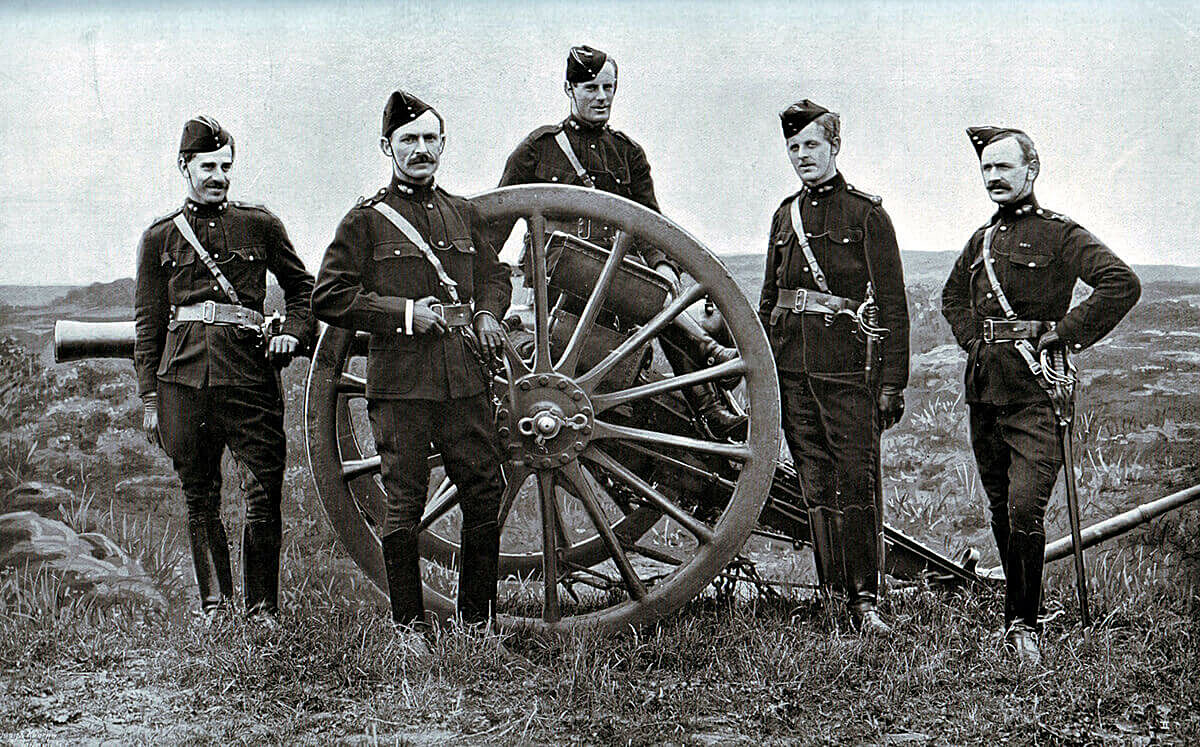
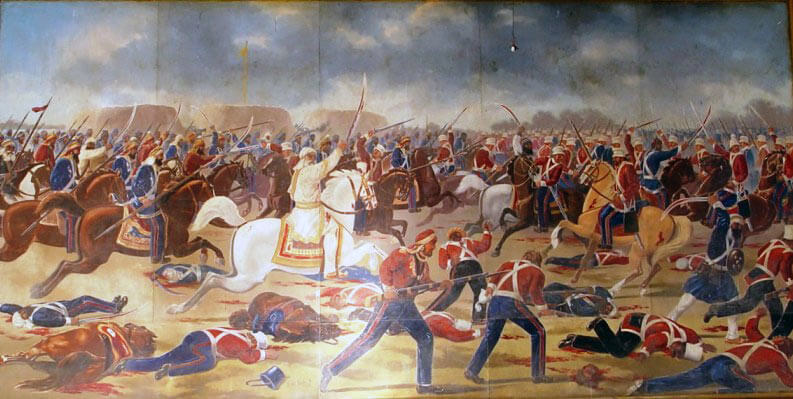
3rd King’s Light Dragoons at the Battle of Sobraon on 10th February 1846 during the First Sikh War: print by Ackermann
The previous battle in the First Sikh War is the Battle of Aliwal
The next battle in the Second Sikh War is the Battle of Ramnagar
Battle: Sobraon
War: First Sikh War.
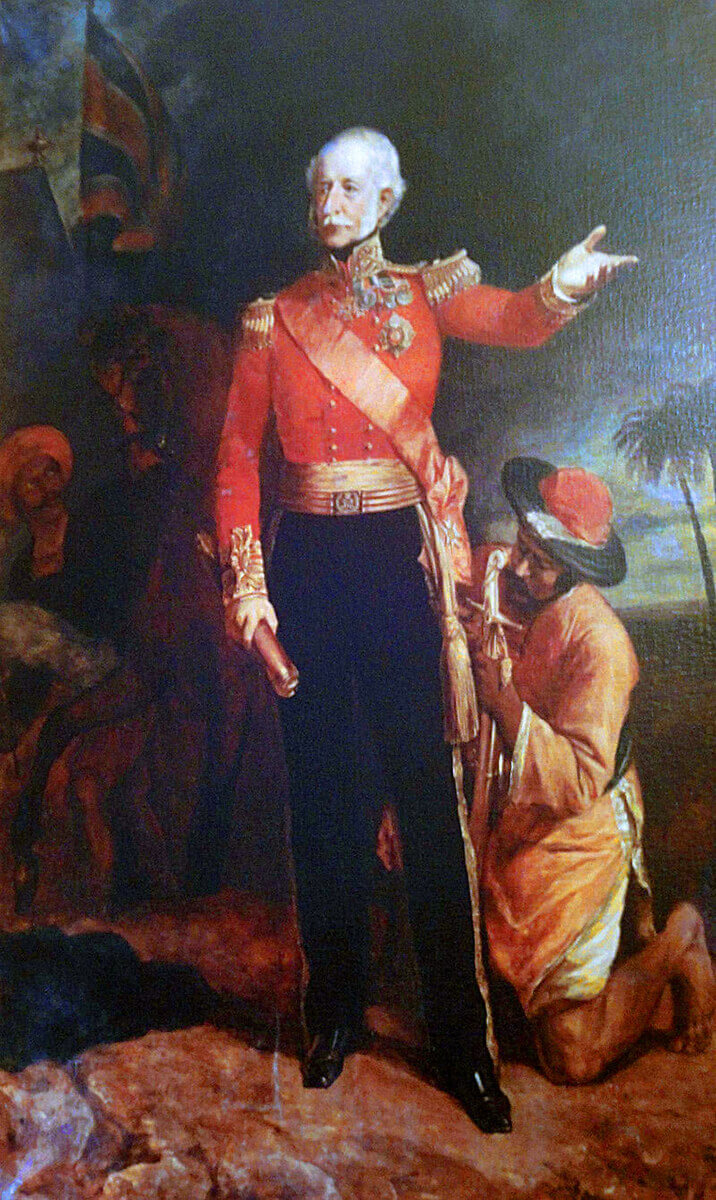
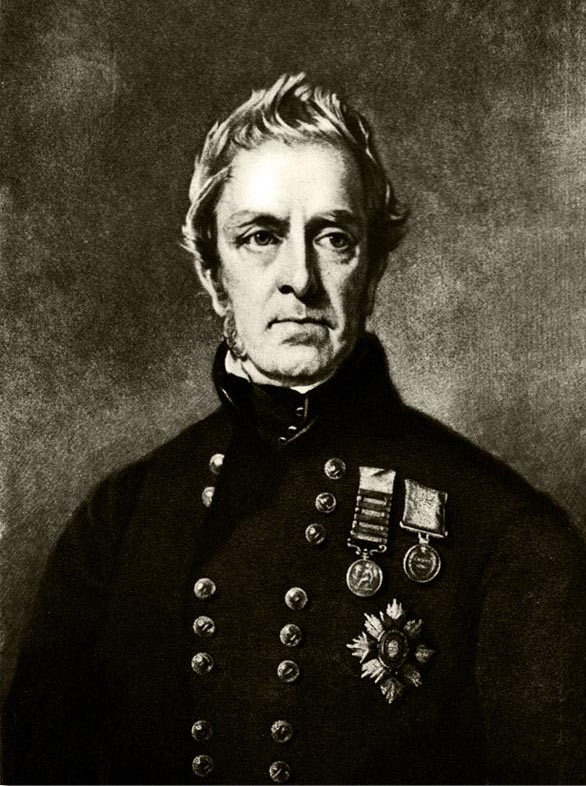
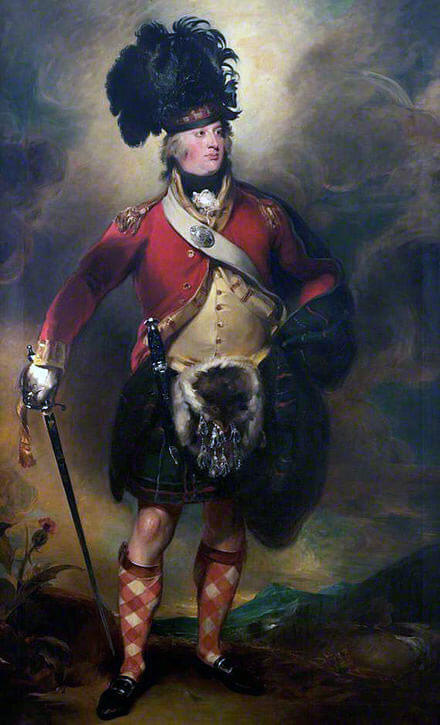
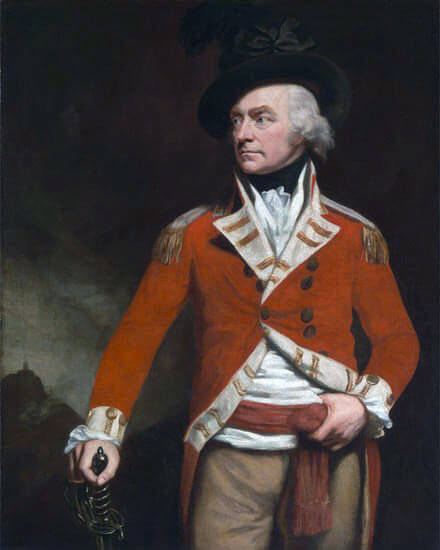
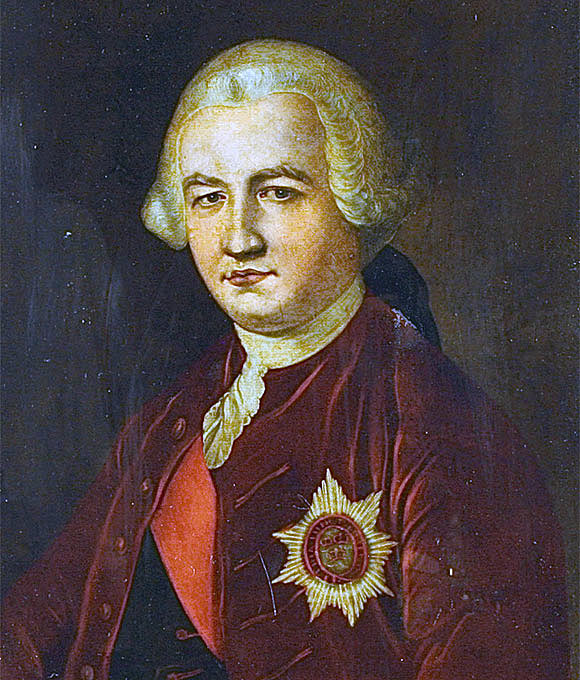
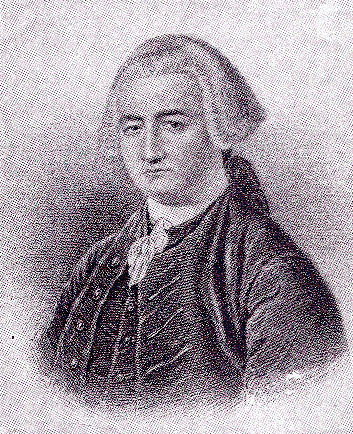
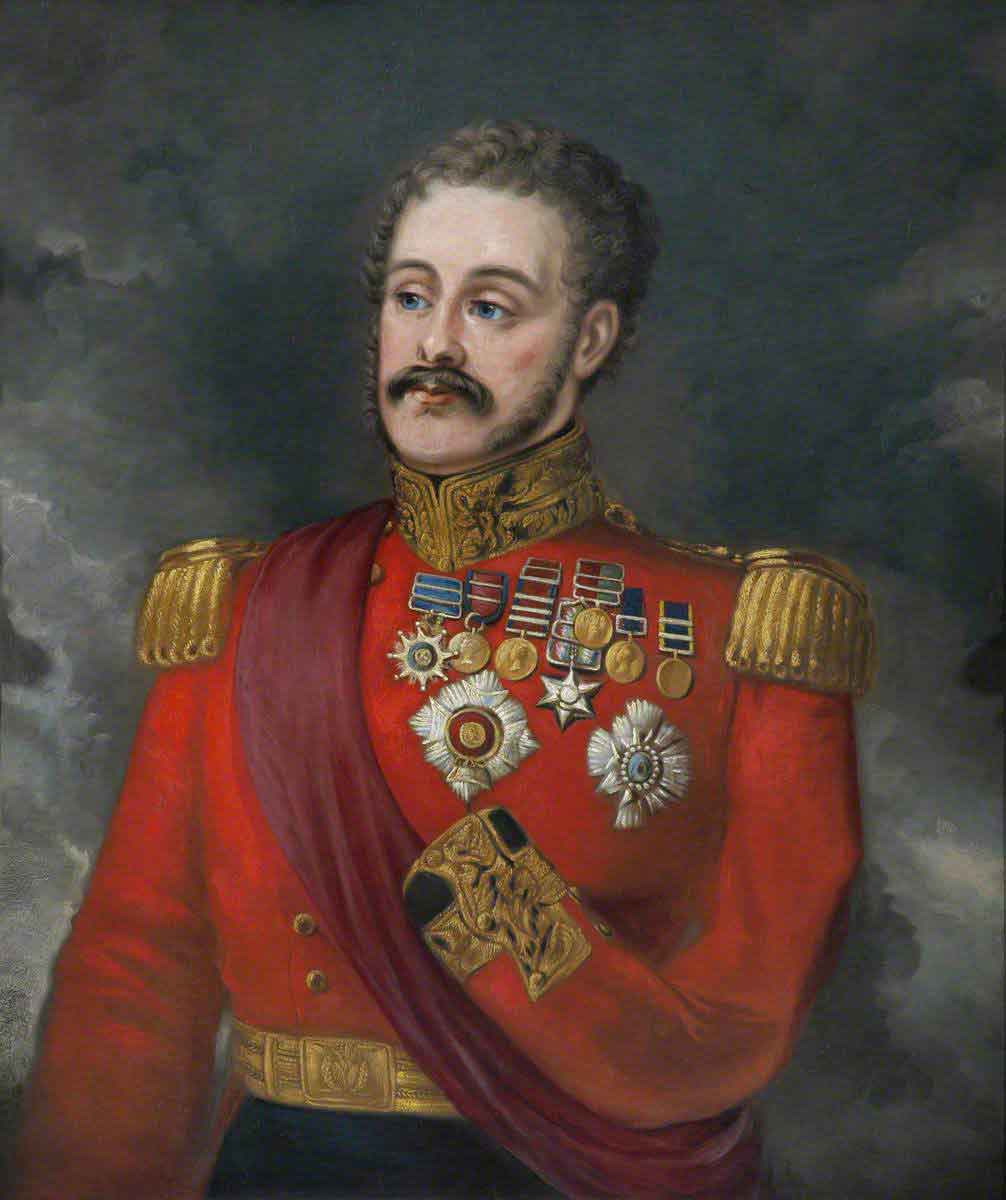
Major General Sir Hugh Gough: Battle of Sobraon on 10th February 1846 during the First Sikh War
Date of the Battle of Sobraon: 10th February 1846.
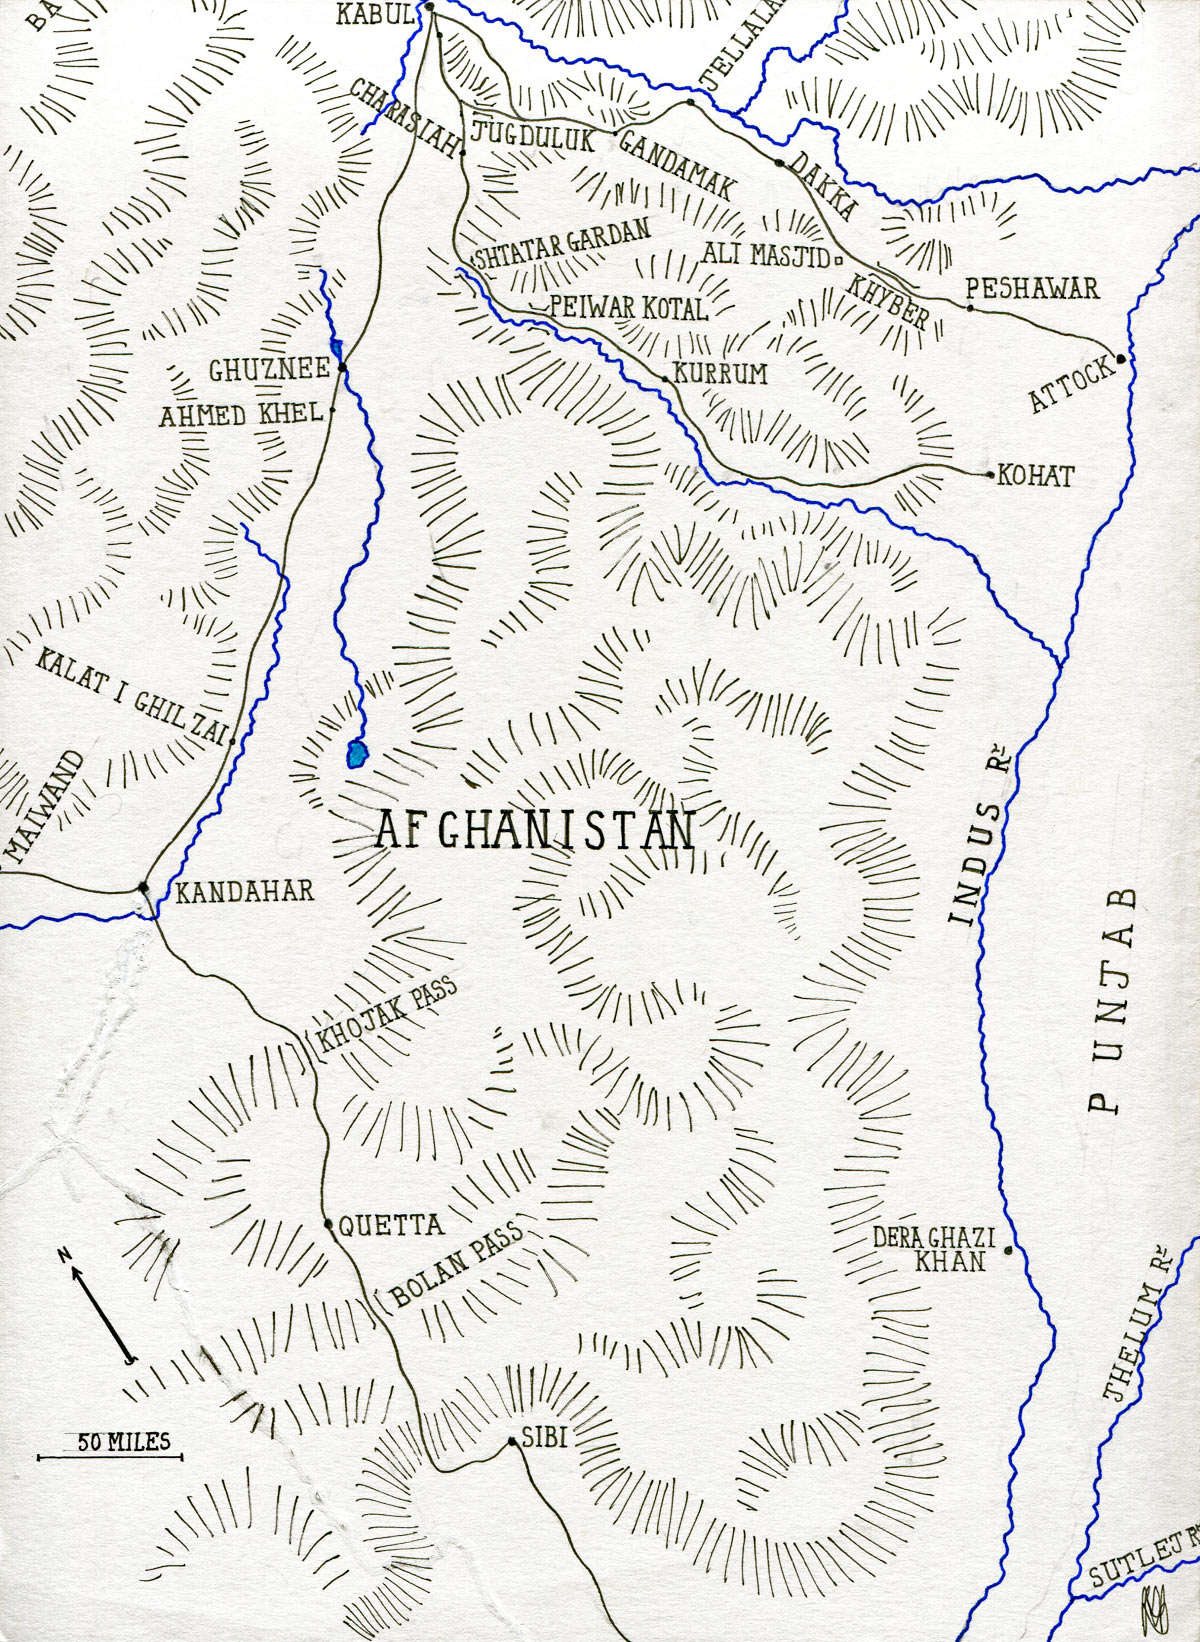
Place of the Battle of Sobraon: In the Punjab in north-west India.
Combatants at the Battle of Sobraon: British troops and Indian troops of the Bengal Presidency against Sikhs of the Khalsa, the army of the Punjab.
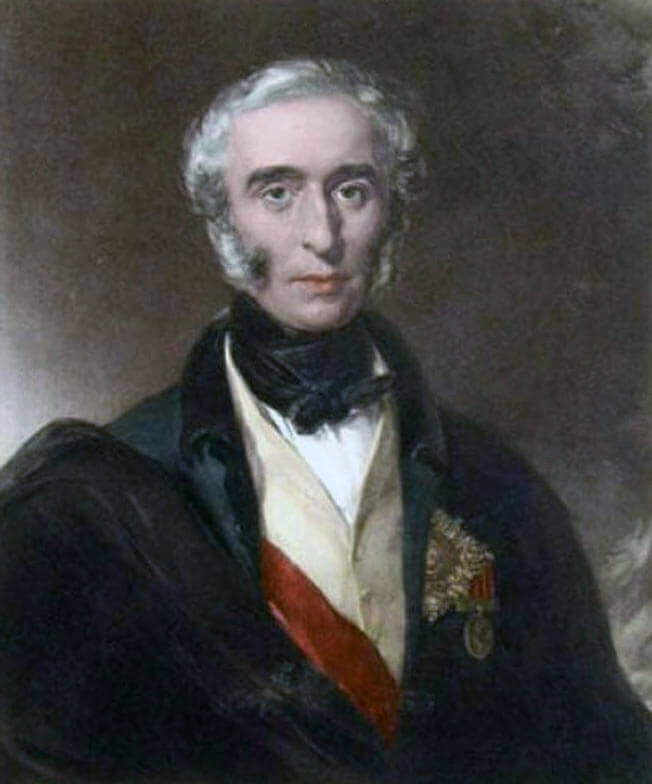
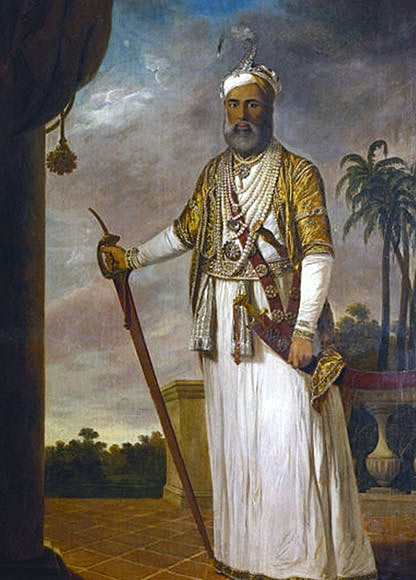
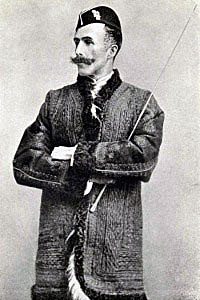
Commanders at the Battle of Sobraon: Major General Sir Hugh Gough and Sir Henry Hardinge against Tej Singh.
Size of the armies at the Battle of Sobraon: A British and Bengali army of 15,000 men and 108 guns against a Sikh army of 40,000 men and 67 guns.
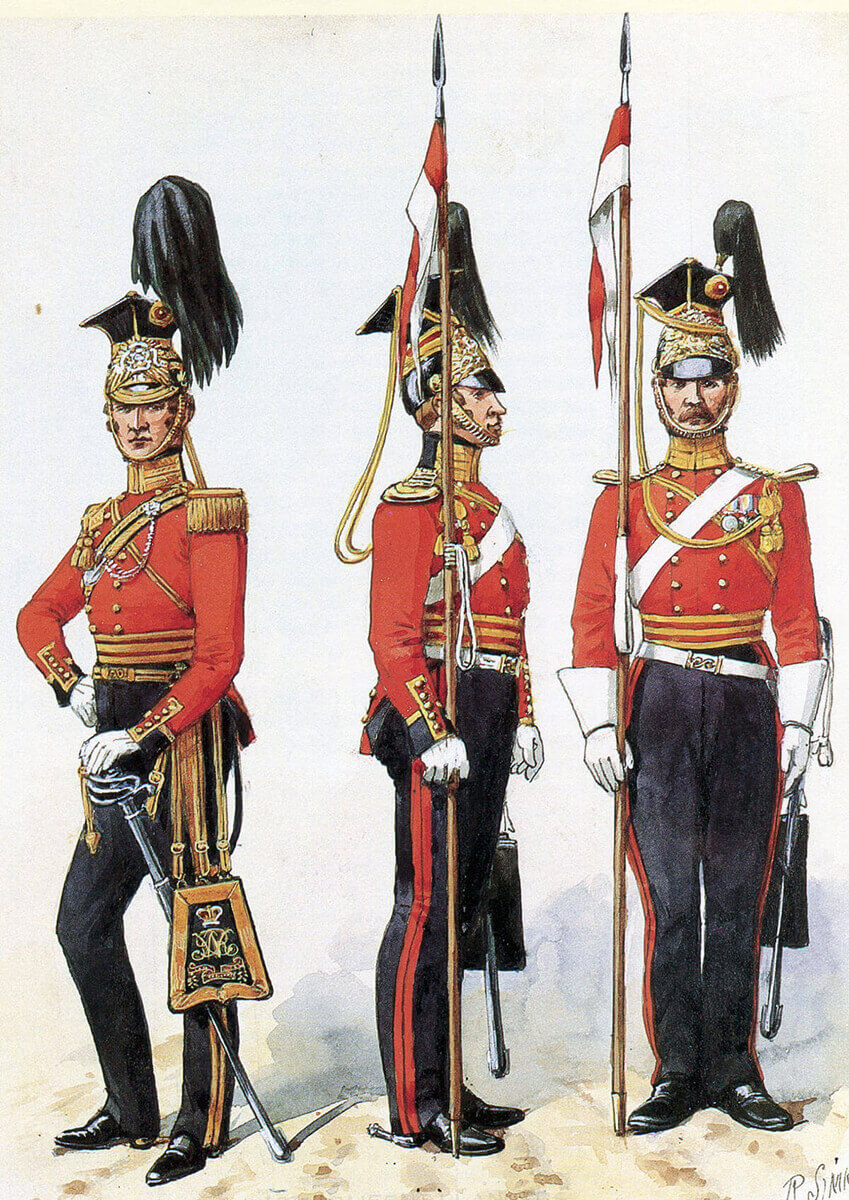
Uniforms, arms and equipment at the Battle of Sobraon (this section is the same in each of the battles of the Sikh Wars):
The two wars fought between 1845 and 1849 between the British and the Sikhs led to the annexation of the Punjab by the British East India Company, and one of the most successful military co-operations between two races, stretching into a century of strife on the North West Frontier of British India, the Indian Mutiny, Egypt and finally the First and Second World Wars.
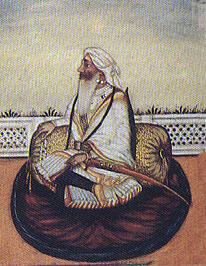
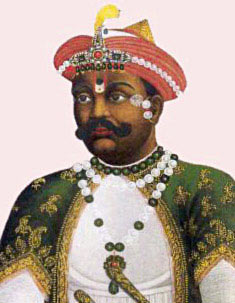
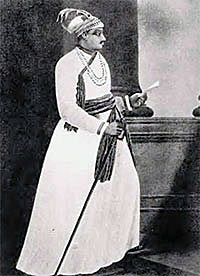
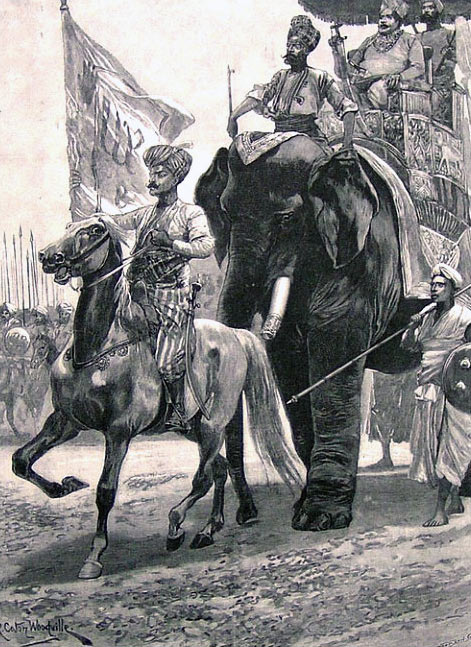
Tej Singh, Sikh commander at the Battle of Sobraon on 10th February 1846 during the First Sikh War
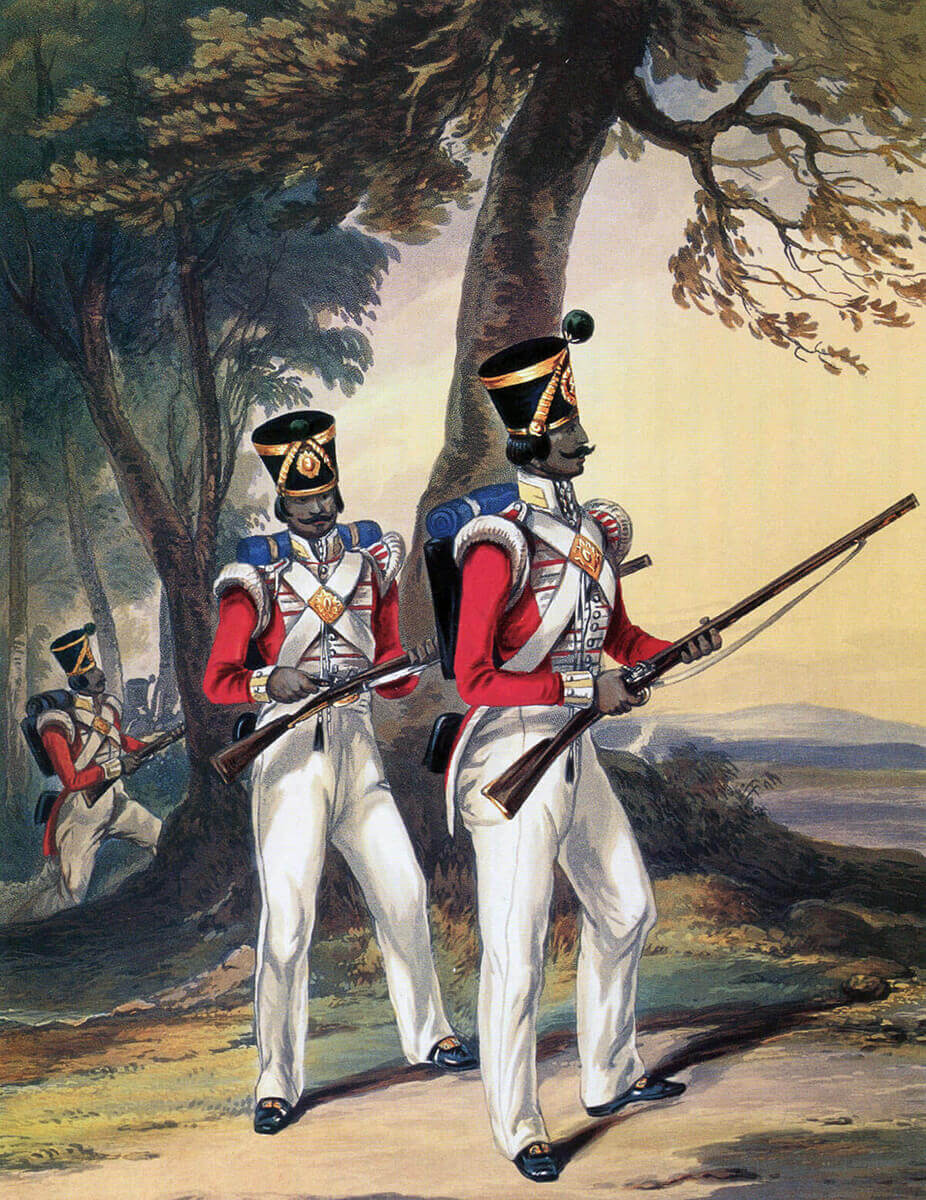
The British contingent comprised four light cavalry regiments (3rd, 9th, 14th and 16th Light Dragoons- the 9th and 16th being lancers) and twelve regiments of foot (9th, 10th, 24th, 29th, 31st, 32nd, 50th, 53rd, 60th, 61st, 62nd and 80th regiments).
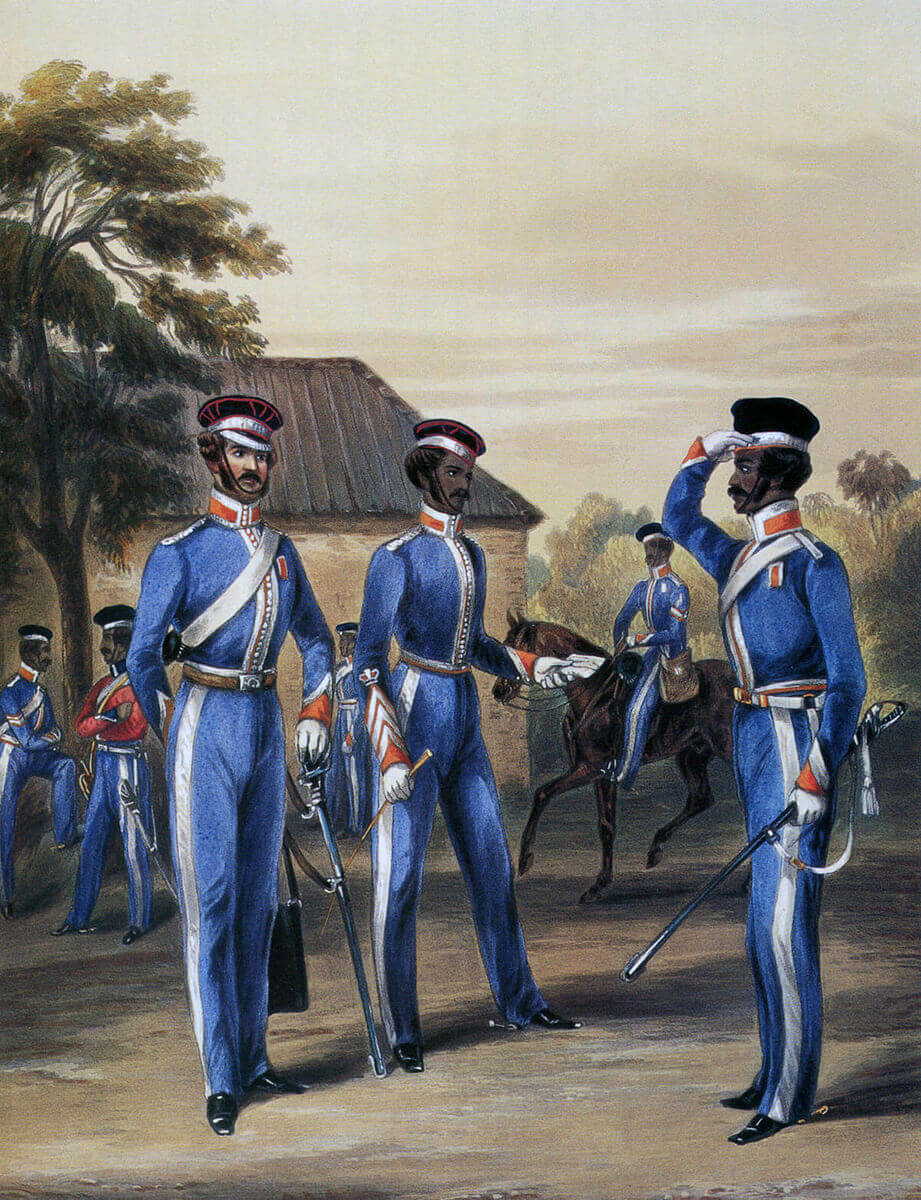
The bulk of General Gough’s ‘Army of the Sutlej’ in the First Sikh War and ‘Army of the Punjab’ in the Second Sikh War comprised regiments from the Bengal Presidency’s army: 9 regular cavalry regiments (the Governor-General’s Bodyguard and 1st, 3rd, 4th, 5th, 6th, 7th, 8th and 11th Bengal Light Cavalry), 13 regiments of irregular cavalry (2nd, 3rd, 4th, 7th to 9th and 11th to the 17th Bengal Irregular Cavalry), 48 regiments of foot (1st to 4th, 7th, 8th, 12th to 16th, 18th, 20th, 22nd, 24th to 27th, 29th to 33rd, 36th, 37th, 41st to 54th, 56th, 59th, 63rd and 68th to 73rd Bengal Native Infantry), horse artillery, field artillery, heavy artillery and sappers and miners.
The Bombay presidency contributed a force that marched in from Scinde, in the west, and gave considerable assistance at the Siege of Multan; the 19th Bombay Native Infantry gaining the title of the Multan Regiment for its services in the siege, a label still held by its Indian Army successor.
A Bombay brigade under Brigadier Dundas joined General Gough’s army for the final battle of the Second Sikh War at Goojerat, where the two regiments of Scinde Horse, Bombay Irregular Cavalry, particularly distinguished themselves. The brigade comprised: 2 regiments of Scinde Horse, 3rd and 19th Bombay Native Infantry and Bombay horse artillery and field artillery.
Each of the three presidencies, in addition to their native regiments, possessed European infantry, of which the 1st Bengal (European) Infantry, 2nd Bengal (European) Light Infantry and 1st Bombay (European) Fusiliers took part in the Sikh Wars.
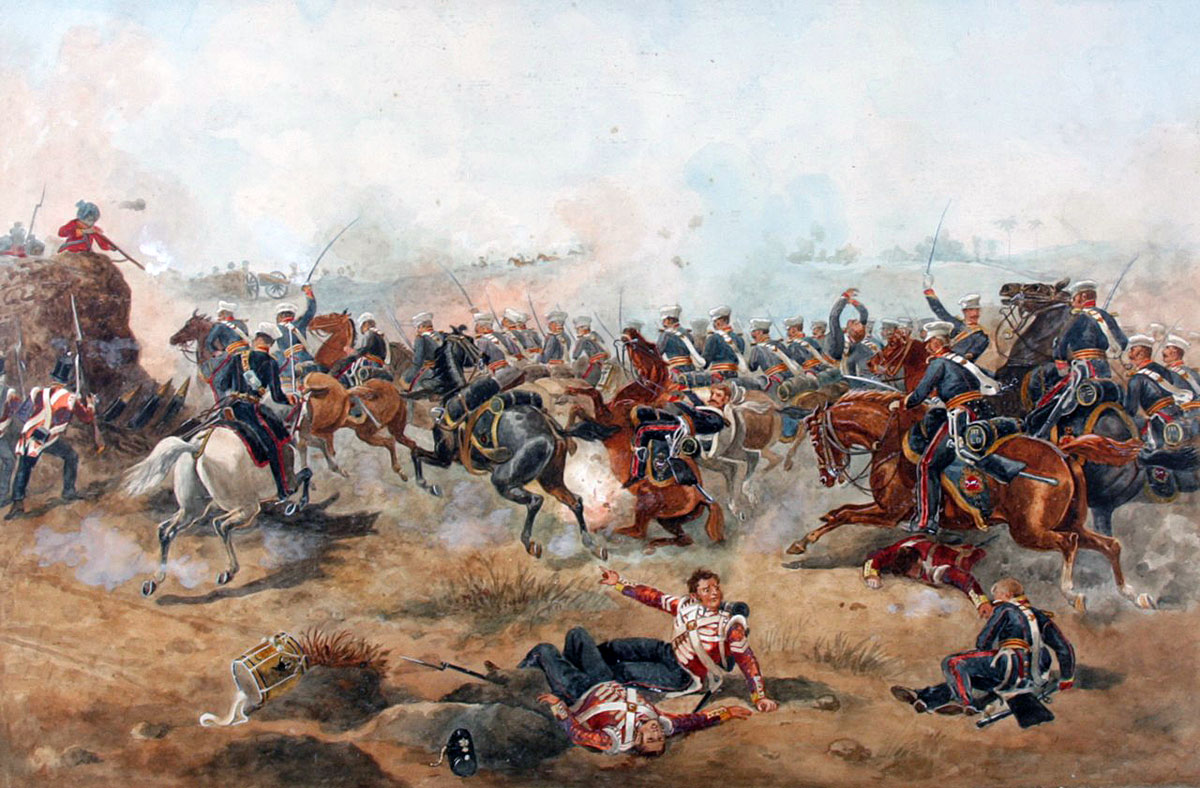
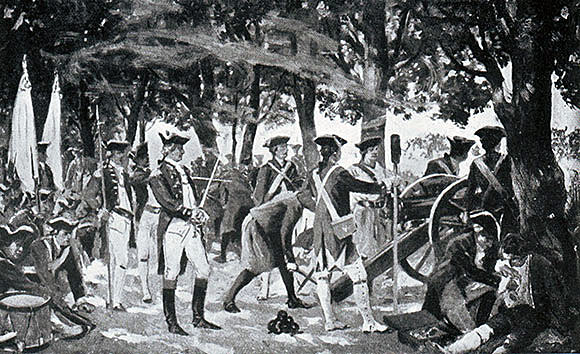
3rd King’s Light Dragoons at the Battle of Sobraon on 10th February 1846 during the First Sikh War: picture by Michael Angelo Hayes
Other corps fought under the British flag, such as the Shekawati cavalry and infantry and the first two Gurkha regiments: the Nasiri Battalion (later 1st Gurkhas) and the Sirmoor Battalion (later 2nd Gurkhas).
General Gough commanded the British/Indian army at 6 of the 7 major battles (not the Battle of Aliwal). An Irishman, Gough was immensely popular with his soldiers, for whose welfare he was constantly solicitous. The troops admired Gough’s bravery, in action wearing a conspicuous white coat, which he called his ‘Battle Coat’, so that he might draw fire away from his soldiers.
Gough’s tactics were heavily criticised, even in the Indian press in letters written by his own officers. At the Battles of Moodkee, Sobraon and Chillianwallah, Gough launched headlong attacks, considered to be ill-thought out by many of his contemporaries. Casualties were high and excited concern in Britain and India. By contrast, Gough’s final battle, Goojerat, which decisively won the war, cost few of his soldiers their lives and was considered a model of care and planning.
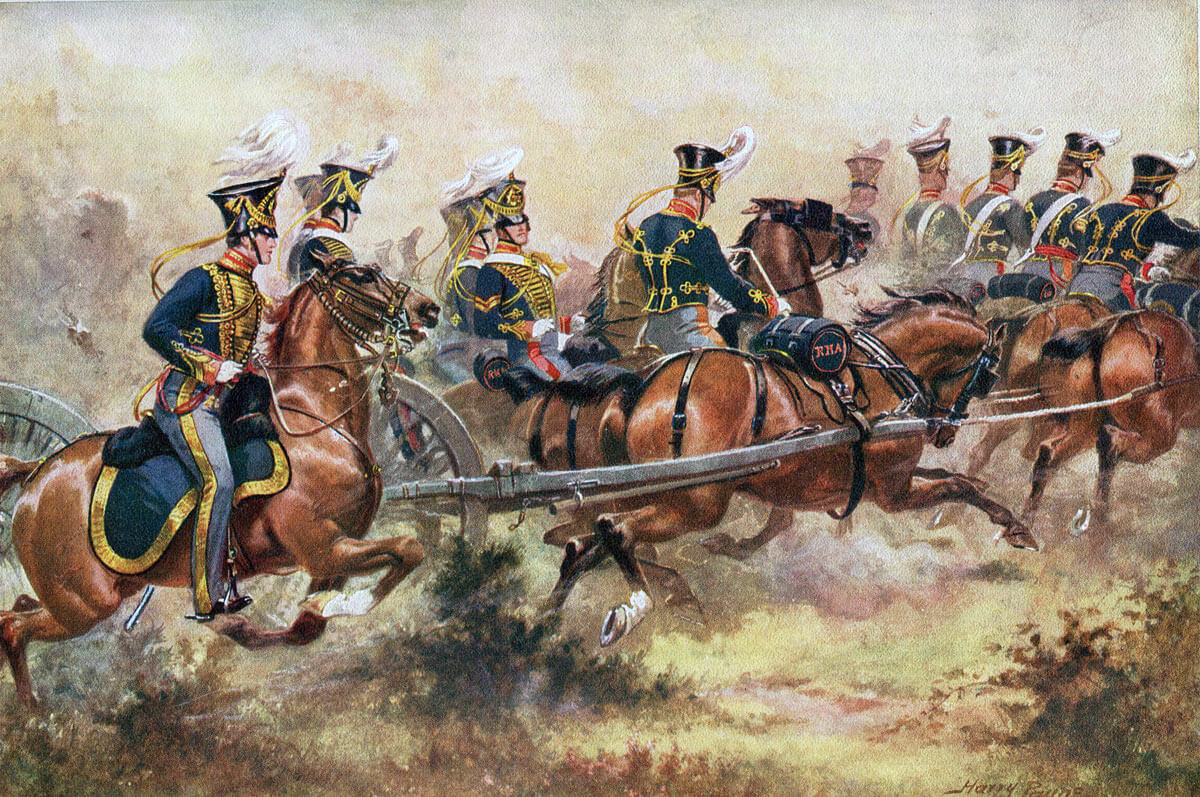
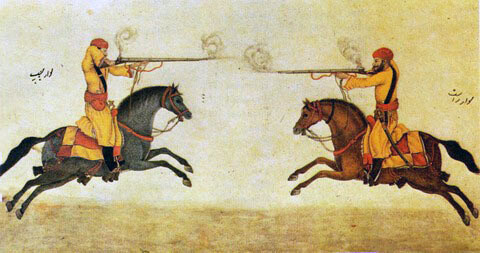
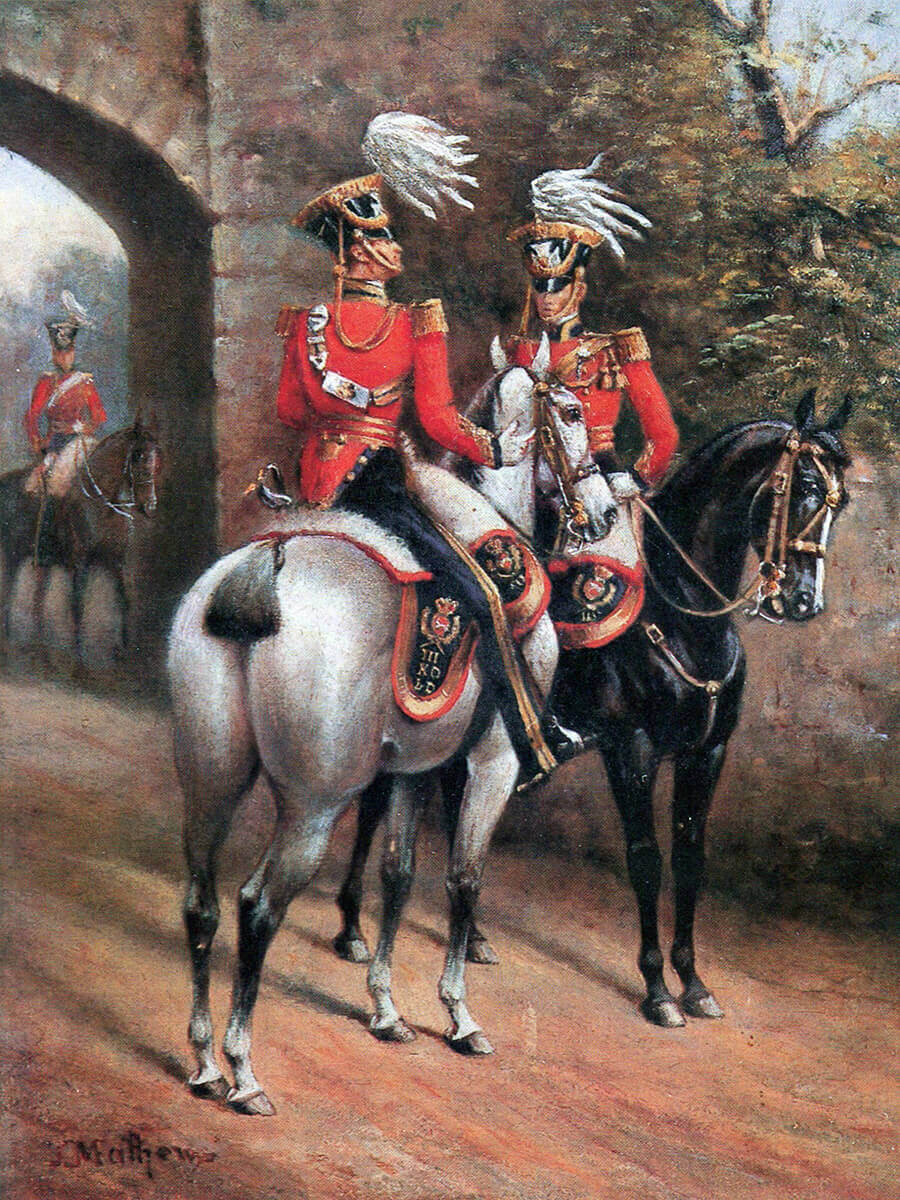
Every battle saw vigorous cavalry actions, with HM 3rd King’s Own Light Dragoons and HM 16th Queen’s Royal Lancers particularly distinguishing themselves. The British light cavalry wore embroidered dark blue jackets and dark blue overall trousers, except the 16th who bore the sobriquet ‘the Scarlet Lancers’ for their red jackets. The headgear of the two regiments of light dragoons was a shako with a white cover; the headgear of the lancers the traditional Polish tschapka.
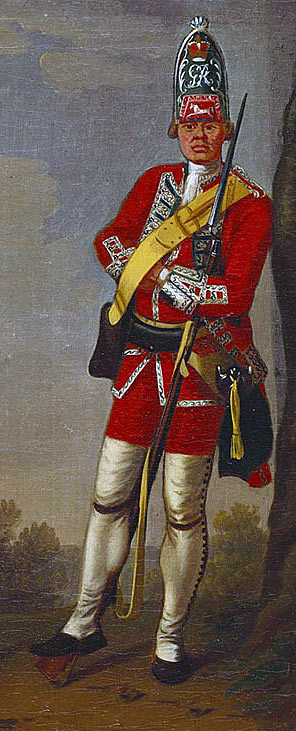
HM regiments of foot wore red coats and blue trousers with shakos and white covers.
The Bengal and Bombay light cavalry regiments wore pale blue uniforms. The infantry of the presidency armies wore red coats and peak less black shakos.
The weapons for the cavalry were the lance for the lancer regiments and sword and carbine for all; the infantry was armed with the Brown Bess musket and bayonet.
Commands in the field were given by the cavalry trumpet and the infantry drum and bugle.
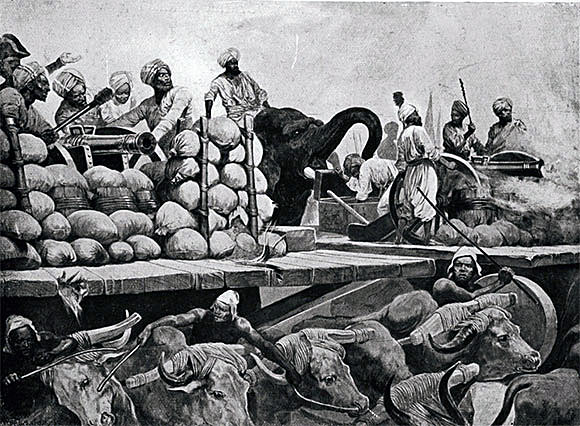
In the initial battles, the Sikh artillery outgunned Gough’s batteries. Even in these battles and in the later ones, the Bengal and Bombay horse and field artillery were handled with great resource and were a major cause of Gough’s success.
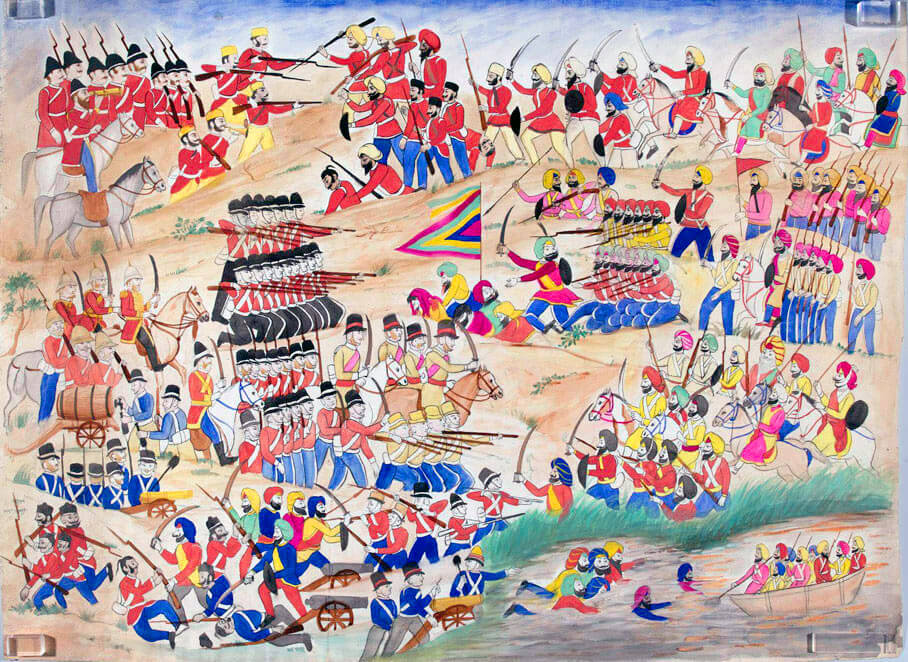
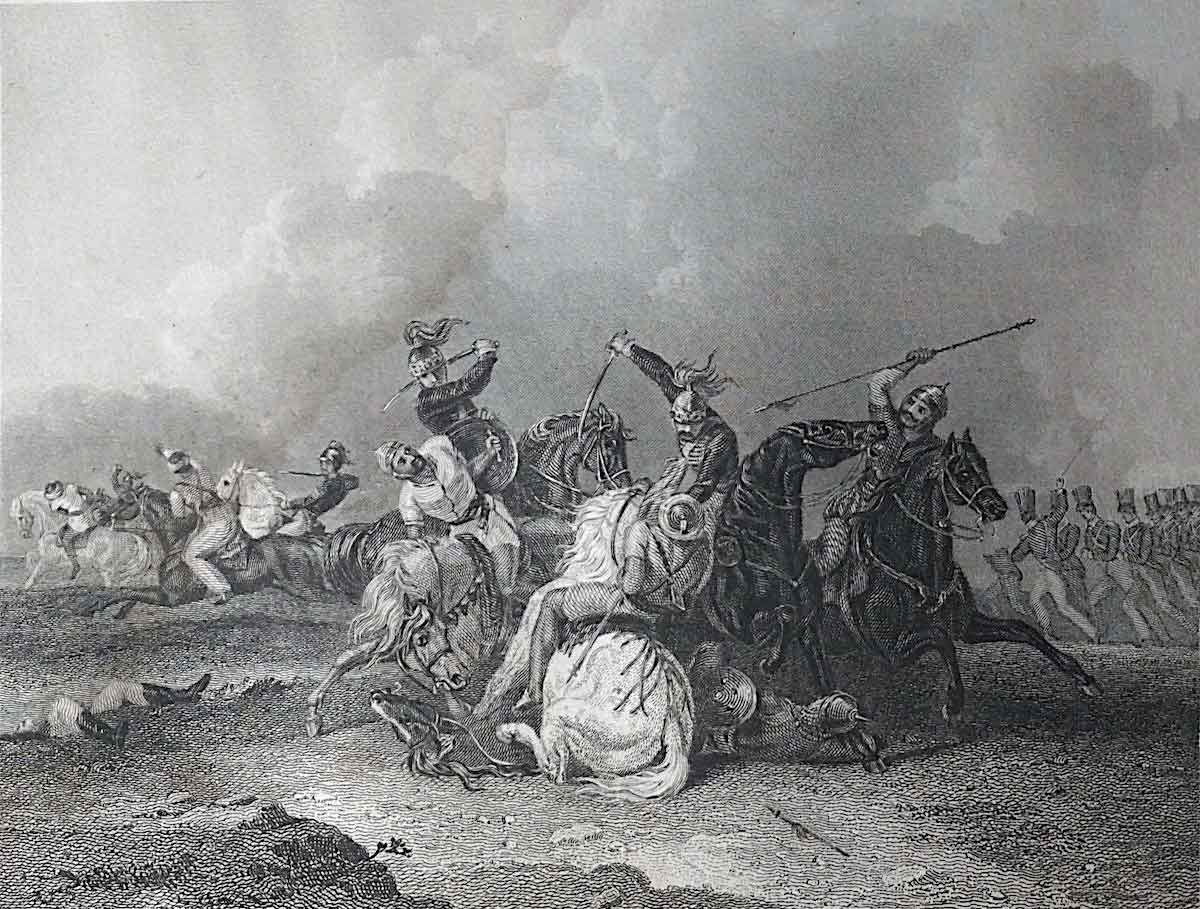
Sikh illustration of the Battle of Sobraon on 10th February 1846 during the First Sikh War
Many of the more senior British officers had cut their military teeth in the Peninsular War, and at the Battle of Waterloo: Gough, Hardinge, Havelock of the 14th Light Dragoons, Cureton, Dick, Thackwell and others. Many of the younger men would go on to fight in the Crimea and the Indian Mutiny.
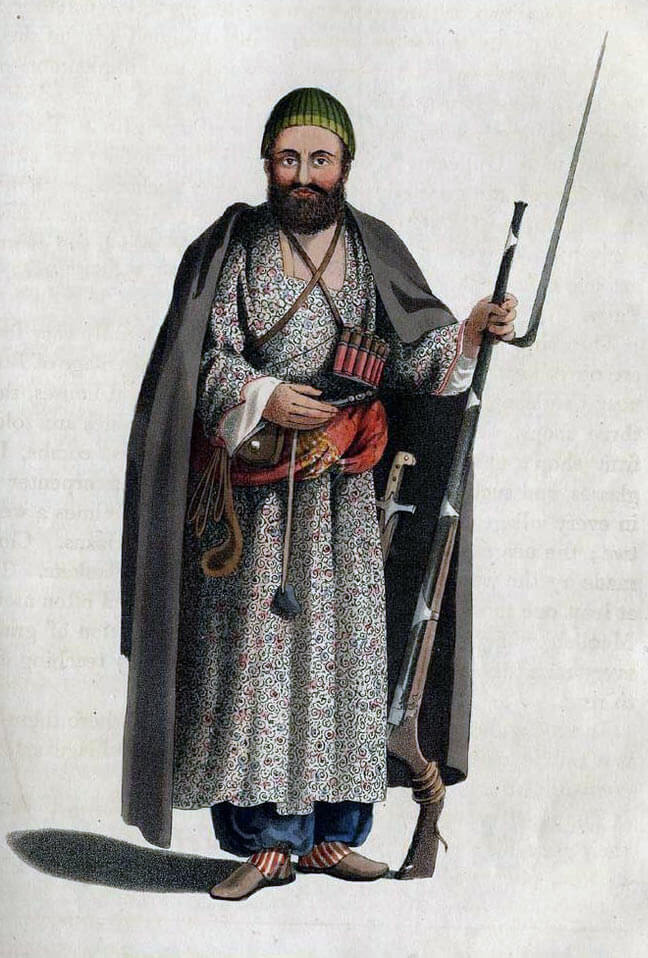
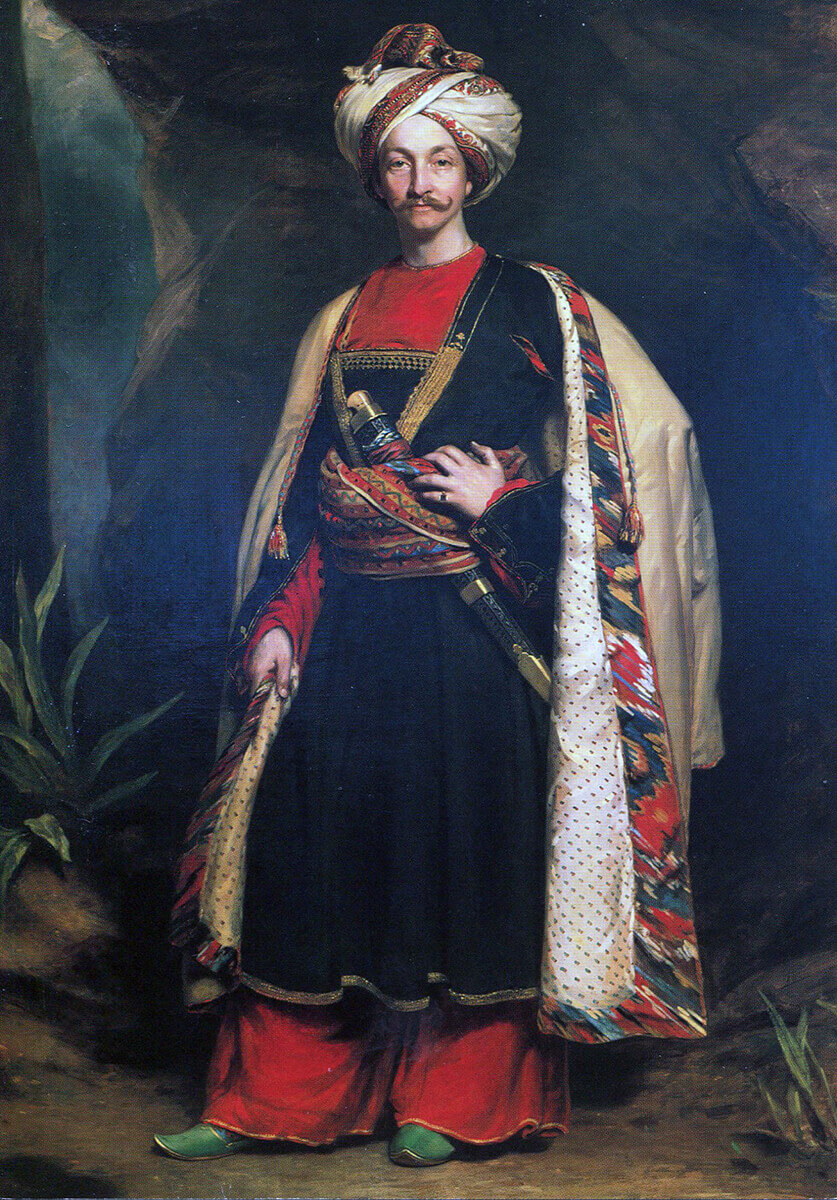
The Sikhs of the Punjab looked to the sequence of Gurus for their spiritual inspiration, and had established their independence, fiercely resisting the Moghul Kings in Delhi and the Muslims of Afghanistan. The Sikhs were required by their religion to wear the ‘five Ks’, not to cut their hair or beard and to wear the highly characteristic turban, a length of cloth in which the hair is wrapped around the head.
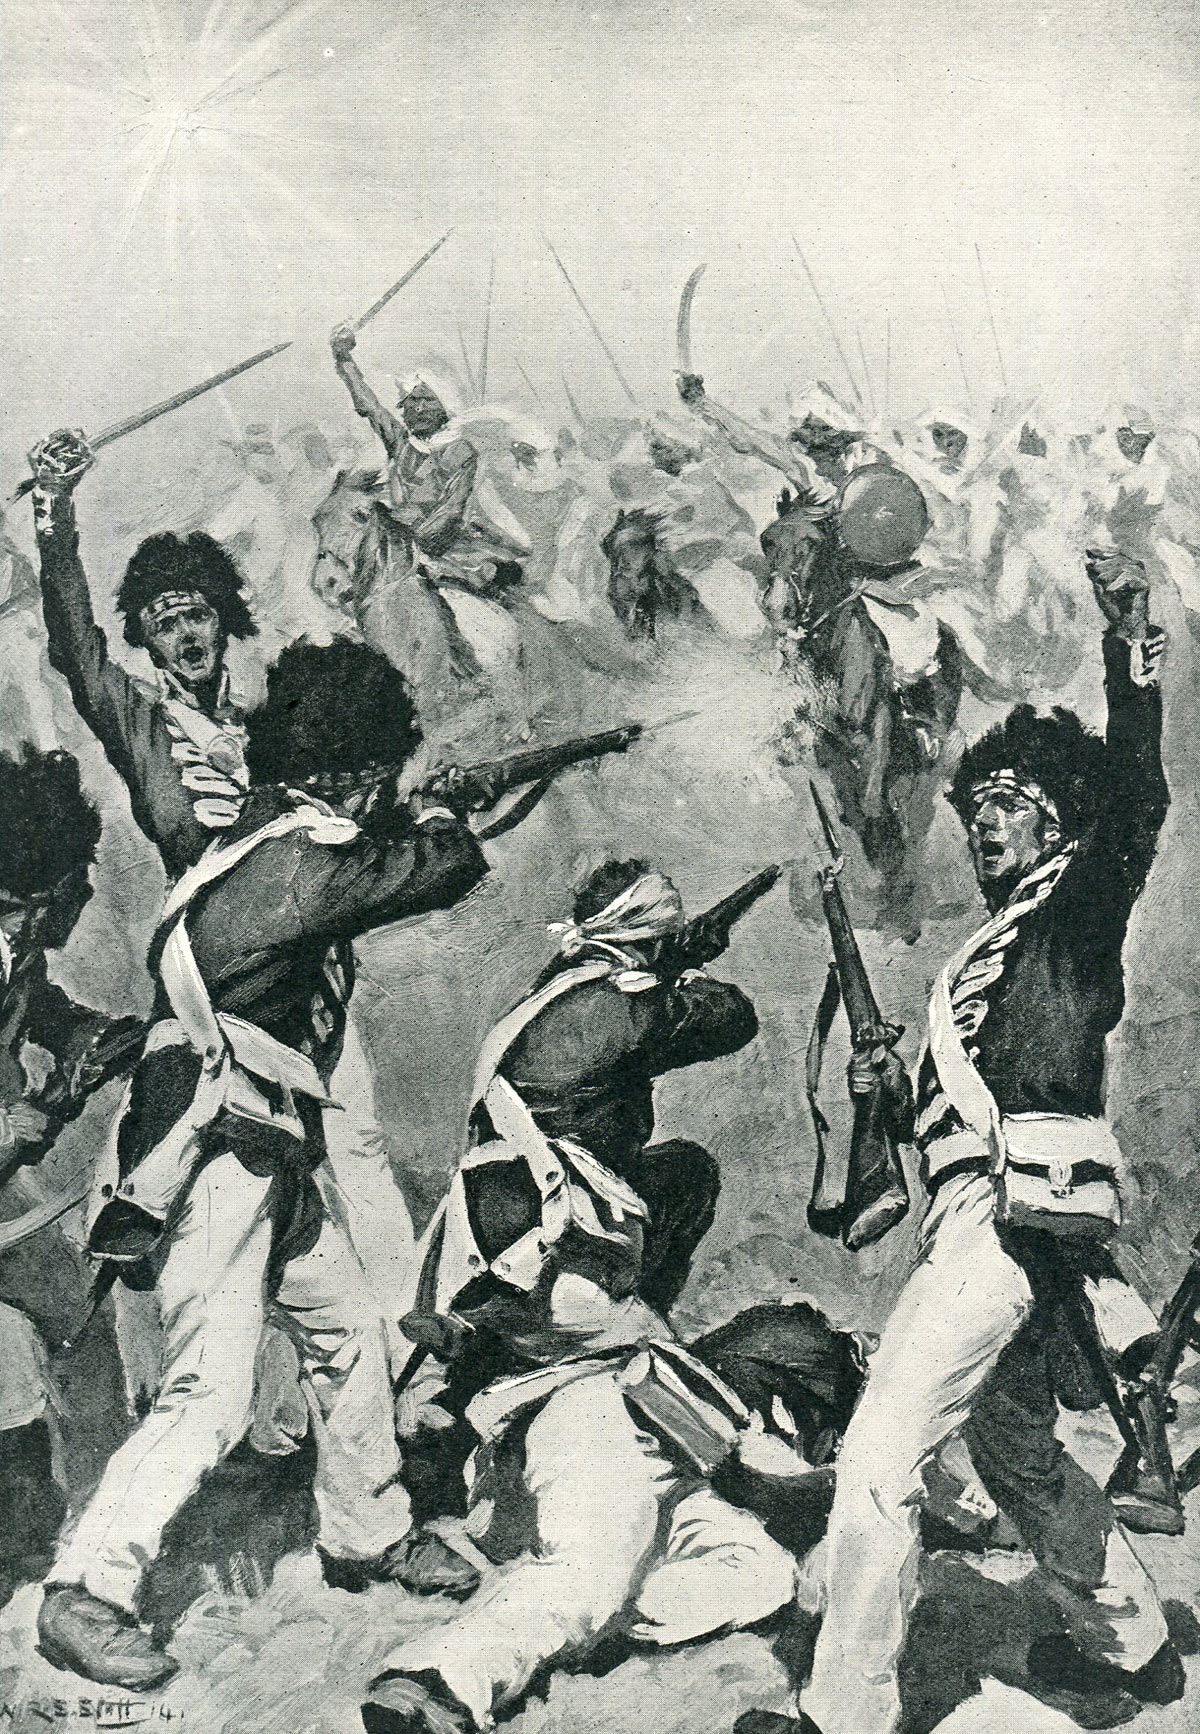
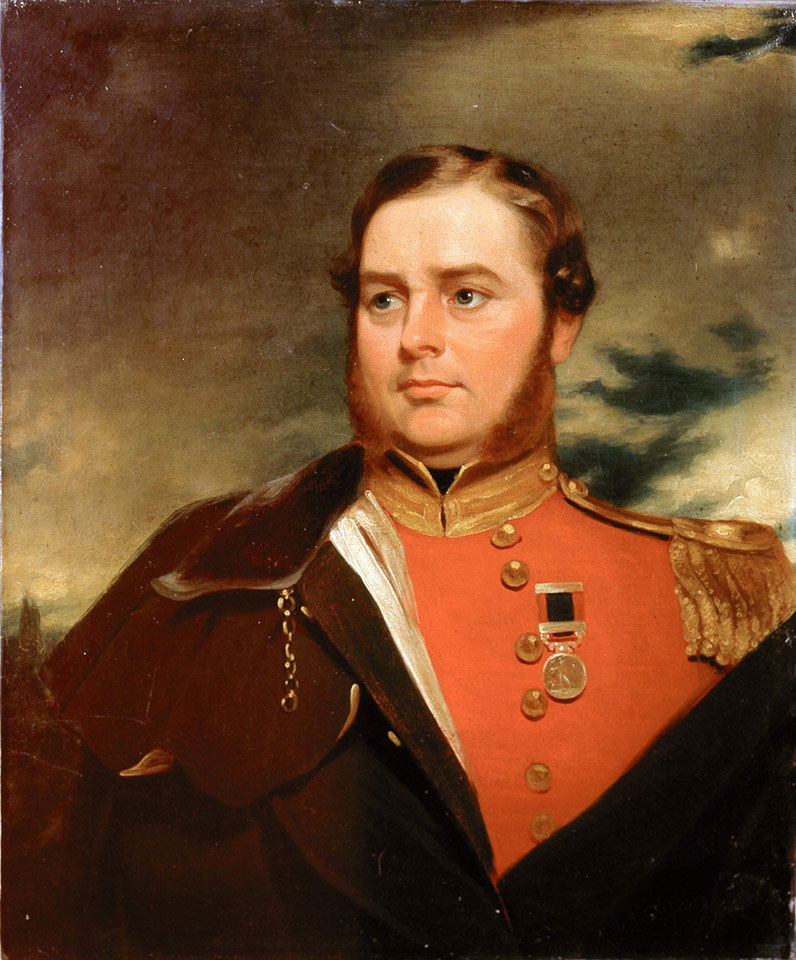
Sergeant McCabe of HM 31st Regiment at the Battle of Sobraon on 10th February 1846 during the First Sikh War: picture by Charles Stadden
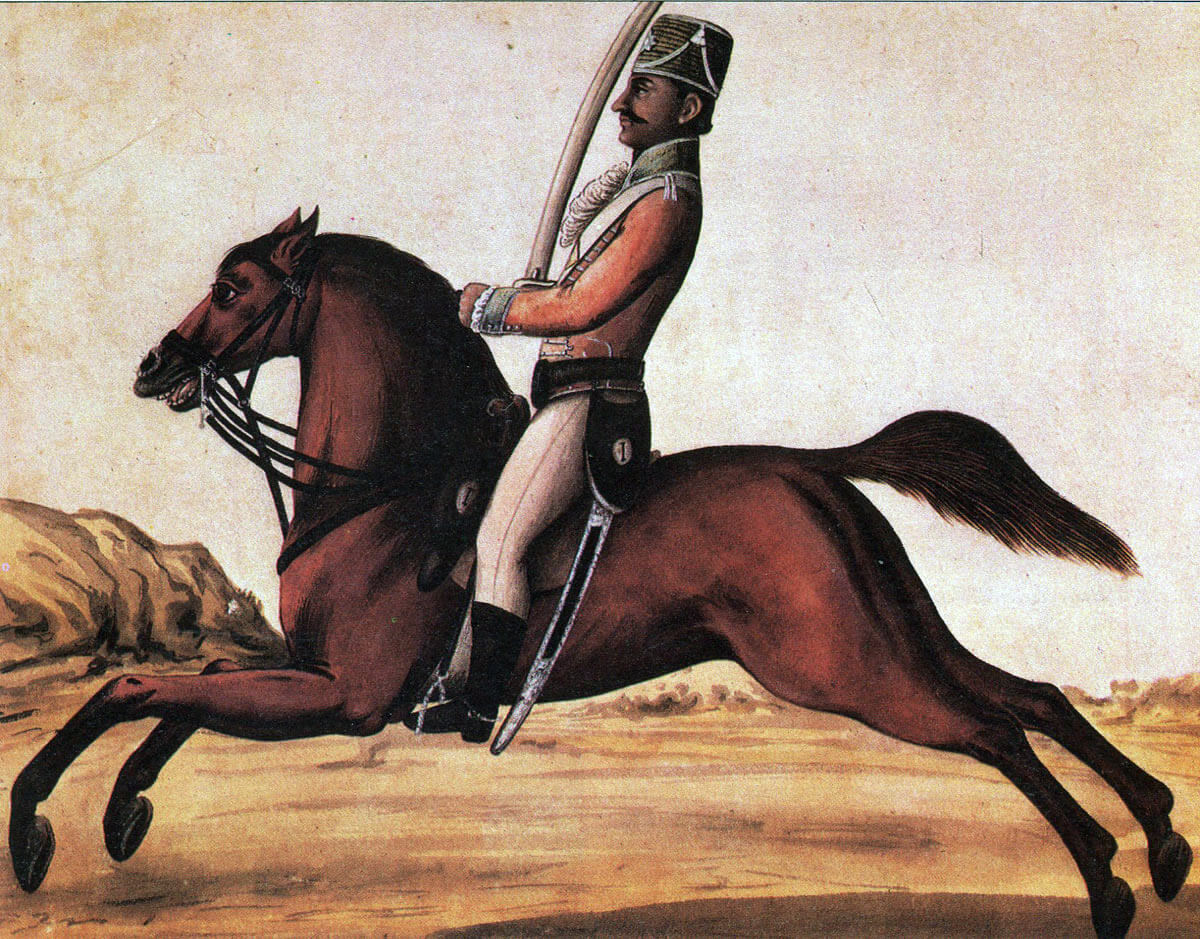
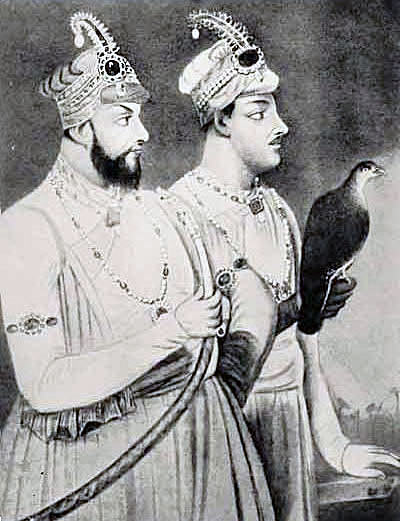
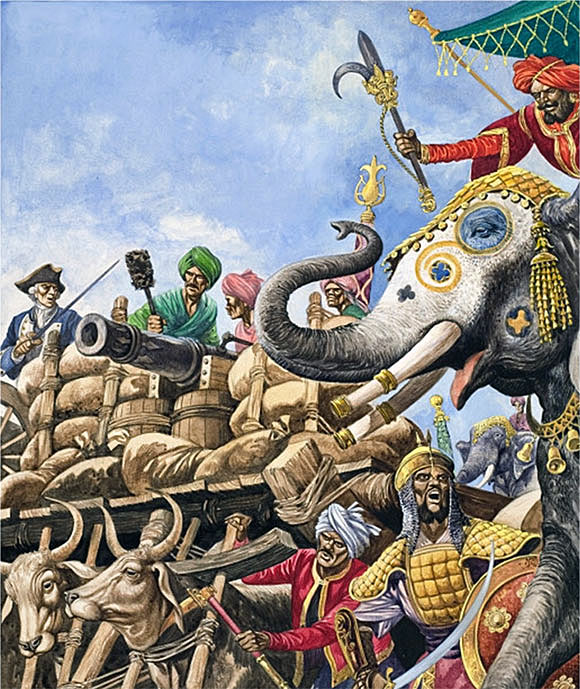
The Maharajah of the Punjab, Ranjit Singh, whose death in 1839 ended the Sikh embargo on war with the British, established and built up the powerful Sikh Army, the ‘Khalsa’, over the twenty years of his reign. The core of the ‘Khalsa’ was its body of infantry regiments, equipped and trained as European troops, wearing red jackets and blue trousers. The Sikh artillery was held in high esteem by both sides. The weakness in the Sikh army was its horse. The regular cavalry regiments never reached a standard comparable to the Sikh foot, while the main element of the mounted arm comprised clouds of irregular and ill-disciplined ‘Gorcharras’.
The traditional weapon of the Sikh warrior is the ‘Kirpan’, a curved sword kept razor sharp and one of the ‘five Ks’ a baptised Sikh must wear. In battle, at the first opportunity, many of the Sikh foot abandoned their muskets and, joining their mounted comrades, engaged in hand to hand combat with sword and shield. Horrific cutting wounds, severing limbs and heads, were a feature of the Sikh Wars, in which neither side gave quarter to the enemy.
It had taken the towering personality of Ranjit Singh to control the turbulent ‘Khalsa’, he had established. Ranjit Singh’s descendants found the task beyond them and did much to provoke the outbreak of the First Sikh War, in the hope that the Khalsa would be cut down to size by the armies of the British East India Company. The commanders of the Sikh armies in the field rarely took the initiative in battle, preferring to occupy a fortified position and wait for the British and Bengalis to attack. In the opening stages of the war there was correspondence between Lal Singh and the British officer, Major Nicholson, suggesting that the Sikhs were being betrayed by their commander.
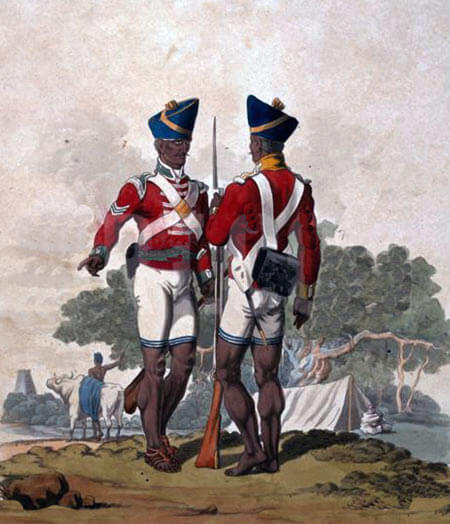
Light Company of a Bengal Native Infantry Regiment: Battle of Sobraon on 10th February 1846 during the First Sikh War
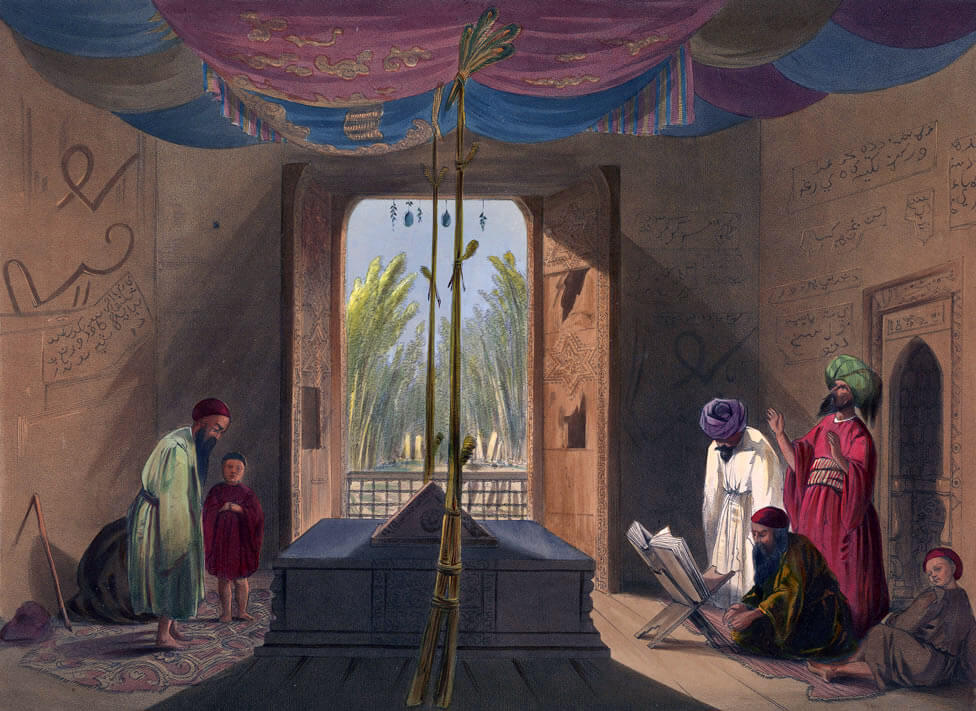
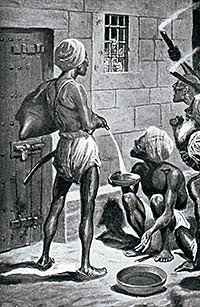
Pay in the Khalsa was good, twice the rate for sepoys in the Bengal Army, but it was haphazard, particularly after the death of Ranjit Singh. Khalsa administration was conducted by clerks writing in the Persian language. In one notorious mutiny over pay, Sikh soldiers ran riot looking for anyone who could, or looked as if they could, speak Persian, and putting them to the sword.
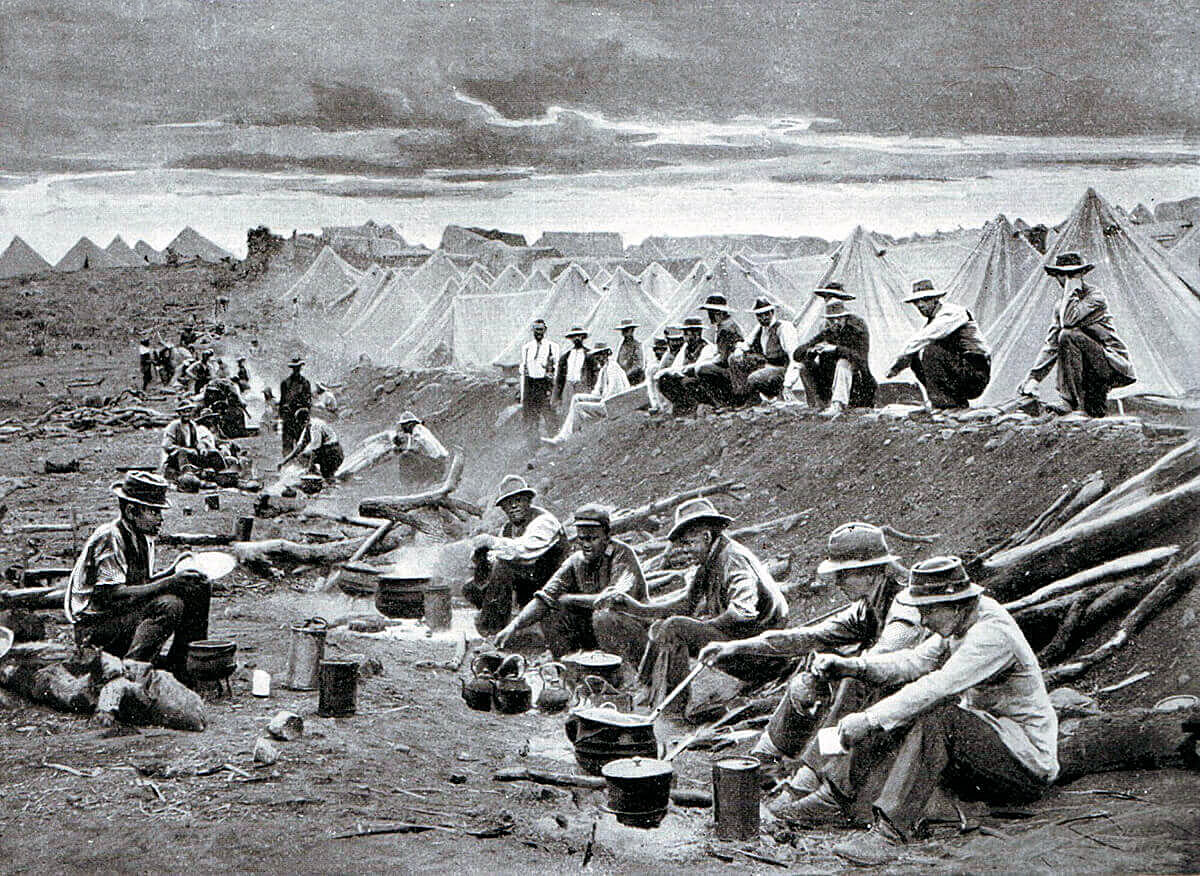
The seven battles of the war and the siege of the city of Multan were hard fought. Several of the battle fields were wide flat spaces broken by jungly scrub, from which the movement of large bodies of troops in scorching heat raised choking clouds of dust. As the fighting began, the dust clouds intermingled with dense volumes of musket and cannon smoke. With the thunder of gunfire and horses’ hooves, the battle yells and cries of the injured, the battles of the Sikh Wars were indeed infernos.
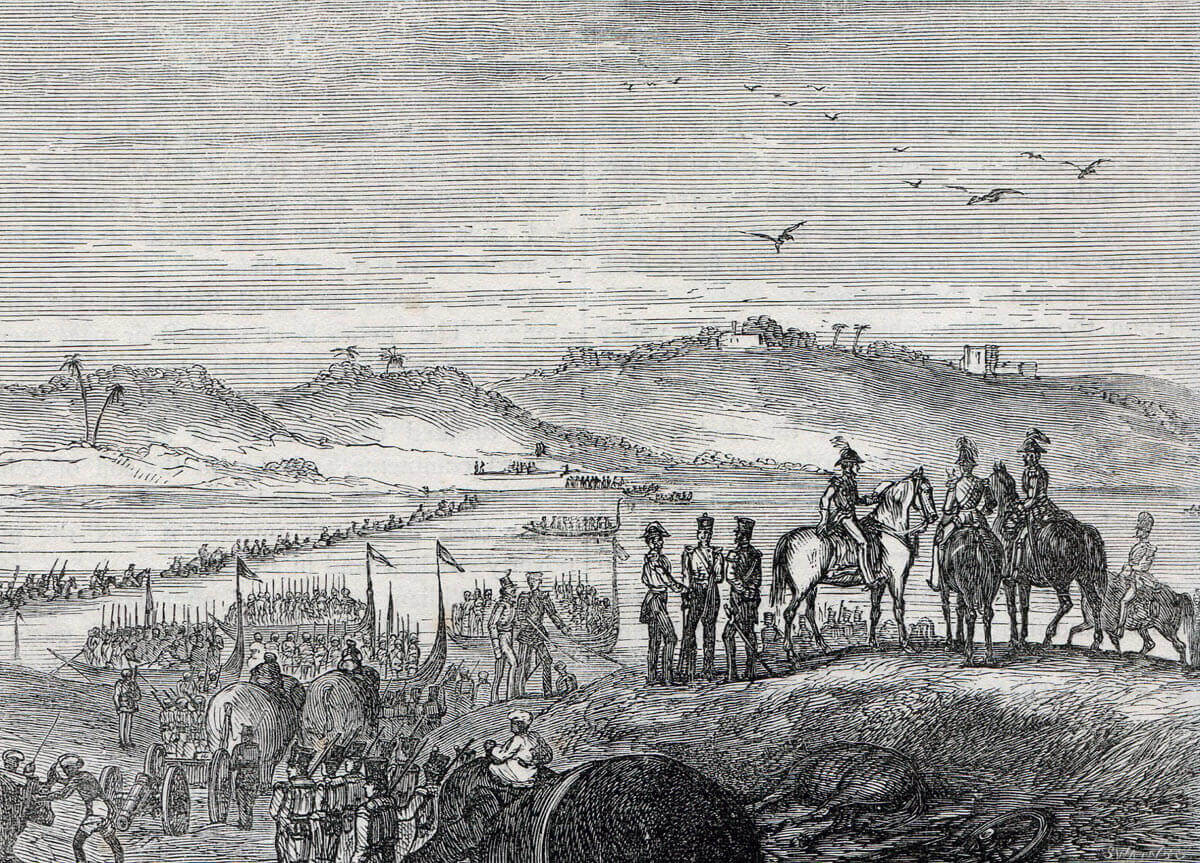
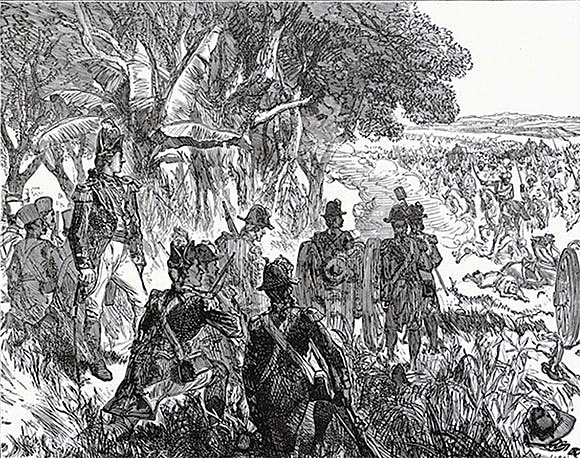
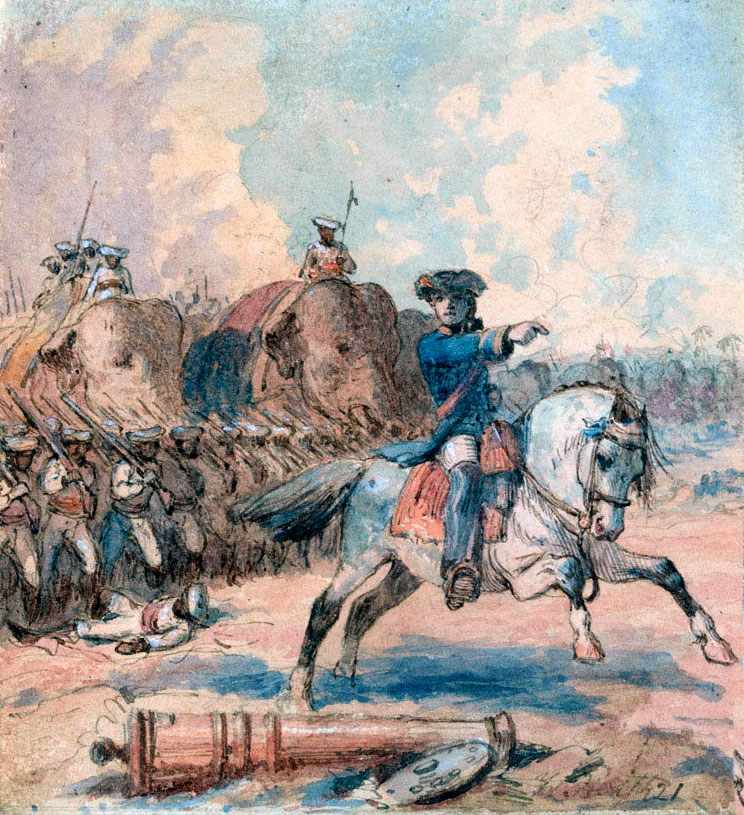
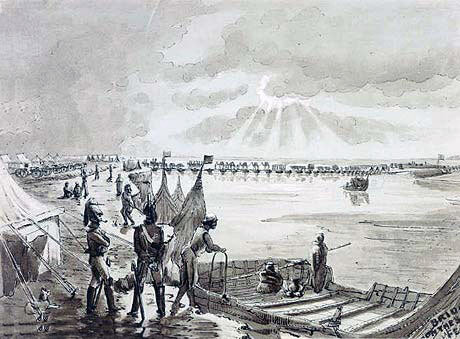
The Anglo-Indian army crossing the Sutlej River after the Battle of Sobraon on 10th February 1846 during the First Sikh War
Winner of the Battle of Sobraon: The British and Bengali troops of General Gough’s “Army of the Sutlej”.
British and Indian Regiments at the Battle of Sobraon:
British Regiments:
HM 3rd King’s Own Light Dragoons, now the Queen’s Royal Hussars. *
HM 9th Queen’s Royal Light Dragoons (Lancers), now the 9th/12th Royal Lancers. *
HM 16th Queen’s Light Dragoons (Lancers), now the Queen’s Royal Lancers. *
HM 9th Foot, later the Norfolk Regiment and now the Royal Anglian Regiment. *
HM 10th Foot, later the Royal Lincolnshire Regiment and now the Royal Anglian Regiment. *
HM 29th Foot, later the Worcestershire Regiment and now the Worcestershire and Sherwood Foresters Regiment. *
HM 31st Foot, later the East Surrey Regiment and now the Princess of Wales’s Royal Regiment.*
HM 50th Foot, later the Queen’s Own Royal West Kent Regiment and now the Princess of Wales’s Royal Regiment.*
HM 53rd Foot, later the King’s Shropshire Light Infantry and now the Rifles.*
HM 80th Foot, later the South Staffordshire Regiment and now the Staffordshire Regiment.*
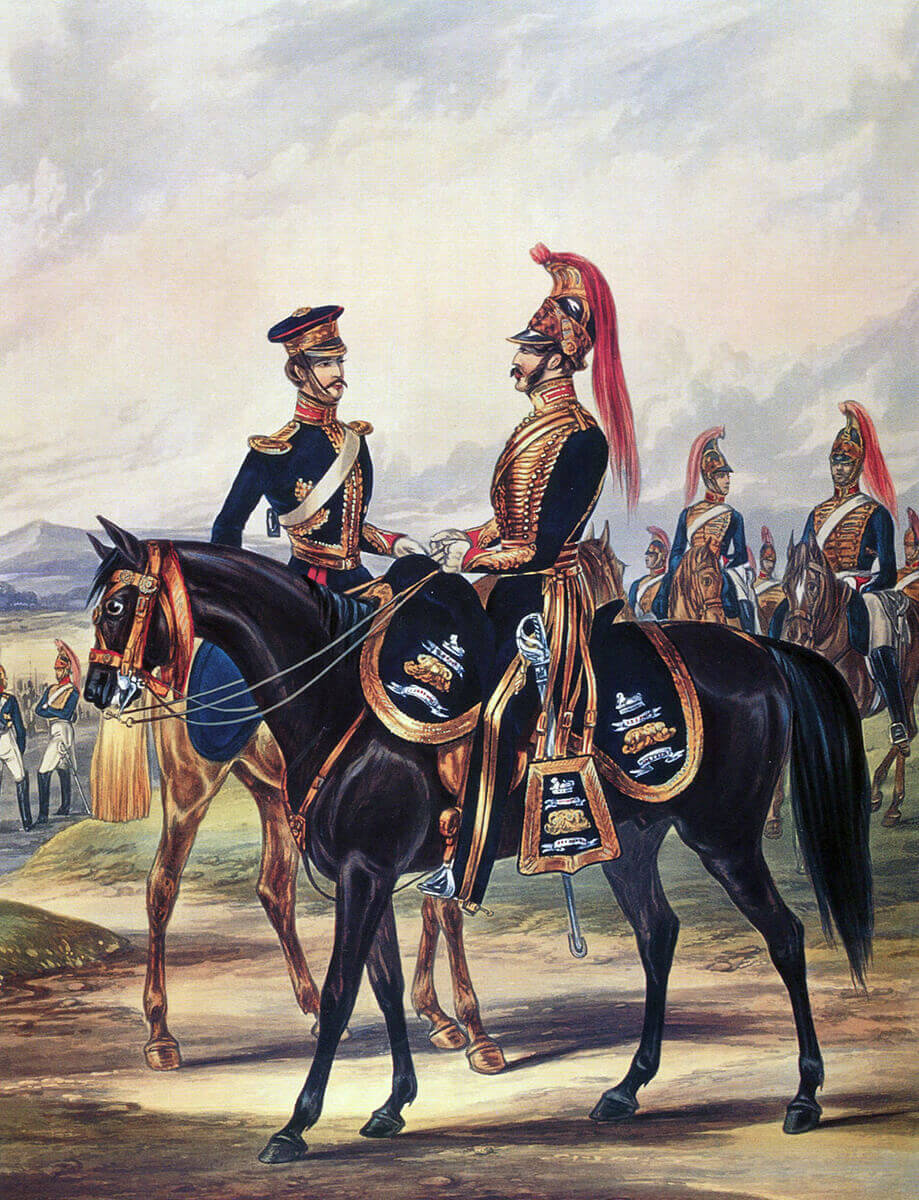
Bengal Light Cavalry: Battle of Sobraon on 10th February 1846 during the First Sikh War: print by Ackermann
Bengal Army Regiments:
Governor General’s Bodyguard.*
3rd Bengal Native Cavalry.*
4th Bengal Native Cavalry.*
5th Bengal Native Cavalry.*
2nd Bengal Irregular Cavalry.*
4th Bengal Irregular Cavalry.*
9th Bengal Irregular Cavalry.*
1st Bengal Europeans.*
4th Bengal Native Infantry.*
5th Bengal Native Infantry.*
16th Bengal Native Infantry.*
26th Bengal Native Infantry.*
31st Bengal Native Infantry.*
33rd Bengal Native Infantry.*
41st Bengal Native Infantry.*
42nd Bengal Native Infantry.*
43rd Bengal Native Infantry.*
47th Bengal Native Infantry.*
59th Bengal Native Infantry.*
62nd Bengal Native Infantry.*
63rd Bengal Native Infantry.*
68th Bengal Native Infantry.*
73rd Bengal Native Infantry.*
Nasiri Battalion (1st Gurkhas).*
Sirmoor Battalion (2nd Gurkhas).*
3rd King’s Light Dragoons at the Battle of Sobraon on 10th February 1846 during the First Sikh War: picture by Harry Payne
Nine horse artillery batteries.
Five field batteries
Siege train (six 18 pounders and eighteen heavy mortars and howitzers).
16th Queen’s Lancers: Battle of Sobraon on 10th February 1846 during the First Sikh War: picture by Richard Simkin
The Indian Army regiments:
Cavalry:
The Governor General’s Bodyguard continues as the President of India’s Bodyguard.*
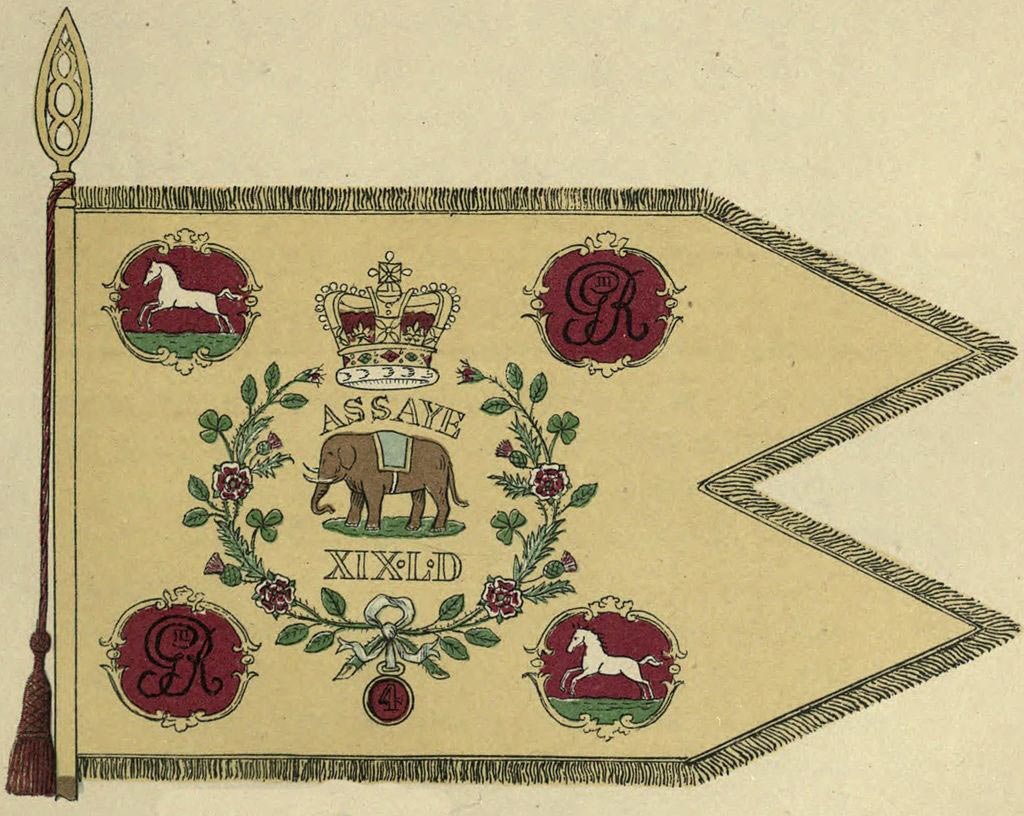
4th Bengal Irregular Cavalry in1861 became 3rd Bengal Cavalry, in 1903 3rd Skinner’s Horse, in 1922 the 1st Duke of York’s Own Skinner’s Horse and from 1950 the 1st Horse of the Indian Army.*
All the regular Bengal cavalry regiments that fought at Sobraon ceased to exist in 1857.
Order of Battle of the Army of the Sutlej at the Battle of Sobraon:
Commander-in-chief: Major General Sir Hugh Gough.
Second-in-command: Sir Henry Hardinge (Governor-General of Bengal).
Cavalry Division: Major General Sir Joseph Thackwell.
1st Brigade: Colonel Scott; HM 3rd King’s Own Light Dragoons, 4th and 5th Bengal Light Cavalry and 9th Bengal Irregular Cavalry.
2nd Brigade: Colonel Campbell; HM 9th Lancers and 2nd Bengal Irregular Cavalry.
3rd Brigade: Governor General’s Bodyguard.
4th Brigade: Brigadier Cureton; HM 16th Queen’s Lancers, 3rd Bengal Light Cavalry and 4th Bengal Irregular Cavalry.
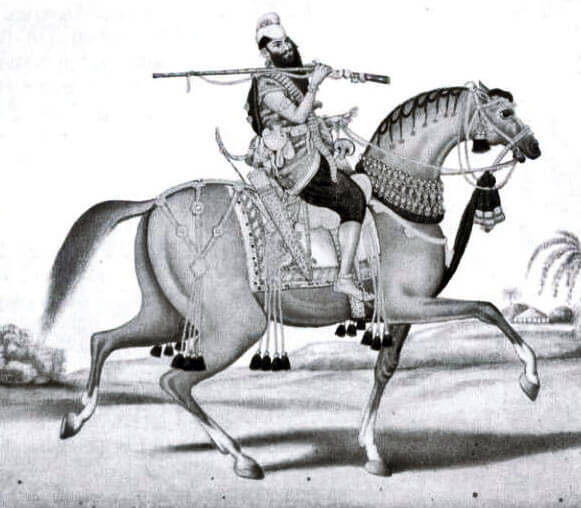
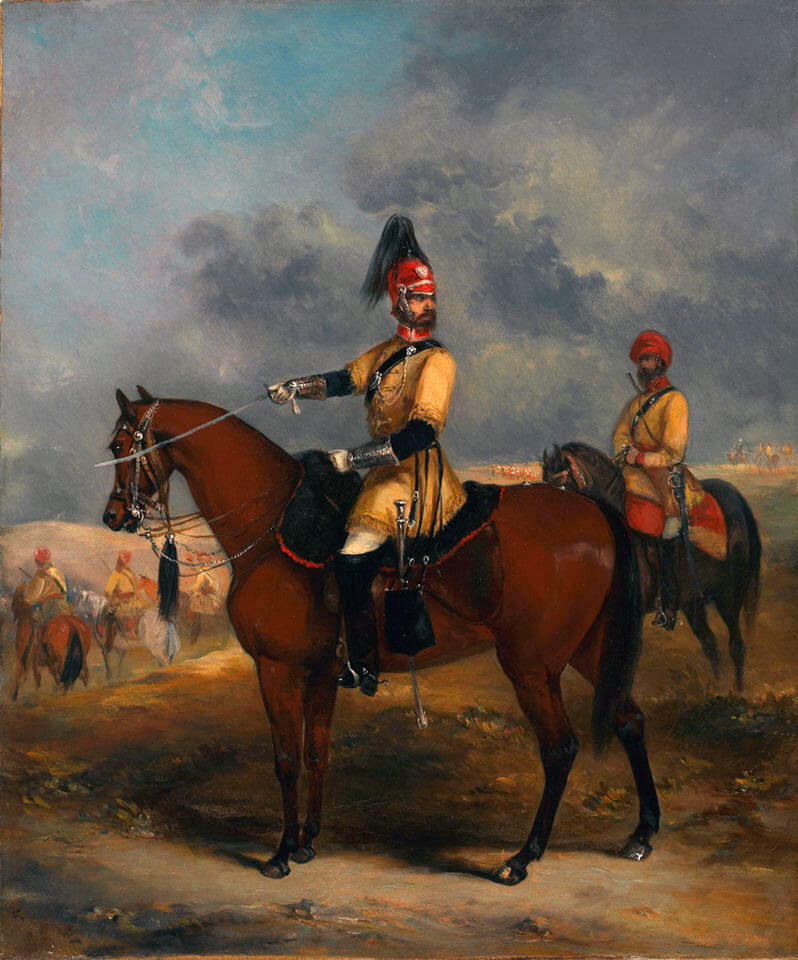
Sikh Cavalryman: Battle of Sobraon on 10th February 1846 during the First Sikh War
Artillery:
Nine horse artillery batteries.
Three field artillery nine pounder batteries.
Two field artillery 12 pounder batteries.
Six 18 pounders.
Eighteen heavy howitzers and mortars.
First Infantry Division: Major General Sir Harry Smith.
1st Brigade: Brigadier Hicks; HM 31st and 47th BNI.
2nd Brigade: Brigade Penny; HM 50th, 42nd BNI and Nasiri Battalion.
Second Infantry Division: Major General Sir Walter Gilbert.
3rd Brigade: Brigadier Taylor; HM 29th, 41st and 68th BNI.
4th Brigade: Brigade Maclaren; 1st Bengal European, 16th BNI and Sirmoor Battalion.
Third Infantry Division: Major General Sir Robert Dick.
5th Brigade: Brigadier Ashburnham; HM 9th, HM 62nd and 63rd BNI.
6th Brigade: Brigade Wilkinson; HM 80th, 33rd and 63rd BNI.
7th Brigade: Brigadier Stacey; HM 10th, HM 53rd and 49th and 59th BNI.
Detached Brigade: 4th, 5th and 73rd BNI.
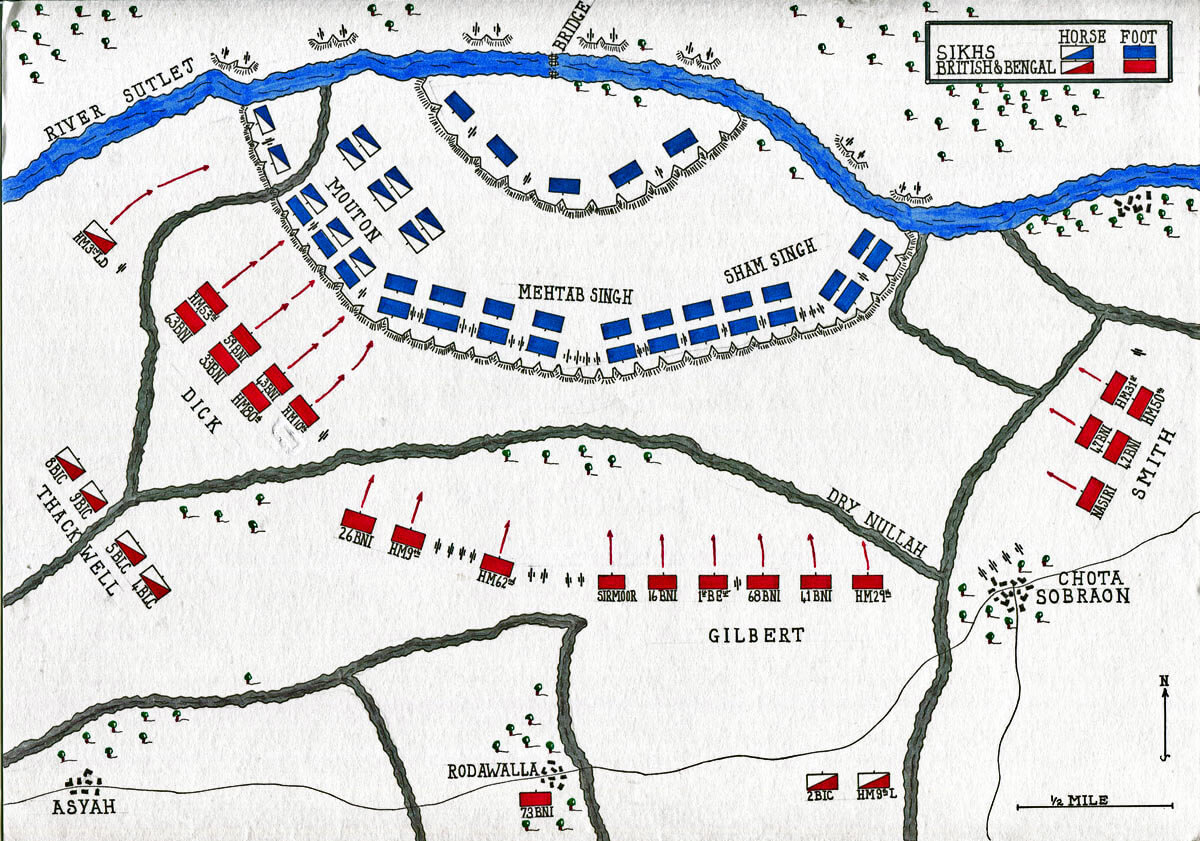
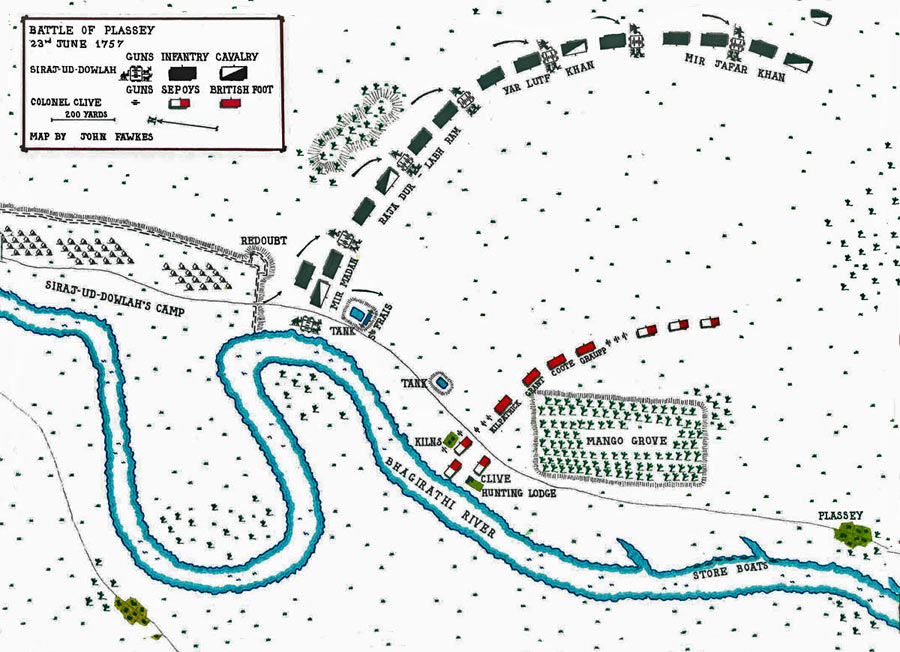
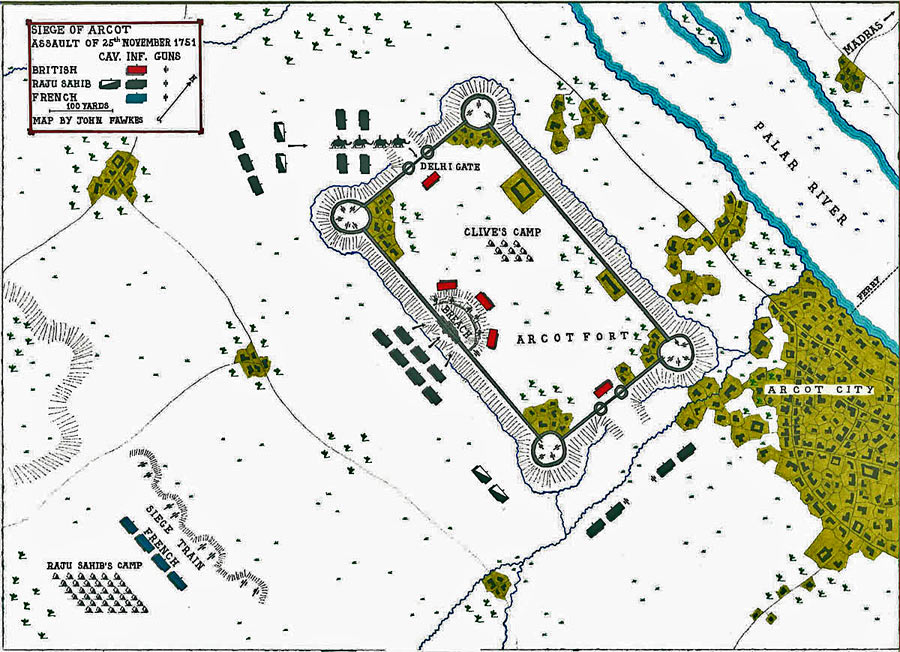
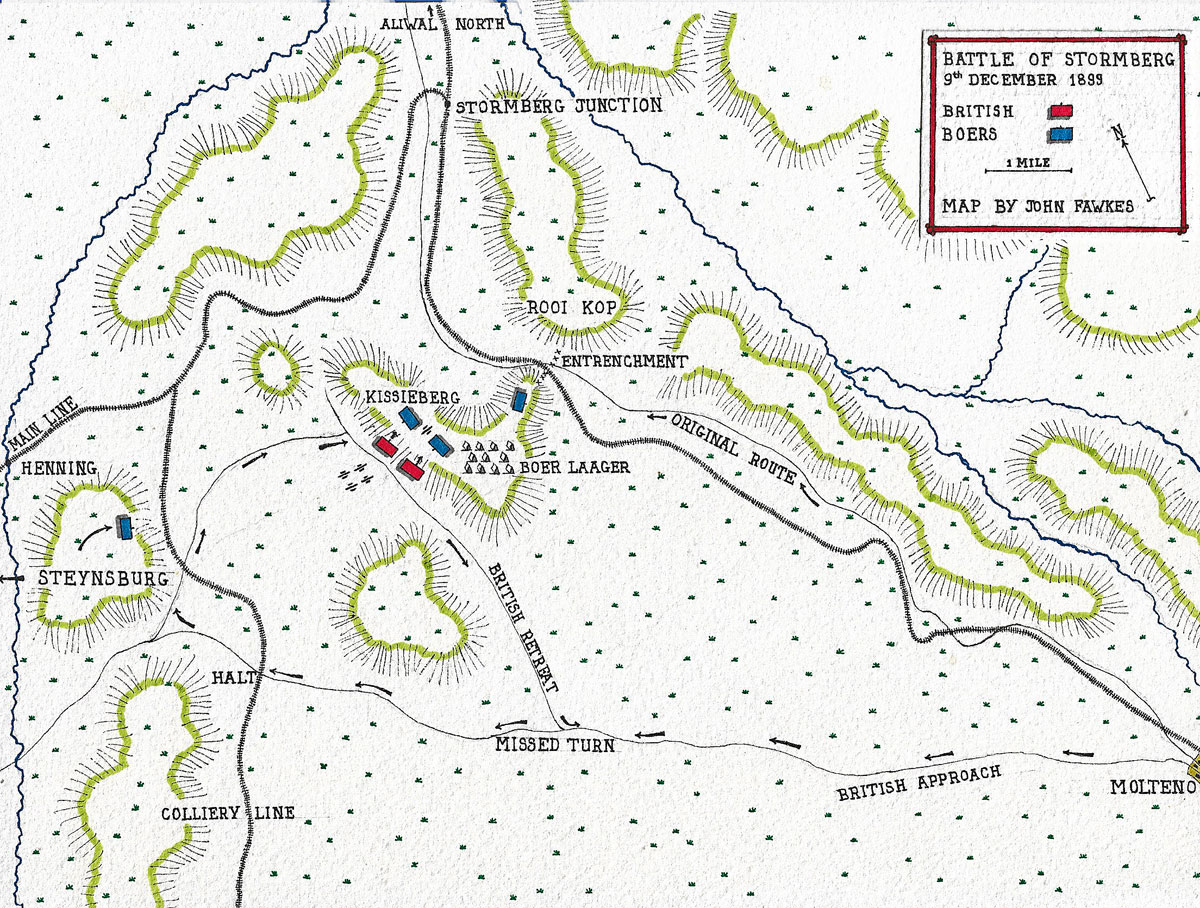
Map of the Battle of Sobraon on 10th February 1846 during the First Sikh War: map by John Fawkes
Account of the Battle of Sobraon:
Following the heavy defeat of Tej Singh by General Sir Harry Smith at the Battle of Aliwal on 29th January 1846, the Sikhs withdrew across the Sutlej River at every point except at Sobraon, where the Sikh army took post in its fortifications on the south bank, defying the British and Bengali army to attack.
On 8th February 1846, Major General Smith re-joined the main army, and Major General Sir Hugh Gough prepared to drive the Sikhs back across the Sutlej River with his complete force.
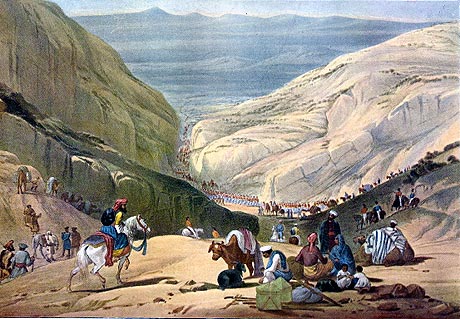
The Sikh position, comprising a semi-circular ditch and earth rampart, two miles in length, lay at a bend in the river. Dry ravines to the front provided added obstacles to an attack. A bridge of boats and several fords crossed the Sutlej River to the higher northern bank, where further fortifications and gun emplacements provided supporting fire to the main position.
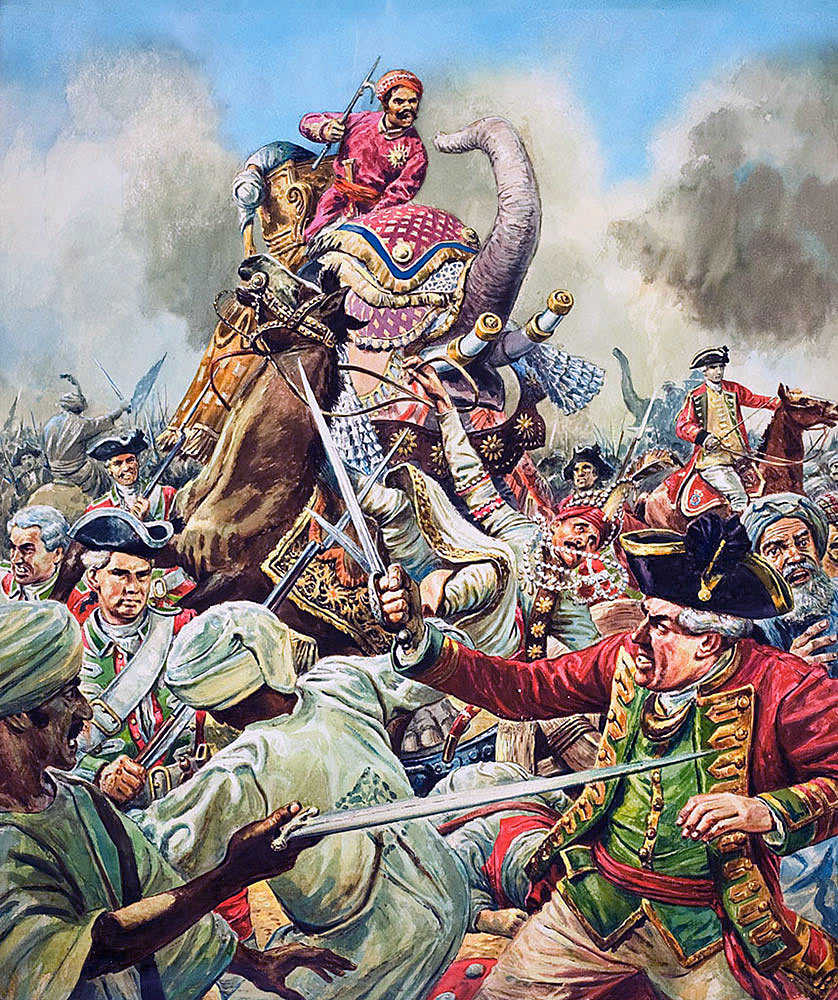
Shaam Singh Attari leading the last Sikh charge at the Battle of Sobraon on 10th February 1846 during the First Sikh War
Hardinge suggested to Gough a plan, whereby a force would be ferried across the river upstream and descend on the Sikh rear and flank, but Gough rejected the plan as leaving him open to an attack in the rear by the powerful Sikh force on the south bank.
True to his usual inclination, Gough resolved on a bombardment by the siege train, followed by a frontal infantry attack on the Sikh positions, using the full strength of his 15,000-strong army.
Initially, the artillery officers of the siege train confidently predicted that the eighteen heavy howitzers and five 18 pounders would make short work of the Sikh fortifications, but, having examined the position, they changed their minds and advised against the plan.
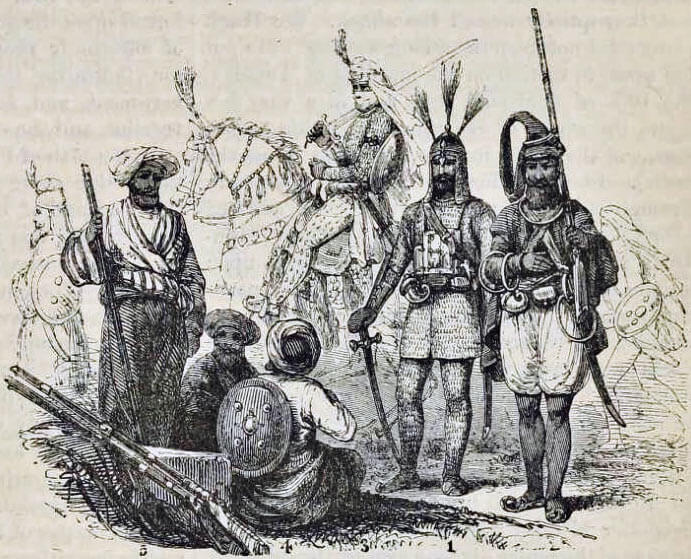
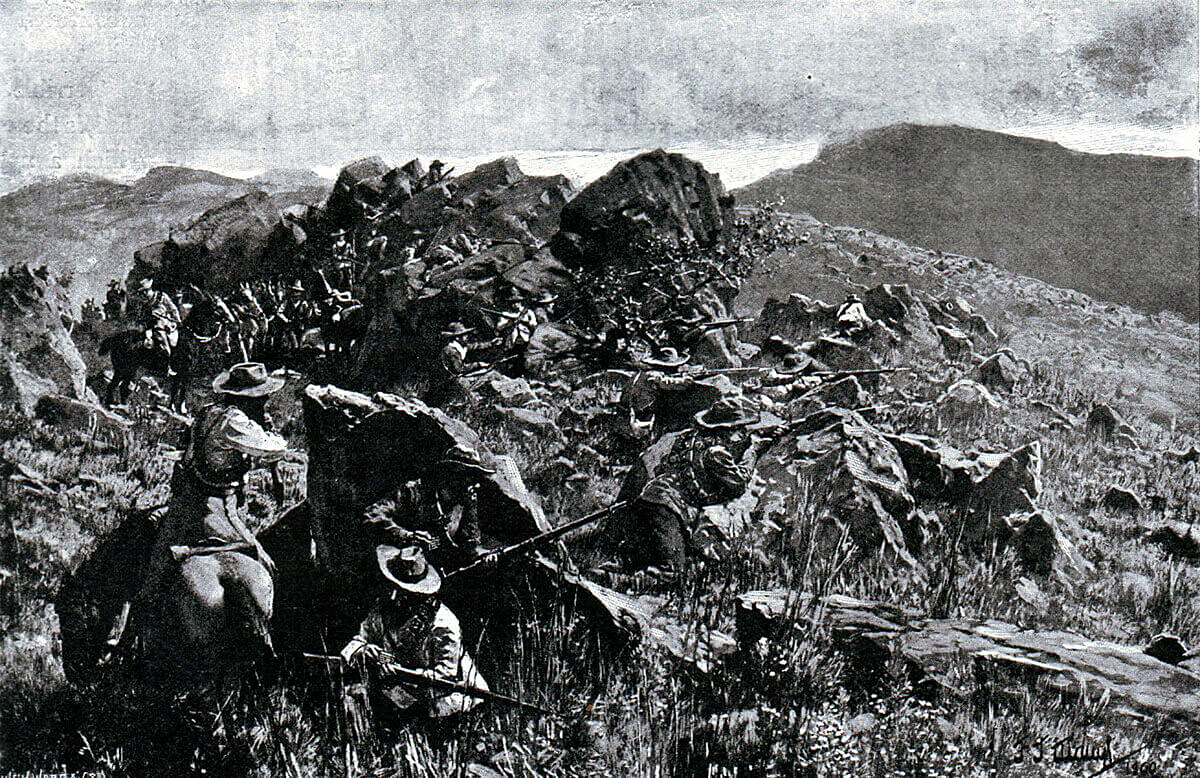
Akali Sikh Warriors: Battle of Sobraon on 10th February 1846 during the First Sikh War
Gough was not inclined to cancel the assault, and, after consultation with other officers, decided to deliver the attack on the western side of the Sikh position, the weakest point. Most of the heavy guns were assigned to bombard these western defences, with the assault to be delivered by General Dick’s division. Gilbert’s division would menace the southern section of the defences, while Harry Smith threatened the eastern. Scott’s cavalry brigade supported Dick, while Campbell supported Smith. Brigadier Cureton took his brigade upstream to create a diversion. The lighter guns were spread around the Sikh position, concentrated particularly at the south-east corner.

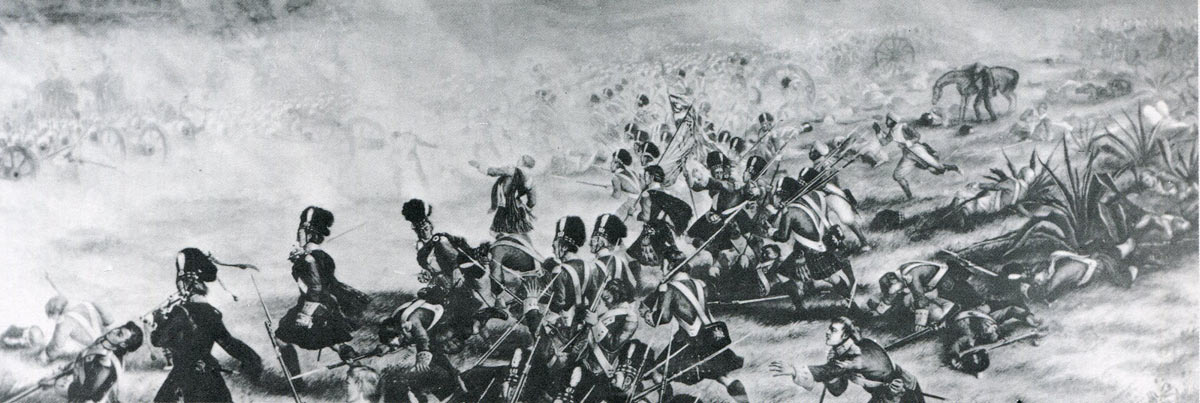
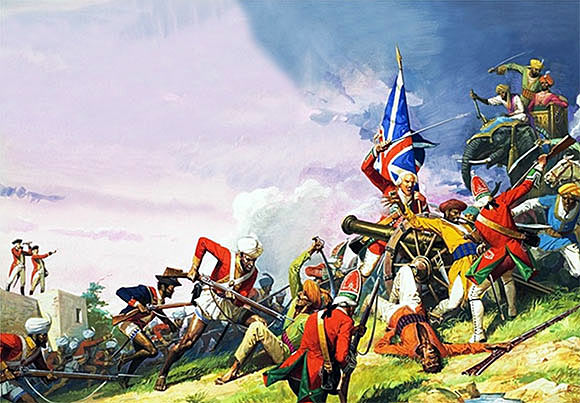
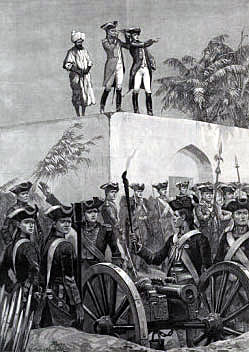
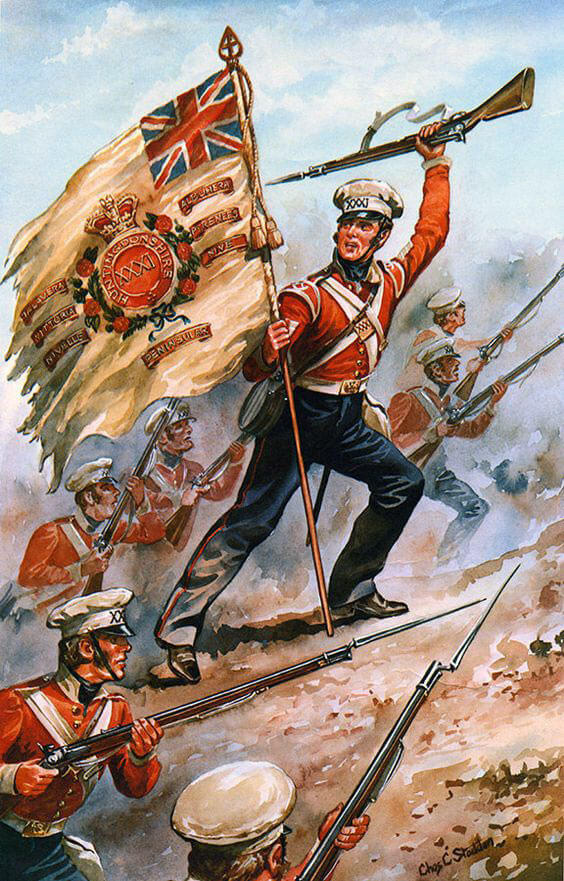
HM 31st Regiment at the Battle of Sobraon on 10th February 1846 during the First Sikh War: Sergeant McCabe is holding the Regimental Colour on the Sikh rampart
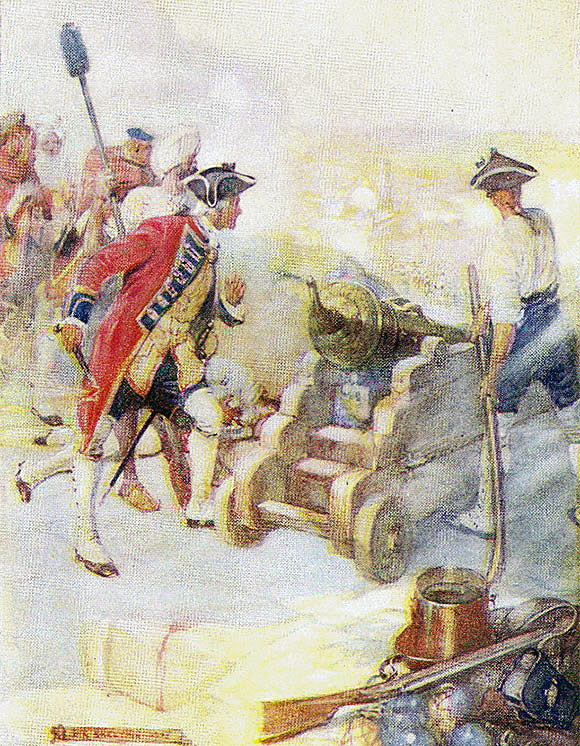
At 3am on 10th February 1846, the British and Bengali regiments got under arms as silently as possible, but no action could be begun due to a dense mist, which lasted until around 6am. As the mist dispersed, the artillery opened fire on the Sikh lines.
The bombardment was a failure. The heavy batteries, short of gunners, were forced to borrow soldiers from the field batteries, many of whom had no experience of serving the larger guns. Due to the recent arrival of the siege train and the lack of time for preparation, insufficient ammunition had been brought up to the gun positions, which were themselves too far back. By around 8.30am the gun ammunition had run out, with little damage inflicted on the Sikh positions.
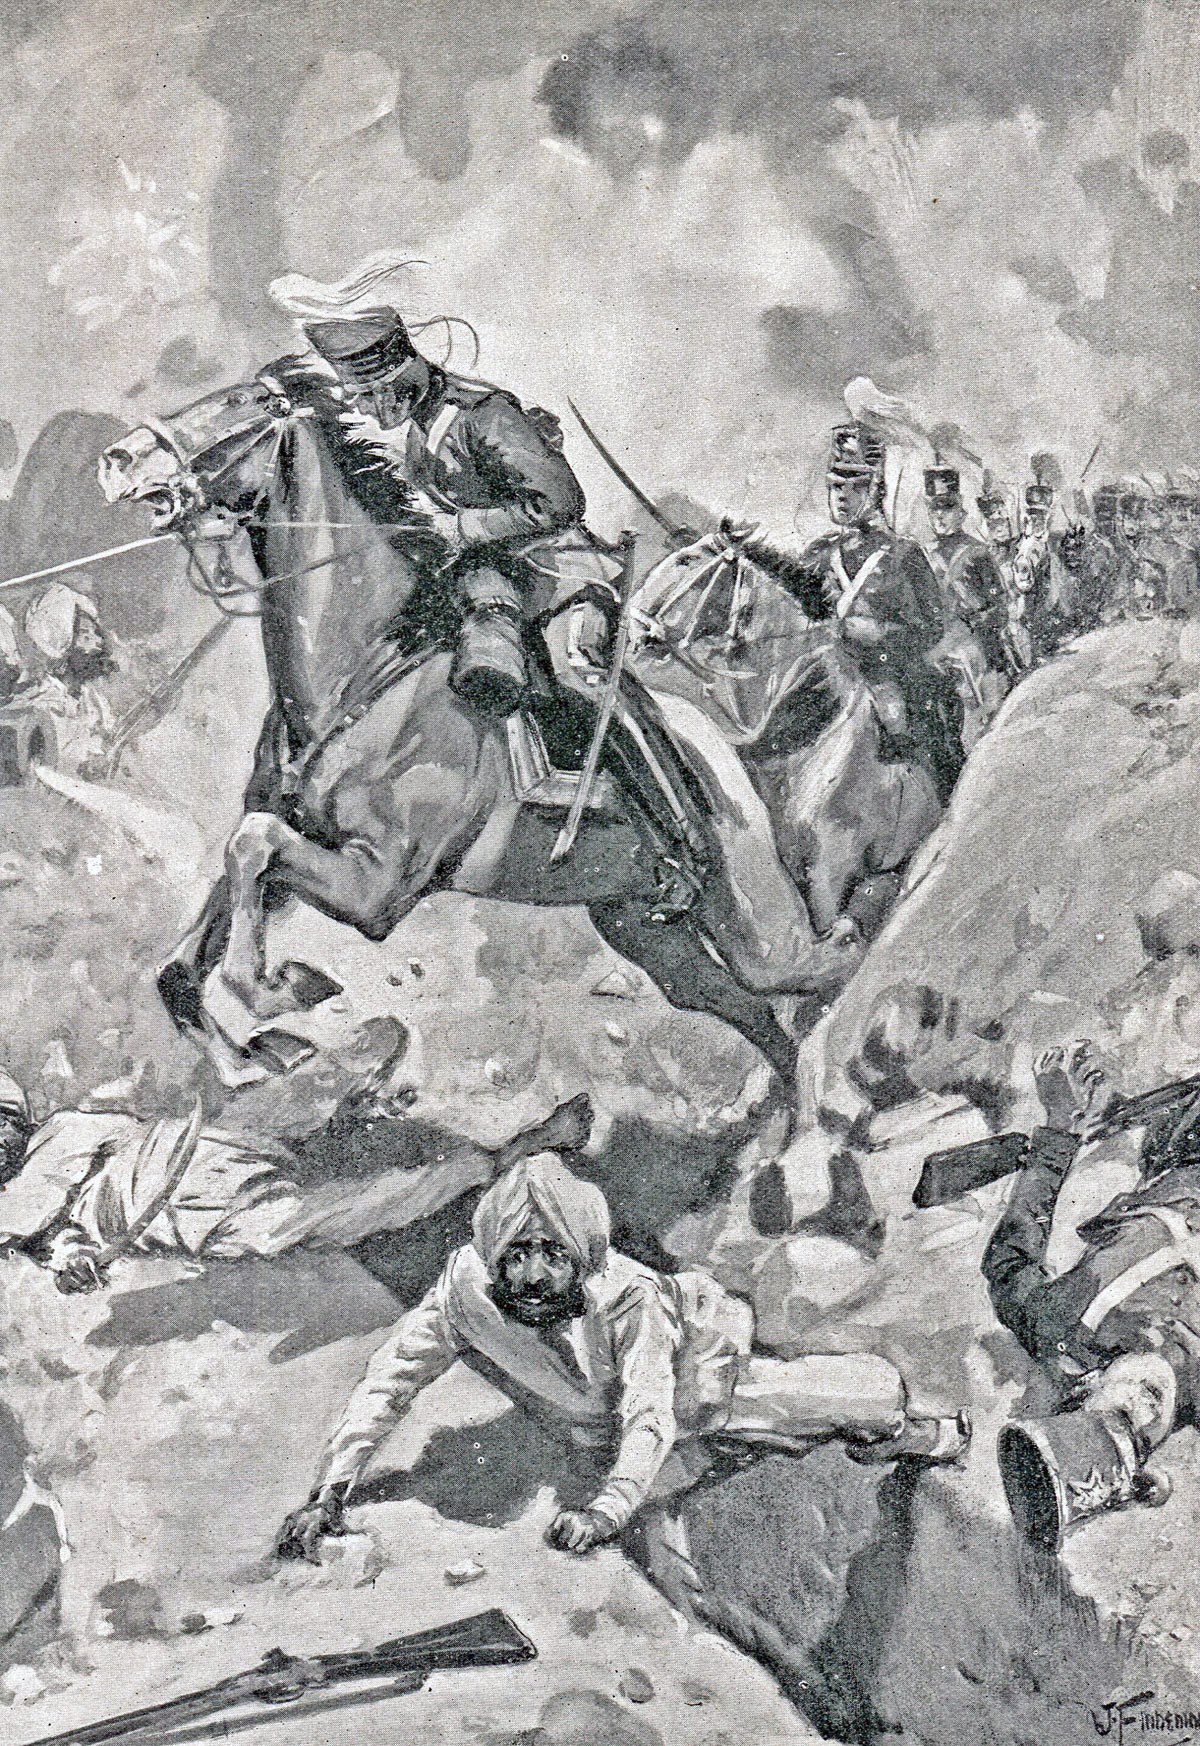
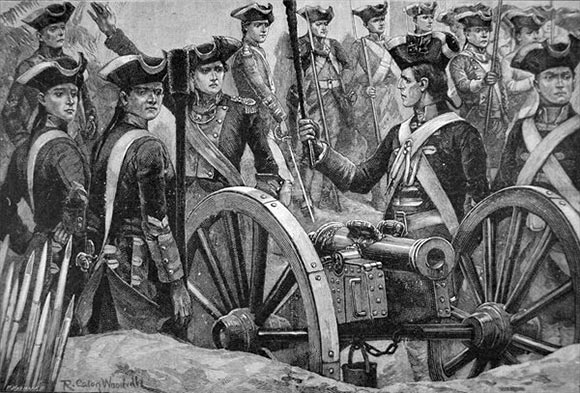
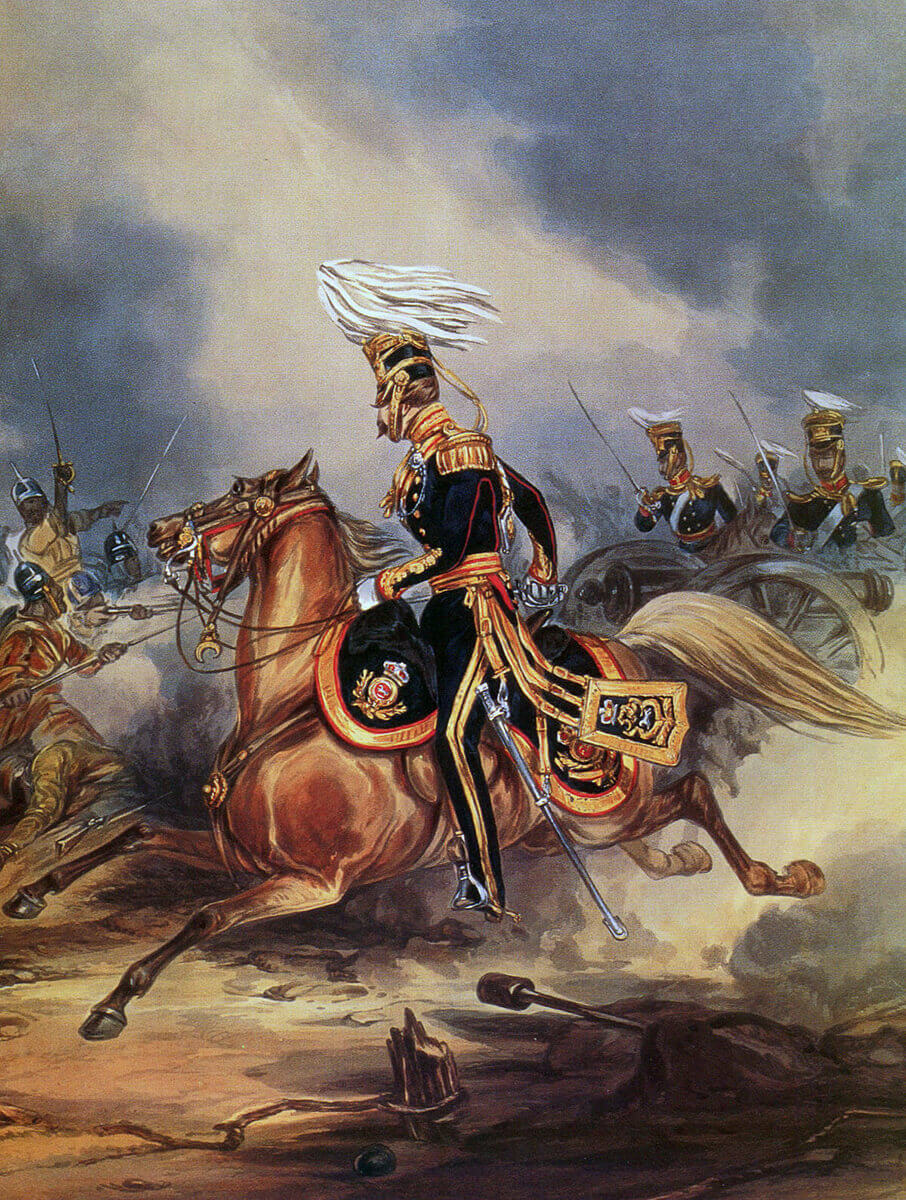
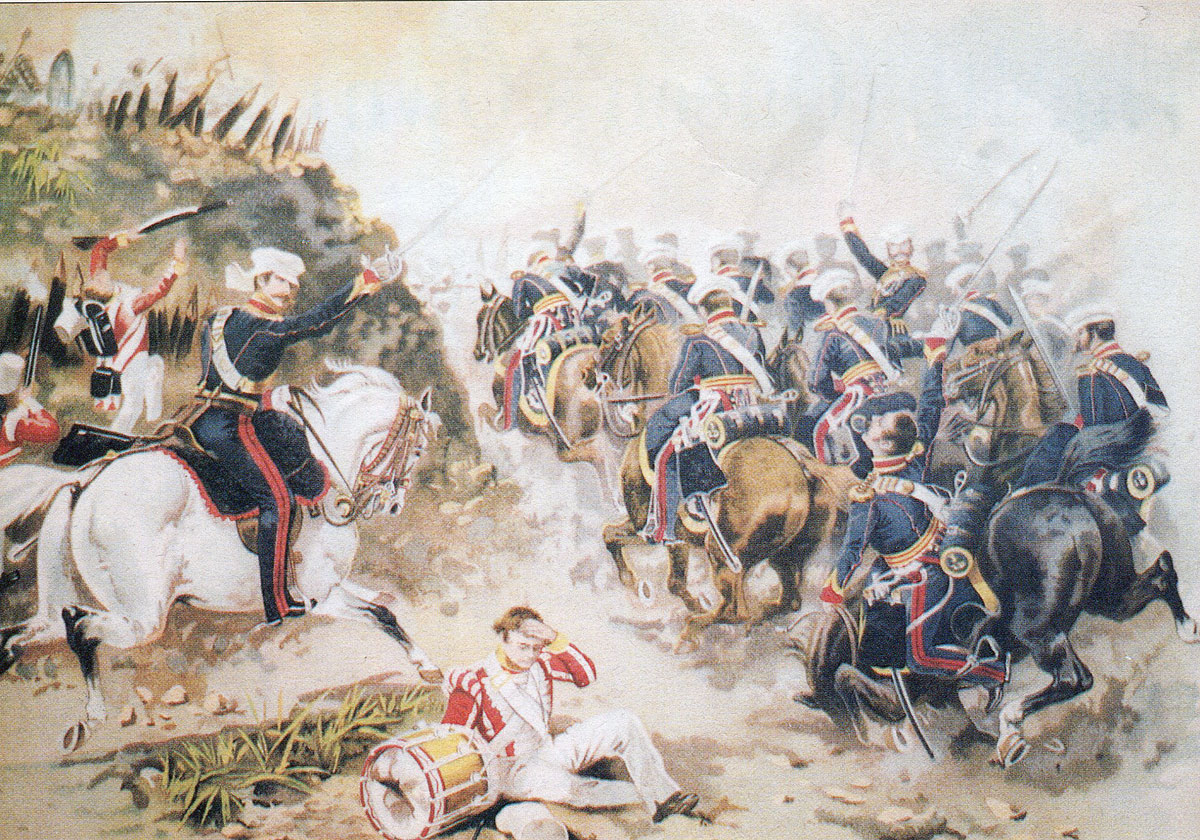
Sir Joseph Thackwell leads 3rd King’s Light Dragoons through the Sikh rampart at the Battle of Sobraon on 10th February 1846 during the First Sikh War
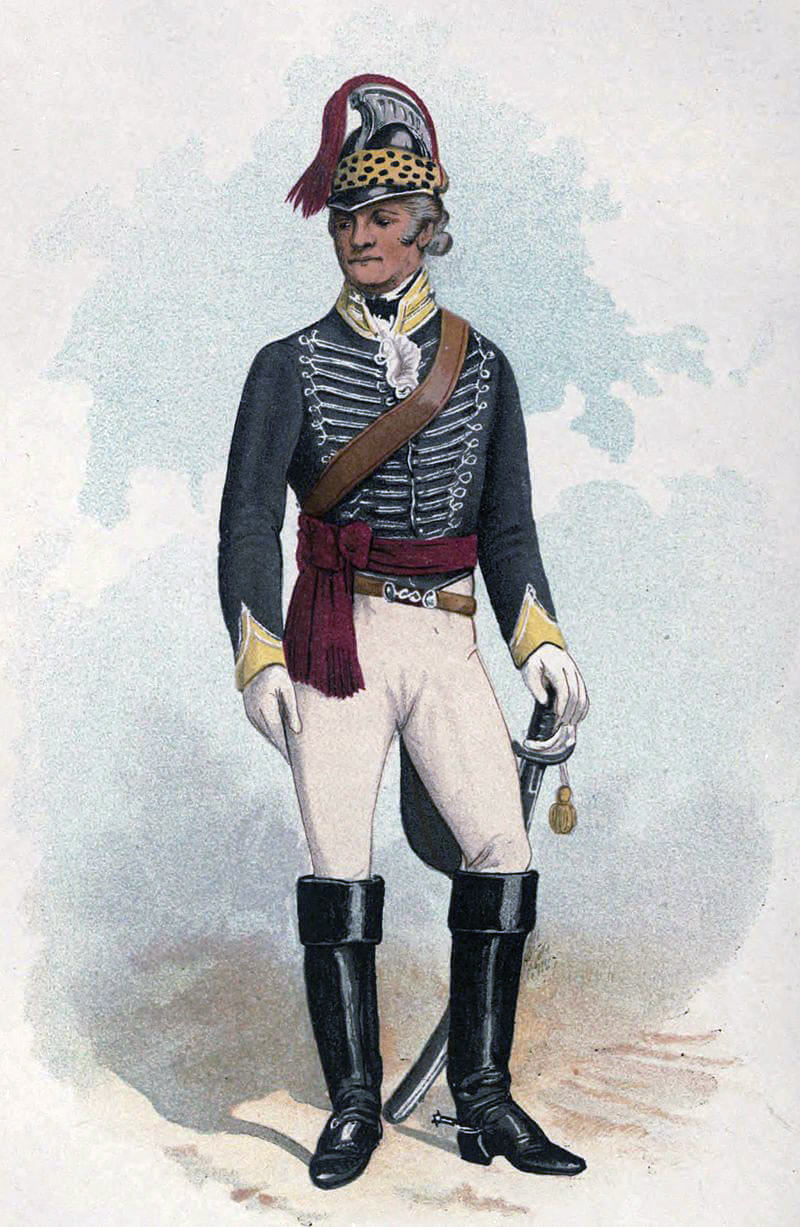
Major General Sir Joseph Thackwell: Battle of Sobraon on 10th February 1846 during the First Sikh War
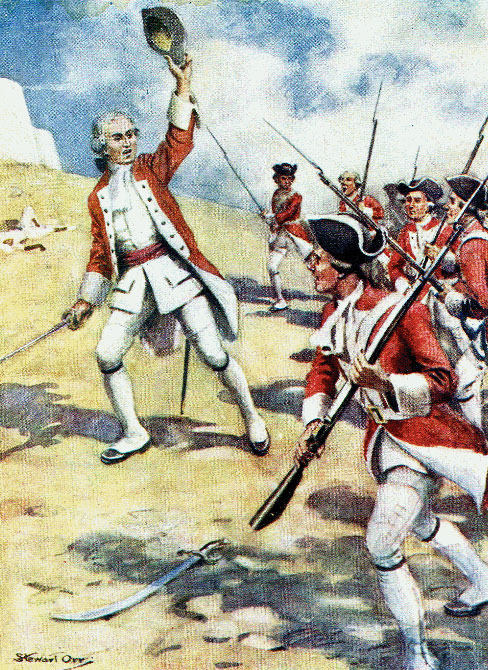
Gough’s reaction to this anti-climax was characteristic: “Thank God.” He said. “Now I’ll be at them with the bayonet” and ordered Dick to attack with his infantry.
It was at this point that a series of messages arrived from Hardinge urging Gough to abandon the attack. Gough ignored these pleas and ordered Dick forward.
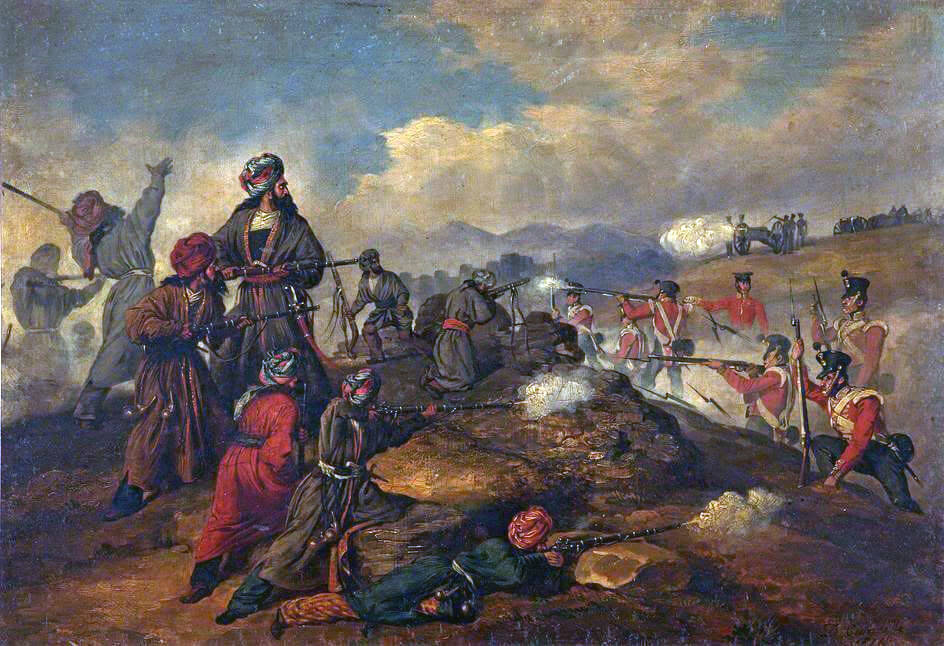
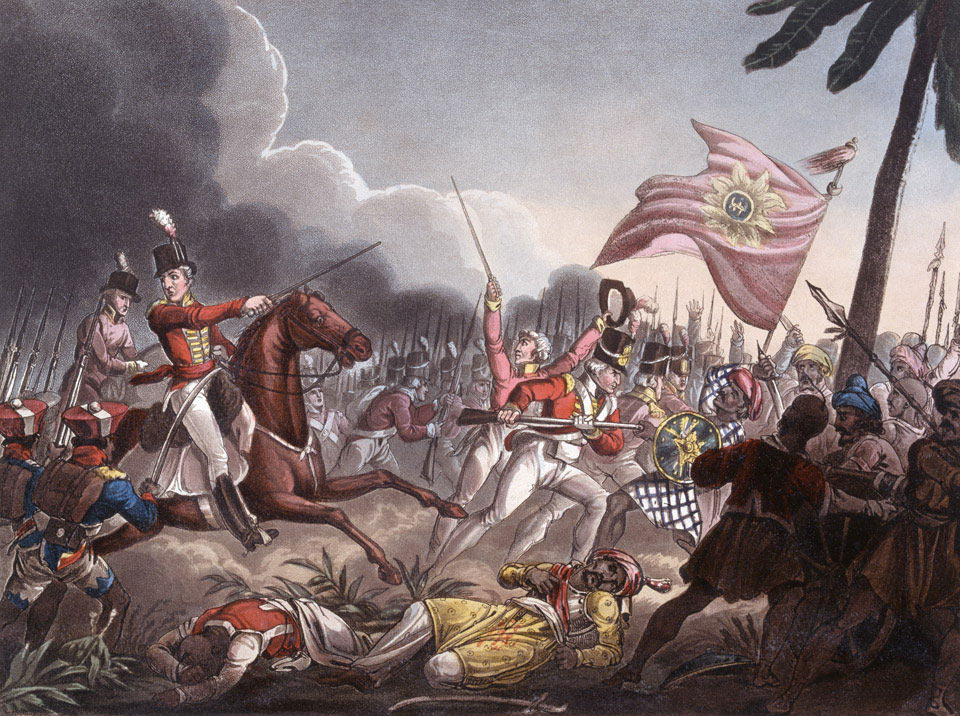
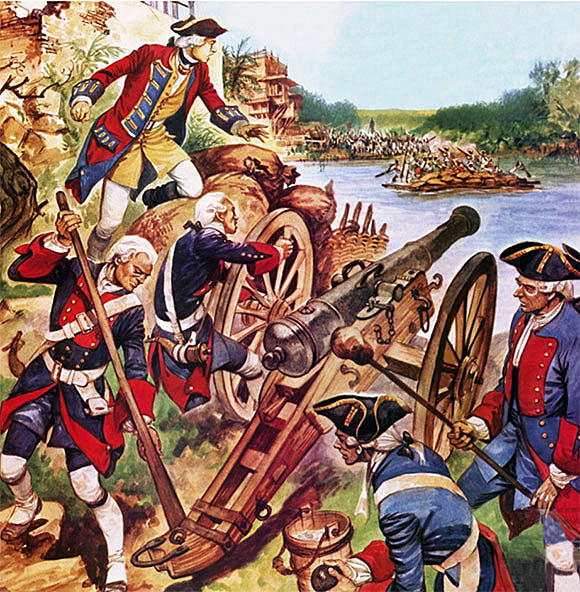
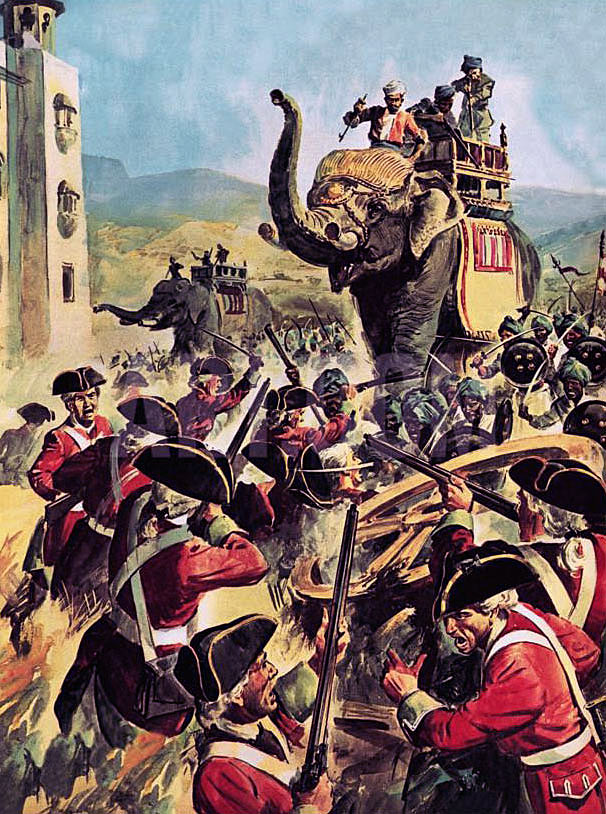
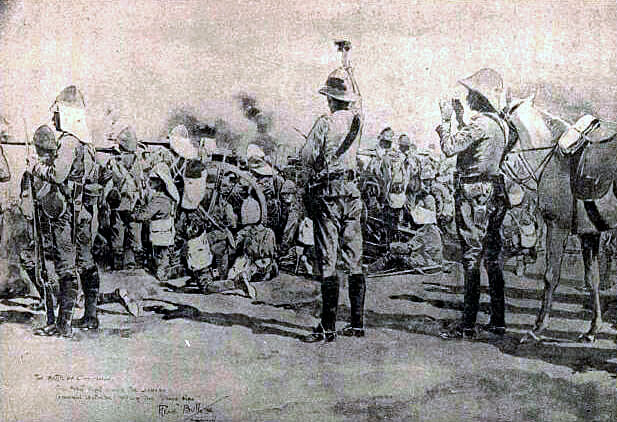
At 9am on 10th February 1846, Dick’s division went into the attack, led by Stacey’s brigade with HM 10th Foot on the right and 43rd and 59th Bengal Native Infantry and HM 53rd Foot in line. Horse and Field Artillery batteries galloped forward on the flanks and opened a covering barrage.
The Sikh troops and guns opened a heavy fire in response, but Stacey’s regiments stormed the ditch and wall, driving the defenders from their positions. The Sikhs rallied and counter-attacked Stacey’s brigade.
Wilkinson’s and Ashburnham’s brigades of Dick’s division came up in support of Stacey. Along the rest of the line, Gough ordered Gilbert and Smith to launch feint attacks, to draw off the Sikhs from the western face of the entrenchments. These feints had little effect, the Sikhs in overwhelming numbers driving Dick’s brigades out of the positions they had taken.
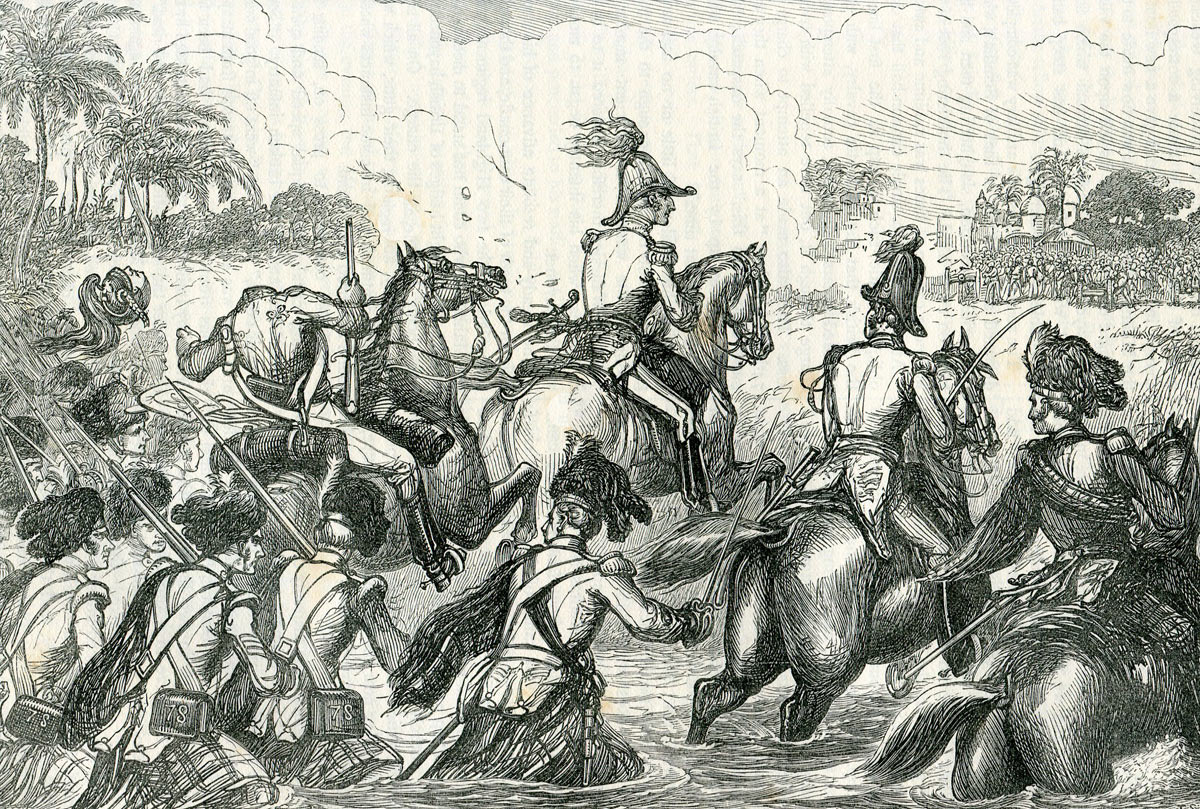
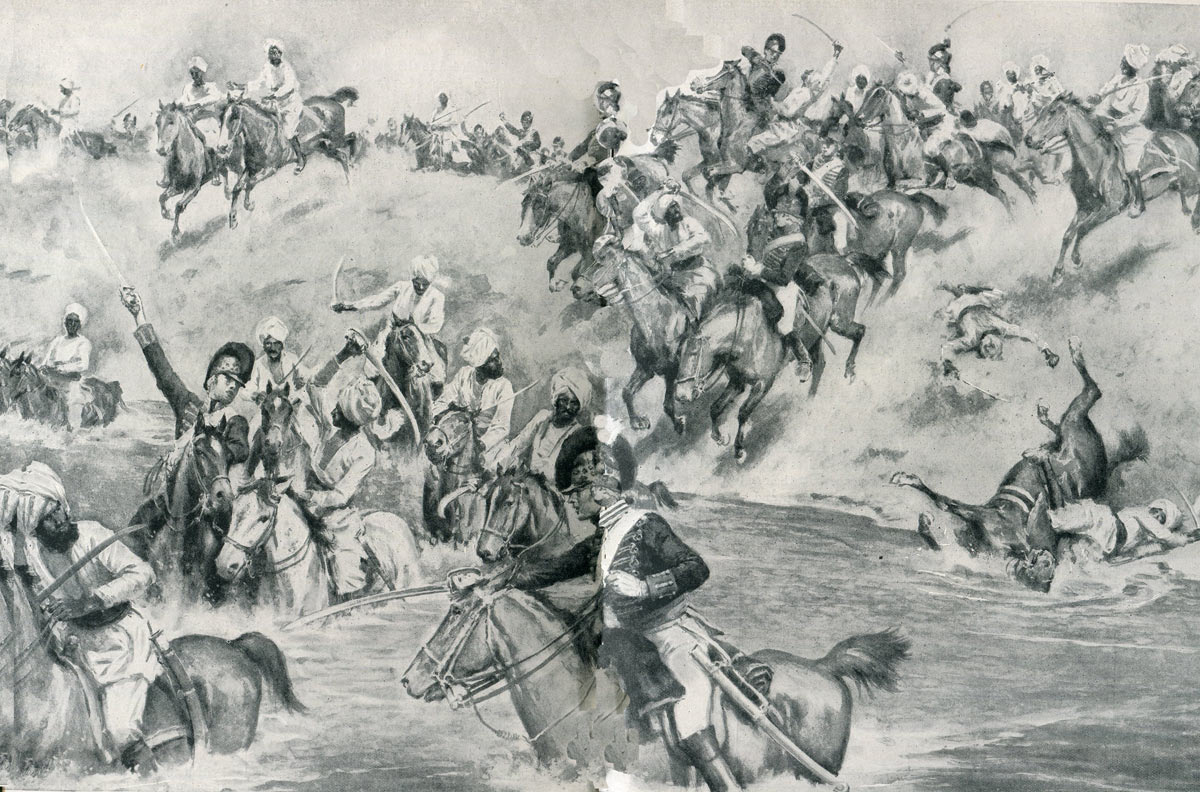
Struggle on the Bridge of Boats over the Sutlej River at the Battle of Sobraon on 10th February 1846 during the First Sikh War
With the collapse of the assault on the western face of the entrenchments, Gough ordered Gilbert and Smith to convert their feints into full attacks on the southern and eastern sections of the Sikh position. But the withdrawal of Dick’s division enabled the Sikhs to move substantial forces into the newly threatened sections. Taylor’s and Maclaren’s brigades reached the ditch, to find the mound behind it too high to be climbed without ladders, which they did not have. The brigades were driven back with both commanders killed. At the eastern end, Smith’s division only managed to establish a toehold in the Sikh fortifications, struggling to maintain it in the face of rising casualties.
On the western flank of the position, Dick’s brigades reformed and renewed the attack, now finding the Sikh presence heavily diluted from sending reinforcements to the other parts of the line. On the southern section, Gilbert’s division was finally forcing its way into the Sikh position.
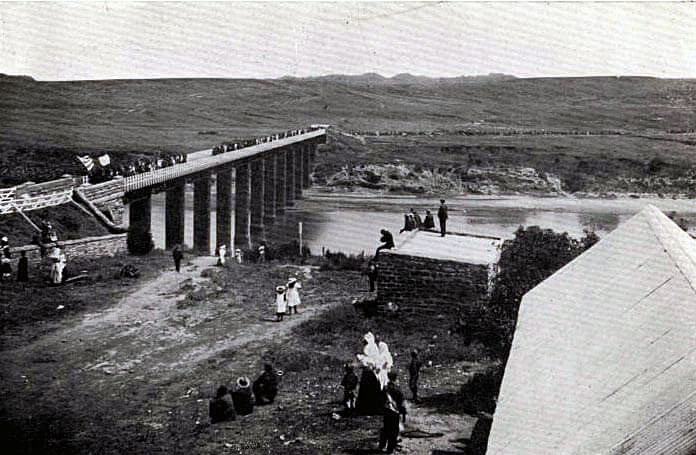
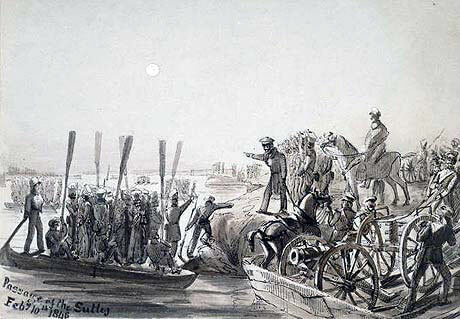
Bridging the Sutlej River: Battle of Sobraon on 10th February 1846 during the First Sikh War
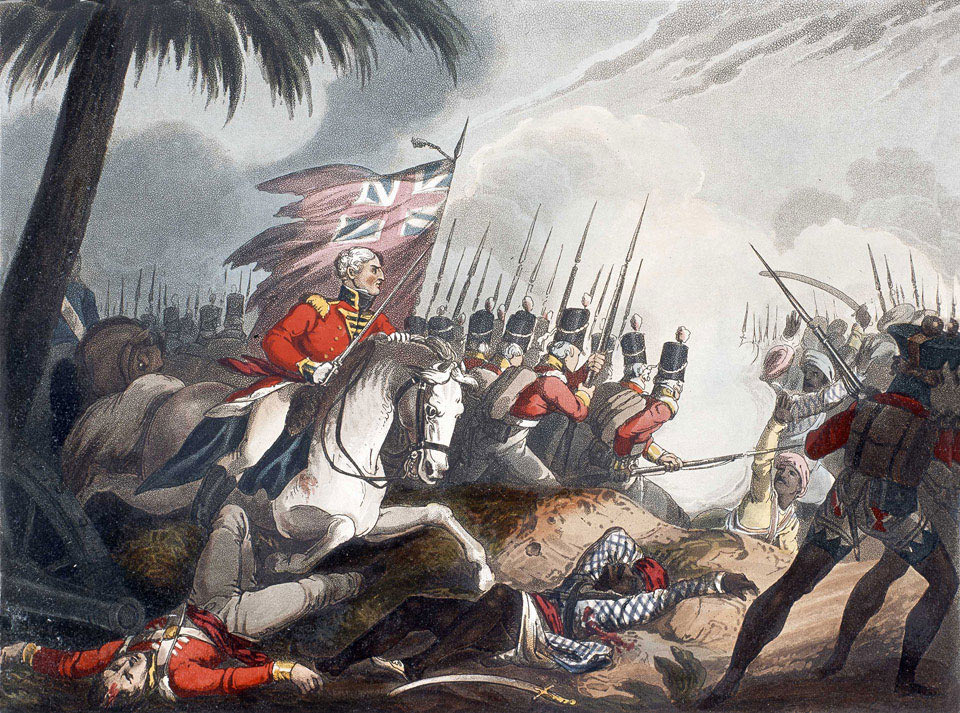
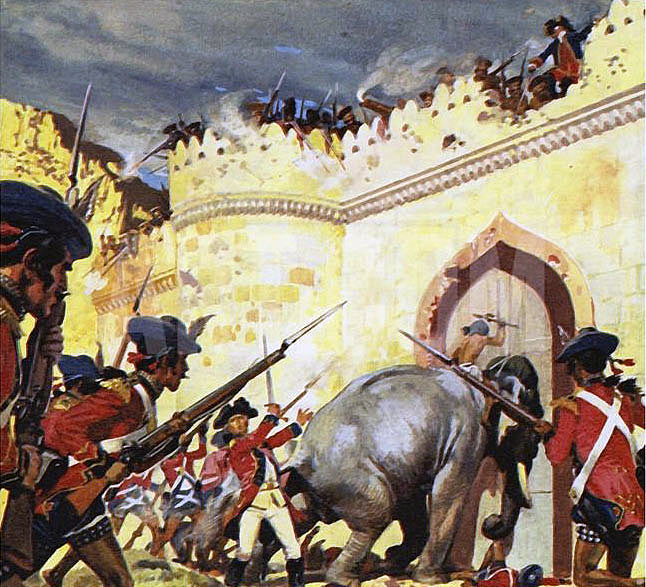
At the extreme western end of the Sikh line, near the bank of the Sutlej River, where the fortifications were all but deserted, the inimitable 3rd King’s Own Light Dragoons found a way across the ditch and bank and infiltrated in single file, led by Sir Joseph Thwackwell. The regiment formed up and cut loose in the rear of the Sikh position.
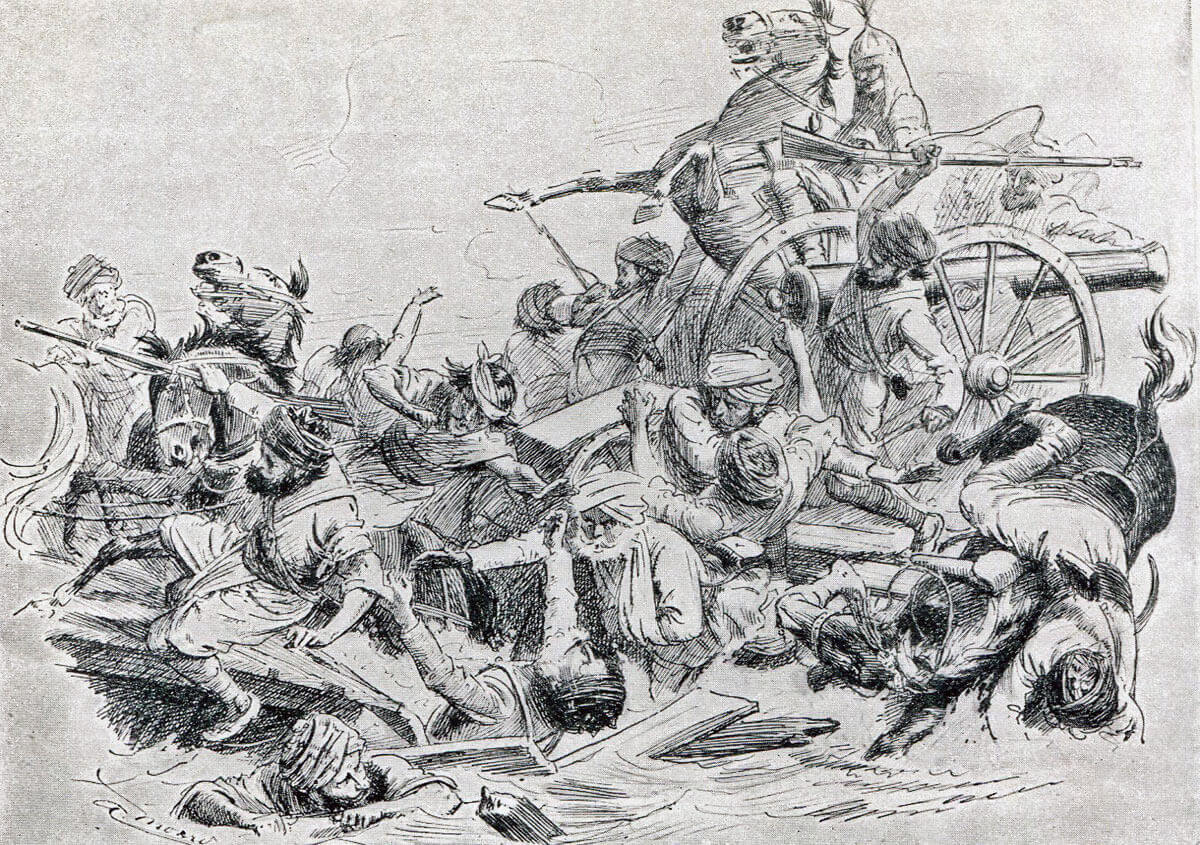
Subject to these increasingly successful attacks, the Sikh line began to collapse, the soldiers making for the river crossings to escape. Unfortunately, this was not possible. During the night, heavy rainfall in the mountains had caused the Sutlej River to rise by seven foot, flooding all the fords. In addition, for some reason, Tej Singh had deliberately cut his army off from safety, by removing the central section of the bridge of boats, making it unusable.
The retreating Sikh army attempted to cross by the swollen fords, or crowded onto the southern section of the bridge, which began to collapse, throwing the soldiers into the torrential river. Many were drowned, while Gough’s guns bombarded the struggling masses.
At some time around midday the battle came to an end.
Crossing the Sutlej River: Battle of Sobraon on 10th February 1846 during the First Sikh War

Generl Sir Robert Dick: Battle of Sobraon on 10th February 1846 during the First Sikh War: picture by William Salter
Casualties from the Battle of Sobraon: Sikh casualties are said to have been 9,000 men killed or wounded. Every one of the 67 Sikh guns was captured.
The casualties of the British and Bengal army were 2,283.
Among the dead in the British and Bengali army were General Sir Robert Dick, the commander of the 1st Infantry Division and two of his brigadiers, Taylor and Maclaren. The commander of the 2nd Division, Major General Gilbert was wounded, as was Brigadier General Penny.
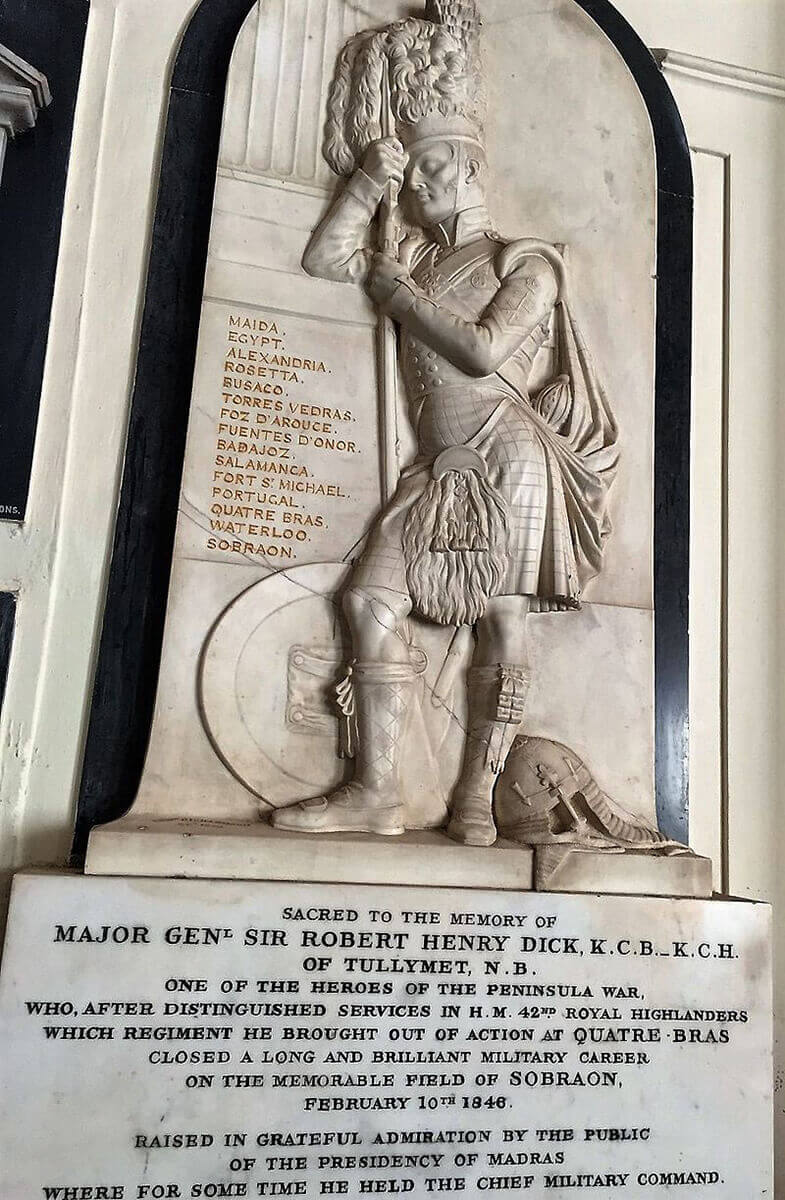
Memorial to General Sir Robert Dick in Madras Cathedral: Battle of Sobraon on 10th February 1846 during the First Sikh War
Follow-up to the Battle of Sobraon:
The Battle of Sobraon ended the First Sikh War.
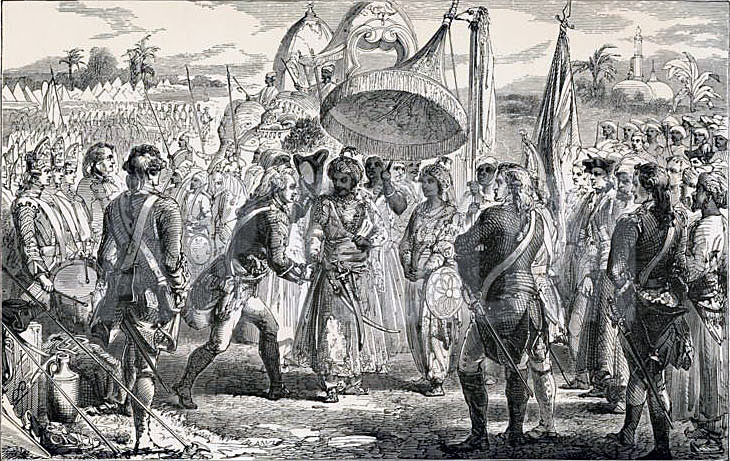
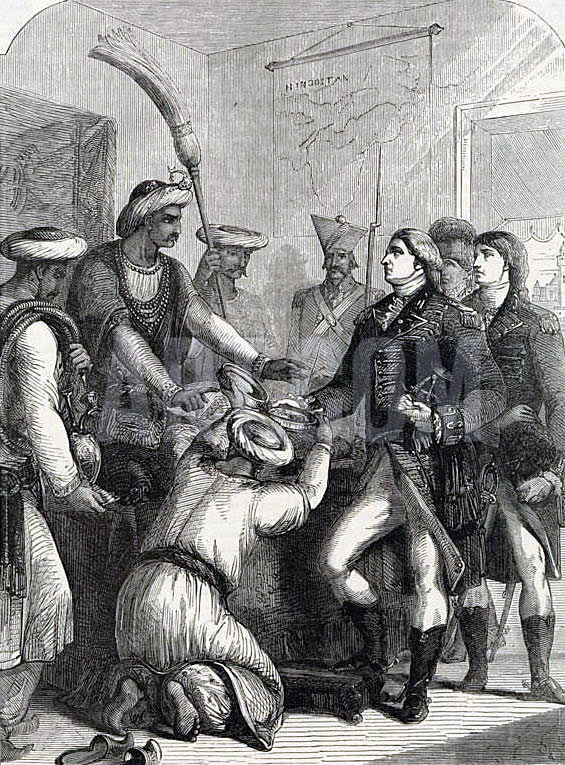
Following the battle, Gough crossed the Sutlej River with his army, and, on 14th February 1846, Gholab Singh arrived in the British camp to negotiate peace. Terms were arranged and Gough marched on to Lahore, the Sikh capital. However, few thought this would end the fighting between the Sikhs and the British, and, within a year, the Second Sikh War broke out.
Anecdotes and traditions from the Battle of Sobraon:
- Sobraon was the third battle of the First Sikh War in which the 3rd King’s Own Light Dragoons distinguished themselves, following the Battle of Moodkee and the Battle of Ferozeshah. In the Second Sikh War, the 3rd would charge again at the battles of Ramnagar, Chillianwallah and Goojrat.
- General Sir Robert Dick, who was killed in the battle, lost an arm during the Peninsular War.
- General Sir Joseph Thackwell, who commanded the Cavalry Division at the Battle of Sobraon, served with the 15th Light Dragoons through much of the Peninsular War. Thackwell led his squadron in several charges at the Battle of Waterloo. Thackwell lost his left arm during the Battle of Waterloo, but still rode in the last charge, holding his reins in his teeth.

Captain Robert Troup, 63rd Bengal Native Infantry, who fought at the Battle of Sobraon on 10th February 1846 during the First Sikh War
- A curious incident took place in Campbell’s cavalry brigade. The major of HM 9th Lancers, Major Hope-Grant, accused the brigade commander, Colonel Campbell of the 9th Lancers, of being drunk during the battle, and threatened to arrest him. In retaliation Campbell put Hope-Grant in arrest. The impasse was resolved by Gough, who took no action against either officer. Hope-Grant was subsequently one of the leading British cavalry commanders in the Indian Mutiny.
- The 63rd Bengal Native Infantry, veterans of the Battle of Sobraon, survived the Indian Mutiny to recruit Nepalese soldiers and become the 9th Gurkha Rifles. Despite its number, the 9th is the senior Gurkha regiment due to the seniority of the 63rd in the Bengal line. At Sobraon the 63rd captured a Sikh standard, which remains in the possession of the regiment, now part of the Indian Army.
- HM 31st Foot went into the Battle of Sobraon with no field officers. Both ensigns carrying the colours became casualties during the assault on the Sikh fortifications. Sergeant McCabe took up the Regimental Colour and carried it to the top of the rampart. On the anniversary of Sobraon, the Regimental Colour of the 31st is carried to the Sergeant’s Mess and entrusted to the Sergeants. See the similar customs that arose after the Battle of Ferozeshah. Sergeant McCabe received a commission and was killed during the Indian Mutiny.
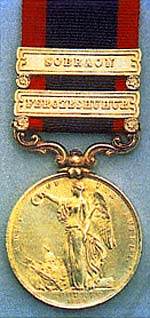
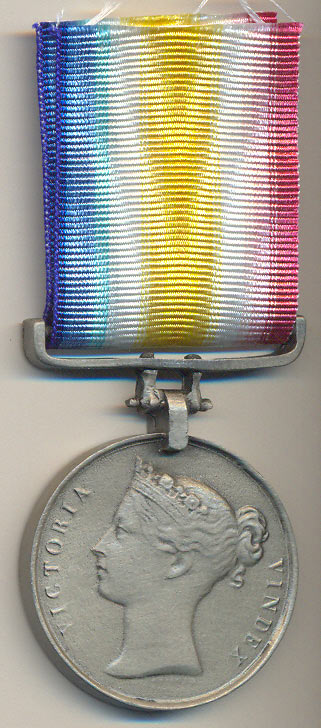
Sutlej Campaign, 1845-6 Medal with clasp for the Battle of Sobraon on 10th February 1846 during the First Sikh War
Medals and decorations: British and Indian soldiers who took part in the First Sikh War received the medal entitled “Sutlej Campaign, 1845-6”.
Where a soldier took part in one or more battles, his medal would have the first battle inscribed on the reverse side of the medal and the remaining battles on clasps on the ribbon.
The battles being described as: “Moodkee 1845”, “Ferozeshuhur 1845”, “Aliwal 1946” and “Sobraon 1846”.
Description of the medal:
Obverse. -Crowned head of Queen Victoria. Legend: “Victoria Regina.”
Reverse. -Victory standing beside a trophy, holding a wreath in her outstretched hand. Inscription: “Army of the Sutlej.”
Mounting. -Silver scroll bar and swivel.
Ribbon: Dark blue with crimson edges. 1 ¼ inches wide.
References for the Battle of Sobraon:
History of the British Army by Fortescue.
History of British Cavalry by the Marquis of Anglesey.
The previous battle in the First Sikh War is the Battle of Aliwal
The next battle in the Second Sikh War is the Battle of Ramnagar