Buller’s disastrous first attempt to cross the Tugela River in Natal and relieve Ladysmith, on 15th December 1899: last of the three battles of ‘Black Week’
Guns of 14th and 66th Batteries Royal Field Artillery come under fire at the Battle of Colenso on 15th December 1899 in the Boer War: picture by Gerlach
 65. Podcast on the Battle of Colenso: fought on 15thDecember 1899 in the Boer War: Buller’s disastrous first attempt to cross the Tugela River in Natal and relieve Ladysmith, the last of the three battles of ‘Black Week’: John Mackenzie’s britishbattles.com podcasts
The previous battle in the Boer War is the Battle of Magersfontein
The next battle in the Boer War is the Battle of Spion Kop
General Botha at the Battle of Colenso on 15th December 1899 in the Boer War
Battle: Colenso
War: The Boer War.
Date: 15th December 1899
Place: Colenso on the Tugela River in Northern Natal, South Africa.

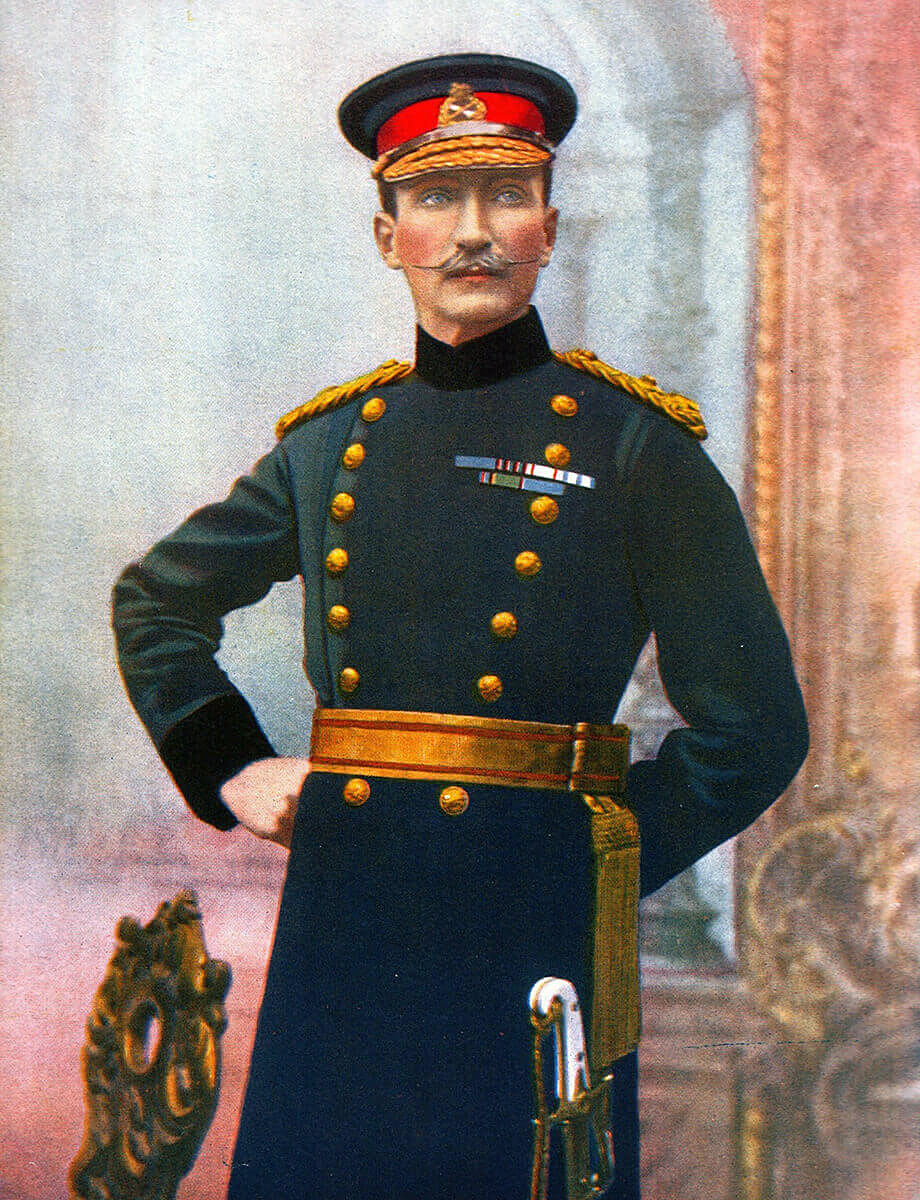
General Sir Redvers Buller the British commander at the Battle of Colenso on 15th December 1899 in the Boer War
Combatants: British against the Boers.
Generals: General Sir Redvers Buller against General Botha.
Size of the armies: 16,000 British against 12,000 Boers.
Arms and equipment at the Battle of Colenso: The Boer War was a serious jolt for the British Army. At the outbreak of the war British tactics were appropriate for the use of single shot firearms, fired in volleys controlled by company and battalion officers; the troops fighting in close order. The need for tight formations had been emphasised time and again in colonial fighting.
In the Zulu and Sudan Wars overwhelming enemy numbers armed principally with stabbing weapons were kept at a distance by such tactics, but, as at Isandlwana, would overrun a loosely formed force. These tactics had to be entirely rethought in battle against the Boers armed with modern weapons.

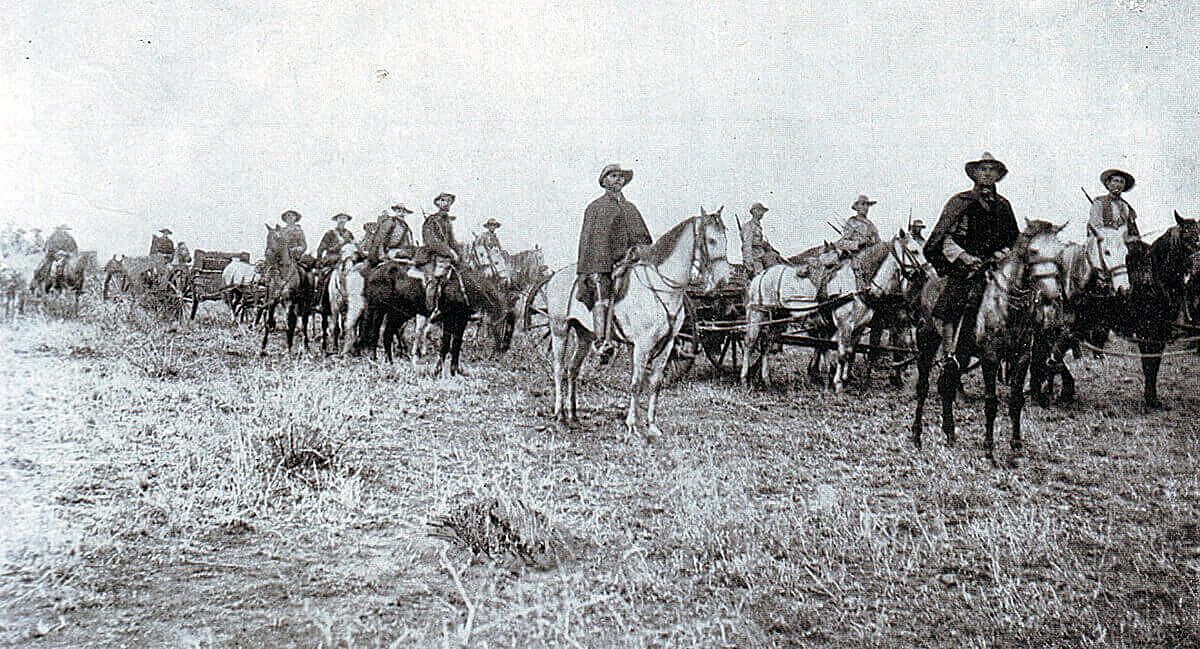
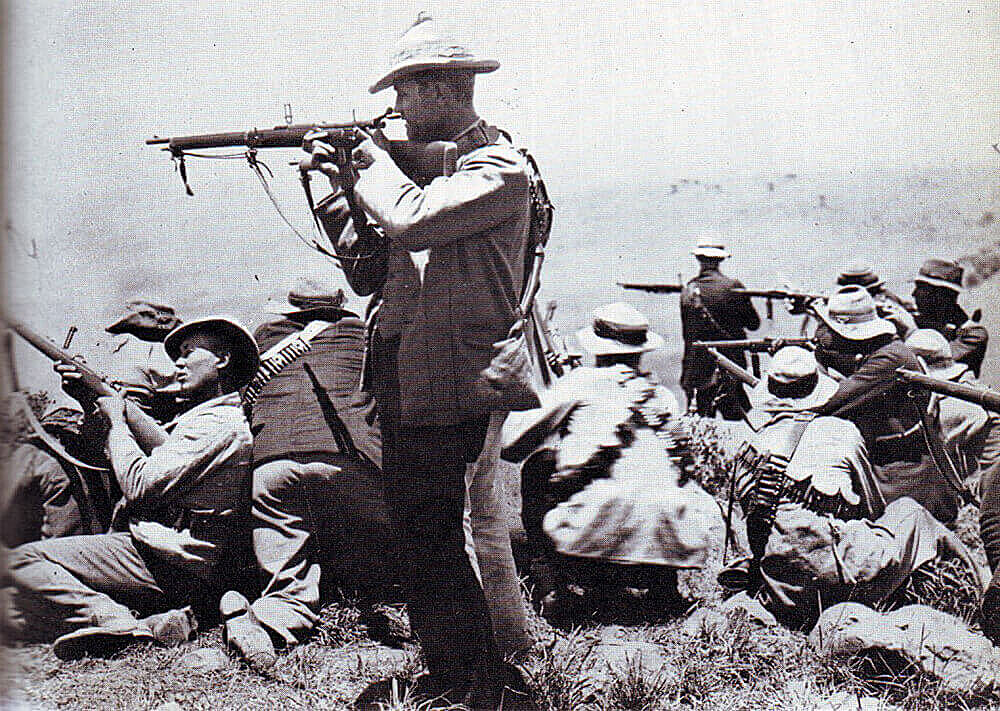
Boers on campaign during the Boer War: Battle of Colenso on 15th December 1899 in the Boer War
1st Border Regiment in camp in Natal during the Boer War: the battalion fought in Hart’s Brigade at the Battle of Colenso on 15th December 1899 in the Boer War
In the months before hostilities the Boer commandant general, General Joubert, bought 30,000 Mauser magazine rifles, firing smokeless ammunition, and a number of modern field guns and automatic weapons from the German armaments manufacturer Krupp, the French firm Creusot and the British company Maxim. Unfortunately for the Boers they chose to buy high explosive ammunition for their new field guns. The war was to show that high explosive was largely ineffective in the field, unless rounds landed on rocky terrain and splintered the rock. The British artillery relied upon air-bursting shrapnel which was highly effective against infantry in open country.
Boers with a Maxim machine gun on a carriage during the Boer War: Battle of Colenso on 15th December 1899 in the Boer War
There were many reports of Boer ammunition failing to explode. It seems likely that this will have been due to a lack of training for the Boer gunners in the use of shells which needed to be fused before firing.
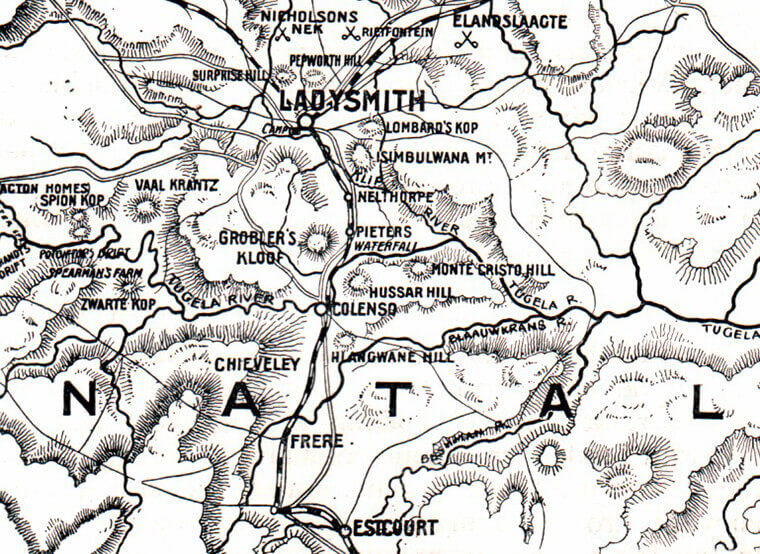
Map of Natal between Estcourt and Ladysmith showing the area of the Battle of Colenso on 15th December 1899 in the Boer War
Once the war was under way the arms markets of Europe were closed to the Boers, due to the British naval blockade, and the error in ammunition selection could not be remedied.
The Boer commandoes, without formal discipline, welded into a fighting force through a strong sense of community and dislike for the British. Field Cornets led burghers by personal influence not through any military code. The Boers did not adopt military formation in battle, instinctively fighting from whatever cover there might be. Most Boers were countrymen, running their farms from the back of a pony with a rifle in one hand. These rural Boers brought a life time of marksmanship to the war, an important advantage further exploited by Joubert’s consignment of smokeless magazine rifles. Viljoen is said to have coined the aphorism “Through God and the Mauser”. With strong field craft skills and high mobility the Boers were natural mounted infantry. The urban burghers and foreign volunteers readily adopted the fighting methods of the rest of the army.
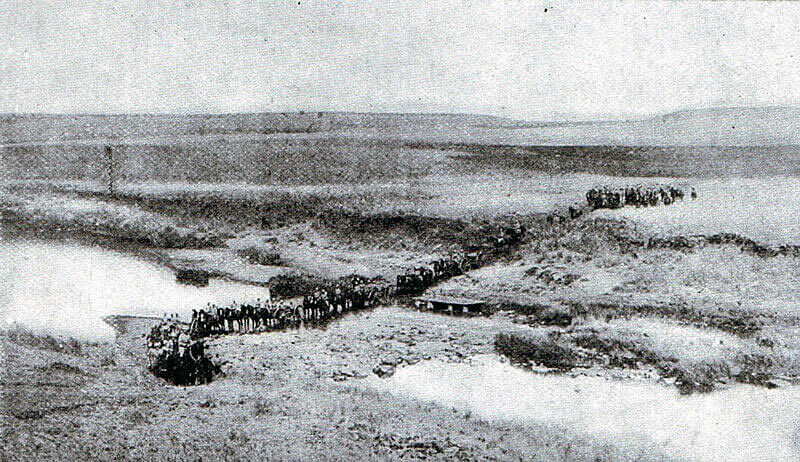
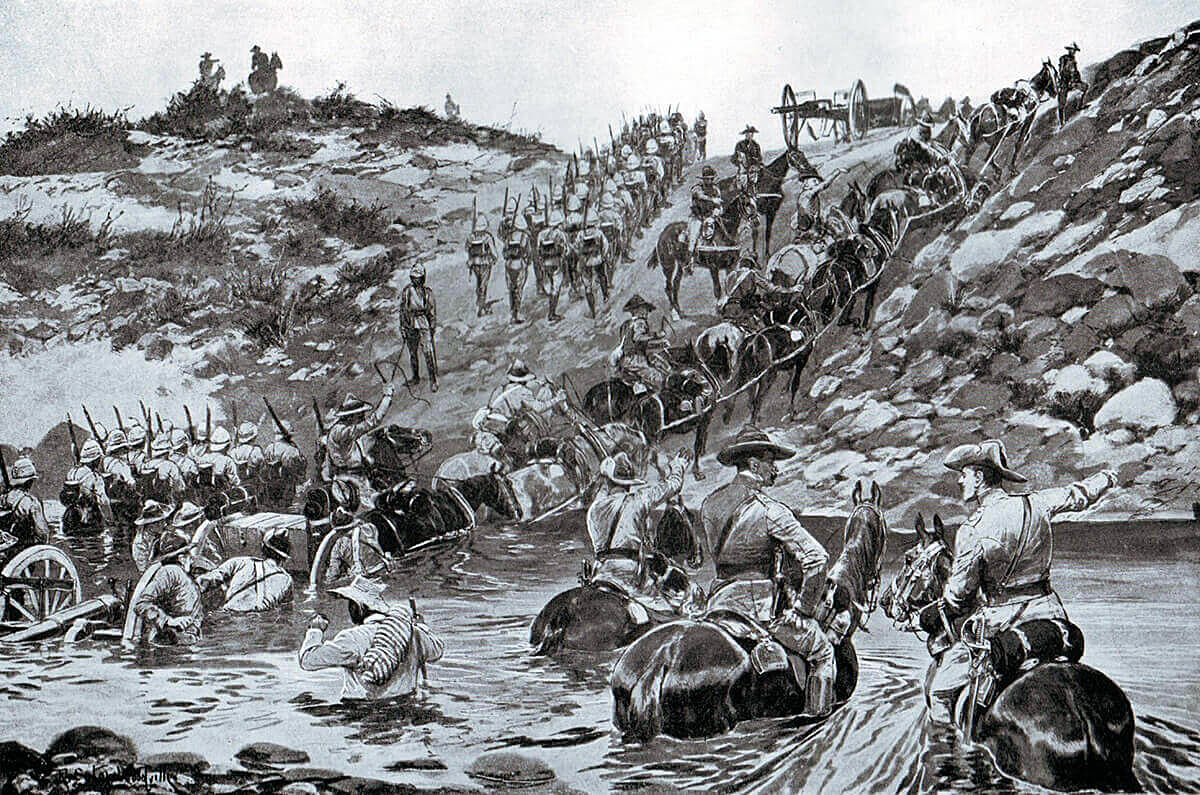
British Royal Field Artillery gun battery crossing a drift during the Boer War: Battle of Colenso on 15th December 1899 in the Boer War
Other than the regular uniformed Staats Artillery and police units, the Boers wore their every day civilian clothes on campaign.
After the first month the Boers lost their numerical superiority, spending the rest of the formal war on the strategic defensive against British forces that outnumbered them, although operating with aggression when led by the younger generation of leaders like De Wet.
British tactics, developed on the North-West Frontier of India, Zululand, the Sudan and in other colonial wars against badly armed tribesmen, when used at Modder River, Magersfontein, Colenso and Spion Kop were inappropriate against entrenched troops armed with modern magazine rifles. Every British commander made the same mistake; Buller, Methuen, Roberts and Kitchener (Elandslaagte was a notable exception where Hamilton specifically directed his infantry to keep an open formation). When General Kelly-Kenny attempted to winkle Cronje’s commandoes out of their riverside entrenchments at Paardeburg using his artillery, Kitchener intervened and insisted on a battle of infantry assaults, with the same expensive consequences as earlier in the war.
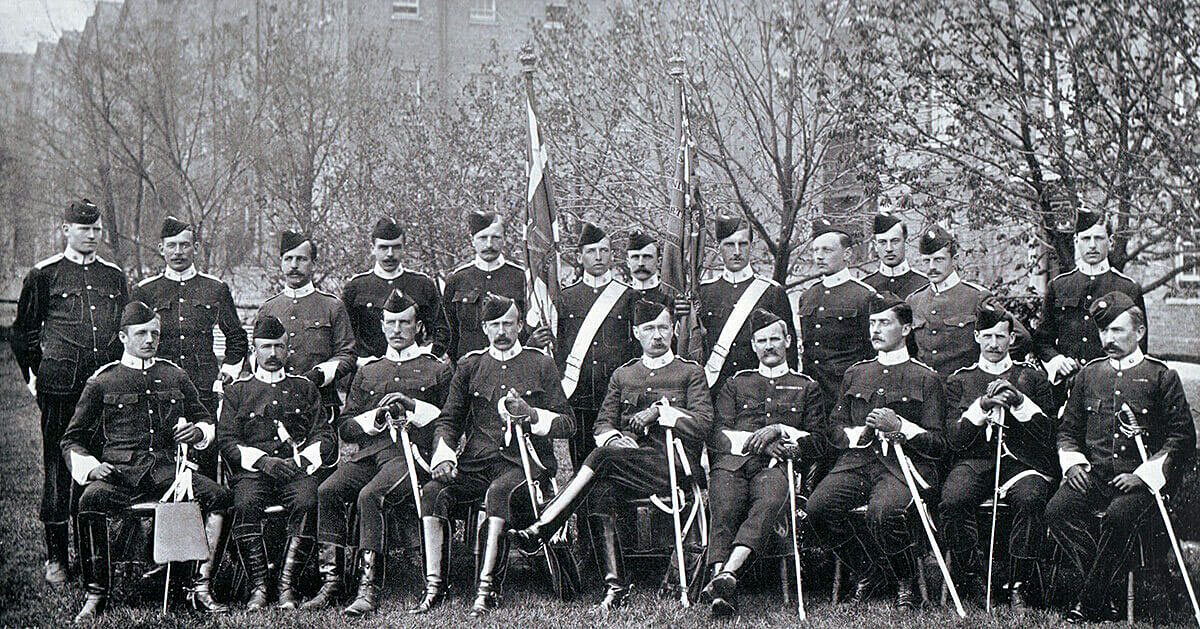
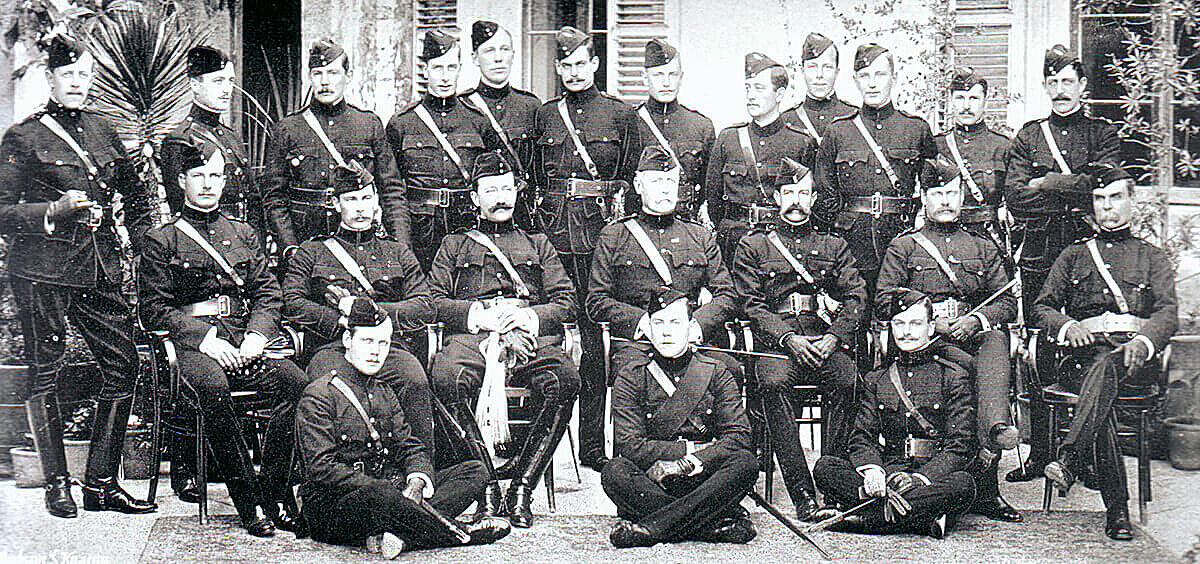
Officers of 2nd Devonshire Regiment in Britain before leaving for the South African War. The Battalion fought in Hildyard’s Brigade at the Battle of Colenso on 15th December 1899 in the Boer War
The British Army was not the only European army to fail to appreciate the effect of long range magazine fed rifle fire. The Germans and the French in the opening months of the First World War made massed infantry attacks in the face of such fire, suffering enormous casualties, as did the Russians and Austro-Hungarians (see the Battle of Mons in 1914).
Some of the most successful British and Empire troops in the South African War were the non-regular regiments; the Imperial Light Horse, City Imperial Volunteers, the South Africans, Canadians, Australians and New Zealanders, who more easily broke from the habit of earlier British colonial warfare, using their horses for rapid movement rather than the charge, advancing by fire and manoeuvre in loose formations and making use of cover, rather than the formal advance into a storm of Mauser bullets.
Boer Riflemen at the Battle of Colenso on 15th December 1899 in the Boer War
The Boer armies suffered from a wide variation in competence and commitment. The general belief was that the Transvaalers were more resilient and determined fighters than the Free Staters. The younger commanders tended to be more resourceful and aggressive and felt handicapped by the older more senior generals.
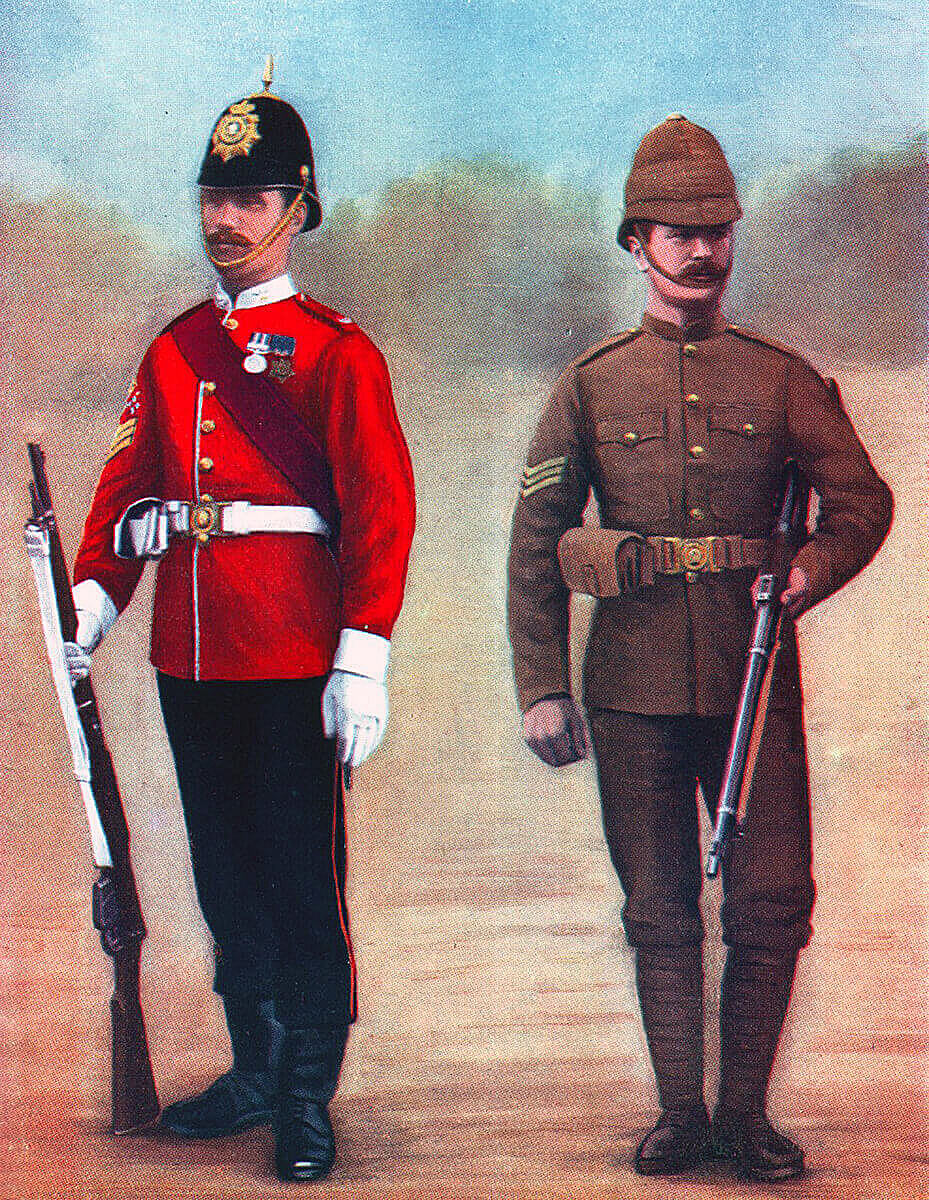
The British regiments made an uncertain change into khaki uniforms in the years preceding the Boer War, with the topee helmet as tropical headgear. Highland regiments in Natal devised aprons to conceal coloured kilts and sporrans. By the end of the war the uniform of choice was a slouch hat, drab tunic and trousers. The danger of shiny buttons and too ostentatious emblems of rank was emphasised in several engagements with disproportionately high officer casualties. Officers quickly took to carrying rifles like their men and abandoned swords and other obvious emblems of rank.
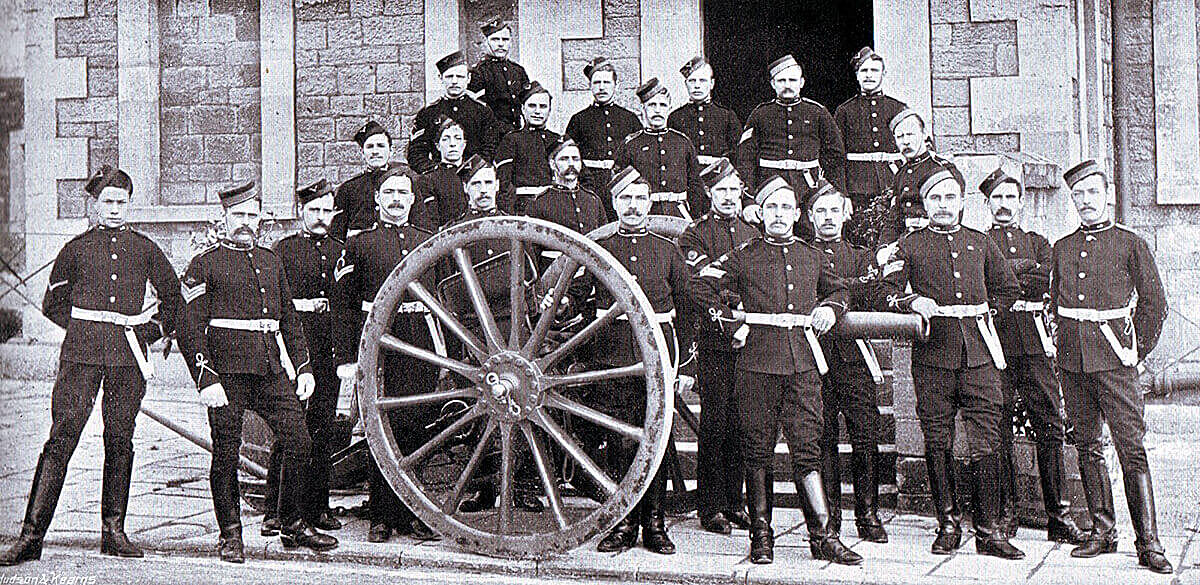
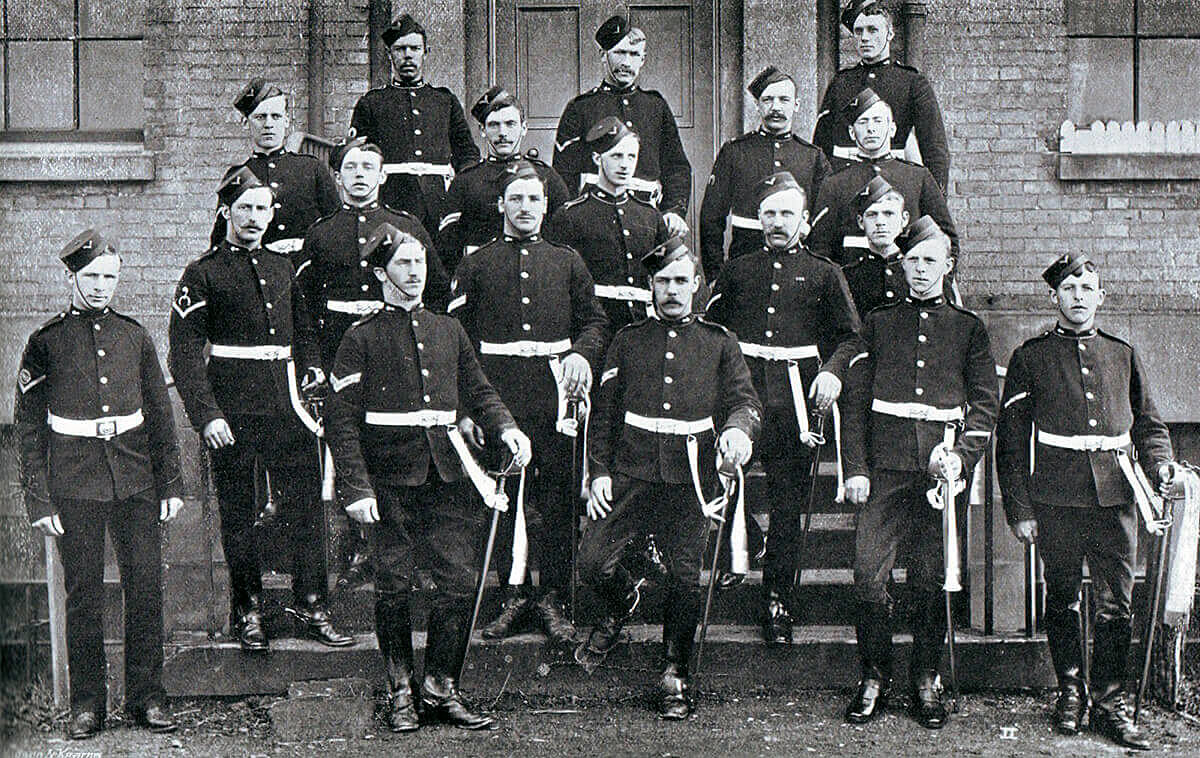
Non-commissioned officers of 63rd Battery Royal Field Artillery which fought at the Battle of Colenso on 15th December 1899 in the Boer War
The British infantry was armed with the Lee Metford magazine rifle firing 10 rounds, but no training regime had been established to take advantage of the range, accuracy and speed of fire of the weapon. Personal skills such as scouting and field craft were little taught. The idea of fire and movement on the battlefield was largely unknown, many regiments still going into action in close order. Notoriously General Hart insisted that his Irish Brigade fight shoulder to shoulder as if on parade in Aldershot. Short of regular troops, Britain engaged volunteer forces from Britain, Canada, Australia and New Zealand who brought new ideas and more imaginative formations to the battlefield.
The war was littered with incidents in which British contingents became lost or were ambushed, often unnecessarily, and forced to surrender. The war was followed by a complete re-organisation of the British Army, with emphasis placed on personal weapon skills and fire and movement using cover.
General Buller watching the Royal Navy’s 4.7 inch guns in action at the Battle of Colenso on 15th December 1899 in the Boer War
The British artillery was a powerful force in the field, under or misused by commanders with little training in the use of modern guns in battle. Pakenham cites Pieters as being the battle at which a British commander, surprisingly Buller, developed a modern form of battlefield tactics: heavy artillery bombardments co-ordinated to permit the infantry to advance under their protection. It was the only occasion that Buller showed any real generalship and the short inspiration quickly died.
The Royal Field Artillery fought with 15 pounder rifled breach loading guns, the Royal Horse Artillery with 12 pounders and the Royal Garrison Artillery batteries with 5 inch howitzers. The Royal Navy provided heavy field artillery with a number of 4.7 inch naval guns mounted on field carriages devised by Captain Percy Scott of HMS Terrible and the iconic long 12 pounders, seen in the Royal Navy gun competitions at the Royal Tournament.

4-7 inch naval guns on Captain Percy Scott gun carriages at Durban used by the British at the Battle of Colenso on 15th December 1899 in the Boer War
Maxim automatic weapons were used by the British, often mounted on special carriages, accompanying the mounted infantry, cavalry and infantry battalions, one on issue to each unit.
War Aims of the Boers in the South African War:
Having started the hostilities the Boers found themselves without an achievable war aim. The only strategy that might have had a chance of success would have been to invade and occupy the whole of Cape Colony, Natal and the other neighbouring British colonies. The two Boer republics did not have the resources to carry out such an extensive operation. In any case they could not have prevented a British sea landing to retake these areas.
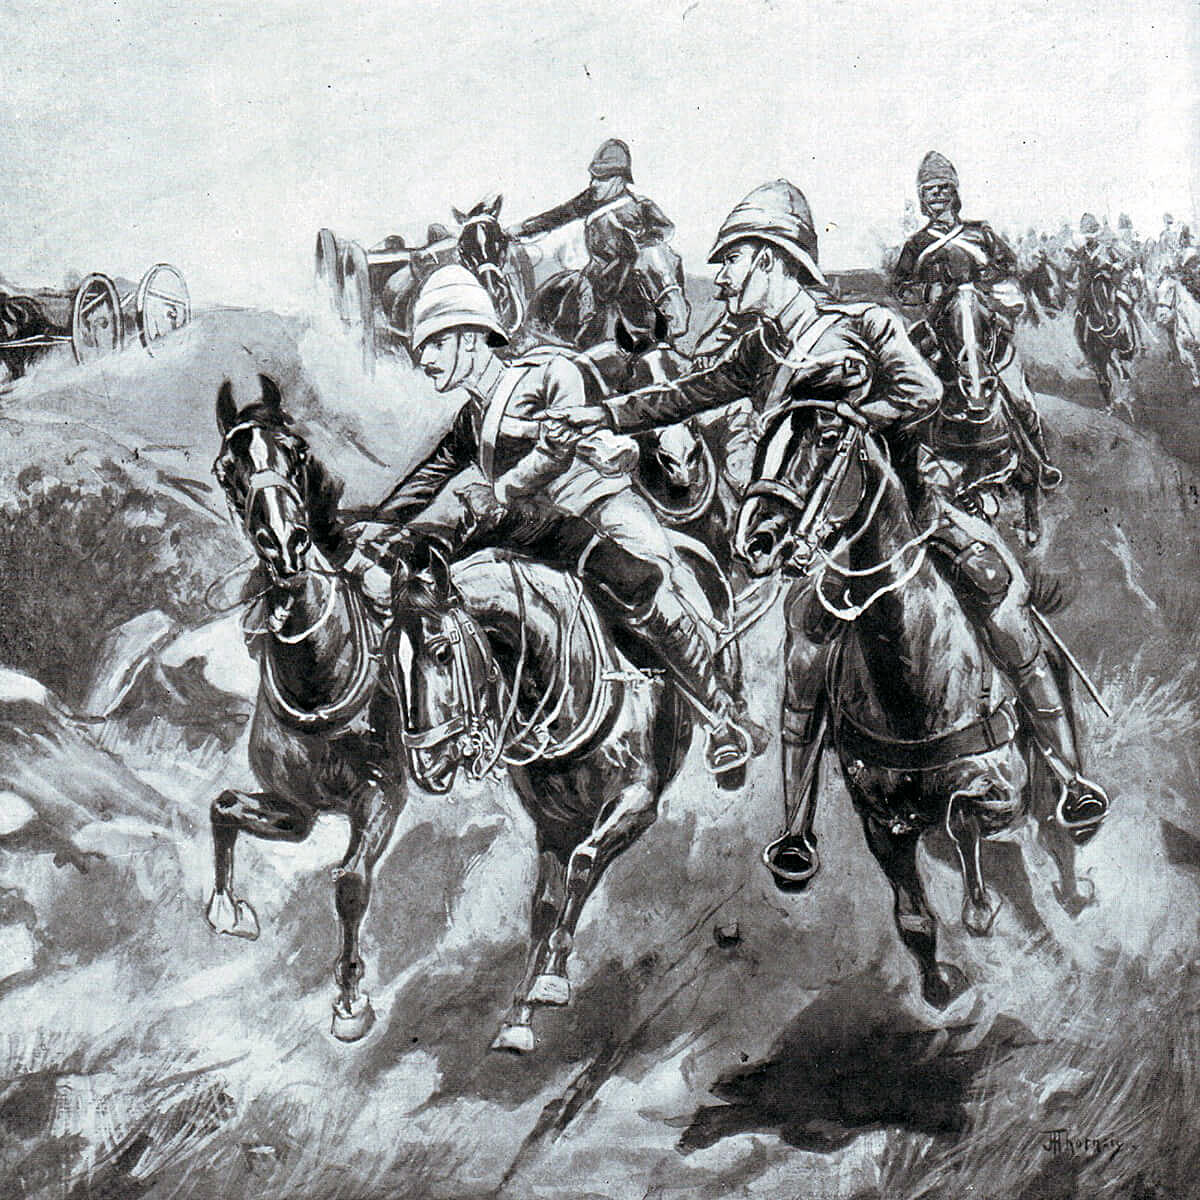
British cavalry driving in a Boer outpost in the Boer War: Battle of Colenso on 15th December 1899 in the Boer War
Once war was declared the Boers invaded and occupied Natal as far as the Tugela River, but with Ladysmith holding out in their rear. The Orange Free State government was reluctant to allow its forces to advance further south in Natal. In Cape Colony some of the citizens of Boer origins joined their brothers from the two Republics but most did not.
The only other offensive operations the Boers carried out were to besiege Mafeking in the north and Kimberley further south on the Cape Colony border. Both sieges were unsuccessful. A limited incursion was carried out into the central part of Cape Colony up to the area around Stormberg, leading to Gatacre’s disastrous counter-attack.
Conan Doyle, who served as a doctor in South Africa during the war, comments that the Boers missed an opportunity at the beginning of the war to capture the substantial quantity of stores built up by the British at De Aar.
A major difficulty for the Boer armies was that although supremely competent in defence, digging field fortifications and using their magazine rifles to great effect to defend them, the Boers lacked an effective tactical offensive capability.
In addition, the absence of formal military discipline made it difficult for the Boer commanders to devise strategies they could rely on their troops to carry through. As the British built up their army and began to advance defeat for the Boers became inevitable.
Winner of the Battle of Colenso: The Boers.
Trooper of the 6th Dragoon Guards in Home Service Uniform: the regiment was part of Dundonald’s Mounted Brigade at the Battle of Colenso on 15th December 1899 during the Boer War
British Regiments at the Battle of Colenso:
The Mounted Brigade (the Earl of Dundonald)
6th Dragoon Guards, the Carabineers: now the Royal Scots Dragoon Guards.
The Royal Dragoons: now the Blues and Royals.
13th Hussars: from 1922 the 13th/18th Royal Hussars and now the Light Dragoons.
Thorneycroft’s Horse #
Natal Carabineers #
Imperial Light Horse #
The Mounted Infantry (formed from various British infantry regiments)
Royal Field Artillery: 7th, 14th, 64th, 66th and 73rd Batteries.
Royal Navy with two 4.7 inch guns and six 12 pounder guns.
West Yorkshire Regiment: the Regiment’s Second Battalion fought at the Battle of Colenso on 15th December 1899 in the Boer War
The 2nd Brigade (Major General Hildyard)
2nd Queen’s West Surrey Regiment: later the Queen’s Regiment and now the Princess of Wales’s Royal Regiment.
2nd West Yorkshire Regiment: later the Prince of Wales’s Own Regiment of Yorkshire and now the Yorkshire Regiment.
2nd Devonshire Regiment: later the Devon and Dorset Regiment and now the Rifles.
2nd East Surrey Regiment: later the Queen’s Regiment and now the Prince of Wales’s Royal Regiment.
The 4th Brigade (Major General Lyttleton)
2nd Scottish Rifles: disbanded in 1966.
3rd King’s Royal Rifle Corps: later the Royal Green Jackets and now the Rifles.
1st Durham Light Infantry: later the Light Infantry and now the Rifles.
1st Rifle Brigade: later the Light Infantry and now the Rifles.
Royal Dublin Fusiliers in Home Service Uniform: the Regiment’s First Battalion fought at the Battle of Colenso on 15th December 1899 in the Boer War
The 5th Irish Brigade (Major General Hart)
1st Royal Dublin Fusiliers: disbanded in 1922.
1st Inniskilling Fusiliers: later Royal Irish Rangers and now the Royal Irish Regiment.
1st Connaught Rangers: disbanded in 1922.
1st Border Regiment: later the King’s Royal Border Regiment and now the Duke of Lancaster’s Regiment.
The 6th Brigade (Major General Barton)
2nd Royal Fusiliers: now the Royal Regiment of Fusiliers.
2nd Royal Scots Fusiliers: later the Royal Highland Fusiliers and now 2nd Battalion the Royal Regiment of Scotland.
1st Royal Welch Fusiliers: now the Royal Welsh Regiment
2nd Royal Irish Fusiliers: disbanded in 1922
Durban Light Infantry #
# These units were raised for the South African War and disbanded at its end
Background to the Battle of Colenso:
The two Boer Republics, the Transvaal and the Orange Free State, began the war against Great Britain on 14th October 1899 by invading Natal in the east, attacking Mafeking in the north-west and Kimberley in the west. The Boers also crossed the Orange River into the main part of Cape Colony. The British garrison in South Africa was inadequate to resist the Boers and was soon on the defensive.
The government in Great Britain prepared to send an Army Corps to South Africa under the command of General Sir Redvers Buller.

British troops learning to take cover in Natal during the Boer War: Battle of Colenso on 15th December 1899 in the Boer War
In the meantime the three battles in Natal, Talana Hill on 20th October, Elandslaagte on 21st October and Ladysmith on 30th October 1899 saw the British force in Northern Natal under Lieutenant General Sir George White forced back to Ladysmith by the Boers and put under siege.
The preponderance of British regular forces in Natal were now penned up in Ladysmith. The adverse effect was that for a time there were few troops to defend the rest of Natal. The benefit for the British was that the Boers had the burden of besieging Ladysmith, requiring a substantial part of their army. The siege prevented the Boers from taking advantage of their initial success. Time was not on their side. On the other hand the British Government could not permit Ladysmith to be taken with the resulting capture of 12,000 of Britain’s regular troops and a disastrous blow to British prestige.
The small number of British troops outside Ladysmith fell back from Colenso on the Tugela River to Estcourt, thirty miles further south down the main railway line. Free State Boers marched into Natal from the west and occupied Frere to the north of Estcourt.
The British authorities raised volunteer regiments from the British population in Natal: the Imperial Light Infantry, Murray’s Mounted Scouts, Thorneycroft’s Mounted Infantry and the Durban Light Infantry among many.
Thorneycroft’s Mounted Infantry in camp in Natal: the regiment attacked Hlangwane Mountain as part of Dundonald’s Mounted Brigade at the Battle of Colenso on 15th December 1899 in the Boer War
The Royal Navy landed sailors and guns from HMS Terrible to erect defences around Durban. 4.7 inch naval guns were mounted on land carriages devised by Royal Navy artificers and named after their commander ‘Captain Percy Scott’.
General Sir Redvers Buller arrived in Cape Colony on 30th October 1899 to take up his appointment as Commander-in-Chief in South Africa. He found the Boers well established in Natal and laying siege to Mafeking in the far North and the important diamond mining town of Kimberley some 20 miles beyond the Orange River on the western border of the Free State. South Africa was in uproar. Sir Alfred Milner, the British High Commissioner, feared the Boer population in Cape Colony, the ‘Cape Dutch’, would rebel in sympathy with their compatriots from the two independent Boer republics.
Officers of 1st Border Regiment: this battalion fought in Hart’s Brigade at the Battle of Colenso on 15th December 1899 in the Boer War
Buller split his newly arrived Army Corps, the largest army Britain had sent overseas since the Crimean War, leaving Lieutenant General Lord Methuen with a sizeable contingent to force his way up the western railway line to Kimberley, while Buller took four infantry brigades and one mounted brigade to Natal to relieve Sir George White in the besieged town of Ladysmith, north of the Tugela River. Major General Gatacre was left with a minimal force to hold the Eastern Cape.
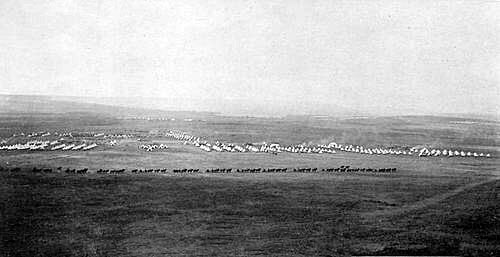
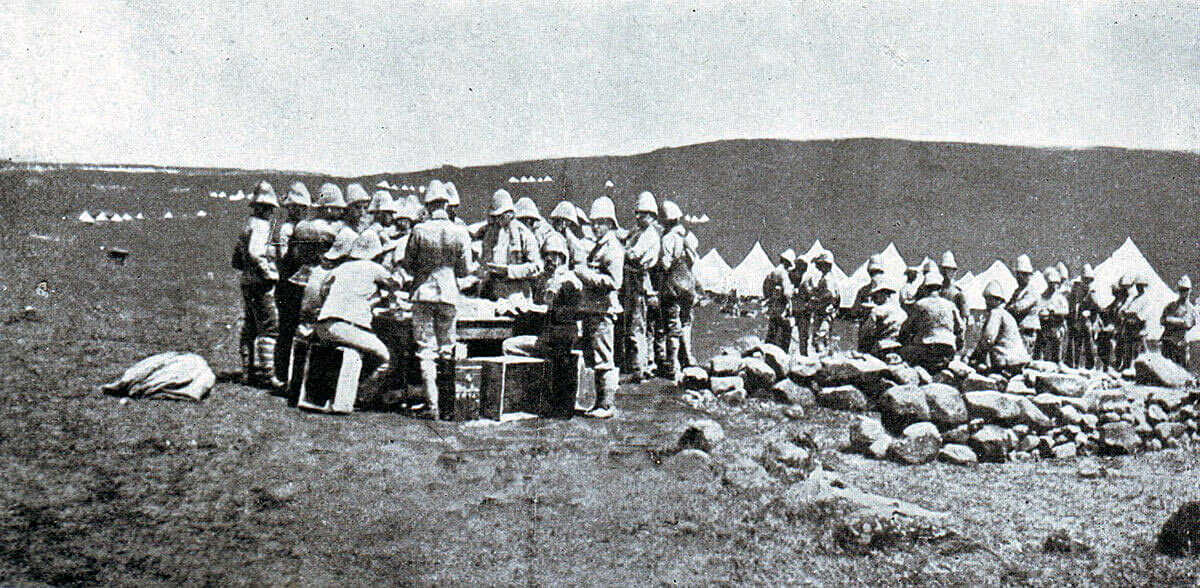
Estcourt camp in Natal before the Battle of Colenso on 15th December 1899 in the Boer War
Buller understandably felt a sense of grievance. His strong urging had been that the British force in Natal should not stray beyond the Tugela. As an old hand from the Zulu War and other South African wars Buller considered he was entitled to be listened to. Nevertheless General Penn Symons, the commander in chief in Natal until his death at the Battle of Talana Hill, had marched into the northern tip of Natal. After the initial successes of Talana and Elandslaagte, his successor General White had been caught and put under siege in Ladysmith, a few miles beyond the Tugela.
The problem Buller warned against had come about: a substantial British force surrounded by the Boers and useless in Ladysmith, with the Boers dug in on the hills between Ladysmith and the Tugela River and threatening the south of Natal. Instead of concentrating on an invasion of the two Boer republics Buller’s task was now to relieve White’s force in the town of Ladysmith, a priority for the British government.
Buller expected it would take him a few weeks to relieve the Ladysmith garrison, after which he could return to Cape Colony. In fact Buller was to spend the rest of the active war crossing the Tugela River and relieving Ladysmith.
The Armoured Train:
The railways played a crucial role in the British war effort, transporting troops and supplies over enormous distances to the front and taking back the wounded and sick to hospital in the seaside cities.
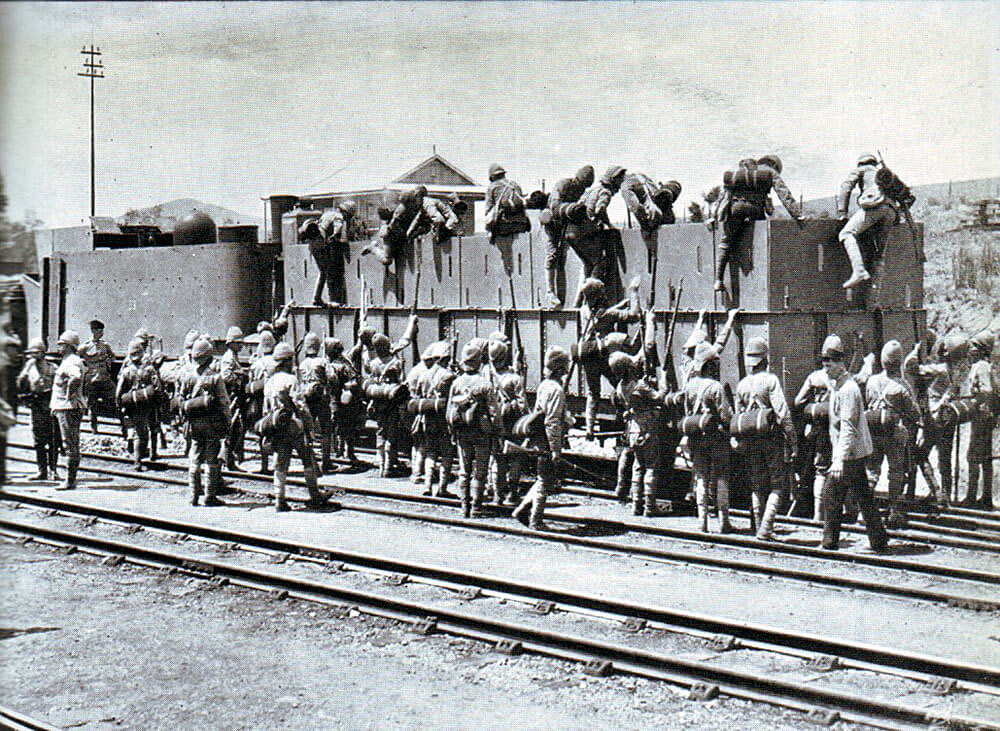
Armoured Train used in Northern Natal by Buller’s Army during the Boer War: Battle of Colenso on 15th December 1899 in the Boer War
From the contemporary obsession with the railway came the ‘Armoured Train’. Armoured Trains were used on all fronts, carrying troops and guns. There was sound tactical benefit so long as the trains only provided a support role.
In Natal the British command sent an armoured train on a reconnaissance mission from Estcourt every day to report on the Boer advance. The junior British officers and soldiers dreaded these missions. They saw that it was just a matter of time before the Boers cut the train off by destroying or blocking the track after it had passed.
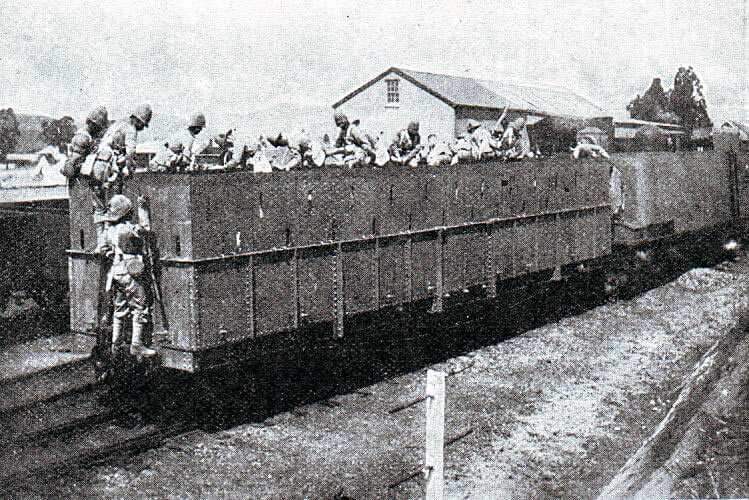
1st Royal Dublin Fusiliers on the Armoured Train in Natal in November 1899 in the Boer War: Battle of Colenso on 15th December 1899 in the Boer War
On 9th November 1899 the Armoured Train was able to visit Colenso and remove supplies and ammunition left behind in the hurried British withdrawal. The train returned to Estcourt safely.
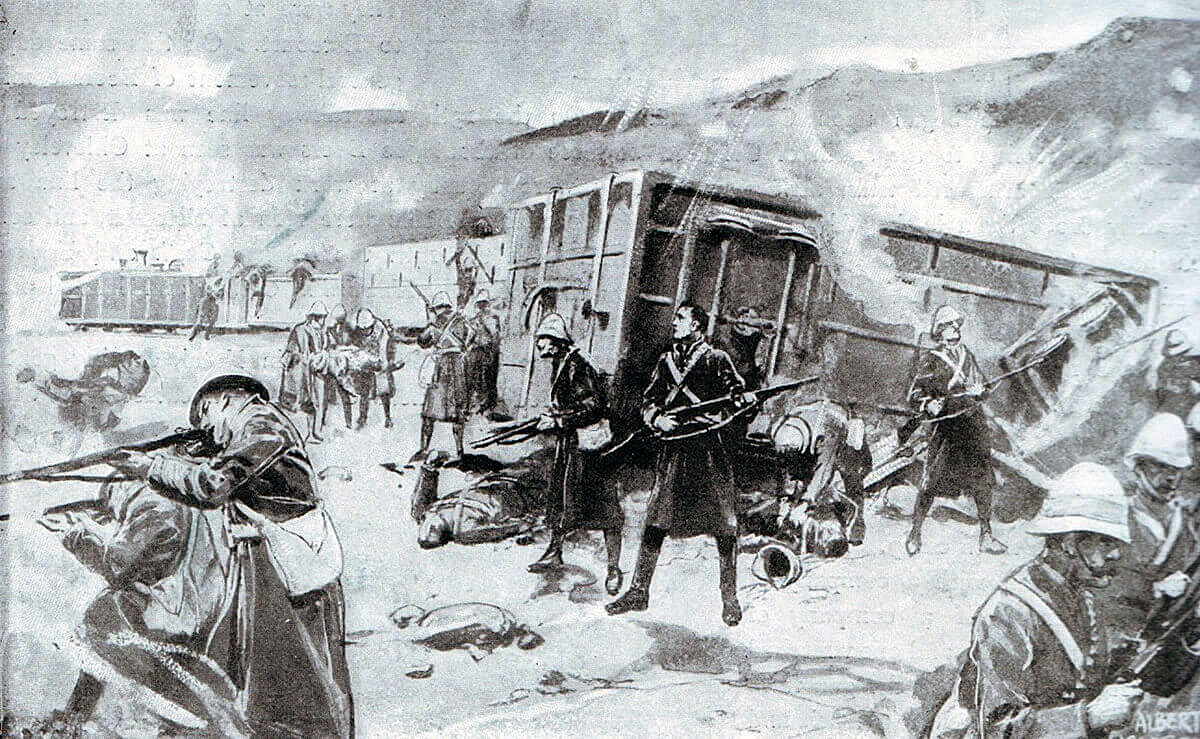
Disaster strikes the Armoured Train on 15th November 1899 in the Boer War: Battle of Colenso on 15th December 1899 in the Boer War
On 15th November 1899 the Armoured Train left Estcourt with a company of Royal Dublin Fusiliers a half-company of Durban Light Infantry and a 7 pounder muzzle loading gun manned by a naval gun crew, all commanded by Captain Haldane. Also on board was Mr Winston Churchill, the war correspondent of the Morning Post.
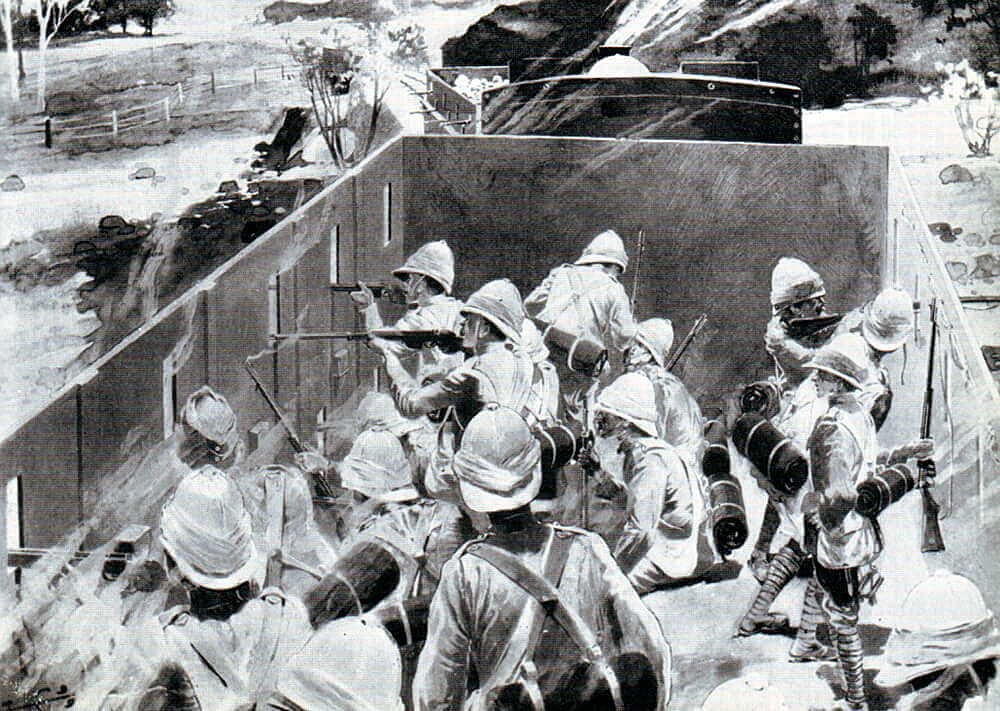
1st Royal Dublin Fusiliers in action on the Armoured Train at Chieveley on 15th November 1899 in the Boer War
Travelling north the train passed Chieveley and then encountered Boers in strength on a hill. One of the advantages of the railway was the ability to use the telegraph laid along the line. The presence of Boers was reported back to Estcourt and the train ordered back. Two miles short of Frere the train encountered a force of Boers with two field guns and a Maxim pom-pom gun. The Boers opened fire and the driver put on full speed to escape, but the Boers had placed a large rock on the line which the train hit, derailing several trucks.
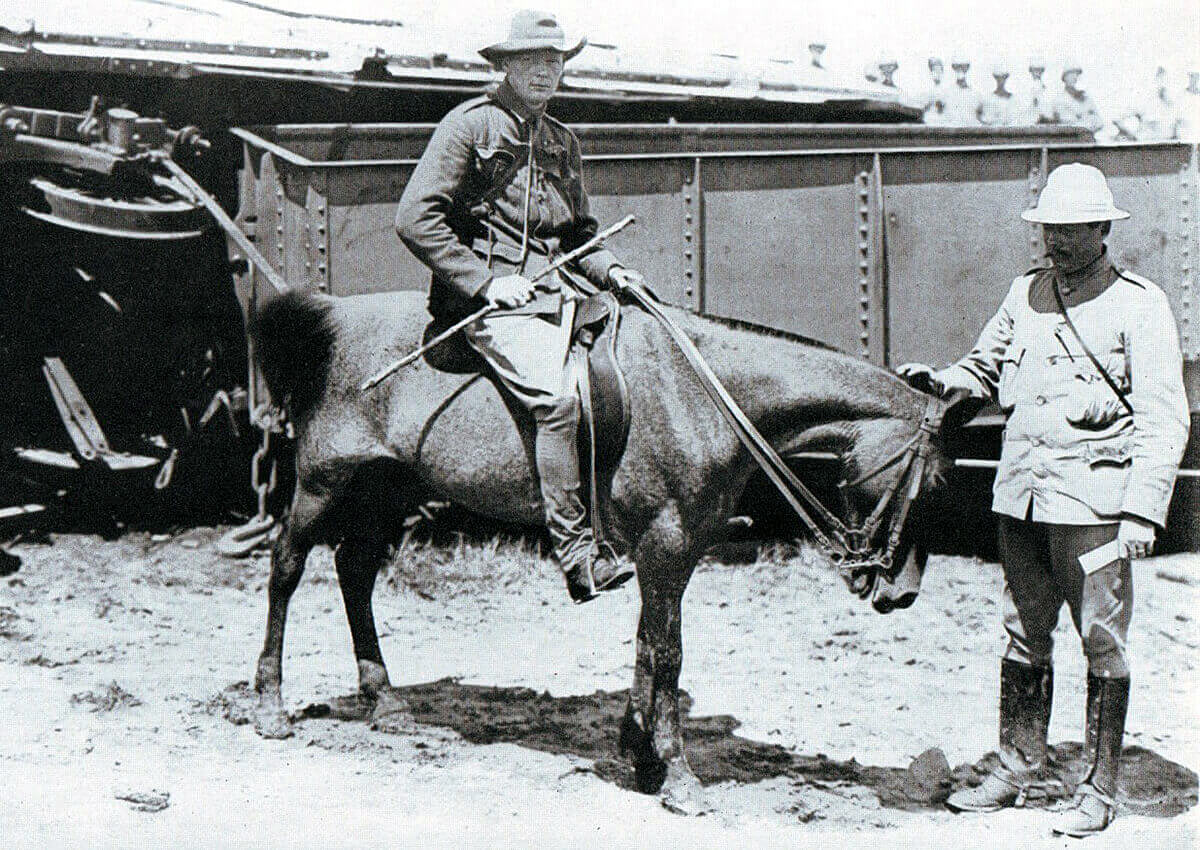
Winston Churchill (on the pony) by the wrecked railway trucks of the Armoured Train at Chieveley on 15th November 1899 in the Boer War
Under heavy fire from the Boers Haldane and Churchill supervised the operation of moving the damaged trucks off the line so that the engine was able to pass the obstacle, but without any of the trucks. Churchill set off on the engine with the wounded. After reaching Frere Churchill returned on foot to the scene, arriving in time to be part of the surrender of the remaining eighty soldiers.
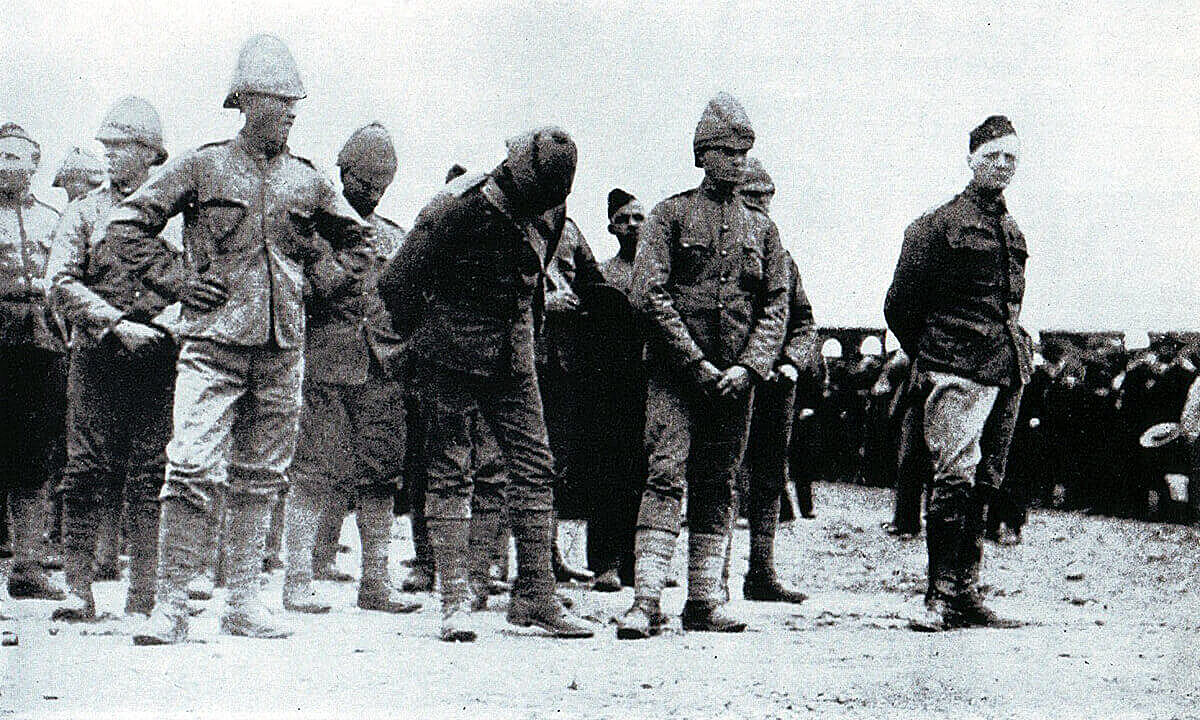
Winston Churchill with soldiers of 1st Royal Dublin Fusiliers captured from the Armoured Train at Chieveley on 15th November 1899 in the Boer War
General Sir Redvers Buller:
While considered to be Britain’s leading fighting general, the appointment of General Sir Redvers Buller to the post of commander-in-chief in South Africa was a disastrous mistake.
Many of the British senior military appointments in South Africa were examples of the principal that success as a junior officer in colonial warfare does not necessarily point to ability as a commander. White, Methuen and Gatacre were all colonial soldiers of high reputation found wanting when in command in the South African War. The French had the same experience with McMahon and Bazaine, unsuccessful commanders in 1870 against the Prussians after brilliant careers as junior officers in North Africa.
Born in 1839, Buller was commissioned into the 60th Rifles in 1858. Buller took part in the Red River campaign in Canada under Wolesley in 1870, becoming a member of the influential Wolseley Ring. Buller served as Wolseley’s intelligence officer in the Ashanti campaign in 1873 to 1874.
Buller took a prominent part in the Zulu War in 1879, winning the Victoria Cross at Hlobane.
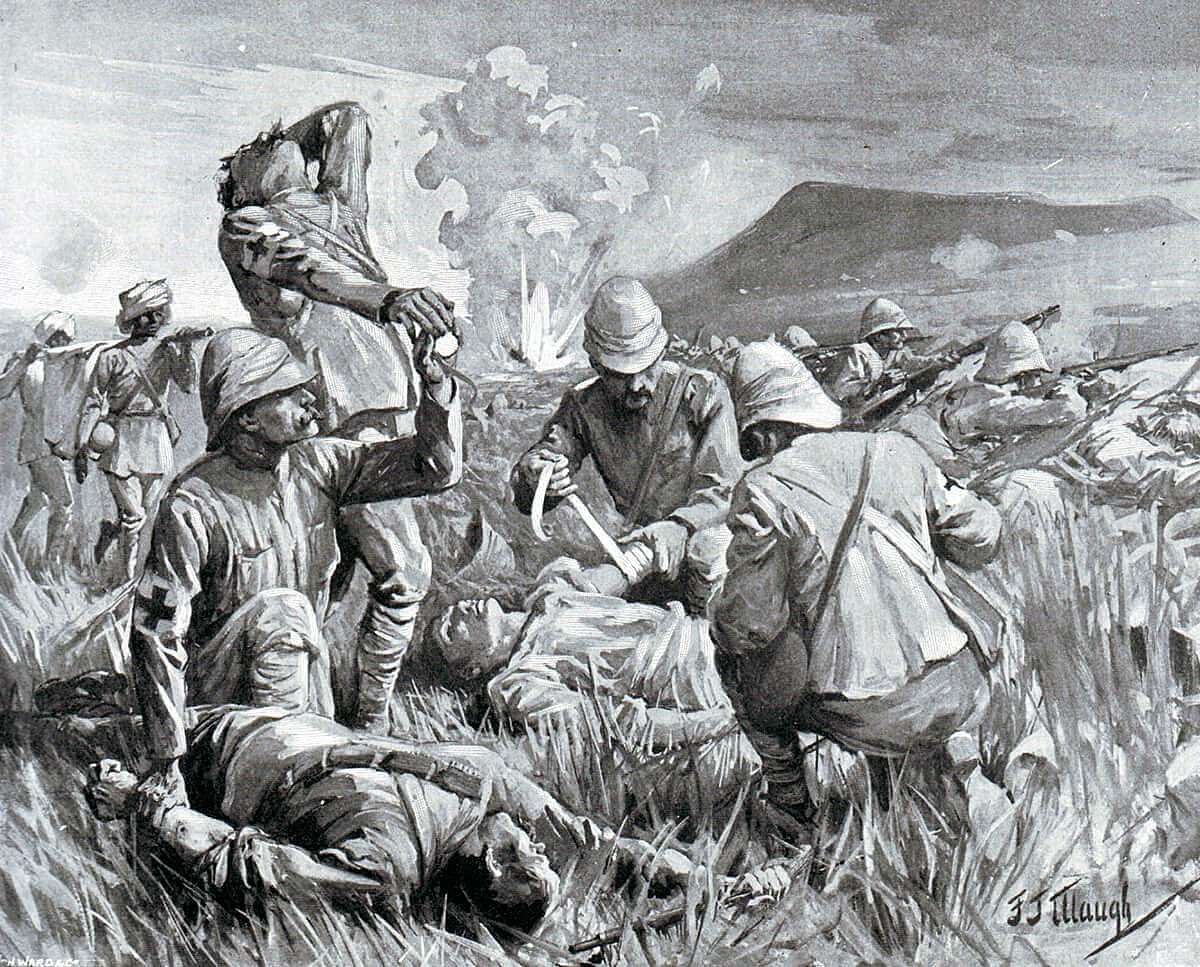
Army medical staff tending the wounded at the Battle of Colenso on 15th December 1899 in the Boer War: picture by F.J. Waugh
In the Sudan campaign of 1882 Buller commanded an infantry brigade at the Battles of Tamai and El Teb.
In 1887 Buller was appointed Quartermaster-General and in 1891 Adjutant-General in the rank of lieutenant general. In 1896 Buller was promoted full general.
Buller was physically strong and popular with his troops. An intelligent and capable administrator Buller was an excellent subordinate commander able to carry out instructions with flair and ruthless decisiveness. However Buller’s assessment of himself was that he had no ability for overall command. Others described him as being obstinate in vacillation. Buller’s performance in the Boer War was to show him to be a disastrous appointment as commander-in-chief.
Account of the Battle of Colenso:
As the British build up took place in Natal pressure was brought to bear on the Boers to force them back across the Tugela River.
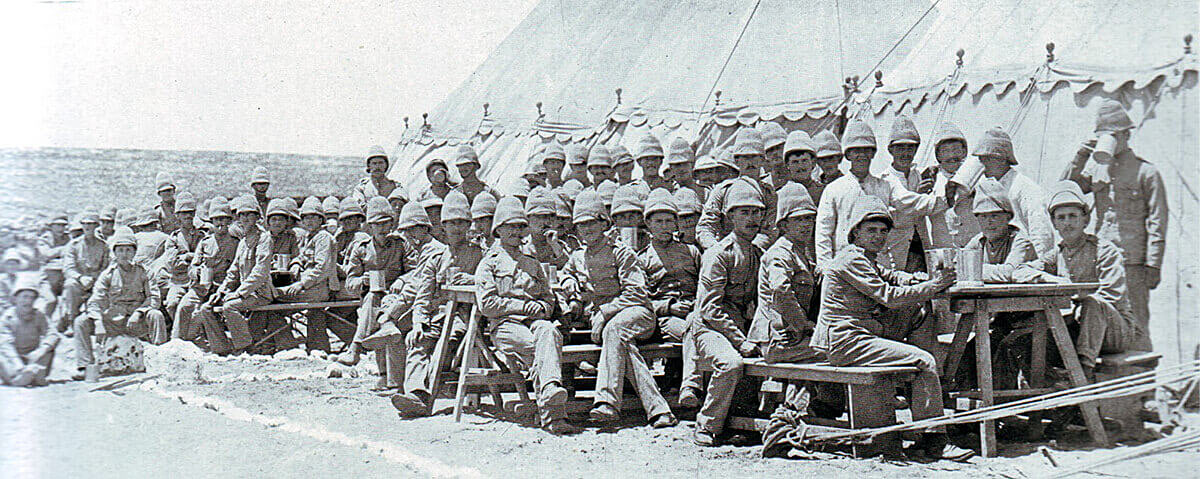
British troops in camp in Natal during the Boer War in the Boer War: Battle of Colenso on 15th December 1899 in the Boer War
On 22nd November 1899 a British force left Estcourt for Willow Grange from where they assaulted Boer positions on Brynbella Hill. The attack was driven back but the result was to cause the Boers to withdraw to Colenso. The Boers did not again penetrate south of the Tugela River.
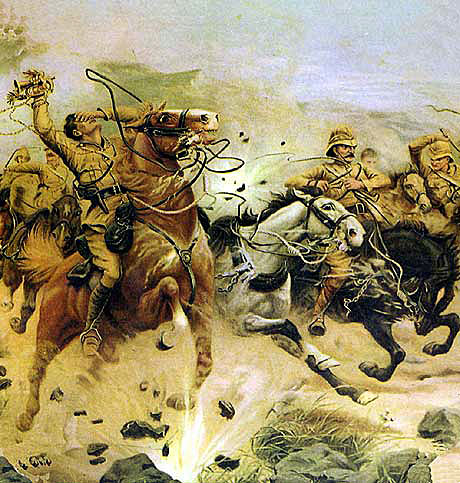
On 24th November 1899 Lord Dundonald, Buller’s commander of mounted troops (the main body of British regular cavalry regiments was shut up in Ladysmith due to White’s failure to send them south before the siege began), led a reconnaissance in force by 1,500 mounted infantry with a battery of field artillery towards Colenso.
Corporals and Bombardiers of 64th Battery Royal Field Artillery. The Battery fought at the Battle of Colenso on 15th December 1899 in the Boer War
After examining the Boer positions Dundonald withdrew. On that day the Boers demolished the railway bridge over the Tugela at Colenso. The road bridge was left intact.
The Boers clearly considered themselves to be on the defensive, building three miles of entrenchments based on the Colenso crossing of the Tugela River, astride a kopje, Grobler’s Kloof, about 3 miles north of Colenso. East of Colenso in a river loop lay the fortified position called Fort Wyllie.
On the Boer left on the southern bank of the Tugela were the mountains of Inhlawe, 4,000 feet in height, Monte Cristo and Hlangwane, all strongly held by the Boers with a pontoon bridge to the north bank.

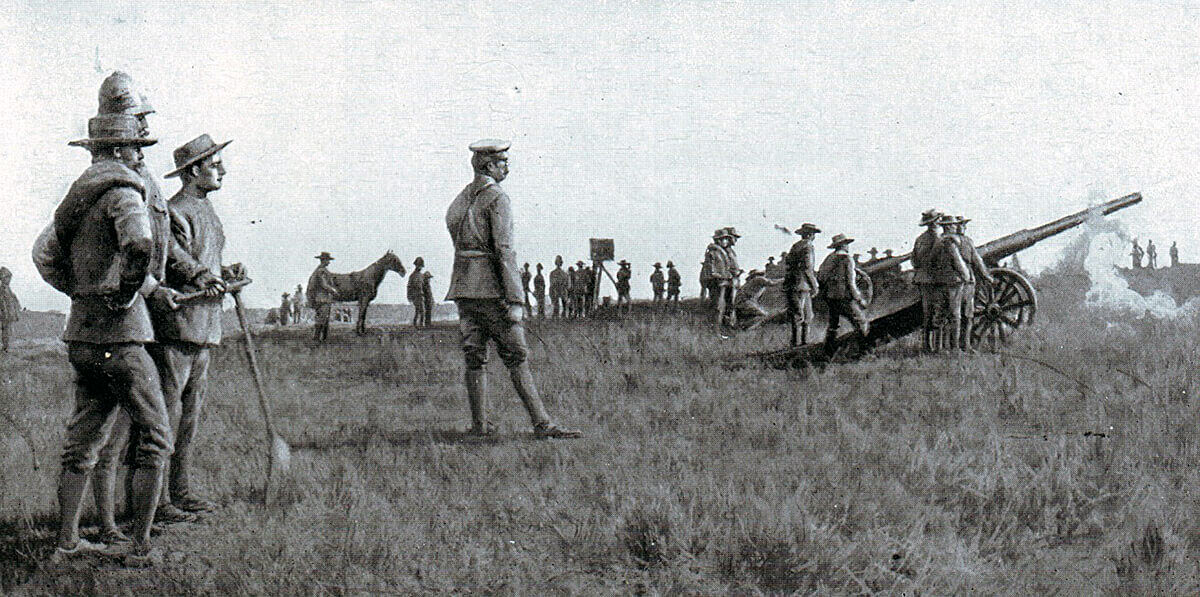
Royal Navy 4.7 inch gun in action at the Battle of Colenso on 15th December 1899 in the Boer War
In the closing days of November and the opening days of December 1899 Buller’s army arrived at Durban and travelled by train to the forward base at Estcourt: sixteen battalions of infantry in four brigades, two regiments of cavalry, several regiments of local volunteers and six batteries, five of field artillery and one of mountain artillery. Buller now had 18,000 infantry, 2,600 mounted men and 36 guns. The Brigades were formed as set out above.
The final addition to Buller’s force comprised a Royal Navy gun contingent of two 4.7 inch guns on ‘Captain Percy Scott gun carriages’ and fourteen 12 pounders.
General Buller’s army marching from Frere to Chieveley to mount the attack at Colenso on 15th December 1899 in the Boer War: picture by Richard Caton Woodville
The Boers were believed to have between 25,000 and 35,000 men in the field in Natal, although a substantial number was needed to maintain the blockade on the British in Ladysmith. The Boers claimed that their number around Ladysmith was reduced to 6,000 during the battles on the Tugela.
Buller informed Lord Landsdowne in London that the Boer positions at Colenso were impregnable and must be bypassed. Buller’s plan was to evade the Boer defences by crossing the Tugela further west at Potgeiter’s Drift and marching to Ladysmith by the Acton Homes road.
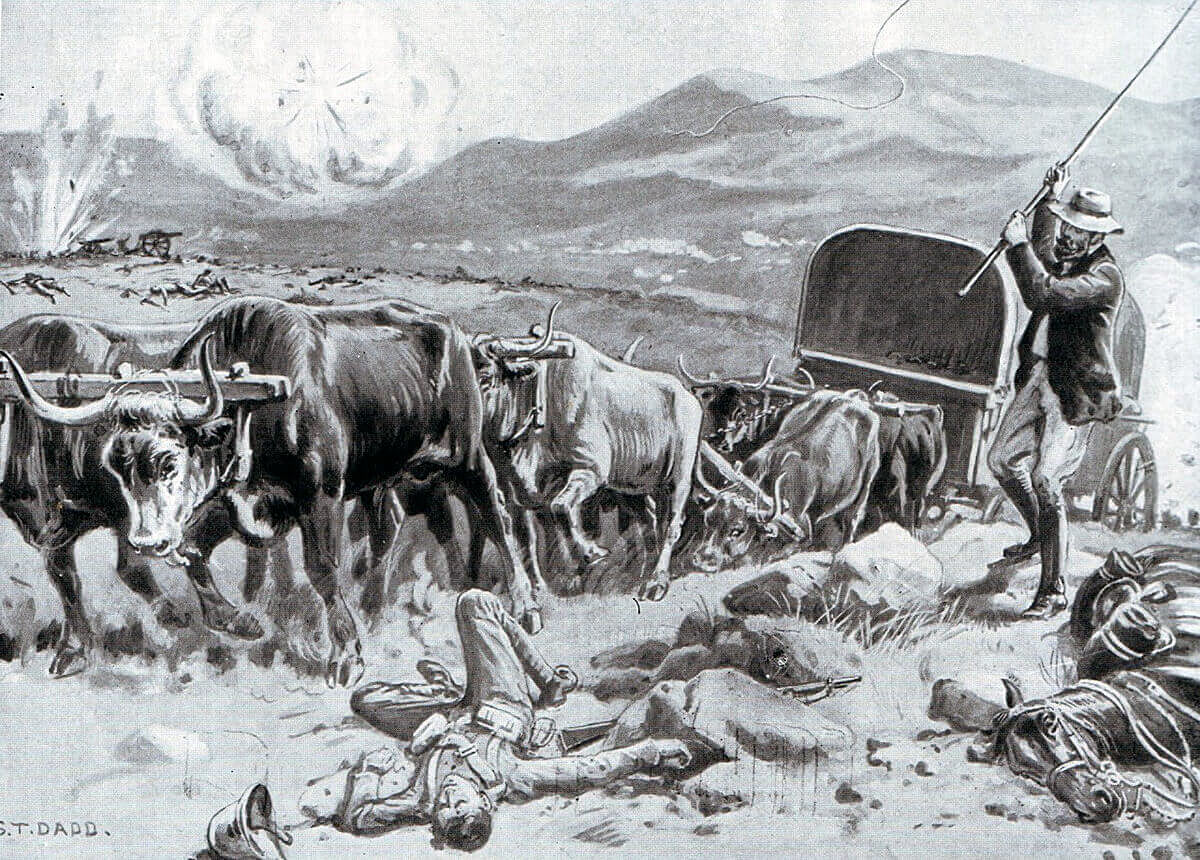
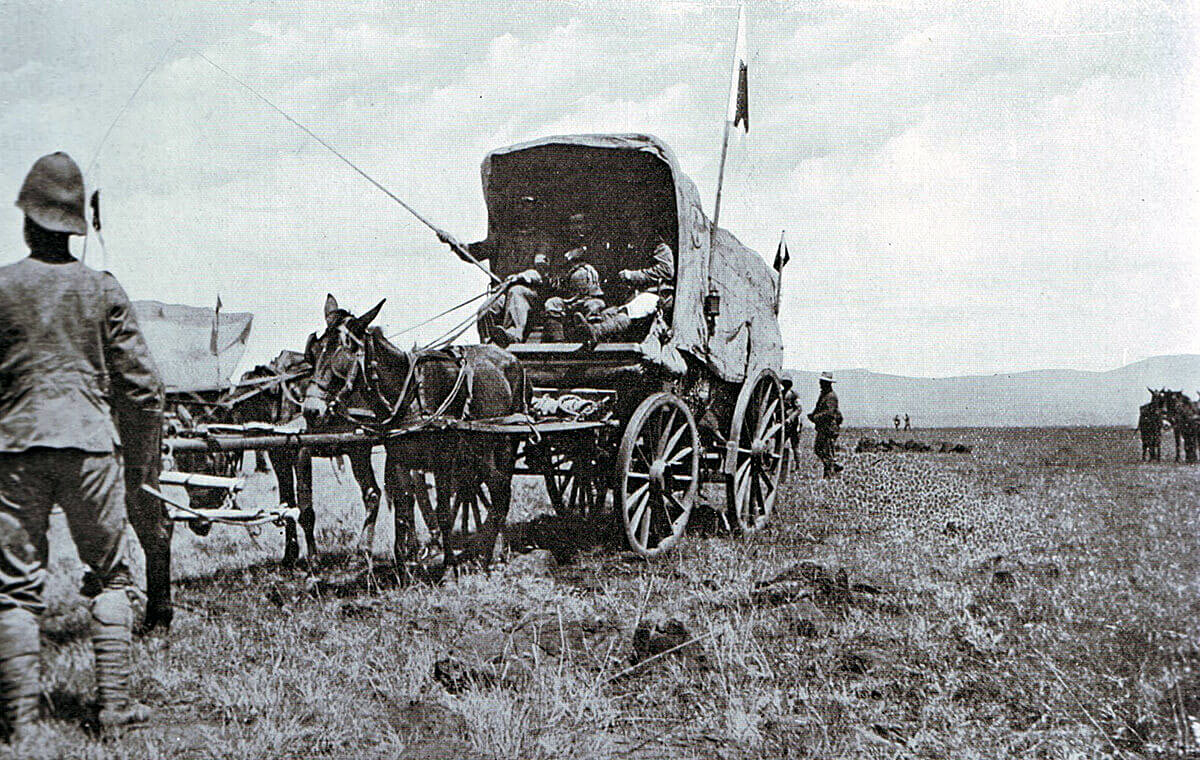
Ammunition wagon withdrawing under fire from Colenso at the Battle of Colenso on 15th December 1899 in the Boer War: picture by Frank Dadd
However, on receiving news of the heavy British defeats at Stormberg on 10th December and Magersfontein on 11th December 1899, Buller abandoned this plan, taking the view that he must without delay attack the Boer positions around Colenso, in spite of his view expressed to Lord Landsdowne that these positions were impregnable.
The first British formation to advance was Barton’s Brigade (2nd Royal Fusiliers, 2nd Royal Scots Fusiliers, 1st Royal Welch Fusiliers and 2nd Royal Irish Fusiliers). On 12th December 1899 Barton’s Brigade marched out of Frere Camp and advanced to the top of a kopje 3 miles south of Colenso.
The two naval 4.7 inch guns followed Barton’s brigade and taking up a position opposite Colenso opened fire at a range of around 7,200 yards on the Boer line, giving particular priority to the kopjes beyond the river.
Royal Navy 12 pounder field guns advancing at the Battle of Colenso on 15th December 1899 in the Boer War
No return fire was made by the Boers who had been ordered by their commander General Botha to remain silent. A few Boers could be seen moving about but the general impression of the British was that the Boers had withdrawn and did not intend to contest the river line.
It was on the evening of 12th December 1899 that Buller finally decided to force the Colenso position rather than take the detour via Potgieter’s Drift, setting 15th December for the attack.

Colenso Railway Bridge, scene of the Battle of Colenso on 15th December 1899 in the Boer War
The Tugela River at Colenso forms a series of loops. If the Boers remained in position the river crossing was a dangerous prospect, each loop a potential salient of extreme vulnerability.
Buller’s plan was for Dundonald’s mounted brigade to occupy Hlangwane Hill on the right to cover the flank of the advance while Hart’s Irish Brigade forced the river line by way of Bridle’s Drift to the west of Colenso and Hildyard’s Brigade forced the main drift by the demolished Colenso railway bridge and the road bridge. Barton’s Brigade would support the right while Lyttelton’s Brigade supported the left. The field batteries were distributed along the line in support while the naval 4.7 inch guns provided a long range fire from behind the centre.
The British infantry began to move before dawn on 15th December 1899. In view of the lack of Boers seen on the far river side over the previous days the general belief was that the Boers had withdrawn from the area.

Map of the Battle of Colenso on 15th December 1899 by John Fawkes in the Boer War
Major General A. Fitzroy Hart, commander of the British 5th Brigade at the Battle of Colenso on 15th December 1899 in the Boer War
In fact Botha’s plan was for the Boers to lie low in their entrenchments, not returning fire until the British troops were fully committed to the attack, to permit the British to cross the Tugela at Colenso and then to detonate the charges under the road bridge, leaving a substantial British force north of the river with no option but to surrender. In the event the British did not manage to cross the river.
Hart’s attack at the Battle of Colenso:
On the left of the British line Hart’s Irish Brigade left camp at around 4.30am, advancing on the river soon after dawn. Hart’s orders were for his brigade to cross by the Bridle Drift. Accompanying Hart at the front of his brigade the native guide indicated that the route was to the right into one of the large loops in the river. In fact Bridle Drift was on a straight stretch of the Tugela River well to the west of the loop. Hart’s staff remonstrated that Bridle Drift lay further west and that the loop was a death trap. Hart chose to follow the guide’s directions. It is clear that the guide was confused and indicating Punt Drift at the head of the loop, not Bridle Drift. It did not help that the guide spoke no English.
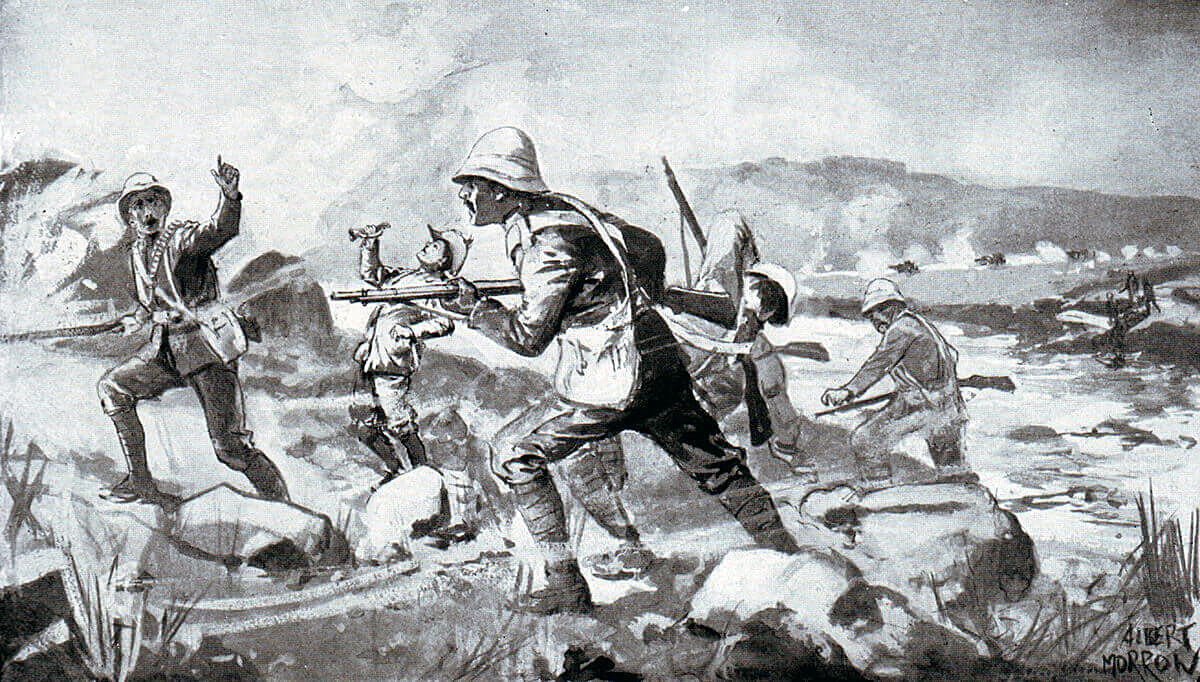
1st Royal Dublin Fusiliers advancing at the Battle of Colenso on 15th December 1899 in the Boer War: picture by Albert Morrow
Hart was an officer obsessed with delivering an attack in close order with fire controlled by volley. With many other British officers in the early stages of the War he had no concept of the effect of massed magazine-fed rifle fire of the sort the Boers were about to unleash on his soldiers. As Hart led his brigade into the loop towards the river bank the commanding officer of his leading battalion, 1st Royal Dublin Fusiliers, ordered his men into open order. Hart directed the fusiliers to remain in close order.
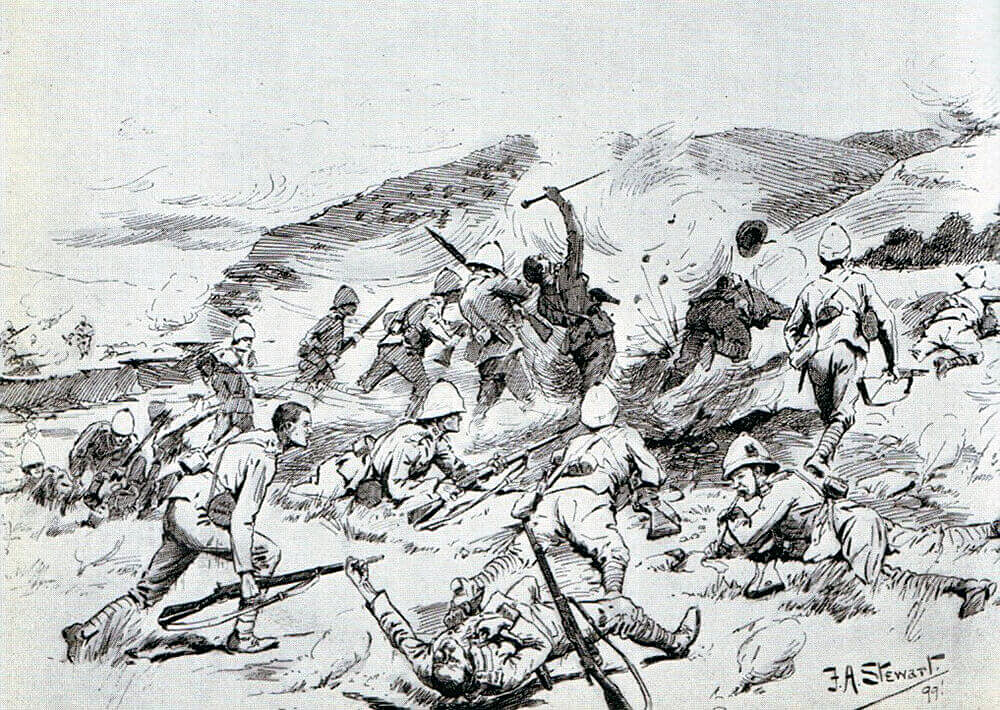
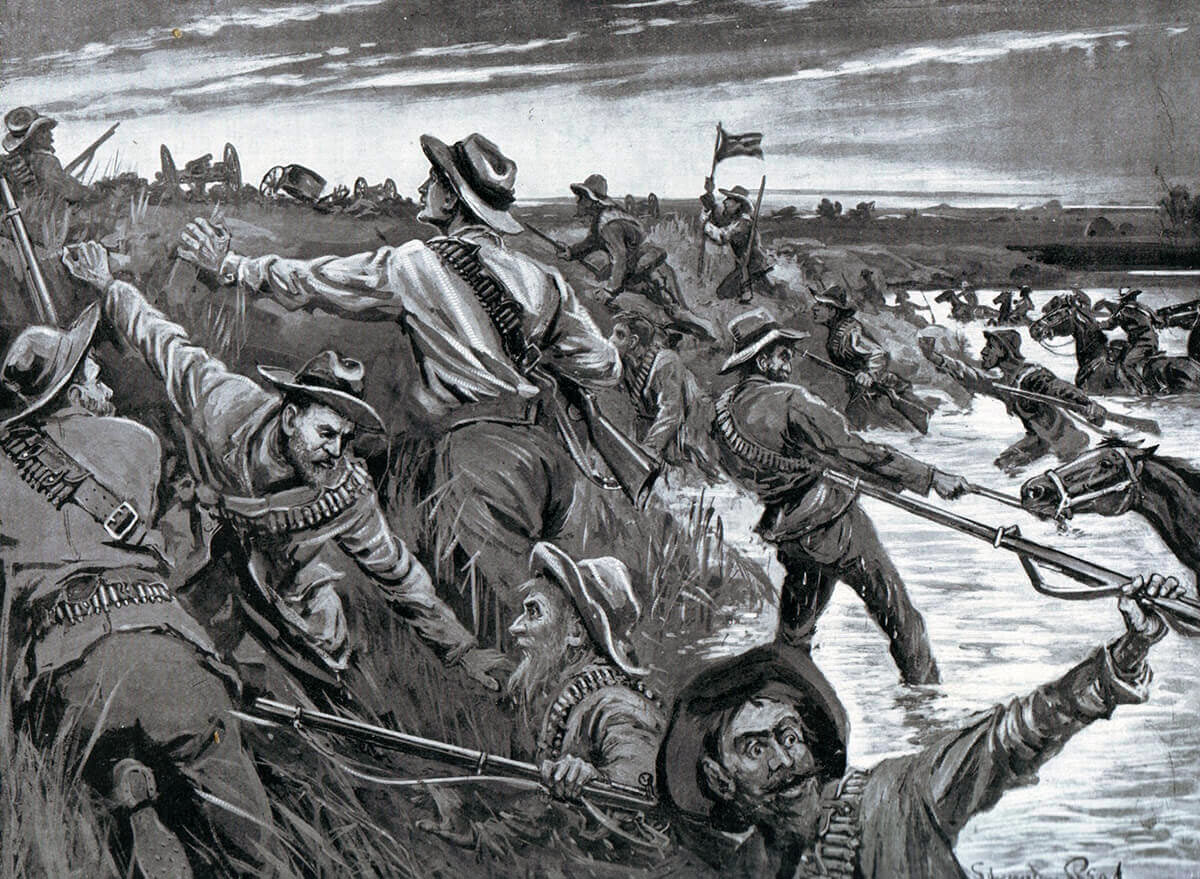
1st Royal Dublin Fusiliers and 1st Inniskilling Fusiliers attempting to cross the Tugela River at the Battle of Colenso on 15th December 1899 in the Boer War: picture by F.A. Stewart
As Hart’s men advanced into the loop the Boer riflemen and guns on the far side of the Tugela opened fire, immediately inflicting extensive casualties on the exposed clustered Irish regiments.
Royal Navy 4.7 inch gun in action at the Battle of Colenso on 15th December 1899 in the Boer War
The soldiers of Hart’s four battalions spread along the river bank in the loop but they were unable to identify any fordable part of the river by which they could cross to the Boer bank. Various groups tried to swim across, several soldiers being drowned. Those who made the crossing found that once on the far side there was nothing they could achieve and swam back.
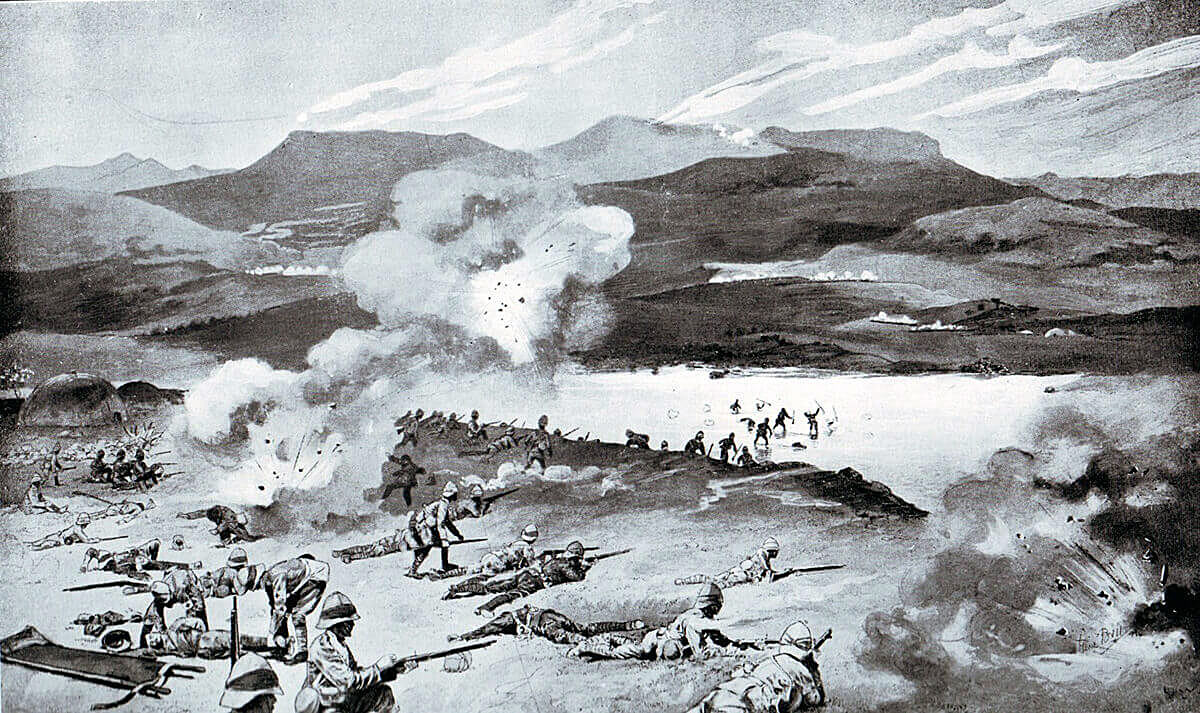
1st Royal Dublin Fusiliers attempting to cross the Tugela River at the Battle of Colenso on 15th December 1899 in the Boer War
Eventually Buller intervened and ordered Hart to withdraw. A major of the Connaught Rangers took the order down to the most advanced troops and a withdrawal took place, although some men did not receive the order and a few were captured later in the day. Hart’s brigade suffered some 500 casualties in an action lasting around an hour.
Lyttelton in support of Hart with his brigade found there was nothing he could do to assist. The battery of field artillery on Hart’s left flank was left without orders by Hart and in any case could see little of the Boers as a target.
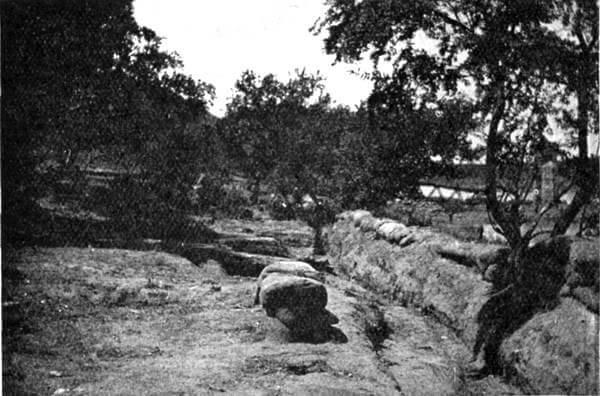
View of the point where Hart’s Irish Brigade attempted to cross the Tugela River from the Boer positions north of the river at the Battle of Colenso on 15th December 1899 in the Boer War

Colonel Long, Royal Horse Artillery; artillery commander at the Battle of Colenso on 15th December 1899 in the Boer War
Colonel Long and the guns at the Battle of Colenso:
In the centre of the British line the two naval 4.7 inch guns opened fire on Fort Wylie in the eastern river loop at 4.45am at a range of 4,000 yards. On the right of the 4.7s the naval 12 pounders and the 14th and 66th Field Batteries, commanded by Colonel Long, joined in the bombardment. There was no responding fire from the Boers.
Colonel Long played a prominent and disastrous part in the Battle of Colenso. Long had commanded the British artillery at the Battle of Omdurman and been commended for his aggression in moving the guns in advance of the infantry to fire with greater effect, although Kitchener was concerned at Long’s impetuosity.
It was Long who dispatched the train to Chieveley on 15th November 1899 leading to the capture of Churchill, Haldane and some 80 British soldiers.
Long’s orders at the Battle of Colenso were to remain behind Barton’s Brigade and to use the naval 12 pounders, which came under his command, for the long range work in support of Hildyard’s attack on Colenso.
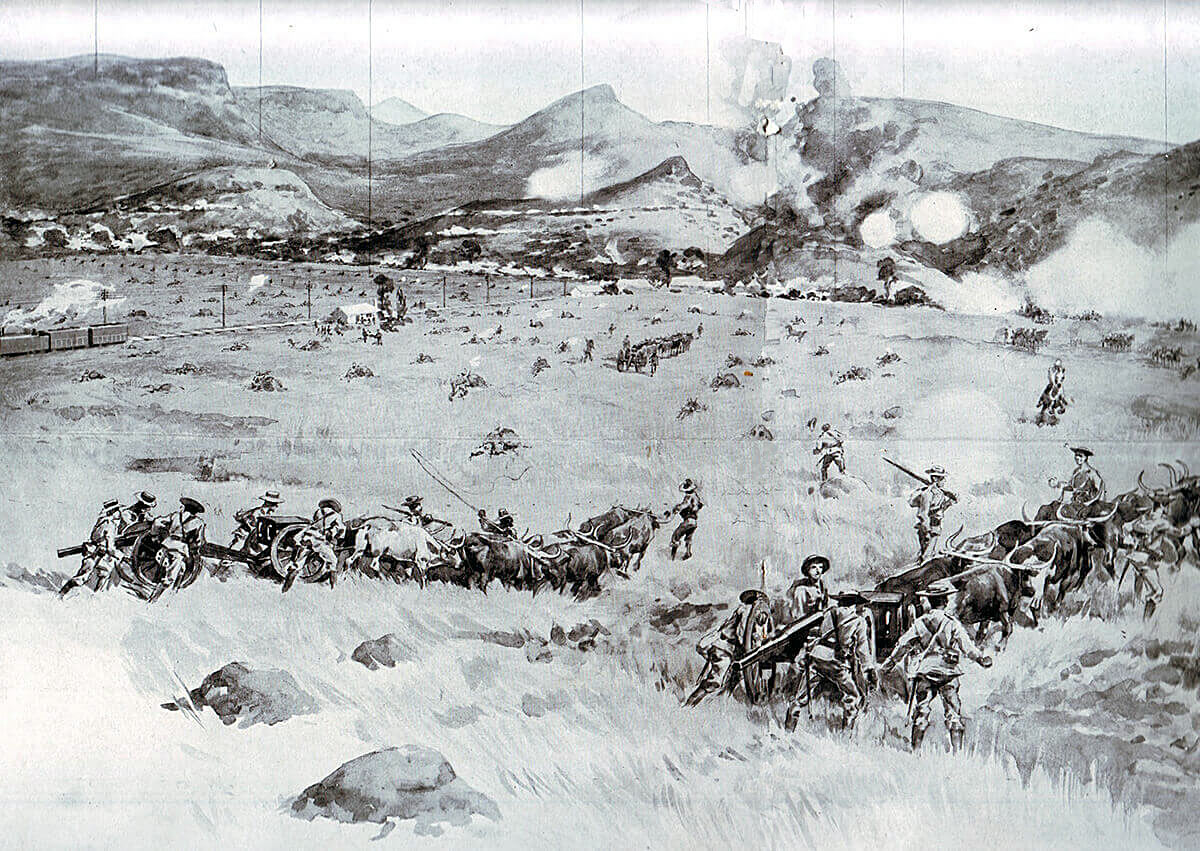
Gun battery advancing at the Battle of Colenso on 15th December 1899 in the Boer War
A German work on the use of artillery stated that the Prussian artillery had been particularly effective in the Franco-Prussian War of 1870 because the guns had been pushed as far forward as possible, often in front of the infantry. The same work pointed to the relative ineffectiveness of the Prussian artillery in the war against Austria when the guns had been kept to the rear. Long was a keen advocate of advancing the guns.
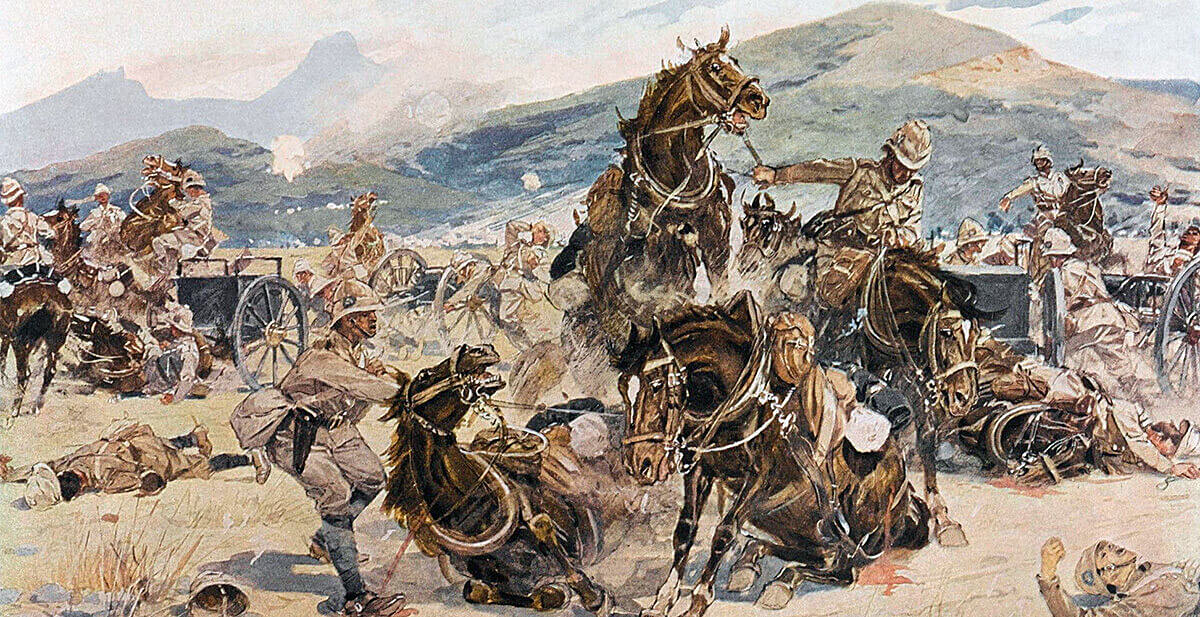
Attempting to save the guns at the Battle of Colenso on 15th December 1899 in the Boer War
Long resolved to move his two field batteries forward towards the river to enable them to fire more effectively on the Boer positions in the hills. Two of Long’s subordinate officers objected to this risky move. Long sent forward two scouts who returned to report there was no sign of the Boers. Long thereupon ordered the 14th and 66th Field Batteries with the naval 12 pounders to move to a position nearer the river.

14th and 66th Batteries unlimbering under Boer fire at the Battle of Colenso on 15th December 1899 in the Boer War
The two field batteries moved forward, overtaking Hildyard’s Brigade, and took up positions opposite Fort Wyllie. The guns were unlimbered and about to come into action when the Boers opened fire from the far side of the river. Along with the devastating rifle fire a Boer one pounder pom pom and other field guns fired on the British gunners. The nearest Boer riflemen in Colenso were only 300 yards to the left of the British gun line which was 500 yards from the river bank to its front.
Within minutes most of the horses of the two batteries and two thirds of the gunners were dead or wounded, including the battery commanders. Long, shot through the arm and liver, was urged to order the survivors to abandon the guns and escape. Long is reputed to have retorted “Abandon be damned. We never abandon guns.”
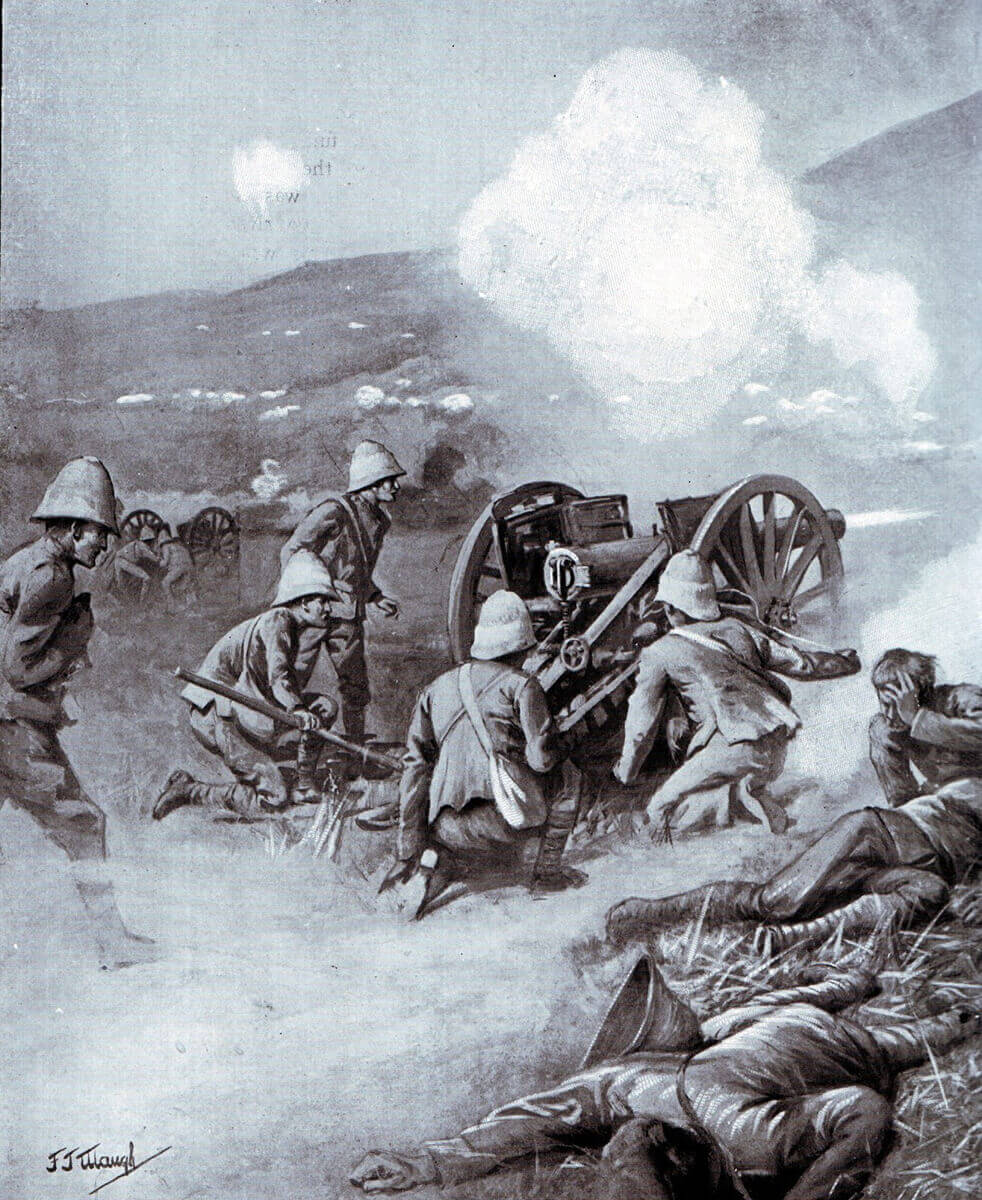
Number 5 gun of 14th Battery in action under Boer fire at the Battle of Colenso on 15th December 1899 in the Boer War: picture by F.J. Waugh
Finally only one gun was being fired and that by two gunners. One of the two was hit and the other turned to walk back to cover. He was struck and the two batteries ceased firing. The few survivors, mainly wounded, lay in a donga behind the gun line with the injured Long, who was reported as saying in delirium “Ah my gunners. My gunners are splendid. Look at them.”
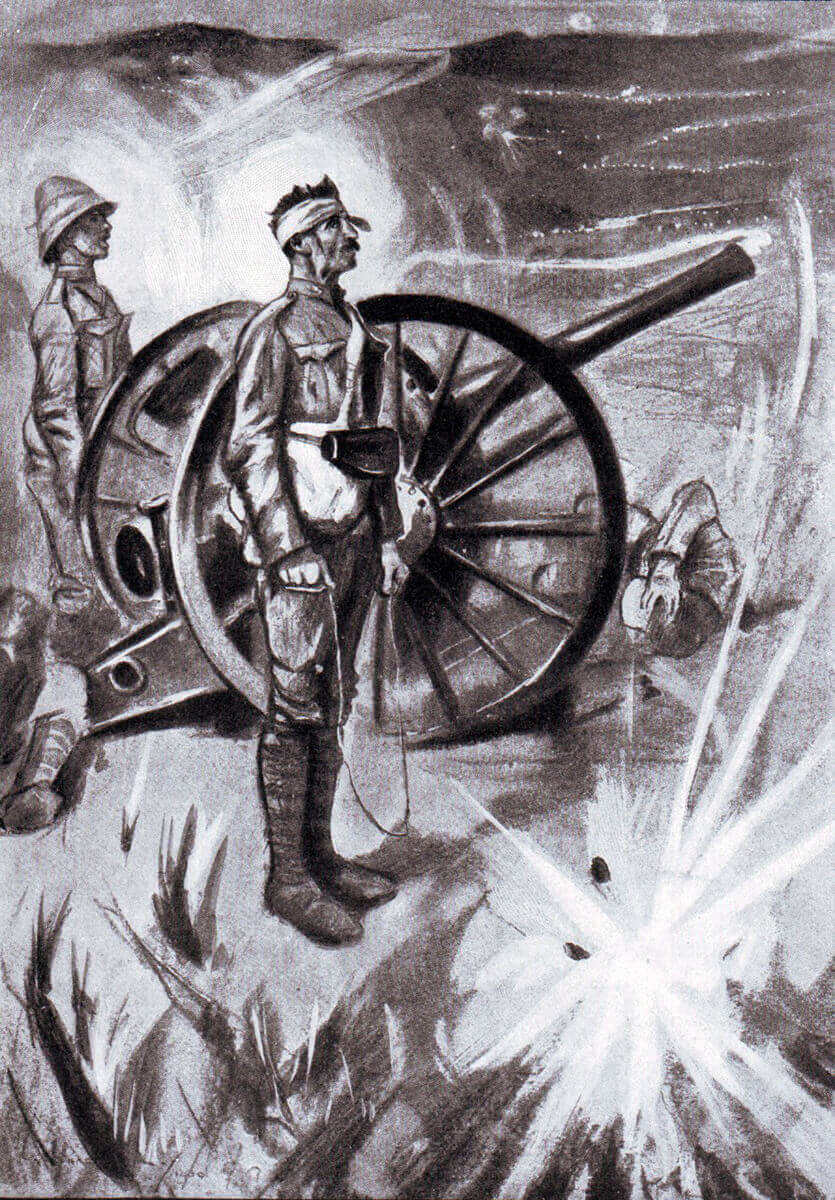
The last two gunners of 14th Battery under Boer fire at the Battle of Colenso on 15th December 1899 in the Boer War
The naval 12 pounders, hauled by slow moving oxen, were far in the rear of the horse-drawn Royal Field Artillery batteries. 2 of the naval guns had just crossed a donga when the Boers opened fire. All the oxen in those two teams were killed, leaving the sailors to manhandle their guns to safety with the remaining 12 pounders.
400 yards behind the two field batteries the naval 12 pounders fired in support, losing only four men wounded, but their fire had little impact on the entrenched Boers.
Dundonald on Hlangwane at the Battle of Colenso:
On the right of the British advance Dundonald’s mounted brigade approached Hlangwane Mountain. Dundonald considered the capture of the mountain to be key to the British attack, which may well have been the case. Certainly as long as the Boers maintained their positions on Hlangwane it would be difficult for Hildyard’s infantry to cross to the north side of the river at Colenso.
The South African Light Horse carried out a dismounted assault directly up Hlangwane while Thorneycroft’s Mounted Infantry moved around the right shoulder of the mountain.
Before the battle began the Boers holding Hlangwane had attempted to withdraw from what they saw as a dangerously exposed position. Botha called for volunteers to return to the mountain. By the time the British attacked the Boers were present in strength on Hlangwane and as Dundonald’s brigade reached the top of the mountain they found themselves unable to make any further progress.
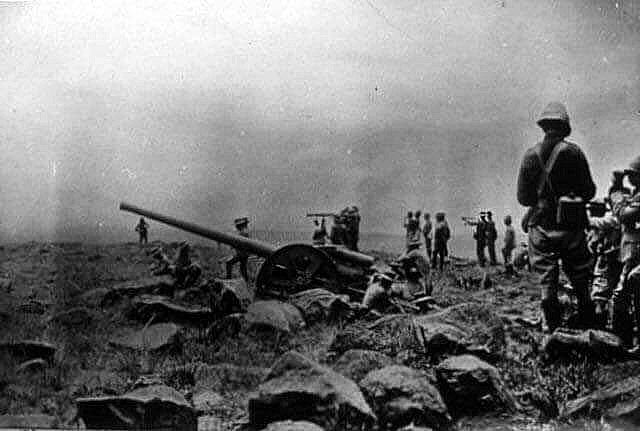
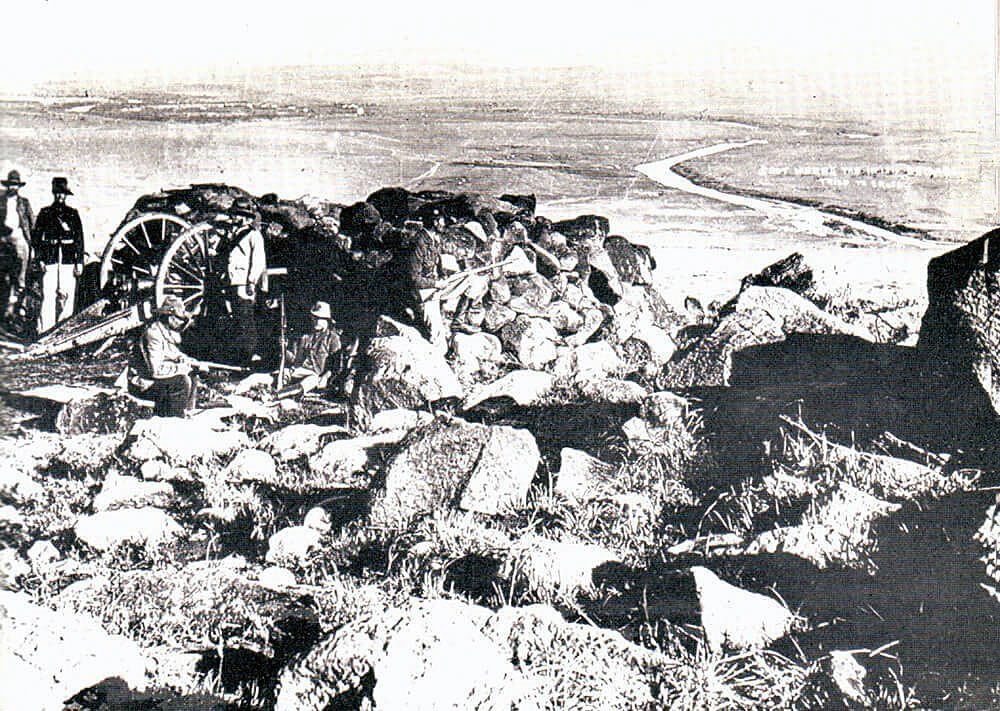
Boer trenches at the Battle of Colenso on 15th December 1899 in the Boer War
Dundonald called for support from Barton’s unengaged infantry brigade behind the right centre of the British line. Barton’s original role had been to provide support for Dundonald’s attack on Hlangwane if needed. However by now the debacle of Hart’s attack on the left and the disaster overwhelming the guns opposite Fort Wyllie was unnerving Buller who ordered Barton to stay put. Barton refused to send troops to support Dundonald.
Hildyard’s attack at the Battle of Colenso:
In the centre Hildyard had the crucial role of launching an attack through Colenso across the Tugela. For unexplained reasons instead of leaving camp at 4am Hildyard did not move until 7am by which time Hart and Long were already in trouble.
Buller told Hildyard to send forward two battalions to try and extricate Long’s guns with an attack against Colenso.
2nd Queen’s and 2nd Devons advanced, this time in open order, and made considerable progress, moving into Colenso and even onto the road bridge over the river.
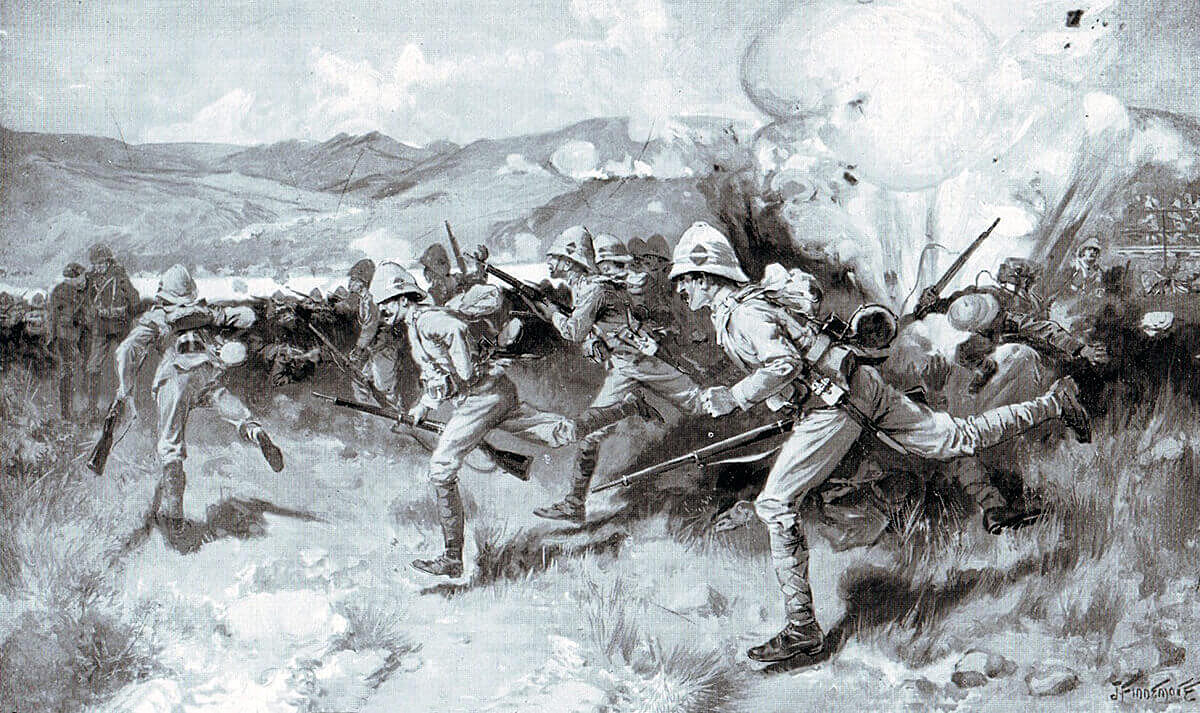
2nd Queen’s West Surreys attacking at the Battle of Colenso on 15th December 1899 in the Boer War: picture by Joseph Finnemore
Buller’s position at 9am in the Battle of Colenso:
By 9am the position of the British was that Hart’s Brigade was withdrawing from the river loop on the left, Hildyard’s Brigade had made progress in taking Colenso and reaching the river, Long’s guns were abandoned in the open opposite Fort Wyllie, out of ammunition and with the surviving crews in cover in a donga and on the right Dundonald’s mounted brigade was clinging to the slopes of Hlangwane in the face of substantial Boer numbers and unsupported by Barton.
The Boers were far from confident of victory. The garrison of Colenso had fled across the river and taken shelter in Fort Wyllie. The Boers on Hlangwane could be driven off the mountain if Barton sent even one of his battalions to assist Dundonald. The assault on the left could be re-launched across the correct Bridle Drift. Only two of Hildyard’s four battalions were in action and the eight battalions of Barton’s and Lyttelton’s Brigades were uncommitted. Less than half of Buller’s infantry was in action.
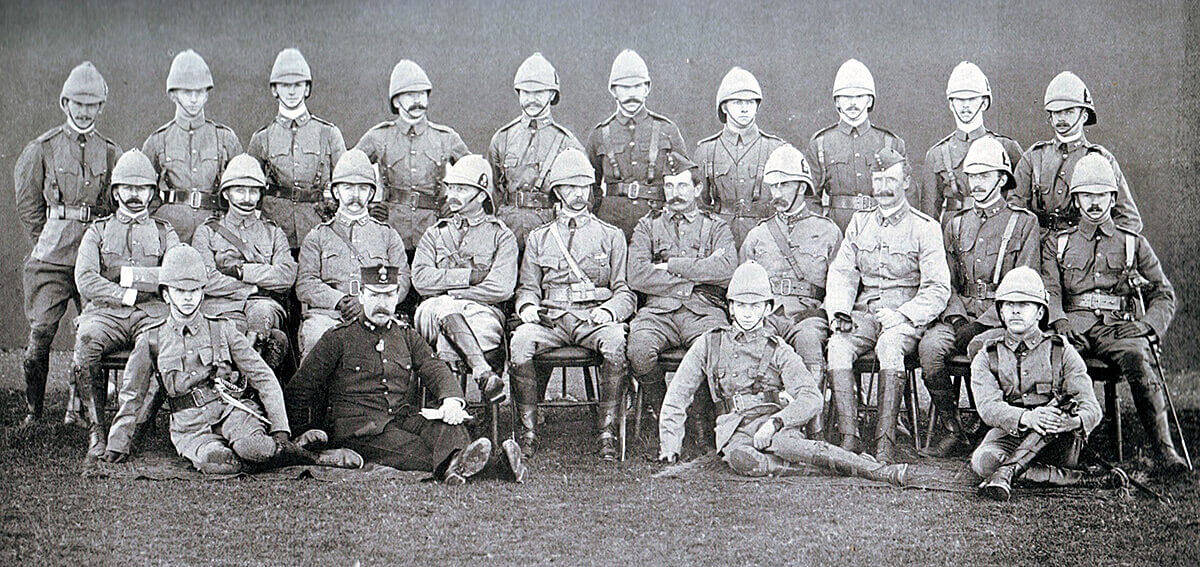
Officers of 1st Royal Dublin Fusiliers: the Battalion led Hart’s disastrous attack at the Battle of Colenso on 15th December 1899 in the Boer War
It was the assessment of the German General Staff in their subsequent review of the South African War that Buller’s army was not beaten it was Buller who was beaten.
Buller was overwhelmed by the casualties in Hart’s Irish regiments and by the loss of the two batteries of Long’s guns. Buller resolved to call off the battle and withdraw. But first the abandoned guns must be recovered if possible.
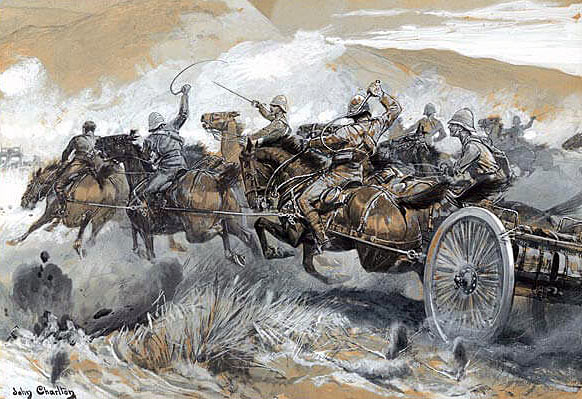
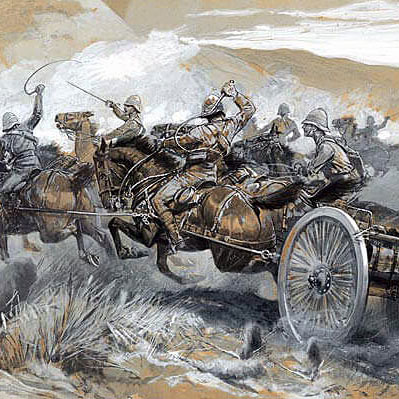
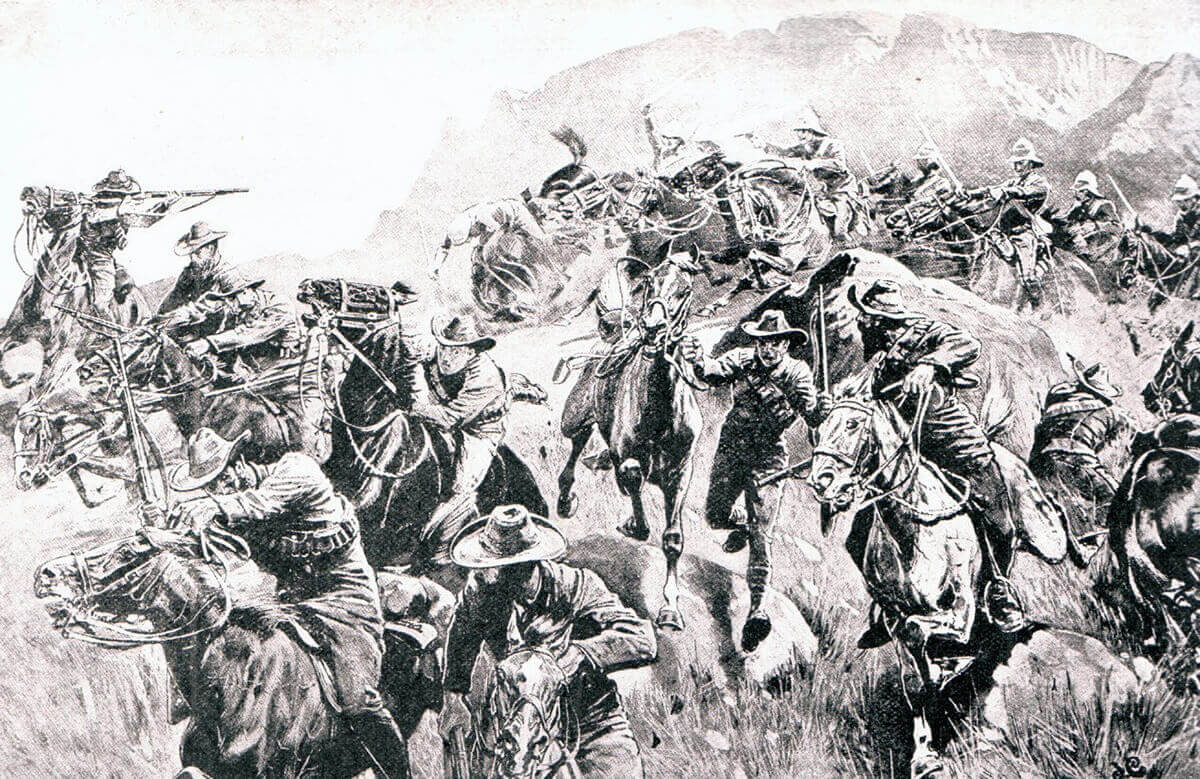
Rescuing the Guns at the Battle of Colenso on 15th December 1899 in the Boer War: picture by John Charlton
The attempts to recover Long’s guns at the Battle of Colenso:
Corporal Nurse of the Royal Field Artillery prepared to take teams of horses forward to recover some of Long’s guns standing in the open.
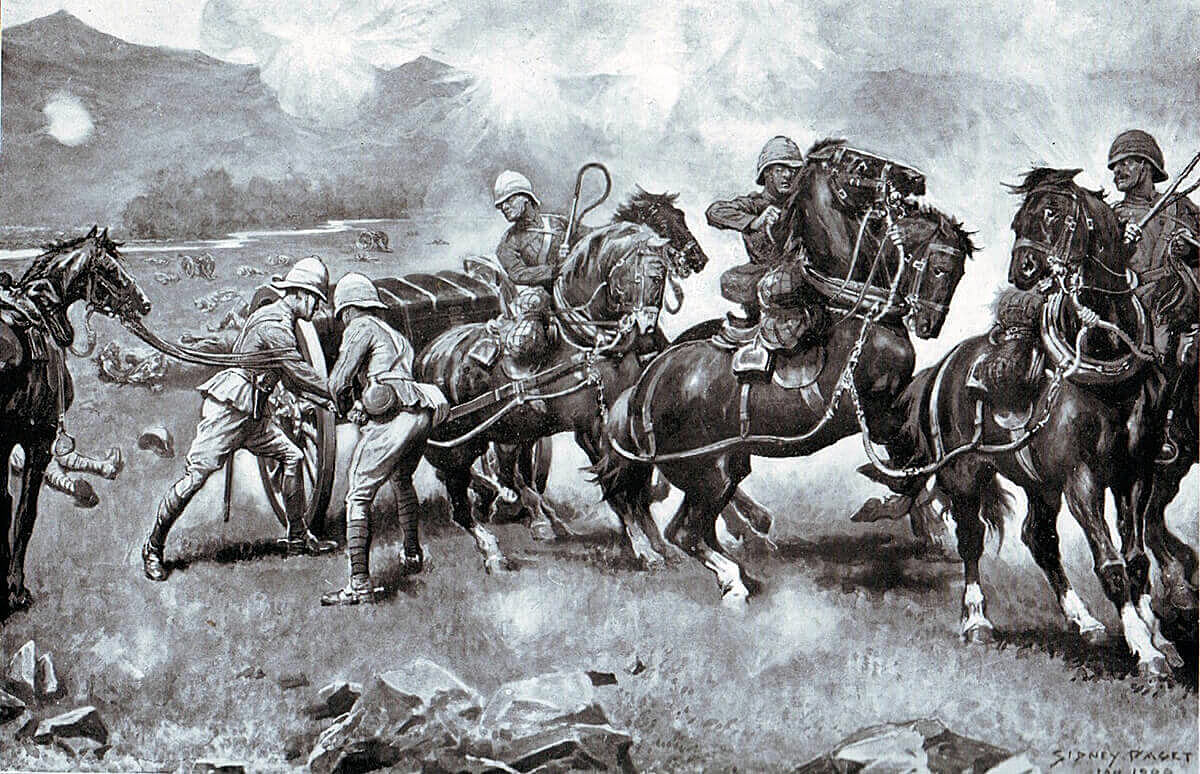
Saving the Guns at the Battle of Colenso on 15th December 1899 in the Boer War: picture by Sidney Paget
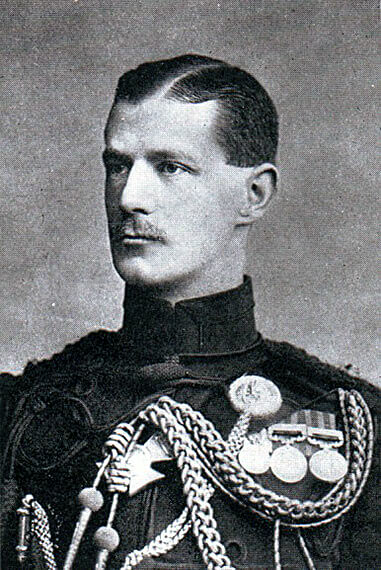
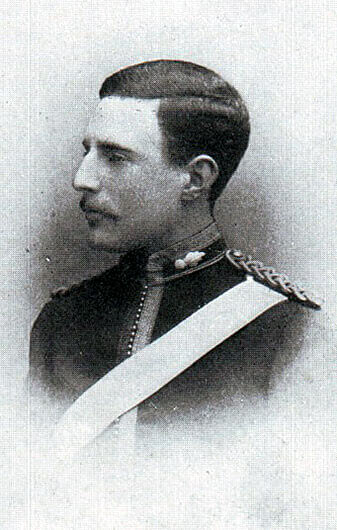
General Buller directed his ADC Captain Schofield to call for volunteers to recover the stranded guns. Major Prince Christian Victor, Queen Victoria’s grandson, Captain Schofield, Captain Congreve and Lieutenant Frederick Roberts, Lord Robert’s son, took up the invitation. The four officers with five teams of horses and limbers galloped over the open ground to the guns under a storm of fire. Two teams were brought down and Christian Victor, Congreve and Roberts were wounded.
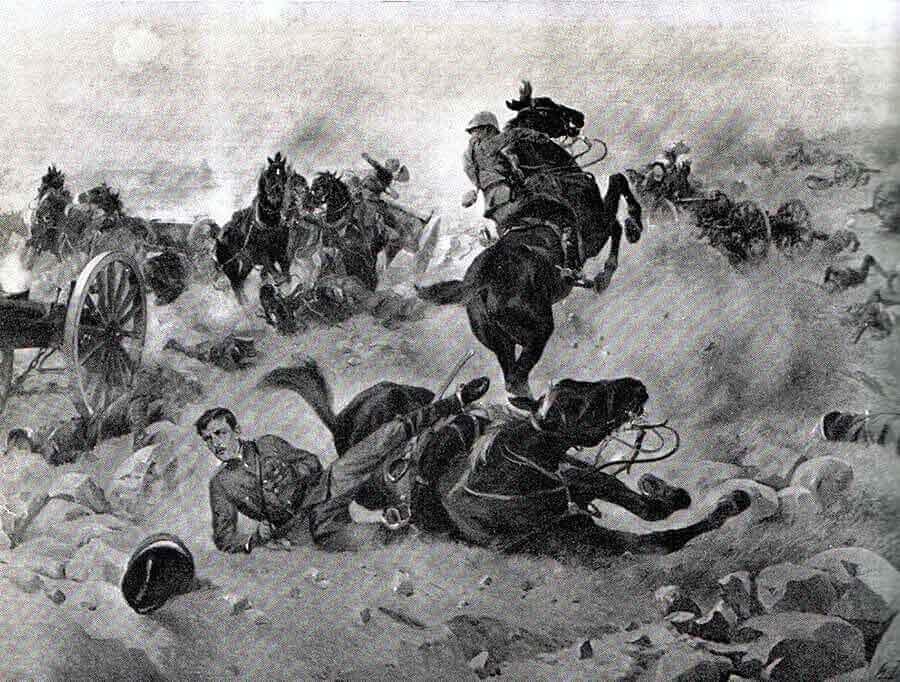
Roberts and Congreve hit by Boer fire while trying to rescue the Guns at the Battle of Colenso on 15th December 1899 in the Boer War: picture by Henri-Louis Dupray
The remaining three teams under Schofield and Nurse reached the guns, hitched up three guns and began the return to cover. A shell hit one of the guns turning it over and bringing down the team. Two guns reached safety.

Saving the Guns at the Battle of Colenso on 15th December 1899 in the Boer War: one of the most illustrated episodes in British Victorian Military History
A further attempt to retrieve the guns was made from the right by Captain Reed of 7th Battery, Dundonald’s supporting guns, with three wagon teams. Reed was forced to abandon the venture after losing 7 men out of 13 and 13 horses out of 22.
Boers removing the captured guns after the Battle of Colenso on 15th December 1899 in the Boer War: picture by Edward Read
Buller now lost his will to continue the battle in any form. He sent orders to Hildyard to withdraw the two battalions from Colenso. Dundonald was ordered to withdraw from Hlangwane, a difficult operation which took some hours and in which he finally received support from Barton’s Brigade.
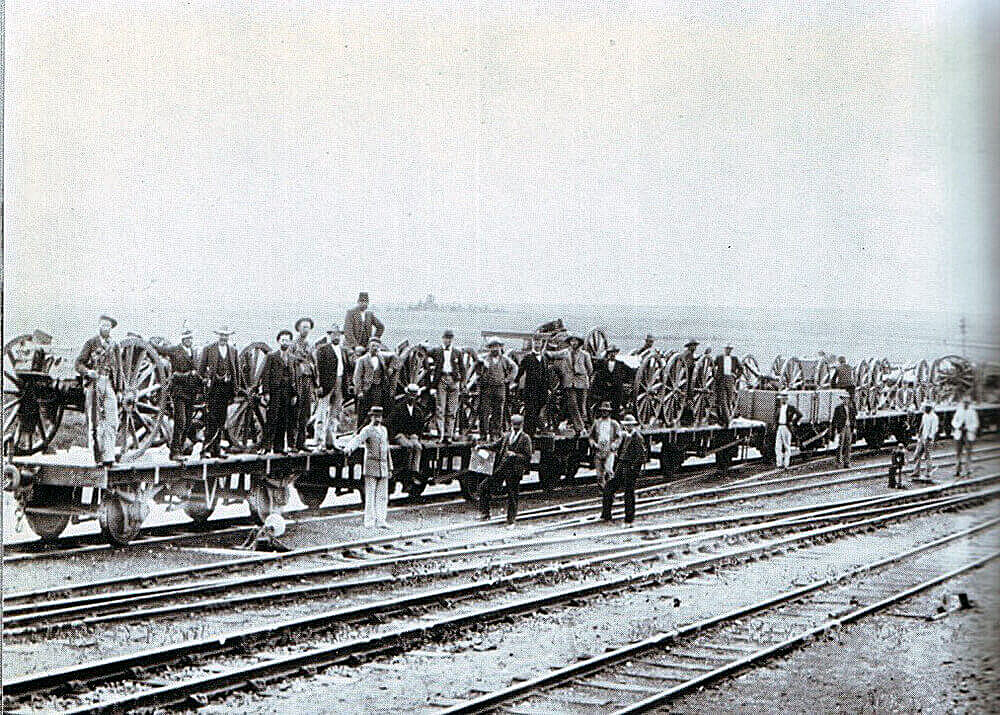
Boers with the captured guns after the Battle of Colenso on 15th December 1899 in the Boer War
A number of pockets of men failed to receive the retirement order or were pinned down. Some of Hart’s Irishmen along the river bank and Lieutenant Colonel Bullock with a party of his Devons and gunners in a donga in advance of the abandoned guns were left to be taken by the Boers.
After dark the Boers crossed the river captured these men and retrieved the abandoned guns.
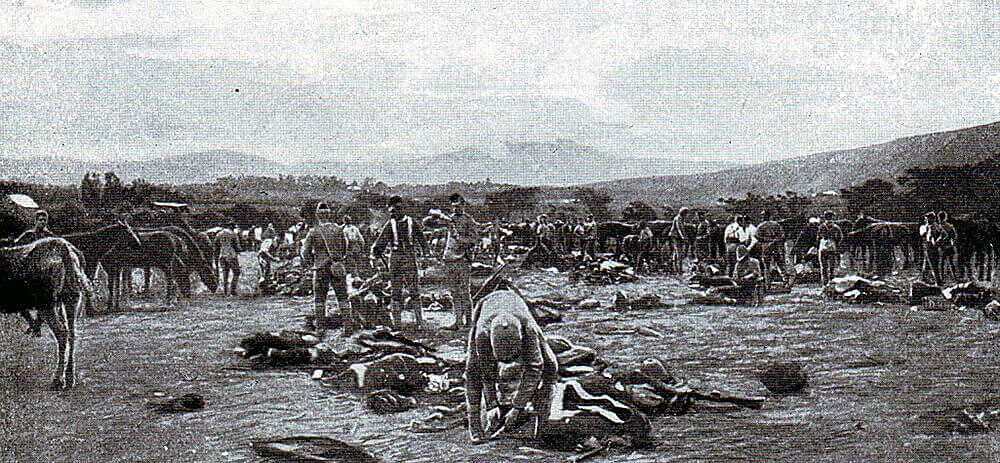
British ambulance collecting wounded soldiers after the Battle of Colenso on 15th December 1899 in the Boer War
Casualties: British casualties at the Battle of Colenso were 1,125: 132 killed, 765 wounded and 228 captured. 1st Royal Dublin Fusiliers, the leading battalion of Hart’s Brigade, suffered 216 casualties out of 900 men.
10 field guns were taken by the Boers, some damaged.
Boer losses are not known but were slight.
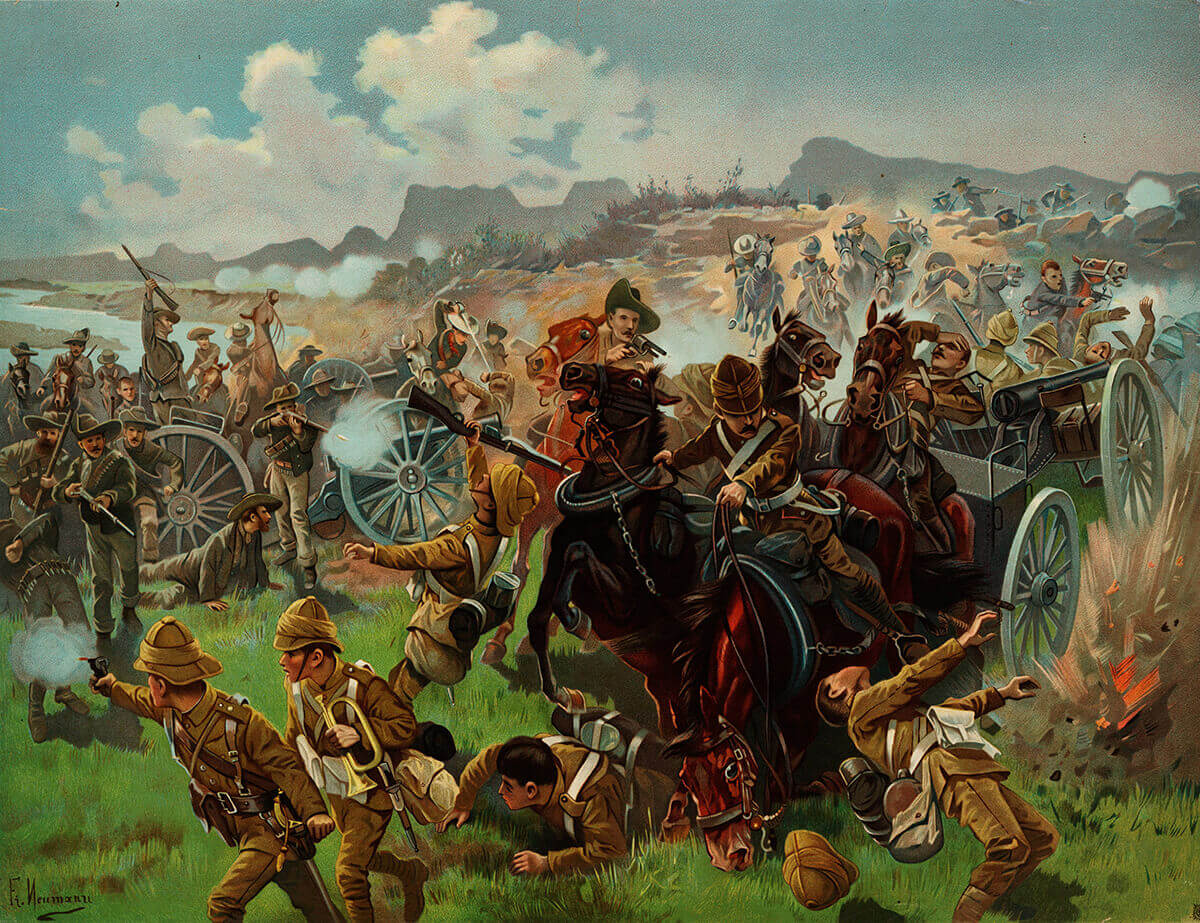
Boers capturing the British guns at the Battle of Colenso on 15th December 1899 in the Boer War: in fact the guns were taken after the British abandoned them: picture by Fritz Neumann
Follow-up to the Battle of Colenso:
Following the Battle of Colenso Buller took Dundonald’s, Hildyard’s and Barton’s Brigades back to Chieveley, sending Lyttelton’s and Hart’s Brigades further back to Frere.
Buller sent message to Botha asking for an armistice to enable the British casualties to be brought in, which Botha granted.
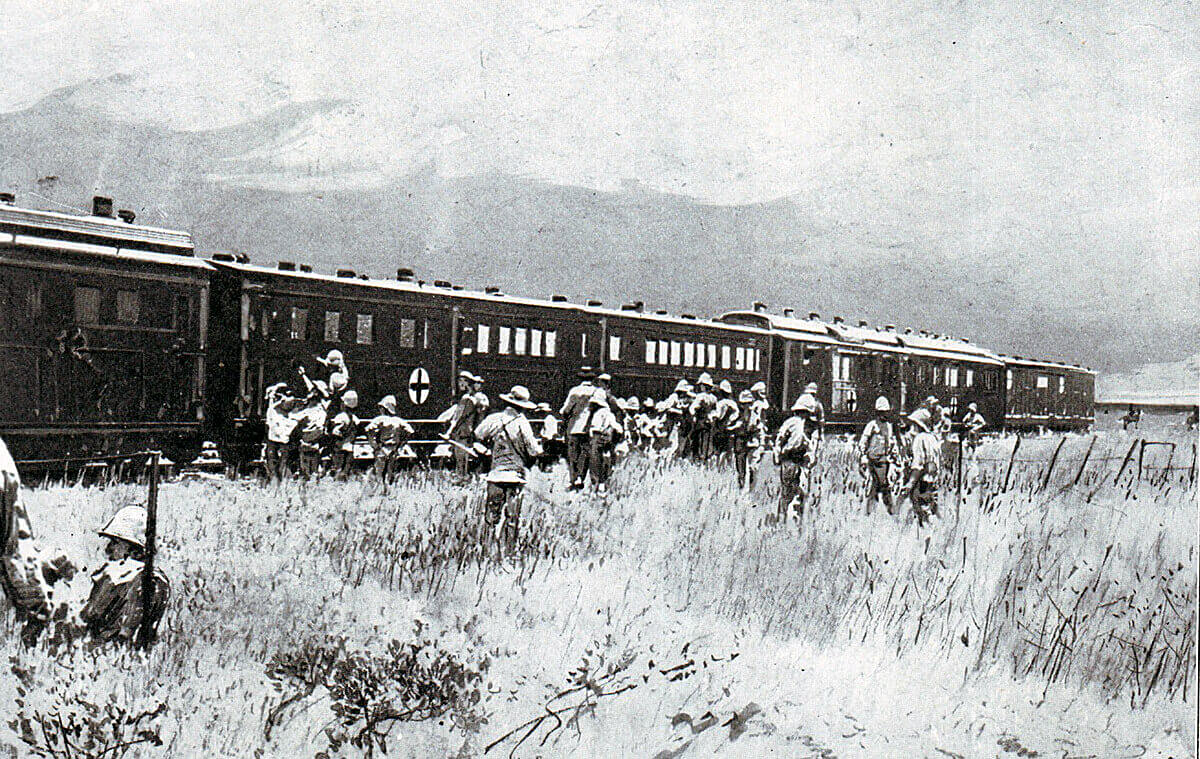
British field hospital train collecting wounded soldiers after the Battle of Colenso on 15th December 1899 in the Boer War
Buller’s complete failure of morale is shown by his subsequent conduct. Buller sent a telegram to Lord Lansdowne the Secretary of State for War in London recommending that Ladysmith should be left to surrender and that his army should abandon offensive operations and simply defend Southern Natal. Buller sent a similar message to Sir George White in Ladysmith.
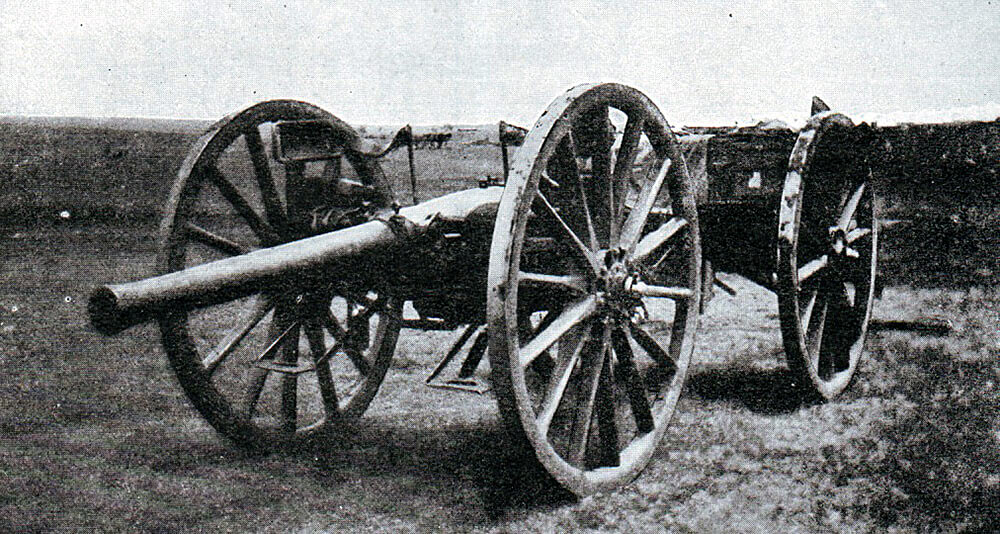
One of the 15 pounder field guns rescued by Captain Schofield’s party at the Battle of Colenso on 15th December 1899 in the Boer War
Both Landsdowne and White reacted angrily that there was no question of Ladysmith surrendering.
The British Government’s next step was to direct Buller to concentrate on relieving Ladysmith as Lord Roberts with Kitchener as his chief of staff was being sent to South Africa to command in Cape Colony in place of Buller.
Colenso was one of the trio of disasters for the British in South Africa over a few days, making up with the Battles of Magersfontein and Stormberg what was labeled “Black Week” by the British Press.
In his continuing attempt to relieve White in Ladysmith Buller moved forward to his next failure, the Battle of Spion Kop.
Battle Honours:
Colenso is not a battle honour. All the regiments that fought in South Africa received the battle honour ‘South Africa’ with the dates of presence in the country.
Lieutenant Frederick Roberts, King’s Royal Rifle Corps, awarded a posthumous Victoria Cross for his conduct in attempting to rescue the guns during the Battle of Colenso on 15th December 1899 in the Boer War
Decorations for conduct at the Battle of Colenso:
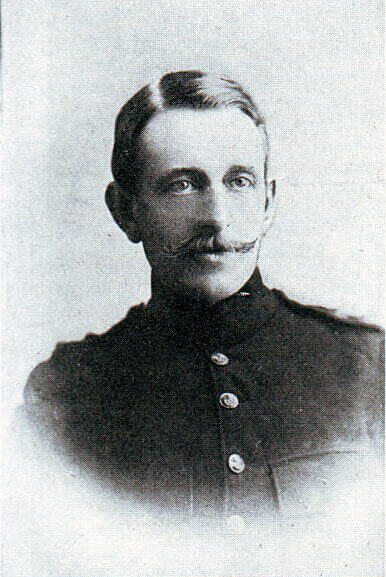
Victoria Crosses were awarded to Captain Congreve, Lieutenant Roberts (posthumously), Captain Reed of 7th Battery, Royal Field Artillery who made the second attempt to retrieve the guns and Corporal Nurse, the initiator of the first successful attempt. Thirteen Royal Field Artillery soldiers of the 66th and 7th Batteries were awarded the Distinguished Conduct Medal.
Captain Reed, Royal Field Artillery, awarded the Victoria Cross for his conduct in attempting to rescue the guns during the Battle of Colenso on 15th December 1899 in the Boer War
Regimental anecdotes and traditions relating to the Battle of Colenso:
Captain Congreve, Rifle Brigade, awarded the Victoria Cross for his conduct in attempting to rescue the guns during the Battle of Colenso on 15th December 1899 in the Boer War
Corporal Nurse of the Royal Field Artillery, awarded the Victoria Cross for his conduct in attempting to rescue the guns during the Battle of Colenso on 15th December 1899 in the Boer War
- Lieutenant Frederick Roberts died of his wounds. His father, Lord Roberts, was overcome by grief at the loss of his only son. On his arrival in South Africa Roberts came near to collapse as he heard from Captain Schofield an account of the battle.
- It was a cruel irony that Both Frederick Roberts and Prince Christian Victor had been given appointments as officers on the staff to protect them from unnecessary danger in view of their status one as Lord Roberts’ only son and the other as Queen Victoria’s grandson. Prince Christian Victor died in 1900 of typhoid fever in South Africa.
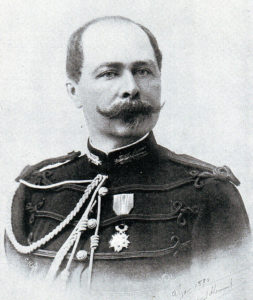
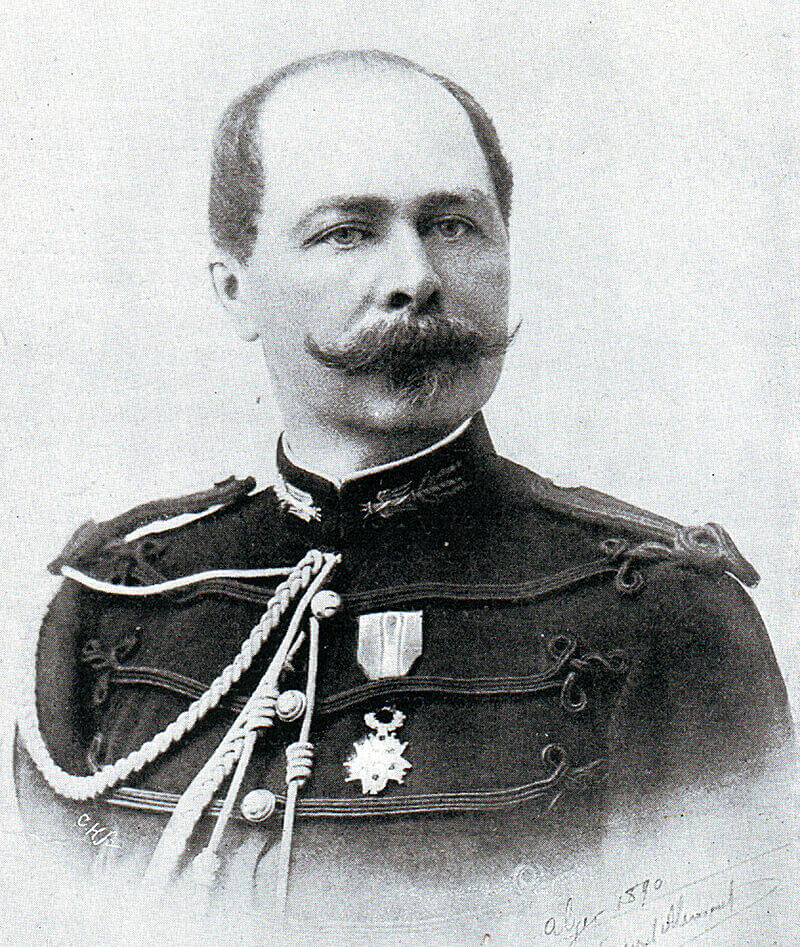
General le Comte de Villebois-Mareuil, the retired French general said to have planned the Boer defences at the Battle of Colenso on 15th December 1899 in the Boer War
- The Boer entrenchments along the north bank of the Tugela are said to have been devised by a retired French general, le Comte de Villebois-Mareuil. Villebois-Mareuil was killed on 5th April 1900 at the action of Boshoff.
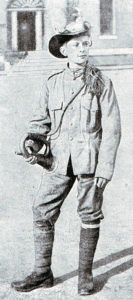
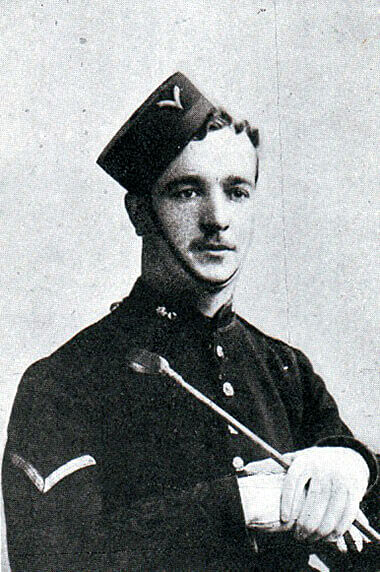
Bugler John Dunne of 1st Royal Dublin Fusiliers who was wounded and lost his bugle at the Battle of Colenso on 15th December 1899 in the Boer War
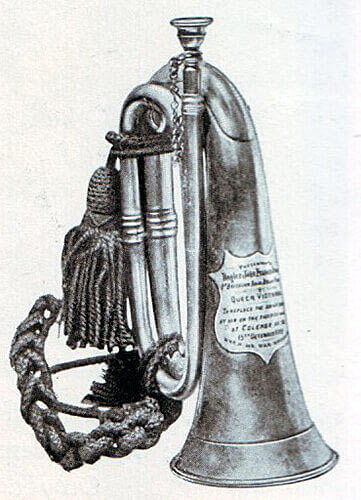
- John Dunne from the Isle of Man was a fourteen year old bugler in 1st Royal Dublin Fusiliers. Dunne accompanied his battalion on the advance to the Tugela at Colenso in spite of orders to remain in camp due to his youth. In the fighting on the bank of the Tugela Dunne was twice wounded and lost his bugle in the river. On being invalided back to Britain Dunne was lionised by the press and public and presented with a new bugle by Queen Victoria.

Bugle presented to John Dunne by Queen Victoria
- The 12 pounder naval guns were immortalised in the Royal Navy gun race at the Royal Tournament held annually at Earl’s Court in London throughout the 20th Century. A 12 pounder can be seen at the Royal Navy Historic Dockyard in Portsmouth.
- The Battle of Colenso is one of the battles in British history that particularly attracted the attention of military artists. There are many illustrations of the focal incident of the loss and attempted rescue of the guns. Several of these illustrations are shown on the britishbattles.com site for the Battle of Colenso.

References for the Battle of Colenso:
The Boer War is widely covered. A cross section of interesting volumes would be:
The Times History of the War in South Africa
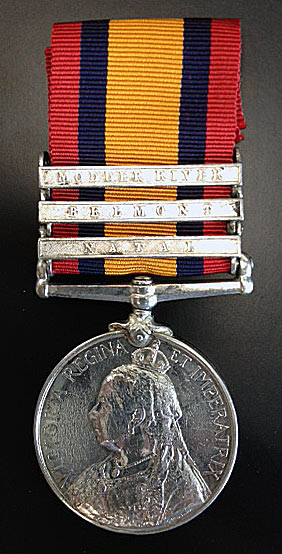
Queen’s South Africa Medal with clasps for ‘Natal’ ‘Belmont’ and ‘Modder River’: Battle of Colenso on 15th December 1899 in the Boer War
The Great Boer War by Sir Arthur Conan Doyle
Goodbye Dolly Gray by Rayne Kruger
With the Flag to Pretoria by HW Wilson
The Boer War by Thomas Pakenham
South Africa and the Transvaal War by Louis Creswicke (6 highly partisan volumes)
Books solely on the fighting in Natal:
Buller’s Campaign by Julian Symons
Ladysmith by Ruari Chisholm
For a view of the fighting in Natal from the Boer perspective:
Commando by Denys Reitz.
65. Podcast on the Battle of Colenso: fought on 15thDecember 1899 in the Boer War: Buller’s disastrous first attempt to cross the Tugela River in Natal and relieve Ladysmith, the last of the three battles of ‘Black Week’: John Mackenzie’s britishbattles.com podcasts
The previous battle in the Boer War is the Battle of Magersfontein
The next battle in the Boer War is the Battle of Spion Kop
© britishbattles.com.